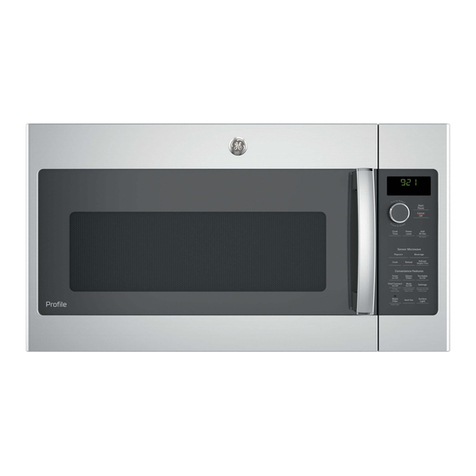
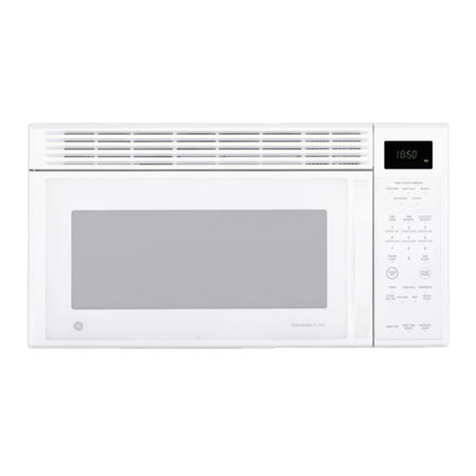
GE Spacemaker-3 JEM616G Installation instructions

.
contents
AdapterPlugs 11
ApplianceRegistration 2
Care and Cleaning 10
ControlPanel 6
Cooking 7
CookingCompleteReminder 5
Defrosting 8
DelayedCooking 9
ExtensionCords H
Features 5
GroundingInstructions 11
FIoMTime 9
Light BUHJReplacement 10
MicrowavingTips 2
Minute/Second13rner 9
Mo~cl and Serial Numbers 2
Precautions 3
probjenl SOfV~r 13
PI”ogI”WllCooking 6
fkmoval from Cabinet Mount 12
J&pairSmvicc H
Wk!iy lnstrLlctiorl$$ 3,4
....,.—
‘1’inlcCOOk 7,9
V/armnty Back cover
—...—
‘I’heelectricOtqmt
OfthisH’nimwi’a%’eoven
is500watts.
. .
.—.-..—
.3.. ....—
—-V. .-

—
wingyourovens
readW$book
It is intendedto helpyouoperate
and maintainyournewmicrowave
ovenproperly.
Keepit handyfor answersto your
questions.
If youdon’tunderstandsomething
or needmore help, write (include
yourphone number):
ConsumerAffairs
General Electric Company
AppliancePark
Louisville,KY40225 ‘
You’llfindthem on alabelinside
theoven.
These numbersare also on the
(lmswner Product Ownership
RegistrationCard that came with
your microwaveoven. Before
sending in thiscard, pkase write
thesenumbers here:
ModelNumber
Serial Number
Use these rmmbersin any
correspondence or service calls
concernillgyour microwaveoven.
Pleasecheckwith yoursupplierto
be surehe hasdone so;also sendin
yourConsumerProductOwnership
RegistrationCard. If youmove,or
ifyouare nottheoriginalpurchaser
pleasewrite to us, statingmodel
and serialnumbers.This appliance
mustberegistered.PkaSt?becertain
that it is.
Writeto:
General Electric Company
RangeProduct Service
AppliancePark
Louisville,KY40225
HyouB%Xeiveda
Oven.e.
Immediatelycontactthedealer (or
builder)that soldyouthe oven.
save the and money.
Before you request service...
checktheProblemSolveronpage13.
It listscauses ofminor operating
problemsthatyoucancorrectyourself.
Accessories
availableat extra cost from your
General Electric supplier.
JX26 Kit convertsthis
ovento abuilt-in walloven.
WM26 Kit allowsthis
ovento be mounted on awaH.
when your
oven .. you should find
an installationpackagethat contains
installationinstructions, atemplate,
and installationhardware for
~~n(~c~.-tl~e-c:~binetmounting. If
missing, contact your supplier.
*Makesureallcookwareusedin
yourmicrowaveovenissuitablefor
microwaving.Mostglasscasseroles,
cookingdishes,measuringcups,
custardcups, potteryor china
dinnerwarewhichdoesnothave
metallictrimor glazewithametallic
sheencan be used. Somecookware
islabeled“suitableformicrowaving?
If youare unsure,usethisdishtest:
Measure 1cupwaterin aglasscup.
Placein ovenonor besidedish.
Microwave1-1%minutesatHIGH. If
waterbecomeshot,dishismicrowwe
safe.If dish heats,it shouldnotbe
used formicrowaving.
~Papertowels,waxpaper, and
plasticwrap can beused tocover
dishesin order toretainmoisture
andpreventspattering.
~Somemicrowavedfoodsrequire
stirring, rotating,or rearranging.
Check yourcookbook.
~Steambuildsuppressure in foods
which are tightlycoveredby askin
or membrane. Piercepotatoes,egg
yolksand chickenliversto prevent
bursting.
- -- .—.—.-.— .-.,—-
0

m
(a) Do Not Attempt tooperate
thisovenwiththe door opensince
opendoor operationcan resultin
harmfulexposureto microwave
energy.It is importantnotto
defeator tamper with the safety
interlocks.
(b)Do Not Pkwe any object
betweenthe ovenfront faceand
thedoor or aliowsoil or cleaner
residueto accumulateon sealing
surfaces.
(c)Do ~TotOpeYatethe oven
ifit is damaged. It isparticularly
in-molrtan~thatthe ovendoor close
Whenusingelectricalappliances
basicsafetyprecautionsshouldbe
followed,includingthefollowing:
*Donotoperatethisappliance
ifithasadamagedpowercordor ~‘-------
plug,ifit isriotwodcingproperly, =:---
orifithasbeendamagedor ‘-
dropped.
*Seedoorsurfacecleaning
instructionsonpage10.
~Thisapplianceshouldbe
servicedonlybyqualifiedservice
personnel.Contactnearest
twthorizedservicefacilityfor
examinat
ion,repairoradjustment.
sAswithanyapplianceclose
supervisionisnecessarywhen
usedbychildren. .
~TO theriskoffireh
theoval Cavity:
–Do notovercookfood.Carefhlly
attendapplianceifpaper,plastic,
orothercombustiblematerialsare
placed inside the oven to facilitate
cooking.
–Removewiretwist-tiesfrom
paperorplasticbagsbefore
placingbaginoven.
—Donotuseyourmicrowave
oventodrynewspapers.
–Paper towels, and
waxpaper.Recycledpaper
productscancontainmetalflecks
whichmaycausearcingorignite.
Paperproductscontainingnylon
or113’lonfi~amentsshou!dbe
avoided,astheymayalsoignite.
—Do-not the Qwm while
towok!.‘damage‘tothe
Wen and the danger Oi’fim]f
byaccidenttheowmshouldrun
emptyaminuteortwo,noharm
isdone.However,trytoavoid
operati~~gtheovenemptyatall
tirnes-lt saves ertergy and.
prolcmgs ihe life of the ovem.

(corMir-mecI)
—mnotpoppopcornh-lyotlr
mm unlessinaspecial
microwavepopcornaccessoryor
tm.lessyouusepopcornlabeledfor
useinmicrowaveovens.
–Do notovercookpotatoes.
Theycoulddehydrateandcatch
fire,causingdamagetoyouroven.
–If materialsinsideovenshould
ignite,keepovendoorclosed,
.turnovenoff,anddiscomect
powercord,orshutoffpowerat
fuseorcircuitbreakerpanel.
*some suchaswhole
eggsandsealedcontainers-for
example,closedglassjars—may
explodeandshouldnotbeheated
inthisoven.
@
Avoid babyfoodin
glassjars,evenwithouttheirlids;
especiallymeatandeggmixtures.
~~~#~defrostfkozenbeverages
innarrow’neckedbottles(especially
carbonatedbeverages).Evenifthe
containerisopened, pressure
can build up. This can cause the
container to burst, resulting in
injury.
@use metal Onlyas in
TV dinners maylx mkrowavd
i~llhil{rdysAS km 3/4”high;
rcm(welop foiluwcr andreturn
tr:ly10box. W’h IIsil]gnwtd in
fhtirllicI”(ww2oven,keep metai
:~~~$:],$$f~]]f”]W?wq’from sides
~}f”{]y’gj~*
@(hung utensilsmay13wme
hotbecause ofheattransferred
fromtheheatedfood.Potholders
maybeneededtohandlethe
utensil.
@thecooking
tray
canbecometoohotto touch.Be
carefdwhenhandlingthecooking
trayduringandaftercooking.
~Foo&cookedin (such
aspasta)maytendtoboilover
morerapidlythanfoodscontaining
lessmoisture.Shouldthisoccur,
refertopage10forinstructionson
howtocleantheinsideoftheoven.
@Thermometer—Donot
useathermometerinfoodyou
aremicrowavingunlessthe
thermometerisdesignedor
recommendedforuseinthe
microwaveoven.
~PlasticUtensils-Plasticutensils
designedformicrowavecooking
areveryuseful,butshouldbe
usedcarefully.Evenmicrowave
plasticmaynotbeastolerantof
overcookingconditionsasareglass
orceramicmaterialsandmay
softenorcharifsubjectedtoshort
periodsofovercooking.Inlonger
exposurestoovercooking,thefood
andutensilscouldignite.For
thesereasons:1)Usemicrowave
plasticsonlyandusethemin strict
compliance with the utensil
i~~aI]tIfiicttl~’e]-’srecommendations,
~) ~)()~ol Subjc(ycmpfy utensilsto
microwavin~: 3) Do not pernli~
chiklrcn [0 usc plasticutensils
wilhoutcomplc[esupervision.
@~~e~cooking porkfollow
ourdirectionsexactlyandalways
cookthemeattoaninternal
temperatureofatleast170°F.
Thisassuresthat,intheremote
possibilitythattrichinamaybe
presentinthemeat,itwillbe
killedandmeatwillbesafetoeat.
@eggsism
Bxcommendedina
oven.Pressurecanbuildup
insidetheeggyolkandmaycause
ittoburst,resultingininjury.
@fiQf)&jw~& ()@l~
%kid suchaspotatoes,sausages,
tomatoes,apples,chickenlivers
andothergiblets,andeggyolks
(seepreviouscaution)shouldbe
piercedtoallowsteamtoescape
duringcooking.
49 cookingpmdws
and dosed )@astkbags
shouIdbeslit,piercedorvented
asdirectedincookbook.Ifthey
arenot,plasticcouldburstduring
orimmediatelyaftercooking,
possiblyresultingininjury.Also,
plasticsto~~gecontainersshouldbe
atleastprtdly uncoveredbecause
~heyformatightseal.When
cookingwithcontainerstightly
coveredwithplasticwrap,Iemove
coveringcarefullyanddirectstmm
awayfromhandsandface.
@
certainspecialcircumstances,
liquidsm~ystarttoboilduringm-
shortlyafterremovalfromthe
microwaveoven.Topreventbums
fromsplashingliquid,stirthe
1iquklbrieflybcfomremovingthe
containerfromthemicrowaveoven.
.— .. ..—

cookingcomplete
(ForTIMKCOOKandTIMEDEFROSTcycles)
Toremindyouthatyouhavefoodinthe
oven,theovenwillbeeponceaminuteuntil
youeitheropen theovendooror touchthe
CLEAR/OFF pad.
4
...k-ljj---’
.:.
.....
.......
v...
:.::.:
%
I
......
......
......
:...
I.
I
—-——.....——
W
8. Glass Cooking Tray.Tray must
be in place whenusing the oveII.
Cooking performance willbe
unsatisfactorywithoutthe tray
in place. The traymay be rcnmved
forcleaning.
9. TouchContl”olR3d and
Display.Scc nextpage fOl-
instruct ions.
-.
.—.

The Touchcontrol Rmd
auow$youtosettheovencontrols
ekctronicwy withthe touchOfa
finger.It’sdesignedtobe easy
touseand understand.
LDUN?LA...Displaystime ofday,
timecountingdownduringcooking
fimctions,powerlevel,cooking
modeand instructions.
2. ‘lmwECxxK I&IL
Microwavefor apreset amountof
timeusingautomaticPowerLevel
10(HIGH), (or changepowerlevel
after enteringcookingtime. See
page7,)
3. CLOCK. Touchthispad to enter
timeofdayor check timeof day
whilemicrowaving.
Tosetclock, firsttouch CLOCK
pad and then enter time ofday.For
example, ifthne is 1:30,touch
numberpads 1,3and Oand 1:30
willappear in display.Touch
STAKI’pad. Toreset or change
time, simplyrepeat aboveprocess.
4. PADS. Touchthese
padsto enter cooking/defrosting
time, power Ieveland time of day.
5. LEVEL. Touchthis
pad befbreentering another power
Ievclnumber if youwantto change
from au[omaticPowerLevel 10
(HIGH) ibr cookingor Power
Level3(LOW) fordefrosting.
6. TRME
mmom.Gentle
thawingatautomaticPower!Level3
(LOW).(Hdesired youmaychange
powerlevelafterentering
defrostingtime. Seepage 8.)
%l!UIN/$ECTIIWER.This feature
usesnomicrowaveenergy.It
functionsasakitchentimer, as a
holdingperiod afterdefrostor asa
delaytimerbeforetimecooking.
(Seepage 9.)
&CLEAJMX?E’.Whentouched, it
shutsoffthe ovenand erases all
settings(excepttimeofday).
9. START.After aHselectionsare
made, touchthispad to startoven.
.
,
Use yourTouchControl Panelto Create your ownprograms to suit
Defrostand Cook bytime using your individualcooking style. For
yoLIrchoice of povwrlevelsfrom example:use the Min/Sec Timer to
1(lowest)to 10(highest), time delaythe startofcookingor program
kitchentaskswith the Min/Sec ahold time between defrostingand.
Timer, and set the clock. cooking. (Seepage 9.) SetTime
Cook I&Hfor atwo-stageprogram
usingdifferent times and power
levels. (See page7.)

—
TheTIMECO(NKI&IIfeature
dkws youtorrnimwavefora
ppxx amountOftimeusing
automaticpowerlevel10
@KxI), m~~qz~ w~~~ ~eve~
Powerlevel 10(HIGH) is
recommendedformostcooking,
butyoumaychangethisformore
flexibility.Seeyour cookbook.
Tobecomebetteracquaintedwith
timecooking,makeacup ofcoffke
byfollowingthe stepsbelow.
;te~1: FillaCUP2/3 fullof
wat&and add 1~easpoonofinstant
coffeeand stir to dissolve. Use a
cup that has no metaldecoration
and is microwavesafe (referto
MicrowavingTips on page2).
~~acecup in ovenand closedoor.
E&q]2; Tw.+hTIME COOK 1.&ii
pd Displayshows“COOK” W-d
‘- V“EN”WRHIVE” is flashing.
1
Ifanotherpowerlevelisdesired,
touchPOWERLEVELpm and
desi.mdnumber,althoughpowerkvel
10(HIGH)ispreferredforthiscupof
Cofke.
Step 4: TouchSTART.“COOK
T?NIEJ’“POWERIOj’andtime
countingdownshowondisplay.
Step5:1%’hentimeisup,theoven
signalsandflashes“Endt’Oven,
lightandhshutOff.
Step 6: Openthedoor.
WW theTimeCookIIfeattm, you
can settwotimecookingfimctions
withinoneprogram.Thiswould
be idealif youdesiredtochange
powerlevelsduringyourcooking
operations.
The followingisan exampleofhow
to changepowerlevekusingTime
CookII.
StepkRepeatSteps1,2 and 3.
Step 2: TouchTIME COOKI&II
pad. Displayshows“COOK”and
“27 “ENTER TIME” isflashing.
Step4: Tochangethepowerlevel,
muchPOWERLEVEL pad and
desirednumber fbrnewpowerlevel.
Step 8: Whentimeisup, theoven
signalsand flashes“End:’ The
oven,lightandfanshutoff.
Step 9: Openthedoor.
Q. Isetmyovenfarthe time
called forinthe recipe,but atthe
endofthe time allowedymyfood
wasn9tdone. Whathappened?
A. Sincehousepowervariesdue
to timeor locationmanyTime
Cookrecipesgiveyouatimerange
topreventovercooking.Setthe
ovenforminimumtime, testthe
foodfor doneness,andcookyour
foodalittlelonger,if necessary.
Q. Itouched thenmk’ pack
ad selectedmypowerlevel.When
ItouchedSTART,however,my
ovendidn’tcomeoneWhy not?
ii. The TIME COOKI&II pad
mustbe touchedbeforesettingthe
numberpads or elseyour ovenwiU
notbegincooking.
Q. 1wantto cookmapower
kvd other thanHIGH. What do
Ineed to do?
A. Tochangethepowerlevel,
touchthe l?OWERLEVEL pad.
“ENTER POWER” flasheson the
displaypanel. Enter new number.
Q. can Imy Time
cook to check the food?
A. Yes.To resume cooking,
simplyclose the door and press
the STARTpad. The timer mustbe
reset for cookingto resume unless
time isremaining on timer.
.-

The Defrost setting is designed
forspeedyWNVimgOffrozenMI(I
andisoneof thegreatadvantages
damicrowaveoven.
@Powerlevel3isautomaticallyset
fordefrosting,butyoumaychange
thisformore flexibility.
@Seeyourcookbookfordefrosting
help.
Tobecomebetteracquaintedwith
the defrostfunction, defrostfrozen
pork chopsbyfollowingthesteps
below.
Step1:Placea l-lb.packageoffi-ozen
chopsin the ovenand closedoor.
Step 4: TouchST~T. “DEF
‘HME” and “POWER 3“ showand
timecountsdownon display.When
cycleis completed,theovensignals
andflashes“Endj’thenautomatically
shutsOff.
Step 5: Turnpackageover,close
door and repeat Steps2and3to set
remaininghalf ofdefrostingtime
and touchSTMT.
Step 6: When ovensignalsand
flashes “End~’opendoor, remove
packageand separatechopsto
finishdefrosting.
~Foodsfrozen in paper or plastic
can be defrostedin the package.
Step 2: TouchTIME DEFROST
Displayshows:0and “POWER
3V“ENTER DEF TIME” flashes.
e~~oreven defrosting, some foods
need to be broken up or separated
part of’the waythrough the
defrostingtime.
Q. ww IP+WSsrm, m3i3F~
MI, noise. ‘Whatis it?
A. Thissoundisnormal. Ris
lettingyouknowthe ovenisusinga
powerlevellowerthan 10(HIGH).
Q. Can 1defrost smallitemsin
ahurry?
A. Yes,buttheywillneed more
frequentattentionthan usual. Raise
the powerlevelafterenteringthe
time bytouchingthe desired power
levelpad. Powerlevel7cutsthe
totaldefrostingtimeaboutin 1/2;
powerlevel 10cutsthe total
defrostingtime to approximately
1/3.During either,rotate or stir
foodfrequently.
Q. Why don%the defrosting
times in the cookbookseem right
for my food?
A. Cookbooktimesare averages.
Defrostingtime can vary according
to thetemperature in your freezer.
Setyour ovenforthe time indicated
in yourcookbook. If your food is
stillnotcompletelythawedat the
end ofthat time, reset your oven
and adjustthe timeaccordingly.
Q. Shouid.all foods be completely
thawedbefore cook-kg?
A. Somefoods shouldnot be
completely thawedbefore cooking.
For example, fish cooks so quickly
it is better to begin cooking while it
is still slightlyfrozen.
Q. Can Iopen the door during
to Cheekon the
prwgress of my food’?
A. Yes.Y6umay open the door at
any time during microwaving.To
resume defrosting, close the door
and press STAR.. The ovenbegins
operating if time is left on tin~e~”.
If not, ~.esettimer.

toUsethe
mmmc TIMER h3sth~~~
timing functions:
...
~It operatesas aminutetimer.
@It can beset todelaycooking.
@Ncan be usedasaholdsetting
after defrosting.
The MIN/SEC TIMER operates
withoutmicrowaveenergy.
How tome a3-Minllk
~~O~e Call
LTouchM@J/SECTIMER pad.
The displayshows: Oand
“ENTER TIME” flashes.
2. Touchnumberpads3,0 andO(for
3minutesand no seconds). Display
shows3:00 and “TIME” flashes.
3. TouchSTART.Displayshows
“TIME” and time countingdown.
4. When time is up, ovensignals,
flashes “Erdl’ and displayshows
time ofday.
a
mm
The Minute/SecondTimer can also
be used to program “hold time”
bctwccn microwwc cooking
functions. The time can range from
onc second to 99 minutesanci99
seconds, AHOLD, or “standing”
time maybe found in some ofyour
own rccipcs or cookbook.
(-j$;fll{i~lg
‘ii)delay cooking up to 99 minuks
Step 1:Takecasserolefromfreezer
andplacein oven.
Step2: TouchTIMEDEFROSTpad.
The displayshows: Oand “POWER
3?’“ENTER DEF TIME” flashes.
Step3: Touchpads 1,5,0 and Ofor
15minutesdefrostingtime. 15:00
appears on display.(Defrostingis
automaticallyseton powerlevel3
but can be changedbytouchingthe
POWER LEVEL pad andthe
desired powerlevel.)
Step 4: Set standingor hold time
bytouchingMIN/SEC T~M~R.
The displayshows :Oand
“ENTER TIME” flashes.
$%ep~: ~OLICh ~, (), C)and ()to hold
f{x”ten minulcs. 10:00appears on
di:;p~tiyfind“TIME” hhes,
Step7:Touch2,5,0 andOfor
twenty-fiveminutesofcookingtime.
“COOKTIME” flashesand25:00
and “POWER 10”appear on
display.
Step$:TouchSTART.“DEFTIME”
and 15:00countingdown show
ondisplay.Aseach fimctionis
automaticallyperformed oven
displayshowsinstructionsentered
andthe function.
Step9:When time is up, theoven
signalsand flashes “End~’
andAnswers
Q. ‘Whatwill happenif I
accidentallyreversemy defrost,
hold and cook instructions?
A. The ovenwillautomatically
rearrangeyour program. Defrosting
will alwayscome first, then hold,
and then the cookingfunction.
Q. Can Idefrost and BRoWIonly?
A. Yes.Sometimesyou mayonly
wantto defrost afood, hold it, and
cookit later. All you need to do is
program in Defrost and amount of
time. Then program Hold and the
amountof time. Be sure to put the
thaweddish in the refrigerator
promptly.
NOTE: Let foodsremain at room
temperature only as long as safe.
Times will vary.
Q. Imy owenih“ a
spQ~ifi~ time but it
defrostedkmfy”th-I I’mMxml”y.
yy~~~happed’?
~ke~,.~~e~inslrllctions
contlict.
Iheovencarries out the Iasi
instruction. Youmay haveset the
OVelliOdCfl”OSth“ 4ti2hlLltC& hO~C]
for 2nlinuics, and then defrost fol”
6nlinutes. 1rIthis case, the oven
~I}WMdefrostfor6~ninutes
and hofdfor 2.Inlnui.cs.

Your newMicrowave(hen is
aVahabk appliance.Protect
itfrommisusebyfoMowing
thesemm%:
@Keepyourovenchxmand
sweet-smelling.Openingtheoven
doorafewminutesafter cooking
helpsair-outtheinterioz.An
occasionalthoroughwipingwith
asolutionof bakingsodaandwater
keepstheinterior fresh.
@Don%use sharp-edgedutensils
onyouroven. Theinsideand
outsideovenwallscan be scratched.
The controlpanelcan be damaged.
eDon~~remove the ~~odestirrer
coveratthetop ofthe oven
(microwavefeature7on page5).
Youwilldamagethe oven.
BE IS WE’
w
PARTOF ~m OVEN.
Door (inside). Window:Wipeup
spattersdailyandwashwhensoiled
withaminimumof sudsy,warm
water.Rinsethoroughlyanddry.
Metalandplasticpartsondoor:
Wipefrequentlywith adamp
clothto removeall soil. DO PWI’
USE ABRASIVES,SUCH As
CLEANING POWDERSOR
STEEL AND PLASTICPADS.
THEY WILL MAR THE
SURFACE.
Glass Cooking ‘hay. Occasionally
itisnecessaryto removethecooking
trayfor cleaningofthetrayor
oven.Topreventbreahge, do not
place trayintowaterjust after
cooking.Washit carefullyin warm,
sudsywateror in the dishwasher.
The traycan be broken ifdropped.
Remember,do notoperatethe oven
withoutthe cookingtrayinplace.
$@@ note when using
Brown ‘NSear Dish: If grease is
present, highheat generatedon
bottomof aBrown ‘NSeardish
maycausethe grease to burn onto
theoventray.This maybe removed
withacleanser suchas Bon.Ami”
brand cleanser.
After usingBonA.mi”brand
cleanser,rinseand dry thoroughly,
followinginstructionsoncan. Do
notuseBon Ami@brandcleanser
on thepaintedsurfacessuchas the
wails.It mayscratch the paint.
EkwvtoCkmRthe
Case. Cleantheoutsideofyour
ovenwithsoapanddampcloth,
rinsewithdampclothandthendry.
W-ipethewindowcleanwitha
dampcloth.Chrometrim isbest
wipedwith adampclothandthen
withadry towel.
ControlFtmeLW@ withadamp
cloth. Dry thoroughly.Do notuse
clcaningsprays,largeamountsof
soapandwater,abrasives,or sharp
objectsonthe panel-they can
damageit.
Door Surface.VVhencleaning
sufiacesofdoor andoventhatcome
togetheron closingthedoor,use
onlymild, nonabrasivesoapsor
detergentsappliedwithasponge
or softcloth.
PowerCord. If thecordbecomes
soiled,unplugandwashwitha
damp cloth. For stubbornspots,
sudsywatermaybe used, butbe
certainto rinse withdampcloth
anddry thoroughlybeforeplugging
cord intooutlet.
oven.Lamp
Firstunplugthe oven.Then
removelamp compartmentcover
by removingscrewwhichholds
coverin place. Coverislocated
on the side oftheouter case.
I‘‘!
.,

II!JG
Thisappiiancemustbe grounded.
In theeventofan electricalshort
circuit, groundingreducestherisk
ofekxtric shockbyprovidingan
escapewire fortheelectriccurrent.
This applianceisequippedwitha
powercordhavingagrounding
wire withagroundingplug. The
plugmustbe pluggedintoan outlet
thatis properly installedand
grounded~(Fig. 1)
useof thegroundingplugcan result
in arisk o~electricshock.
Fi -.
Consultaqualified electrician or
service technicianif the grounding
instructionsare notcompletely
W3ge powerax-dVviu
be
Becauseofpotentialsafetyhazards
undercertain conditions,we
stronglyrecommendagainstthe
useof anadapterpiug.However,
ifyoustillelect tousean adapter,
wherelocalcodespermit, a
TEMPORARYCONNECTION
maybemadeto aproperlygrounded
two-prongwallrecep~~clebytheuse
ofaUL listedadapter(Fig.2)
whichisavailable-atmos~local
hardwarestores.
TEMPORARYMETHOD
(ADAPTERPLUGSNOT
PERMIITED INCANADA) IYa
ALIGNLARGE
PRONGS/SLOTS-a-~
The largerslot intheadaptermust
be alignedwith thelargerslotin the
wallreceptacle toprovideproper
polarity in the connectionofthe
powercord.
Attachingthe adapter
ground terminal to the wall
receptaclecoverscrew does not
ground the applianceunlessthe
coverscrew ismetal, and not
insulated, and the wallreceptacle
is gr~~lndedthrough t~lehouse
wiring. Youshould havethe circuit
chcckcd byaqualified chxtrician
to makesure the receptacle is
pOpMly groundixf.
Uw2e where!
Do notuseanadapterpluginthese
situationsbecausedisconnectingof
thepowercord placesunduestrain
onthe adapterandleadsto eventual
failureoftheadaptergmundterminal.
Youshouldhavethetwo-prongwall
receptaclereplacedwith athree-
prong(grounding)receptacleby a
qualifiedelectricianbeforeusing
theappliance.
use COd$
Becauseofpotentia.1safetyhazards ‘“”‘-=’--- -
undercertainconditions,Westrongly‘..:-:‘--:-----
recomrner~dagainsttheuse ofan —. —
extensioncord. However,if it is
necessW to usean extensioncord, “‘‘ ~~•
useonly a3-wireextensioncord ..
thathas a3-bladegroundingplug, -. -
and a3-slotreceptaclethatwill
acceptthe plugon the appliance. R---- ~.-
The marked ratingofthe extension “=” =-
——----
cord shallbe equalto or greater ~..-
thanthe electrical rating ofthe ~
appliance(15amperes).
Suchextensioncords are obtainable
throughGeneral Electric service.
Uyou do U&X?an extension ‘cord
with your owm~the
interior lightmay flicker andthe
Mowersound mayvary when oven
is in use. Cook times maybe longer
as well.
.. .. .— .

TtB the
Step 1:Replacetherubber feet.
Step 2: Fully supportthe
microwavewith somethingsturdy.
Forexampleusetelephonebooks
or encyclopedias,stackedevenly
andcloseenoughto balancethe
weightofthe oven.
Step 3: Openyour cabinetand with
yourscrewdriver,beginto remove
thescrewsholdingthe microwave
ovenin piace byturningthem
counterclockwise.
(Alternatebetweenscrews sothat
ovenis loosenedas evenlyas
possible.)
Note: Beforefinal removalofthe
screws,check to be sure that the
microwaveovenis being suitably
supportedto prevent it from falling
or sliding.
—...-

PROBLJEIW
OVENWILLNOI’
COME(NN
CONTROLPANEL
LIGHTED,YETOVEN
WHXNOTSTMT
FCKXXSARE EITHER
wERcoCKqMR
~~~ER~_j~KE~
POSSIBLE CAUSEAINIDREMEDY
sco~~g timesmy wbecauseofsting foodtemperature,fooddensityoramount
offoodsinoven.TouchTIME COOKI&IIand additionalcookingtimeforcompletion.
*~come~t ~wer }eve}ente~, Checkcookbookforrecommendedpowerlevel,or
changinglevelsduringcookingifneeessary.
*Dish~s n~tro~ted, ~med or stirred, Somedishesrequire specifk instructions.
Checkcookbookor reeipeforinstructions.
~Too~my dishes~ovenat sametime. Cool&g timemustbeincreasedwhencooking
morethanonefooditem. Cheekcookbooktime reqmmendations.
,
62
AllTIM?%?ThingsAre
withyourrvmmwvaw‘oven:
>~tcamor vaporescapingfrom
‘.%
.:
..’
—... -. ...—.. .— ,—-—------.--- .—

o
‘&&-
.-=,.
.
Toobtainservice,seeyourwarranty
on thebackpageofthisbook.
We’reproudofour serviceand
wantyouto bepleased. If for some
reasonyouare nothappywiththe
serviceyoureceive,here arethree
stepsto followforfurther help.
FIRST,contactthepeoplewho
servicedyourappliance.Explain
whyyouare notpleased. Inmost
cases, thiswill solvethe problem.
NEXT, ifyouare stillnotpleased,
writeallthedetails-including
yourphonenumber—to:
Manager,Consumer Relations
GeneralElectric
AppliancePark
Louisville,Kentucky40225
FINALLY,ifyourproblem isstill
notresolved,write:
Major Appliance
Consumer ActionPanel
20 North WackerDrive
Chicago.Hlinois60606
;.,:
:.‘
-.. .
o

-
Saveproofof original purchasedatesuch as your sales slip or cancelledcheckto establish warrantyperiod. I
Thiswarrantyisextendedto
the original purchaserand any
succeedingownerfor products
purchasedfor ordinaryhomeuse
inthe 48 mainland states,Hawaii
andWashington,IX. InAlaskathe
warrantyisthe sameexceptthat it is
LIMITEDbecauseyoumust payto
shipthe productto theserviceshop
orforthe servicetechnician’stravel
coststoyour home.
All warrantyservicewill be provided
byour FactoryServiceCentersor
byourauthorized CustomerCare@
servicersduring normalworking
hours.
Lookinthe White orYellowPages
ofyourtelephone directoryfor
GENERAL ELECTRICCOMPANY,
GENEHAL ELECTRICFACTORY
SERVICE,GENERAL ELECTRIC-
I-K3TPOINTFACTORYSERVICEor
GENERAL ELECTRICCUSTOMER
CARE@SERVICE.
~Replacementof housefuses or
resetting of circuit breakers.
@Failureof the product if it is used
for other than its intended purpose
or usedcommercially.
QDamageto product caused
byaccident, fire, floods or acts
Of God.
WARRANTORISNOTRESPONSIBLE
FORCONSEQUENTIAL DAMAGES.
is
1s
FLH..LTHREE-YEAR
Forthreeyearsfromdateoforiginal
purchase,wewill provide,freeof
charge,partsandservicelabor
inyourhometo repairor replace
my pm ofthe I?’)ifx’owaveOwen
thatfailsbecauseofamanufacturing
defect.
LU$$IIIH)A13D!TIONAL
TWOYEARWARRANTY
Forthe fourth andfifth yearfrom
dateof original purchase,we
wiil provide,free of charge,a
replacementmagnetron tube if
the magnetrontube fails because
of amanufacturing defect.Youpay
for the servicetrip to yourhome
and servicelabor charges.
@Servicetrips to your hometo
teach you howto usethe product.
Readyour Useand Caiematerial.
Ifyou then haveany questions
about operating the product,
please contact yourdealer or our
Consumer Affairs office atthe
addressbelow,or call, toll free:
The GEAnswer CenteF
800.626.2000
consumer information service
eImproper installation.
If you havean installation problem,
contact your dealer or installer.
Youare responsible for providing
adequate electrical, exhausting
and cdherconnecting facilities.
Some states do not Mow Ihe exclusion or iimitation of incidental or consequential damages, so the above Iimitation or exclusion
rn:>yr:cdapply to you. This vmrran[y gives yGuspecific legal rights, and you may also have other rights which vary from stateto state.
“RIkI)OLcji::h:]t your legal righ[s arc in your state, consult your local or state consumer affairs office or your state’s Attorney General.
..... ..
Other GE Microwave Oven manuals

GE
GE Spacemaker XL JVM1840 User manual

GE
GE Over the Ran Microwave Oven User manual

GE
GE Spacemaker PVM2070 User manual

GE
GE JES0734PMRR User manual

GE
GE JES1380 User manual

GE
GE JES1334BD User manual

GE
GE Spacemaker-3 JEM 4H Installation instructions

GE
GE PSB9240SF1SS User manual

GE
GE JES738WH - Countertop Microwave Oven User manual

GE
GE Hotpoint RE1440H Use and care manual

GE
GE Spacemaker JVM1540LMCS Manual

GE
GE JES638 User manual

GE
GE Spacemaker III JEM4KWA Use and care manual

GE
GE JES1036 User manual

GE
GE JE510 User manual

GE
GE JES1145DPWW User manual

GE
GE Spacemaker JVM1750SPSS Manual

GE
GE SpacemakerXL JVM1640 User manual

GE
GE GMOG28ECPSS User manual

GE
GE JVM1630WFC User manual