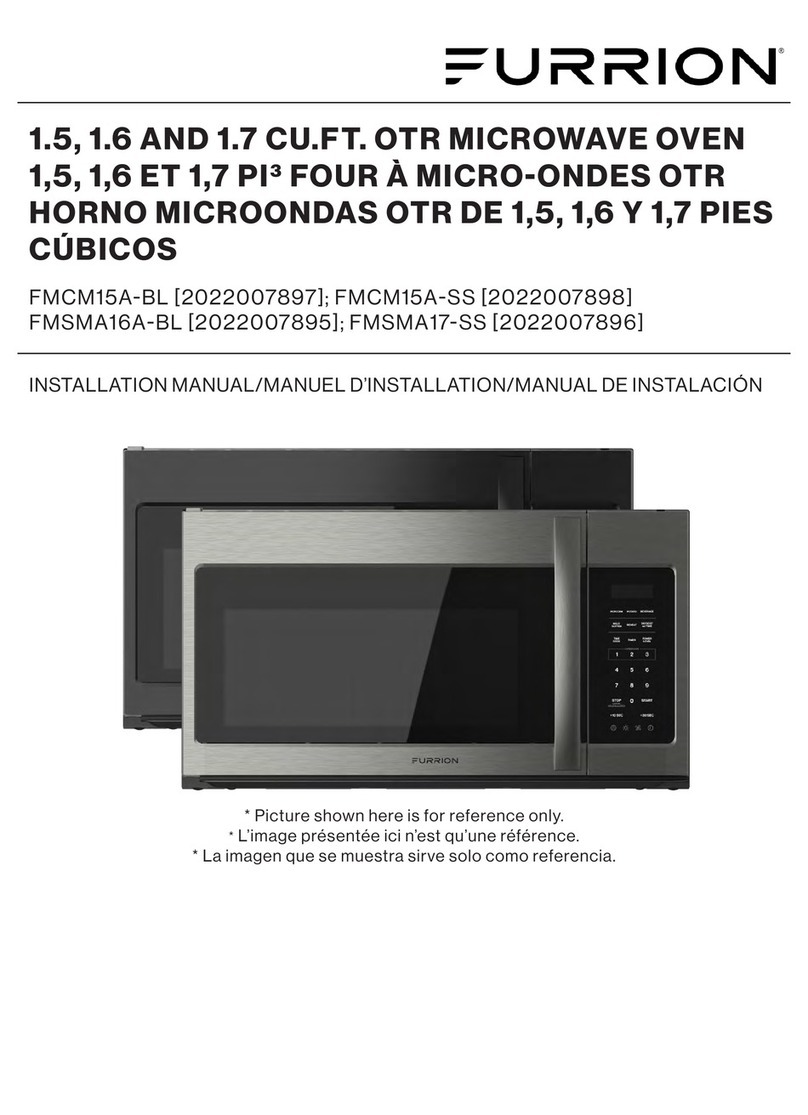
Furrion FMSMA16A-BL/2022007895 User manual

1.6 AND 1.7 CU.FT. OTR NON-CONVECTION
MICROWAVE OVEN
1,6 ET 1,7PI3 FOUR À MICRO-ONDES OTR
NON-CONVECTION
HORNO MICROONDAS OTR SIN CONVEC-
CIÓN DE 1,6 Y 1,7 PIES CÚBICOS.
FMSMAABL/; FMSMASS/
USER MANUAL/MANUEL DE L’UTILISATEUR/MANUEL DE L’UTILISATEUR
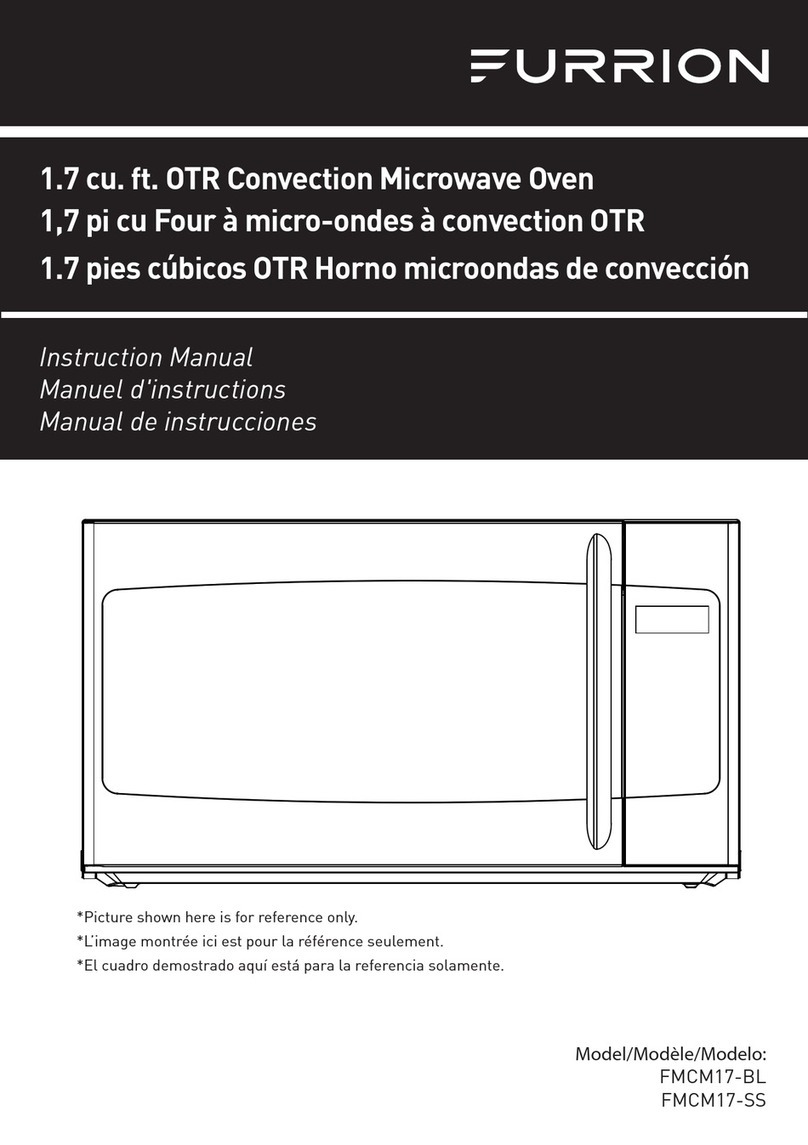
* Picture shown here is for reference only.
*L’image présentée ici n’est qu’une référence.
* La imagen que se muestra sirve solo como referencia.

English
CCD-0006073 Rev: 09-16-22 - 1 -
Thank you for purchasing this Furrion® product. Before operating your new appliance, please read these instructions carefully. This
instruction manual contains information for safe use, installation and maintenance of the appliance.
Please keep this instruction manual in a safe place for future reference. This will ensure safe use and reduce the risk of injury. Be
sure to pass on this manual to new owners of this appliance.
The manufacturer does not accept responsibility for any damages due to not observing these instructions.
TABLE OF CONTENTS
TABLE OF CONTENTS ..........................................................................................................................................................................................
EXPLANATION OF SYMBOLS.............................................................................................................................................................................
IMPORTANT SAFETY INSTRUCTIONS...........................................................................................................................................................
Safety Precautions............................................................................................................................................................................................................................................2
Grounding Instructions...................................................................................................................................................................................................................................3
Radio Interference.............................................................................................................................................................................................................................................3
Precautions To Avoid Possible Exposure To Excessive Microwave Energy ...................................................................................................................3
PRODUCT OVERVIEW ..........................................................................................................................................................................................
Microwave Oven.................................................................................................................................................................................................................................................4
Control Panel........................................................................................................................................................................................................................................................4
BEFORE USING ........................................................................................................................................................................................................
What's in the Box ...............................................................................................................................................................................................................................................5
Unpacking Instructions...................................................................................................................................................................................................................................5
About Your Microwave Oven.......................................................................................................................................................................................................................5
About Food............................................................................................................................................................................................................................................................6
About Microwave Cooking ..........................................................................................................................................................................................................................6
About Safety.........................................................................................................................................................................................................................................................6
About Utensils and Coverings....................................................................................................................................................................................................................6
About Children and the Microwave.........................................................................................................................................................................................................7
OPERATION ...............................................................................................................................................................................................................
Manual Cooking .................................................................................................................................................................................................................................................8
One-touch Cooking..........................................................................................................................................................................................................................................8
Defrost .....................................................................................................................................................................................................................................................................9
Other Features ..................................................................................................................................................................................................................................................10
SETTINGS................................................................................................................................................................................................................
CLEANING AND MAINTENANCE .....................................................................................................................................................................
Cleaning Suggestions....................................................................................................................................................................................................................................11
Cleaning the Outside of Your Microwave............................................................................................................................................................................................11
Cleaning the Inside of Your Microwave ................................................................................................................................................................................................11
Cleaning and Replacing the Filters........................................................................................................................................................................................................12
TROUBLESHOOTING ..........................................................................................................................................................................................
SPECIFICATIONS...................................................................................................................................................................................................
TABLE DES MATIÈRES ........................................................................................................................................................................................
EXPLICATION DES SYMBOLES.......................................................................................................................................................................

English
CCD-0006073 Rev: 09-16-22
- 2 -
EXPLANATION OF SYMBOLS
This manual has safety information and instructions to help you
eliminate or reduce the risk of accidents and injuries. Always
respect all safety warnings identified with these symbols. A
signal word will identify safety messages and property damage
messages, and will indicate the degree or level of hazard
seriousness.
DANGER
Indicates an imminently hazardous situation which, if not
avoided, will result in death or serious injury.
WARNING
Indicates a potentially hazardous situation which, if not
avoided, could result in death or serious injury.
CAUTION
Indicates a potentially hazardous situation which, if not
avoided, may result in minor or moderate personal injury, or
property damage.
IMPORTANT SAFETY INSTRUCTIONS
Safety Precautions
WARNING: To reduce the risk of burns, electric shock, fire,
injury to persons or exposure to excessive microwave energy.
When using electrical appliances basic safety precautions
should be followed, including the following:
1. Read all instructions before using the appliance.
2. Read and follow the specific “Precautions to Avoid
Possible Exposure to Excessive Microwave Energy"
section.
3. To reduce the risk of fire in the oven cavity:
–Do not overcook food. Carefully attend the appliance
when paper, plastic, or other combustible materials are
placed inside the oven to facilitate cooking.
–Remove wire twist-ties and metal handles from paper
or plastic containers/bags before placing them in the
oven.
–If materials inside the oven ignite, keep the oven door
closed. Turn the oven off, and unplug the appliance.
Disconnect the power cord, shut off power at the fuse
or circuit breaker panel.
–Do not use the oven cavity for storage purposes. Do
not leave paper products, cooking utensils, or food in
the cavity when not in use.
4. This appliance must be grounded. Connect only
to properly grounded outlet. See “GROUNDING
INSTRUCTIONS” section.
5. Install or locate this oven only in accordance with the
installation instructions provided.
6. Some products such as whole eggs and sealed
containers-for example, closed glass jars-are able to
explode and should not be heated in the oven.
7. Use this appliance only for its intended uses as described
in this manual. Do not use corrosive chemicals or vapors
in this appliance. This oven is specifically designed to
heat or cook or dry food. It is not designed for industrial or
laboratory use.
8. As with any appliance, close supervision is necessary
when used by children.
9. Do not operate this oven if it has a damaged cord or plug,
if it is not working properly or if it has been damaged or
dropped.
10. Liquids, such as water, coffee, or tea are able to be
overheated beyond the boiling point without appearing to
be boiling. Visible bubbling or boiling when the container is
removed from the microwave oven is not always present.
THIS COULD RESULT IN VERY HOT LIQUIDS SUDDENLY
BOILING OVER WHEN THE CONTAINER IS DISTURBED
OR A SPOON OR OTHER UTENSIL IS INSERTED INTO
THE LIQUID.
–Do not overheat the liquid.
–Stir the liquid both before and halfway through heating
it.
–Do not use straight-sided containers with narrow
necks.
–After heating, allow the container to stand in the
microwave oven for a short time before removing the
container.
–Use extreme care when inserting a spoon or other
utensil into the container.
11. Do not cover or block any openings on the appliance.
12. Do not store or use this appliance outdoors.
13. Do not use this oven near water, for example, near a
kitchen sink, in a wet basement, near a swimming pool, or
similar locations.
14. Do not immerse cord or plug in water. Keep cord away from
heated surface. Do not let cord hang over edge of table or
counter.
15. This appliance should be serviced only by qualified service
technicians. Contact the nearest authorized service facility
for examination, repair or adjustment.
16. When cleaning surfaces of door and oven that comes
together on closing the door, use only mild, nonabrasive
soaps or detergents applied with a sponge or soft cloth.
17. Ventilating Hoods
–Clean Ventilating Hoods Frequently-Grease should not
be allowed to accumulate on hood or filter.
–When flaming foods under the hood, turn the fan on.
18. Use care when cleaning the vent-hood filter. Corrosive
cleaning agents, such as lye-based oven cleaners, may
damage the filter.
19. Do not mount over sink.
20. Do not store anything directly on top of the appliance
surface when the appliance is in operation.
21. Suitable for use above both gas and electric cooking
equipment.
22. As with most cooking appliances, close supervision is
necessary to reduce the risk of a fire in the oven cavity.
English
CCD-0006073 Rev: 09-16-22 - 3 -
Grounding Instructions
This appliance must be grounded. In the event of an electrical
short circuit, grounding reduces the risk of electric shock
by providing an escape wire for the electric current. This
appliance is equipped with a cord having a grounding wire
with a grounding plug. The plug must be plugged into an
outlet that is properly installed and grounded.
WARNING
Improper use of the grounding plug can result in a risk of
electric shock.
Consult a qualified electrician or serviceman if the grounding
instructions are not completely understood or if doubt
exists as to whether the appliance is properly grounded. If
it is necessary to use an extension cord, use only a 3-wire
extension cord that has a 3-blade grounding plug, and a
3-slot receptacle that will accept the plug on the appliance.
The marked rating of the extension cord shall be equal to or
greater than the electrical rating of the appliance.
DANGER
Electric Shock Hazard
Touching some of the internal components can cause
serious personal injury or death. Do not disassemble this
appliance.
WARNING
Electric Shock Hazard
Improper use of the grounding can result in electric shock.
Do not plug into an outlet until appliance is properly installed
and grounded.
Electrical Requirements
The electrical requirements are a 120VAC / 60Hz / 15A max /
1500W. It is recommended that a separate circuit serving only
the oven be provided. The oven is equipped with a 3-prong
grounding plug. It must be plugged into a wall receptacle that
is properly installed and grounded.
1. A short power cord is provided to reduce the risks
resulting from becoming entangled in or tripping over a
longer cord.
2. Longer cord sets or extension cords are available and
may be used if care is exercised in their use.
3. If long cord or extension cord is use:
a) The marked electrical rating of the cord set or
extension cord should be at least as great as the
electrical rating of the appliance.
b) The extension cord must be a grounding-type 3-wire
cord, and the longer cord should be arranged so
that it will not drape over the counter top or table top
where it can be pulled on by children or tripped over
unintentionally.
NOTE:
1. If you have any questions about the grounding or
electrical instructions, consult a qualified electrician or
service person.
2. Neither Furrion nor the dealer can accept any liability
for damage to the oven or personal injury resulting from
failure to observe the electrical connection procedures.
Radio Interference
Operation of the microwave oven may cause interference to
your radio, TV or similar equipment.
When there is interference, it may be reduced or eliminated by
taking the following measures:
1) Clean door and sealing surface of the oven.
2) Reorient the receiving antenna of radio or television.
3) Relocate the microwave oven with respect to the receiver.
4) Move the microwave oven away from the receiver.
5) Plug the microwave oven into a different outlet so that
microwave oven is on different branch circuits.
Precautions To Avoid
Possible Exposure To
Excessive Microwave
Energy
●Do not attempt to operate this oven with the door open
since this can result in harmful exposure to microwave
energy. It is important not to defeat or tamper with the
safety interlocks.
●Do not place any object between the oven front face and
the door or allow dirt or cleaner residue to accumulate on
sealing surfaces.
●Do not operate the oven if it is damaged. It is
particularly important that the oven door closes
properly and that there is no damage to the:
(1) DOOR (bent)
(2) HINGES AND LATCHES (broken or loosened)
(3) DOOR SEALS AND SEALING SURFACE
●The oven should not be adjusted or repaired by
anyone except properly qualified service personnel.
Save these instructions for
future reference!
This device complies with
part 18 of the FCC Rules.

English
CCD-0006073 Rev: 09-16-22
- 4 -
PRODUCT OVERVIEW
Microwave Oven
4
5
6
8
9
10
15
3
1
6
7
2
11
12
13
14
Front View
Bottom View
4
5
6
8
9
10
15
3
1
6
7
2
11
12
13
14
Front View
Bottom View
Item Part Name
1Microwave oven door with see-through window
2Door Hinges
3Wave Guide Cover
Do not remove the wave guide cover.
4Turntable Motor Shaft
5
Microwave Oven Light
It will light when the door is opened or the microwave
oven is in operating.
6Safety Door Latches
7Handle
8Control Panel
9Digital Displaying Screen
10 Ventilation Openings
Item Part Name
11 Removable Turntable
Do not remove it unless cleaning.
12 Removable Turntable Support
13 Surface Light with Cover
14 Grease Filters
15 Rating Label
Control Panel
DISPLAY
Cooking time, power, indicators and present time are
displayed.
POPCORN
Touch to enter and set popcorn cooking program.
POTATO
Touch to enter and set potato cooking program.
Beverage
Touch to enter and set beverage cooking program.
MELT/SOFTEN
Touch to enter and set melt/soften cooking program.
REHEAT
Touch to enter and set reheat cooking program.

English
CCD-0006073 Rev: 09-16-22 - 5 -
DEFROST wt/TIME
Defrost by weight/time.
TIME COOK
Cook with the setting you programmed.
TIMER
Touch to set the microwave oven as a kitchen timer.
POWER LEVEL
Touch multiple times to choose different cooking power.
EXPRESS COOK
Touch numbers 1 through 3 to quickly select a time cooked
setting from 1 to 3 minutes.
NUMBER PAD
Touch to enter cooking time, power level, or food weight.
STOP CANCEL, HOLD s to LOCK
Touch to stop the oven or touch for 3 seconds to set control
lock.
START
Touch to start the cook.
+ SEC
Touch to start a 10 seconds cooking. During the cooking
process, touch to increase the cooking time.
+ SEC
Touch to start a 30 seconds cooking. During the cooking
process, touch to increase the cooking time.
Touch multiple times to enter the oven settings of alert tone
volume, weight unit or demo mode.
Touch the set the oven light ON/OFF.
Touch to set the vent fan speed.
Touch to set the clock display ON/OFF.
BEFORE USING
What's in the Box
Make sure you have the following listed items included in the
packaging. If any item is damaged or missing, contact your
dealer.
●Microwave Oven Body
●Grease Filter
●Charcoal Filter
●Removable Turntable
●Removable Turntable Support
●Mounting Kit
●User Manual
●Installation Manual
●Rear Wall Template
●Top Cabinet Template
●Warranty Manual
Unpacking Instructions
Unpacking and Examining Your Oven
Carefully remove oven from carton. SAVE THE CARTON AS IT
MAY MAKE INSTALLATION EASIER.
Remove:
1. All packing materials from inside the oven cavity; however,
DO NOT REMOVE THE WAVEGUIDE COVER, which is
located on the side of microwave oven. Check to see that
there are Installation Manual, Rear Wall Template, Top
Cabinet Template, bag of Installation Hardware, Charcoal
Filter and Exhaust Damper Assembly. Read enclosures
and SAVE the User Manual.
2. The feature sticker from the outside of the door, if there is
one.
Check the microwave oven for any damage, such as
misaligned or bent door, damaged door seals and sealing
surfaces, broken or loose door hinges and latches and dents
inside the cavity or on the door. If there is any damage, do not
operate the oven and contact your dealer.
See Installation Manual for more details.
About Your Microwave Oven
NEVER use the oven without the turntable and roller ring nor
turn the turntable over so that a large dish could be placed in
the oven. The turntable will turn both clockwise and counter
clockwise.
ALWAYS have food in the oven when it is on to absorb the
microwave energy.
When using the oven at power levels below 100%, you may
hear the magnetron cycling on and off.
Condensation is a normal part of microwave cooking. Room
humidity and the moisture in food will influence the amount
of moisture that condenses in the oven. Generally, covered
foods will not cause as much condensation as uncovered ones.
Ventilation openings must not be blocked.
In using recipes or package directions, check food a minute or
two before the minimum time and add time accordingly.

English
CCD-0006073 Rev: 09-16-22
- 6 -
About Food
FOOD DO DON'T
Eggs,
sausages,
fruits and
vegetable
●Puncture egg yolks
before cooking to prevent
“explosion”.
●Pierce skins of potatoes,
apples, squash, hot dogs
and sausages so that steam
escapes.
●Cook egg in shells.
●Reheat whole eggs.
Popcorn
●Use specially bagged
popcorn for the microwave
oven.
●Listen while popping corn
for the popping to slow to 1
or 2 seconds or use special
popcorn cooking functions
listed on OPERATION/
POPCORN section.
●Pop popcorn in regular
brown bags or glass
bowls.
●Exceed maximum time
on popcorn package.
Baby food
●Transfer baby food to small
dish and heat carefully, stirring
often. Check temperature
before serving.
●Put nipples on bottles after
heating and shake thoroughly.
“Wrist” test before feeding.
●Heat disposable bottles.
●Heat bottles with nipples
on.
●Heat baby food in
original jars.
General
●Cut baked goods with filling
after heating to release steam
and avoid burns.
●Stir liquids briskly before
and after heating to avoid
eruption.
●Use deep bowl, when cooking
liquids or cereals, to prevent
boilovers.
●Heat or cook in closed
glass jars or airtight
containers.
●Can in the microwave as
harmful bacteria may not
be destroyed.
●Deep fat fry.
●Dry wood, gourds, herbs
or wet papers.
About Microwave Cooking
●Arrange food carefully. Place thickest areas towards
outside of dish.
●Watch cooking time. Cook for the shortest amount of
time indicated and add more as needed. Food severely
overcooked can smoke or ignite.
●Cover foods while cooking. Check recipe or cookbook for
suggestions: paper towels, wax paper, microwave plastic
wrap or a lid. Covers prevent spattering and help foods to
cook evenly.
●Shield with small flat pieces of aluminum foil any thin areas
of meat or poultry to prevent overcooking before dense,
thick areas are cooked thoroughly.
●Stir foods from outside to center of dish once or twice
during cooking, if possible.
●Turn foods over once during microwaving to speed
cooking of such foods as chicken and hamburgers. Large
items like roasts must be turned over at least once.
●Rearrange foods such as meatballs halfway through
cooking both from top to bottom and from the center of the
dish to the outside.
●Add standing time. Remove food from oven and stir, if
possible. Cover for standing time that allows the food to
finish cooking without overcooking.
●Check for doneness. Look for signs indicating that cooking
temperatures have been reached.
●Doneness signs include:
–Food steams throughout, not just at edge.
–Center bottom of dish is very hot to the touch.
–Poultry thigh joints move easily.
–Meat and poultry show no pinkness.
–Fish is opaque and flakes easily with a fork.
About Safety
Check foods to see that they are cooked to the following
recommended temperatures.
TEMP FOOD
160°F ...For fresh pork, ground meat, boneless white poultry, fish,
seafood, egg dishes and frozen prepared food.
165°F …For leftover, ready-to-reheat refrigerated, and deli and carry-out
“fresh” food.
170°F …White meat of poultry.
180°F …Dark meat of poultry.
●To test for doneness, insert a meat thermometer in a
thick or dense area away from fat or bone. NEVER leave
the thermometer in the food during cooking, unless it is
approved for microwave oven use.
●ALWAYS use potholders to prevent burns when handling
utensils that are in contact with hot food. Enough heat from
the food can transfer through utensils to cause skin burns.
●Avoid steam burns by directing steam away from the face
and hands. Slowly lift the farthest edge of a dish’s covering
and carefully open popcorn and oven cooking bags away
from the face.
●Stay near the oven while it’s in use and check cooking
progress frequently so that there is no chance of
overcooking food.
●NEVER use the cavity for storing cookbooks or other
items.
●Select store and handle food carefully to preserve its high
quality and minimize the spread of food borne bacteria.
●Keep waveguide cover clean. Food residue can cause
arcing and/or fires.
●Use care when removing items from the oven so that
utensil, your clothes or accessories do not touch the safety
door latches.
About Utensils and Coverings
It is not necessary to buy all new cookware. Many pieces
already in your kitchen can be used successfully in your new
microwave oven. Make sure the utensil does not touch the
interior walls during cooking.
Should you wish to check if an utensil is safe for
microwaving:
1. Fill a microwave-safe container with 1 cup of cold water
(250ml) along with the utensil in question.
2. Cook on maximum power for 1 minute.
3. Carefully feel the utensil. If the empty utensil is warm, do
not use it for microwave cooking.
4. Do not exceed 1 minute cooking time.
Materials to be avoided in microwave oven
Utensils Remarks
Browning dish Follow manufacturer* instructions. The bottom of
browning dish must be at least 3/16 inch (5mm)
above the turntable. Incorrect usage may cause
the turntable to break.
Dinnerware Microwave-safe only. Follow manufacturer's
instructions. Do not use cracked or chipped
dishes.

English
CCD-0006073 Rev: 09-16-22 - 7 -
Glass jars Always remove lid. Use only to heat food until just
warm. Most glass jars are not heat resistant and
may break.
Glassware Heat-resistant oven glassware only. Make sure
there is no metallic trim. Do not use cracked or
chipped dishes.
Oven cooking bags Follow manufacturer* instructions. Do not close
with metal tie. Make slits to allow steam to escape.
Paper plates and cups Use for short term cooking/warming only. Do not
leave oven unattended while cooking.
Paper towels Use to cover food for reheating and absorbing fat.
Use with supervision for a short-term cooking only.
Parchment paper Use as a cover to prevent splattering or a wrap for
steaming.
Plastic Microwave-safe only. Follow the manufacturer*
instructions. Should be labeled "Microwave Safe".
Some plastic containers soften, as the food inside
gets hot. "Boiling bags" and tightly closed plastic
bags should be slit, pierced or vented as directed
by package.
Plastic wrap Microwave-safe only. Use to cover food during
cooking to retain moisture. Do not allow plastic
wrap to touch food.
Thermometers Microwave-safe only (meat and candy
thermometers).
Wax paper Use as a cover to prevent splattering and retain
moisture.
Materials to be avoided in microwave oven
Utensils Remarks
Aluminum tray May cause arcing. Transfer food into microwave-
safe dish.
Food carton with metal
handle
May cause arcing. Transfer food into microwave-
safe dish.
Metal or metal-
trimmed utensils
Metal shields the food from microwave energy.
Metal trim may cause arcing.
Metal twist ties May cause arcing and could cause a fire in the
oven.
Paper bags May cause a fire in the oven.
Plastic foam Plastic foam may melt or contaminate the liquid
inside when exposed to high temperature.
Wood Wood will dry out when used in the microwave
oven and may split or crack.
The following coverings are ideal:
●Paper towels are good for covering foods for reheating and
absorbing fat while cooking bacon.
●Wax paper can be used for cooking and reheating.
●Plastic wrap that is specially marked for microwave use
can be used for cooking and reheating. DO NOT allow
plastic wrap to touch food. Vent so steam can escape.
●Lids that are microwave-safe are a good choice because
heat is kept near the food to hasten cooking.
●Oven cooking bags are good for large meats or foods that
need tenderizing. DO NOT use metal twist ties. Remember
to slit bag so steam can escape.
How to use aluminum foil in your microwave oven:
●Small flat pieces of aluminum foil placed smoothly on the
food can be used to shield areas that are either defrosting
or cooking too quickly.
●Foil should not come closer than one inch to any surface of
the oven.
ACCESSORIES: There are many microwave accessories
available for purchase. Evaluate carefully before you purchase
so that they meet your needs. A microwave-safe thermometer
will assist you in determining correct doneness and assure you
that foods have been cooked to safe temperatures. Furrion is
not responsible for any damage to the oven when accessories
are used.
About Children and the Microwave
●Children below the age of 7 should use the microwave
oven with a supervising person closely with them. Between
the ages of 7 and 12, the supervising person should be in
the same room.
●The children must be able to reach the oven comfortably. If
not, he/she should stand on a sturdy step stool.
●At no time should anyone be allowed to lean or swing on
the oven door.
●Children should be taught all safety precautions - use
potholders, remove coverings carefully and pay special
attention to packages that crisp food because they may be
extra hot.
●Don’t assume that because a child has mastered one
cooking skill he/she can cook everything.
●Children need to learn that the microwave oven is not a toy.
OPERATION
Before operating your new microwave oven, make sure you
read and understand this user manual completely.
Power Level
The power level is the percent of the total watts that will be
used to cook your food. The 11 power levels allow you to
choose the power output that is best suited for the food type
you are cooking. Always consult the cookbook or recipe
instructions that are printed on the food packaging.
POWER CHART
TOUCHING PAD POWER PERCENTAGE DISPLAY
POWER LEVEL x 1 or 1, 0 100% P-HI
POWER LEVEL x 2 or 9 90% P-90
POWER LEVEL x 3 or 8 80% P-80
POWER LEVEL x 4 or 7 70% P-70
POWER LEVEL x 5 or 6 60% P-60
POWER LEVEL x 6 or 5 50% P-50
POWER LEVEL x 7 or 4 40% P-40
POWER LEVEL x 8 or 3 30% P-30
POWER LEVEL x 9 or 2 20% P-20
POWER LEVEL x 10 or 1 10% P-10
POWER LEVEL x 11 or 0 0% P-0
Setting the Clock
Each time the microwave is disconnected from the power, you
will be asked to set the time when it is connected to the power
again. You can touch the pad to skip the clock setting, or
reset it by following the steps below.

English
CCD-0006073 Rev: 09-16-22
- 8 -
Suppose you want to set the clock at 10:59.
Step Touch Display Remark
1
2, , ,
3or
Setting the Kitchen Timer
The kitchen timer serves as a reminder, it helps to time your
cooking and measures the specific time it takes to cook your
food.
Your microwave oven can be used as a kitchen timer, and you
can set a kitchen timer while the microwave oven is running.
The maximum 99 minutes, 99 seconds (99:99) kitchen timer
can be set.
Suppose you want to set for a three-minute kitchen timer:
Step Touch Display Remark
1
2, ,
3Timer start counting down.
NOTE: The kitchen timer counting down will not stop even the
door is opened. While in cooking process, if a kitchen timer was
set, touch the pad once to show the remaining time, touch
the second time to cancel the timer. If it is not in cooking, touch
the pad once to cancel the timer.
Manual Cooking
Time Cooking
The time cooking feature enables you to set a specific
cooking time and cooking power during a cooking process.
Your microwave oven can be programmed for 99 minutes, 99
seconds (99:99) of cooking. Always enter the seconds after
the minutes, even if they are both zeros.
Suppose you want to cook for 10 minutes, 59 seconds at 90%
power:
Step Touch Display Remark
1
2, , ,
3
4x 2 or
5Time start counting
down.
NOTE: The oven will cook at 100% power level automatically if
you did not set the power level.
Express Cooking
The express cooking allows you to cook food for a period
of time (1 - 3 minutes) at instantly 100% power level just by
touching the corresponding number pad (1 - 3).
Suppose you want to cook for 3 minutes:
Step Touch Display Remark
1
After 2 seconds. Time start counting
down.
NOTE: If the door is kept closed for over 5 minutes, the "Food"
text will be displayed on the display after 3 seconds when an
express cooking cycle is selected. You must open the door and
then close to clear the text.
Using +10 SEC/+30 SEC Cooking
The plus 10 seconds and plus 30 seconds features enable
you to quickly start the microwave cook for 10 seconds or 30
seconds at 100% power level. During the cooking process,
touch or pad each time to increase the cooking
time by 10 seconds or 30 seconds. The maximum 99 minutes,
99 seconds (99:99) cooking time is allowed to set.
Suppose you want to cook for 30 seconds:
Step Touch Display Remark
1Time start counting down.
NOTE: If the door is kept closed for over 5 minutes, the "Food"
text will be displayed on the display when the or
pad is touched. You must open the door and then close to clear
the text.
Two-Stage Cooking
For best results, some recipes call for different power levels
and cooking times during a cook cycle. Your microwave can be
programmed a maximum of 2 stages during the cooking cycle.
Suppose you want to cook for 10 minutes, 59 seconds with
90% power and 10 minutes, 50 seconds with 80% power. In
standby, clock, or timer mode:
Step Touch Display Remark
1
2, , ,
3
4x 2 or
5
6, , ,
7
8x 3 or
9Time start counting
down.
One-touch Cooking
Popcorn
Suppose you want to cook 3.3 oz. popcorn. In standby, clock,
or timer mode:

English
CCD-0006073 Rev: 09-16-22 - 9 -
Step Touch Display Remark
1x 1
SEE MENU LABEL PRESS START
2Time start counting down.
Touch Amount
x 1 3.30 oz.
x 2 3.00 oz.
x 3 1.75 oz.
Potato
Suppose you want to cook 1pc potato. In standby, clock, or
timer mode:
Step Touch Display Remark
1x 1
SEE MENU LABEL PRESS START
2Time start counting down.
Touch Amount
x 1 1
x 2 2
x 3 3
x 4 4
Beverage
Suppose you want to cook 2 cups of beverage. In standby,
clock, or timer mode:
Step Touch Display Remark
1x 2
SEE MENU LABEL PRESS START
2Time start counting down.
Touch Amount
x 1 1 cup
x 2 2 cups
Melt/Soften
Suppose you want to melt 2 sticks of butter. In standby, clock,
or timer mode:
Step Touch Display Remark
1x 1
SEE MENU LABEL
2
3Time start counting down.
MELT TABLE
Food Amount of Food Touch Pad
BUTTER 1 stick
2 sticks
1
2
CHOCOLATE
2 oz.
4 oz.
8 oz.
1
2
3
ICE CREAM Pint
1.5 Quart.
1
2
CREAM CHEESE 3 oz.
8 oz.
1
2
Reheat
Suppose you want to reheat for 16oz amount of food. In
standby, clock, or timer mode:
Step Touch Display Remark
1x 2
SEE MENU LABEL PRESS START
2Time start counting down.
Touch Amount
x 1 8 oz
x 2 16 oz
Defrost
Defrost by Weight
You are allowed to defrost 0.1 lb - 6.0 lb amount of food at a
time.
Suppose you want to defrost for 1.2 lb amount of food. In
standby, clock, or timer mode:
Step Touch Display Remark
1
.
SEE MENU LABEL
2,
PRESS START
3Time start counting down.
NOTE: The buzzer will sound during defrosting to remind you
of turning over the food.
Defrost by Time
Suppose you want to defrost for 10 minutes, 59 seconds.
In standby, clock, or timer mode:
Step Touch Display Remark
1x 2
.
.
SEE MENU LABEL
2, , ,
3Time start counting down.
NOTE: The buzzer will sound during defrosting to remind you
of turning over the food.

English
CCD-0006073 Rev: 09-16-22
- 10 -
Other Features
Setting the Control Lock
You may want to lock the control panel to prevent accidental
programming when wiping the control panel or unsupervised
operation by children.
To turn on the control lock:
●If the time has already been set. In standby mode:
Step Touch Display Remark
1Touch for 3 seconds.
●If the time has not been set. In standby mode:
Step Touch Display Remark
1Touch for 3 seconds.
To cancel the control lock:
●If the time has already been set. In locked mode:
Step Touch Display Remark
1Touch for 3 seconds.
●If the time has not been set. In locked mode:
Step Touch Display Remark
1Touch for 3 seconds.
Vent Fan
The pad controls the 2-speed vent fan. When the vent fan is
OFF:
Step Touch Display Remark
1x 1 Touch once to turn on the fan and run at
high fan speed.
2x 2 Touch the second time to switch to low
fan speed.
3x 3 Touch the third time to turn the fan off.
Light
The pad controls the microwave light. When the light is OFF:
Step Touch Display Remark
1x 1 Touch once to turn on the light.
2x 2
Touch the second time to turn off the
light.
SETTINGS
The microwave has various settings that allow you to
customize the operation for your convenience. Touch the
pad multiple times to switch to your desired setting. The
following shows the various settings:
Touch Pad Option
x 1 Volume
x 2 Weight
x 3 Demo Mode On/Off
Setting the Alert Tone Volume
You can set the volume of the alert tones to your preferred level
through the pad.
Suppose the alert tone volume level was set at HI position, and
you want to change it to LO:
Step Touch Display Remark
1x 1
SEE MENU LABEL PRESS START
2
PRESS START
PRESS START
PRESS START
PRESS START
The options will display in order
each 2 seconds.
3Touch the pad once the desired
mode is shown.
Setting the Weight Unit
You can set the microwave displaying weight unit through the
pad to your preferred unit.
NOTE: Only "kg" and "lb" are available.
Suppose the displaying weight unit was set as kilogram and
you want to change it to pound:
Step Touch Display Remark
1
SEE MENU LABEL PRESS START
2
PRESS START
PRESS START
The options will display in order each
2 seconds.
3Touch the pad once the desired unit
is shown.
Setting the Demo Mode ON/OFF
The demo mode is ideal for learning how to set various
programs and use the microwave without actually generating
any microwave power.
Suppose the demo mode is off, and you want to set it on.
Step Touch Display Remark
1x 3
SEE MENU LABEL PRESS START
2
PRESS START
PRESS START
The options will display in order each 2
seconds.

English
CCD-0006073 Rev: 09-16-22 - 11 -
3Touch the pad once the desired mode is
shown.
Setting the Clock Display Mode
You can set the clock display ON/OFF.
When in display ON mode:
Step Touch Display Remark
1Touch for 3 seconds.
To set display ON. In display OFF mode:
Step Touch Display Remark
1Touch for 3 seconds.
CLEANING AND MAINTENANCE
WARNING
ELECTRIC SHOCK HAZARD
●Disconnect electrical power before servicing.
●Replace all parts and panels before operating.
●Failure to do so can result in death or electric shock.
Cleaning Suggestions
For best performance and for safety reasons, keep the oven
clean inside and outside. Take special care to keep the inner
door panel and oven front frame free of food and grease build-
up.
Never use rough scouring powder or pads on the microwave.
Wipe the microwave oven inside and out with a soft cloth and
warm (not hot) mild detergent solution. Then rinse and wipe
completely dry.
Wipe spatters immediately with a wet paper towel, especially
after cooking greasy foods like chicken or bacon.
Clean your microwave oven weekly or more often, if needed.
Follow these instructions to clean and care for your
microwave oven:
●Keep the inside (cavity) of the oven clean. Food particles
and spilled liquids can stick to the oven walls, causing the
oven to work less efficiently.
●Wipe up spills immediately. Use a damp, clean cloth and
mild soap. DO NOT use harsh detergents or abrasive
cleaners.
●To help loosen baked-on food particles or liquids, heat 2
cups of water (add the juice of 1 lemon if you desire to keep
the oven fresh smelling) in a 4 cup measuring glass at High
power for 5 minutes or until boiling. Let stand in oven cavity
for 1 or 2 minutes.
●Remove the glass turntable tray from the oven when
cleaning the oven cavity or tray. To prevent the glass
turntable from breaking, handle with care and do not put it
in water immediately after cooking. Wash the turntable tray
in warm sudsy water or in the dishwasher.
●Clean the outside surface of the microwave with soap and
a clean damp cloth. Dry with a clean soft cloth. To prevent
damage to the operating parts of the oven, do not let water
seep into any vents or openings.
●Wash the oven door window with very mild soap and water.
Be sure to use a soft clean cloth to avoid scratching.
●If steam accumulates inside or outside the oven door,
wipe with a soft cloth. Steam can accumulate when
operating the oven in high humidity and in no way indicates
microwave leakage.
●Never operate the oven without food in the oven cavity; this
can damage the magnetron tube or glass tray. You may
wish to leave a cup of water standing inside the oven when
it is not in use to prevent damage if the oven is accidentally
turned on.
Cleaning the Outside of Your
Microwave
Exterior
The outside surface is precoated steel and plastic. Clean the
outside with mild soap and water, then rinse and dry with a soft
cloth. Do not use any type of household or abrasive cleaner.
Door
Wipe the window on both sides with a damp cloth to remove
any spills or spatters. Metal parts will be easier to maintain if
wiped frequently with a damp cloth. Avoid the use of spray and
other harsh cleaners as they may stain, streak, or dull the door
surface.
Control Panel
If the control panel is dirty, open the door of your microwave
before cleaning. Wipe the panel with a cloth dampened slightly
with water only. Dry with a soft cloth. Do not scrub or use any
sort of chemical cleaners. Close the door and press Stop to
clear any buttons you may have pressed.
Cleaning the Inside of Your
Microwave
Interior
Wipe with a soft cloth and warm water. Do not use abrasive
or harsh cleaners or scouring pads. For baked-on food, use
baking soda or a mild soap, then rinse thoroughly with hot
water.
Waveguide Cover
The waveguide cover is located on the right side of the
microwave cavity. It is made from mica so it requires special
care. Keep the waveguide cover clean to assure good

English
CCD-0006073 Rev: 09-16-22
- 12 -
microwave performance. Carefully wipe the surface of the
cover immediately with a damp cloth if any food spatters on it.
Built-up splashes may overheat and cause smoke or possibly
catch fire. DO NOT REMOVE THE WAVEGUIDE COVER.
Removing Odors
Occasionally, a cooking odor may remain in your microwave.
To remove, combine one cup water, the grated peel and juice
of one lemon in a two-cup glass measuring cup. Boil for several
minutes using 100% power, then let it cool in your microwave.
Wipe the interior with a soft cloth.
Turntable and Turntable Support
Remove the turntable and turntable support and wash them in
mild, sudsy water. For stubborn stains, use a mild cleanser and
non-abrasive scouring sponge. You can also wash them in the
top rack of a dishwasher.
The turntable motor shaft is not sealed, so excess water or
spills should be wiped up immediately.
Cleaning and Replacing the Filters
Cleaning the Grease Filters
CAUTION
To avoid risk of personal injury or property damage, do not
operate oven hood without filters properly in place.
Surface light
Ta b
Grease Filters
Front
Rear
1. To remove the grease filters, slide the filter to the rear. Then
pull filter downward and push to the other side. The filter
will drop out. Repeat for the second filter.
2. Soak the grease filters in hot water using a mild detergent.
Rinse well and shake to dry or wash in a dishwasher. Do
not use ammonia. The aluminum on the filter will corrode
and darken.
3. To reinstall the grease filter, slide it into the side slot, then
push up and toward oven to lock. Reinstall the second filter
using the same procedure.
Replacing the Charcoal Filter
Charcoal Filter installed in your microwave oven, is used for
non-vented, recirculated installation. The filter should be
changed every 6 to 12 months depending on use.
1. Disconnect power to the microwave oven at the circuit
breaker panel or by unplugging.
2. Remove the vent grill mounting screws.
3. Pull the vent grill away from the unit.
4. Remove the charcoal filter by pushing the top of the filter
inwards, then pull it forward out from the unit.
5. Slide the top of the new charcoal filter into the top area of
the filter cavity.
6. Press the bottom of charcoal filter to place it into the
correct position.

English
CCD-0006073 Rev: 09-16-22 - 13 -
7. Put the vent grille bottom tabs into the slots then push the
top of the vent grille into place.
8. Reinstall the vent grille screws.
Replacing the Surface and Interior Light
Bulb
WARNING
ELECTRIC SHOCK HAZARD
●Disconnect electrical power before servicing.
●Failure to do so can result in death or electric shock.
CAUTION
To avoid risk of personal injury or property damage, wear
gloves when replacing the light bulbs.
NOTE: For replacing the light bulbs on this product, please
have this completed by a certified technician.
Call Furrion service department to order a new replacement
light bulb.
TROUBLESHOOTING
Check your problem by using the chart below and try the solutions for each problem. If the microwave oven still does not work
properly, contact the nearest authorized service center.
Trouble Possible Cause Possible Remedy
Oven will not start
Electrical cord for oven is not plugged in.
Door is open.
Wrong operation is set.
Plug into the outlet.
Close the door and try again.
Check instruction.
Arcing or sparking
Materials to be avoided in microwave oven are used.
The oven is operated when empty.
Spilled food remains in the cavity.
Use microwave-safe cookware only.
Do not operate with oven empty.
Clean cavity with wet towel.
Unevenly cooked foods
Materials to be avoided in microwave oven are used.
Food is not defrosted completely.
Cooking time, power level is not suitable.
Food is not turned or stirred.
Use microwave-safe cookware only.
Completely defrost food.
Use correct cooking time, power level.
Turn or stir food.
Overcooked foods Cooking time, power level is not suitable. Use correct cooking time, power level.
Undercooked foods
Materials to be avoided in microwave oven are used.
Food is not defrosted completely.
Oven ventilation ports are restricted.
Cooking time, power level is not suitable.
Use microwave-safe cookware only.
Completely defrost food.
Check to see that oven ventilation ports are not restricted.
Use correct cooking time, power level.
Improper defrosting
Materials to be avoided in microwave oven are used.
Cooking time, power level is not suitable.
Food is not turned or stirred.
Use microwave-safe cookware only.
Use correct cooking time, power level.
Turn or stir food.
SPECIFICATIONS
FMSMA16A-BL FMSMA17-SS
Power Input 120V~60Hz 120V~60Hz
Max Rated Input Power 1500W 1500W
Max Rated Output Power (Microwave) 950W 950W
Oven Capacity 1.6 cu. ft. 1.7 cu. ft.
Turntable Diameter ø13.6" ø13.6"
Product Dimensions (W*H*D) 29⅞ x 16⁄ x 15⁄" (759 x 417 x 392 mm) 29⅞ x 16⁄ x 15⁄" (759 x 417 x 392 mm)
Net Weight (kg/lbs) Approx. 22.6 lbs / 10.3 kg Approx. 23.0 lbs / 10.4 kg

Français
CCD-0006073 Rev: 09-16-22
- 14 -
Nous vous remercions d’avoir acheté ce produit Furrion®. Avant d’utiliser votre nouvel appareil, veuillez lire attentivement ces instructions. Ce manuel
d’instruction contient des informations pour une utilisation, une installation et un entretien sûrs de l’appareil.
Veuillez conserver ce manuel d’instructions dans un endroit sûr afin de pouvoir vous y référer ultérieurement. Cela permettra de garantir une utilisation sûre
et de réduire les risques de blessures. Veillez à transmettre ce manuel aux nouveaux propriétaires de l’appareil.
Le fabricant n’accepte aucune responsabilité pour tout dommage dû au non-respect de ces instructions.
TABLE DES MATIÈRES
INSTRUCTIONS DE SÉCURITÉ IMPORTANTES.......................................................................................................................................
Mesures de sécurité.......................................................................................................................................................................................................................................15
Instructions de mise à la terre...................................................................................................................................................................................................................16
Interférences radio..........................................................................................................................................................................................................................................16
Précautions pour éviter une exposition possible à une énergie micro-ondes excessives ....................................................................................16
APERÇU DU PRODUIT .........................................................................................................................................................................................
Four à micro-ondes........................................................................................................................................................................................................................................17
Panneau de commande...............................................................................................................................................................................................................................17
AVANT D’UTILISER................................................................................................................................................................................................
Contenu de la boîte.........................................................................................................................................................................................................................................18
Instructions de déballage............................................................................................................................................................................................................................18
À propos de votre four à micro-ondes.................................................................................................................................................................................................18
À propos de l’alimentation ..........................................................................................................................................................................................................................19
À propos de la cuisson au micro-ondes ............................................................................................................................................................................................19
À propos de la sécurité.................................................................................................................................................................................................................................19
À propos des ustensiles et des revêtements...................................................................................................................................................................................19
À propos des enfants et du micro-ondes..........................................................................................................................................................................................20
FONCTIONNEMENT............................................................................................................................................................................................
Cuisson manuelle ............................................................................................................................................................................................................................................21
Cuisson par simple pression .....................................................................................................................................................................................................................21
Dégivrage............................................................................................................................................................................................................................................................22
Autres caractéristiques ...............................................................................................................................................................................................................................23
RÉGLAGES ..............................................................................................................................................................................................................
NETTOYAGE ET ENTRETIEN...........................................................................................................................................................................
Suggestions de nettoyage.........................................................................................................................................................................................................................24
Nettoyage de l’extérieur de votre micro-ondes..............................................................................................................................................................................24
Nettoyage de l’intérieur de votre micro-ondes...............................................................................................................................................................................24
Nettoyage et remplacement des filtres..............................................................................................................................................................................................25
DÉPANNAGE ...........................................................................................................................................................................................................
SPÉCIFICATIONS..................................................................................................................................................................................................

Français
CCD-0006073 Rev: 09-16-22 - 15 -
EXPLICATION DES SYMBOLES
Ce manuel contient des informations et des instructions de sécurité pour
vous aider à éliminer ou à réduire les risques d’accidents et de blessures.
Respectez toujours tous les avertissements de sécurité identifiés par ces
symboles. Un mot de signalisation identifiera les messages de sécurité et
les messages relatifs aux dommages matériels, et indiquera le degré ou le
niveau de gravité du danger.
DANGER
Indique une situation dangereuse imminente qui, si elle n’est pas évitée,
entraînera la mort ou des blessures graves.
AVERTISSEMENT
Indique une situation potentiellement dangereuse qui, si elle n’est pas
évitée, peut entraîner la mort ou des blessures graves.
MISE EN GARDE
Indique une situation potentiellement dangereuse qui, si elle n’est pas
évitée, peut entraîner des blessures mineures ou modérées, ou des
dommages matériels.
INSTRUCTIONS DE SÉCURITÉ IMPORTANTES
Mesures de sécurité
AVERTISSEMENT: Pour réduire les risques de brûlures, d’électrocution,
d’incendie, de blessures corporelles ou d’exposition à une énergie micro-
ondes excessives.
Lors de l’utilisation d’appareils électriques, il convient de prendre des
mesures de sécurité de base, notamment les suivantes:
1. Lisez toutes les instructions avant d’utiliser l’appareil.
2. Lisez et suivez la section spécifique «Précautions pour éviter une
exposition possible à une énergie micro-onde excessive».
3. Pour réduire le risque d’incendie dans la cavité du four:
–Ne faites pas trop cuire les aliments. Surveillez attentivement
l’appareil lorsque du papier, du plastique ou d’autres matériaux
combustibles sont placés à l’intérieur du four pour faciliter la
cuisson.
–Retirez les attaches métalliques et les poignées en métal des
récipients/sacs en papier ou en plastique avant de les placer
dans le four.
–Si les matériaux à l’intérieur du four s’enflamment, gardez la
porte du four fermée. Éteignez le four et débranchez l’appareil.
Débranchez le cordon d’alimentation, coupez le courant au
niveau du panneau de fusibles ou de disjoncteurs.
–N’utilisez pas la cavité du four à des fins de stockage. Ne laissez
pas de produits en papier, d’ustensiles de cuisine ou de nourriture
dans la cavité lorsqu’elle n’est pas utilisée.
4. Cet appareil doit être mis à la terre. Ne branchez que sur une prise
correctement mise à la terre. Voir la section «INSTRUCTIONS DE
MISE À LA TERRE».
5. N’installez ou ne placez ce four que conformément aux instructions
d’installation fournies.
6. Certains produits tels que les œufs entiers et les récipients fermés
- par exemple, les bocaux en verre fermés - peuvent exploser et ne
doivent pas être chaués dans le four.
7. N’utilisez cet appareil que pour l’usage auquel il est destiné, tel que
décrit dans ce guide. N’utilisez pas de produits chimiques ou de
vapeurs corrosives dans cet appareil. Ce four est spécifiquement
conçu pour chauer, cuire ou sécher des aliments. Il n’est pas conçu
pour un usage industriel ou de laboratoire.
8. Comme pour tout appareil, une surveillance étroite est nécessaire
lorsqu’il est utilisé par des enfants.
9. N’utilisez pas ce four si le cordon ou la fiche sont endommagés, s’il ne
fonctionne pas correctement, s’il a été endommagé ou s’il est tombé.
10. Les liquides, comme l’eau, le café ou le thé, peuvent être surchaués
au-delà du point d’ébullition sans donner l’impression de bouillir. Il
n’y a pas toujours de bouillonnement ou d’ébullition visible lorsque
le récipient est retiré du four à micro-ondes. CELA POURRAIT
ENTRAÎNER LE DÉBORDEMENT SOUDAIN DE LIQUIDES TRÈS
CHAUDS LORSQUE LE RÉCIPIENT EST REMUÉ OU QU’UNE
CUILLÈRE OU UN AUTRE USTENSILE EST INSÉRÉ DANS LE
LIQUIDE.
–Ne pas surchauer le liquide.
–Remuez le liquide avant et au milieu du processus de chauage.
–N’utilisez pas de récipients à bords droits et à goulot étroit.
–Après le chauage, laissez le récipient reposer dans le four à
micro-ondes pendant un court moment avant de le sortir.
–Faites très attention lorsque vous insérez une cuillère ou un autre
ustensile dans le récipient.
11. Ne pas couvrir ou bloquer les ouvertures de l’appareil.
12. Ne pas stocker ou utiliser cet appareil à l’extérieur.
13. N’utilisez pas ce four près de l’eau, par exemple, près d’un évier de
cuisine, dans un sous-sol humide, près d’une piscine ou dans des
endroits similaires.
14. Ne pas immerger le cordon ou la fiche dans l’eau. Gardez le cordon
éloigné de la surface chauée. Ne laissez pas le cordon pendre au-
dessus du bord de la table ou du comptoir.
15. Cet appareil ne doit être réparé que par des techniciens de service
qualifiés. Contactez le centre de service agréé le plus proche pour
examen, réparation ou réglage.
16. Pour nettoyer les surfaces de la porte et du four qui se rejoignent
à la fermeture de la porte, utilisez uniquement des savons ou des
détergents doux et non abrasifs appliqués à l’aide d’une éponge ou
d’un chion doux.
17. Hottes de ventilation
–Nettoyez fréquemment les hottes de ventilation - La graisse ne
doit pas s’accumuler sur la hotte ou le filtre.
–Lorsque vous faites flamber des aliments sous la hotte, mettez le
ventilateur en marche.
18. Faites attention lorsque vous nettoyez le filtre de la hotte. Les produits
de nettoyage corrosifs, tels que les nettoyants pour four à base de
levure, peuvent endommager le filtre.
19. Ne pas monter au-dessus d’un évier.
20. Ne posez rien directement sur la surface de l’appareil lorsque celui-ci
est en marche.
21. Convient pour une utilisation au-dessus des appareils de cuisson
électriques et à gaz.
22. Comme pour la plupart des appareils de cuisson, une surveillance
étroite est nécessaire pour réduire le risque d’incendie dans la cavité
du four.

Français
CCD-0006073 Rev: 09-16-22
- 16 -
Instructions de mise à la terre
Cet appareil doit être mis à la terre. En cas de court-circuit
électrique, la mise à la terre réduit le risque de décharge
électrique en fournissant un fil de fuite pour le courant
électrique. Cet appareil est équipé d’un cordon comportant un fil
de mise à la terre avec une fiche de mise à la terre. La fiche doit
être branchée dans une prise de courant correctement installée
et mise à la terre.
AVERTISSEMENT
Une utilisation incorrecte de la fiche de mise à la terre peut
entraîner un risque de décharge électrique.
Consultez un électricien ou un réparateur qualifié si les
instructions de mise à la terre ne sont pas entièrement
comprises ou si vous avez des doutes quant à la mise à la terre
correcte de l’appareil. S’il est nécessaire d’utiliser une rallonge,
n’utilisez qu’une rallonge à 3fils munie d’une fiche de mise à la
terre à 3lames et d’une prise à 3fentes qui accepte la fiche de
l’appareil. La puissance marquée de la rallonge doit être égale ou
supérieure à la puissance électrique de l’appareil.
DANGER
Risque de décharge électrique
Le fait de toucher certains des composants internes peut entraîner des
blessures graves, voire mortelles. Ne démontez pas cet appareil.
AVERTISSEMENT
Risque de décharge électrique
Une utilisation incorrecte de la mise à la terre peut entraîner une
décharge électrique. Ne pas brancher dans une prise de courant avant
que l’appareil ne soit correctement installé et mis à la terre.
Exigences électriques
Les exigences électriques sont les suivantes: 120
VCA/60Hz/15A max/1500W. Il est recommandé de prévoir un
circuit séparé ne desservant que le four. Le four est équipé d’une
fiche de mise à la terre à trois broches. Elle doit être branchée
dans une prise murale correctement installée et mise à la terre.
1. Un cordon court est fourni pour réduire les risques résultant
d’un enchevêtrement ou d’un trébuchement dans un cordon
plus long.
2. Des jeux de cordons plus longs ou des rallonges sont
disponibles et peuvent être utilisés si l’on fait attention à leur
utilisation.
3. Si vous utilisez un cordon long ou une rallonge:
a) La puissance électrique indiquée du cordon ou de la
rallonge doit être au moins aussi élevée que la puissance
électrique de l’appareil.
b) La rallonge doit être un cordon à 3fils avec mise à la
terre, et le cordon le plus long doit être disposé de façon
à ne pas traîner sur le comptoir ou le dessus de la table
où il pourrait être tiré par des enfants ou sur lesquels on
pourrait trébucher involontairement.
REMARQUE:
1. Si vous avez des questions concernant la mise à la terre ou
les instructions électriques, consultez un électricien ou un
technicien qualifié.
2. Ni Furrion ni le revendeur ne peuvent être tenus responsables
des dommages causés au four ou des blessures corporelles
résultant du non-respect des procédures de raccordement
électrique.
Interférences radio
Le fonctionnement du four à micro-ondes peut provoquer des
interférences avec votre radio, votre téléviseur ou tout autre équipement
similaire.
En cas d’interférence, il est possible de la réduire ou de l’éliminer en prenant
les mesures suivantes:
1) Nettoyez la porte et la surface d’étanchéité du four.
2) Réorienter l’antenne de réception de la radio ou de la télévision.
3) Déplacez le four à micro-ondes par rapport au récepteur.
4) Éloignez le four à micro-ondes du récepteur.
5) Branchez le four à micro-ondes dans une prise diérente afin que le four
à micro-ondes soit sur des circuits de dérivation diérents.
Précautions pour éviter
une exposition possible à
une énergie micro-ondes
excessives
●N’essayez pas de faire fonctionner ce four avec la porte ouverte,
car cela peut entraîner une exposition dangereuse à l’énergie des
micro-ondes. Il est important de ne pas neutraliser ou modifier les
verrouillages de sécurité.
●Ne placez aucun objet entre la face avant du four et la porte et ne
laissez pas de saleté ou de résidus de nettoyant s’accumuler sur les
surfaces d’étanchéité.
●Ne pas faire fonctionner le four s’il est endommagé. Il est
particulièrement important que la porte du four se ferme
correctement et qu’elle ne soit pas endommagée:
(1) PORTE (pliée)
(2) CHARNIÈRES ET LOQUETS (cassés ou desserrés)
(3) JOINTS DE PORTE ET SURFACES D’ÉTANCHÉITÉ
●Lefour ne doit pas être réglé ou réparé par quiconque, à
l’exception du personnel de service dûment qualifié.
Conservez ces instructions
pour vous y référer
ultérieurement!
Cet appareil est conforme à la
partie18 des règles de la FCC.

Français
CCD-0006073 Rev: 09-16-22 - 17 -
APERÇU DU PRODUIT
Four à micro-ondes
4
5
6
8
9
10
15
3
1
6
7
2
11
12
13
14
Vue de face
Vue d’en bas
4
5
6
8
9
10
15
3
1
6
7
2
11
12
13
14
Vue de face
Vue d’en bas
Article Nom de la pièce
1 Porte du four à micro-ondes avec fenêtre transparente
2 Charnières de porte
3Couverture du guide d’ondes
Ne retirez pas le couvercle du guide d’ondes.
4 Arbre du moteur de la table tournante
5
Lumière du four à micro-ondes
Il s’allume lorsque la porte est ouverte ou que le four à micro-
ondes est en fonctionnement.
6 Verrous de porte de sécurité
7 Poignée
8 Panneau de commande
9 Écran d’achage numérique
10 Ouvertures de ventilation
Article Nom de la pièce
11 Plateau tournant amovible
Ne le retirez pas à moins de le nettoyer.
12 Support de table tournante amovible
13 Lampe de surface avec couvercle
14 Filtres à graisse
15 Étiquette d’évaluation
Panneau de commande
AFFICHEUR
Le temps de cuisson, la puissance, les indicateurs et l’heure actuelle sont
achés.
POPCORN MAIS SOUFFLÉ
Touchez pour entrer et régler le programme de cuisson du pop-corn.
POMME DE TERRE
Touchez pour entrer et régler le programme de cuisson des pommes de
terre.
Boissons
Touchez pour entrer et régler le programme de cuisson de la boisson.
FONDRE/ASSOUPLIR
Touchez pour entrer et régler le programme de cuisson «fondre/
adoucir».

Français
CCD-0006073 Rev: 09-16-22
- 18 -
RÉCHAUFFER
Touchez pour entrer et régler le programme de cuisson de réchauage.
DÉGIVRAGE wt/TIME
Décongélation par poids/temps.
TEMPS DE CUISSON
Cuisez avec le réglage que vous avez programmé.
TIMER MINUTERIE
Touchez pour régler le four à micro-ondes comme une minuterie de
cuisine.
NIVEAU DE PUISSANCE
Touchez plusieurs fois pour choisir une puissance de cuisson diérente.
CUISINIER EXPRESS
Touchez les numéros1 à 3 pour sélectionner rapidement un réglage de
temps de cuisson de 1 à 3minutes.
TOUCHES NUMÉRIQUES
Touchez pour saisir le temps de cuisson, le niveau de puissance ou le
poids des aliments.
ARRÊTER ANNULER, MAINTENIR s sur LOCK
Touchez pour arrêter le four ou touchez pendant 3secondes pour régler
le verrouillage des commandes.
START DÉMARRER
Touchez pour démarrer la cuisson.
+ SEC
Touchez pour démarrer une cuisson de 10secondes. Pendant le
processus de cuisson, touchez pour augmenter le temps de cuisson.
+ SEC
Touchez pour démarrer une cuisson de 30secondes. Pendant le
processus de cuisson, touchez pour augmenter le temps de cuisson.
Appuyez plusieurs fois sur cette touche pour accéder aux réglages du
four concernant le volume de la tonalité d’alerte, l’unité de poids ou le
mode démo.
Touchez pour activer ou désactiver l’éclairage du four.
Touchez pour régler la vitesse du ventilateur.
Touchez pour régler l’achage de l’horloge sur ON/OFF.
AVANT D’UTILISER
Contenu de la boîte
Assurez-vous que tous les éléments suivants sont inclus dans l’emballage.
Si un élément est endommagé ou manquant, contactez votre revendeur.
●Corps du four à micro-ondes
●Filtres à graisse
●Filtre à charbon
●Plateau tournant amovible
●Support de table tournante amovible
●Kit de montage
●Manuel de l’utilisateur
●Manuel d’installation
●Modèle de paroi arrière
●Modèle d’armoire supérieure
●Manuel de garantie
Instructions de déballage
Déballage et examen de votre four
Retirez délicatement le four du carton. CONSERVEZ LE CARTON, CAR IL
PEUT FACILITER L’INSTALLATION.
Retirer:
1. Retirez tous les matériaux d’emballage de l’intérieur de la cavité du
four; toutefois, N’ENLEVEZ PAS LE COUVERCLE DU GOUTTE-À-
GOUTTE, qui se trouve sur le côté du four à micro-ondes. Vérifiez la
présence du manuel d’installation, du gabarit de la paroi arrière, du
gabarit de l’armoire supérieure, du sac de matériel d’installation, du
filtre à charbon et du volet d’évacuation. Lisez les pièces jointes et
SAUVEGARDEZ le manuel d’utilisation.
2. L’autocollant de la caractéristique de l’extérieur de la porte, s’il y en a un.
Vérifiez que le four micro-ondes ne présente aucun dommage, comme
une porte mal alignée ou pliée, des joints de porte et une surface
d’étanchéité endommagée, des charnières et des loquets de porte cassés
ou desserrés et des bosses à l’intérieur de la cavité ou sur la porte. En cas
de dommage, n’utilisez pas le four et contactez votre revendeur.
Voir le manuel d’installation pour plus de détails.
À propos de votre four à micro-ondes
N’utilisez JAMAIS le four sans le plateau tournant et l’anneau à rouleaux
et ne retournez pas le plateau tournant pour pouvoir placer un grand plat
dans le four. La platine tourne dans le sens des aiguilles d’une montre et
dans le sens inverse.
Mettez TOUJOURS des aliments dans le four lorsqu’il est allumé pour
absorber l’énergie des micro-ondes.
Lorsque vous utilisez le four à des niveaux de puissance inférieurs à 100%,
vous pouvez entendre le magnétron s’allumer et s’éteindre.
La condensation est une partie normale de la cuisson au micro-ondes.
L’humidité de la pièce et l’humidité des aliments influencent la quantité
d’humidité qui se condense dans le four. En général, les aliments couverts
ne provoquent pas autant de condensation que les aliments non couverts.
Les ouvertures de ventilation ne doivent pas être obstruées.
En utilisant les recettes ou les instructions de l’emballage, vérifiez les
aliments une minute ou deux avant le temps minimum et ajoutez du temps
en conséquence.

Français
CCD-0006073 Rev: 09-16-22 - 19 -
À propos de l’alimentation
ALIMENTATION NE PAS
Œufs, saucisses,
fruits et légumes
●Percer les jaunes d’œufs avant
la cuisson pour éviter toute
«explosion».
●Percer la peau des pommes de
terre, des pommes, des courges, des
hot-dogs et des saucisses pour que
la vapeur s’échappe.
●Faire cuire l’œuf dans les
coquilles.
●Réchauer les œufs entiers.
Popcorn (mais
soué)
●Utiliser du pop-corn en sachet spécial
pour le four à micro-ondes.
●Écouter pendant l’éclatement du
maïs pour que l’éclatement ralentisse
à 1 ou 2secondes ou utilisez les
fonctions spéciales de cuisson du
pop-corn indiquées dans la section
FONCTIONNEMENT/POPCORN.
●Faire éclater le pop-corn
dans des sacs bruns
ordinaires ou des bols en
verre.
●Dépasser le temps
maximum sur le paquet de
pop-corn.
Alimentation pour
bébés
●Transférer la nourriture pour bébé
dans un petit plat et chauer avec
précaution, en remuant souvent.
Vérifiez la température avant de servir.
●Mettez les tétines sur les biberons
après les avoir chaués et secouez-
les soigneusement. Test du
«poignet» avant l’alimentation.
●Chauez les bouteilles
jetables.
●Chauez les biberons avec
les tétines.
●Faites chauer les aliments
pour bébés dans des
bocaux originaux.
Général
●Coupez les produits de boulangerie
garnis après les avoir fait chauer
pour libérer la vapeur et éviter les
brûlures.
●Remuez vivement les liquides avant
et après le chauage pour éviter les
éruptions.
●Utilisez un bol profond pour la cuisson
des liquides ou des céréales, afin
d’éviter les débordements.
●Chauer ou cuire dans des
bocaux en verre fermés ou
des récipients hermétiques.
●Ne pas mettre au micro-
ondes, car les bactéries
nocives pourraient ne pas
être détruites.
●Friture.
●Bois sec, calebasses,
herbes ou papiers humides.
À propos de la cuisson au micro-ondes
●Disposez les aliments avec soin. Placez les parties les plus épaisses
vers l’extérieur du plat.
●Surveillez le temps de cuisson. Faites cuire pendant la durée la plus
courte indiquée et ajoutez-en si nécessaire. Les aliments fortement
surcuits peuvent fumer ou s’enflammer.
●Couvrez les aliments pendant la cuisson. Consultez la recette ou le
livre de cuisine pour obtenir des suggestions: serviettes en papier,
papier ciré, film plastique pour micro-ondes ou couvercle. Les
couvercles empêchent les éclaboussures et aident les aliments à
cuire uniformément.
●Protégez avec de petits morceaux plats de papier d’aluminium les
parties minces de la viande ou de la volaille pour éviter qu’elles ne
soient trop cuites avant que les parties denses et épaisses ne soient
bien cuites.
●Remuez les aliments de l’extérieur vers le centre du plat une ou deux
fois pendant la cuisson, si possible.
●Retournez les aliments une fois pendant la cuisson au micro-ondes pour
accélérer la cuisson d’aliments tels que le poulet et les hamburgers. Les
gros articles comme les rôtis doivent être retournés au moins une fois.
●Réorganisez les aliments tels que les boulettes de viande à mi-
cuisson, à la fois de haut en bas et du centre du plat vers l’extérieur.
●Ajoutez le temps d’attente. Retirez les aliments du four et remuez-les, si
possible. Couvrez pendant un temps qui permet aux aliments de finir
de cuire sans être trop cuits.
●Vérifiez la cuisson. Recherchez les signes indiquant que les
températures de cuisson ont été atteintes.
●Les signes de cuisson sont les suivants:
–Les aliments cuisent en continu, pas seulement sur le bord.
–Le centre du plat est très chaud au toucher.
–Les articulations des cuisses de volaille se déplacent facilement.
–La viande et la volaille ne présentent pas de rosissement.
–Le poisson est opaque et se défait facilement à la fourchette.
À propos de la sécurité
Vérifiez les aliments pour vous assurer qu’ils sont cuits aux températures
recommandées suivantes.
TEMP ALIMENTATION
160°F … Pour le porc frais, la viande hachée, la volaille blanche désossée, le poisson,
les fruits de mer, les plats à base d’œufs et les aliments préparés surgelés.
165°F … Pour les restes, les aliments réfrigérés prêts à réchauer et les aliments
«frais» à emporter.
170°F … La viande blanche de la volaille.
180°F … La viande brune de la volaille.
●Pour vérifier la cuisson, insérez un thermomètre à viande dans une
zone épaisse ou dense, loin du gras ou de l’os. Ne laissez JAMAIS le
thermomètre dans l’aliment pendant la cuisson, à moins qu’il ne soit
approuvé pour une utilisation au four à micro-ondes.
●Utilisez TOUJOURS des maniques pour éviter les brûlures lorsque
vous manipulez des ustensiles qui sont en contact avec des aliments
chauds. La chaleur des aliments peut passer à travers les ustensiles et
provoquer des brûlures de la peau.
●Évitez les brûlures dues à la vapeur en dirigeant la vapeur loin du
visage et des mains. Soulevez lentement le bord le plus éloigné de la
couverture d’un plat et ouvrez soigneusement les sacs de pop-corn et
de cuisson au four en les éloignant du visage.
●Restez à proximité du four lorsqu’il est en marche et vérifiez
fréquemment la progression de la cuisson afin d’éviter que les
aliments ne soient trop cuits.
●N’utilisez JAMAIS la cavité pour ranger des livres de cuisine ou
d’autres articles.
●Sélectionnez, stockez et manipulez les aliments avec soin afin de
préserver leur haute qualité et de minimiser la propagation des
bactéries alimentaires.
●Gardez le couvercle du guide d’ondes propre. Les résidus alimentaires
peuvent provoquer des arcs électriques et/ou des incendies.
●Faites attention lorsque vous retirez des articles du four afin que les
ustensiles, vos vêtements ou vos accessoires ne touchent pas les
loquets de sécurité de la porte.
À propos des ustensiles et des
revêtements
Il n’est pas nécessaire d’acheter tous les nouveaux ustensiles de cuisine.
De nombreuses pièces déjà présentes dans votre cuisine peuvent être
utilisées avec succès dans votre nouveau four à micro-ondes. Veillez à ce
que l’ustensile ne touche pas les parois intérieures pendant la cuisson.
Si vous souhaitez vérifier si un ustensile peut être mis au micro-
ondes:
1. Remplissez un récipient allant au micro-ondes avec une tasse d’eau
froide (250ml) ainsi que l’ustensile en question.
2. Cuire à puissance maximale pendant 1minute.
3. Touchez soigneusement l’ustensile. Si l’ustensile vide est chaud, ne
l’utilisez pas pour la cuisson au micro-ondes.
4. Ne pas dépasser une minute de cuisson.
Matériaux à éviter dans le four à micro-ondes
Ustensiles Remarque
Plat de brunissage Suivez les instructions du fabricant*. Le fond du plat à gratiner doit
se trouver à au moins 5mm au-dessus du plateau tournant. Une
utilisation incorrecte peut entraîner la rupture de la platine.
Vaisselle Résiste aux micro-ondes uniquement. Suivez les instructions du
fabricant. N’utilisez pas de vaisselle fêlée ou ébréchée.
Bocaux en verre Retirez toujours le couvercle. N’utiliser que pour chauer les
aliments jusqu’à ce qu’ils soient tout juste chauds. La plupart des
bocaux en verre ne sont pas résistants à la chaleur et peuvent
se briser.
This manual suits for next models
1
Table of contents
Languages:
Other Furrion Microwave Oven manuals

Furrion
Furrion FMCM17-BL User manual

Furrion
Furrion FMSPR09-SS User manual

Furrion
Furrion FMCM15A-BL User manual

Furrion
Furrion FMSN09-BL User manual

Furrion
Furrion FMAN09-BL User manual

Furrion
Furrion FMSMA16-SS User manual

Furrion
Furrion FMCM15A-BL User manual

Furrion
Furrion FMCM15-BL-A User manual

Furrion
Furrion FMSN09-BL User manual

Furrion
Furrion FMSMA15-SS User manual