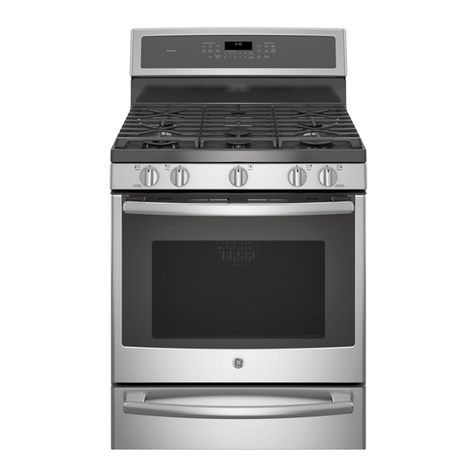
GE JB960 How to use

gGE Consumer Service Training
TECHNICAL SERVICE GUIDE
1999 SPECTRA™SERIES - FREE-STANDING
ELECTRIC RANGES W/TRUETEMPTM
g
03/99
MODEL SERIES:
JB960_B
JB940_B
JBP79_B
JBP78_B
JBP63_B
JBP64_B
JBP66_B
JBP60_B
JBP48_B
JBP35_B
JBP30_B
JBP26_B
JBP24_B
JBP21_B
JBP19_B

CAUTION
To avoid personal injury while servicing this unit,
disconnect power before servicing. If grounding
wires, screws, straps, clips, nuts, or washers used
to complete a path to ground are removed for
service, they must be returned to their original
position and properly fastened.
IMPORTANT SAFETY NOTICE
The information in this service guide is intended
for use by individuals possessing adequate
backgrounds of electrical, electronic and
mechanical experience. Any attempt to repair a
major appliance may result in personal injury and
property damage. The manufacturer or seller
cannot be responsible for the interpretation of this
information, nor can it assume any liability in
connection with its use.

– 1 –
34-37
21
22-23
24-25
26-28
28
29
30-33
Features and Benefits
Cooktop Configuration
Model Series / Installation
Use and Care Information
Cooktop Light Replacement
Door Removal
Cooktop Removal
Bake Element Removal
Door Switch Removal
Oven Liner Removal
Control Console Access
Infinite Heat Controls
Thermal Limiter Switch
ERC Special Features
ERC Fault Code MemoryTest
ERC On-board DiagnosticTests
Door Latch Mechanism
TrueTemp™ Cooking
Schematic & Strip Circuits
Exploded Parts Views
2-3
4
5-8
9-12
13
13
Table of Contents
14
15-17
18
18-19
20
21

– 2 –
1999 SPECTRA™series - Free Standing Electric Ranges w/ TrueTemp™
Pages 5 through 8 of this service guide show all of the models in the new series of Spectra™ranges. This
service guide will focus primarily on the JB960, GE Profile Performance models listed on page 5. The JB960
models reflect most of the changes that are incorporated in the new series of electric ranges (Spectra™
series). This service guide will focus primarily on the NEW features introduced in the Spectra™model series.
What this service guide will not cover is basic component servicing common to most of our previous year
models (component removal/installation and diagnostics).
The information in this service guide is intended for use by individuals possessing adequate backgrounds of
electrical, electronic and mechanical experience. All resistances listed in this guide are approximate resis-
tances and will vary depending on the type and condition of the meter being used. All disassembly proce-
dures should be performed with power removed from the unit.
GE Profile Performance Series™
JB960AB
• Almond on almond • Largest oven in America* • Self-
cleaningconvectionovenwith dedicatedthird, dual-loop
heating element • Super large 4.5 cu.ft. capacity oven
•CleanDesignoveninterior •Right rear6”element with
warming function •QuickSetV ovencontrols (seepage
6, QuickSet V) • Two 7” ribbon heating elements with
connecting bridge element • One dual 6”/9”and one 6”
ribbon heating element • Easy-view hot lights • One-
piece upswept cooktop • Frameless glass oven door
withSureGriphandle • Automatic self-cleanovenlatch
• Big View window • Fluorescent night light • Three
oven shelves - one off-set • Automatic meat thermom-
eter
* Among leading manufacturers
GE
TrueTemp
+40
+30
+20
+10
Baking
Temp.
-10
-20
-30
-40
Other
Manufacturers'
Average
GE Convection ranges use the European or“true”con-
vection system. The difference between“us and them”
is a third dual loop heating element that surrounds the
convection fan in the back wall of the oven. The con-
vection fan at the rear of the oven, gently circulates
heated air evenly throughout the entire oven cavity,un-
der and around the food. The moving air penetrates
foods faster than stationary air.
SmartLogic Electronic Control delivers more con-
sistent oven temperatures for exceptional cook-
ing results.

– 3 –
➊➋
➌
➍
➎
➏
➐
➑
➒
➓
Ten exclusives make it super versatile,
super accurate and easy-to-clean
1.1.
1.1.
1. Seamless backguard Design 5.5.
5.5.
5. 5.0 cu. ft.oven capacity 9.9.
9.9.
9. CleanDesign Interior
2.2.
2.2.
2. Bridge element 6.6.
6.6.
6. Largest usable capacity 10.10.
10.10.
10.Largest broiler pan
3.3.
3.3.
3. Frameless glass oven door 7.7.
7.7.
7. Six rack design
4.4.
4.4.
4. TrueTemp™8.8.
8.8.
8. Six-Pass bake element
With the largest, most accurate oven in america and a variety of cooktop elements, the
GE Spectra™Range lets you cook exactly what you want to cook. And with CleanDesign,
cleanup has never been easier or faster!
Exclusive CleanDesign
As for cleanability, the CleanDesign oven interior* con-
ceals the lower oven element under a porcelain-coated
steelsurface. Allyouseeandclean is aflat,smoothoven
surface.
* on select models
Convenient NewWarming Option
Keeps soups, sauces, breads and pancakes warm, or
melts butter and chocolate. Or use this new burner as
you would any other element.

– 4 –
OFF
FRONT
REAR
HOT
COOKTOP
LARGE
BURNER
SMALL
BURNER
OFF
OFF
FRONT REAR
Profile Performance
HOT
COOKTOP
BRIDGE
BURNER
FRONT
BURNER
OFF
TrueTemp
Convection
1
CLEAR
OFF
PROBE
SELF
CLEAN
COOKING
TIME
KITCHEN
TIMER OVEN
LIGHT
DELAY
START
CLOCK
TOP
LIGHT
BAKE
BAKE
CONVECTION
ON OFF
ROAST
CONVECTION
BROIL
START
234567890
OVEN
TIME CONTROLS
HS
2
DUAL
ELEMENT
1000W
2500W
HS
4
2
SINGLE
ELEMENT
1500W
W
M
REAR
H
I
8
8
H
I
6
6
4
2
L
O
L
O
2
4
SMALL
BURNER LARGE
BURNER
OFF
W
M
FRONT
BRIDGE SURFACE
ELEMENT ASSY.
1800W
1800W
LR
LF
BRIDGE
2600W
RR
RF
SMALL
RF
LARGE
(Inner & Outer)
RF SMALL 1000 W
RF LARGE 2500 W
(BOTH ELEMENTS)
RR 1500 W
LF SINGLE 1800 W
LF BRIDGE 2600 W
(LF + CENTER)
LR 1800 W
LOCATION WATTAGE
COOKTOP CONFIGURATION
H
I
8
8
H
I
6
6
4
2
L
O
L
O
2
4
BRIDGE
BURNER
OFF
FRONT
BURNER
FRONT REAR
TrueTemp
Convection
OVEN
BAKE
PROBE
SELF
CLEAN
CLEAR
OFF
BAKE
12345678
CONVECTION
ROAST
CONVECTION
BROIL
CLOCK
START
HI LO
KITCHEN
TIMER OVEN
LIGHT
TOP
LIGHT
COOKING
TIME DELAY
START
TIME CONTROLS
ON OFF
90
CONTROL LOCKOUT
= LF Element Only
= LF Element + Center Bridge Element
= RF Inner & Outer Element
= RF Inner Element Only
H1
P
H2
L2
L1
CURRENT
SENSITIVE
CONTROL
5N
23
L1 H1
TOP
4
P
L2
H2
GRND
VOLTAGE
SENSITIVE
CONTROL
(DUAL)
5N
23
L1 H1
TOP
4
P
L2
H2
GRND
VOLTAGE
SENSITIVE
CONTROL
(DUAL)
VOLTAGE
SENSITIVE
CONTROL
H1
P
H2
L1 L2
TOP
ERC V (QUICKSET V) - WITH CAPACITANCE TOUCH CONTROLS

– 5 –
JB960WB JB940WB JBP79WB JBP78WB JBP66WB
JB960AB JB940AB JBP79AB JBP78AB JBP66AB
JB970SB JB960BB JB940BB JBP79BB JBP78BB JBP66BB JBP64BB JBP63BB JBP60BB
Features
Self-cleaning oven Convection Convection Convection
●●●●●●
Self-clean latch Auto Auto Auto Auto
●●●●●
Oven capacity (cu. ft.) 3.7 4.5 4.5 5.0 5.0 5.0 5.0 3.7 3.7
CleanDesign Oven Interior (hidden bake)
●●
Oven shelves 3 (1 off-set) 3 (1 off-set) 3 (1 off-set) 2 2 2 2 2 1
White White White White White
Almond Almond Almond Almond Almond
Patterned glass-ceramic cooktop Black Black Black Black Black Black Black Black Black
One-piece upswept cooktop
●●●●●●●●
1 Ribbon 1 Ribbon 1 Ribbon 1 Ribbon 1 Ribbon
Dual 6"/9" heating element (1000/2500 watt) (1000/2500 watt) (1000/2500 watt) (1000/2500 watt) (1000/2500 watt)
1 Ribbon 1 Ribbon 1 Ribbon 2 Ribbon 2 Ribbon 2 Ribbon 2 Ribbon
8" heating elements (2000 watt) (2000 watt) (2000 watt) (2000 watt) (2000 watt) (2000 watt) (2000 watt)
2 Ribbon 2 Ribbon
7" heating element (1800 watt) (1800 watt)
Bridge element 1 (800 watt) 1 (800 watt)
Total wattage 4400 4400
1 Ribbon 1 Ribbon 2 Ribbon 2 Ribbon 2 Ribbon 2 Ribbon 2 Ribbon 2 Ribbon 2 Ribbon
6" heating elements (1500 watt) (1500 watt) (1500 watt) (1500 watt) (1500 watt) (1500 watt) (1500 watt) (1500 watt) (1500 watt)
Warming option (75 watt) (75 watt) (75 watt) (75 watt)
Warming zone 1 (120 watt)
Infinite heat controls
●●●●●●●●●
TrueTemp™ System
●●●●●●
SmartLogic™ controls
●●●●●●
Six-pass power bake element
●●●●●●
Convection Bake
●●●
Convection Roast
●●●
Convenience Controls
●●●●●●●●●
QuickSet oven controls QuickSet V QuickSet V QuickSet V QuickSet IV QuickSet III QuickSet III QuickSet II QuickSet II QuickSet I
Digital temperature display
●●●●●●●●
Oven function icons
●●●●
Glass touch controls
●●
Digipad numeric entry
●●●●
Convection conversion
●●●
Delay bake
●●●●●●
Oven light pad
●●●
Control lock capability
●●●●
Start pad
●●●●
Self-clean cool-down time display
●●●●●●●●
Auto self-clean
●●●●●●●●●
Delay clean option
●●●●●●
Auto oven shut-off w/override w/override w/override w/override w/override w/override w/override w/override
Audible preheat signal
●●●●●●●●
Dual element bake
●●●●●●●●●
Automatic meat thermometer
●●●
Hot surface lights
●●●●●●●●●
Oven “ON” light
●●●●●●●●●
Self-clean cycle light
●●●●●●●●●
Interior oven light Auto/Pad Auto/Pad Auto/Pad Auto/Pad Switch Switch Switch Switch Switch
Full-width fluorescent cooktop night light
●●●●
White White White White White
Almond Almond Almond Almond Almond
Storage drawer Stainless steel Black Black Black Black CM* CM* CM* CM*
Broiler pan/grid
●●●●●●●●●
Roasting rack
●●●
Appearance
WW WW WW WW WW
AA AA AA AA AA
Color appearance* SS BB BB BB BB WH/AD WH/AD WH/AD WH
White White White White White
Almond Almond Almond Almond Almond
Frameless glass oven door Stainless steel Black Black Black Black Black Black Black Black
Oven door with window
●
Big View Big View Big View Big View
●●●
Designer-style handle Tubular Sure Grip Sure Grip Sure Grip
●●●●●
Easy Level System
●●●●●●●●●
Weights & Dimensions
Overall oven interior dimensions 22-3/4 x 15-7/8 24-1/4 x 19 x 17 24-1/4 x 19 x 19 23 x 16
(WxHxD in inches) x 15-7/8 x 17-3/4
Approx. ship. wt. (lbs.) 194 206 206 198 198 175 174 165 165
Power/Ratings
KW rating @ 240V 11.9 12.4 11.5 11.0 11.0 10.5 10.5 10.5 10.5
208V 8.9 9.3 8.6 8.3 8.3 7.9 7.9 7.9 7.9
Accessories
Cooktop cleaning creme and scraper
●●●●●●●●●
*SS = Stainless steel, BB = Black on black, WW = White on white, AA = Almond on almond, WH = White, AD = Almond, CM = Color-Matched indicates color of drawer matches range cooktop (either white or almond).
30" F
REE
-S
TANDING
C
LEAN
D
ESIGN
E
LECTRIC
R
ANGES
GE Profile Performance Series
™
GE Profile
™
GE

– 6 –
Warranty Information
Full one-year warranty (parts and labor at no additional charge)
applies to the entire range. Additional limited four-year warranty
on glass-ceramic cooktop (parts only). See written warranty for
complete details.
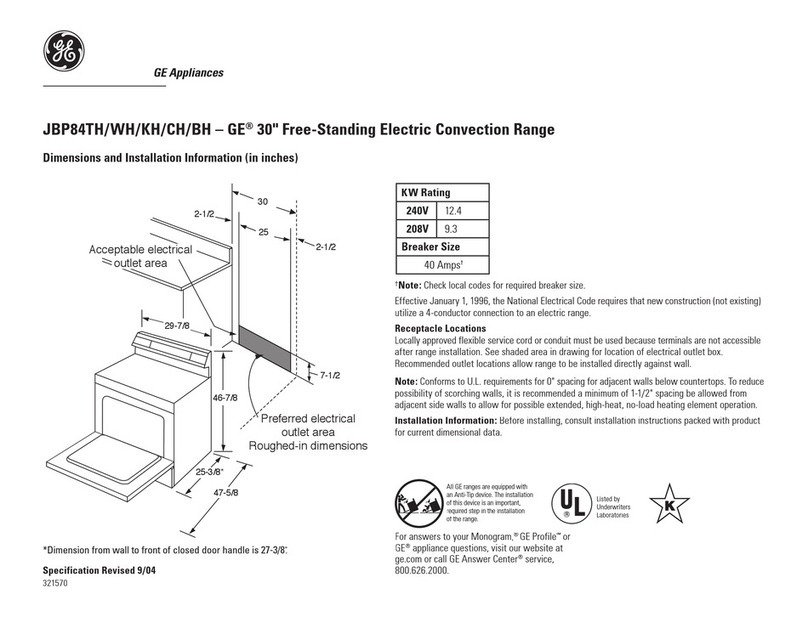
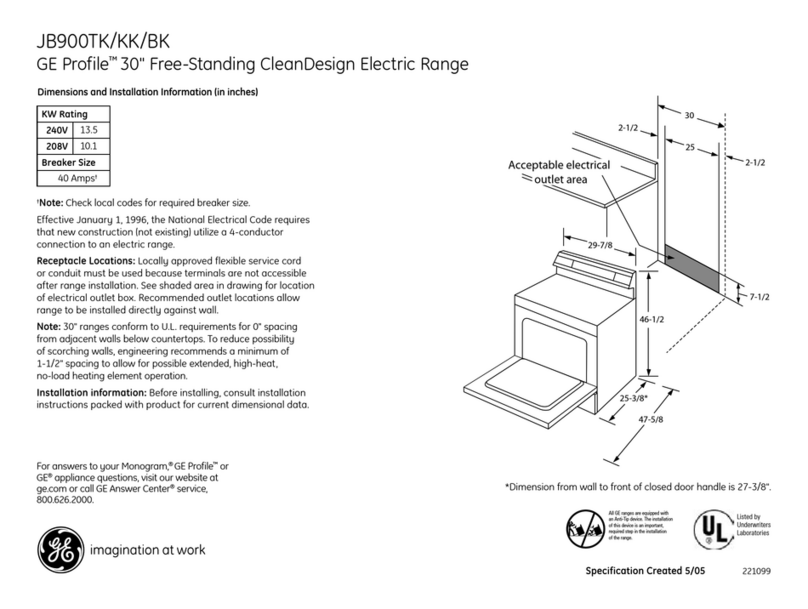
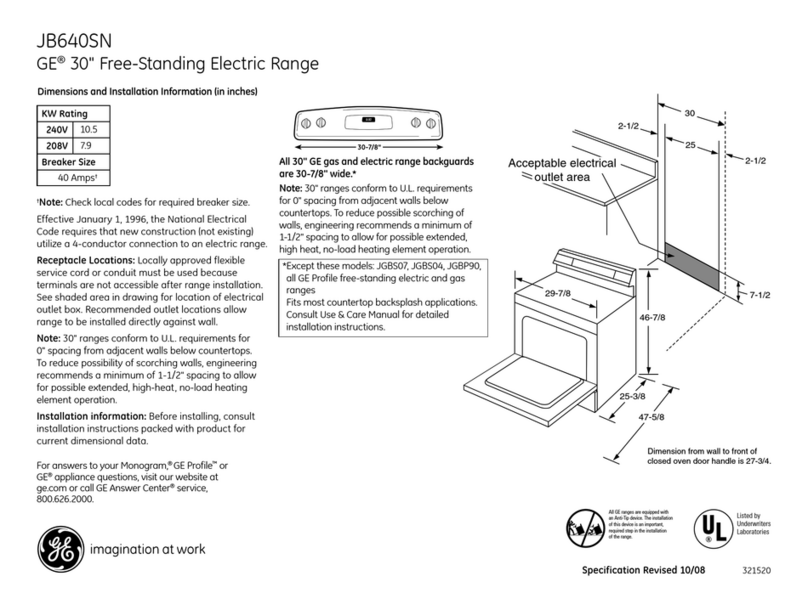
Dimensions and Installation Information (in inches)
Receptacle Locations: For 30” Free-Standing Ranges locally approved
flexible service cord or conduit must be used because terminals are not
accessible after range installation. See shaded area drawing for location
of electrical outlet box. Recommended outlet locations allow range to
be installed directly against wall.
Note: Conforms to U.L. requirements for 0” spacing for adjacent walls
below countertops. To reduce possibility of scorching of walls, it is
recommended a minimum of 1-1/2” spacing be allowed from adjacent
side walls to allow for possible extended, high-heat, no-load heating
element operation.
Installation Information:
Before installing, consult installation instructions packed with range
for current dimensional data.
All GE ranges are equipped
with an Anti-Tip device. The
installation of this device is an
important, required step in the
installation of the range.
Model A B C* D
JB970SB 30 48-1/4 26-5/8 45-1/8
JB960WB/AB/BB 29-7/8 46-1/2 25-3/8 47-5/8
JB940WB/AB/BB 29-7/8 46-1/2 25-3/8 47-5/8
JBP79WB/AB/BB 29-7/8 46-1/2 25-3/8 47-5/8
JBP78WB/AB/BB 29-7/8 44-7/16 25-3/8 47-5/8
JBP66WB/AB/BB 29-7/8 44-7/16 25-3/8 47-5/8
JBP64BB 29-7/8 44-7/16 25-3/8 47-5/8
JBP63BB 29-7/8 44-1/2 25-7/16 46-1/8
JBP60BB 29-7/8 44-1/2 25-7/16 46-1/8
*Dimension from wall to front of closed oven door handle is
28-7/8" on model JB970; 27-3/8" on models JB960/940, JBP79;
27-3/4" on models JBP78/66/64; and 27-1/2" on model JBP63/60.
Cabinet Dimensions (in inches)
I
NSTALLATION
/S
PECIFICATIONS FOR
30" F
REE
-S
TANDING
C
LEAN
D
ESIGN
E
LECTRIC
R
ANGES
30
25
2-1/2
7-1/2
A
C*
D
B
2-1/2
Acceptable electrical
outlet area
Preferred electrical
outlet area
Roughed-in dimensions
QUICKSET I
• Auto self-clean • 2-step self-clean • Preheated oven light • Dual element
bake • Quick turn oven control • Platinum-tipped electronic oven sensor
QUICKSET II
Same as QuickSet I, plus:
• Digital temperature display with recall • Electronic digital clock • Electronic
reminder timer, up to 12 hours • Audible Preheat signal • 12 hour automatic
oven shut-off • Self-clean countdown digital display, includes cook down
QUICKSET III
Same as QuickSet II, plus:
• Automatic oven control • Delay Bake • Delay Self-Clean • Adjustable self-
clean cycle time
QUICKSET IV
Same as QuickSet III, plus:
• Automatic self-clean • All touchpad control • Large digital temperature
display • Variable broil
QUICKSET V
Same as QuickSet IV, plus:
• Convection bake/roast • Temperature probe • Extra-large graphics and
extra-large touchpads • Digital glass capacitance touch control (0-9) entry
• Oven function icons

– 7 –
30" F
REE
-S
TANDING
Q
UICK
C
LEAN
™
S
ELF
-C
LEAN
E
LECTRIC
R
ANGES
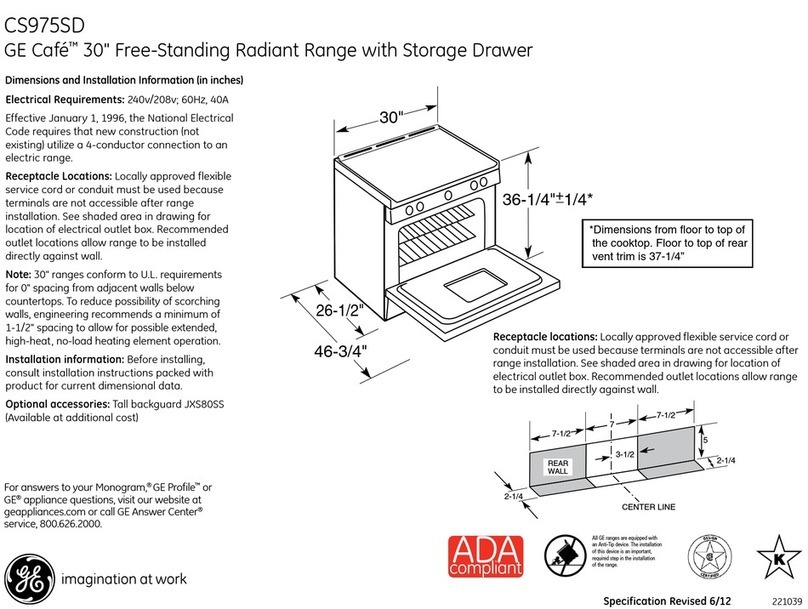
Note: 30" ranges conform to U.L. requirements for 0" spacing
from adjacent walls below countertops. To reduce possible
scorching of walls, engineering recommends a minimum of
1-1/2" spacing to allow for possible extended, high heat, no-load
heating element operation.
Receptacle Locations:
Locally approved flexible service cord or conduit must be used
because terminals are not accessible after range installation.
See shaded area in drawing for location of electrical outlet box.
Recommended outlet locations allow range to be installed
directly against wall.
Installation Information: Before installing, consult installation
instructions packed with product for current dimensional data.
Warranty Information
Full one-year warranty (parts and labor at no additional charge)
applies to the entire range.
Model A B C* D
JBP48WB/AB/BB 29-7/8 44-7/16 25-3/8 47-5/8
JBP35BB 29-7/8 44-7/16 25-3/8 47-5/8
JBP30WB/AB/BB 29-7/8 44-7/16 25-3/8 47-5/8
JBP26WB/AB/BB 29-7/8 44-7/16 25-3/8 47-5/8
JBP24BB 29-7/8 44-7/16 25-3/8 47-5/8
JBP21WB/BB 29-7/8 45-1/8 25-7/16 46-1/8
JBP19BB 29-7/8 45-1/8 25-7/16 46-1/8
*Dimension from wall to front of closed oven door handle is
27-3/8" on model JBP48; 27-3/4" on models JBP35/30/26/24;
27-1/2" on models JBP21/19, JBS27 and JBS03V; and 27-1/8"
on models JBS26/07/05/03GV.
Cabinet Dimensions (in inches)
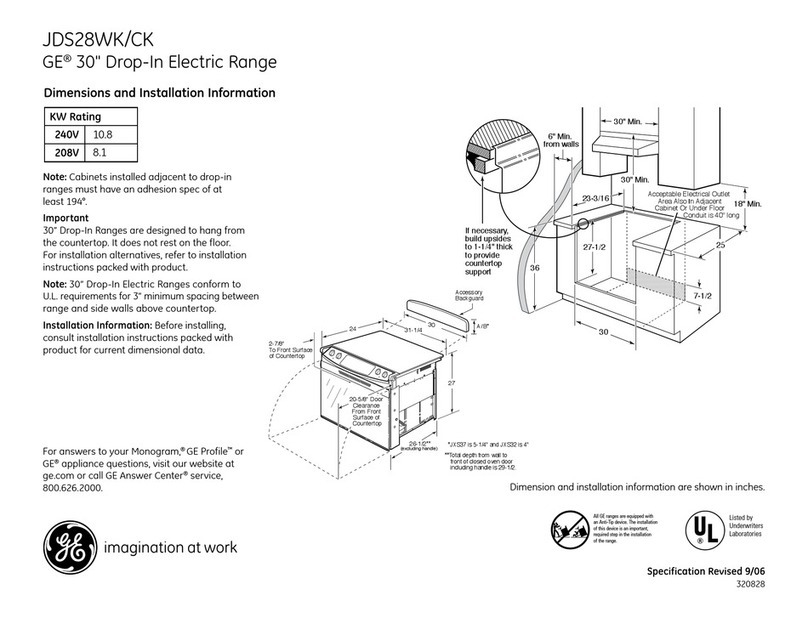
Dimensions and Installation Information
(in inches)
All GE ranges are equipped
with an Anti-Tip device. The
installation of this device is an
important, required step in the
installation of the range.
GE Profile
™
GE
JBP48WB JBP30WB JBP26WB
JBP48AB JBP30AB JBP26AB JBP21WB
JBP48BB JBP35BB JBP30BB JBP26BB JBP24BB JBP21BB JBP19BB
Features
Oven cleaning Self-Clean Self-Clean Self-Clean Self-Clean Self-Clean Self-Clean Self-Clean
Oven capacity (cu. ft.) 5.0 5.0 5.0 5.0 5.0 3.7 3.7
Oven shelves 2 2 2 2 2 2 1
Upswept porcelain-enameled
cooktop ●●●●●●●
Clean-Well™ Cooktop System ●●●●●●●
Lift-up cooktop w/dual support rods ●●●●●●
8" heating elements 2 (6 turns) 2 (6 turns) 2 (6 turns) 2 (5 turns) 2 (5 turns) 2 (5 turns) 1 (5 turns)
6" heating elements 2 (5 turns) 2 (5 turns) 2 (5 turns) 2 (4 turns) 2 (4 turns) 2 (4 turns) 3 (4 turns)
Warming option ●
Infinite heat controls ●●●●●●●
Plug-in Calrod® heating elements Deluxe Deluxe Deluxe ●●●●
Grey Grey
Black Black
Removable 1-piece drip bowls Black Black Black Chrome Chrome Chrome Chrome
TrueTemp™ System ●●●●
SmartLogic™ controls ●●●●
Six-pass power bake element ●●●●
Convenience controls ●●●●●●●
QuickSet oven controls QuickSet IV QuickSet III QuickSet III QuickSet III QuickSet II QuickSet II QuickSet I
Digital temperature display ●●●●●●
Electronic oven controls ●
Auto oven shut-off w/override w/override w/override w/override w/override w/override
Control lock capability ●
Start pad ●
Delay clean option ●●●●
Auto self-clean ●●●●●●●
Self-clean cool down display ●●●●●●
Audible preheat signal ●●●●●●
Clock and minute timer ●●●●●●
Dual element bake ●●●●●●●
Heating element “ON” indicator light ●●●●●●●
Interior oven light Auto/Switch Switch Switch Switch Switch Switch
Preheated oven light in display ●●●●●●
White White White
Removable full-width Almond Almond Almond White
storage drawer Black CM* CM* CM* CM* CM* White
Broiler pan with grid ●●●●●●●
Appearance
WW WW WW
AA AA AA WW
Color appearance* BB WH/AD WH/AD WH/AD WH/AD WH/AD WH
WG WG WG
AG AG AG WG
Frameless oven door* BG BG BG BG BG BG BG
Oven door with window Big View Big View ●●● ●
Lift-off oven door ●●●●●●●
Designer-style handle Sure Grip ●●●●●●
Easy Level System ●●●●●●●
Textured steel side panels ●●●●●●●
Weights & Dimensions
Overall oven interior dimensions
(WxHxD in inches) 24-1/4 x 19 x 19 23 x 16 x 17-3/4
Approx. shipping weight (lbs.) 176 173 170 172 170 144 141
Power/Ratings
KW rating @ 240V 11.7 11.7 11.7 11.7 11.7 10.8 9.7
208V 8.8 8.8 8.8 8.8 8.8 8.1 7.3
*WW = White on white, AA = Almond on almond, BB = Black on black, WH = White, AD = Almond, CM = Color-Matched indicates color of oven door or
storage drawer matches range cooktop (either white or almond),
WG = White Glass, AG = Almond Glass, BG = Black Glass.
30
25
2-1/2
7-1/2
A
C*
D
B
2-1/2
Acceptable electrical
outlet area
Preferred electrical
outlet area
Roughed-in dimensions

– 8 –
40" E
LECTRIC
R
ANGES
40" Range Dimensions and Installation Information (in inches)
*Dimension from wall to front of closed oven door handle.
**Includes required 4" door swing allowance for side-hinged
oven or storage compartment door.
Receptacle Locations: For all 40" Free-Standing
Ranges locally approved flexible service cord or
conduit must be used because terminals are not
accessible after range installation. See shaded
area in drawing for location of electrical outlet
box. Recommended outlet locations allow range
to be installed directly against rear wall.
Warranty Information
Full one-year warranty (parts and labor at no additional charge) applies to
the entire range. See written warranty for complete details.
JCP67Y JCS57Y
Features
Master Oven—Self-Clean
Oven cleaning Companion Oven—Standard Standard
Master Oven—2
Oven shelves Companion Oven—1 Master Oven—2
8" heating elements 2 2
6" heating elements 2 2
Removable drip bowls One-Piece Chrome One-Piece Chrome
Clock and minute timer Electronic Electronic
Automatic oven timer Master
Heating element “ON” indicator light
●●
Interior oven light
●●
Full-width fluorescent
cooktop night light
●●
Oven cycling light 2
●
Storage drawer
●●
Master Oven—1
Broiler pan with grid Companion Oven—1 Master Oven—1
Appearance
Color appearance* WW WW
Oven door with window Master Oven
●
Lift-off oven door Master
●
Weights & Dimensions
Master Oven—
22-5/8 x 15-7/8 x 18-1/8
Overall oven interior dimensions Companion Oven—
(WxHxD in inches) 9-9/16 x 16 x 19-1/2 22-5/8 x 15-7/8 x 18-1/8
Approx. shipping weight (lbs.) 224 197
Power/Ratings
KW rating @ 240V 14.2 12.6
208V 10.7 9.5
*WW = White on white.
GE
30" F
REE
-S
TANDING
Q
UICK
C
LEAN
™
S
TANDARD
C
LEAN
E
LECTRIC
R
ANGES
GE
JBS27WY
JBS27AY JBS03GV
JBS27BY JBS26W JBS23BB JBS07V JBS05Y JBS03V JBS02BB
Features
Oven cleaning Standard Standard Standard Standard Standard Standard Standard
Oven capacity (cu. ft.) 3.7 3.7 3.7 3.5 3.7 3.7 3.7
Oven shelves 2 2 2 2 2 2 1
Upswept porcelain-enameled
cooktop
●●●●●●●
Clean-Well™ Cooktop System
●●●●●●●
Lift-up cooktop w/dual support rods
●
8" heating elements 2 (6 turns) 1 (6 turns) 2 (6 turns) 1 (6 turns) 1 (6 turns) 1 (6 turns) 1 (6 turns)
6" heating elements 2 (5 turns) 3 (5 turns) 2 (5 turns) 3 (5 turns) 3 (5 turns) 3 (5 turns) 3 (5 turns)
Infinite heat controls
●●●●●●●
Plug-in Calrod
®
heating elements
●●● ●●●
Removable 1-piece drip bowls Chrome Chrome Chrome Chrome Chrome Chrome Chrome
Clock and minute timer
●●●
Dual element bake
●●●●●●●
Heating element “ON” indicator light
●●●●●●●
Interior oven light Switch Switch Switch Switch Auto/Switch
White
Removable full-width Almond
storage drawer CM* CM* CM* White CM* CM* CM*
Broiler pan with grid
●●●●●●●
Appearance
WW
AA
Color appearance* WH/AD WH/AD WH/AD WW WH/AD WH/AD WH
WG
AG BG
Frameless oven door* BG CM BG White CM CM BG
Oven door with window
●●●●●
Lift-off oven door
●●●●●●●
●
Designer-style handle
●
Visor Visor Visor Visor Visor Visor
Easy Level System
●●● ●●●
Textured steel side panels
●●●●●●●
Weights & Dimensions
Overall oven interior dimensions 23 x 16 x 23 x 16 x 22-3/4 x 23 x 16 x 23 x 16 x
(WxHxD in inches) 23 x 16 x 17-7/8 17-3/4 17-7/8 15-3/4 x 17 17-7/8 17-3/4
141
Approx. shipping weight (lbs.) 141 144 146 141 153 139 141
Power/Ratings
KW rating @ 240V 10.9 9.8 10.4 9.8 9.3 9.8 9.8
208V 8.4 7.4 8.4 7.4 6.9 7.4 7.6
*WW = White on white, AA = Almond on almond, BB = Black on black, WH = White, AD = Almond, CM = Color-Matched indicates color of oven door or
storage drawer matches range cooktop (either white or almond),
WG = White Glass, AG = Almond Glass, BG = Black Glass.
Model A B C* D
JBS27WY/AY/BY 29-7/8 45-1/8 25-7/16 46-1/8
JBS26W 29-7/8 45-1/8 25-5/16 46-3/8
JBS23BB
JBS07V 29-7/8 45-1/8 25-5/16 46-3/8
JBS05Y 29-7/8 44-5/8 25-5/16 45-1/2
JBS03GV 29-7/8 45-1/8 25-5/16 46-1/8
JBS03V 29-7/8 45-1/8 25-5/16 46-3/8
JBS02BB
*Dimension from wall to front of closed oven door handle is
27-3/8" on model JBP48; 27-3/4" on models JBP35/30/26/24;
27-1/2" on models JBP21/19, JBS27 and JBS03V; and 27-1/8"
on models JBS26/07/05/03GV.
Cabinet Dimensions (in inches)
Dimensions and Installation Information
(in inches)
30
25
2-1/2
7-1/2
A
C*
D
B
2-1/2
Acceptable electrical
outlet area
Preferred electrical
outlet area
Roughed-in dimensions
C
L
7" MAX.
10
10 Wall
of range
Locate outlet
in shaded area.
Wall mount only.
Floor
20
40-1/8
4
Top View
44-1/8**
40-1/8
47-1/4
27-3/8*
18-1/2
All GE ranges are equipped
with an Anti-Tip device. The
installation of this device is an
important, required step in the
installation of the range.

– 9 –
Using the convection oven.
The convection oven fan shuts off when the oven door is opened.
DO NOTleave the door open for long periods of time while using convection
cooking or you may shorten the life of the convection heating element.
To help you understand the difference between
convection bake and roast and traditional bake and
roast, here are some general guidelines.
Convection Bake
■
Ideal for evenly browned baked foods cooked on all 3 shelves.
■
Good for large quantities of baked foods.
■
Good results with cookies, biscuits, muffins, brownies, cupcakes,
cream puffs, sweet rolls, angel food cake and bread.
Heat comes from the heating element in the rear of the
oven. The convection fan circulates the heated air
evenly, over and around the food. Preheating is not
necessary with foods having a bake time of over 15
minutes.
Convection Roast
■
Good for large tender cuts of meat, uncovered.
Heat comes from the top heating element. The
convection fan circulates the heated air evenly over and
around the food. Meat and poultry are browned on all
sides as if they were cooked on a rotisserie. Using the
roasting rack provided, heated air will be circulated
over, under and around the food being roasted. The
heated air seals in juices quickly for a moist and tender
product while, at the same time, creating a rich golden
brown exterior.
Roasts or poultry should be cooked on the lowest
shelf position (A) on a shelf.
When you are convection roasting it is important that
you use the broiler pan and grid and the special roasting
rack for best convection roasting results. The pan is used
to catch grease spills and the grid is used to prevent
grease spatters. Place the meat on the special roasting
rack. The rack holds the meat. The rack allows the
heated air to circulate under the meat and increase
browning on the underside of the meat or poultry.
■Place the shelf in the lowest shelf position (A).
■Place the grid on the broiler pan and put the roasting
rack over them making sure the posts on the roasting
rack fit into the holes in the broiler pan.
In a convection oven, a fan circulates
hot air over, under and around the
food. This circulating hot air is evenly
distributed throughout the oven cavity.
As a result, foods are evenly cooked
and browned—often in less time with
convection heat.
You can use your favorite recipes in the convection oven. Recipe
conversion is as easy as 1, 2, 3.
When baking, reduce baking temperature by 25˚ F.
No need to preheat when cooking longer than 15 minutes.
■
For more information on adapting recipes, see the
Convection Cookbook.
■
Use pan size recommended.
■
Some package instructions for frozen casseroles or main
dishes have been developed using commercial convection
ovens. For best results in this oven, preheat the oven and
use the temperature on the package.
2
1
Adapting Recipes…
Before using your convection oven, check to see if your cookware
leaves room for air circulation in the oven. If you are baking with
several pans, leave space between them. Also, be sure the pans do
not touch each other or the walls of the oven.
Paper and Plastic
Heat-resistant paper and plastic containers that are recommended
for use in regular ovens can be used in convection ovens.
Plastic cookware that is heat-resistant to temperatures of 400˚ F.
can also be used.
Metal and Glass
Any type of cookware will work in your convection oven.
However, metal pans heat the fastest and are recommended
for convection baking.
■
Darkened or matte-finished pans will bake faster than shiny pans.
■
Glass or ceramic pans cook more slowly.
When baking cookies, you will get the best results if you use a flat
cookie sheet instead of a pan with low sides.
For recipes like oven-baked chicken, use a pan with low sides. Hot
air cannot circulate well around food in a pan with high sides.
Cookware for Convection Cooking

– 10 –
Using the convection oven.
How to Set the Oven for Convection
Baking or Roasting
Press the
CONVECTION BAKE
or
CONVECTION
ROAST
pad.
Press the number pads to set the desired
oven temperature.
Press the
START
pad.
To change the oven temperature, press the
CONVECTION
BAKE
or
CONVECTION ROAST
pad and then the number
pads to set the new temperature.
When the oven starts to heat the changing temperature,
starting at100˚ F., will be displayed. When the oven
reaches the temperature you set, 3 beeps will sound.
Press the
CLEAR/OFF
pad when finished.
NOTE:
■
You will hear a fan while cooking with convection. The fan will
stop when the door is opened but the heat will not turn off.
■
You may hear the oven clicking during baking. This is normal.
4
3
2
1
Multi-Shelf Baking
How to Set the Oven for Convection Roasting
when Using the Probe
Do not lock the oven door with the latch during convection roasting.
The latch is used for self-cleaning only.
The display will flash
PROBE
and the oven control will
signal if the probe is inserted into the outlet, and you
have not set a probe temperature and pressed the
START
pad.
Place the shelf in the lowest position (A). Insert the
probe into the meat.
Plug the probe into the outlet on the oven wall. Make
sure it is pushed all the way in. Close the oven door.
Touch the
CONVECTION ROAST
pad.
Touch the number pads to set the desired internal
probe temperature.
Touch the
PROBE
pad.
Touch the number pads to set the desired internal
food temperature.
Touch the
START
pad.
When the oven starts to heat, the word
LO
will show
in the display. After the internal temperature of the
food reaches 100˚ F., the changing internal temp-
erature will show in the display.
When the internal temperature of the food reaches
the number you have set, the probe and the oven
turn off and the oven control signals. To stop the
signal, press the
CLEAR/OFF
pad. Use hot pads to
remove the probe from the food. Do not use tongs
to pull on it—they might damage it.
CAUTION: To prevent possible burns, do not unplug the probe from
the oven outlet until the oven has cooled. Do not store probe in oven
NOTE:
■
If the probe is removed from the food before the final
temperature is reached, a tone will sound and the display
will flash until the probe is removed from the oven.
■
You will hear a fan while cooking with this feature. The fan will
stop when the door is opened but the heat will not turn off.
■
You can use the timer even though you cannot use
timed oven operations while using the probe.
8
7
6
5
4
3
2
1
For best results when roasting large
turkeys and roasts, we recommend
using the probe included in the
convection oven.
To change the oven temperature
during the Convection Roast cycle,
press the CONVECTION ROAST pad
and then press the number pads to
set the new desired temperature.
START
CLEAR
OFF
Because heated air is circulated evenly through out
the oven, foods can be baked with excellent results
using multiple shelves.
Multi-shelf baking may increase cook times slightly
for some foods but the overall result is time saved.
Cookies, muffins, biscuits, and other quick breads
give very good results with multi-shelf baking.
When baking on 3 shelves, place one shelf in the
bottom (B), one on the 4th (D) position and the
offset shelf in the 6th (F) position.
When convection baking with only
1 shelf, follow the shelf positions
recommended in the Using the
oven section.
START
CLEAR
OFF

– 11 –
Convection roasting guide.
*
†
Using Convection Conversion
By using the Convection Conversion feature you can automatically
convert the oven temperature from regular baking to Convection
Bake temperatures.
To convert the oven temperature for convection baking,
follow the steps below.
Press and hold the
CONVECTION BAKE
pad for
4 to 5 seconds.
Using the number pads enter the temperature
recommended in the recipe.
Press the
START
pad.
The display shows the converted (reduced)
temperature. For example, if you entered a recipe
temperature of 350˚ F., the display will show 325˚ F.
when it is converted.
Press the
CLEAR/OFF
pad when baking is finished.
NOTE: Conversion must be set each time you want to use it. It is
not held in memory.
4
3
2
1
Stuffed birds generally require 30-45 minutes additional roasting time. Shield legs and breast with
foil to prevent over-browning and drying of skin.
The U.S. Department of Agriculture says "Rare beef is popular, but you should know that cooking it
to 140˚ F. means some food poisoning organisms may survive." (Source: Safe Food Book. Your
Kitchen Guide. USDA Rev. June 1985.)
START
CLEAR
OFF
Convection Roasting Guide
Meats Minutes/Lb. Oven Temp. Internal Temp.
Beef Rib (3 to 5 lbs.) Rare
†
20–24 325˚F. 140˚F.
Medium 24–28 325˚F. 160˚F.
Well 28–32 325˚F. 170˚F.
Boneless Rib, Top Sirloin Rare
†
20–24 325˚F. 140˚F.
Medium 24–28 325˚F. 160˚F.
Well 28–32 325˚F. 170˚F.
Beef Tenderloin Rare
†
10–14 325˚F. 140˚F.
Medium 14–18 325˚F. 160˚F.
Pot Roast (2½to 3 lbs.) chuck, rump 35–45 300˚F. 170˚F.
Pork Bone-in (3 to 5 lbs.) 23–27 325˚F. 170˚F.
Boneless (3 to 5 lbs.) 23–27 325˚F. 170˚F.
Pork Chops (1/2 to 1″thick) 2 chops 30–35 total 325˚F. 170˚F.
4 chops 35–40 total 325˚F. 170˚F.
6 chops 40–45 total 325˚F. 170˚F.
Ham Canned (3 lbs. fully cooked) 14–18 325˚F. 140˚F.
Butt (5 lbs. fully cooked) 14–18 325˚F. 140˚F.
Shank (5 lbs. fully cooked) 14–18 325˚F. 140˚F.
Lamb Bone-in (3 to 5 lbs.) Medium 17–20 325˚F. 160˚F.
Well 20–24 325˚F. 170˚F.
Boneless (3 to 5 lbs.) Medium 17–20 325˚F. 160˚F.
Well 20–24 325˚F. 170˚F.
Seafood Fish, whole (3 to 5 lbs.) 30–40 total 400˚F.
Lobster Tails (6 to 8 oz. each) 20–25 total 350˚F.
Poultry Whole Chicken (2½to 3½ lbs.) 24–26 350˚F. 180˚–185˚F.
Cornish Hens Unstuffed (1 to 1½lbs.) 50–55 total 350˚F. 180˚–185˚F.
Cornish Hens Stuffed (1 to 1½lbs.) 55–60 total 350˚F. 180˚–185˚F.
Duckling (4 to 5 lbs.) 24–26 325˚F. 180˚–185˚F.
Turkey, whole
*
Unstuffed (10 to 16 lbs.) 8–11 325˚F. 180˚–185˚F.
Unstuffed (18 to 24 lbs.) 7–10 325˚F. 180˚–185˚F.
Turkey Breast (4 to 6 lbs.) 16–19 325˚F. 170˚F.

– 12 –
Cleaning the glass cooktop.
Clean the glass surface with cleaning cream before you use the cooktop for the first time. Also, clean
the glass surface after each use. This helps protect the top and makes clean-up easier.
To clean the cooktop seal around the edge of the glass, let a wet cloth rest on it for a few minutes, then wipe clean.
Use a mild detergent if needed.
Do not use a knife or any sharp object on the seal because it will cut or damage it.
Normal Cleaning
Use only a recommended cleaning cream,
such as Cerama Brite or another cooktop
cleaning cream, on the glass cooktop.
To maintain and protect the surface of
your new glass cooktop follow these steps.
Before you use the cooktop for the
first time, clean it with cleaning
cream. This helps protect the top
and makes clean-up easier.
Clean the surface with the cleaning
cream after each use.
Rub a few drops (less is better) of the
cleaning cream onto soiled area
using a damp paper towel. Buff with
a dry paper towel until all soil and
cream are removed.
For Heavy, Burned-On Soil…
Allow the cooktop to cool.
Apply a few drops of the cleaning
cream to the (cool) soiled area.
Using a damp paper towel, rub the
cream into the burned-on area. As
with any burned-on spill, this may
require some effort.
Carefully scrape soil with razor
scraper. Hold scraper at a 30˚angle
against the glass cooktop.
Be sure to use a new sharp razor scraper. Do not
use a dull or nicked blade.
If any soil remains, repeat the steps
listed above. For additional
protection, after all soil has been
removed, polish the entire surface
with the cleaning cream.
Buff with a dry paper towel.
To order more cream and/or scrapers for
cleaning your glass cooktop, please call
our toll-free number:
National Parts Center . . . . . . . . .800-626-2002
Cleaner . . . . . . . . . . . . . . . . . . . . . .# WX10X300
Scraper . . . . . . . . . . . . . . . . . . . . .# WX5X1614
Cream & scraper kit . . . . . . . . .# WB64X5027
Special Care
Be sure to use a new sharp razor scraper. Do not
use a dull or nicked blade.
Sugary spillovers (such as jellies, fudge,
candy syrups) or melted plastics can
cause pitting of the surface of your
cooktop (not covered by the warranty)
unless the spill is removed while still hot.
Special care should be taken when
removing hot substances.
Turn off all surface units affected by
the spillover. Remove hot pans.
Wearing an oven mitt, hold the razor
scraper at a 30˚angle to the cooktop.
Scrape the hot spill to a cool area
outside the surface unit.
With the spill in a cool area, use a dry
paper towel to remove any excess.
Any spillover remaining should be
left until the surface of the cooktop
has cooled. Do not continue to use
the soiled surface unit until all of the
spillover has been removed. Follow
the steps under
Heavy Burned-On Soil
to continue the cleaning process.
NOTE: If pots with a thin overlay of aluminum,
copper or enamel are allowed to boil dry, the
overlay may bond with the glass cooktop and
leave a black discoloration. This should be
removed immediately before heating again
or the discoloration may be permanent.
Using a razor scraper will not
damage the surface if the 30˚ angle
is maintained.
Using the self-cleaning oven.
The oven door must be closed and all controls set correctly for the cycle to work properly.
Before a Clean Cycle
We recommend venting your kitchen
with an open window or using a
ventilation fan or hood during the first
self-clean cycle.
Remove the shelves, broiler pan, broiler
grid, probe, all cookware and any
aluminum foil from the oven.
The oven shelves and convection roasting
rack can be self-cleaned, but they will
darken, lose their luster and become
hard to slide.
Soil on the front frame of the range and
outside the gasket on the door will need
to be cleaned by hand. Clean these areas
with hot water, soap-filled steel-wool pads
or cleansers such a Soft Scrub®. Rinse well
with clean water and dry.
Do not clean the gasket. The fiberglass
material of the oven door gasket cannot
withstand abrasion. It is essential for the
gasket to remain intact. If you notice it
becoming worn or frayed, replace it.
Wipe up any heavy spillovers on the oven
bottom.
Make sure the oven light bulb cover is in
place and the oven light is off.
IMPORTANT:
The health of some birds is
extremely sensitive to the fumes given off
during the self-cleaning cycle of any
range. Move birds to another well
ventilated room.
Wipe up heavy soil on the oven
bottom.
How to Set the Oven for Cleaning
Touch the
SELF CLEAN
pad.
Using the number pads, enter the
desired clean time, if a time other
than 4 hours, 30 minutes is needed.
Clean cycle time is normally 4 hours, 30
minutes. You can change the clean time
to any time between 3 hours and 5 hours,
depending on how dirty your oven is.
Touch the
START
pad.
The door locks automatically. The display
will show the clean time remaining. It will
not be possible to open the oven door
until the temperature drops below the
lock temperature and the
LOCKED DOOR
light goes off.
When the
LOCKED DOOR
light is off, open
the door.
The oven shuts off automatically when
the clean cycle is complete.
■The words
LOCK DOOR
will flash and
the oven control will signal if you set
the clean cycle and forget to close the
oven door.
■To stop a clean cycle, touch the
CLEAR/OFF
pad. When the
LOCKED
DOOR
light goes off indicating the
oven has cooled below the locking
temperature, open the door.

– 13 –
COOKTOP LIGHT REPLACEMENT
To RemoveThe Old Bulb:
1. Remove power to the unit.
2. Pull the range away from the wall.
3. Remove the two screws from the top edge
on the back of the range (A).
4. Pull up on the hand grips on the back of
the range (B) until the tabs at the bottom
of the cooktop light housing separate from
the back of the range.
5. Pull out the cooktop light housing as far as
possible - approx. 2 inches (C).
6. Remove the lightbulbbyunpluggingit from
both sockets with one motion.
To InstallThe New Bulb:
1. Install the new light bulb by plugging it into
both sockets with one motion.
2. Using the hand grips on the cooktop light
housing (D), lift up and push the housing
back into the rear wall of the range. Then
lowerthehousinguntilthebottomtabs are
inserted back into the range.
3. Reinstallthetwoscrewsalong thetop edge
on the back of the range.
OVEN DOOR REMOVAL
The oven door is locked to the range cabinet
with hinge locks, located on top of both door
hinges.
To RemoveThe Oven Door:
1. Fully open the oven door.
2. Pushthe hinge locksdowntowardthe door
frame, to the unlocked position.
3. Raise the door to the broil position.
4. Firmly grasp both sided of the door about
centerwaysdownthe doorandlift upwards
todisengagethehinge armfrom the hinge
slot. At the same time, pull the door to-
wards you while lifting it away from the
range.
To Reinstall Oven Door:
1. Firmly grasp both sides of the door and
insert the hinge arms into the door hinge
slots, while holding the door angle in the
broil position.
2. Lower the hinge arms downward, aligning
thehingearm indentation to the lowerpor-
tion of the hinge slot.
3. Fully open the door.
4. Push the hinge locks up against the front
frame of the oven cavity, to the locked po-
sition.
SCREWS
A
2"
HAND
GRIPS
COOKTOP
LIGHT
HOUSING
B
LIGHT BULB
SOCKET
C
COOKTOP
LIGHT
HOUSING
HAND
GRIPS
D
HINGE LOCK
(UNLOCKED POSITION) HINGE LOCK
(LOCKED POSITION)
SLOT
HINGE ARM SEATED HINGE
ARM
LOWER HINGE ARM
INTO HINGE SLOT

– 14 –
COOKTOP REMOVAL
The ceramic glass cooktop is sealed into the
porcelain cooktop frame and is not replaceable
as a separate part. The cooktop comes as a
complete assembly (porcelain frame and ce-
ramic glass).
To remove the cooktop:
1. Remove power to the unit.
2. Remove the two screws which secure the
cooktop to the front frame.
3. Lift the front of the cooktop upward (no
more than 45°). NOTE: lifting the front of
the cooktop too high, can break the glass.
4. Unplug the two electrical connector plugs
and remove the ground wire from the
cooktop (located at the rear of the
cooktop).
5. While grasping both sides of the cooktop,
liftthe front ofthecooktop upward approxi-
mately 30 to 40° (see illustration A, lower
right).
6. While holding the front of the cooktop up-
ward, lower the rear of the cooktop in or-
der to disengage the cooktop hinges from
the hinge pins (see illustration B, lower
right).
7. Once the cooktop hinges are disengaged
from the hinge pins, lift the rear of the
cooktop upward and over the hinge pins
whilepullingthe cooktopforwardtoremove
(see illustration C, lower right).
Once the cooktop is removed, the oven vent
tube, and latch motor assembly are accessible.
Important note: priortoreinstallingthecooktop,
study the hinge mechanism for a few moments,
noting the location of the hinge pins and the
design of the hinges. Doing so will allow for a
much easier reinstallation.
COOKTOP REMOVAL
HINGE
HINGE
PIN
A
B
C
LIFT UPWARDS
ON FRONT OF
COOKTOPTO A
45˚ ANGLE
LOWERTHE REAR
OFTHE COOKTOP
TO DISENGAGE
THE HINGES FROM
THE HINGE PINS
LIFTTHE COOKTOP
UPWARDS AND
OVERTHE HINGE
PINS

– 15 –
A
B
C
HIDDEN BAKE ELEMENT
The bake element is located underneath the
oven liner (hidden bake), where it is protected
from spillage and oven cleaning agents which
can shorten the life of the element.
Thebakeelement is accessiblefrom the leftside
(facingthe unit) of therange. To access the bake
element, carefully remove the range from its in-
stallation taking care to protect the customer’s
floor.
Bake Element Removal:
1. Remove power to the unit.
2. Remove the cooktop following the instruc-
tions outlined on page 14.
3. Remove the seven screws shown in the
illustration to the right.
4. At the front corner of the panel, near the
leveling leg, is a hidden screw. Access to
thisscrewisobtainedbyremovingthestor-
age drawer. From inside the storage
drawer area, located just above the left
frontlevelingleg(as youfacethe unit), are
two 1 inch holes. If you shine a light into
the top hole you will be able to see the ¼
inch hex screw that will need to be re-
moved, in order to remove the side panel.
5. Facing side of the panel, grasp the front
and rear portion of the panel. Pull the rear
ofthe paneltowardsyou (A)approximately
2-3inches,whileliftingupwardsonthefront
of the panel (B) approximately 1 inch. No-
tice in the illustration to the right that the
panel is held to the range frame with 2 ny-
lon grommets (top and center of panel),
which fit into holes in the side panel. By
liftingupwards on the front panel (B),while
at the same time pulling the panel towards
you (C), you are able to disengage the
panel from the rubber grommets.
,
,
HIDDEN BAKE
PHILLIPS
#10TORX
¼ HEX
¼ HEX
¼ HEX
¼ HEX
¼ HEX

– 16 –
Bake Element Removal (cont.)
6. Disconnecttheelectricalterminalsfromthe
bake element and remove the bake ele-
ment wires from the retaining clip on the
metalcoverplate(remembertoreinstallthe
wires back into the retainer clip during re-
installation to prevent pinched wires). Re-
move the four ¼ inch hex screws which
secure the metal insulation cover plate to
the frame. Remove the metal plate.
Note: that one of the screws holding the
metal plate to the frame, also secures a
groundwire to the cabinet. Alsonoticethat
the frame has two locator tabs which align
the plate to the frame during reinstallation.
7. Usingrubber glovesto protect yourhands,
carefully grasp the insulation which cov-
ersthe side of the rangeand roll it upwards
to the top of the range. Tuck the end of it
under the brace which runs from the front
of the oven to the back of the oven. This
will hold the insulation in place while you
service the bake element.
8. Remove the two screws which mount and
secure the bake element to the frame.
Note: remember the screw on the left is
the one which secures the ground wire.
Don’t forget to reattach this wire when re-
installingthe bakeelement(thisis theother
end of the ground wire referred to in step
5).
9. Graspthe retaining channel ontheleft side
and swing it outwards and to the left. No-
tice that the channel is hinged on the right
side (fits into a slot in the frame). You are
nowabletoseeinto the areawhichhouses
the bake element.
LOCATOR
TABS
GROUND
WIRE
BAKE ELEMENT
WIRES
BAKE ELEMENT
WIRE RETAINER
CLIP
INSULATION
GROUND
WIRE
RETAINING CHANNEL

– 17 –
Bake Element Removal (cont.)
10. Graspthebakeelement onboth sidesand
gently pull it towards you as you remove
it from its housing. IMPORTANT: notice
thattheopposite end of the bake element
hastwoalignment tabs which mustfit into
slots on the other side of the housing.
When reinstalling the element, be sure
that the tabs are engaged into the locator
slots on the opposite end. If you fail to do
this, the bake element will not fit flush
against the frame and will protrude
enough that you will not be able to re-
mount it to the frame.
Tip: The bottom area of the bake ele-
ment housing bows slightly upward in the
center - this is due to insulation under-
neath it which forces it slightly upward.
Using a long bladed screw driver, gently
push downward on the bake element
housing while pushing the element for-
ward. This is also helpful in forcing the
backside of the element downward
enough so that it can align with the loca-
tor slots on the opposite side.
NOTE: TWO LOCATOR
TAB SLOTS
REFLECTOR
PAN
BAKE
ELEMENT
INSULATION
ALIGNMENT
CHANNELS
LOCATOR
SLOT
LOCATOR
TAB

– 18 –
DOOR SWITCH REMOVAL
The door switch can be accessed through two
methods. If you have small hands you can ac-
cess the switch from the top of the range. If you
have large hands, you will need to remove the
left side of the range to access the switch.
IfYou Have Small Hands:
1. Remove the cooktop.
2. Remove the bracket across the top/front
of the range. This bracket is held in place
with 6 torx screws. Once the bracket is
removed, you can access the switch.
3. To remove the switch, depress inward on
the locking tabs while pulling outward on
the switch body.
If you Have Large Hands:
1. Remove the cooktop.
2. Remove the left side panel of the range.
3. To remove the switch, depress inward on
the locking tabs while pulling outward on
the switch body.
OVEN LINER REMOVAL
Should it ever become necessary to replace the
oven liner (customer damage), you can do so,
following the steps listed below:
1. Remove the cooktop.
2. Remove both side panels and metal cov-
ers (metal insulation covers).
3. Remove the bake element.
4. Remove two ¼ inch screws in the back of
the cabinet (A) which secure the liner to
the rear wall of the range.
5. From the back of the range disengage the
twometalhooks of the liner,whichengage
intothebackwallof therange(B). Dothis
by pushing upward on the hooks with a
metal object (screwdriver blade) while
pushing forward at the same time
6. From the backof the range,disengagethe
oven lamp clip which secures the lamp to
the rear wall of range (C).
7. From the back of the range, remove the
following.
a. Convectionfanwiring (caution: term-
inal connections are tight & fragile).
b. Oven lamp wiring
c. Sensor wiring (disconnect plug)
d. Broil element wiring
e. Convection element wiring
DEPRESS SWITCH
LOCKINGTABS
TO RELEASE
AA
BB
C
BACK OF RANGE WITH ELECTRICAL
SHIELD AND LAMP SOCKET COVER
REMOVED
This manual suits for next models
59
Table of contents
Other GE Range manuals
Popular Range manuals by other brands

Whirlpool
Whirlpool TEP315KW1 Use and care guide

Whirlpool
Whirlpool FOR IKEA W10017750B2 Use and care guide

Garland
Garland S680 SERIES Installation and service manual

Dacor
Dacor ER30D installation instructions

GIGA
GIGA K2FZ Instructions for installation, use and maintenance

Samsung
Samsung NSI6D 91 Series user manual