GE JB705TT1CC User manual

OGEAppliances.com
wO,)
I.,,,.
a
mI
0
oS
1:I
u')
O.)
I,,,-
Espafiol
Fora Spanishversion of this manual, visit
our Websiteat GEAppliance.com.
Para consultar una version en espaflol
de este manual de instrucciones, visite
nuestro sitio de internet
GEAppliunce.com.
In Conodo:
www. GEApptiances.co
Safety Instructions ............................ 2-5
Operating Instructions
Kitchen Timer .......................................... 11
Oven ............................................... 10-27
Adjust Oven Thermostat .............................. 15
Baking or Roosting .................................... 13
Broiling, Broiling Guide ................................ 14
Controls ............................................... 10
Convection Oven ................................. 16, 17
Preheating ............................................ 13
Probe ................................................. 18
Sabbath Feature ...................................... 27
Self-Cleaning ...................................... 22, 23
SlowCookand Worming Features....................... 20
Special Features .................................. 25, 26
Steam Cleon .......................................... 24
Timed Baking and Roosting ........................... 19
Worming Drawer ..................................... 21
Surface Units ......................................... 6-9
Bridge Burner .......................................... 7
Cookwore .............................................. 9
Gloss Cooktop ......................................... 8
Worming Zone ......................................... 7
Care and Cleaning
Aluminum Foil................................... B,4, 5, 13
Control Knobs ......................................... 28
Control Panel ......................................... 28
Glass Cooktop ..................................... 34, 35
Lift-Off Oven Door.................................. 30, 31
Light ................................................... 29
Oven Floor ............................................. 33
Oven Heating Elements ................................ 3B
Rocks ................................................. B1
RemovableWorming Drawer/Lower OvenDrawer Pan.... BB
Storage Drawer ....................................... 33
Surfaces .............................................. 28
Vent ................................................... 33
Troubleshooting Tips.......................... 36-40
Accessories ........................................ 41
Consumer Support
Consumer Support ........................... Back Cover
Warranty .............................................. 43
Write the model and serial
numbers here:
Model #
Serial #
You can find them on a label
behind the drawer or behind the
lower oven door on the front of
the range frame.
Quick Set V,
Quick Set VI
Printed on
Recycled Paper
Printed in the United States /49-80633 03-11 GE

IMPORTANT SAFETY INFORMATION.
READ ALL INSTRUCTIONS BEFORE USING.
[A WARNING ]
Read all safety instructions before using the product. Failure to follow these instructions may result in fire, electric shock,
serious injury or death.
ANTI-TIP DEVICE
Tjp-Over Hazard
A child or adult can tip the range and be killed.
Verify the anti-tip bracket has been properly installed and engaged.
Ensure the anti-tip bracket is re-engaged when the range is moved.
Do not operate the range without the anti-tip bracket in place and engaged.
Failure to follow these instructions can result in death or serious burns to
children or adults.
Anti-Tip _
Bracket -'_-- ; !
Leveling Leg __
Freestanding and Slide-ln Ranges
Countertop or
Wood Block
Anti-T
Bracket
Oven
To reduce the risk of tipping the
range, the range must be secured
by a properly installed anti-tip
bracket. See installation instructions
shipped with the bracket for
complete details before attempting
to install.
For Freestanding and Slide-In
Ranges
To check if the bracket is installed
and engaged properly, look underneath the range to see that the rear
leveling leg is engaged in the bracket. On some models, the storage drawer
or kick panel can be removed for easy inspection. If visual inspection is not
possible, slide the range forward, confirm the anti-tip bracket is securely
attached to the floor or wall, and slide the range back so the rear leveling
leg is under the anti-tip bracket.
If the range is pulled from the wall for any reason, always repeat this
procedure to verify the range is properly secured by the anti-tip bracket.
Never completely remove the leveling legs or the range will not be secured
to the anti-tip device properly.
For Drop-In Ranges
To check if the bracket is installed and engaged properly, slide the range
forward, confirm the anti-tip bracket issecurely attached to the rear of the
range, and slide the range back so that the anti-tip bracket slides just under
the countertop or wood block attached to the rear wall.
If you did not receive an anti-tip bracket with your purchase, call
1.800.626.8774 to receive one at no cost (in Canada, cull 1.800.561.3344).
For installation instructions of the bracket, visit GEAppliances.com (in
Canada, GEAppliances.ca).
Drop-In Ranges
iA WARNING l IMPORTANT SAFETYNOTICE
TheCaliforniaSafeDrinking Water and ToxicEnforcementAct requiresthe Governorof Californiato publish a listof substances
known to thestate to causecancer,birth defectsor other reproductive harm, andrequires businessesto warn customersof potential
exposure tosuch substances.
The fiberglass insulation in self-clean ovens gives off a very small amount of carbon monoxide during the cleaning cycle. Exposure can
be minimized by venting with an open window or using a ventilation fan or hood.

GEAppliances.com
j WARNING i GENERAL SAFETYINSTRUCTIONS
Usethis appliancefor its intendedpurposeasdescribedinthis
Owner'sHanual.
Besureyour applianceisproperlyinstalledand grounded bya
qualifiedinstallerin accordancewith theprovidedinstallation
instructions.
Donot attempt to repairor replaceany partofyour range unless
it isspecificallyrecommendedin this manual.Allother servicing
shouldbetransferredto a qualifiedtechnician.
Beforeperformingany service,unplug therange or disconnect
the powersupplyatthe householddistributionpanelby removing
thefuse or switchingoff the circuitbreaker.
Donot leavechildrenalone-children shouldnot beleft alone
or unattended inan area wherean applianceisin use.They
shouldneverbe allowedto climb,sitor stand on any partof the
appliance.
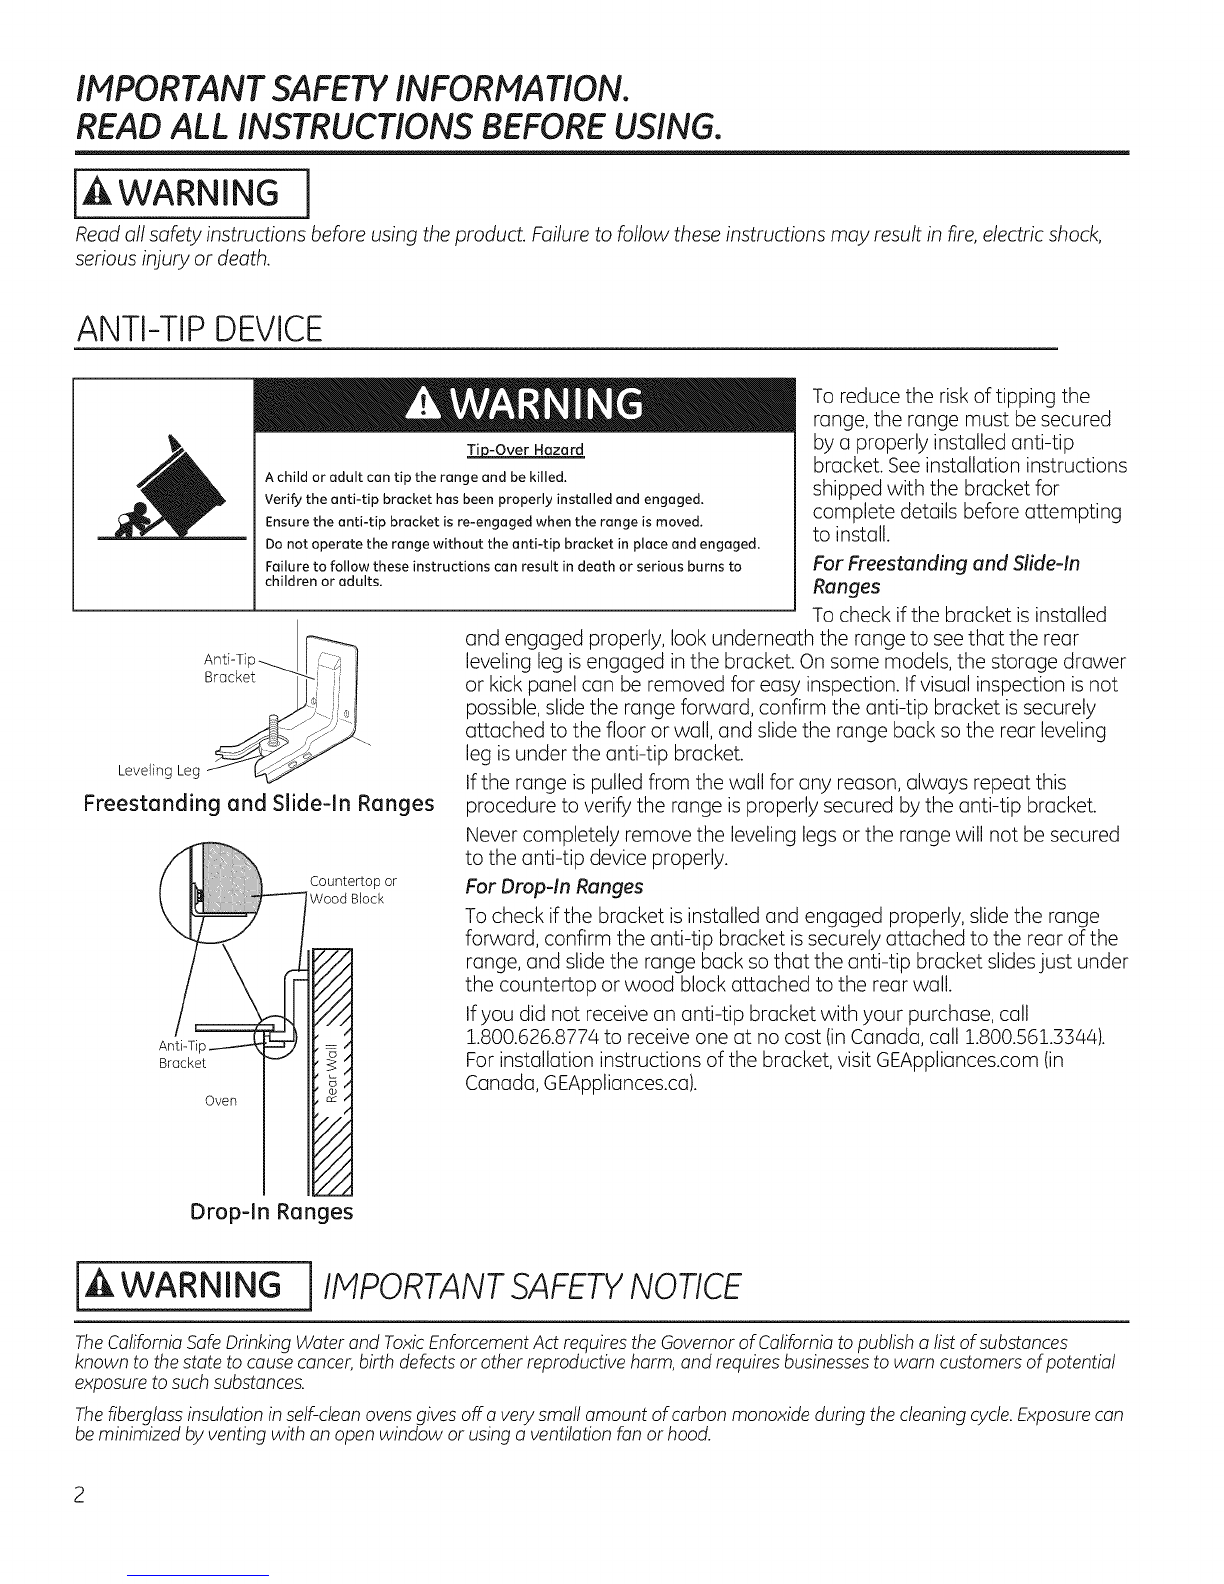
CAUTION :Donotstoreitemsofinteresttochildren
abovea range or onthe backguardof a range-children climbing
on the rangeto reachitemscouldbeseriouslyinjured.
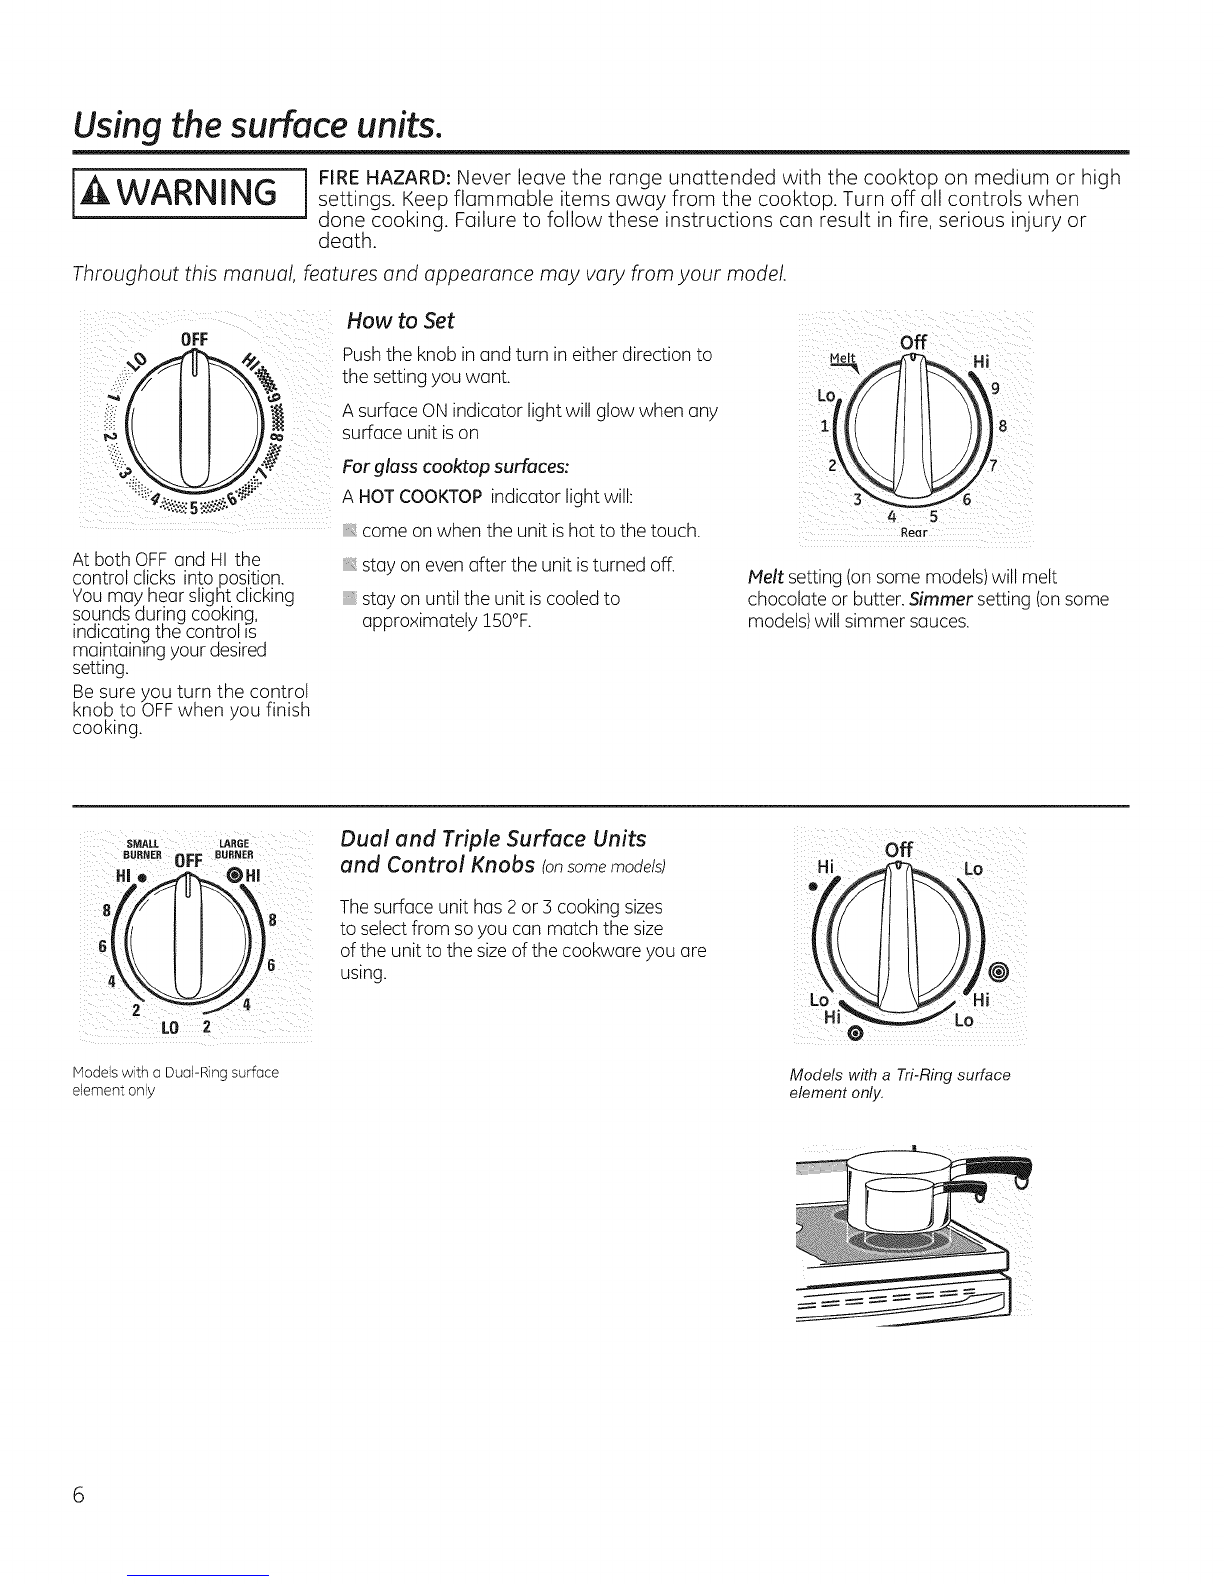
Useonlydry pot holders-moist or damp pot holderson hot
surfacesmay resultin burnsfrom steam.Donotlet pot holders
touch hot surfaceunitsor heatingelements.Donotusea towel
or other bulkycloth in placeof pot holders.
Neveruseyour applianceforwarming or heatingthe room.
Donot touch thesurfaceunits,the heatingelementsorthe
interiorsurfaceof theoven.Thesesurfacesmay be hotenough
to burn eventhough they aredark in color.Duringand after use,
do not touch,or letclothingor otherflammable materialscontact
the surfaceunits,areasnearbythe surfaceunitsor any interior
area ofthe oven;allowsufficienttime for coolingfirst.Other
surfacesof theappliancemay becomehot enoughto cause
burns.Potentiallyhot surfacesincludethe cooktop,areasfacing
the cooktop,ovenvent opening,surfacesnearthe openingand
crevicesaround theovendoor.
Donot heatunopenedfoodcontainers.Pressurecouldbuild up
and the containercouldburst,causingan injury.
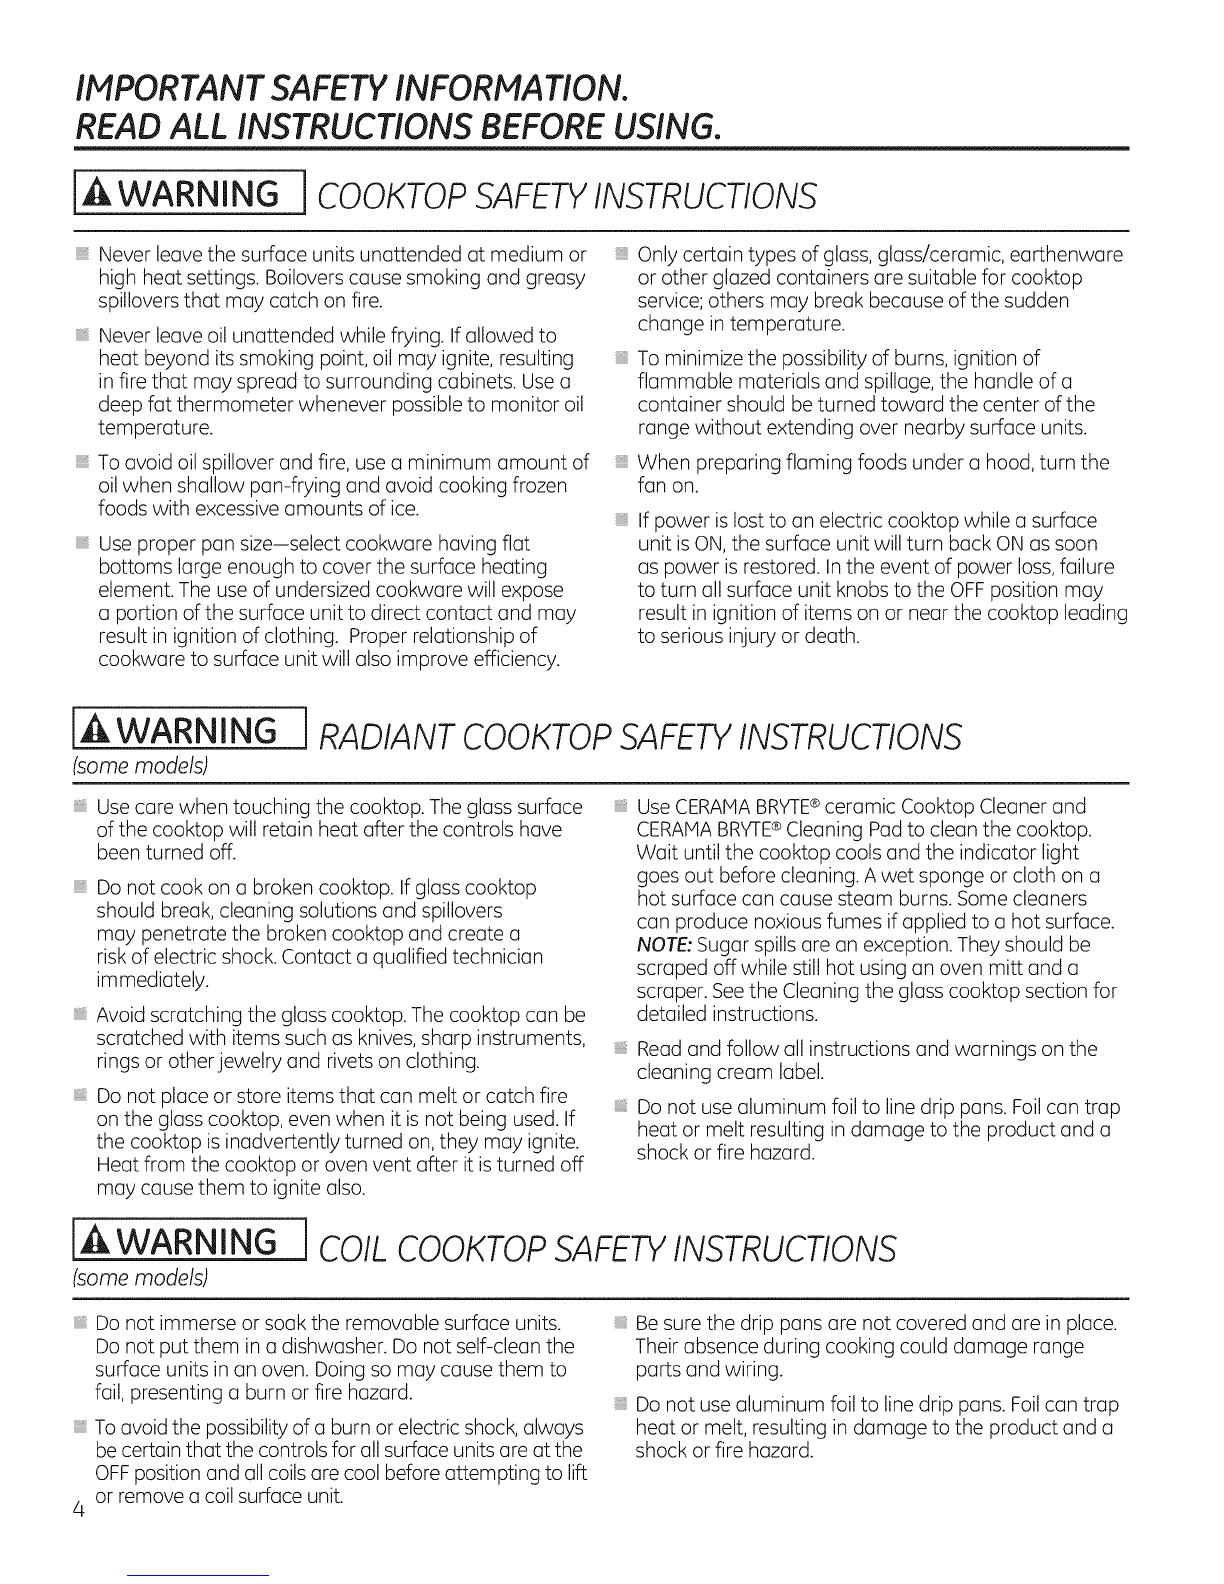
Donot usealuminum foilto linethe drip pansoranywhereinthe
oven,exceptasdescribedinthis manual.Misusecouldresult in
damageto the rangeand shockor fire hazard.
Avoidscratchingor impactingglassdoors,cooktopsor control
panels.Doingso may leadto glassbreakage.Donot cookon a
product with brokenglass.Shock,fireor cuts mayoccur.
iii_Cookmeat and poultrythoroughly-meat to at leastan internal
temperatureof Z60°Fand poultryto at leastan internal
temperatureof Z80°F.Cookingto thesetemperaturesusually
protects againstfoodborneillness.
jA WARNING j KEEPFLAIVllVlABLEMATERIALSAWAY FROM
THE RANGE.
iii_,Donotstore or useflammablematerialsin an ovenor near
the cooktop,includingpaper,plastic,pot holders,linens,wall
coverings,curtains,drapesand gasolineor otherflammable
vapors and liquids.
iii_,Neverwear loose-fittingor hanginggarmentswhileusing
the appliance.Thesegarmentsmay igniteifthey contact hot
surfaces,causingsevereburns.
iii_,Donotletcooking greaseor otherflammable materials
accumulatein or nearthe range.Greaseinthe ovenor onthe
cooktopmay ignite.
iii_,Cleanventilatinghoodsfrequently.Greaseshouldnotbe allowed
to accumulate onthe hoodor filter.
iA i
In WARNING 1IN THEEVENTOFA FIRE,TAKETHEFOLLOWINGSTEPS
TOPREVENTTHE FIREFROM SPREADING:
iii_,Donot usewater on greasefires.Neverpick up a flaming pan.
Turnthe controlsoff.Smothera flaming pan on a surfaceunitby
coveringthe pancompletelywith awell-fitting lid,cookiesheet
or flat tray.Usea multi-purposedry chemicalor foam-type fire
extinguisher.
iii_Ifthere isa fire inthe ovenduring baking,smotherthefire by
closingthe ovendoor and turning theovenoff or byusinga
multi-purposedrychemicalor foam-type fireextinguisher.
iii_Ifthere isa fire inthe ovenduringself-clean,turn theoven
off andwait for thefireto go out. Donotforce thedoor open.
Introductionoffresh air at self-cleantemperatures may leadto
a burstof flame from the oven.Failureto follow this instruction
may resultin severeburns.
]

IMPORTANT SAFETY INFORMATION.
READ ALL INSTRUCTIONS BEFORE USING.
iA WARNING i COOKTOPSAFETYINSTRUCTIONS
Never leave the surface units unattended at medium or
high heat settings. Boilovers cause smoking and greasy
spillovers that may catch on fire.
iiiiiiiiiiii_i;i
Never leave oil unattended while frying. If allowed to
heat beyond its smoking point, oil may ignite, resulting
in fire that may spread to surrounding cabinets. Use a
deep fat thermometer whenever possible to monitor oil
temperature.
To avoid oil spillover and fire, use a minimum amount of
oil when shallow pan-frying and avoid cooking frozen
foods with excessive amounts of ice.
iiiiiiiiiiii_i;i
Use proper pan size-select cookware having flat
bottoms large enough to cover the surface heating
element. The use of undersized cookware will expose
a portion of the surface unit to direct contact and may
result in ignition of clothing. Proper relationship of
cookware to surface unit will also improve efficiency.
iiiiiiiiiiii_i;i
iiiiiiiiiiii_i;i
iiiiiiiiiiii_i;i
Only certaintypes of glass,glass/ceramic,earthenware
or other glazed containersare suitable for cooktop
service;others may break because of the sudden
change in temperature.
To minimize the possibility of burns, ignition of
flammable materials and spillage, the handle of a
container should be turned toward the center of the
range without extending over nearby surface units.
When preparing flaming foods under a hood, turn the
fan on.
If power is lost to an electric cooktop while a surface
unit is ON, the surface unit will turn back ON as soon
as power is restored. Inthe event of power loss, failure
to turn all surface unit knobs to the OFF position may
result in ignition of items on or near the cooktop leading
to serious injury or death.
[A WARNING JRADIANT COOKTOPSAFETYINSTRUCTIONS
(some models)
Use care when touching the cooktop. The glass surface
of the cooktop will retain heat after the controls have
been turned off.
Do not cook on a broken cooktop. If glass cooktop
should break, cleaning solutions and spillovers
may penetrate the broken cooktop and create a
risk of electric shock. Contact a qualified technician
immediately.
Avoid scratching the glass cooktop. The cooktop can be
scratched with items such as knives, sharp instruments,
rings or other jewelry and rivets on clothing.
Do not place or store items that can melt or catch fire
on the glass cooktop, even when it is not being used. If
the cooktop is inadvertently turned on, they may ignite.
Heat from the cooktop or oven vent after it is turned off
may cause them to ignite also.
[A WARNING !
(somemodels)
iiiiiiiiiiii_i;i
Use CERAMA BRY-I-E®ceramic Cooktop Cleaner and
CERAMABRYTE®Cleaning Pad to clean the cooktop.
Wait until the cooktop cools and the indicator light
goes out before cleaning. A wet sponge or cloth on a
hot surface can cause steam burns. Some cleaners
can produce noxious fumes if applied to a hot surface.
NOTE: Sugar spills are an exception. They should be
scraped off while still hot using an oven mitt and a
scraper. See the Cleaning the glass cooktop section for
detailed instructions.
Read and follow all instructions and warnings on the
cleaning cream label.
Do not use aluminum foil to line drip pans. Foilcan trap
heat or melt resulting in damage to the product and a
shock or fire hazard.
COIL COOKTOP SAFETYINSTRUCTIONS
Do not immerse or soak the removable surface units.
Do not put them in a dishwasher. Do not self-clean the
surface units in an oven. Doing so may cause them to
fail, presenting a burn or fire hazard.
To avoid the possibility of a burn or electric shock, always
be certain that the controls for all surface units are at the
OFF position and all coils are cool before attempting to lift
or remove a coil surface unit.
4
i Be sure the drip pans are not covered and are in place.
Their absence during cooking could damage range
parts and wiring.
i Do not use aluminum foil to line drip pans. Foil can trap
heat or melt, resulting in damage to the product and a
shock or fire hazard.

GEAppliances.com
[A WARNING [OVEN SAFETYINSTRUCTIONS
Stand away from the range when opening the oven
door. Hot air or steam which escapes can cause burns
to hands, face and/or eyes.
Keep the oven vent unobstructed.
Keep the oven free from grease buildup. Grease in the
oven may ignite.
Place oven racks in desired location while oven is cool.
If rack must be moved while oven is hot, do not let pot
holder contact hot heating element in oven.
When using cooking or roasting bags in the oven,
follow the manufacturer's directions.
Pull the oven rack to the stop-lock position when
loading and unloading food from the oven. This helps
prevent burns from touching hot surfaces of the door
and oven walls.
Do not leave items such as paper, cooking utensils or
food in the oven when not in use. Items stored in an
oven can ignite.
Do not use aluminum foil to line the oven bottom. Foil
may trap or reflect heat, leading to a shock or fire
hazard.
[,&WARNING
(Some models) ] SELF-CLEANING OVEN SAFETYINSTRUCTIONS
The self-cleaning feature operates the oven at temperatures high enough to burn away food soils in the oven.
Follow these instructions for safe operation.
Before operating the self-clean cycle, remove pans,
shiny metal oven racks and other utensils from the
oven. Only gray porcelain-coated oven racks may be
left in the oven. Do not use self-clean to clean other
parts, such as drip pans or bowls.
Beforeoperating the self-clean cycle,wipe grease and
food soilsfrom the oven. Excessiveamount of grease
may ignite, leadingto smokedamage to your home.
If the self-cleaning mode malfunctions, turn the oven
off and disconnect the power supply. Have it serviced
by a qualified technician.
Do not clean the door gasket. The door gasket is
essential for a good seal. Care should be taken not to
rub, damage or move the gasket.
Do not use oven cleaners. No commercial oven cleaner
or oven liner protective coating of any kind should be
used in or around any part of the oven.
WARNING ]WARMING DRAWER/LOWEROVENDRAWERSAFETY
INSTRUCTIONS(somemode sl
The purpose of the warming drawer isto hold hot
cooked foods at serving temperature. Bacteria will grow
in food while it is below 140°F. Do not put cold food
in warming drawer. Do not heat food for more than 2
hours. Failure to follow these instructions may result in
foodborne illness.
Do not leave paper products, plastics, canned food or
combustible materials in the drawer. They may ignite.
Do not touch the heating element or the interior surface
of the drawer. These surfaces may be hot enough to
cause burns.
Usecarewhenopeningthedrawer.Openthe drawera
crackand lethot airor steamescapebeforeremovingor
replacingfood.Hotairor steamthat escapescancause
burnsto hands,faceand/or eyes.
Do not use aluminum foil to line the lower drawer. The
foil will trap heat below, and upset the performance
of the oven. Foil can melt and permanently damage
the drawer bottom. Damage from improper use of
aluminum foil is not covered by the product warranty.

Using the surface units,
[ WARNING i IRE HAZARD: Never leave the range unattended with the cooktop on medium or highsettings. Keep flammable items away from the cooktop. Turn off all controls when
done cooking. Failure to follow these instructions can result in fire, serious injury or
death.
Throughout this manual, features and appearance may vary from your model.
How to Set
oF Pushthe knob in and turn in either direction to
the setting you want.
A surface ONindicator lightwill glow when any
surface unit ison
Farglass cooktop surfaces:
A HOTCOOKTOPindicator light will:
come on when the unit ishot to the touch.
At both OFF and HI the
control clicks into position.
You may hear slight clicking
sounds dur.ingcooking,
_nd_cetlngthe control is
maintainrngyour desired
setting.
Be sure you turn the control
knob to OFFwhen you finish
cooking.
stay on even after the unit isturned off.
stay on until the unit is cooledto
approximately !50°F.
Off
4
Rear
Melt setting (on some models)will melt
chocolate or butter. Simmer setting (on some
models will simmer sauces.
SMALL U_ROE
B.R.E.OFF _u..E_
6
Modelswitha Dual-Ringsurface
elementonly
Dual and Triple Surface Units
and Control Knobs (onsomemodels)
Thesurface unit has 2 or 3 cooking sizes
to selectfrom soyou can match the size
of the unit to the sizeof the cookware you are
using. LoI" LO
Models with a Tri-Ring surface
element only.

GEAppliances.com
Throughout this manual, features and appearance may vary from your model.
Models with abridge burner only.
BRIDGE
FRONT _ BUB_JER
BURNER
6 6
,XI t):
LO LO
FRONT
Using the Bridge Burner (onsomemodels)
To usethe bridge burner, turn the left-front
control knob to the BRIDGEBURNERsettings,
Forfull bridge surface unit operation, olsoturn
on the left-rear surface unit.
To useonly the front surface unit, turn
the control knob to the FRONTBURNERsettings.
! ii
Warming Zone Using the Warming Zone
iAwAR,,,Gi....
FOODPOISONHAZARD:Bucterio moy grow in
food at temperatures below 140°F.
_,Always stort with hot food. Do not useworm
setting to heat coldfood.
Donot useworm setting for more thGn
2 hours.
Failureto follow these instructions moy result in
foodborne illness.
TheWARHINGZONE,located inthe back
center ofthe gloss surface,will keep hot,cooked
food at serving temperature. Alwoysstart with
hot food. Donot useto heat coldfood. Plucing
uncooked or coldfood on the WARMINGZONE
could result in foodborne illness.
Pushand turn the control knob to ony desired
setting.
Forbest results,oilfoods on the WARHING
ZONEshould be covered with o lid or aluminum
foil. Whenworming postriesor breads,the
cover should bevented to allow moisture to
escape.
Usethe lowest setting for breads and pastries.
Useo medium setting for vegetobles, souces,
stews, cream soups,butter and chocolote. Use
the highest setting for soups (liquid)and hot
beverages.Theseinitiol suggested settings ore
for reference only.Thetemperature, type and
amount offood, type of pon,and the time held
will affect the quolity of the food.
Always use pot holders or oven mitts when
removing food from the WARMINGZONE,
since cookwore and plotes will be hot.
NOTE:The surface wormer will not glow red
likethe cooking elements.

Using the surface units,
Home Canning Tips
Be surethe canner iscentered over the surface
unit.
Hake surethe canner isflat on the bottom.
Toprevent burns from steam or heat, use
caution when canning.
Use recipesand procedures from reputable
sources.Theseare availablefrom
manufacturers such as Ball®and Kerr®and the
Department of Agriculture ExtensionService.
Flat-bottomed canners are recommended. Use
of water bath canners with rippled bottoms
may extend the time required to bring the
water to a boil.
_JeverCOOKJirect, )n me glass
AIwa_s use COOKware.
Always place the pan in the center of
the surface unit you are cooking on.
For Models With a Radiant Glass Cooktop
The radiant cooktop features heating units
beneath a smooth glass surface.
NOTE:Aslight odor isnormal when a new
cooktop isusedfor the first time. It iscaused
bythe heating of new parts and insulating
materials and will disappear in a short time.
NOTE:On models with light-colored glass
cooktops,it isnormal for the cooking zonesto
change color when hot or cooling down. This is
temporary and will disappear as the glass cools
to room temperature.
Thesurface unit will cycle on and off to
maintain your selectedcontrol setting.
It issafe to place hot cookware on the glass
surface evenwhen the cooktop iscool.
Evenafter the surface units are turned off,the
glasscooktop retains enough heat to continue
cooking.Toavoid overcooking, remove pans
from the surface units when the food iscooked.
Avoid placing anything on the surface unit until
it has cooled completely.
Do not slide cookware across the cooktop because
t canscratchtheglass-the glassisscratch-resistant,
notscratchproof.
Water stains (mineraldeposits)are
removable using the cleaning cream or full-
strength white vinegar.
Useofwindow cleaner may leavean
iridescent film on the cooktop. The cleaning
cream will remove this film.
Don'tstore heavy items abovethe cooktop. If
they drop onto the cooktop, they can cause
damage.
Donot usethe surface asa cutting board.
Temperature LimNer on Radiant Glass
Everyradiant surface unit has a temperature
limiter.
Thetemperature limiter protects the glass
cooktop from getting too hot.
Cooktops
Thetemperature limiter may cyclethe surface
units off for a time if:
the pan boils dry.
the pan bottom isnot flat.
the pan isoff-center.
there is no pan on the unit.

Selectingtypes ofcookwarefor
lass cooktop models. GEAppliances.com
The following information will help you choose cookware which will give good performance on glass cooktops.
Check pans for flat bottoms by
using a straight edge.
Stainless Steel:
recommended
Aluminum:
heaW weight recommended
Good conductivity. Aluminum residues
sometimes appear as scratches on the cooktop
but can be removed if cleaned immediately.
Becauseof its low melting point,thin weight
aluminum should not be used.
Copper Bottom:
recommended
Coppermay leave residueswhich can appear
asscratches. Theresidues can be removed, as
long as the cooktop iscleaned immediately.
However, do not let these pots boil dry.
Overheated metal can bond to glass cooktops.
An overheated copper bottom pot will leavea
residuethat will permanently stain the cooktop
if not removed immediately.
Porcelain Enamel on Cast Iron:
recommended if bottom of pan is coated
Porcelain Enamel on Steek
not recommended
Heating empty pans can cause permanent
damage to cooktop glass. The enamel can melt
and bond to the ceramic cooktop.
Glass-ceramic:
not recommended
Poor performance. Willscratch the surface.
Stoneware:
not recommended
Poor performance. May scratch the surface.
Cast Iron:
not recommended-unless designed specifically
for glass cooktops
Poor conductivity and slow to absorb heat. Will
scratch the cooktop surface.
Pans with rounded, curved,
ridged or warped bottoms are not
recommended. NOTE:Follow all cookware manufacturer's recommendations when usingany type ofcookware on
the ceramiccooktop.
ii_I • _iii_ii_iiii_!i_i_ii(i_i_i_i__:_:iii_!_/_
Do not place wet pans
on the g!ass cooktop.
Donot use woks with support
Use flat-bottomed woks
On the glass Cooktop,
For Best Results
Placeonly dry pans on the surface
elements. Do not place lids on the surface
elements, particularly wet lids.Wet pans
and lids may stick to the surface when cool.
"' Do not use woks that have support rings.
This type of wok will not heat on glass
surface elements.
We recommend that you use only a flat-
bottomed wok. They are available at your
local retail store. The bottom of the wok
should have the same diameter as the
surface element to ensure proper contact.
Some special cooking procedures require
specific cookware such as pressure
cookers or deep-fat fryers. All cookware
must have flat bottoms and be the correct
size.

Usingthe oven controls.
Throughout this manual, features and appearance may vary from your model.
I STEAM I
CLEA.I
BROIL HI/LO Pad
Touchthis pad to selectthe broilfunction. Seethe
How toSettheOvenfor Broilingsection.
BAKE Pad
Touchthis pad to selectthe bakefunction. See
the How to SettheOvenforBakingsection.
CONVECTIONCOOKor CONVECTIONBAKE
Pad
Usesa fan to circulateair in theoven.Seethe
Usingtheconvectionovensection.
CONVECTIONROASTPad
Touch to roast large tender cuts of meat.
See the Using the convection oven section.
WARM Pad
Touchto keepcookedfoods warm.
Seethe How to SettheOvenfor Warmingsection.
SLOW COOKPad
Touchfor long hoursof unattended cooking.
Seethe How to SettheOvenforSlowCook
section.
PROBEPad
Touchwhen usingthe probeto automatically
cook to a desiredinternalfood temperature.
Seethe UsingtheProbesection.
SELF CLEAN Pad
Touch to self-clean the oven.
See the Using the Self-Cleaning Oven section.
STEAM CLEANPad
Touchthis pad for easiercleaningof lightsoiling
off the ovencavity or door..Seethe Usingsteam
cleansection.
OVENLIGHT Pad
Touchto turn theoven lightson or off.
_ _ TIMERON/OFF Pads
Touchto setthe kitchentimer.
Seethe UsingtheKitchenTimersection
COOKTIME TIMEPad
Touchthis pad and then touch the number pads
to setthe amount oftime youwant your food
to cook.Theovenwill shut off when the cooking
time has run out.
DELAY START Pad
Touch this pad to set the oven to start
; automatically at a time you set.
CLOCKPad
NOTE:Whensettingtimes,you aresettinghours
and minutesonly.Thelowesttimeyou cansetis
oneminute.
Theclockmust be setto the correcttime of day
for theautomatic oventiming functions to work
properly.Thetime of daycannot be changed
during a timed bakingor self-cleaningcycle.
See Toset the clock section.
Ifyour ovenwas set for a timed oven operation
and a power outage occurred, the clockand all
programmed functions must be reset.Thetime
of dav will flash in the display when there has
beena power outage.
WARMING
DRAWER
[0_/0_ J
WARMING DRAWER pod
Thewarming drawer will keep hot, cooked
foods at serving temperature. Always start with
hot food. Seethe Usingthe warming drawer
section.
CLEAR/OFFPad
Touchto cancelALL ovenoperationsexceptthe
clockand timer.
STARTPad
Hust betouched to start any cookingor cleaning
function.
CONTROLLOCKOUTor RANGE LOCKOUT
Thecontrol pads can be locked so they cannot
be activated when touched (ControlLockout).
Somemodels have RangeLockoutwhich will
alsoturn off the surface units. Seethe How to
LockOut the Controlssection.
10

Using the clock, kitchen timer, and control lockout. GEAppliances.com
To Set the Clock
Theclock must be set to the correct time of day
for the Delay Start functions to work properly.
Thetime of day cannot be changed during
a delayed cooking or a delayed self-cleaning
cycle.
Touch the CLOCKpad.
Touch the number pads untilthe correct
time of day isshown in the display. Ifthe
number pads are not touched within one
minute after you touch the CLOCKpad,
the display revertsto the original setting. If
this happens,touch the CLOCKpad and
enter the time of day.
r_ Touch the STARTpad until the time of day
shows in the display.This enters the time
and starts the clock.
Tocheckthe time of day when the display is
showing other information, touch the CLOCK
pad.Thetime of day shows until another pad
istouched. Tochange the time format or turn
off the clock display,seethe SpecialFeatures
section.
TIMER
ON TIMER ]
OFF
TheKitchenTimer isin hours and
minutes.
TheKitchenTimerdoesnotcontroloven
operations.Themaximum settingonthe
KitchenTimeris9hoursard 59minutes.
To Set the Kitchen Timer
%
[] Touch the TIMERON pad.
Touch the number pods untilthe amount
of time you want shows in the display.For
example,to set 2 hours and 45 minutes,
touch 2, 4 and 5in that order.If you make
a mistake,touch the TIMEROFFpad and
begin again.
r_ Touch the STARTpad.
Aftertouching the STARTpod,SET
disappears;this tellsyou the time iscounting
down, although the display doesnot change
until one minute has passed.Secondswill not
be shown inthe display untilthe lust minute is
counting down.
r4] Whenthe kitchentimer reaches:00,the
control will beep 3 timesfollowed by one
beep every 6 seconds untilthe TIMEROFF
pad.
The6-second tone can be cancelled by
following the stepsin the Specialfeaturesof
your oven control section under Tonesat the
Endof oTimedCycle.
To Reset the Kitchen Timer
If the display isstill showing the time remaining,
you may change it by touching the TIMERON
pad,then touching the number pads sothat the
time you want appears in the display.
If the remaining time isnot in the display (clock,
delay start or cooking time are inthe display),
recall the remaining time by touching the
TIMERON pad and then touch the number
pads to enter the new time you want.
]To Cancel the Kitchen Timer
TIMER TIMER Touch the TIMEROFFpad.
ON OFF
How to Lock Out the Controls (on some models)
Control Lockout will allow you to lock out the
touch pads so they cannot be activated when
touched. Some models have Range Lockout
which will also turn off the surface units.
Tolock/unlock the controls:
%Touch and hold the Control Lockout or
Renge Lockout pad for 3 seconds. For
some models,you have to touch and hold
the 9and 0pads at the same time for 3
seconds. A lightwill turn on indicating the
controls are locked out.
Tounlock the control,Touch and hold the
Control Lockout or Renge Lockout pad
for 3 seconds. Forsome models,you hove
to touch and hold the 9and 0pads at the
same time for 3 seconds. Thelight will
turn off indicating the controls are
unlocked.
When this feature ison,the touch pads will not
respond except for the Cleer/Off pad.
Theadjustment will be retained in memory
after a power failure.
11

Usingthe oven.
To avoid possible burns, place the racks in the desired position before you turn on the oven.
The number of rack positions may
vary by model,
Before you begin...
Therackshavestops,sothat when placed
correctlyonthesupports,theywillstop before
comingcompletelyout andwillnottilt.
When placing and removing cookware, pull the
rack out until itstops.
On some models,the bake heating element
isunder the oven floor. Never placecooking
utensils,baking stones, foil,or any other items
on the oven floor.
Toremove a rack, pull it toward you, tilt the
front end up and pull it out.
[A CAUTION
BURNHAZARD:Avoid touching the hot door
surface when usingthe oven rack inthe lowest
position.Always use 2 hands and 2 mitten pot
holdersto move the rack.Pullthe rack out a
few inches and then carefully graspthe sidesof
the rack to pull it out the rest of the way.
Toreplace, placethe end of the rack (stop-
locks)on the support, tilt up the front and push
therack in.
Neverplace cooking utensils,bakingstones,
foil,or any other itemson the ovenfloor.
12
Front
Rail
Fully Open Position
3rasp here
£
Extension Rack
When placing and removing cookware,
always pull the rack out by its upper front
rail to its fully open position.
Do not extend the rack quickly. Food may
slide off the front of the rack.
To remove the rack:
[Z] Hake surethe rack is pushed all the way
_ntothe oven sothat side paddles on the
rack from disengagedwith oven support.
r_ Slidethe rack toward you to the bump
(stop position) on the rack support.
[] Firmlygrasp both sidesof the rack frame
and the slidingrack,tilt the front end up
and pull it out.
NOTE:When handling the extension rack, do
not allow the sliding portion to fall open. This
can damage the slides.
Toreplace the rack:
[Z] Firmlygrasp both sidesof the rack
frame and the sliding rack.
r21Placethe curved end of the rack (stop-
locks)onto the oven supports,tilt up the
front of the rack and push it in asfar as it
will go.
[A CAUTION
Never use the rack when its frame is not fully
inserted in the oven and locked into position.
When the rack isproperly installed and
locked into position,the locking sidepaddles
on the rack frame will click-lock into place
on the oven supports. If the side paddles
did not click-lock into position, repeat the
stepsabove and make surethe side paddles
have been correctly cleaned and lubricated.
SeeExtensionRackin the Careand cleaning
section.

GEAppliances.com
Aluminum Foil
Do not usealuminum foil to line oven bottoms.
Thefoil will trap heat below and upset the
performance of the oven. Foilcan melt
and permanently damage the oven bottom.
Damage from improper useof aluminum foil is
not covered by the product warranty.
Foilmay be usedto catch spills by placing a
sheet on a lower rack,several inches below
the food. Do not usemore foilthan necessary
and never entirely cover an oven rack with
aluminum foil. Keepfoil at least t-!/2" from
oven walls to prevent poor heat circulation.
EP
%-
Rackposition for baking 4 ayer
cakes.
Preheating and Pan Placement
To avoid possible burns, placethe racks
in the desired position beforeyou turn on the
oven,
Preheattheoveniftherecipecallsforit.Preheating
isnecessaryfor goodresultswhenbakingcakes,
cookies,pastriesandbreads.
tfbakingfourcakelayersatthesametime,place
two layersonrackCandtwo layerson rackE.
Staggerpansontheracksooneisnotdirectly
abovetheother.
Bakingresultswillbebetteriffoodiscenteredin
theovenasmuchaspossible.Angelfoodcakeis
theexceptionandshouldbeplacedonthebottom
ovenrack(positionA).Followpackagedirectionson
prepackagedandfrozenfoodsforpanplacement.
Pansshouldnottoucheachotherorthewallsof
theoven.tfyou needto usetwo racks,staggerthe
panssooneisnotdirectlyabovetheother.Leave
approximately1½"betweenpansandfromthe
front,backandsidesofovenwall.
How to Set the Oven for Baking or Roasting
JTI TouchtheBAKEpad.
[] Touchthenumberpadsuntilthedesired
temperatureisdisplayed.
,[_ [] TouchtheSTARTpad.
r_ Theovenwillstartautomatically.Thedisplaywill
showthechangingtemperaturestartingat IO0°F.
(Thetemperaturedisplaywillstarttochangeonce
theoventemperaturereachesIO0°F.)Whenthe
ovenreachestheselectedtemperature,theoven
controlwillbeepseveraltimesandthedisplaywill
showtheoventemperature.
NOTE:You may hear the convection fan (on
some models)while the oven ispreheating. The
fan will stop after the oven ispreheated and
the display showsyour set temperature. This is
normal.
TochangetheoventemperatureduringtheBAKE
cycle,touchtheBAKEpadandthenthenumber
padstogetthenewtemperature.
F_ Checkfoodfor donenessatthe minimumtime
ontherecipe.Cooklongerifnecessary.
[] TouchtheCLEAR/OFFpadwhenbakingis
finished,andthenremovethefoodfromthe
oven.
Roasting Guide
Beef
Pork
Lamb
Poultry
Heat Oven Temp.
Rib Roast (4to 8 Ibs.) Rare 525°F
Bone-In and Boneless Medium 525°F
Beef Tenderloin (4 to 6 Ibs.) Rare 425°F
Beef Tenderloin (2 to 3Ibs.) Rare 425°F
Bone-In, Boneless (5to 5 Ibs.) 525°F
Bone-In (5 to 9 Ibs.) Medium 525°F
Boneless (4 to 7 Ibs.) Medium 575°F
Whole Chicken (Sto 7Ibsj 5SO°F
Turkey, Whole*
Unstuffed 110to 16 Ibs.) 525°F
Unstuffed (18 to 24 Ibs.) 525°F
Turkey Breast (4 to 6 ]bs.) 525°F
*Stuffed birds generally require 30-45 minutes additional roasting time. Shield lec
prevent overbrowning and dcving of skin.
Internal Temp.
145°F
160°F
145°F
145°F
160°F
165°F
165°F
170°F
170°-180°F
170°-180°F
170°F
s and breast with foil to
13

Usingthe oven.
Leave the door open to the broil stop
position, The door stays open by
itself,yet the proper temperature is
maintained in the oven.
How to Set the Oven for Broiling
Use LOBroil to cook foods such as poultry
or thick cuts of meat thoroughly without
overbrowning them.
[] Placethe meat or fish on a broiler grid in a
broiler pan designedfor broiling.
r_ Followsuggested rack positions in the
Broiling Guide.
r_ Touch the BROILHI/LO pad once for HI
Broil.
%
r-al
To change to LO Broil, touch the
BROIL HI/LO pad again.
Touch theSTART pad.
When broilingisfinished,touchthe
CLEAR/OFF pad.
Thesize,weight,thickness,
starting temperature
and your preference
of alonenesswill affect broiling
times. Thisguide
is basedon meats at
refrigerator temperature.
t The U.S.Department of
Agriculture says "Rarebeef is
popular, but you should know that
cooking it to only 140°F means
some food poisoning organisms
may survive." (Source:Safe Food
Book. YourKitchen Guide.USDA
Rev.June 1985.)
Broiling Guide
Preheatthe broiler for2 minutes to improve performance.
Type or
Food Doneness Thickness Rack Position* Comments
Beef Rare (140°F) Steaks - Eor F (food should be 1" Steaks lessthan 1"
1" thick to S"from broil element) thick are difficult to
cook rare. They cook
Medium (160°F) Steaks - E(food should be Y' through beforebrowning
3/4" to 1" thick to 4" from broil element) To prevent curling of
meat, slash fat at 1"
Well Done (170°F) Steaks - D or E(food should be 3" intervals.
3/4" to 1" thick to 5" from broil element)
or Ground Beef Patties
Chicken Breast, boneless C(food should be 8" Broil skin-side-down
to 9" from broil element) first.
C(food should be 7"
to 8" from broil element)
Breast, bone-in
1/2" to 1" thick
3/4" thick
Fish Fillets D or E(food should be 3" Handle and turn very
to 6" from broil element) carefully.
Pork Chops Well Done (170°F) D (food should be 6" To prevent curling of
to 7" from broil element) meat, slash fat at 1"
intervals.
*For double ovens,userack position A for the smaller,2-rock-position oven.
If your range isconnected to 208 volts, rare steaks may be broiled by preheating the
broiler and positioning the oven rack one position higher.
14

Adjust the oven thermostat--Do it yourself! GEApplio,ces.com
You may find that your new oven cooks differently than the one it replaced. Use your new oven for a few weeks to
become more familiar with it. If you still think your new oven is too hot or too cold, you can adjust the thermostat
yourself.
Do not use thermometers, such as those found in grocery stores, to check the temperature setting of your oven. These
thermometers may vary 20-40 degrees.
NOTE:This adjustment will only affect baking and roasting temperatures; it will not affect broiling or self-cleaning
temperatures. The adjustment will be retained in memory after a power failure.
ITIE]E]EIE]
E]E]E]EEE]
To Adjust the Thermostat
r!] Touch the BROILHI/LO and BAKEpadsat
the same time until the display shows SF.
r_ Touch the BAKEpad. A number shows in
the display.
Double Ovens:To adjust the upper oven
thermostat, touch the upper oven BAKE
pad.Toadjust the lower oventhermostat,
touch the lower oven BAKEpad.
Touch the BAKEpad, again,to alternate
between increasing and decreasing the
oven temperature.
@Theoventemperature can be adjusted up
to (+)35°F hotter or (-)35°F cooler.Touch
the number pads the same way you read
them. Forexample,to change the oven
temperature !5°F, touch iand 5.
%Whenyou have made the adjustment,
touch the STARTpad to go back to the time
of day display.Useyour oven asyouwould
normally.
The type of margarine will affect baking performance!
Most recipes for baking have been developed using high-fat products such as butter or margarine (80% fat).
Ifyou decrease the fat, the recipe may not give the same results as with a higher-fat product.
Recipe failure can result if cakes, pies, pastries, cookies or candies are made with low-fat spreads.
The lower the fat content of a spread product, the more noticeable these differences become.
Federalstandards require products labeled "margarine" to contain at least 80% fat byweight. Low-fat spreads,on the other hand,
contain lessfat and more water. The high moisture content ofthese spreads affects the texture and flavor of baked goods. Forbest
resultswith your old favorite recipes,usemargarine, butter or stick spreads containing at least 70% vegetable oil.
15

Usinq the convection oven. ransomemode s
Convection Fan Operation
In u convection oven, o fun circulates hot air
over, under and around the food.
Thiscirculating hot air isevenly distributed
throughout the oven cavity.Asu result,foods
are evenlycooked and browned-often in less
time with convection heat.
NOTE'.On some models,the fun isdesigned
to rotate in both directions,with u pause in
between.This is normal.
Theconvection fan shuts off when the oven
door isopened. DONOTleove the door open
for long periods of time while using convection
cooking or you may shorten the lifeof the
convection heating element.
CONVECTION
Convection Cook (on some models)
Theconvection oven comes with one
convection cook mode and can be used
for Multi-RackConvectionBakingor 2-Rack
ConvectionBaking.
Multi-rack position.
Multi-Rack Convection Baking (on some models)
Because heated air is circulated evenly
throughout the oven,foods can be baked with
excellent resultsusing multiple racks.
Multi-rack baking may increase cook times
slightly for some foods but the overall result
istime saved.Cookies,muffins, biscuitsand
other quickbreods givevery good resultswith
multi-rack baking.
When baking on 3 racks,place one rack in the
second (B)position,another rack in the fourth
(D)position and the third rack inthe sixth (F)
position.
Fortwo-rack baking, placeone rack in the
second (B)rack position.Placethe other rack in
the fifth (E)rack position.
l-Rack Convection Baking (on some models)
When convection baking with only I rack,place
the food sothat it iscentered in the oven.
Broiler pan
Convection Roast (on some models)
Good for large tender cuts of meat,
uncovered.
Theconvection fan circulates the heated air
evenly over and around the food. Meat and
poultry are browned on all sidesas ifthey were
cooked on a rotisserie.The heated air sealsin
juices quicklyfor a moist and tender product
while, at the same time, creating o rich golden
brown exterior.
When you are convection roasting, itis
important that you use a broiler pan and grid
for best convection roasting results.The pan is
usedto catch grease spillsand the grid isused
to prevent greasespatters.
16

GEAppliances.com
DDDD
DDDD
CLEAR
OFF
How to Set the Oven for Convection Baking or Roasting
J-_ Touch the CONVECTIONBAKEpad (on
some models)once for !-rack convection
baking. Seethe !-Rack ConvectionBaking
section.
Touch the CONVECTIONBAKE pad
(on some models) twice for multi-rack
convection baking. Seethe Multi-Rack
ConvectionBakingsection.
Touch the CONVECTIONCOOKpad for
convection cooking (onsome models).
Seethe ConvectionCooksectionfor more
information.
Touch the CONVECTIONROASTpad for
convection roasting (on some models).
[] Touchthe number pads to set the oven
temperature.
[] Touch the STARTpad.
NOTE:Ifthe Auto Recipe_'Conversion Feature
ison, it will automatically reducethe set regular
baking temperature by approximately 25°F
to the appropriate convection temperature
in convection bake mode. SeeAuto Recipe'"
Conversionin the SpecialFeaturessection.
Tochange the oventemperature, touch the
CONVECTIONCOOK,CONVECTIONBAKEor
CONVECTIONROASTpad and then the number
pads to set the new temperature.
When the oven starts to heat,the changing
temperature, starting at !O0°F,will be displayed.
When oven reaches the temperature you set,3
beepswill sound.
[] Touch CLEAR/OFFpad when finished.
You will hear a fan while cooking with
convection.Thefan will stop when the door is
opened,but the heat will not turn off.
You may hear the oven clicking during
baking.This is normal.
When baking cookies, you will get
the best results if you use aflat
cookie sheet instead of a pan with
low sides.
Cookware for Convection Cooking
Beforeusingyour convection oven,check to see
ifyour cookware leavesroom for air circulation
in the oven. Ifyou are bakingwith severalpans,
leavespace between them. Also,be surethe
pans do not touch each other or the walls of the
oven.
Paper and Plastic
Heat-resistant paper and plastic containers that
are recommended for use in regular baking can
alsobe usedfor convection baking but should
not be usedat temperatures higher than the
temperature recommended by the cookware
manufacturer. Plasticcookware that isheat-
resistant to temperatures of 400°Fcan also be
used.
Metal and Glass
Anytype of cookware will work in your
convection oven; however, metal pans heat the
fastest and are recommended for convection
baking.
Darkened or matte-finished pans will bake
faster than shiny pans.
Glassor ceramic pans cook more slowly.
Forrecipes likeoven-baked chicken, usea pan
with low sides.Hot air cannot circulate well
around food in a pan with high sides.
17

Using the probe, consomemode sI
For many foods, especially roasts and poultry, internal food temperature is the best test for doneness. The temperature
probe takes the guesswork out of roasting by cooking foods to the exact alonenessyou want.
The temperature probe has a
skewer-like probe at one end and
a plug at the other end that goes
into the outlet in the oven.
[A CAUTION
Topreventburns,do not unplug the probe from
the ovenoutlet untilthe ovenhascooled.
Use of probes other than the one provided with
this product may result in damage to the probe
or oven control.
Usethe handles of the probe and plug when
inserting and removing them from the food and
outlet.
Toavoid damaging your probe, do not use
tongs to pull on the cablewhen removing it.
Toavoid breakingthe probe, make sure food
iscompletely defrosted before inserting.
After preparing the meat and placing it on
a trivet or a broiler pan grid, follow these
directions for proper probe placement.
Insertthe probe completely into the meat. It
should not touch bone,fat or gristle.
NOTE:Failureto fully insert the probe into the
meat may result in poor cooking performance
because the probe will sensethe oven air vs.
the food temperature.
iPlug
Readand remove label
Never leaveyour probe insidethe oven
during a self-cleaning or broil cycle.
Do not store the probe in the oven.
Forroasts with no bone, insert the probe into
the meatiest part of the roast. Forbone-in ham
or lamb, insert the probe into the center of the
lowest large muscle.
Insertthe probe into the center of dishes such
as meat loaf or casseroles,
Insertthe probe into the meatiest part of the
inner thigh from below and parallel to the leg of
a whole turkey.
NOTE:Self-cleanand Broil settings will not work
#the temperature probe isplugged in.
FqlTIlZI%IT1
rqrqlT1EZlFq
l-qrqlEl rq
FqEIITIlT1F1
How to Set the Oven For Baking/Roasting When Using the Probe
(onsome models)
ryl
r21Insertthe probe fully intothe food.
Plugthe probe into the outlet in the oven.
Hake sure it's pushed all the way in.Close
the oven door. Hake surethe probe cable
is not touching the broil element.
[] Touch the PROBEpad. Displaywill show
"SetProbe Temp."
[] Touchthe number pads to set the desired
internal food or meat temperature. The
maximum internal temperature for the
food that you can set is200°F.
J-_ Touch the STARTpad.
[] Touch the BAKEor CONVECTIONpad.
[Z] Touch the number pads to set the desired
oven temperature.
[] Touch the STARTpad.
Thedisplay will flash if the probe is inserted
into the outlet and you have not set a probe
temperature and touched the STARTpad.
After the internal temperature of the food
reaches 100°F,the changing internal
temperature will be shown in the display.
[] When the internal temperature ofthe food
reaches the number you have set,the
probe and the oven turn off and the oven
control signals.To stop the signal,touch
the CLEAR/OFFpad.Use hot pads to
remove the probe from the food. Do not
usetongs to pull on it-they might
damage it.
If the probe isremoved from the oven
while probe cooking,the oven will not
automatically turn off.
Tochange the oventemperature during
the Bake/Roastcycle,touch the BAKEor
CONVECTIONpad and then the number pads
to set the new temperature.
You can usethe Kitchen Timer eventhough
you cannot usetimed oven operations while
usingthe probe.
18

Usingthe timed baking
and roastingfeatures,conso=e=ode sl GEAppliances.com
NOTE: Foods that spoil easily-such us milk, eggs, fish, stuffings, poultry and pork-should not be allowed to sit for more
than 1hour before or offer cooking. Room temperoture promotes the growth of harmful bacteria.
Be sure that the oven light is off because heat from the bulb will speed harmful bacteria growth.
How to Set an Immediate Start and Automatic Stop
Theoven will turn on immediately and cook [] Touch the START pad.
for a selected length of time.At the end
of the cooking time the oven will turn off Theovenwillturn ON,and the displaywillshow
automatically.
[] Touch the BAKEor CONVECTIONBAKE
pad or other desired cooking function.
[] Touch the number pads to set the desired
oven temperature.
the cookingtime countdown and the changing
temperature startingat 100°F.(Thetemperature
displaywillstart to changeoncethe oven
temperature reaches100°F.)When the oven
reachesthe temperatureyou set,3 beepswill
sound.
r_ Touch the STARTpad.
r_ Touch the COOKTIME pad.
NOTE:Ifyour recipe requires preheating, you
may need to add additional time to the length of
the cooking time.
[] Touch the number pads to set the desired
length of cooking time. The minimum
cooking time you can set is I minute.
The oven temperature that you set and
the cooking time that you entered willbe
in the display.
Theovenwill continue to cook for the set
amount oftime, then turn off automatically.
r_ Touch the CLEAR/OFFpad to clear the
display ifnecessary.Removethe food from
the oven. Remember,eventhough the
oven turns off automatically, food left in
the oven will continue cooking after the
oven turns off.
DDD[]D
DDD D
DDDD[]
E]DDD[]
DDD D
E]DD[]D
How to Set a Delayed Start and Automatic Stop
Theoven will turn on at the time of day you set,
cook for a specific length of time and then turn
off automatically.
Make surethe clock showsthe correct time of
day.
[Z] Touch the DELAYSTART pad.
Touch the number pads to set the time of
day you want the oven to turn on and
start cooking.
[-_ Touch the START pad.
[] Touch the BAKEor CONVECTION BAKE
pad or other desired cooking function.
[_ Touch the number pads to set the desired
oven temperature.
[_] Touch the START pad.
[_ Touch the COOK TIME pad.
NOTE:Ifyour recipe requirespreheating, you
may need to add additional time to the length
of the cooking time.
r_] Touch the number pads to set the desired
length of cooking time. Theminimum
cooking time you can set is i minute.
Theoven temperature that you set and
the cooking time that you entered will be
in the display.
rg] Touch the STARTpad.
NOTE:Ifyou would liketo check the times
you have set,touch the DELAYSTARTpad to
check the start time you have set or touch the
COOKTIMEpad to checkthe length of cooking
time you have set.
When the oventurns ONat the time of day
you set,the displaywill show the cooking time
countdown and the changing temperature
starting at 100°F.(Thetemperature displaywill
start to change oncethe oven temperature
reaches 100°F.)When the oven reaches the
temperature you set,beepswill sound.
Theoven will continue to cook for the set
amount of time, then turn off automatically.
[] Touch the CLEAR/OFFpad to clear the
display ifnecessary.Removethe food from
the oven. Remember,eventhough the
oven turns off automatically, food left in
the oven will continue cooking after the
oven turns off.
19

Using the slow cookand warming features.
[A WARNING iOOD POISONHAZARD. Bacteria may grow in food at temperatures below !40°F.
•Always start with hot food. Do not use warm settings to heat cold food.
•Do not warm food for more than 2hours.
Failure to follow these instructions may result in foodborne illness.
@N1DDD
DPlDDN1
How to Set the Oven For Slow Cook
Slow Cook is designed for long hours of unattended
cooking.
rT] Touch the SLOW COOK pad.
[_ Displaywill show Poultry.To change to Heats,
touch the SLOWCOOKpad again. See the Stow
CookGuide below for proper setting. Use Heats
ifyou are unsure which setting to use..
I-_ Touch the number pads to setthe desired
length of cooking time. Thecooking time must
be at least 5hours, up to !! hours 59 minutes.
[-41 Touch the STARTpad.
NOTE:Ifa power outage occurswhile the oven is in
Slow Cook,the range will shut off.
Slow Cook Guide
Food
Beef
Chuck Roast
Beef Ribs
Poultry
Whole Chicken
Chicken Pieces
Pork
Boneless Blade
Roast
Country Style
Pork Ribs
Pork Chops
Soup
Vegetable Beef
Soup
Chili
Rack Food Time
Quantity Position Setting (Hours)
3-3'/2 Ibs. C Heats HI 5-6 hrs.
LO8-10 hrs.
3½-4 Ibs. C Heats HI3-4 hrs.
LO6-8 hrs.
4 Ibs.
8 pieces
(approx. 3 Ibs.)
3-4 Ibs.
3½-4 Ibs.
4-8 Ibs.
4 quarts
4 quarts
C
C
c
c
c
c
c
Poultry HI4-5 hrs.
LO 7-9 hrs.
Poultry HI3-4 hrs.
LO5-6 hrs.
Heats HI 5-6 hrs.
LO8-10 hrs.
Heats HI3-4 hrs.
LO6-8 hrs.
Heats HI3-4 hrs.
LO6-8 hrs.
Heats HI4-5 hrs.
LO8-10 hrs.
Heats HI3-4 hrs.
LO6-8 hrs.
Comments
Add 1/2 cup liquid.
Place ribs in asingle layer.
Add 1/2 cup liquid.
Best submerged under a sauce
to prevent surface drying.
Add 1/2-1 cup liquid.
Place ribs in a single layer.
Place chops in asingle layer.
Hake sure beef chunks
are submerged.
Submerge beans
to prevent surface drying.
Guideline Tips
The slow cook program uses o complex series of
temperature cycling to obtain the best results. For this
reason, it is recommended that the stow cook program
be allowed to run without cancelling or restarting.
Restarting the stow cook feature while it is in progress
may result in overcooked meat.
Farjuicy and tender meat, choose cuts of meat such
aschuck roast or abonelessblade roast. Leanercuts
of meat, such astop round,ore drier and may need
additional liquid.
Useonly glossand ceramic dishes.Metalpots and pans
tend to transfer the heat into the foodstoo quickly.
Match the quantity offood to the sizepan. Fillthe pan
about 3/4 full for best results.Toolarge apot allows the
steam to escape,causingfoods to dry out.
,Always cover the pot with o lid or aluminum foiL
A wide range of recipesmay beused in the stow cook
feature. Forbest results some adjustments may need to
be made. Forsmaller sized recipes, begin checking
at minimum time. For large recipes or when doubling
recipes, foods may be cooked for longer periods of time.
When the slow cook feature completes, the oven will
automatically switch to "warm" mode. Ifadditional stow
cook time is desired, this warm mode may be used to
obtain the extra time.
{[WAR. 1
START
How to Set the Oven For Worming
The WARM feature keeps cooked foods hot.
This feature is not designed to reheat cold food.
To use the WARM feature, touch the WARM
pad and then the START pad.
NOTE:Plasticcontainers,lidsor plastic wrap will
melt if placed in the oven.Meltedplastic may
not be removable and isnot covered underyour
warranty.
20
This manual suits for next models
6
Table of contents
Other GE Range manuals
Popular Range manuals by other brands

Whirlpool
Whirlpool RS575PXR5 installation instructions

Electrolux
Electrolux EW30ES65GWE Use & care guide

Whirlpool
Whirlpool RF362BXG Use & care guide

Maytag
Maytag MGR7665WB - Gas Range installation instructions

Midea
Midea MES30S2AST installation instructions

Electrolux
Electrolux CEW30GF6GSH Use & care guide