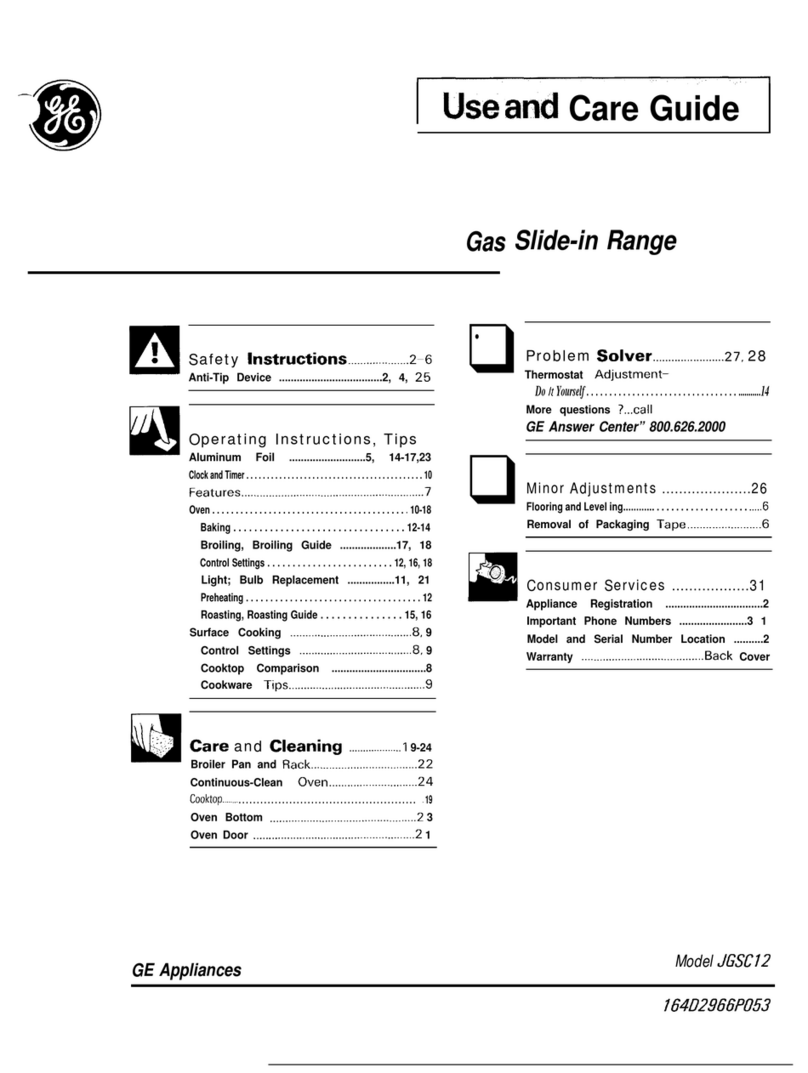
GE JMP28 User manual

UseandQre
Guide
Safety Instructions
...................3 --5
Operating Instructions, Tips
Aluminum Foil . . . 5, 14, 18, 20
Clock and Timer . . . . . . . . . . . . . . . . . . . . . . . . . . . . . . . . . . . . . . . . . 11
Features . . . . . . . . . . ............6
Oven . . . . . . . . . . . . . . . . . . . . . . . . . . . . . . . . . . . . . . . . . . . . . . . . . . . . 10-24
Baking . . . . . . . . . . . . . . . . . . . . . . . . . . . . . . . . . . . . . . . . . . . . . . . . . . 13--16
Broiling, Broiling Guide . . . . . . . . . . . . . . . . . . . 20,21
Control Panel . . . . . . 10
Control Settings . . . . . . . . . . . . . . . . . . . . . . . . . . . . . . . . 10, 11
Light; Bulb Replacement . . . . . . . . . . . . . . . . . 12, 28
Preheating . . . . 14, 19, 21
Roasting, Roasting Guide ...............18, 19
Self-Cleaning Instructions ..............22. -24
Shelves . . . . . . . . . . . . . . . . . . . . 12-14, 18, 22, 24, 27
Timed Baking . . . . . . . . 15, 15
Surface Cooking . . . . . . . . 8, 9
Control Settings . . . . . . . . . . . . . . . . . . . . . . . . . . . . . . . . . . ........8
Cooking Tips . . . . . . . .....8, 9
Cooktop
Comparison . .........7
Home Canning Tips. . . . . . . . . . . . . . . . . . . . . . . . 9
Problem Solver . . . . . . . . . . . . . . . . . . . . . .
29,30
Thermostat
Adjustment–
Do It Yourself . . . . . . . . . . . . . . . . . . . . . . . . . . . . . . . . . . . . . . . . . . .
.
17
More questions ?...call
GE Answer
Center@
800.626.2000
Care
and Cleaning . . . . . . . . . . . . . . . . . . .
25-28
Cooktop..........................................................2 5
Door Removal ...............................................2 7
Oven Shelves ................................................2 7
Consumer Services .,,..,.............3
1
Appliance Registration ..................................2
Important Phone Numbers........................3 1
Model and Serial Number Location ...........2
Removal of Packaging Tape ........................2
Warranty ........................................Back Cover
Models:
JMP28
JMP29
GE Appliances
JMP31
164D2966P715

HELP US HELP YOU...
Before using your range, read Write down the model
this guide carefully.
and serial numbers.
It is intended to help you operate
~nc{
maintain your You’ II find them on a
label
behind the range door.
new
range
properly.
These numbers are also on
the
Consumer
ProducI
Keep it handy (or
unswers
to your questions.
Ownership
Registr-atiorl
Card
th~t
came with your
If
yOLI
don’t understand something or need more help,
c211:
range.
Before sending i n this card, please write these
C,E
Answer Center”
nurnbcr~
here:
800.626.2000
24 hours
a
day, 7 days
a
week
Model Number
How to Remove Packaging Tape
Serial
Number
To assure no damage is done to the finish
of
the Use
(hesc
number-s in any correspondence or service
product,
the
safest way to remove adhesive left
fr(~rn
ca
I IS concerning
jour
- range.
p~~k~ging
tape
on
new
appliances
is
an application
Of’
a
household liquid dishwashing detergent, mineral oil
If you received a damaged range . . .
or cooking oi 1. Apply with
a
soft cloth and allow to
soak. Wipe dry and then apply
on
appliance polish to
lmrnediate[y
contact the dealer (or builder)
thtit
sold
thoroughly
clean and protect the surface. you the range.
NOTE:
The plastic tape must be removed from the
chrome trim on oven
purts.
It cannot be removed if it
Save time and money.
is
baked on.
Before you request service . . .
Check the Problem Solver in the
bfick
of this guide. It
lists causes of minor operating problems that you
can
correct yourself.
IF YOU NEED SERVICE
To obtain service, see the Consumer Services
page
in
the back of this guide.
We’re proud of our service and want you to be
pleased. If for some reason you are not happy with the
service you receive, here are three steps to follow for
further help.
FIRST, contact the people who serviced your
appliance. Explain why you are not pleased. In most
cases, this will solve the problem.
NEXT,
if you are
still not pleased. write all
the
details—including your phone number-to:
Manager, Consumer Relations GE Appliances
Appliance Park
Louisville. KY 40225
FINALLY, if your problem is
stil[
not resolved, write:
Major Appliance Consumer Action
Pane[
20 North
Wacker
Drive
Chicago,
[L
60606
2
—
.——

IMPORTANT SAFETY
mSTRUCTIONS
Read all instructions before using this appliance.
iMPORTANT SAFETY NOTICE
●
The California Safe Drinking Water and
Toxic Enforcement Act
requires the Governor
of
California to publish a list
of
substances known
to the state to cause birth defects or other
reproductive harm, and requires businesses to
warn customers of potential exposure to such
substances.
*
The fiberglass insulation in self-clean ovens
gives off a very small amount of carbon
monoxide during the cleaning cycle.
Exposure
can be minimized by venting with an open
window or using a ventilation fan or hood.
When using electrical appliances, basic safety
precautions should be followed, including the
following:
●
Use this appliance only for its intended
use as
described in this guide.
●
Be
sure
your appliance is properly installed and
grounded
by a qualified technician in accordance
with the provided installation instructions.
s
Do not attempt to repair or replace any part of
your range unless it is specifically recommended
in this guide.
All other servicing should be referred
to a qualified technician.
●
Before performing any service, DISCONNECT
THE RANGE POWER SUPPLY AT THE
HOUSEHOLD DISTRIBUTION PANEL
BY
REMO\’lNG
THE FUSE OR SWITCHING OFF
THE
CIRCUJT
BREAKER.
●
Have the installer show you the location of the
circuit breaker or fuse. Mark it for easy
reference.
*
Be sure the range is securely installed in a
counter that is firmly attached to the house
structure.
Weight on the oven door could cause the
oven to tip and result in injury. Never allow anyone
to climb, sit, stand or hang on the oven door.
●
Do not leave children
alone—children should
not be left alone or unattended in an area where an
appliance is in use. They should never be allowed
to sit or stand on any part of the appliance.
●
Do not allow anyone to climb, stand or hang on
the door or cooktop. They could damage the
range or cause severe personal injury.
●
CAUTION: ITEMS OF INTEREST TO
CHILDREN SHOULD NOT BE STORED IN
CABINETS ABOVE A RANGE OR ON THE
BACKSPLASH OF A RANGE—CHILDREN
CLIMBING ON THE RANGE TO REACH
ITEMS COULD BE SERIOUSLY INJURED.
●
Never leave the oven door open
when you are
not watching the range.
●
Always keep combustible wall coverings,
curtains or drapes a safe distance from
your range.
●
Do not store flammable materials in an oven or
near the cooktop.
●
Never wear
loose-fhting
or hanging garments
while using the appliance.
Be careful when
reaching for items stored over the range.
Flammable material could be ignited if brought in
contact with hot surface units or heating elements
and may cause severe burns.
*
●
Use only dry pot holders—moist
or damp pot holders on hot surfaces
may result
in burns from steam.
Do not let pot holders touch hot surface units
or heating elements. Do not use a towel or
other bulky cloth. Such cloths can catch fire
on a hot surface unit or heating element.
●
For your safety, never use your appliance for
warming or heating the room.
“
Always keep dish
toweh,
dish cloths, potholders
and other linens a safe distance from your range.
“
Always keep wooden and plastic utensils and
canned food a safe distance away from
your range.
●
Teach children not to play with the controls or
any other part of the range.
●
DO NOT STORE OR USE COMBUSTIBLE
MATERIALS, GASOLINE OR OTHER
FLAMMABLE VAPORS AND LIQUIDS
IN THE VICINITY OF THIS OR ANY
OrrHER
APPLIANCE.
c
Keep the hood and grease filters clean
to
maintain good venting and to avoid grease fires.
●
Do not let cooking grease or other flammable
materials accumulate in or near the range.
(continued next page)
3

IMPORTANT SAFETY INSTRUCTIONS
(continued)
&
4:
‘
,(
‘
●
Do not use water on grease fires.
Never pick up a flaming pan.
Turn
the controls off. Smother flaming pan
on surface unit by covering the pan completely
with well-fitting lid, cookie sheet or flat tray. Use
a multi-purpose dry chemical or foam-type fire
extinguisher.
Flamin&
grease outside a pan can be put out by
covering with baking soda, or, if
avajlable,
by
using a multi-purpose dry chemical or foam-type
fire
extin&uisher.
Flame in oven can be smothered completely
by closing the oven door and turning the oven off
or by using a multi-purpose dry chemical or
foam-
type fire extinguisher.
●
Do not touch the surface units, heating
elements or the interior surface of the oven.
These surfaces may be hot enough to burn even
though they are dark
jn
color. During and after
use, do not touch, or let clothing or other
flammable materials contact surface units, areas
nearby surface units or any
jnterior
area of the
oven; allow sufficient time for
coo[ing
first.
Potentially hot surfaces include the cooktop, areas
facing the cooktop, oven vent opening, surfaces
near the opening, crevices around the oven door
and metal trim parts above the door.
Remember:
The inside surface of the oven tnay
be hot when the door is opened.
●
When cooking pork,
follow the directions
exactly and always cook the meat to an internal
temperature of at least
170°F,
This assures that, in
the remote possibility that trichina may be present
in the meat, it will be killed and the meat will be
safe to eat.
Oven
●
Stand away from the range when opening the
oven door. Hot air or steam which escapes can
cause burns to hands, face antior eyes.
c
Do not heat unopened food containers.
Pressure
could build up and the container
couId
burst,
causing an injury.
●
Do not use aluminum foil to line oven bottom,
except as suggested in this guide. Improper
installation of aluminum foil may result in a risk of
electric shock or fire.
4
●
Keep the oven vent duct unobstructed.
●
Keep the oven free from grease buildup.
●
Place the oven shelf in the desired position
while the oven is cool.
If shelves must be handled
when hot, do not let pot holder contact heating
elements in the oven.
●
Pulling out the shelf to the shelf stop is a
convenience in lifting heavy foods.
It is also a
precaution against burns from touching hot
surfaces of the door or oven walls.
●
When using cooking or roasting bags in the
oven, follow
the manufacturer’s directions.
●
Do not use your oven to dry newspapers.
If overheated, they can catch fire.
●
Do not use oven for a storage area.
Items stored in an oven can ignite.
Q
Do not leave paper products, cooking utensils,
or food in the oven when not in use.
●
After broiling, always take the broiler pan out
of the range and clean it.
Leftover grease in the
broiler pan can catch fire next time you use the pan.
●
Never leave jars or cans of fat drippings on or
near your range.
●
Never leave the oven door open when you are
not watching the range.
Self-Cleaning Oven
●
Do not clean the oven door gasket.
The door
gasket is
essential
for a good seal. Care should
be
taken not to rub, damage or move the gasket.
●
Do not use oven cleaners. No
commercial oven
cleaner or oven liner protective coating of any
kind should be used in or around any part of the
oven. Residue from oven cleaners will damage the
inside of the oven when the self-clean cycle is used.
“
Clean
ordy
parts listed in this Use
and Care Guide.
●
Before self-cleaning the oven, remove the
broiler pan and other cookware.
●
Be sure to wipe up excess spillage before
sbrting
the self-cleaning operation.
●
If the self-cleaning mode malfunctions,
press
the
CLEAWOFF
pad and disconnect the power
supply. Have serviced by a qualified technician.
.
.

lurface
Cooking Units
>
i$p>~~;i
.
~lSC
proper
pan size—Select
ir-
cookware
havin&
flat bottoms large
enough to cover the surface unit
heating element. The usc of undersized cookware
will expose a portion of the surface unit to direct
contact and may result in ignition of clothing.
Proper relationship of the cookware to the
suflace
unit will also improve efficiency.
* Never leave the surface units unattended at
high heat settings.
Boilovers
cause smoking and
greasy spillovers that may catch on fire.
*
Be sure the drip pans and vent are not covered
and are in place.
Their absence during cooking
could damage range parts and wiring.
e
Do not use aluminum foil to line drip pans or
anywhere
in the oven except as described in this
guide. Misuse could result in a shock, fire hazard
or damage to the range.
●
Only certain types of glass,
glassjceramic,
earthenware or other glazed containers are
suitable for cooktop cooking;
others may break
because of the sudden change in temperature.
Q
‘1o
minimize the possibility of burns,
ignition of
tlammable
materials and spillage,
the handle
of
a
container should be turned
toward the center of the range without extending
over nearby surface units.
*
INever
clean cooktop surface when it is hot.
Some
cleaners
produce noxious fumes and
wet cloths could cause steam burns if used on
a hot surface.
.
~
~WJayS
turn
the
surface unit controls to off
before removing the cookware.
a
Keep an eye on foods being fried at high or
medium high heat settings.
*
To avoid the possibility of a burn or electric
shock,
always be certain
thtit
the controls for all
surface units are at the off position and
all
coils
are cool before attempting to lift or remove a unit.
●
Do not immerse or soak the removable surface
units. Do not put them in a dishwasher. Do not
self-clean the surface units in the oven.
●
When flaming foods are under the hood, turn
the fan off. The fan, if operating, may spread
the flame.
●
Foods for frying should be as dry as possible.
Frost on frozen foods or moisture on fresh foods
can cause hot fat to bubble up and over the sides
of the pan.
●
Use little fat for effective shallow or deep-fat
frying.
Filling the pan too full of fat can cause
spillovers when food is added.
“
If a combination of oils or fats will be used
in frying,
stir together before heating, or as fats
melt slowly.
●
Always heat fat slowly,
and watch as it heats.
o
~Tse
a
deep
fat
thermometer
whenever
possible
to prevent overheating fat beyond the
smoking point.
●
Never try to move a pan of hot fat, especially a
deep fat fryer.
W’ait
until the fat is cool.
SAVE THESE
INSTRUCTIONS
5
—

FEATURES OF YOUR RANGE
w
UI
N
Ill
Explained
Feature Index on page
I Bake Element
May be lifted gently
28
for
wiping oven
tloor.
1
2
Model and Serial
2
Numbers Location
I
3
Broil Element
28
4 Oven Vent
4
5 Surface Unit Controls
8,25
6
Surface Unit “ON” Indicator Light
8
7 Lift-Up
Cooktop
Support rods hold
25
it up to simplify cleaning underneath.
8 Plug-In Surface Units
26
9 Drip Pans
26
10
Oven Light Switch
12
Lets you turn the oven
light on
and
off.
“-
Models:
Feature Index
1
[ Oven Controls
Oven Thermostat
Clock
Timed Baking
Timer
12
Oven Interior Light
13 Oven Shelf Supports
Shelf positions
for
cooking
are
sug&ested
in the Baking, Roasting
and Broiling sections.
14
Oven Shelves with Stop-Locks
15
Removable Oven Door with
Broil Stop Position
Easily removed for cleaning.
16
Oven Door Gasket
17 Broiler Pan and Rack
Do not clean in Self-Clean oven.
JMP28
JMP29
JMP31
Explained
on page
I (). 1 I , I 7
17
II
15,
16
11
I 2.28
12-14, 18,
22,24,
27
27
4, 22, 27
4, 18,
20,26
6

HOW DOES THIS COOKTOP COMPARE
TO YOUR OLD ONE?
four new
cooktop has electric coil surface units.
The best
types of cookware to use, plus heat-up and
If
you are used to cooking
with
gas burners or other cool-down
tilnes,
depend upon the type of burner or
types of electric
cooklops.
you will notice some surlace unit you have.
differences when you
use
electric coils.
-,
,.
,,
-,. . . .. .,1, ,.-1 — . . . . .
._.I--,,.
--,J
.Ln
I
ne
]“01
low
In&
~ndr[
Wll! [l~lp
YOU
LU
UIIUCI
hLdllU
Ll LG
differences between electric coil surface units and any
olher
type of cooktop you may have used in the past.
Type of Cooktop
Electric Coil
@
,-=
~,
\
\..,=,.
~
Radiant
~(rlass
Ceramic)
Cooktop
o
Solid Disk
o
, -.,
“!
\
““
\
. .
(;as
Burners
Description
Fla[tened metal
tubing containing
eleclric
resistance
wire suspended
o~er a
drip
pan.
Electric coils
under
a
glass-
ceramic cook~op.
High frequency
induclion
coi
Is
under a glass
surface.
Sol id cast iron
disk sealed [o the
cooktop surface.
Regular or sealed
gas burners usc
eitbel- LP gas
How It Works
Heats by direct contact with
Lhe
pan and by heating the air under tbe pan. For best
cooking results, usc good quality pans. Electric coils are more forgiving of
warped pans than radiant or solid disks. Heats up quickly but does not change
hea[ settings as quickly as gas or induction. Electric coils stay hot enough to
continue cooking for a short time after they are turned off.
Heat travels
LO
the
&lass
surface and tben to the cookware, so pans must be flat on
tbc bottom for good cooking results. The glass cooktop stays hot enough to
continue cooking after it is turned off. Remove the pan from the surface unit
if
you want cooking to stop.
Pans must be made of ferrous metals (metal that attracts
a
magnet). Heat is
produced by
~
rnagnctic circuit between the coil and tbe pan. Heats up right away
and changes heat settings
rigbt
away, like a gas cooktop. After turning the control
off. the glass
cooktop
is hot
froln
the heat of the pan, but cooking stops
righ[
away.
Heats by direct con[ac[ with the pan. so pans must be
flat
on the bottom for &ood
cooking results. Heats up and cools down more slowly than electric coils. Tbe
disk stays hot enough
10
continue cooking after it is turned off. Remove the pan
from tbe solid disk if you want the cooking to stop.
Flames heal the pans directly. Pan flatness is not critical to cooking results, but
pans should be well balanced. Gas burners heat the pan right away and change
hca~
settings
rigbt
away. When you turn the control off, cooking stops right away.
I
or natural gas
7

SU~ACE
COOKING
Your
SL1l-filCe
units
tind
controls
are designed to When
ct~okirlg
in
a
quiet
kitchen, you may
hear
slight
give you an infinite choice
of
heat settings for surface
“c
I
ick
i rig.’ SOLI rids—an indication that the heat settings
unit cooking. At both OFF
and
HI the
control
“click s.. you
selected
are
being
maintained
into position.
Switching to higher heat settings
alwtiys
resulls
in a
quickel heat change than switching to
Iowt’r
settings.
How to Set the Controls
pLlsh
the knob in and turn in either direction to the heat setting
yOLI
want.
F
+
Be sure you turn the control to OFF when you finish cooking. The
surface unit indicator light will glow when ANY heat on any
surl’acc
1’
unit is on.
4
Cooking Guide for Using Heat Settings
Hi—Used to begin cooking or to bring water to
a
boil.
Reduce heat setting after water boils.
<,,
MEDIUM
HIGH—(Setting
halfway between HI and
3
0
>0
.,,
+
MED) Maintains
a
fast boil on
lar&e
amounts of food.
;.
‘>
$:
~,
,7
MED-Saute
and brown; keeps food
at
a
medium
~,
;,
boil or simmer.
—;
~
~
~
—
MEDIUM
LOW—(Setting
halfway between MED
:
i
:,”
and LO) Cook after starting at HI; cooks with little
/
Medium
~
water in covered pan.
;ED
)%
Medium
Low
LO—Used for long slow cooking (simmering) to High
tenderize and develop tlavors, Use this setting to melt
butter and chocolate or to keep foods warm.
NOTE: The surface indicator
light
may glow
between LO
and
OFF, but there is no power to
the surface units.
COO~NG
TIPS
Cookware
Use medium- or heavy-weight cookware. Aluminum
cookware conducts heat faster than other metals.
Cast-iron and
coaled
cast-iron cookware are slow to
absorb heat, but generally cook evenly at low to
medium heat settings. Steel pans may cook unevenly
if
not combined with other metals.
For best cooking results pans should be jlat on the
bottom. Match the size of the saucepan to the size of
the surface unit.
The
pan should not extend over the
edge of the surface unit more than 1 inch.
Right
Wrong
Not over 1 inch
Over 1 inch

)eep
Fat Frying
D(>
not
t~verfill
c(>okw~ire
with
i’zlt
[hot
nlay
spill
over
when
tidding
food.”
Frc~sty
foc)ds
bubble
vigorously.
W;llch
l’o(~d
trying
:it
high
tetnpcratures.
Keep
rtingc
and
ll(~od
clean
f’r(~ln
~reas~
Do not use woks that have
support rings.
Use
c>l’
these
types
of
woks, with or
W’ith(lut
the ring in
pt:lce,
c~~n
be
d:inger-t~us.
Pl:lc
i
ng
*
the
ring
over
the
surf:lce
u n i t w i
t
t
cause
a
bu i
td-up
oi’
he:~t
that
w’i
]
I
d;lrn:lgc
the
por’celtiin
c~)oktop.
Dc>
not
try
to
use such
woks
w
ittlou(
the r-in:.
You
c(~ulcl
be
seriousty
burned i
1-
the
wok
tipped
o}cr.
HOME CANNING TIPS
(;anning
should
be
done on
surt’ace
units only. HOWEVER. DO NOT
[USE
LARGE
DtAMETER
“(J(s
(11:1[
extend
beyt)nct
I i
ncb
(J1’
surfticc
units CANNERS OR OTHER LARGE DIAMETER
.i
p
p:~n
ilre
not
reconlrllendc’~i
f(>r
ln(lst
suri’:lcc
POTS FOR FRYING OR BOILING FOODS OTHER
ci){lk
i n g.
tl(~wc\er,
when
c~ln
n i
n:
w i
(
h wzltcl--b:ltll t)r
TtHAN
WATER.
M(Js1
syrup or
s:iuce
nlix[\lres-
prcssurc
cilnner,
tlirgcr-ctillrllelcr’
pots
nl:l)
be lrscci. tlnct
:It
t
I}
pes
c)i’
I-ry i
ng-c(~t>k
a~
tcrnpcratures
nluch
Thi\
is hcc:ILIsc
bc~it
in:
Wlltcr
ternpet”:lt
L1l-es
(e\;cn
higher
lll~irl
bc~iting
w:ltcr.
Such
te]npeli~tures
could
unc]cr’
pr”cssut”c)
:u’c
n(~l
h~ll”!lltu
I
tt)
c(~ok[~)p
suri’:lccs
e\’cnt
Lr21t
]y
h~]rnl
ttlc
cooklop
suri’:lces
sLlrrC>ll
ndi
rl:
surround i ng the suri’:lcc unit.
the
su
rl’:lcc
un
ils.
observe the Following Points in Canning
IJlat-hottomed
canners
arc
recommended.
9

FEATURES OF YOUR OVEN CONTROL
1.
CLEAWOFF.
Press this pad to
c;]nccl
all oven
t)pcra~ions
except clock and
li
rner.
2. DISPLAY. Shows the operation you
h:tke
selected, the time of
d~y
and
the cooking or
clean
ing
status.
3.
[NCREASE.
ShO1.t
[zips
to this pad
incre:]se
4.
j.
6.
7.
time or temperature by
sm:ll
I amounts. Press
:ind
hold
p:ld
to i
ncre~~se
Ii
me or
temperotu
re by
ldl”ger
anloLlnts.
Dk;CREASE.
Short
t;]ps
L()
lhis
p:id
dccreiise
lime
or
temperiltllre
by
snl~iil
dmounls.
Prcs3
~lnd
hold
p~ld
to
decreilse
tin]e
or
trmper:]ture
b}
!:ll’gel’
illlloLill[S.
BAKE. Press
[his
p:ld
10
sclec[
!he
h~ike
!’unction
II ROJL.
Pre\s
Ihis
p:ld
10
selecl
[he
broil
~’unclion.
,4u’ro
Sh;I.E’
CLEAN.
Press
this
p:ld
to
select
t!le
seli’-clei]ll
i
ng
furlcti(~r~. See
Lhe
Opcr:]ti
ng the
Self-(-”lc;lr]ing
O\crl
seclion.
8. COOK TIME. Press this pad for Timed
B:lkc
opcr~tions.
9. STOP TIME.
Use
this
ptid
along
with COOK
TIME or-
A(JTO
SELF CLEAN
p:~d
to set
[he
oven to start
:Iutomilticillly
at
a
t{rne
you select.
10. CLOCK. To
set
the clock. first
nress
the CLOCK
p:~d.
Then press
the-
INCREASE’ or IIECREASE
pad
to
ch~lngc
the
tirnc
ol’
d:]y.
Press
the CLOCK
p:ld
to
stllrt.
11.
TIMER ON/OFF.
Press
this
pild
to select the
ti
met
I’unction.
The
[i
nler
dt~es
not
con[rc)l
oie[r
Ope[-21t
ions.
‘rhe
1
i
Iller-
c’:lrl
time
[I
p
10
C,
hou
I’S
:ind
55
mirlu[es.
T()
set
the
tirncr.
first press
the
TI
hlER
ON/OFF
i)ild.
T’hcn
\31CSS
the INCREASE 01 DECREASI
pLId
to
change
lhc
time.
To
ci~nccl
the
[imer.
press
:ind
Ilotd
the TIMER
ON/OFF
p:id
while
‘TIMER’.
is
displ~lycd.
Jf “k’-and
a
nulnher”
flush on the
display
and
the
o~en
control signals, this indicates
functi{~n
error code. Put the
o\erl
bilck
into
opcr:ltio]~.
Press the
C1.EAR/OFF
p~ld.
At low
~hc
L~\en
((~
coot
l’or
t hour.
If
(he
funcliorl
er”ror
code
I’cpeti(s.
disconnec[
power to the
r~]r):e
und
ctilt
t’or
ser\icc.
10
—
———
—.
—-—

OVEN CONTROL, CLOCK AND
T~ER
Clock To Set the Clock
The
clock
must
be
set to
the
correct
tin]e
(~1”
da!)
for
D
1. Press the CLOCK pad.
{he
autoillatic
o~en
timing
i’unctions
to work properly.
The
tilnc
0[’
day cannot
be
chan:cd during
a
Timed
CLOCK
Baki
n:
or
Sel
l’-C’lear]ing
c>cle.
A
2. Press the INCREASE or 1> ECREASE pad to set
the
time
of
day.
3.
Press
the CLOCK pad to start.
Timer To Set the Timer
‘T”’ilc
timer
does
not
control
o\crl
D
1. Press tile The timer will
sturt
automatically
(
)pcrat
ions.
Tbc
maximum sel
li
n:
TIMER
TIMER (“) N/OFF pad. with
i
n a f’ew seconds
of
releasi
n:
i)ll
the
t i
me
r is
‘)
tlolll-s
a[ld
55
@N/oFF
the pad. The timer. as you are
i
1]
i
nutes.
A
setti
n:
it, wilt
display
seconds
unl
i I
one
minute
is reached. Then it
uit
I
2.
Prcs\
the I NC
R13AS
E or display’
lninutes
and seconds until
[JE.C’REASE
paci
to
sel
~h~
60
minules
is
reached.
amou
n~
01’ t i
Inc on the t i mer.
After
(j(j
minutes, it
witt
displa)
hours
(.’HR’.
now
appci~rs
in
display) and
minules
untit
the
mtix
i mum time of
9
hours
and
ss minutes is reached.
To Reset Timer To Cancel Timer
Ii’
“TINIF;R”
is displayed, press the
INCREASE
01” Press and bold
tllc
TIMER
ON/OFI;
pad
un[il
the
DECREASE pad until the desired
tilne
is
reached. word
“TI
IMER’.
disappears from the
di~play.
If
“TIhlFIR”
is not displayed,
press
the TIMER
ON/OFF pad
I’irst,
then
l’otlow
the
i])structi(~ns
abo\c
(o
set the timer.
End of Cycle Tones Display Messages
The
end
ol’
cycle
tone is
tbrec
short beeps
foltowed
by
“
lf
“clean’> appears in the display,
DOOR tlasbes
I beep that repeats elcry six
secc~nds
until
}OLI
pre~s
and the oien cent
r(~l
signals, you set the
sett’-clean
:Iny’
opertit
ion:
11’
yOLI wou Id
I
i kc
to
eliminate
(h>
cycle
and did not shut
t~le
door.
repcatin:
beeps, press and
h(~td
the CL, EAR/OFF pad
● If “1.OC K“
only’
appears in the display, the
l’or
I () seconds.
()~cn
door is in
[he
locked position. BAKE,
BROI
T()
re[urn
the
cnd
01’
cyctc
tone to the
repeating
beeps.
and COO K TIME
cannot
bc set if’ the
door
is in the
press and hold the
CLEAR1OFF
pad
I’or
I
()
seconds locked position.
—
Power
Otltage
A1’~cr
a power outage. when
poucl-
is restored the The
disptay
ilashes
until the clock is reset. All other
iisplay
wi II flash and
tilnc
sht~url
mill
no
l~>rlger
hr
t’unctions
that
wet-e
in
operfition
when the power went
.Ort”cct--t’ol”
Cxal)lptc.
al’(cr
a
5-llli
llUtC
pow’cl”
C)U1
w
i
!
I
tlaye
to
bc program riled again.
interrupt ion
(Ilc
c’!oc’k
W’i
It
bc
5
minutes
slow.
11

USING YOUR OVEN
Before Using l’our Oven
1. Look
at
the controls. Be sure
yOLI
understfind
how to set them properly.
2. Check the oven interior. Look
at
the
sheli”es.
Take
a
practice run at
removin&
and
replacing
them
properly to give sure, sturdy
support.
3.
Read over the information
tind
tips
that
follow.
4. Keep this guide
hundy
so you can refer to it, especially
during the first weeks Of
using
YOUI”
new ran~e
NOTE:
.
YoLl
Illfiy
notice
a
“burning” or
“oily”
sl~lell the
first few times you turn your oven on. This is
normal in
a
new oven
~nd
will disappear in
a
short
time. To speed
the
process,set a
self-cle~n
cycle
for
a minimum of
3
hours. See the
Operaling
the
Se!
f-
Cleaning Oven section.
● On some models, a fan
mtiy
automalical
Iy
lurn
on to
~oOI
internal parts. This is normal.
~nd
the fan
[ll:IY
continue to run even
~fter
the oven is turned
oft.
Oven Shelves
The shelves are designed with stop-locks so that
when placed correctly on the shelf
sopports,
the~
will stop before coming completely out from the
oven, and will not tilt when removing food from or
placing food on them.
When placing cookware on a shelf,
pLIll
the
shelf out
to the bump on the shelf support. Place the
cookwfire
on the she]
f,
then
S
1 ide the shelf back into the oven.
This will eliminate reaching into the hot oven.
To remove a shelf from
the oven,
PUII
Lhe
shelf
toward you, tilt the front
end Lrpward and
pLrll
the
shelf out.
To replace,
place
the
shelf
on the shelf
support with the
stop-
Iocks
(curved extension
under the shelf) facing
up toward the rear of the
o~en.
Tilt up the I’rent and
push the shelf toward the back of
tt,e
oven until
it
(7c~es
past the bump on the shelf
sup}~ort.
Then
Iowel’
~he
front
of
the shelf and push it all the way hack.
Shelf
Positions
The
o~en
has
4
shelf
supper’ls identified in this
i II
ustra(i{)n
a~
A (bottom), B. C
aild
D
(t~>p).
1~~~1
Shelt positions for cooking are suggested in
the
\
~::~>~~:ti]
Baking. Roasting and Broiling sections.
\
\
..... ’’y,~<>,
>.
—
Oven Light
Llsc
[be
switch on
lhe
ptincl to turn the
light
on and
(){t’.
12
—————

BAKING
/(~ur
(lkcn
tetnpcrdture
is c(~ntrol
led
kcry
:Iccu
ra[cly
LI
si
n:
:ln
(~tcrl
corrtr(l!
sys[enl,
We
].econlrnend
th~lt you (lpet”tlte I he rilngc
for
LI
llUlllhCi’
of
we~~s
Llsing
the
ti
Ine
given
on
recipes
as agLlide to
becolne
}anliliar
with
y(>[lr
new
c>\en’s
pcri’(~rnl~nce.
It’
yoLI
think
:)n
:ldjustnlcnt
is necessary. scc the Adjust
the
Over)
Tclnperi~ture
sccti~~n.
It lists easy
f)f)
It
Y~~ll}-.\[J/j”i
nstrLlctions.
NOTE: When
[he
t>vcn
is
hc~t,
the top
~ind
t)utside
surldccs
of the
rt~nge
get
hot
too.”
How to Set Your Range for Baking
‘Ki)
avoid possible burns,
pt:lcc
the shelves in
the
~.(>rrect
p~~si
[
ion
bet’(~r”c
yt)u
ILI
rn the
OVCI1
011.
~
BAKE
I
J
1–
A
4
2. Press
[hc
INCREASE
or
[> E(;REASE
pild.
I“hc
t~lst
tJ\ell
tcnlpcr:lture
Llsed
i/Q
\
:Ippc211’s
i n tbc
displ:lj.
(;i)n[inuc
v’
pressing
unlil
the desired
Lenlpcl-:ltu!”c
@
is d
ispl~lycd.
The
w~>rd
“ON’.
:Ind
“
I ()()0” wi
tt
be
displtiyed.
As the
t~~crl
hc;l[s
up,
[hc
di
spta)j
wil 1 sh(>w the
ch:ulgi
n:
[enlperiltur-c.
When t hc
t>\cn
re;lches
the temperature
}ou
set.
:1
lone
\vi
I t
sound.
o
3.
Pr~>s\
the
CLEAR1OFF
pad
when
bilking
CLEAR
is finished
t~rld
then
rcrnove
the
food
OFF
t’r-t)nl
the
(~verl.
NOTE;:
A
f~r~
In:])
~]lrrorll~]tic:ltly)
turn
on
to
cool”
in[ern~ll
pilrts.
Tbis is
rlorrndt,
~~ntt
the
l’i~n
rn~ly
continue
to
run even
:lfter
the
t)ven
is turned
ot’t’.
To change the oven temperature during the
BAKE cycle, press the BAKE
pod
tind
then the
t
NC
REASE
or
DECREASE
p:id
to
get the new
tenlpcr~ltur-e.
—
Oven Shelves
,Arr:lnyc
t be
t)\crl
shcl
1’
or
shc
I
vcs
i n
[hc
desired
loc~tions”
w h i
Ic
tbc
()\crl
is
coot”.
The
correct
stlcli’
position”
depends
on
tbt>
kind
1)1’
food”
:]nd
the
brown
ing
dcsi
red.
i\s
:1
gcrlcr’~11
ru Ic.
~)l;lcc
most
l’()~.)ds
i n
.
the
rniddlc
01”
tthe
()\crl,
~~n
either
shctf
p~)\i[
ions
[~
or”
(;.
See
the
ch:lrt
t’or”
su~gestcd
shett
ptlsitiorls
((’()/1/;/11/(,(/
//(.\/
/)(/:()
13
—..———————
—-
—

BAKING
(conti
nLled)
Preheating
Preheating is necessary for good results when baking
cakes,
c[>okies,
pastry and breads. For most casseroles
and
rotists,
preheating is not necessary. For ovens
wilhout
a
preheat indicator I
ight
or tone, preheat
10
minutes. After the oven
is
preheated,
place
the
food in the oven as quickly as possible to prevent heat
Preheat the oven
if
the recipe calls for
it.
Prehcal
means bringing the oven up to the
specified
tenlpcrature before putting the food in
the
oven.
To
preheat,
set
the
oven at the correct
tenlper;~ture—scle~tl
ng
a higher
tenlperatLlre
does
nf~t
shorten preheat time.
from
escaping.
Baking Pans
Use
[he
proper baking pan. The type
of
finish on the
pan
delerl~lirlcs
the
an~~~unt
of browning
lhat
will
(>ccllr-.
“
Dark, rough or
dLI
1 I pans absorb heat resulting i n
a
br-owner,
crisper
crusl.
Use this type for pies.
●
.Sh
i ny, bright and smooth pans reflect heat, resulting
in
a
I
ighter,
rnor-e
clel
icate
browning. Cakes
and
cookies
require this type
of
pan.
. Glass
bilking
dishes also absorb heat. When baking i n
~]ass
baking
dishes,
lower the temperature
b>’
~5’3
F.
● I f you are using dark non-stick pans, you may
find
lh~t
you need to reduce the oven temperature
25C’F.
to pr-event
t~verbrowning.
Pan Placement
For
eten
cooking
~nd
proper browning, there
l~lLI~t
be
cnou
gh
room for air ci
rcu
Iation
in the
o~cn.
Bak
i
n:
results wi II be better
-
if baking pans are
ccnlered
as
Illuch
as possible rather than being
p]:l~ed
tO
I he
fr-(~rll
or to the back of the
o\en.
Pans
should
not touch
e:~ch
other or the walls
of
[he
o\en. Allow I to 1
Y?
inch space
belween
pans as well
as
from the back of the oven. the door and the sides.
If you need to use two shelves
, stagger
the
pans
so
that one is not directly
abo\e
the other-.
Baking Guides
When
using
prepared baking mixes,
follow
package recipe or
instrucliofls
for the best baking results.
Cookies
wben
baking
c(~~)kies.
flat
cookie
sheets
(\~itllout
sides
]lrodLiCC
t>etter-
I(loking
cookies.
IL)(lkies
baked in
~
.j~l]y
rol
I pan (short
sides all
:Ir-ou
nd
)
ma!
ha\e
darker
cdge~
and
~>a!c
or I i
ght
Aluminum Foil
~~v~r
entirely
cover
a
she!
f
with
al
11
In
i nu m foi
].
Th
Is
\vi
I I
dis[urh
the hedt
cir”cula[lon
anLl
rc\ul\
111
1>001-
hak
i n g.
A
sr)):r]
Ier shdcl
01”
t’oi
I
ITla>
bc
Lrsed
to
ca[ch
~al
Is or the door
of
the oven. Never entirely cover a
sbel
f with a cookie sheet.
For best
r-esults,
use
(~nly
one
cookie
sheet in the
o\;erl
at a
(i
me.
browning may occur
r~(~
not use a cookie sheet so large
thal
it
tOU~hes
the bclo\v
the
t’()()d.
14
—-—
————

>i~s Cakes
For
best results, bake pies in dark, rough or dull pans When baking cakes, warped or bent pans will cause
to produce
a
browner. crisper crust. Frozen pies in foil
uneven baking results and
poorly
shaped
pr~du~ts.
pans
sh(~uld
be placed on an
tiluminum
cookie sheet
A cake
buked
in
a
pan larger than
the
recipe
f(~r
baking
\ince
the shiny i-oil
pun
reflects
heat
away
recommends will
usually’
be crisper, thinner and drier
from the
pic
crus[:
the cookie sheet helps retain it.
than
i[
should be. If baked in a pan smaller than
recommended, it may be undercooked and batter may
[~vertlow.
Check the recipe to make sure the pan size
used is the one recommended.
Don’t Peek
Set
I he timer
tor
[hc
eslimated
cooking time and
do
DO NOT open the door to check until the minimum
not open the door
10
look
at
your food. Most recipes time. Opening the oven door frequently during cooking
pro\idc
minirnunl
and maximum baking times such as allows
hea[
to escape and makes baking times
l~~nger.
‘bake
3(]-40
minutes.”
Y’our
baking results may also be affected.
TIMED BAKING
The
()\;cn control
ollows
yOLI to turn the
o~’en
on or off
NOTE:
Before beginning,
mtike
sure the oven clock
auloma[ical
]y
at
spec
if.ic
limes I hat y
OLI
set. Ex amp
Ies
shows the correct
[irne
of day.
of
1
mrncdiale
Starl
(o\erl
turns on now
and
you set
i(
to To set the clock,
first
press the CLOCK pad. Press
lrn
ot’f
au[omalical
ly
)
and Delay
Start
and
S[op
(
sctti
n:
the INCREASE or DECREASE pad until correct time
,he
c)t’erl
10
turn on automat
ical
t)
al
a later time and
of day is displayed. Press the CLOCK pad to start.
lar-n
off
at
a
preset Stop Time)
wil
I bc described later.
How to Set Immediate Start and Automatic Stop
l-o
avoid possible burns, place the shel\es in
Lhc
cf~rrect
p~)si
Lion
before
yt~u
turn t
hc
oven
on.
I“hc
(lvcn
w’itt
tLll”n
on immediately and cook for a
sclectcd
tength
of’ time. At
(I1c
end
of
Cook
Time.
the
(~\cn
wit I
tLlrn
off aL::.:jrnalicat
t~.
1.
l’rcss
the (TOOK TIME pad.
NOTE;:
tf your recipe
rcquir-es
preheating. you
lnaj
c
need to
ad~
additioilat
ti~ne
10
the
tcngth
of the
Cook Time.
2.
Press
the t NC REASE pad unlit the desired
tcng[h
of baking time appear’s in the display.
The
o\en will start automatically. The word “ON”
:Ind
.’
t
()()0”
wi
It
be
dispttiyed.
The Cook Time
wit
t
begin
10
c(~unt
down. As the oven
heats
up. the display
wit t show the
chtinging
temperature. When the
o\en
reaches
[he
temperature you set.
~
tone will sound.
The oven
witl
continue to cook for the programmed
anlo[lnt
01 time. then shut off
autornaticai
ly.
n.
Press
~he
CLE.
A R/OFF pad to
ctear
the
dispt
a)
i f
necessary.
Renlo\e
the
tk~od
trorn
the
o\erl.
Relnernber.
e\cn
though
the oven
sbuls
ofl
autornaticat
Iy, foods
cent inue cooking after the
controts
are off.
NOTF:!
3.
Press the BAKE pad. . .
.,
.
—.
●
Foods
Lhat
spoil
easi
ty, such as milk, eggs, fish,
4.
PICSS
the iNCREASE or DECREASE pad
untit
the
stul’fi
rigs, pout try
and
pork, should not be at towed to
desired temperature is
disptayed.
An
attention
tone
wit
t sound if step
3
is
not done. sit for
-
more
th~n
one hour before or after
cookin&.
Room temperature promotes the growth of harmful
The words ‘TIME
BAKE’.
aITd
COOK
TIN4E’ bacteria. Be sure that the oven light is 011 because heat
wil I
be
displayed
atong
with the oven temperature from the
butb
wit]
speed harmful bacteria growth.
that you set and the Cook Time that yOLI entered. ● A fan ma!)
autorrralicalty
turn on and off to cool
internal
parts.
This
is
normal. and the fan may
continue to run after the oven
is
turned off.
(i(~illitlltc(l
t)c,.ri
I?(i,yo
15

—
TIMED BAKING
(continued)
How to Set Delay Start and Automatic Stop
Quick Reminder:
1.
Press the COOK TIME pad.
2. Press the
INCREASEIDECREASE
pad to
set
the length
of
baking time.
3. Press the STOP TIME pad.
4. Press the INCREASE/DECREASE pad until
the desired Stop Time
appetirs
in the display.
5. Press the BAKE pad.
6. Press the
INCREASEIDECREASE
pad
to
select an oven temperature.
TO avoid possible
burns,
pl~~e
the
shelves
in
the
correct position before you turn the oven on.
You
con
set the oven control to delay-start the oven,
cook for
a
specific length of time and then turn off
automatically.
n
1. Press
the COOK TIME pad.
cT?$f
NOTE: If your recipe requires
A
preheating, you may need to add
additional time to the Cook Time.
2. Press the INCREASE pad until the desired
lenglh
of baking time appears in the display.
D
3. Press the STOP TIME pad. “STOP
~?j[
TIME” and
the
earliest Stop Time you
A
can set appear in the display.
The control automatically sets the Stop Time by
adding the Cook Time to the time of day. For
example, the time of day is
2:00
and the Cook
Time is
3
hours. Adding 3 hours to the time
of
day
equals 5:00.
4. Change the Stop Time by pressing the
INCREASE pad until the desired Stop Time
appears in the display.
n
5. Press the BAKE
pfid.
BAKE
A
6. Press the INCREASE or
DECREASE pad until the desired
temperature is displayed.
The oven will turn on automatically. The
word ‘. ON”
tind
“ 1000’” wi 11 be displayed.
The Cook Time will begin to count down.
AS
the
oven heats up, the display
will
show
the
ch:]nging
tempertiture.
The-oven
Wi!l
continue to cook for the programmed
time
and
shut
off
automatically.
At the end of Timed Bake, the display
will show
“OHR:OO
COOK TIME” and
the oven will turn
oft.
The end of cycle
tone will sound.
o
7. Press the CLEAR/OFF pad to clear
CLEAR
the display if
necessury.
Remove the
OFF
food from the oven. Remember, even
though the oven shuts off automatically
foods continue cooking after the controls
are off.
NOTE:
●
Foods that spoi I easily, such as milk, eggs, fish,
stuffings. poultry and pork, should not be allowed to
sit for more than one hour before or after cooking.
Room temperature promotes the growth of harmful
bacteria. Be sure the oven light is off because heat
from the bulb will speed harmful bacteria growth.
● A fan may
autornatical
Iy
turn on and off to cool
internal parts. This is normal, and the fan may
continue to run after the oven is turned off.
16

ADJUST THE OVEN
THE~OSTAT—
DO
IT
YOURSELF!
‘OU
may find that your new oven cooks differently
-han
the one it replaced. We recommend that
yoa
use your new oven
for
a
I’cw
weeks to become more
tami
Iior
with it, following the times given in your
recipes as
a
guide.
If you think your new oven is too hot or too cold,
you can adjust the thermostat yourself.
[f
you think
it is
too
hot,
tid,]ust
the thermostat to make it cooler. If
you think it is
too
cool, adjust the thermostat to make
i t
hotlet-.
We do not recommend the use of inexpensive
thermometers, such as those
found
in
grocery stores,
to check the
tempertiture
setting of your new oven.
These thermometers may vary
2040
degrees.
To Adjust the Thermostat:
❑
1.
Press the BAKE pad.
BAKE
A
2. Select an oven temperature between
5000F.
und
5500F.
3. Immediately, before “ON” appears, press and
hold the BAKE pad for about 4 seconds. The time
display will change
10
the oven adjustment display.
A
4. The oven temperature can be adjusted up
to
(+)
35°F.
hotter or (–)
35°F.
cooler.
Q
Use the INCREASE or DECREASE pad
to select the desired change in the display.
-
o
5. When you have made the adjustment,
CLEAR
press the CLEAR/OFF pad to
go
back to
OFF
tbe time of day display. Use your oven as
you would normally.
NOTE: This adjustment will not affect the Broiling
or Self-Cleaning temperature. It will be retained in
memory after a power failure.
17

ROASTING
Roasljr]g
is cooking by dry heat. Tender meat or
poultry
can
be roasted uncovered in your oven.
Roas(ing
temperatures, which should be low and
steady, keep spattering to
a
minimum.
Roastirrg
is really
a
baking procedure used for meats.
Therefore,
oken
controls are set for Baking or Timed
Baking. (You may hear a slight clicking sound.
indicating the oven is working properly.)
Most meats continue to cook slightly while standing.
after being removed from the oven. The
standi
n&
time
recommended
for
roasts is I
()
to
20
minutes. This
allows roasts to firm up and makes them easier to
carve. The internal temperature wi II rise about 5“ to
1O°
F.: to compensate for temperature rise, if desired,
remove the roast from the oven sooner (at 5° to
10OF.
less than the temperature in the Rousting Guide).
Remember that
food
will continue to cook in the hot
oven and therefore should be removed when
[he
desired
internul
temperature has been reached.
1.
Place the shelf in A or B
is
necessary.
2. Check the
weight
of the
meat. Place it fat side
up (or for poultry, breast
side up)
on
a
rOasting
-
rack in a shallow pan.
The
melting fat will
baste the
me~t.
Select a
pan
:1s
CIOSC
to
the
size
of the
meat
as possible.
(The broiler pan with
rack is
~
good pan for
position.
No preheating
n
4. Press the INCREASE or DECREASE
pad. The
Ias(
oven temperature used
appears in the display’.
Conti
rrue
pressing
until the desired temperature is
disployed.
I\@/
The oven will start automatically.
The word
“ON.’
and
‘.
10
O[’..
will be
this. )
n
3.
prc~s
the BAKE
pad,
o
5.
CLEAR
OFF
displayed. As the oven heats up, the
display will show the
changing
temperatures. When the oven reaches the
temperature you set. a tone will sound.
Press the CL
EAR1OFF
pad when
roasting is finished, and then
Icnl(J\c
the
food
I-rem the
oven.
NOTE: A fan may automatically turn on to cool
LJ
BAKE
in[
L>rnal
parts. This is normal. and the fan ma)
A.
continue to run even after
lhe
oven is
turned
oft.
To
change the oven temperature during roasting,
press the BAKE pad and then
the
INCREASE or
DECREASE pad to
get
the
new
tcrnperature.
~)se of Aluminum
Foil
You can usc aluminum foil to line the broiler pan.
This
rnakcs
clean-up easier when using the pan
ti)r
rnarinati
ng,
(:ooking
with fruits, cooking heavily
cured meats or basting food during
cookin&.
Press
the [oil tightly around the inside of the pan.
18

Juestions and Answers
Q. Is it necessary to check for doneness with
a
Q. Do I need to preheat my oven each time I cook a
meat thermometer’?
roast or poultry?
1.
Checking
the
finished internal
[cnlper”alure
at
the completion
of
coo~ing
time is recommended
Temperatures arc shown in
the
R(>asting
Guide.
For roasts
o~er
8
Ibs.. check with
thcrrnorneter
at ha! f-hour i
ntcrvals
at’ter
hal
f
the cook i
ng
ti rne
h:]s
passed.
Q.
Why is my roast crumbling when 1 try to
car}e it’?
.-i.
Roasts arc
e~]sier
to slice
if
allowed to coo] I ()
to
z()
rlll
rlLr~cs
~lfter-
rerllo\
in:
[hem
Fronl
(he
o\’en.
Be
sure [o
CLI1
across
lhe
grdin
ot’
[he
nlcat.
,4.
It is not necessary to preheat your oven. Preheat
only
for
\ery
srnal
I roasts, which cook a short
length
of
time.
Q.
When buying
a
roast, are there any special tips
that would help me cook it more evenly’?
A.
Y’es.
Buy
o
roast as even in thickness as possible,
or
buy
rol
Icd r-oasts.
Q. Can I seal the sides of my foil “tent” when
roasting
a
turkey:)
i.
Sealing the
toil
will steam the meat. Leaving
il
Lrnsealed
~1
lows
the
:li
r
-
to
c
i
rcu
late and brown
the meat.
ROASTING
GU~E
Frozen Roasts
Frozen
roasts
oi’ beet. pork, Iamb, etc.,
can
be started
.
ithout
thaw
ing,
but
al
low I
~
to 25
nl
inu[es
per
.)urld
additional
[irne
( I
()
rni
nutes
per pound for
roasls
under 5
pounds.
more time tor
larger
roasts).
Doneness
Make sure poultry is thawed before roasting,
Unthawed poultry often does not cook evenly. Some
commercial
frozen
poultry can be cooked successfully
without
thawil]g.
FOI1OW
the directions given on the
package
label
,4pproxinlate
Roasting
Time
in Nlinutes per Pound
3
to
5
Ibs.
6
to 8lbs.
1~-.~~ 18–22
;5-3~)
~~–~c)
40-45 30-35
Q
I
..75 ?()–23
-.
25--30,
24–2X
30--35
2X–33
jj
..J5
30-40”
.{i
.4.$
30-40”
)
7-
Q()
lllillLllC\
PC1’
170
LI11(I
(illl>’
!!
Clgh[)
3
to
5
11)s.
()\’cl-
5
111s.
.35
-4( I
30-35
.:5-
4(
)
10 to
i5
11)s.
()*er
15 Ibs.
I
8–2.7
I
5--20
Internal
Temperature
‘E’.
I
~()-
I
50’’-;
I 500-I 60(”
I
70-]
s~
I 40”- [
50<’”;”
I 50”- I 60[”
I 70[’- I 85”
I
70 ‘–1
800
I 70’” I
80
I I 5“-- I
20”
I 85 -i
~)()
I
Sj...
I
C)()
In tbigb:
[
X5”-
I
()()”
19

r-----
BROILING
Broiling is cooking food by intense radiant
heat
from
the upper broil element in the oven.
,Most
fish
and
tender
cuts of meat can be broiled. Follow these directions to
keep spattering and smoking to a
minimuln.
I’ui-n
[he
Iood
using
tongs
only once during
cooking. Time the foods f’or the
t’irst
side
a~’cord
i
ng
to the Broiling Guide. Turn the food. then use the
times given for the second side as a guide to
[he
preferred doneness.
[f’ the meat has fat or gristle around the edge, cut
vertical slashes through both about 2 inches
apar[.
If desired. the [’al may be trimmed. leaving a
layer
about
1/8
inch thick.
Place
the meat on the broiler rack in the broiler
DJII.
Always use the rack so the fat drips into the
bro~lel
pan: otherwise the juices may” become hot enough
to
catch
on fire.
3. Position the shelf on the recommended
shtlf
po\ition
as suggested in the Broiling Guide.
h/lo\[
broiling is done on C position. but if your range
i:-
connected to 208 volts, you may wish to use
a
higher position.
4. leave the door open position. The door sla)s
open by itself. yet the proper
ternpcru[ure
is
rnai
ntained
i n the oven.
5. Press the BROIL pad.
Prehca[i
ng
the elements is
nol
necessary. (See the
Cornrncnls
cOILI
rnn in the
Broiling Guide. )
6.
Press
the INCREASE
p~d
once for LO
Brt~il
o:
t\k
ice for HI Broil.
To change
I“rorn
HI Broil to LO
Br~~il,
pr-ess
the
BROIL
Pild
then
press
tbc
DECREASE
~)ad
once.
7. When hi-oiling is finished, press the CLEAR/OFl:
p~d.
Ser\c the
food
irnrncdialcly.
and
lca~’e
tllc
~)tin
out:~idc
the oven to cool
during
the meal for
easiest
c
Ietini
ng.
NOTE: A t~Il
IIIa~
aut(>l~lati~illl~
tLlrn
011
to
~0[)1
internal parts, This is
norma
1. and the
I’i[n
Inaj’
continue to run e\en after the oven is
tur-ncd
oft.
Use of Aluminum
I1oil
You
can use
atuminurn
fbil WiLhout
the
stils,
the
i’oit
witl
pre\ent
fat
and
mei]t
to line your broiter pan and
~~~g?$’~
(2
~,r~>ilerr:lck
However, you
fj&~~>~~-’”:~\
<j!
juices
from
dri]ining
into
the broiler pan. The juices
cou
Id
become
hot enough to catch
(Jn
I’ire.
I
f
yOLI
do
must rnotd the
foit
tightly to
.s.:
not cut the
slits, you are
fry
i n g. not
~Jr”oi
I i n
g.
the rack and
cul
slits in it
;Q$~\)>>)~”
M
lust
like the rack.
Questions and Answers
Q. Should I salt the meat before broiling’?
Q.
I]o
I need to grease mj broiler rack to prevent
A. No. Salt draws out the
,juiccs
and
atlows
them
10
meat from sticking’?
e~aporate.
Always salt after cook i
n!.
Piercing the A. No. The broiler
rack
is designed to
r-el-lcct
broiter
Q.
A.
meat
wi[b
a
fork also allows
juices
tt~
escape
.-TLlrn
heat. thus keeping the
surl’ace
coo]
enough to pre\cnt
the meat with
tc~ngs
instead
of
a fork.
mcot
f’rom
sticking to
the
surlticc.
Howe\er. spraying
When broiling, is it necessary to always use
a
[he
br[)i
!cr rack
lightl)
with a
\cgct:lhlc
cookin:
racl<
in the
uan?
sprtiy
befort
ct)oki
ng
wi
11
l~lilh~’
c
lelltl-~li:
~:l~,i~r’.
Yes.
Usins
the rack
suspends
the meat
o\er
the Q.
Why,
are my meats not turning out as brown as
pan. As
tie
meat
cooks:
the
juices
f’alt
into the
p~n.
they should?
Illu\
keeping
the
meat drier. Juices tire protected by
A. In
s(>rnc
areas. the power
(\cllIage)
to the range
ma>
[he
rack and
stay
cooler, thus
prcventi
ng
excessive be low. In these cases.
pr-chcd[
the broil
clement
t“t)r”
spatter- and smoking.
I () minutes
bcli)rc
ptdcing
broiler
pan
\vith
food
in
o\en.
[’heck
[()
\ee
il’
you
are
using the
rec(~nlnlendcd
shel
1’
p{}sition.
Broi
I
i’or
Iongcs(
period
t)l’
time
i
ndicatcd
i n
lhc
Broi
I i
n:
Gu
idc.
TUIJI
food”
on
1)
once
duri
n:
I>roi
I i n:.
Y(>11
IIlil!’
rlecd
[t)
Ino\
c
Illc
20 food
tt~
a
hiyhcr’
shelf
l~o~i[it)l~.
————-————
——
This manual suits for next models
2
Table of contents
Other GE Range manuals
Popular Range manuals by other brands

Kenmore
Kenmore Lifestyler EXPANSE 1500 Use & care guide

Lang
Lang R30C AP Installation, operation & maintenance instructions

Thor Kitchen
Thor Kitchen HB3001U owner's manual

SERV-WARE
SERV-WARE Select Series Installation Instructions and Care

Samsung
Samsung NX58K7850S SERIES installation manual

Viking
Viking VDSC548T Series Service manual