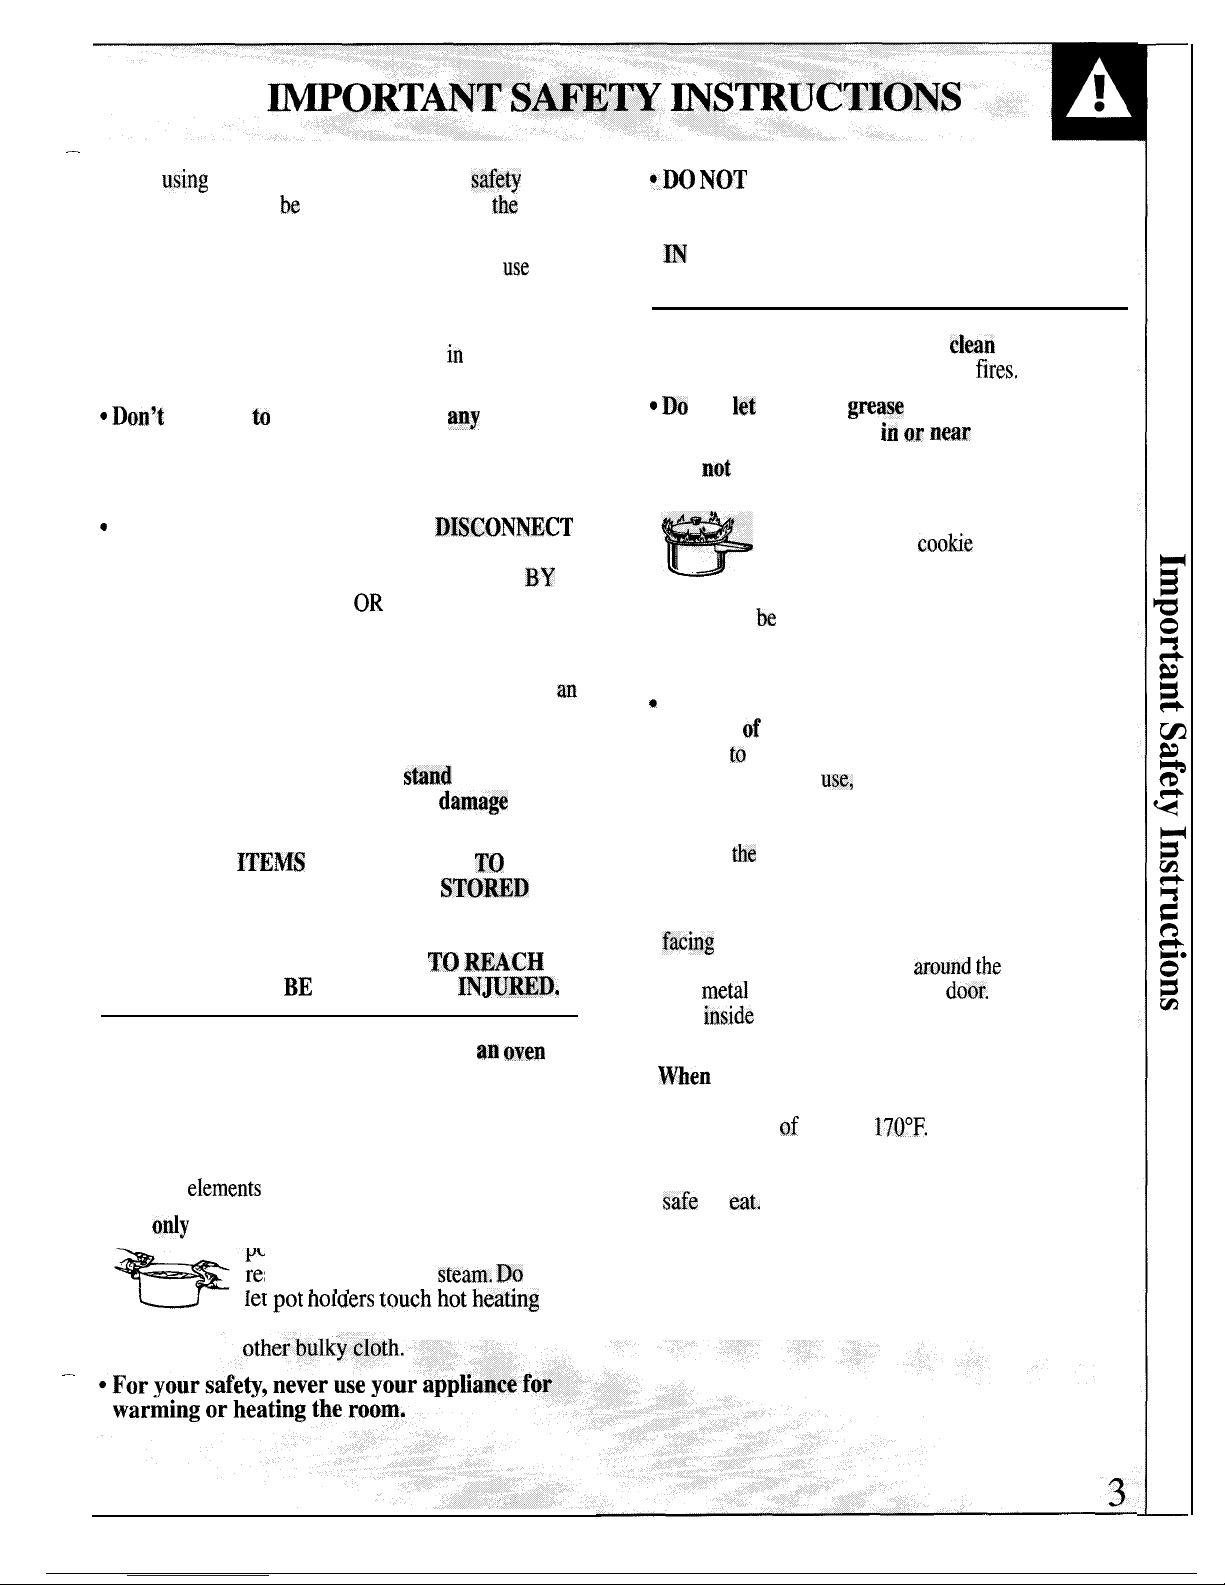
GE JMP28GR User manual

Range
❑
!
Safety instructions .................... z-5
u
Operating Instructions, Tips
‘,
Aluminum Foil ...................................5, 16, 19
Models:
JMP28GR
JMP29GR
JMP31WR
JMP32AR
IrlR
●
Problem
Soker.......................28,
29
. More questions
?...call
‘w%.
GEA~~~~~C~nt~~”
800.
BzB.ZOO0
,.’&:.
;.,;:.:
;
~’$ff>f$;~gf,><,
GE Appliances
MNU097
Re~ 1

HELP US HELP YOU
Before using your range,
read this book carefully.
It is intended to help you
operate and maintain your new
range properly.
Keep it handy for answers to
your questions.
If you don’t understand something
or need more help, write (include
your phone number):
Consumer Affairs
GE Appliances
Appliance Park
Louisville. KY 40225
—
To
obtain service, see the
Consumer Services page in
back of this book.
Write down the model
and serial numbers.
You’ll find them on a label
behind the range door.
These numbers are also on the
Consumer Product Ownership
Registration Card that came with
your range. Before sending in
this card, please write these
numbers here:
Model Number
Serial Number
Use these numbers in any
correspondence or service calls
concerning your range.
If you received
a damaged range . . .
Immediately contact the dealer (or
builder) that sold you the range.
Save time and money.
Before you request
service...
Check the Problem Solver in the
back of this book. It lists causes of
minor operating problems that you
can correct yourself.
IF
YOU NEED SERVICE...
We’re proud of our service and
FIRST, contact the people who
FINALLY, if your problem is still
the
serviced your appliance. Explain not resolved, write:
why you are not pleased. In most
cases, this will solve the problem.
Major Appliance Consumer
Action Panel
want you to be pleased. If for some NEXT, if you are still not pleased,
20 North Wacker Drive
reason you are not happy with the write all the details—including Chicago, IL 60606
service you receive, here are three your phone number—to:
steps
to
follow for further help. Manager, Consumer Relations
GE Appliances
Appliance Park
Louisville, KY 40225
IMPORTANT SAFETY INSTRUCTIONS
Read all instructions before
using
this appliance.
IMPORTANT SAFETY NOTICE
The fiberglass insulation in
self-ckan
ovens
gives
The California Safe
I.kinlckg
Water and Toxic
off a very small amount of carbon monoxide during
Enforcement
Act
requires the Governor of
the cleaning cycle. Exposure can be minimized by
California to publish a list of substances known to venting with an open window or using a ventilation
the state
to
cause
birth defects
or
other reproductive
fan or hood.
harm, and requires businesses to warn customers of
potential exposure to such substances.
—
2

.
—
When
using
electrical appliances, basic
saikty
*DO
N(IT
STORE OR USE COMBUSTIBLE
precautions should
be
followed, including
the
MATERIALS, GASOLINE OR OTHER
following:
FLAMMABLE VAPORS ANI) LIQUIDS
. Use
this
appliance only for its intended
me
as
IN
THE VICINITY OF THIS OR ANY
described in this manual.
OTHER APPLIANCE.
●
Be sure
your appliance is properly installed arid
grounded
by a qualified technician
in
accordance
●
Keep
hood
and grease filters
clean
to maintain
with the provided installation instructions.
good venting and to avoid grease
fires,
“
Don’t
attempt
to
repair or replace
any
part of
*
Do
not
let
cooking
greas~
or other flammable
your range unless it is specifically recommended
materials accumulate
in
ar
near
the range.
in this book.
All other servicing should be referred
*
Do
not
use water on grease fires. Never pickup
to a qualified technician.
a flaming pan.
Smother flaming pan on surface
~
Before performing any service,
IM!KX)NNECT
unit by covering pan completely with
THE RANGE POWER SUPPLY
AT THE
well-fitting lid,
cookie
sheet or flat
HOUSEHOLD DISTRIBUTION PANEL
BY
tray, or if available, use dry chemical
REMOVING THE FUSE
OR
SWITCHING
OFF
or foam type extinguisher. Flaming grease outside
THE CIRCUIT BREAKER. a pan can
be
put out by covering with baking soda
or, if available, a multi-purpose dry chemical or
●
Do not leave children alone-children should
foam-type fire extinguisher.
not be left alone or unattended in an area where
an
appliance is in use. They should never be allowed
*
Do not touch heating elements or interior
to sit or stand on any part of the appliance.
surface
of
oven. These
surfaces maybe hot
win.@
to
burn even though they are dark in color.
●
Don’t allow anyone to climb,
stand
or hang on
During and after
USE,
do not touch, or let clothing
the door or cooktop. They could
damage
the
or other flammable materials contact surface
range or cause severe personal injury.
units, areas nearby surface units or any interior
●
CAUTION:
ITEMS
OF INTEREST
T()
area of
the
oven; allow sufficient time for cooling
CHILDREN SHOULD NOT BE
STORED
IN
first.
CABINETS ABOVE A RANGE OR ON THE
Potentially hot surfaces include the cooktop, areas
BACKSPLASH OF A RANGE-CHILDREN
facing
the cooktop, oven vent opening, surfaces
CLIMBING ON THE RANGE
TO
REACH
ITEMS COULD
BE
SERIOUSLY
#NJUEED,
near the opening, crevices
around
the
oven door
and
metal
trim parts above the
door.
Remember:
The
inside
surface of the oven maybe hot when
●
Do not store flammable materials in
an
oven
or
the
door is opened.
near the cooktop.
●
ll%en
cooking pork,
follow the directions
●
Never wear loose-fitting or hanging garments
exactly and always cook the meat to an internal
while using the appliance.
Flammable material
temperature
of
at least
170°F.
This assures that, in
could be ignited if brought in contact with hot the remote possibility that trichina may be present
heating
eIements
and may cause severe burns.
in the meat, it will be killed and the meat will be
safe
to
eat+
. Use
only
dry pot holders—moist or damp
(continued next page)
pot holders on hot surfaces may
m.
111
.)uc~hotkeating
result in burns from
steam,
Do
not
t use a towel or
let
pot
nolaers
u
elements. Do no


—
Surface
Cooking Units
●
Use
proper
pa~
size—This appliance
i!
equipped
o
F-
for
f@ng
.&o@M
be
w
dry as possible,
with different size
mrface
units.
$Wct.cookww
Frost
cm
frozen
foods
OE
moisture
cm
fresh foods
having flat bottoms large
enough
to
cover
the can
ca~se
hot
fat
to
bubbIe
up
and over sides
*
surface unit heating
eiement.
The
use
of
pan.
of
undersized
tmkwtim
will
expose
a portion of
tiw
heating
elmrwfit
@
Q
Use
?iitle
fdfar
effidw
ahallow
or
d~ep-fat
direct contact and may
restdt’in
f~kg.
Filling
the
pari
too
full
of
fat can cause
ignition of clothing. Proper relationship of :,.
spillovers
whgn
food
is
added.
cookware to burner will also
improve
dfkiency,
o
If
a
cqr@hation
of
oils
or
fats will
be
used
in &y@,
stir
togetherbdfore
heating,
or
as
fats
●
Never leave surface units unattended.
atti,gh melt
slowly,’
“
heat settings,
Boilover
causes
smoki~g,~d
greasy
spillovers
that may
catch
on f@
~~•••
*
klwt$%
h@
f~t
sIowly,
and
watch as it heats.
*
Be sure drip pans
and
vent
are
not
wmxed
and
‘s
~~
d~~
fg$
therm~m&gr
whmever
possible
to
are in
place.
Their absence during
cooking
could pr~v&t
&er@atingfat
beyond the
smcdcing
point.
damage range parts and wiring.
‘“.
-
,,
F
w
●
Don’t
use
aluminum
foil to line
ddp
pans
Or
,,
anywhere
in
the
oven
except
as
described
in
Ms’
SAW
THESE
$
bo&
Misuse could result
in
a
shock,
fire
hm~d
~
~
s
or damage to the range.
w
●
only
certain
types
of
glass$
glasslceiamic;
~~•
‘
w
earthenware
or
other
@axed
containers
are
g
suitable for
cooktop
service;
others
may
break
because of the sudden
changfi
in temperature.
SO”
v
section
on
Surface Cooking for
suggsstiom.
9
●
To minimize the possibility
of
bum+
ignition
m
of
flammable materials, and spillage,
the
handle
R
g
of a container should be
turned
toward
the
center
of the range without extending
aver
nearby
*
*4
surface units.
o
s
● Always turn
surface
unit
to
OFF
before
m
removing cookware.
,’
●
Keep
an
eye
on
foods being
fried
at
~
@r
.‘ .,
MEDIUM
HIGH
heat
settings.
●
To avoid
the possibility of a
burn’or
electfic.
shock, always be certain that the controls
for
all surface units are at
(IFE
position
and
all
coils
are cool
before
attwnpti~.ta
lift
oy
remove the unit.
‘
. .
.
●
Don>t
immerse or soak
remavable
smfam
units. Don’t put them in a dishwasher.
Do
not
.,,
,,
self-clean the surface units in
the
oven..
,,
—
●
When flaming foods are
under
the ho@
tm%
the fan off. The fan, if operating,
may
spread.
the flame,
~
,.
5

FEATu~s
OF YOUR RANGE
JMP28GR
JMP29GR
JMP31wR
JMP32AR
6

Feature Index
1 Bake Unit
(may be lifted gently for wiping oven floor)
2 Model and Serial Numbers Location
3 Broil Unit
4 Oven Vent
5 Surface Unit Controls
6 Surface Unit “ON” Indicator Light
7 Lift-Up Cooktop
(support rods hold it up to simplify cleaning underneath)
8
Calrod@
Plug-In Surface Units
9 Broiler Pan and Rack
10
DriIJ
Pans
11 Oven Light Switch
(lets you turn oven light on and off)
12
Oven Controls
Automatic Timed Baking
(turns oven on and off for you automatically)
Oven Thermostat
Clock
Timer
(lets
vou time anv kitchen function, even when the oven is in use)
13 Oven Interior Light
14 Oven Shelf
SUDDOItS
15 Oven Shelves
16 Removable Oven Door
17 Oven Door Gasket
Explained
on page
—
2
—
4
10,24
10
24
25
4, 17, 19,25
25
12
8,9
9
12
9
9
12,27
12
12, 15,26
26
4,21,26
7

FEATURES OF YOUR OVEN CONTROL
77!?77777
1. CLEAR/OFF. Press this pad to cancel all oven
operations except clock and timer.
2.
3.
4,
5.
6.
7.
8.
9.
10.
PROGRAM STATUS. Words light up in the
display to indicate what is in time display.
Programmed information can be displayed at any
time by pressing the pad of the operation you
want
to
see. For example, you can display the
current time of day while the timer is counting
down by pressing the CLOCK pad.
TIME DISPLAY. Shows the time of day,
the times set for the timer or automatic
oven operation.
OVEN TEMPERATURE AND BROIL
DISPLA17.
Shows the oven temperature or
broil setting selected.
the
FUNCTION INDICATORS. Lights up to show
whether oven is in bake, broil or self-clean mode.
INCREASE. Short taps to this pad increase
time or temperature by small amounts. Press
and
hold pad to increase time or temperature by
larger amounts.
DECREASE. Short taps to this pad decrease
time or temperature by small amounts. Press and
hold pad to decrease time or temperature by
larger amounts.
BAKE. Press this pad to select bake function.
BROIL. Press this pad to select broil function.
CLEAN. Press this pad to select self-cleaning
function. See Self-Cleaning Instructions.
11. COOK TIME. Press this pad for Time Bake
operations.
12. STOP TIME. Use this pad along with COOK
TIME or CLEAN pad to set the oven to start
automatically at a time you select.
13. CLOCK. To set clock, first press CLOCK pad.
Then press the INCREASE or DECREASE pad
to change the time of day. Press the CLOCK pad
to start.
14. TIMER. Press this pad to select timer function.
The timer does not control oven operations. The
timer can time up to 9 hours and 55 minutes.
To set timer, first press TIMER pad. Then press
the INCREASE or DECREASE pad to change
the time.
To cancel timer, press and hold the TIMER
ON/OFF pad.
r
If “F-” and a number flash on display and the
control beeps, this indicates function error code.
Put the oven back into operation. Press the
CLEAR/OFF pad. Allow oven to cool for one
hour. If function error code repeats, disconnect
power to the range and call for service.
8

Clock To Set the Clock
The clock must be set for the
automatic oven timing functions to
work properly. The time of day
cannot be changed during
a TIME
BAKE or CLEAN cycle. n
Step 1: Press the
CLOCK pad.
CLOCK
J
A
Step 3: Press the CLOCK pad
Step 2: Press the
INCREASE or
DECREASE pad to
set the time of day.
to start,
Timer To Set The Timer
The timer is an alarm or minute
timer only. The timer does not
control oven operations. The
maximum setting on the timer is
9 hours and 55 minutes.
TIMER
Step 1: Press the
TIMER pad.
Step 2: Press the INCREASE or
DECREASE pad to set the amount
of time on timer.
The timer will start automatically
within a few seconds of releasing
the pad.
The timer, as you are setting it,
will display seconds until 60
seconds is reached.
Then it will display minutes
and seconds until 60 minutes
is reached.
After 60 minutes, it will display
hours (“HR” now appears in
display) and minutes until the
maximum time of 9 hours and
55 minutes is reached.
To Reset Timer To Cancel Timer Power Outage?
It “TIMER” is showing,
press the INCREASE or
DECREASE pad until desired
time is reached.
If “TIMER” is not showing,
press the TIMER pad first then
follow instructions above to set
the timer.
Press the TIMER pad until the After a power outage, when power
word “TIMER” quits flashing on is restored, the display
will
flash
the display (about 4 seconds).
and time shown will no longer be
correct-for example, after a
5-minute power interruption the
clock will be 5 minutes slow.
The display flashes until the clock
is reset. All other functions that
were in operation when the power
went out will have to be
programmed again.
End of Cycle Tones Display Messages
The end of cycle tone is three short beeps followed If “door” appears on the display, the door is open.
by one beep that repeats every six seconds until you Close the door. If “LOCK” appears on the display, the
press any operation. If you would like to eliminate the oven door is in the locked position. BAKE, BROIL
repeating beeps, press and hold the CLEAIUOFF pad and COOK TIME cannot be set if the door is in the
for ten seconds. locked position.
To return the timer tone to the repeating beeps, press
and hold the CLEAR/OFF pad for 10 seconds.
9

SURFACE COOKING
At both OFF and HI the control “clicks” into position. You may hear slight
“clicking” sounds during cooking, indicating the control is keeping the unit
at the heat level or power level you set.
How to Set the Controls
14
A
Push the knob in and turn in either direction to the heat setting you want.
Be sure you turn control to OFF when you finish cooking. The surface unit -
indicator light will glow when ANY heat on any surface unit is on.
●
Heat Setting Guide
HI–-lJsed to begin cooking or to bring water to a
❑
lcl
boil. Reduce heat setting after water boils.
%F
MEDIUM HIGH—(Setting halfway between HI and
MEI)) Maintains a fast boil on large amounts of food.
LO
MED—Saute and brown; keeps food at a medium \
boil. or simmer.
\
MEDIUM LOW—(Setting halfway between MED
and LO) Cook after starting at HI; cooks with little
water in
ccwered
pan.
MEDIUM
*
<
LO–--Used for long slow cooking (simmering) to
LOW
-@-
HI
0
0
-
W
MEDIUM
0
tenderize and develop flavors. Use this setting to melt
1~1
\
HIGH
butter and chocolate or to keep foods warm.
MED
NOTE: Surface Indicator Light may glow between
LO and OFF, but there is no power to the surface units.
COOKING TIPS
Cookware
● Use medium-or heavy-weight cookware. Aluminum
cookware conducts heat faster than other metals.
Cast-iron and coated cast-iron cookware are slow to
absorb heat, but generally cook evenly at low to
medium heat settings. Steel pans may cook unevenly
if not combined with other metals.
● For best cooking results pans should be flat on the
bottom. Match the size of the saucepan to the size of
the surface unit. The pan should not extend over the
edge of the trim ring more than l“.
Wrong
NOT OVER 1“ OVER 1“
10

Deep Fat Frying
● Do not overfill cookware with fat that may spill over when adding food.
Frosty foods bubble vigorously. Watch food frying at high temperatures.
Keep range and hood clean from grease.
Wok Cooking
“Eijl’z::d::;
-
● Use of these types of woks,
without the support ring in
place, is dangerous because
are available at your
local retail store.
‘hewOkisunstable
*
,,:,ig:~’;
’’’’’u::j?;:}~
● With the ring inplace, heat
,i:;~~~~~
::::~~~:
will be trapped inside the
ring and may cause darnage to the porcelain cooktop.
HOME CANNING TIPS
Canning should be done on surface units only. HOWEVER, DO NOT USE LARGE DIAMETER
Pots that extend beyond one inch of surface unit’s
CANNERS OR OTHER LARGE DIAMETER
drip pan are not recommended for most surface POTS FOR FRYING OR BOILING FOODS OTHER
cooking. However, when canning with water-bath or THAN WATER. Most syrup or sauce mixtures—
pressure canner, larger-diameter pots may be used. and all types of frying-cook at temperatures much
This is because boiling water temperatures (even higher than boiling water. Such temperatures could
under pressure) are not harmful to cooktop surfaces eventually harm cooktop surfaces surrounding
surrounding the surface unit. surface units.
Observe the Following Points in Canning
1. Be sure the canner fits over the center of the
surface unit. If your range or its location does not
allow the canner to be centered on the surface unit,
use smaller-diameter pots for good canning results.
2. For best results, use canners with flat bottoms.
Canners with flanged or rippled bottoms (often
found in enamelware) don’t make good contact
with the surface unit and take a long time to
boil water.
Flat-bottomed canners are recommended.
3. When canning, use recipes and procedures from
reputable sources. Reliable recipes and procedures
are available from the manufacturer of your
canner; manufacturers of glass jars for canning,
such as Ball and Kerr; and the United States
Department of Agriculture Extension Service.
4. Remember that canning is a process that generates
large amounts of steam. To avoid burns from steam
or heat, be careful when canning.
NOTE: If your house has low voltage, canning
may take longer than expected, even though
directions have been carefully followed.
The process time will be shortened by:
(1) using a pressure canner, and
(2) starting with HOT tap water for fastest heating
of large quantities of water.
11

USING YOUR OVEN
Before Using Your Oven
1.
Look at the controls. Be sure you understand how
3. Read over information and tips that follow.
to set them properly. Read over the directions for the
Oven Controls so you understand how to use them. 4. Keep this book handy so you can refer to it,
especially during the first weeks of using your
2. Check oven interior. Look at the shelves. Take a new range.
practice run at removing and replacing them
properly, to give sure, sturdy support.
Oven Shelves Shelf Positions
The shelves are designed with stop-locks so that when The oven has four
placed correctly on the shelf supports, they will stop
shelf supports
before coming out completely from the oven, and
identified in this
will
not tilt when removing food from or placing food
illustration as
on them.
A (bottom), B, C
TO REMOVE
the shelves from
the oven, pull
toward you, tilt
front end upward
and pull them
oat.
TO REPLACE,
place shelf on
shelf
support
with
and D (top).
Oven Light
stop-loc”ks
(curved extension under shelf) facing up
toward the rear of the oven. Tilt up front and push the
Use the switch on the panel to turn the light on
shelf toward the back of the oven until it goes past and off.
“stop” on the oven wall. Then lower the front of the
shelf and push it all the way back.
Adjusting Oven Thermostat
When cooking food for the first time in your new
To Adjust Temperature:
oven. use time given on recipes as a guide. Oven 1. Press BAKE pad.
thermostats, over a period of years, may “drift” from
the factory setting and the differences in timing
2. Select an oven temperature between
500”F.
and
550”F.
between an old and a new oven of 5 to 10 minutes are 3. Immediately, before BAKE indicator stops
not unusual. Your oven has been set correctly at the
flashing, press and hold the BAKE pad for about 4
factory and is more likely to be accurate than the oven seconds. The red display will change to the oven
which it replaced. adjustment display.
If you think the oven should be hotter or cooler, you 4. The oven temperature can be adjusted up to
(+)
35”F.
can adjust it yourself. To decide how much to change hotter or (–)
35”F.
cooler. Use the INCREASE or
the temperature, set the oven temperature
25”F.
higher DECREASE pads to select the desired change in
or lower than the temperature in your recipe, then
the red display.
bake. The results of this “test” should give you an 5. When you have made the adjustment, press the
idea of how much the temperature should be changed. CLEAWOFF pad to go back to the time of day
display. Use your oven as you would normally.
NOTE: This adjustment will not affect Broil or
Clean temperatures. It will be remembered
when power is removed.
12

Your oven temperature is controlled very accurately using an oven control
system. We recommend that you operate the range for a number of weeks
using the time given on recipes as a guide to become familiar with your new
oven’s performance. If you think an adjustment is necessary, see the
Adjusting Oven Temperature section.
How to Set Your Range for Baking
To avoid possible burns, place the shelves in the When the oven starts to heat, the word “ON” and the
correct position before you turn the oven on.
changing temperature, starting at 100”F., will be
Step 1: Press the BAKE pad. displayed. When the oven reaches the set temperature
1f
a tone will sound.
u
BAKE
c1AStep 2: Press the INCREASE or
DECREASE
~ad.
The
disr)lav
will
n
Step 3: Press the CLEAR/OFF pad
when baking is finished and then
CLEAR remove food from oven.
L!LJ
show the last hake
temper~tu~e
that To change oven temperature during BAKE
was used. (Tap to change temperature
5“F.
a tap. Press and hold to change cycle, press BAKE pad and then INCREASE
tem~erature
25°F. at a
time.)
or DECREASE pad to get new temperature.
,
1
J
TIMED BAKING
How to Time Bake
The oven control allows you to turn the oven on or To set the clock, first press the CLOCK pad. Press
off automatically at specific times that you set.
INCREASE or DECREASE pad until correct time
NOTE: Before beginning make sure the oven clock
of day is displayed. Press the CLOCK pad to start.
shows the correct time of day.
How to Set Immediate Start and Automatic Stop
The oven turns on right away, cooks for preset
length of time, and turns off automatically at the
preset Stop Time.
To avoid possible burns, place the shelves in the
correct position before you turn the oven on.
Step 1: Press the COOK TIME pad.
)
f
II
COOK
TIME
Step 2: Press the INCREASE pad until desired
length of baking time appears in the display.
Step 3: Press the BAKE pad. Attention tone will
occur if step 5 is not done.
When the oven starts to heat, the word “ON”
and the changing temperature, starting at 100”F.,
will be displayed. When the oven reaches the set
temperature a tone will sound. The oven will continue
to cook for the programmed amount of time, then
shut off automatically.
Step 5: Remove food from the oven. Remember,
even though oven shuts off automatically, foods
continue cooking after controls are off.
NOTE: Foods that spoil easily such as milk, eggs,
fish, stuffings, poultry and pork should not be allowed
to sit out for more than one hour before or after
cooking. Room temperature promotes the growth of
harmful bacteria. Be sure the oven light is off because
heat from the bulb will speed harmful bacteria growth.
Step 4: Press the INCREASE or DECREASE pad
(continued
next
page)
until desired temperature is displayed.
13

TIMED BAKING
(continued)
How to Set Delay Start and Automatic
Quick Reminder:
1. Press the COOK TIME pad.
2. Press the INCREASE/ DECREASE pad to set
cooking time.
3. Press the STOP TIME pad.
4. Press the INCREASE/ DECREASE pad until
desired Stop Time appears in display.
5. Press the BAKE pad.
6.
Press the INCREASE/ DECREASE pad to
select oven temperature.
Delay Start and Automatic Stop is setting the oven
timer to turn the oven on and off automatically at a
later
time than the present time of day.
For example: Let’s say it’s
2:00
and dinner time is
shortly after
7:00.
The recipe suggests 3 hours baking
time at
325”F.
Here’s how:
Step 1: Position the shelf or shelves in the oven. If
cooking on two shelves at the same time, stagger the
pans for best heat circulation.
Step 2:
Close the oven door.
El
COOK
TIME
c1
A
c1
STOP
TIME
Step 3: Press the COOK TIME pad.
Step 4: For 3 hours of cooking time,
press the INCREASE pad until
“3:00”
appears in the display.
Step 5: Press the STOP TIME pad.
itop
“5:00”
appears on
the display and
“STOP TIME”
flashes. The control
automatically sets
Stop Time
b;
adding the Cook Time to the time of
day. In this example, the time of day is
2:00
and the
Cook Time is 3 hours. Adding 3 hours to the time of
day equals
5:00.
Step 6: Change Stop Time from
5:00
to
7:00
by
pressing the INCREASE pad until
“7:00”
appears
in the display.
Step 7: Press the BAKE pad.
)
t
I
‘AKE
I
J
Step 8: Press the INCREASE pad. The last
oven set temperature appears in the display.
Press the INCREASE or DECREASE pad until
“325°” is displayed.
At
4:00,
the oven will turn on automatically. The
word “ON” and the changing oven temperature,
starting at 100”F., will be displayed as the oven
heats up. The oven will continue to cook for the
programmed 3 hours and shut off automatically
at
7:00.
Step 9: Remove food from the oven. Remember, even
though oven shuts off automatically, foods continue
cooking after controls are off.
NOTE:
● The low temperature zone of this range (between
150”F.
and
200”F.)
is available to keep hot cooked
foods warm. Food kept in the oven longer than two
hours at these low temperatures may spoil.
● When setting your oven for a delay start, never
let foods such as dairy products, fish, meat,
poultry, etc. sit for more than 1 hour before actual
cooking begins. Room temperature promotes the
growth of harmful bacteria. Be sure the oven light
is off because heat from the bulb will speed
bacteria growth.
14

For best baking results, follow these suggestions:
Oven Shelves
Arrange the oven
shelf or shelves
in the desired
locations while
the oven is cool.
The correct shelf
position depends
on the kind of
food and the
browning desired.
As a
general
rule,
place-most foods in the middle of the oven, on either
~he
second or third shelf from the bottom. See the
chart for suggested shelf positions.
Type of Food
I
Shelf Position
I
Angel food cake
I
1A
Biscuits or muffins B or C
Cookies or cupcakes B or C
Brownies
I
B orC
I
I
Layer cakes
I
B orC
I
I
Bundt or pound cakes
I
A orB
I
Pies or pie shells B or C
Frozen pies A (on cookie sheet)
Casseroles B or C
Roasting A or B
Preheating
Preheat the oven if the recipe calls for it. Preheat Preheating is necessary for good results when baking
means bringing the oven up to the specified cakes, cookies, pastry and breads. For most casseroles
temperature before putting in the food. To preheat, set
and roasts, preheating is not necessary. For ovens
the oven at the correct temperature—selecting a without a preheat indicator light or tone, preheat 10
higher temperature does not shorten preheat time. minutes. After the oven is preheated place the food
in the oven as quickly as possible to prevent heat
from escaping.
Baking Pans
Use the proper baking pan. The type of finish on the
pan determines the amount of browning that will occur.
● Dark, rough or dull pans absorb heat resulting in a
browner, crisper crust. Use this type for pies.
● Shiny, bright and smooth pans reflect heat, resulting
in a lighter, more delicate browning. Cakes and
cookies require this type of pan.
● Glass baking dishes also absorb heat. When
baking in glass baking dishes, lower the temperature
by 25°F. and use the recommended cooking time
in the recipe. This is not necessary when baking pies
or casseroles.
Pan Placement
For even cooking and proper browning, there must be
enough room for air circulation in the oven. Baking
results will be better if baking pans are centered as
much as possible rather than being placed to the front
or to the back of the oven.
Pans should not touch each other or the walls of the
oven. Allow 1 to 1
Yz
inch space between pans as well
as from the back of the oven, the door and the sides. If
you use two shelves stagger the pans so one is not
directly above the other.
15

BAKING
(continued)
Baking Guides
Follow the recipe or the directions on the back of the box to get the best
baking results.
Cookies
When baking cookies, flat cookie sheets (without
sides) produce better-looking cookies. Cookies baked
in a jelly roll pan (short sides all around) may have
darker edges and pale or light browning may occur.
Do not use a cookie sheet so large that it touches the
walls or the door of the oven.
For best results, use only one cookie sheet in the oven
at a time.
Pies Cakes
For best results, bake pies in dark, rough or dull pans When baking cakes, warped or bent pans will cause
to produce a browner, crisper crust. Frozen pies in foil
uneven baking results and poorly shaped products.
pans should be placed on an aluminum cookie sheet A cake baked in a pan larger than the recipe
for baking since the shiny foil pan reflects heat away recommends will usually be crisper, thinner and drier
from the pie crust; the cookie sheet helps retain it. than it should be. If baked in a pan smaller than
recommended, it may be undercooked and batter may
overflow. Check the recipe to make sure the pan size
used is the one recommended.
Aluminum Foil
Never cover a shelf entirely with a large cookie sheet
or aluminum foil. This will disturb the heat
circulation and result in poor baking. A smaller sheet
of foil may be used to catch a spillover by placing it
on a lower rack several inches below the food.
Don>t
Peek
Set the timer for the estimated cooking time and do DO NOT open the door to check until the minimum
not open the door to look at your food. Most recipes time. Opening the oven door frequently during
provide minimum and maximum baking times such cooking allows heat to escape and makes baking
as
“bake 30-40 minutes.”
times longer. Your baking results may also be affected.

Roasting is cooking by dry heat. Tender meat or
poultry can be roasted uncovered in your oven.
Roasting temperatures, which should be low and
steady, keep spattering to a minimum.
ROASTING
Roasting is really a baking procedure used for meats.
Therefore, oven controls are set for BAKE or Timed
Bake. (You may hear a slight clicking sound,
indicating the oven is working properly.) Roasting is
easy; just follow these steps:
Step 1. Place the shelf in A or B position.
No preheating is necessary.
Step 2. Check weight of meat, and place, fat side up,
or poultry breast-side-up, on roasting rack in a
shallow pan. The melting fat will baste the meat.
Select a pan as close to the size of the meat as
possible. (Broiler pan with rack is a good pan for
‘this.) Line broiler pan with aluminum foil when using
pan for marinating, cooking with fruits, cooking
heavily cured
meats, or basting
food during
cooking. Avoid
spilling these
materials inside
the oven door.
11
Q
o
c1
BAKE
nA
Step 3. Press the BAKE pad.
Step 4. Press the INCREASE or
DECREASE pad until desired
temperature is displayed.
u!
/
When the oven starts to heat, the word “ON” and the
changing temperature, starting at 100”F., will be
displayed. When the oven reaches the set temperature
a tone will sound.
1Step 5. Press the CLEAR/OFF pad
when roasting is finished and then
CLEAR remove food from oven.
OFF
Step 6. Most meats continue to cook slightly while
standing, after being removed from the oven.
Standing time recommended for roasts is 10 to 20
minutes. This allows roasts to firm up and makes
them easier to carve. Internal temperature will rise
about 5° to 10”F.; to compensate for temperature
increase, if desired, remove the roast from oven
sooner (at 5° to
10°F.
less than temperature in the
Roasting Guide).
NOTE:
● You may wish to use Timed Baking, as described in
the Baking section of this book, to turn the oven on
and off automatically.
● Remember that food will continue to cook in the
hot oven and therefore should be removed when
the desired internal temperature has been reached.
To change oven temperature during roasting,
press the BAKE pad and then the INCREASE
or DECREASE pad to get new temperature.
For Frozen Roasts
Frozen roasts of beef, pork, lamb, etc., can be started Thaw most frozen poultry before roasting to ensure
without thawing, but allow 10 to 25 minutes per even doneness. Some commercial frozen poultry can
pound additional time (10 minutes per pound for be cooked successfully without thawing. Follow
roasts under 5 pounds, more time for larger roasts).
directions given on package label.
(continued next page)

ROASTING
(continued)
Questions and Answers
Q. Is it necessary to check for doneness with a Q. Do I need to preheat my oven each time I cook a
meat thermometer?
roast or poultry?
A. Checking the finished internal temperature at the A. It is unnecessary to preheat your oven.
completion of cooking time is recommended.
Temperatures are shown in Roasting Guide. For Q. When buying a roast, are there any special tips
that would help me cook it more evenly?
roasts over 8
Ibs.,
check with thermometer at
half-
hour intervals after half the time has passed. A. Yes. Buy a roast as even in thickness as possible,
Q. Why is my roast crumbling when I try to carve
or buy rolled roasts.
it?
Q. Can I seal the sides of my foil “tent” when
A. Roasts are easier to slice if allowed to cool 10 to
roasting a turkey?
20 minutes after removing from oven. Be sure to A. Sealing the foil will steam the meat. Leaving
cut across the grain of the meat. it unsealed allows the air to circulate and brown
the meat.
Type
Meat
Tender cuts; rib, high quality sirloin
tip, rump or top round*
Lamb leg or bone-in shoulder*
Veal shoulder, leg or loin*
Pork loin, rib or shoulder*
Ham.
mecooked
Poultry
Chicken or Duck
Chicken pieces
Turkey
ROASTING GUIDE
Oven
remperatur(
325°
325°
325°
325°
325°
325°
350°
325°
Doneness
Rare:
Medium:
Well Done:
Rare:
Medium:
Well Done:
Well Done:
Well Done:
To Warm:
Well Done:
Well Done:
Well Done:
Approximate Roasting Time
in Minutes per Pound
3 to 5
lbs.
6 to 8 lbs.
24-33 18-22
35-39 22-29
40-45
3CP35
21-25 20-23
25-30
2628
30-35 28-33
35-45 3040
3545
30-40
17-20 minutes per pound (any weight)
3
to 5 lbs.
Over 5 lbs.
35-40 30-35
35-40
10 to 15 lbs. Over 15
lbs
18-25
15-20
Internal
rem~erature“F.
140°–1500t
150°–1600
170°–1850
140°–1500t
150°–1600
170°-1850
170°–1800
170°–1800
115°–1250
185°-1900
185°–1900
In thigh:
185°–1900
*For boneless rolled roasts over 6 inches thick, add 5 to 10 minutes per pound to times given above.
~The
U.S. Department of Agriculture says “Rare beef is popular, but you should know that cooking it to only
140°F.
means
some food poisoning organisms may survive.” (Source: Safe Food Book. Your Kitchen Guide. USDA Rev. June 1985.)
18

Broiling is cooking food by intense radiant heat from
the upper unit in the oven. Most fish and tender cuts
of meat can be broiled. Follow these steps to keep
spattering and smoking to a minimum.
Step 1: If meat has fat or gristle near edge, cut
vertical slashes through both about 2 inches apart.
If desired, fat maybe trimmed, leaving layer about
1/8 inch thick.
Step 2: Place meat on broiler rack in broiler pan.
Always use rack so fat drips into broiler pan;
otherwise juices may become hot enough to catch fire.
Step 3: Position shelf on recommended shelf position
as suggested in Broiling Guide. Most broiling is
done on C position, but if your range is connected to
208 Volts, you may wish to use a higher position.
Step 4: Leave door open to broil stop position. The
door stays open by itself, yet the proper temperature,
is maintained.
Step 5: Press BROIL pad.
Step 6: Select LO Broil (450°F.) by tapping
INCREASE pad once. Select HI Broil
(550”F.)
by
tapping INCREASE pad twice.
To change from HI Broil to LO Broil, press the
BROIL pad then tap DECREASE pad once.
-/&’
Step 7: Turn food only
once during cooking.
@
Time foods for first side
h
per Broiling Guide.
Turn food, then use times given for second side as a
guide to preferred doneness. (Where two thicknesses
and times are given together, use first times given for
thinnest food.)
Step 8: When Broiling is completed press the
CLEAIVOFF pad. Serve food immediately, and
leave pan outside oven to cool during meal for
easiest cleaning.
Use of Aluminum Foil
/1
You can use aluminum foil to line your broiler pan and broiler rack. However,
you must mold the foil tightly to the rack and cut slits in it just like the rack.
Without the slits, the foil will prevent fat and meat juices from draining to the
broiler pan. The juices could become hot enough to catch on fire. If you do
not cut the slits, you are frying, not broiling.
Questions & Answers
Q. When broiling, is it necessary to always use a
rack in the pan?
A. Yes. Using the rack suspends the meat over the
pan. As the meat cooks, the juices fall into the pan,
thus keeping meat drier. Juices are protected by the
rack and stay cooler, thus preventing excessive
spatter and smoking.
Q. Should I salt the meat before broiling?
A. No.
Salt draws out the juices and allows them to
evaporate. Always salt after cooking. Turn meat
with tongs; piercing meat with a fork also allows
juices to escape. When broiling poultry or fish,
brush each side often with butter.
Q. Why are my meats not turning out as brown as
they should?
A. In some areas, the power (voltage) to the range
may be low. In these cases, preheat the broil unit
for 10 minutes before placing broiler pan with
food in oven. Check to see if you are using the
recommended shelf position. Broil for longest
period of time indicated in the Broiling Guide.
Turn food only once during broiling.
Q. Do I need to grease my broiler rack to prevent
meat from sticking?
A. No. The broiler rack is designed to reflect broiler
heat, thus keeping the surface cool enough to
prevent meat from sticking to the surface.
However, spraying the broiler rack lightly with a
vegetable cooking spray before cooking will make
cleanup easier.
(continued next page)
19

BROILING GUIDE
(continued)
1. Always use broiler pan and rack that comes with 5. When arranging food on pan, do not let fatty
your oven. It is designed to minimize smoking and edges hang over sides, which could soil oven with
spattering by trapping juices in the shielded lower
fat dripping.
part of the pan.
6. Broiler does not need to be preheated. However,
2. Oven door should be open to the broil stop for very thin foods, or to increase browning,
position.
preheat if desired.
3. For steaks and chops, slash fat evenly around 7. Frozen steaks can be broiled by positioning
outside edges of meat. To slash, cut crosswise the oven shelf at next lowest shelf position and
through outer fat surface just to the edge of the
increasing cooking time given in this guide
meat. Use tongs to turn meat over to prevent
1% times per side.
piercing meat and losing juices.
8. If your range is connected to 208 volts, rare steaks
4. If desired, marinate meats or chicken before may be broiled by preheating broil heater and
broiling, or brush with barbecue sauce last 5 to 10
positioning the oven shelf one position higher.
minutes only.
Quantity and/or
Thickness
1/2
lb. (about 8
thin slices)
1 lb.
(4
patties)
1/2 to 3/4 inch thick
Shelf
Position
c
Second Side
Time, Minutes Comments
4!A
Arrange in single layer.
Food
Bacon
Ground Beef
HI
10
Space evenly.
7
Up to 8 patties take about same time.
Well Done
Beef Steaks
Rare
Medium
Well Done
c
Steaks less than 1 inch thick cook
through before browning. Pan frying
is recommended.
Slash fat.
1
inch thick
(1 to 1
!4
lbs.)
c
c
c
HI
6
8
12
10
15
25
5
6
11
7–8
14–16
20-25
I
1Y2
inch thick c
(2 to 2X
lbs.)
c
Rare
Medium
Well Done
Chicken c
LO
35
10-15 Reduce time about 5 to 10 minutes per
side for cut-up chicken. Brush each side
with melted butter. Broil skin-side-down
first.
1 whole
(2 to
2!A
lbs.),
split lengthwise
A
1
Bakery Products
Bread (Toast) or
Toaster Pastries
Emdish
Muffins
+
HI
1
Z–2
34
HI 13-16
+
Space evenly. Place English muffins
cut-side-up and brush with butter,
Cut through back of shell. Spread open.
Brush with melted butter before and
u
Lohster Tails
2-4
B
(6
to
8
oz.
each)
c
5
Handle and turn very carefully. Brush
with lemon butter before and during
cooking if desired. Preheat broiler to
Fish
l-lb. fillets 1/4 to
1/2 inch thick
*
LO
8
HI
10
13
increase browning.
8
Increase time 5 to 10 minutes per side
for
llA
inch thick or home cured ham.
I
1
inch thick
B
Ham Slices
(precooked)
Pork Chops
Well Done
m
10
Slash fat.
13
Lamh
Chops
Medium
Well Done
I
2(1 inch thick) c
about 10 to 12 oz.
c
HI
10
12
14
9
10
12
Slash fat.
2
(1X
inch thick)
about 1 lb.
c
B
c
Medium
Well Done
17
12–14
HI
6
1-2
If desired, split sausages in half
lengthwise; cut into 5- to 6-inch pieces.
Wieners
and similar
precooked sausages,
bratwurst
l-lb. pkg. (10)
20
.—
This manual suits for next models
3
Table of contents
Other GE Range manuals

GE
GE JB910SLSS - ProfileTM 30" Electric Range Manual

GE
GE PCGB940ZEJ5SS User manual

GE
GE JB258 User manual

GE
GE PD900 User manual

GE
GE JGB800SEPSS Manual

GE
GE CGS975SEDSS Manual

GE
GE Profile J2S968 SERIES How to use

GE
GE Cafe CGS700P User manual

GE
GE Monogram ZDP36L6DSS User guide

GE
GE JGB720SEJSS User manual
Popular Range manuals by other brands

Indesit
Indesit K 1G210/R operating instructions

Bertazzoni
Bertazzoni PRO36 6 DFS X Installation, use & care manual

Fulgor Milano
Fulgor Milano SOFIA F6PGR366S2 Use & care manual

Electrolux
Electrolux TGF336FSA Use & care manual

Frigidaire
Frigidaire FFGF3011L Specifications

Vulcan-Hart
Vulcan-Hart VR Installation and operation manual