manuals.online logo
Brands
  1. Home
  2. •
  3. Brands
  4. •
  5. GE
  6. •
  7. Refrigerator
  8. •
  9. GE Kleenmaid PFCE1NJWDSS User manual

GE Kleenmaid PFCE1NJWDSS User manual

EXCLUSIVE DISTRIBUTOR OF
SPECIFICATIONS
French Door Refrigerator
PFCE1NJWDSS
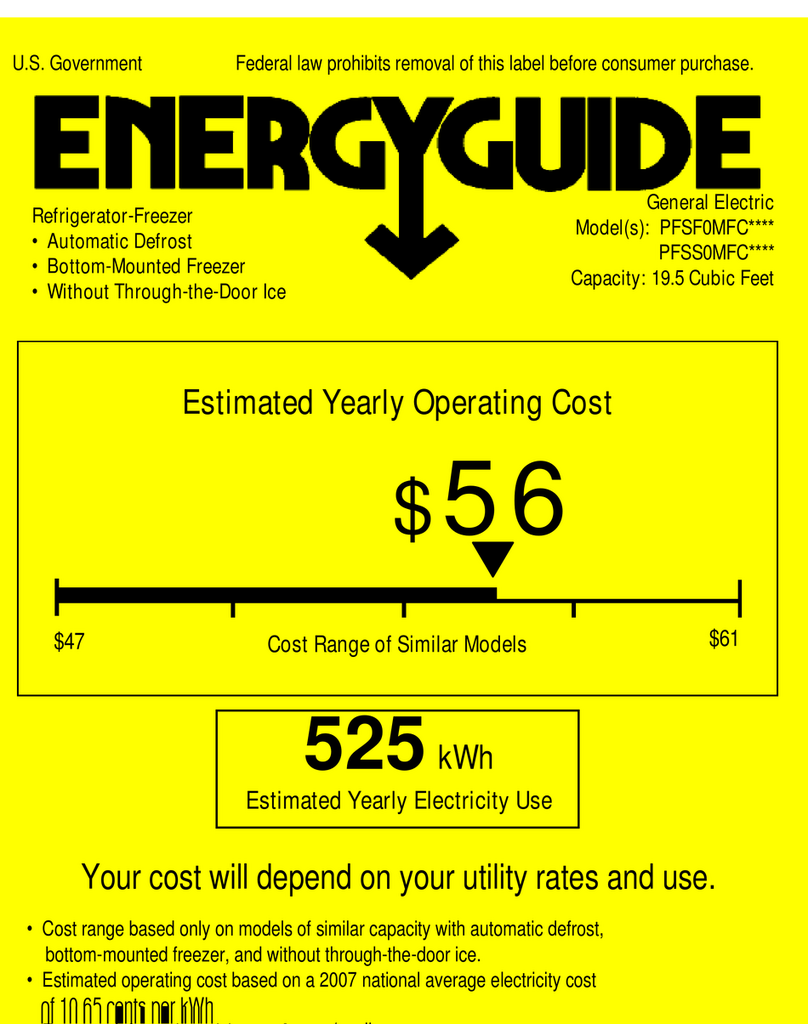
Energy rating: 3.5 stars (693kWh per year)
Capacities: 635 L (Total)
424 L (Fridge)
212 L (Freezer)
Electronic controls: Electronic external dispenser controls
Operating Noise level: 47Dba
Temperature management: ClimateKeeper system
Construction: Contoured bevelled doors with hidden hinges
Colour: Stainless steel
Dimensions: 1769mm (H)
912mm (W)
607mm - counter depth (D)
*Technical Specifications and product sizes can be varied by Manufacturer without notice. Any cut-outs for appliances should only be by physical measurements. Drawings are not to scale. All
information supplied is for general reference purposes only and is on the understanding that Kleenmaid Pty Ltd will not be liable for any loss, liability or damage whatsoever arising as a result of
reliance of such information.
Convenient eye level fresh food storage combined with
contoured doors, sculptural handles and an external water
dispenser with electronic touch controls, reflect the latest in
refrigeration design trends.
PFCE1NJWDSS.indd 1 11/8/08 10:19:19 AM
EXCLUSIVE DISTRIBUTOR OF
SPECIFICATIONS
French Door Refrigerator
PFCE1NJWDSS
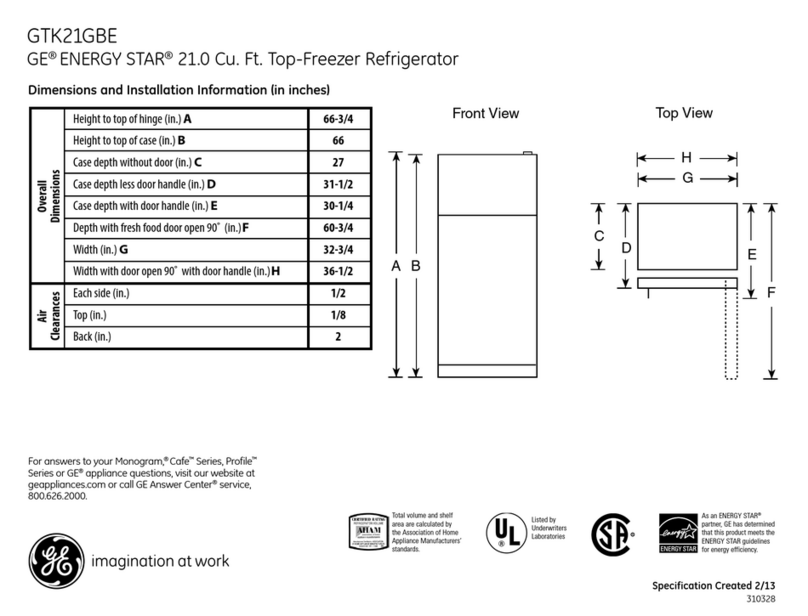
Minimum clearance behind the refrigerator is 13mm. This allows
for the water pipe to connect to the refrigerator. Please ensure the
water and tap electrical point are located in an adjacent cupboard
(within 1 metre of either side of the unit), or above (within 100mm
of the height of the refrigerator) rather than behind the refrigerator.
Additional clearance will be required if the utilities are located
directly behind the refrigerator.
PLAN VIEW
MINIMUM CORNER CLEARANCES
LEFT HAND
HINGE
RIGHT HAND
HINGE
40 40
Note:
GE refrigerators have been designed for full access to most interior
parts with the doors open to 90º, providing there is a 40mm
clearance, as shown, to the side wall. This allows for the depth
of the door handles. Full access can be achieved with increased
corner clearances.
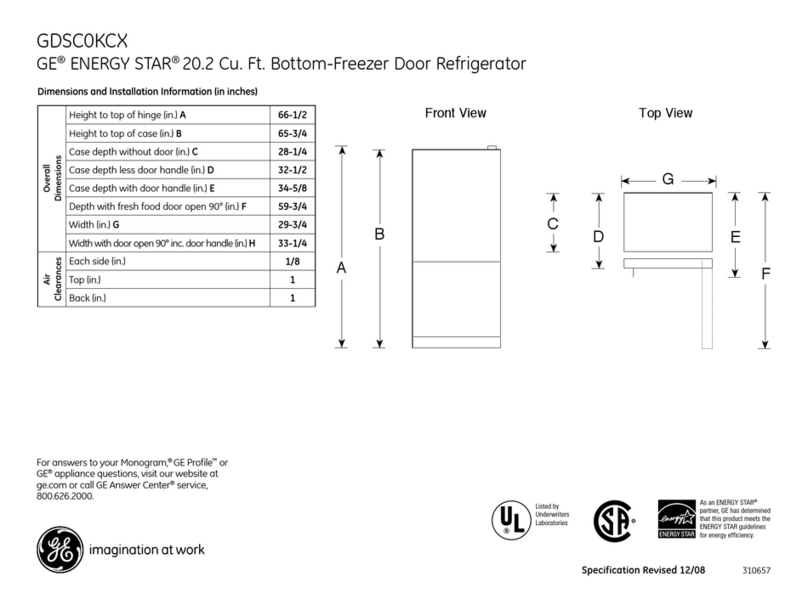
APPLIANCE PFCE1NJWDSS
A - Total Height to above hinges ~1769mm
B - Cabinet Height ~1753mm
C - Cabinet Depth without doors ~607mm
D - Cabinet Depth without door handle ~711mm
E - Cabinet Depth including handle ~788mm
F - Depth with Door Open 90o~1095mm
G - Cabinet Width ~912mm
MINIMUM CAVITY DIMENSIONS
* - Height ~1780mm
* - Width ~920mm
* - Depth ~620mm
CLEARANCES (*Included in above)
Top ~25mm
Sides ~3mm
Back ~13mm
DOOR OPENING DIMENSIONS
Y ~384mm
Z ~384mm
FRONT VIEW
B A
*Technical Specifications and product sizes can be varied by Manufacturer without notice. Any cut-outs for appliances should only be by physical measurements. Drawings are not to scale. All
information supplied is for general reference purposes only and is on the understanding that Kleenmaid Pty Ltd will not be liable for any loss, liability or damage whatsoever arising as a result of
reliance of such information.
F
E
C
D
G
YZ
The following information is only a brief outline of installation considerations pre-delivery. Detailed installation instructions are provided with appliance
and should be followed carefully. This document is for illustration purposes only and is not intended to replace the full installation procedures.
PFCE1NJWDSS.indd 2 11/8/08 10:19:21 AM
SPECIFICATIONS
French Door Refrigerator
BEFORE YOU BEGIN
Instructions to your plumber: Install 1/2 inch stop cock (tap), located in the cabinetry or adjacent to, or if
possible above fridge cavity. Not to be located in fridge cavity.
* Technical Specifications and product sizes can be varied by manufacturer without notice. Any cut-outs for appliances should only be by physical measure-
ments. Drawings are not to scale. All information supplied is for general reference purposes only and is on the understanding that Kleenmaid Pty Ltd will not be
liable for any loss, liability or damage whatsoever arising as a result of reliance of such information.
CONNECTING THE REFRIGERATOR
TO THE HOUSE WATER LINE
(icemaker and dispenser models)
A cold water supply is required for automatic
icemaker operation. If there is not a cold water
supply, you will need to provide one.
BEFORE YOU BEGIN
The water line installation is not warranted by the
refrigerator or icemaker manufacturer. Follow these
recommendations carefully to minimize the risk of
expensive water damage.
Water hammer (water banging in the pipes) in
house plumbing can cause damage to refrigerator
parts and lead to water leakage or flooding. Call a
qualified plumber to correct water hammer before
installing the water supply line to the refrigerator.
To prevent burns and product damage, do not hook
up the water line to the hot water line.
If you use your refrigerator before connecting the
waterline, make sure the icemaker power switch is
in the 0 (off) position.
Do not install the icemaker tubing in areas where
temperatures fall below freezing.
When using any electrical device (such as a power
drill) during installation, be sure the device is
insulated or wired in a manner to prevent the hazard
or electric shock.
All installations must be in accordance with
local plumbing code requirements.
Installation of the icemaker must be done by a
qualified service technician.
WARNING! Connect to
potable water supply only.
NOTES:
It is the installer’s responsibility to ensure
plumbing is compliant with local codes and
regulations.
Before making the connection to the refrigerator,
be sure the refrigerator power cord is not
plugged into the wall outlet.
If your refrigerator does not have a water filter,
we recommend installing one if your water
supply has sand particles that could clog the
screen of the refrigerator’s water valve. Install it
in the water line near the refrigerator. If using GE
SmartConnectTM Refrigerator Tubing Kit, you will
need an additional tube (WX8X10002) to connect
the filter. Do not cut plastic tube to install filter.
•
•
•
!
1CONNECTING THE REFRIGERATOR
TO THE HOUSE WATER LINE
(cont.)
If you are using copper tubing, place a
compression nut and ferrule (sleeve) onto the end of
the tubing coming from the hose cold water supply.
If you are using the GE SmartConnectTM tubing,
the nuts are already assembled to the tubing.
If you are using copper tubing, insert the end of
the tubing into the refrigerator connection, at the
back of the refrigerator, as far as possible. While
holding the tubing, tighten the fitting.
If you are using GE SmartConnectTM tubing,
insert the molded end of the tubing into the
refrigerator connection at the back of the
refrigerator, and tighten the compression nut until it
is hand tight. Then tighten one aditional turn with a
wrench. Overtightening may cause leaks.
Fasten tuning into the clamp provided to hold it in
position. You may nee to pry open the clamp.
1
A
B
C
One of the illustrations below will look like the
connection on your refrigerator.
Icemaker-Ready models
PFCE1NJWDSS.indd 3 11/8/08 10:19:24 AM

Other GE Refrigerator manuals

GE GTS18ABSALWW and Operating instructions

GE

GE GTS18ABSALWW and Operating instructions

GE CYE23TSDFSS Operating instructions

GE

GE CYE23TSDFSS Operating instructions

GE GSHF6PGY Manual

GE

GE GSHF6PGY Manual

GE GBSL3HCXLLS Manual

GE

GE GBSL3HCXLLS Manual

GE PFSF2MIYBB - Profile 22.2 cu. Ft.... Assembly instructions

GE

GE PFSF2MIYBB - Profile 22.2 cu. Ft.... Assembly instructions

GE GPS12FG Operating instructions

GE

GE GPS12FG Operating instructions

GE HSH22IFT User manual

GE

GE HSH22IFT User manual

GE GSS20GEWBB Manual

GE

GE GSS20GEWBB Manual

GE TBXS19 User manual

GE

GE TBXS19 User manual

GE GPE12 Original instructions

GE

GE GPE12 Original instructions

GE 22 Safety guide

GE

GE 22 Safety guide

GE ZIS360NM How to use

GE

GE ZIS360NM How to use

GE Cafe CSCP5UGXSS Original instructions

GE

GE Cafe CSCP5UGXSS Original instructions

GE 21 Operating instructions

GE

GE 21 Operating instructions

GE Monogram ZISW420DX Manual

GE

GE Monogram ZISW420DX Manual

GE 20 User manual

GE

GE 20 User manual

GE GFSF2HCY Manual

GE

GE GFSF2HCY Manual

GE GDSC3KCYBB Manual

GE

GE GDSC3KCYBB Manual

GE Profile PDS20SFSLSS Manual

GE

GE Profile PDS20SFSLSS Manual

GE ZIC36ON Series How to use

GE

GE ZIC36ON Series How to use

GE 25 User manual

GE

GE 25 User manual

GE Profile PSSF3RGZ Safety guide

GE

GE Profile PSSF3RGZ Safety guide

GE GE Profile Arctica PTS22LBN User instructions

GE

GE GE Profile Arctica PTS22LBN User instructions

GE GTV120PANR User manual

GE

GE GTV120PANR User manual

Popular Refrigerator manuals by other brands

Daewoo FR-550NT Service manual

Daewoo

Daewoo FR-550NT Service manual

Maytag MSF21D4MDH01 user guide

Maytag

Maytag MSF21D4MDH01 user guide

Reimo Carbest CV50L instruction manual

Reimo

Reimo Carbest CV50L instruction manual

Beko CHILL55W Installation, operation & food storage instructions

Beko

Beko CHILL55W Installation, operation & food storage instructions

Gorenje HPI1566 Detailed instructions for use

Gorenje

Gorenje HPI1566 Detailed instructions for use

Perlick SDBR48 Installation & operation manual

Perlick

Perlick SDBR48 Installation & operation manual

Porkka Future Installation and operation manual

Porkka

Porkka Future Installation and operation manual

Danby DAR044A1SSDD Owner's use and care guide

Danby

Danby DAR044A1SSDD Owner's use and care guide

Maytag MFF2558VEQ - 24.8 cu. Ft. Refrigerator cabinet parts

Maytag

Maytag MFF2558VEQ - 24.8 cu. Ft. Refrigerator cabinet parts

Dometic 9 SERIES operating manual

Dometic

Dometic 9 SERIES operating manual

Saturn ST-CF1954U manual

Saturn

Saturn ST-CF1954U manual

EAS Electric EMF1761 instruction manual

EAS Electric

EAS Electric EMF1761 instruction manual

Reliant RXGD-7 user manual

Reliant

Reliant RXGD-7 user manual

Perlick HP24Z Use & care guide

Perlick

Perlick HP24Z Use & care guide

Bartscher 700932 manual

Bartscher

Bartscher 700932 manual

Godrej Appliances 170 L STAR user guide

Godrej Appliances

Godrej Appliances 170 L STAR user guide

Vissani HVDR1040W instruction manual

Vissani

Vissani HVDR1040W instruction manual

Estate REFRIGERATOR Use & care guide

Estate

Estate REFRIGERATOR Use & care guide

manuals.online logo
manuals.online logoBrands
  • About & Mission
  • Contact us
  • Privacy Policy
  • Terms and Conditions

Copyright 2025 Manuals.Online. All Rights Reserved.