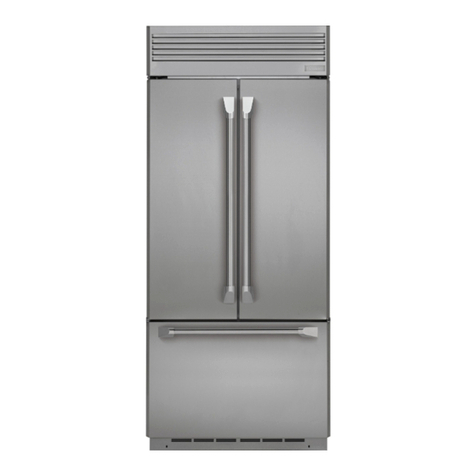
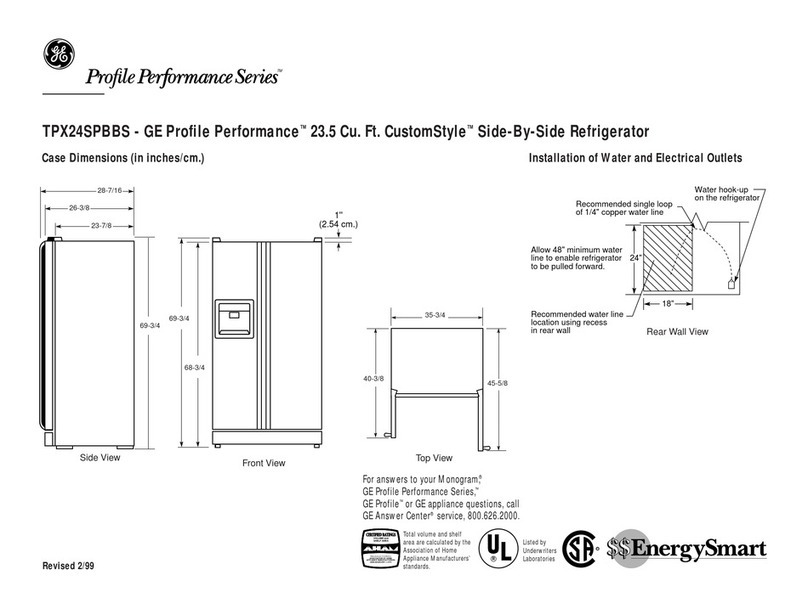
GE Monogram ZFGB21HYASS User manual

Double Door, Double Drawer,
Stainless Steel, Free-Standing
Refrigerators
149-60584 I
01-09 JR
monogram.com

Consumer Information
Stainless Stee! Refrigerator
Introduction Your new Monogram refrigerator makes an eloquent statement of stgle, convenience and kitchen
planning flexibilitg. Whether gou chose it for its puritg of design, practical storage arrangements or
assiduous attention to detail-or for all of these reasons-gou'll find that gour Monogram refrigerator's
superior blend of form and function will delight gou for gears to come.
Theinformation on the following pages will help gou operate and maintain gour refrigerator properlg.
If gou have ang other questions, visit our Website at: monogram.cam
Contents Consumer Services
Important Phone Numbers .................. 27
Model and Serial Numbers .................... 5
Performance Data Sheet .................... 25
Problem Solver .......................... 20-24
Product Registration .......................... 3
Safetg Instructions ........................ 4-7
State of California
Water Treatment Device Certificate .......... 26
Warrantg .......................... Back Cover
Care and Cleaning
Cleaning-Outside and Inside ................ 18
Light Bulb Replacement ..................... 19
Moving ..................................... 18
Vacation .................................... 18
Operating Instructions
Automatic Icemaker ......................... 17
Additional Features .......................... 15
Crispers ..................................... 16
Internal Water Dispenser .................... 10
Other Controls ................................ 9
Performance Air Flow Sgstem ................. 8
Shelves and Bins ......................... 12-14
Temperature Controls ........................ 8
TurboCoolT"................................... 9
Water Filter ................................. 11
Before
using
your
refrigerator
Read this manual carefullg. It isintended to help
gou operate and maintain gour new refrigerator
properlg.
Keep it handg for answers to gour questions.
If gou don't understand something or need
more help, there is a list of toll-free consumer
service numbers included in the back section
of this manual.
OR
Visit our Website at: monogram.corn

Consumer Information
Stainless Stee! Refrigerator
Write
down
the model
& seria!
numbers
You'll see them on a label inside the fresh food
compartment at the top on the right side.
Please write these numbers on the Consumer
Product Ownership Registration Card included
with the packing material.
Before sending in this card, please also write
these numbers here:
Model Number
Serial Number
Use these numbers in ang correspondence
or service calls concerning gour refrigerator.
Ifgou
received a
damaged
refrigerator
Immediatelg contact the dealer (or builder) that
sold gou the refrigerator.
Save time
&moneg
Before gou request service, check the Problem
Solver in the back of this manual. It lists causes of minor operating problems that
gou can correct gourself.
Ifgou
need
service
Toobtain service, seethe Consumer Services
page in the back of this manual.
We're proud of our service and want gou to be
pleased. If for some reason gou are not happg
with the service gou receive, here are steps to
follow for further help.
For customers in the USA:
FIRST,contact the people who serviced gour
appliance. Explain whg gou are not pleased.
In most cases, this will solve the problem.
NEXT,if gou are still not pleased, write all
the details-including gour phone number-to:
Manager, Customer Relations
GEAppliances
Appliance Park
Louisville, KY40225
For customers in Canada:
FIRST,contact the people who serviced gour
appliance. Explain whg gou are not pleased.
In most cases, this will solve the problem.
NEXT,if gou are still not pleased, write all
the details-including gour phone number to:
Manager, Consumer Relations
Mabe Canada Inc.
! Factorg Lane,Suite 3!0
Moncton, N.B.E1C9M3

IMPORTANTSAFETYINSTRUCTIONS
READ AND SAVE THESE INSTRUCTIONS
WARNING: Whenusingthisapp/ ance,
always exercisebasicsafety precautions,including
thefollowing:
• Usethis appliance onlg for its intended purpose
asdescribed in this Owner's Manual.
• This refrigerator must be properlg installed in
accordance with the Installation Instructions
before it isused.
Do not allow children to climb, stand or hang
on the shelves in the refrigerator. They could
damage the refrigerator and seriously injure
themselves.
Do not touch the cold surfaces in the freezer
compartment when hands are damp or wet.
Skin may adhere to these extremely cold surfaces.
Do not store or use gasoline or other flammable
vapors and liquids in the vicinity oftMs or any
other appliance.
In refrigerators with automatic icemakers,
avoid contact with moving parts of the ejector
mechanism, or with the heating element located
on the bottom ofthe icemaker.Do not place
fingers or handson the automatic icemaking
mechanism while the refrigerator isplugged in.
Keepfingers out of the "pinch point" areas:
clearances between the doors and between
the doors and cabinet are necessarily small.
Becareful closingdoors when children are
in the area.
Unplug your refrigerator before cleaning and
making repairs. NOTE:We strongly recommend
that any servicing be performed by a qualified
individual.
Before replacing a burned-out light bulb,
the refrigerator should be unplugged in order
to avoid contact with a livewire filament.
(Aburned-out light bulb may breakwhen
being replaced.)
NOTE:Turningcontro!to OFFdoesnot remove
power to the lightcircuit.
Do not refreeze frozen foods which have thawed
completely.
,&,DANGER: RISK OF CHILD ENTRAPHENT
Childentrapment and suffocation are not problems
of the past. Junked or abandoned refrigerators are
still dangerous...evenifthey will sit for '_justa few
days."If you are getting rid of your old refrigerator,
pleasefollow the instructions below to help prevent
accidents.
Before you throw away your old refrigerator
or freezer:
• Takeoffthe doors.
Leavethe shelvesin place sothat children
may not easily climb inside.
REFRIGERANTS
All refrigeration products contain refrigerants,which
under federal law must be removed priorto product
disposal.
If you are getting rid of an old refrigeration product,
checkwith the company handling the disposal
about what to do.

MESURESDESI CURITI IMPORTANTES
LIREETCONSERVERCESINSTRUCTIONS
AVERTISSEHIENT:Lorsquevous
utilisezle r_frig_rateur,observeztoujours certaines
prdcautionsde base,notamment :
• N'utilisez le r@fricj@rateurque pour son usage
pr@vu,comme d#crit dans le present manuel.
• Installez le r@fricj@rateurconform@ment aux
directives d'Jnstallation avant de I'utJlJsen
• Nelaissezpas lesenfants gnmper, s'asseoir,
setenir debout ni se pendre aux clayettes
du r_frig_rateur. IIspourraient endommager
le rdrig_rateur etse blessergravement.
• Unelois le r_fMcj_rateur en marche, ne touchez
pas lessurfaces froides du concj_lateur, surtout
sivous avez les mains humides ou mouill_es :
Iopeau risqued'adh_rer _ ces surfacestr_s
froides.
N'entreposez et n'utilisez pasd'essence ou
autres vapeurs et liquidesinflammables 6
proximit_ de cet appareil ou de tout autre
appareil _lectrom_nacjer.
Pour les r_frig_rateurs dot_s d'une machine
6 gla¢ons automatique, _vitezle contact avec
lespi_cesmobiles du m_canisme _jecteur,
ou avec I'#l#mentchauffant situ@a la partie
inf#rieurede la machine a glaqons.Neposez
pas lesdoigts ou lesmains sur le m#canisme
de la machine a glaqons pendant que
le r#frig#rateur est branch&
I_loignezlesdoigts des parties du r_frig_rateur
oQI'on peut facilement se pincer: lesespaces
entre lesportes et entre lesportes etles placards
sont toujours _troits.Soyez prudent Iorsque
vous fermez lesportes de I'appareilen presence
desenfants.
• D_branchez votre r_frig_rateur avant
de Ienettocjer et de le r_parer. REMARQUE:Nous
vous recommandons vivement de confier toute
r_paration 6 un technicien qualifi&
• Avant de remplacer une ampoule cjrill_e,
le rdrig_rateur doit _tred_branch_ afin
d'_viter tout contact avec un fil sous tension.
(Uneampoule grill_e peut sebriser pendant
I'op_ration).
RENARQUE:Lorsquevousp!acezlacommande
surdteint, !'alimentationdlectriquede/'ampoule
n'estpascouple.
Nefaites pas reconcjeJerdesaliments surcjel_s
qui ant compl_tement d_cjel&
DANGER: RISQUESPOUR LESENFANTS
Lesenfants prisau pi_geou marts d'asphyxie sont
toujours d'actualit& Lesappareilsde r_frig_ration
abandon_s sont toujours aussi dangereux, m_me
sion n'attend qua "quelquejours" pour s'en
d_barasser.Sivous negardez pasvotre ancien
appareil,veuillezsuivre lesdirectives ci-dessous
afin de pr_venir lesaccidents.
Avant de vous d_barasser de votre vieux
appareil de r6frig_ration :
D_montezlesportes.
Laissezlesclayettes en placeafin d'emp_cher
lesenfants de grimper 6 I'int@rieur.
REFRIGERANTS
Tousles appareilsde rdrig6ration contiennent
desrefrigerants qui,conform6ment aux lois
f6d6rales,doivent 6tre enlev6savant toute
61iminationde I'appareil.
Sivous vous d_barrassezde vieux appareilsde
rdrig_ration, v_rifiez,aupr_s de la soci_t_qui
s'occupe de leur _limination, ceque vous
devezfaire.
IHPORTANTSAFETYINSTRUCTIONS
HOW TO CONNECT ELECTRICITY
Do not, under ang circumstances, cut or remove
the third (ground) prong from the power cord.
For personal safetg, this appliance must be
properlg grounded.
Thepower cord ofthis appliQnceisequipped
with Q3-prong (grounding)plug which mates
with a standQrd3-prong (grounding)wQIIoutlet
to minimize the possibility of electricshock
hQzQrdfrom this appliQnce.
Hove thewQIIoutlet and circuit checked by
a quQlifiedelectricianto make surethe outlet
isproperlg grounded.
Where QstandQrd2-prong wQIIoutlet is
encountered, itis your personQIresponsibility
and obligQtionto hove it replQcedwith a
properlg grounded 3-prong wQIIoutlet.
Therefrigerator shouldQIwQgsbe plugged into
its own individuQIelectrical outlet which hQs
a voltage rating thQt matches the rating plQte.
Thisprovidesthe best performance and Qlso
preventsoverloQdinghousewiring circuits which
could cause a fire hQzardfrom overheQtedwires.
Never unplug gour refrigerator bg pulling
on the power cord.Always grip plug firmly
and pull straight out from the outlet.
Repairor replace immediately all power cords
that have become frayed or otherwise damaged.
Donot usea cord that shows cracks or abrasion
damage along its length or at either end.
When moving the refrigerator away from the wall,
be careful notto rollover or damage the power cord.
USE OF EXTENSION CORDS
Beca use of potentia Isafetg haza rd s under
certain conditions, we stronglg recommend
against the use of an extension cord.
However,ifyou must usean extensioncord, it is
absolutely necessarythat it be a UL-listed,3-wire
grounding type appliance extension cord having
a grounding type plug and outlet and that
the electrical rating of the cord be 15 amperes
(minimum)and 120volts.
SAVETHESEINSTRUCTIONS

MESURESDESE CURITEIMPORTANTES
RACCORDEMENT 4LLECTRIQUE
Ne coupez ni retirez en aucun cas la troisi_me
broche (mise 6 la terre) de la fiche du cordon
d'alimentation. Pour votre s_cudt_, cet appareil
doit _tre correctement rnis 6 la terre.
Lecordon d'alimentation de cet appareil est
muni d'une fiche 6 3broches (mise6 la terre)
qui sebranche dans une prisemural ordinaire
63alv_oles(mise6 laterre)pour r_duire au
minimum lesrisquesdu chocs_lectriques.
Faitesexaminer la prise de courant et lecircuit
par un _lectricienqualifi_ pour vous assurer
que la priseestcorrectement mise6 laterre.
Sila prisemumle est du tgpe standard 6 2 alv_oles,
il vous incombe de lafaire remplacer par une prise
63alv_olescorrectement mise6 laterre.
La machine 6 glaqonsdoit toujours _tre
branch6 dans sa propre prisede courant,
dont latension nominale est identique
6 celleindiqu_e sur la plaque signal_tique.
Cetteprecaution est recommand_e pour garantir
un rendement optimum et _viter une surcharge des
circuits _lectriquesde la r_sidence,ce qui pourrait
crier un risqued'incendie par surschauffe desills.
Ned_branchezjamais I'appareilen tirant lecordon
d'alimentation. Saisissezfermement la fiche
du cordon et tirez droit pour la retirerde la prise.
R_parezou remplacezimm_diatement tout cordon
effiloch_ ou endommag& N'utilisezpasun cordon
fendill_ou pr_sentant dessignesd'usure.
Lorsquevous d_placez I'appareildu mur,faites
attention de ne pas la faire foulersur le cordon
d'alimentation afin de ne pasI'endommager.
CORDONS PROLONGATEURS
Nous vous recommandons fortement de ne pas
utiliser de cordons prolongateurs 6 cause des
risques potentiels qu'ils pr_sentent dans certaines
conditions.
Toutefoissivous d_cidezd'utilisertout de m_me
un cordon prolongateur,il est absolument n_cessaire
qu'il s'agissed'un cordon 6 3fils avec mise 6 la terre
pour appareils_lectrom_nagers homologu_ UL
aux Etats-Unis)ou homologu_ CSA(au Canada),
pourvu d'une fiche etd'une prisemises6 la terre
de 15 amperes (minimum) etde 120volts.
CONSERVEZ CESDIRECTIVES

Operating Instructions
Stainless Stee! Refrigerator
Temperature
controls ®
®FREEZER REFRIGERATOR
The temperature controls are preset in the factory at 37°F
for the fresh food compartment and O°F for the freezer
compartment. Allow 24 hours for the temperature to stabilize
to the preset recommended settings.
The temperature controls can display both the SETtemperature
as well as the actual temperature in the flesh food and freezer
compartments. The actual temperature may vary slightly
from the SET temperature based on usage and operating
environment.
Setting either or both controls to OFF stops cooling in both
the freezer and fresh food compartments but does not shut
off electrical power to the refrigerator.
NOTE; The refrigerator is shipped with protective film covering
the temperature controls. If this film was not removed during
installation, remove it now.
To change the temperature, press and release
the (_(warmer) or @ (colder) pad. The SETlight
will come on and the displag will show the set
temperature. To change the temperature, tap
either the ($) (warmer) or _')(colder)pad until
the desired temperature is displaged. Fresh food
temperatures can be adjusted between 34°F
and 44°Fand the freezer temperatures can be
adjusted between -6°F and +6°F.
Once the desired temperature has been
set, the temperature displag will return to
the actual fresh food and freezer temperatures
after 5 seconds. Several adjustments mag
be required. Eachtime gou adjust controls,
allow 24 hours for the refrigerator to reach
the temperature gou have set.
To turn the cooling sgstem off, tap
the @ (warmer) pad for either the fresh food
compartment or the freezer until the displag
shows OFF.To turn the unit back on, press
the @(colder) pad for either the fresh food
compartment or freezer.The SETlight will
illuminate on the side gou selected. Then press
the @(colder) pad again (on the side where
the SETlight is illuminated) and it will go to
the preset points of O°Ffor the freezer and 37°F
for the fresh food compartment.
Performance
Air Flow
Sgstem
The Performance Air-Flow Sgstem is designed to
maximize temperature control in the fresh food
and freezer compartments. This unique special
feature consists of the Air Tower along the top
and back walls of the fresh food compartment
and the Air Tunnel on the bottom portion of
the freezer rear wall. Placing food in front of
the louvers on these components will not affect
performance.
Although the Air Tower and the Air Tunnel
can be removed, doing sowill affect temperature
performance. (For removal instructions, on-line,
24 hours a dag, contact us at GEAppliances.com
or call 800.444.1845. InCanada, call us at
!.800.56!.3344.)

Other Controls
Stainless Stee! Refrigerator
HOW
TurboCool TM
works TurboCool rapidly cools
TURBO•the refrigerator compartment in
order to more quickly cool foods.
Use TurboCool when adding
a large amount of food to the refrigerator
compartment, putting away foods after they
have been sitting out at room temperature
or when putting away warm leftovers. It can
also be used if the refrigerator has been
without power for an extended period.
Once activated, the compressor will turn on
immediately and the fans will cycle on and
off at high speed as needed for 8 hours.
The compressor will continue to run until
the refrigerator compartment cools to
approximately 34°F (1°C),then it will cycle
on and off to maintain this setting. After
8 hours, or if TURBOCOOLis pressed again,
the refrigerator compartment will return
to the original setting.
How to use
TurboCool 1 PressTURBOCOOL The refrigerator
temperature display will show TC.
2 After TurboCool is complete,
the refrigerator compartment
will return to the original setting.
NOTES:
• Therefrigerator temperature cannot
be changed during TurboCool.
•Thefreezer temperature is not affected during
TurboCool.
•When opening the refrigerator door during
TurboCool, the fans wi!! continue to run if
they have cycled on.
Energy Saver This product is equipped with
an Energy Saver feature.
The refrigerator is shipped
with the Energy Sever feature ON.
Over time, moisture can form on the front
surface of the refrigerator cabinet and cause
rust. If moisture does appear on the front surface
of the refrigerator cabinet, turn offthe Energy
Sever feature by pressing and releasing
the ENERGYSAVERpad on the control panel.
Door Alarm The door alarm will sound
if either door isopen for more than
2 minutes. The beeping sound will
stop when you close the door.

Internal Water Dispenser
Stainless Stee! Refrigerator
Internal Water
Dispenser Thewater dispenser islocated on the left wall
inside the refrigerator compartment.
To dispense water:
1 Holdthe glass against the recess.
2 Pushthe water dispenser button.
3 Hold the glass underneath the dispenser
for 2-3 seconds after releasing the dispenser
button. Water mag continue to dispense
after the button is released.
If no water is dispensed when the refrigerator is
first installed, there mablbe air in the water line
s;jstem. Press the dispenser button for at least
2minutes to remove trapped air from the water
line and to fi!! the water Sblstem.During this
process, the dispenser noise mablbe loud as
the air ispurged from the water line SblStem.
Toflush out impurities in the water line, throw
awa;j the first 6 glassfuls of water.
NOTE:Toavoid water deposits, the dispenser
should be cleaned periodically by wiping with
a clean cloth or sponge.
10

Water Filter
Stainless Stee! Refrigerator
Water filter Wo e ,,e Cor,, e
Thewater filter cartridge is
located in the back upper
right corner of the
refrigerator compartment. Jf
When to Replace the Filter
There is a replacement indicator light for the
water filter cartridge on the temperature display.
This light will turn orange to tell you that you
need to replace the filter soon. The filter cartridge
should be replaced when the replacement
indicator light turns red or if the flow of water to
the dispenser or icemaker decreases.
On models with external dispensers, the top of
the LCDscreen will display, "Replace Water Filter."
Installing the Filter Cartridge
1 If you are replacing the
cartridge, first remove
the old one by slowlyturning it
to the left. DONOTpull down on
the cartridge. Asmall amount of
water may drip down.
CAUTION: airhasbeentrapped
the system, the filter cartridge ma_l be ejected as
it is removed. Use caution when removing.
2 Removethe protective foil from the end of the
cartridge.
3 Fillthe replacement cartridge with water from the
tap to allow for better flow from the dispenser
immediately after installation.
Lining up the arrow on the
cartridge and the cartridge _" _ /
holder, slowly rotate the
cartridge clockwise until it
stops. When the cartridge is
properly installed, you will feel
it "click" asit locks into place. I
Do not overtighten.
S Runwater from the dispenser for ] minutes
(about 1V2gallons) to clear the system
and prevent sputtering. See ToUse the
Dispenser section.
6 Pressand hold the RESETWATER
FILTERpad for 3 seconds.
NOTE:A new!_l-insto!led water
filter cartridge ma_jcuuse wuter
to spurt from the dispenser.
Filter Bgpass Plug
You must use the filter bypass plug when
a replacement filter cartridge isnot available.
The icemaker will not operate without the filter
or filter bypass plug.
Replacement Filters:
Toorder additional filter cartridges
in the United States, visit our Website,
GEAppliances.com, or call GE Parts and
Accessories, 800.626.2002.
Filter MlodelMWF
Customers in Canada should consult the yellow
pages for the nearest MlabeService Center.
11

Shelves and Bins
Stainless Stee! Refrigerator
Rearranging
the shelves Shelves in the refrigerator compartment
are adjustable.
Refrigerator Compartment
To remove:
1 Removeall items from the shelf.
2 Tilt the shelf up at the front.
3 Lift the shelf up at the back and bring
the shelf out.
To replace:
1 While tilting the shelf up, insert the top hook
at the back of the shelf in a slot on the track.
2 Lower the front of the shelf until the bottom
of the shelf locks into place.
Somemodelshavewireshelvesthat
canbeadjustedinthesamemanner.
2 i
vii
Slide-out
spillproof
shelf
The slide-out spillproof shelf allows Sou to reach
items stored behind others. The special edges
are designed to help prevent spills from dripping
to lower shelves.
To remove:
1 Removeall items from shelf.
2 Slide the shelf out until it stops.
3 Lift the front edge of the shelf until the central
tabs are above the front bar.
4 Continue pulling the shelf forward until
it can be removed.
To replace:
1 Placethe rear shelf tabs just in front
of the central notches on the shelf frame.
2 Slide the shelf in until the central tabs
are slightlg behind the front bar.
3 Lower the shelf into place until it is horizontal
and slide the shelf in.
lake sure that the shelf sits fiat after reinsta!lation
and doesn't move freelg from side to side.
lake sure Sou push the shelves a!! the wag
in before Sou close the door.
QuickSpace TM
shelf This shelf splits in half and slides under itself
for storage of tall items on the shelf below.
This shelf can be removed and replaced or
relocated just like Slide-Out Spillproof Shelves.
On some models, this shelf can not be used
in the lowest position.
12

Shelves and Bins
Stainless Steel Refrigerator
Basket
removal (top
drawer)
To Remove the Full-Width Basket on
Top Freezer Drawer Models:
1 Openthe top freezerdrawer until it stops.
2 Thefreezer basket restson the insidetabs
on the drawer slides.
Lift the front end of the basketsothat the front
two alignment tabs come out ofthe slide bracket
first. Thenrotate the front edge of the basketup
while lifting the remainingtwo rear alignment tabs
out of the slidebracket.
4 Make surethe plastic sleevesremain attached
to the 4 slotson the slidebrackets.
When Replacing the Full-Width Basket:
Tiltthe basket back and lower it down into
the drawer. Rotatethe basketto a horizontal position
and pressit down into the 4 alignment tabs.
NOTE:Alwags besurethat a!!4basketslots
are engagedin the slidebrackets beforesliding
back into thefreezer.
Appearancemayvary
Tab
Basket
removal
(bottom
drawer)
To Remove the Full-Width Upper Basket:
1 Open the bottom freezer drawer until
it stops.
2 Pullthe basket out to the stop location.
3 Lift the basket up at the front to release it from
the slides.
4 Lift the back up and out of the slide.
When Replacing the Full-Width Upper
Basket:
Drop the upper rear wire rail of the basket into
place behind the plastic tabs. Then drop the front
end of the basket into place and slide the basket
back into the closed position.
NOTE:Alwags be sure to fu!!£ close this basket.
Appearancemayvary
13

Shelves and Bins
Stainless Stee! Refrigerator
Basket removal
(bottom
drawer)
(cont.)
To Remove the Deep Fuji-Width Lower
Basket:
1 Open the bottom freezer drawer until
it stops.
2 Lift the rear of the basket up so the two rear
alignment tabs are pulled out of the slide
bracket.
3 Rotate the basket up and out of the drawer.
When Replacing the Deep Full-Width
Lower Basket:
Lower the front end of the basket into position so
that the two front alignment tabs enter the slide
bracket. Then lower the rear of the basket into
place, ensuring the two rear alignment tabs
are pressed into place in the slide bracket.
NOTE:AlwaFs be sure that a!! 4basket slots are
engaged in the slide brackets before sliding back
into the freezer.
Appearancemayvary
AdJustable
bins on
the door
Adjustable bins can easilu be carried from
refrigerator to work area.
To remove: Lift bin straight up, then pull out.
To replace or relocate: Slide in the bin just above
the molded door supports, and push down.
The bin will lock in place.
The snugger helps prevent tipping, spilling
or sliding of small items stored on the door shelf.
Grip the finger hold near the rear of the snugger
and move it to fit your needs.
Non-
AdJustable
bins on
the door
To remove: Lift the bin straight up,then
pull out.
To replace: Engage the bin in the molded
supports on the door and push down. It will lock
in place.
Non-
AdJustable
beverage
rack
To remove: Lift the rack straight up, then pull out.
To replace: Engage the rack in the molded
supports on the door and push down. It will lock
in place.
14

Additional Features
Stainless Stee! Refrigerator
Door swing
clearances The doors are factorg set for a 150°
door swing. To avoid contact damage
to the refrigerator doors or to adjacent
cabinetrg or walls, observe the minimum
clearances shown.
Allow 4" clearance on each side
to an adjacent wall for a 90° opening
and access to drawers.
Allow 15" clearance on each side
to an adjacent wall for removal of drawers.
IE i_1
150°DoorSwing ,
24-5/8"
T
19-1/16"
l
Door
alignment
If the top of the doors are uneven, first trg to raise
the lowest door bg turning the leveling leg on
the same side as the door until the doors are
even. If the unit rocks, re-adjust the leveling
legs to the extent that the unit is stable.
If the doors remain uneven, turn the adjustable
pin to raise, or lower, the left door to match
the right door. Use a !/4"Allen wrench
to turn the pin.
Adjustable Pin
\ ,
Leveling
Leg
15

Crispers and Pans
Stainless Steel Refrigerator
Fruit and
vegetable
crispers
Excesswater that may accumulate in the bottom
of the drawers should be wiped dry.
AdJustable
humidity
crispers
Slide the control all the way to the HIGH setting
to provide high humidity recommended for most
vegetables.
Slide the control all the way to the LOW setting
to provide lower humidity levels recommended
for most fruits.
Convertible
meat pan The convertible meat pan has its own cold air
duct to allow a stream of cold air from the freezer
compartment to flow to the pan.
The variable temperature control regulates
the air flow from the Climate Keeper.
Setthe control to the coldest setting to store
fresh meats.
Setthe control to Cold to convert the pan
to normal refrigerator temperature and provide
extra vegetable storage space. The cold air duct
is turned off. Variable settings between these
extremes can be selected.
Deli pan
removal To remove:
i Removethe fruit and vegetable drawers.
2 Pullthe drawer out to the stop position.
3 Lift the lid to access the/4 swing locks.
4 Rotate all four swing locks to the unlock
position.
5 Lift the front of the drawer up and out.
To replace:
1 Make sure all four swing locks are in the unlock
position.
2 Placethe sides of the drawer into the drawer
supports, making sure the swing locks fit
on the drawer slots.
4
5
Lock all four swing locks by rotating them
to the lock position.
Lower the lid and slide in the drawer.
Replace the fruit and vegetable drawers. SwingLocks- SwingLocks-
UnlockPosition LockPosition
16

Automatic Icemaker
Stainless Stee! Refrigerator
Automatic
icemaker NOTE: A newl£ installed refrigerator ma£ take 12 to 24 hours to begin making ice.
The icemaker will produce seven cubes
per cgcle-approximatelg 100-!30 cubes
in a 24-hour period, depending on freezer
compartment temperature, room temperature,
number of door openings and other use
conditions.
See below for how to access ice and reach
the power switch.
If the refrigerator is operated before
the water connection is made to the icemaker,
set the power switch in the O (off) position.
When the refrigerator has been connected
to the water supplg, set the power switch
to the IIon) position. The icemaker power light
will turn green when the freezer light switch is
pressed in or when the freezer door isclosed.
The icemaker will fill with water when it cools to
!5°F (-10°C).A newlg installed refrigerator mag
take 12 to 24 hours to begin making ice cubes.
You will hear a buzzing sound each time
the icemaker fills with water.
Throw awag the first few batches of iceto allow
the water line to clear.
Be sure nothing interferes with the sweep
of the feeler arm.
Power
Switch
-k_ Icemal<er
When the bin fills to the level of the feeler arm,
the icemaker will stop producing ice. It is normal
for several cubes to bejoined together.
If ice is not used frequentlg, old ice cubes will
become cloudg, taste stale and shrink.
NOTE:In homes with lower-than-average water
pressure, you may hear the icemoker c£cle
multiple times when making one batch of ice.
NOTE: Set the power switch to the 0 [off) position
if the water supp!£ is shut off.
Accessing ice
and reaching
the power
switch
Toreech the icemaker power switch,open the top
freezerdrawer and remove the full-width basket.
Alwags be sureto replacethe basket.
Toaccess ice, simplg open the bottom freezer
drawer and slideout the full-width basketto expose
the ice bucket.
Ice
Bucket
Toreach the power switch. Toaccessice.
17

Care and Cleaning
Stainless Steel Refrigerator
Cleaning
the outside The stainless steel panels and handles can be
cleaned with a commercially available stainless
steel cleaner such as Stainless Stee! MagicYM
Stainless SteelMagic isavailable at Ace, True
Value, Servistar, HWIand other leading stores.
It is also available through GE Parts and
Accessories, 800.626.2002. Order part number
WX!OX!5.
Do not use appliance wax or polish
on the stainless steel.
Cleaning
the inside To help prevent odors, leave an open box
of baking soda in the fresh food and freezer
compartments.
Unplug the refrigerator before cleaning.
If this is not practical, wring excess moisture
out of sponge or cloth when cleaning around
switches, lights or controls.
Use warm water and baking soda solution-
about a tablespoon (15 ml)of baking soda to
a quart (1 liter) of water. This both cleans and
neutralizes odors. Rinseand wipe dry.
Use of any cleaning solution other than
that which is recommended, especially those
that contain petroleum distillates, can crack
or damage the interior of the refrigerator.
Avoid cleaning cold glass shelves with hot
water because the extreme temperature
difference may cause them to break. Handle
glass shelves carefully. Bumping tempered
glass can cause it to shatter.
Do not wash any plastic refrigerator parts
in the dishwasher.
Behind the
refrigerator Be careful when moving the refrigerator away
from the wall. All types of floor coverings can be
damaged, particularly cushioned coverings and
those with embossed surfaces.
Pull the refrigerator straight out and return it
to position by pushing it straight in. Moving
the refrigerator in a side direction may result
in damage to the floor covering or refrigerator.
When pushing the refrigerator back, make sure
you don't roll over the power cord or icemaker
supply line.
Preparing
for vacation For long vacations or absences, remove food
and unplug the refrigerator. Clean the interior
with a baking soda solution of one tablespoon
(15 ml) of baking soda to one quart (1 liter)
of water. Leave the doors open.
Setthe icemaker power switch to the O[off)
position and shut offthe water supply to
the refrigerator.
If the temperature can drop below freezing,
have a qualified servicer drain the water supply
system to prevent serious property damage due
to flooding.
Preparing
to move
18
Secure all loose items such as shelves and
drawers by taping them securely in place
to prevent damage.
When using a hand truck to move the refrigerator,
do not rest the front or back of the refrigerator
against the hand truck. This could damage
the refrigerator. Handle only from the sides
of the refrigerator.
Be sure the refrigerator stays in an upright
position during moving.

Replacing the Light Bulbs
Stainless Stee! Refrigerator
Fresh food
compartment--
upper light
Setting the controls to OFF does not remove
power to the light circuit.
1
2
Unplug the refrigerator.
The bulbs are located at the top
of the compartment, inside the light shield.
Toremove the light shield, pull forward
on the shield to disengage the tabs at the back
of the shield. Pull down to remove the light
shield.
After replacing the bulbs with appliance
bulbs of the same or lower wattage, replace
the light shield.When replacing the light shield,
set the front tabs into the appropriate slots
in the front of the shield housing and pull
forward to seat the tabs at the back
of the shield into the housing.
5 Plugthe refrigerator back in.
'.,__ ,._ L9 //
Freezer light CAUTION:Lightbulbsmaybehot
Setting the controls to OFFdoes not remove
power to the light circuit.
1 Unplug the refrigerator.
2 Removethe freezer basketfor access.Thebulb is
located atthe rear of thefreezer insidea light
shield.
3 Toremove,grasp the shieldat the top and pull out
to releasethe tabs at the bottom.
4 After replacing with an appliance bulb of the
same or lower wattage, replace
the shield and freezer basket.
5 Plug the refrigerator back in.
Light
Shield
\
Appearance may vary
19

The Problem Solver
Stainless Stee! Refrigerator
Normal
operating
sounds
Newer refrigerators sound different from older refrigerators. Modern refrigerators have more
features and use newer technolog_t.
Do you hear what I hear? These sounds are normal.
HUMMM,..
--WHOOSH...
The new high efficiency compressor may run
faster and longer than your old refrigerator
and you may hear a high-pitched hum or
pulsating sound while it is operating.
Sometimes the refrigerator runs for an
extended period, especially when the doors
are opened frequently. This means that
the Frost Guerd'"feature is working
to prevent freezer burn and improve
food preservation.
You may hear a whooshing sound when
the doors close.This is due to pressure
equalizing within the refrigerator.
CLICKS,POPS,
CRACKSand CHIRPS
You may hear cracking or popping sounds
when the refrigerator isfirst plugged in.
This happens as the refrigerator cools
to the correct temperature.
Electronic dampers click open and closed to
provide optimal cooling and energy savings.
The compressor may cause a clicking or
chirping sound when attempting to restart
(this could take up to 5 minutes).
The electronic control board may cause
a clicking sound when relays activate
to control refrigerator components.
Expansion and contraction of cooling coils
during and after defrost can cause a cracking
or popping sound.
After an icemaking cycle, you may hear
the ice cubes dropping into the ice bucket.
WHIR./
You may hear the fans spinning at high
speeds. This happens when the refrigerator
is first plugged in,when the doors are opened
frequently or when a large amount of food
is added to the refrigerator or freezer
compartments. The fans are helping
to maintain the correct temperatures.
If either door is open for over 3 minutes,
you may hear the fans come on in order
to cool the light bulbs.
Thefans change speeds in order to provide
optimal cooling and energy savings.
WATERSOUNDS
6
Theflow of refrigerant through the freezer
cooling coils may make a gurgling noise like
boiling water.
Water dropping on the defrost heater can
cause a sizzling, popping or buzzing sound
during the defrost cycle.
A water dripping noise may occur
during the defrost cycle as ice melts from
the evaporator and flows into the drain pan.
Closing the door may cause a gurgling sound
due to pressure equalization.
20
This manual suits for next models
1
Table of contents
Other GE Refrigerator manuals

GE
GE GTE21 Operating instructions

GE
GE Monogram Refrigerator User manual

GE
GE 22 Models Training manual

GE
GE Profile PDF22MCR User manual

GE
GE WML04GADBS Service manual

GE
GE Cafe CFCP1NIXSS Manual

GE
GE GTS22WSTCRSS Original instructions

GE
GE GTH18HCT Manual

GE
GE GTH18IBXWW - R 18.0 Cu. Ft. Top-Freezer... Manual

GE
GE SIDE-BY-SIDE REFRIRATOR 22 User manual

GE
GE Monogram ZISS480DRSS User manual

GE
GE Profile PFSF6PKW Manual

GE
GE Monogram ZFSB27DYSS User instructions

GE
GE 15 Operating instructions

GE
GE GDSL3KCYLLS Manual

GE
GE TFHA22R User manual

GE
GE Profile PCF23RGW Manual

GE
GE GDSS0KCX Manual

GE
GE GFSS2KEXSS Manual

GE
GE GE Profile Arctica CustomStyle PSW23PSR User instructions