GE PSC23NHPABB and Safety guide

vvvvvv.GEAppliances.com
°v,,,q
oq
°v,,,q
oq
Safety Instructions ........... 2-4
Operating Instructions
Automatic Icemaker ........... 14
Care and Cleaning .......... 16, 17
Crispers and Pans ............. 13
CustomCool r'*. ............... 7, 8
Ice and _A'ater Dispenser ........ 15
Refligerator Doors ............ 12
Replacing the Light Bulbs ....... 18
Shelves and Bins ........... 10, 11
Temperature Controls ........... 5
TurboCooF _ ................... 6
_A'ater Fiher . .................. 9
Installation Instructions
Installing the Refligerator . . . .98-31
Moving the Refligeramr . .... 24-27
Preparing to Install
the Refligerator . .............. 93
Trim Kits and Panels ........ 19-92
Wamr Line Installation ...... 39-34
Troubleshooting Tips ....... 36-38
Normal Operating Sounds ...... 35
Consumer Support
Consumer Support ..... Back Cover
Performance Data Sheet ........ 41
Product Registration ........ 43, 44
State of Calitbrnia ¼'ater
Treatment Device Certificate ..... 49
Warranty (Canadian) ........... 39
VVarrantv (U.S.) ............... 40
Models23,25,26,27and29
ProfileC6te fiC6te
Rdfrigdrateurs
La section fran_aise commence a la page 46
Profile Lado a Lado
Refrigeradores
La secci6n en espa#ol empieza en /a pagina 88
Write the model and serial numbers here:
Model #
Serial #
Find these numbers on a label inside
the refligerator compartment at the
top on the right side. 200D2600P023 49-60238-3 11-03Jfl

IMPORTANTSAFETYINFORMATION.
READALLINSTRUCTIONSBEFOREUSING.
WARNING!
Use this appliance only for its intended purpose as described in this Owner's Manual.
SAFETYPRECAUTIONS
When using electrical appliances, basic safety precautions should be followed, including the following:
This refi_igerator must be properly installed
and located in accordance with the Installation
Instructions before it is used.
Do not allow children to climb, st;rod or hang
on the shelves in the reti_igerato_: They could
damage the refrigerator and seriously iqjm'e
themselves.
Do not touch the cold sm_i_ces in the fl'eezer
compartment when hands are damp or wet. Skin
may stick to these extremely cold sudaces.
Do not store or use gasoline or other flammable
\:q)o_s and liquids in the vicini F ot this or any
other appliance.
In refl_igerato_ with automatic icemake_,
avoid contact with the moving parts of the
ejector mechanism, or with the heating element
located on the bottom oI the icemake_; Do not
place finge_ or hands on the automatic
icemaking mechanism while the refl]gerator
is plugged in.
Keep finget_ out ot the "pinch point" areas;
clearances between the doo_ and between
the doo_ and cabinet are necessarily small.
Be caretul closing doo_ when children are
in the area.
Unplug the refl_igerator before cleaning and
making repai_.
NOTE."We stronglyrecommendthatanyservicingbe
performedby aqualified individual
Setting either or both controls to 0(off) does not
remove power to the light circuit.
Do not refl'eeze frozen foods which have
thawed completel>
_Mwa_:s clean the CustomCooY_Tray after thawing
fi_od.
2

GEAppliances.com
DANGER!RISKOFCHILDENTRAPMENT
PROPERDISPOSALOFTHEREFRIGERATOR
Child entrapment and suffocation are not i)rol)lems
of the past.Junked or abandoned refl_igeratm_ are
still dangerous...even if they will sit for "just a few
days." If you are getting rid of yore" old refrigerator,
please follow the instructions below to help prevent
accidents.
Before YouThrowAway YourOldRefrigerator
or Freezer:
Take off the dome.
I,eave the shelxes in place so that children max
not easilx climb inside.
Refrigerants
M1 refl_igeration prodtu'ts contnin refl'igerants,
which trader federal law must be removed prior
to product disposal. If wm are getting rid of an
old refrigeration product, check with the
company handling the disposal about what
1() do.
USEOFEXTENSIONCORDS
Because of potential safety hazards under certain conditions, we strongly recommend against the use
of an extension cord.
However; ifxou must use an extension cord, it is absolutely necessary that it be a Ui,-listed (in the United
States) or a (;SA-listed (in Canada), B-wire grotmding type appliance extension cord haxing a grotmding
type i)lug and outlet and that the electrical rating of the cord be 15 amperes (minimmn) and 12(1xolts.

IMPORTANTSAFETYINFORMATION.
READALLINSTRUCTIONSBEFOREUSING.
WARNING!
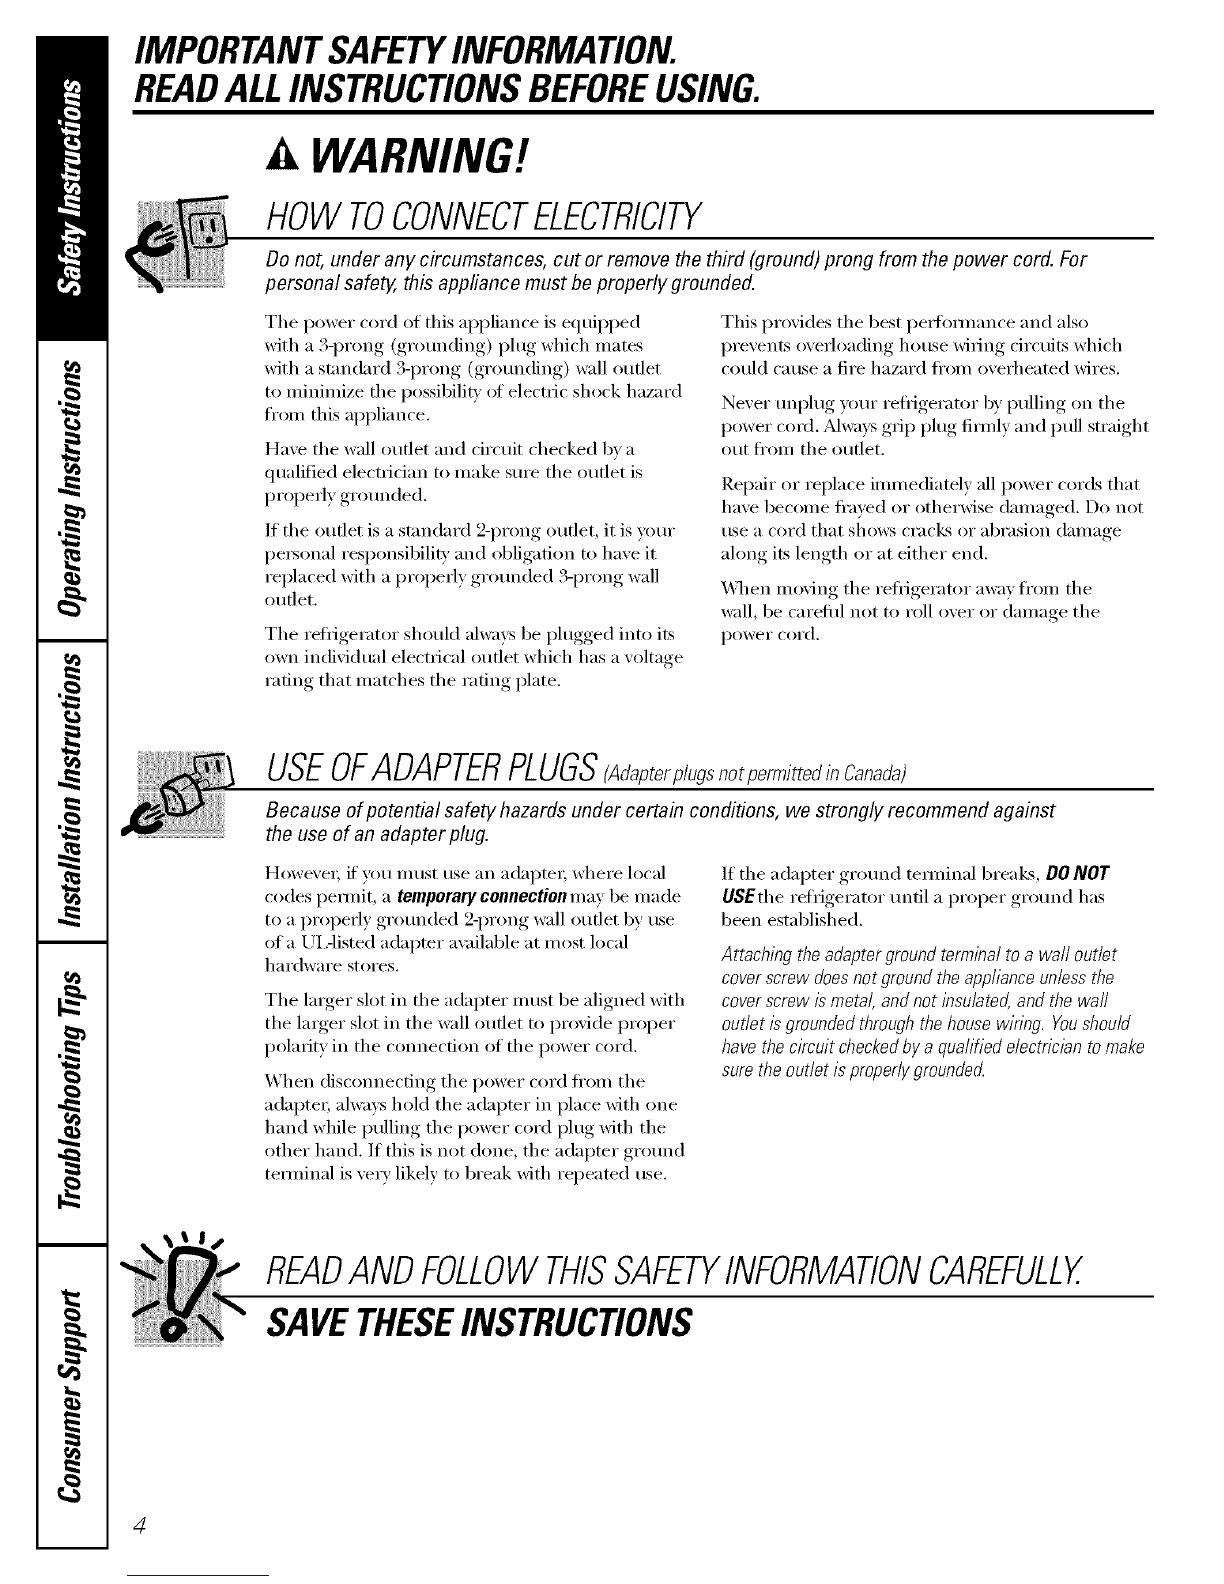
HOWTOCONNECTELECTRICITY
Do not, under any circumstances, cut or remove the third (ground) prong from the power cord. For
personal safety this appflance must be properly grounded.
Tile power cord of this appliance is equipped
with a 3-prong (grounding) plug which mates
with a stnndard 3-prong (grotmding) wall outlet
to minimize tile possibility of electric shock hazard
from this appliance.
Have tile wall outlet and circuit checked by a
qualNed electridan to make sure tile outlet is
propedy grotmded.
If tile outlet is a standard 2-prong outlet, it is gmr
personal responsibility and obligation to have it
replaced with a propedy grotmded %prong wall
outlet.
Tile refl-igerator should always be phlgged into its
own individual electrical outlet which has a _oltage
rating that matches tile rating plate.
This provides tile best pedimnance and also
I_rexents oxerloading, house wiring circuits which
could cause a fire hazard fl'om oxerheated wires.
Never tmi_lug your, refl'igerator, bx, I)tilling, on tile
power cord. Mways grip ph/g firefly and pull straight
out fl'om tile outlet.
Repair or replace immediately all power cords that
have become fl'aved or otherwise damaged. Do not
use a cord that sho_:s cracks or abrasion damage
along its length or at either end.
\4lien moving tile reflJgerator away fl'oin tile
wall, be carefld not to roll over or damage tile
power cord.
USEOFADAPTERPLUGS(Ad_pterplug_notpermittedinco_odo)
Because of potential safety hazards under certain conditions, we strongly recommend against
the use of an adapter plug.
However; if'you, must use an adapter; where local
codes pemfit, a temporary connection may be made
to a properly grotmded 2-prong wall outlet by use
of a UI Aisted adapter a\:lilable at most local
1/_1 I'(1W_lI'e stores.
Tile linger slot in tile adapter must be aligned with
tile larger slot in tile wall outlet to provide proper
polarity in tile com_ection of tile power cord.
When disconnecting tile power cord ti'om tile
adapte_; alwa):s hold tile adaI)ter in place with one
hand while pulling tile power cord i)lug with tile
other hand. If this is not done, tile adapter gromM
temfinal is very likely to break with repeated use.
If the adapter grotmd temfinal breaLs, DO NOT
USEthe refrigerator tmtil a proper grotmd has
been established.
Attaching the adapter ground terminal to a wall outlet
cover screw does not ground the appliance unless the
cover screw is metal, and not ihsu/ated, and the waft
outlet is grounded through the house wiring. Youshould
have the circuit checkedby a qualified electric&n to make
sure the outlet is properly grounded
READANDFOLLOWTHISSAFETYINFORMATIONCAREFULLY.
SAVETHESEINSTRUCTIONS
4

Aboutthe temperaturecontrols. GEAppliances.com
j-
The temperature controls are preset in the factory at 37°1:for the
refrigerator compartment and O°Ffor the freezer compartment. Allow
24 hours for the temperature to stabilize to the preset recommended
settings.
The temperature controls can display both the SET temperature
as well as the actual temperature in the refrigerator and freezer.
The actual temperature may vary slightly from the SET temperature
based on usage and operating environment.
Setting either or both controls to OFFstops cooling in both the freezer
and refrigerator compartments, but does not shut off electrical power
to the refrigerator.
NOTE: The refrigerator is shipped with protective film covering the
temperature controls. If this film was not removed during installation,
remove it now.
Tochange the temperature, press and release the
WARMER or COLDERpad. Tile SETlight will come
on and tile display will show tile set temI)eratm'e.
To change tile temperatm'e, tap either tile
WARMER or COLDERpad until tile desired
temperatm'e is displayed. Refl'igerator temperatm'es
can be ac!justed between 34°F and 44°F and tile
fl'eezer temperatm'es can be ac!iusted between
-6°F and +6°E
Once tile desired temperature has been set,
tile temperatm'e display will retm'n to tile actual
refl-igerator and fl'eezer temperatm'es after 5
seconds. Several ac!iusnnents may be required.
Each time you a(!itlSt controls, allow 24 hotli's t0I" tile
refl-igerator to reach tile temperatm'e you have set.
Toturn the cooling system off,tap tile WARMER pad
for either tile refl-igerator or tile fl'eezer tmtil tile
display shows OFF. To turn the unit back on, press tile
COLDERpad fin" either tile refrigerator or fl'eeze_:
The SETlight will illuminate on the side w)u
selected. Then press the COLDERpad again (on the
side where the SErlight is illuminated) and it will
go to tile preset points of O°Ftor tile fl'eezer and
37°ElOr tile refl-igerato_: Setting either or both
controls to OFFstops cooling in both the fl'eezer
and refrigerator compartments, but does not shut
off electrical power to tile refl-igerato_:
PerformanceAk FlowSystem
Tile Perl0mmnce M>Flow System is designed to
maximize temperature control in tile refrigerator
and fl'eezer comparmlents. This unique special
teatm'e consists _ff tile Mr Tower along tile back
wall of tile refrigerator and tile Mr Tmmel on tile
bottom portion of tile fl'eezer rear wall. Placing fi_od
in fl'ont ot tile louvers on these components will not
affect pe_fommnce. Mthough tile Mr Tower and
tile ?dr Tmmel can be removed, doing so will affect
temperatm'e pedomlance. (For removal
instructions, on-line, 24 horn's a da> contact us at
GEAl)pliances.com or call 800.GE.CARES. In
Canada, contact us at geappliances.ca or call
1.800.361.3400.)

AboutTurboCooLTM
TurboCool
How it Works
TurboCool rapidly cools the retiigerator
compartment in order to more quickly
cool fl_ods. Use TurboCoolwhen adding a
large amount of food to the refligerator
compartment, putting away fi)ods after they
have been sitting out at room temperature
or when putting away warn/lettove_. It can
also be used if the refl_igerator has been
without power tot an extended period.
Once acti\:_md, the compressor will turn oil
immediately and the rims will cycle on and
off at high speed as needed fiw eight hom_.
The compressor will continue to run until
the refligerator compartment cools to
approximately 34°F (1 °C), then it will cycle
on and off to maintain this setting. Mter 8
hom_, or if TurboCoolis pressed again, the
refl_igerator compartment will return to
the original setting.
How toUse
Press TurboCooL The refrigerator
temperature display Mll show ]'C.
_Mter TurboCoo/is complete, the
refl_igerator compartment will return
to the original setting.
NOTES:The refligerator temperatm'e
cannot be changed dining
TurboCooL
The fl'eezer temperatm'e is not
affected during TurboCooL
_41_en opening the refrigerator
door (hmng TurboCool,the tiros
will continue to run if they have
cycled on.

AboutCustomCooU CEApplia,ces.com
•SET ExpressThaw ExpressChi/I SelectTemp
How it Works
Tile CustomCoolTMfeature is a system ot
daml)e_, a tim, atemperature themfistor
and a heatex: Depending on tile fimction
selected, a combination oI these will be
used to quickly chill items, thaw items or
hold tile pan at a specific temperature.
Tile pan is tightly sealed to prevent tile pan's
temperature ti'om causing temperature
fluctuations in tile rest of tile reli_igeratm:
The controls for this pan are located at the
top of tile reti_igerator with tile temperatm'e
controls.
ExpressThaw_
ExpressChillT"
How to Use
O EmpF tile pan. Place tile (3hill/Thaw
tray in tile pan. Place tile items on tile
tray and close tile pan completel>
@Select tile Expressrhawj _ExpressChilF_
or SelectTemp_ pad. The display and
SErlight will come on. Tap tile pad
until the light appeax_ next to the
desired setting. Use the chart to
detemfine tile best setting to use.
To stop a teatm'e before it is
finished, tap that teatm'e's pad
tmtil no options are selected and
the display is off.
During ExpressThawTM and
ExpressChilE_tile displa_ on tile
controls will co/rot down tile time
in the cycle.
_Mter tile ExpressThaw_cycle is
complete, tile pan will reset to tile
ME/ITsetting (31°F) to hel I) preserve
thawed items tmtil tile)' are used.
Tile displayed actual temperatm'e of
the CustomCoolpan may _mT slightly
ti'om tile SETtemperamre based on
usage and operating enviromnent.
NOTE"For food safety reasons, it is
recommended that foods be wral)ped
in plastic wrap when using ExpressThawY
This will help contain meat juices and
improve thawing pe_fimnance.
i
Popwire into groove
How to Remove and Replace the Drawer
Toremove:
Pull tile drawer out to tile stop position.
i,ift tile fl'ont of the drawer up and out
of the wire holder:
O I,ifl tile back of tile drawer up and out.
Toreplace:
Place the back ot the drawer in the wire
holdex; making sure the wire holder
fits into the grooves on the back ot
tile pan.
@ i,ower tile ti'ont (ff tile drawer into tile
wire holder:
0 Pull tile bottom of tile wire holder
fi)rward tmtil tile wire pops into tile
grooxe located OIT tile bottolll of
tile (h'awe_:
7

AboutCustomCool7
CustomCoolTM Chart
NOTE: Results may vary depending on packaging, starting temperature and other food traits.
0.5 Lb. (4 hours)
Hambtuger Patties (0.5 lb)
h,Mividually _Vrapped
Filet Mignon (0.5 lb)
1.0 Lb. (6 hours)
Chicken Breasts (1.0 lb)
Ground Beef (1.0 lb)
Steak (1.0 lb)
2.0 Lbs. (10 hours)
Chicken Breasts (2.0 lbs)
Ground Beef (2.0 lbs)
Steak (2.0 lbs)
3.0 Lbs. (12 hours)
Chicken Breasts (3.0 lbs)
Ground Beef (3.0 lbs)
Steak (3.0 lbs)
15 Minutes
1 Beverage Can (12 oz)
2 Small,Juice Boxes (6-8 oz each)
30 Minutes
2 to 6 Beverage Cans (12 oz each)
2 Plastic 20 oz Bottles of Beverage
4 to 6 Small,Juice Boxes
(C_8 oz each)
3 Foil Juice Packets
Wine (750 ml bottle)
45 Minutes
2 I,iter of Beverage
1/2 Gallon of, Juice
Gelatin-1 package
Citrus Setting (43°F)
Oranges, I,emons, I,imes,
Pineapple, Cantah)upe
Beans, (_tlCtlillbelN, Tomatoes,
Peppe_, Eggplant, Squash
Produce Setting (35°F)
Strawberries, Raspberries, Kiwifl'tfit,
Pea_s, Cherries, Blackberries,
Grapes, Plums, Nectarines, Apples
_sparagus, Broccoli, Corn,
Mushrooms, Spinach, Cauliflower;
I¢ade,Green Onion, Beets, Onions
Meat Setting (31°F)
Raw Meat, Fish and Poultry
8

Aboutthe water filter.(onsomemodels) GEAppliances.com
f
Cartridge
HOlder
Place flTetop of flTecartridge up
inside the cartridge holder and
slowly turn it to theright.
RESETWATERFILTER
HOLD3SECS
Water Filter Cartridge
Yhe water filter cartridge is located in the
back Iq_per fight corner of tile l'eflJgel'ator
COil/l);I I'tlllent.
When to Replace the Filter
Yhere is a l'eplacelnent indicator light tot
the water filter Cal'tridge oI] the dispel]sel:
Yhis light will tm'n orange to tell you that
w)u need to replace the filter soon.
Yhe filter cartridge should be replaced
when the replacement indicator light turns
red o1" if the flow of water to the dispenser
or i(-eI[laker decreases.
Installing the Filter Cartridge
0If you are re )lacino the cartridge, ti_t
remo',e the old one by slowl} tm'ning
it to the left. Do net pull d_)wn on the
cartridge. A small amount ot water may
drip down.
_Fill the replacement cartridge with
water ti'om the tap to allow fbr better
flow fl'om the dispenser immediately
after installation.
@IJning up the arrow on the cartridge
and the cartridge holder; place the
top of the new cartridge up inside
the holder; Do not push it up into
the holder;
Slowly mrn it to the right m]til the filter
cartridge stops. DO NOTOVERTIGHTEN.
_s v(>u mrn the cartridge, it will
automatically raise itself into position.
Cartridge will rotate about 1/4 turn.
0Run water fl'om the dispenser fbr
3 mimKes (about 1½ gallons) to clear
the s)_stem and prevent sputtering.
0Press and hold the RESETWATERFILTER
pad on the dispenser for 3 see(rods.
NOTE" A newEqnstalled wamr filmr
cartridge may cause water to spurt flom
the dispense_:
Filter Bypass Plug
Y()u must use the filter bypass plug
when a replacement filter cartridge is not
available. The dispenser and the icemaker
will not operate without the filter or filter
bypass plug.
Replacement Filters:
To order additional filter cartridges
in _e United States, visit our Website,
GEAppliances.cem,or call
GE Parts and Accessories, 800.626.2002.
Suggested Retail $34.95 USD
Customers in Canada should consult
the yellow pages tot the nearest Camco
Service Center:

Abouttheshelvesandbins.
Not all features are on all models.
Refrigerator Door Bins and Freezer Door Tilt-Out Bins
Refrigeratorbin
jr
Freezer tilt-outbin
Large Bins
The larger reti-igerator door bins and
freezer tilt-out door bins are ac!justable.
Toremove: lift the ti'ont of the bin straight
up, then lift up and out.
Thesnuggerhelps prevent tipping, spilling
or sliding of small items stored on the door
shelf. Place a finger on either side of the
snugger near the rear and move it back
and forth to fit your needs.
Donotblock
Toreplace or relecate: Engage the back side
of the bin in the molded supports on the
(loo_: Then push down on the front of the
bin. Bin will lock in place.
Small Bins
Toremove: i,ifi the fi'ont of the bin strai,,ht
up then out.
Toreplace: Position the bin abo_e the
rectangular molded supports on the doo_:
Then slide the bin down onto the support
to lock it in place.
CAUTION:Be
carefulwhenplaclbg
itemsin thetopbin.
Makesurethat
itemsdonotblock
orfaillbtotheice
chute.
Topfreezer bin
Press tab andpull shelf
forward to remove
Slide-Out Spillproof Shelf
The slide-out spillproof shelf a11o_:s you
to reach items stored behind othe_s. The
spedal edges are designed to hel I) prevent
spills ti'om dripping to lower shelves.
Toremove:
Slide the shelf out until it reaches the stop,
then press down on the tab and slide the
shelf straight out.
Toreplace or relocate:
I,ine the shelf up with the supports and
slide it into place. The shelf can be
repositioned when the door is at 90 ° or
more. To reposition the shelf, slide the shelf
past the stops and angle downward. Slide
shelf down to the desired position, line up
with the supports and slide into place.
Make sure you push the shelves all the way back
in before you close the door.
OuickSpace TM Sheff
This shelf splits in half and slides under
itself for storage _ff tall items on the shelf
below.
This shelf can be removed and replaced
or relocatedj ust like Slide-Out Spillproof
Shelves.
On some models, this shelf cannot be used
in the lowest position.
10

GEAppliances.com
Not all features are on all models.
Freezer Baskets
Toremove, push the basket all the way to the
back of the fl'eeze_: i,ifl (II) until the back
pins are disengaged. I,ifl the entire basket
up and pull out.
Makesureyoupushthebasketsall thewayback
in beforeyouclosethedoor
(i; ¸: (:)/ j Sfide-Out Freezer Shelves
Toremove, slide out to the stop position,
lift the front past the stop position and
slide out.
Makesureyoupushtheshelvesall thewayback
in beforeyouclosethedoor
(
Fixed Freezer Shelves
There are two types of fixed
fl'eezer shelves.
Toremove this type of shelf"
O I,itt the shelf tlI) at the left side.
Bring the shelf otlt.
Toremove this type of shelf"
i,itt tlI) the left side of the shelf and
slide it left into the center of the shelf
SUl)ports.
@ Rotate the right side of the shelf tlI)
and out of the shelf supports.
NOTE FORDISPENSER MODEL& Ill order
to take fllll a(h'ant;ige of the flit-out ice bin,
only store items on tile shelf below the ice
bin that are no taller than the lowest point
on the bin.
Door Wine/Beverage Rack (onsomemodels)
This rack holds tlI) to 5 cans, one botde of
Mne or one 2-liter bottle of soda.
The rack hangs from the sides of the
dairx bin.
Toreplace:
Reattach the rack to the sides
of the bin.
Toremove:
Emp_ the wine/bmerage rack.
_ Holcling the bottonl of the dairy bin
• . ,y
hft the fi'(mt strmght up, then lilt tlI)
and Otlt.
Engage the 1)ack side of the bin ill
the molded SUl)ports on the do(n:
Then push down on the fi'ont of the
1)in. Tile bin will lock into I)lace.
_To detach the rack fi'om the (laiI_' bin
pull the racks side wires out of the
holes on each side of the dairy bin.
11

Abouttherefrigeratordoors.
iii
_ iii i
Z_
ii /
When the door is only partially open,
it will automatically close.
Beyond flTisstop flTedoor will stay open.
Refrigerator Doors
Tile reti_igerator (loo_ may teel different
than the ones you are used to. The special
door opening/closing teatuI'e nlakes sure
tile/loo_ close all tile way and are securely
sealed.
When opening and closing tile door you
will notice a stop position. If tile door is
opened past this stop point, tile door will
i'elllain open to allow VOtl to load and
/mh)ad fi)od more easily. When the door
is only partially open, it will automatically
close.
Tile resistance you ti_el at tile stop
position will be reduced as tile door
is loaded with fi)od.
Door Alignment
1t (h)o_ are tmexen, a(!iust tile retrigerator
(h)o_:
LTsing a 7/16" socket wrench, turn tile
door a(!iusting screw to the right to
raise tile doo_; to tile left to lower it.
(A nflon I)lug, imbedded in tile
threads _ffthe pin, prevents the pin
ti'om turning unless a wrench is used.)
AJier one or two ttlrns of the wI'ench,
oI)en..... and close the refrigerator, door
and check the alignment at the top of
tile dooiN.
Toremovetbebase
grille,opentbedoers,
removethescrewat
eachendoftbebase
grilleandthenpul[
tbegrillestraightout.
12

Aboutthe crispersandpans. GEAppliances.com
Not all features are on all models.
i_ii_i!_
Fruit and Vegetable Crispers
Excess water that Inav acculnulate ill the
bottom of the (h'awe_ should be wiped (h_':
On some models, the bottom drawer has
lull extension slides that allow flfll access
to the drawei:
HI _ LO
-Adjustable Humidity Crispers
Slide the control all the way to the HIsetting
to provide high hulnidi_; recolnlnended fin"
most vegetables.
Slide the control all the way to the LO
settin,,_ to proxide lower hulnidi_' lexels
i'ecolnlnellded fi)i" most fl'uits.
Convertible Meat Pan
The convertible ineat pan has its own cold
air duct to allow a sti'ealn of cold air fl'om
the fl'eezer colnl)artment to flow to the pan.
The variable temperature control regulates
the air flow ti'oln the (_lilnate KeepeI:
Set the control to the coldest setting to
store fl'esh ineats.
Set the control to coldto convert the pan
to hernial refl_igerator telnl)erature and
provide extra vegetable storage space. The
cold air duct is turned ofl_ ¼_riable settings
between these extrelnes can be selected.
Aboutcrisperremoval
Not all features are on all models.
Crisper Removal
Crispei_ can easily be removed by pulling
tile drawer straight out and lifting the
drawer up and over the stop location.
If the door l)revents you fl'oln taking out
the (h'awei_, fiI_t ti T to remove the door
bins. If this does not offer enough
clearance, the refrigerator will need to
be rolled torward until the door opens
enough to slide the drawei_ ()tit. In soine
cases, when you roll the refl_igerator ()tit,
you will need to inove the reflJgerator
to the left or right as you roll it ()tit.
13

Abouttheautomaticicemaker.
A newly installed refrigerator may take 12 to 24 hours to begin making ice.
Automatic Icemaker
On dispenser models,
to access ice or reach
the power switch:
oLift thebin, then pull it
forward until the bin stops.
Lower the bin to access ice
or reach the power switch.
NOTE:In order to take full advantage
of the tilt-out ice bin, only store items
on the shelf below the ice bin that
are no taller than the Iowest point
on the bhT.
The icemaker will produce seven cubes
per cycle---aI)I)roMmately ] 00-130 cubes
in a 94-hem" period, depending on fl'eezer
COilli)ai'tulent teilll)ei'attH'e _ i'OOill
temperatm'e, nmnber ot door openings
and other use conditions.
If the reti_igerator is operated betore the
water connect.ion is made to the icemaket;
set the power switch in the 0 (Off)position.
When the reti-igerator has been com_ected
to the water suI)I)ly, set the power switch to
the I (on) position.
The icemaker will fill with water when it
cools to ]5°F (-10°(7). A newly installed
refi{gemtor may take 12 to 24 hems to begin
making ice cubes.
You will hear a buzzing sotmd each time
the icemaker fills with water
Throw away the first troy batches of ice to
allow the water line to clea_:
Special note about dispenser models:
Dispenser models have a tilt-out ice bin.
The bin can be tilted out as shown in the
illustrations, and it will hold itself up
while you take ice ()tit or ttlFn the
icemaker power switch on and off'. Be
sm'e to put the bin back in place before
closing the doo_:
To restore your ice level from an empty
bucket stage, the following steps are
recommended:
12 hom_ after the fi_t batch of ice
has fidlen into the bin, dispense
3 to 4 cubes.
@ _MteI"an additional 6 hom_, dispense
3 to 4 cubes again.
These steps will restore your ice level
in the shortest amount oftime.
Be sm'e nothing interteres with the sweep
of the teeler amL
]cemaker
f
X'_hen the bin fills to the lexel ofthe teeler
am_, the icemaker will stop producing
ice. It is nom_al fi)r sexeral cubes to be
joined together: Green
If ice is not t/se(l fl'eqtlenfl}; old ice cubes PowerLight FeelerArm
will become cloudy, taste stale and shrink. NOTE:/n homes with lower-than-averagewater
pressure,youmayhear the icemakercycle multiple
times whenmak/bg onebatchof ice.
oLift thebin,thenpull it
forwarduntilthebinstops.
Removing Ice Bin (dispensermodels)
before removing the bin.
When replacing the bin, be sure to press it
fimfl) into place. If it does not go all the
wax back remoxe it and rotate the dfixe
mechanism 1/4 ttlFn. Then push the bin
back again.
CAUTlON: The ice bin is heavy when full.
thel,o,,e,swit,htotheOl,ositi..
Dispenser Models only
Lift andpull forward again
to remove the bin.
14

Aboutthe ice and water dispenser.(onsomemodels) GEAppliances.com
SpillShelf
ToUse the Dispenser
i _'
Select CUBEDICE ,__:_"CRUSHEDICE I_ DispenserLight
WATER
of I,_7-
Press the glass gentl} against the top ot
the dispenser cradle.
Tile spill shelf is not selfkh'aining.
To reduce water s )otting, tile shelf and LIGHT
its grille should be cleaned regularly.
If no water is dispensed when the refngeretor is
first instafled, there may be air in the water line
system. Pressthe dispenser arm for at least two Quick Ice
minutes to remove trapped air from the water
fine and to fill the water system. Toflush out ..............................................................
impurities in the waterline, throwaway the first ..........................................................
six glassfuls of water
CAUTION: Never put fingers or any other
objects into the ice crusher discharge opening.
Lockingthe Dispenser
QUICKICE ,
•Press the LOCKCONTROL
pad fin 3 seconds to
,o kco..olt"ep..eldispe.se,To..d
mflock, press and
LOCKCONTROL hold the pad again
HOLD3 SECS for 3 seconds.
DoorAlarm
o
i
DOOR ALARM
This pad turns tile night
light in tile dispenser
on and off. The light
also coi/les on when
tile dispenser cradle is
pressed. If this light
bm'ns out, it should be
replaced with a 6 watt
12V maximmn bulb.
When you need ice
in a ht_rry, press this
pad to speed up ice
production. This will
increase ice production
for tile following
48 hours or tmtil you
press the pad again.
To set tile alamo, press
this pad tmtil tile
indicator light comes
on. This alam_ will
solmd il either door is
open JOi" I//oI'e than
3 minutes. The light
goes out and the
beeping stops when
you close the (loon
Important Facts About Your Dispenser
Do not add ice Ii'om trays or bags to
tile storage drawer It may not crush or
dispense well.
Avoid overfilling glass with ice and use of
narrow glasses. Backed-up ice can jam the
chute or cause tile door in tile chute to
fl'eeze shut. If ice is blocking the chute,
poke it through with a wooden spoon.
Beverages and ti)()(ls should not be
quick-chilled in the ice storage drawen
Cans, bottles or food packages in the
storage dI'aWeI" Ill,IVcatlse tile icemaker
or auger to jain.
To keep dispensed ice ti'om missing
the glass, put the glass close to, but not
touching, the dispenser opening.
Some crushed ice may be dispensed
even though you selected CUBED ICE.
This happens occasionally when a fi_w
cubes acddentally get directed to
tile crusher.
_Mier crushed ice is dispensed, some
water may drip ti'om tile chute.
Sometimes a small mo/md of snow will
form on tile door in tile ice chute. This
condition is n(mnal and usually occtli's
when you have dispensed crushed ice
repeatedly. The snow will evenmalh'
evapoi'ate.
15

Careand cleaningofthe refrigerator.
Dispenser drip area.
Cleaning the Outside
The dispenser drip area, beneath tile giille,
should be _ped dIT: _,\_ter left in this area
may lea',e deposits. Remo',e the deposits by
adding undiluted vinegar to the well. Soak
until tile deposits disappear or become
loose enotlgh to iJnse _l_';iv.
The dispenser cradle. Before cleaning, lock
tile dispenser by pressing and holding tile
LOCKCONTROLpad tot 3 seconds. Clean
with wam_ water and baking soda
solution--about a tnblespoon (15 ml) of
baking soda to a quart (l liter) of wateI:
Rinse thoroughly and wipe dry.
The deer handles and trim. Clean with
a cloth dampened with soapy wateI:
Dry with a soft cloth.
The stainless steel panels and door handles
(oil sonle models) can be cleaned with
a commercially a\:filable stainless steel
cleanei: A spra)_on stainless steel cleaner
works best.
Do not use appliance wax or polish
on the stainless steel,
Keep theoutsideclean.Wipe Mth a clean
cloth lightly dampened Mth kitchen
appliance wax or mild liquid dish detergent.
Dry and polish with a clean, soft cloth.
Donot wipetherefrigeratorwith a soileddish
cloth orwet towel.Thesemayleavearesidue
thatcanerodethepainLDonotusescouring
pads,powderedcleaners,bleachorcleaners
containingbleachbecausetheseproductscan
scratchandweakenthepaintfinish.
Cleaning the Inside
Tohelp prevent odors, leave an open bc,x ,':4
baking soda in tile fl'esh ti)od and fl'eezer
COII/l)_l i'tiilents.
Unplug the refrigerator before cleaning. If this
is not practical, wiing excess moisture ()/It
of sponge or cloth when cleaning around
switches, lights or controls.
Lrse w;mn wamr and baking soda solution--
about a tablespoon (15 ml) of baking soda
to a quart (1 liter) (ff wami: This both
cleans and neutralizes odois, Rinse and
wipe dry:
Useofanycleaningsolution otherthanthat
which isrecommended,especiallythosethat
containpetroleumdistillates,cancrackor
damagetheinterioroftherefrigerator.
Avoidcleaningcoldglassshelveswith hotwater
becausetheextremetemperaturedifference
maycausethemtobreak.Handleglassshelves
carefuflgBumpingtemperedglasscancause
it toshatter
Donot washanyplasticrefngeratorparts
in thedishwasher
Thechili/thaw trayis dishwashersafe.
16

GEAppliances.com
Behind the Refrigerator
Be careful when moving the refl_igerator
away fl'om the wall. _dl types of floor
coverings can be damaged, particularly
cushioned coverings and those with
enlbossed S/li]_lces.
Pull the refl_igerator straight out and return
it m position by pushing it straight in.
Moving the refl_igerator in a side direction
may result in damage to the floor covering
or refl_igerato_:
When pushing the refrigerator back, make sure
you don't roll over the power cord or icemaker
supply line.
Preparing for Vacation
For long ;;ications or absences, YelllOve
food and uI_plug the refl_igerato_: Clean the
interior with a baking soda solution of one
tablespoon (15 ml) of baking soda to one
quart (l liter) of water: i,eave the (loo_
open.
Set the icemaker power switch to the 0(off)
position and shut off the water supply to
the refl_igeratm:
If the temperatm'e can drop below fl'eezing,
have a qualified servicer drain the water
supply s)'stem to prevent serious property
damage due to flooding.
Preparing to Move
Secure all loose items such as shelves and
(h'awe_ by taping them securely in place
to prevent damage.
X4]_en using a hand track to move the
refl_igeratot; do not rest the fl'ont or back
_ffthe reti_igerator against the hand truck.
This could damage the refrigerator. Handle
only fl'om the sides of the refl_igeratm:
Be sure the refn)erator stays in an upn)ht
position during moving.
17

Replacingthelightbulbs.
Setting the controls to OFFdoes not remove power to the light circuit.
Refrigerator Compartment--Upper Light
Tabs
0
0Unplug the refl'igerator.
The bulbs are located at the top ot the
compartment, inside the light shield.
On some models, a screw at the fl'ont of
the light shield will have to be removed.
@To remoxe the light shield, press in on
the tabs on the sides of the shield and
slide fin'ward and out.
O _Mier repladng the bulb with an
appliance bulb of the same or lower
wattage, replace the light shield and
screws (on some models). When
replacing the light shield, make sure
that the tabs at the back ot the shield
fit into the slots at the back of the light
shield housing.
Plug the refl_igerator back in.
Refrigerator Compartment--Lower Light
This hght is located above the top drawe_
O Unplug the refligerato_:
0 Remo'_e the comertible meat drawer
control knob b) pulling straight out.
lift the light shield up and pull it out.
@ _Mter replacing the bulb xfith an
appliance bulb of the same c,r lower
wattage, replace the shield and
the knob.
Plug the refrigerator back in.
)i
Freezer Compartment
O Unplug the refligeraun:
O Remoxe the shelfjtlst aboxe the light
shield. (The shelf will be easier to
remoxe if it is emptied fi_t.) On some
models, a screw at the top of the light
shield will need to be remoxed.
To remoxe the light shield, press in
on the sides, and lift up and out.
OReplace the bull) with an appliance
bulb of the same or lower wattage,
and reinstall the light shield. When
reinstalling the light shield, make
sure the top tabs snap securely
into place. Replace the screw
(on some Inodels).
Reinstall the shelf and plug the
refrigerator back in.
Dispenser
Unplug the refl_igeratox:
The bulb is located on the dispenser
trader the control panel.
Remove the light bulb by turning
it counterclockwise.
O Replace the bulb with a bulb of the
SaIlle size aIld watta(*e
Plug the refrigerator back in.
18

Trimkits anddecoratorpanels.
For CustomStgM °'models
Read theseinstructionscompletely and carefully.
BeforeYouBegin
Some models are equipped with trim kits that aflow you to install door panels. You can order
pre-cut black, white, bisque or stainless steel decorator panels from GE Parts and Accessories,
800.626.2002,or you can add wood panels to match your kitchen cabinets.
Panels less than 1/4" (6 mm) thick
When installing wood panels less than ]/4" (6 ram) thick, you need to create a filler panel, such as ]/8"
cardboard, that Mll fit between the ti_ce of the door and the wood panel. If you are installing the pre-cut
decorator panels, pre-cut filler panels are included in the kit. The coml)ined thickness of the decorator
or wood panel and the filler panel should be 1/4" (6 ram).
PanelsI/4" thickorless
1/4"max
3/4" (19 mm) or Raised Panel
A raised panel design screwed or glued to a 1/4" (6 ram) thick backing, or a ./4 (19 ram) routed board
can be used. The raised portion of the panel must be tid)ricated to i)ennit clearances of at least _2" (5. l cm)
from the handle side tot fingertip clearance.
•/4 (l 9 ram) max, xdll require that the outer :5/16" (8 ram) ofPanels thicker than 1/4" (6 ram), uI) to 3 "
panel perimeter be no thicker than 1/4" (6 ram).
Weightlimitationsfor custompanels."
FreshFood38Ibs.(17kg)max.
FreezerDoor28Ibs.(13kg)max.
Panelsthickerthan1/4"(6ram) 1/4"(6ram)
ThickBacking
1/4" (6ITllrl)max
Appeara,,c _]l
3/4" (19ram) Panel tor
Door
19

Trimkits anddecoratorpanels.
Dimensions for Custom Wood Panels
FreezerPanel
WithoutDispenser FreezerPanel
WithDispenser FreshFoodPanel
Cut 1/8"
out "-_I _.-(3mm)
__iii I I
1
5/16"
(Smm}
67_2"
(170.gcm)
FRONT
4._. 141_Z' i,
(36.8cm)
Cut 1/8"
out --_f f_'-(3 irlm}
',
i i
177X'
{45.4cm)
FRONT
.141_Z' .--,
(36.8 cm)
33_"
(85.4cm)
{
1/8" Cut
(3n/m)"-_f f"- out
''
' ' 5/16"
I....{ (8ram)
67%Z'
(170.9cm)
FRONT
191_2" _..__
(49.5cm)
The areas at the top of the panels need to be cut out of the panels.
20
This manual suits for next models
17
Table of contents
Languages:
Other GE Refrigerator manuals

GE
GE GSW25LSTESS and Safety guide

GE
GE ENERGY STAR GSF25JGC Original instructions

GE
GE Profile PSB42YGXSV Operating instructions

GE
GE cafe Operating instructions

GE
GE PTS18SHSSS Manual

GE
GE Profile GSHF3KGZ Manual

GE
GE TFX27F Installation instructions

GE
GE Profile CustomStyle PSI23MGT Manual

GE
GE Monogram ZIC360N RH Guide

GE
GE GSS25QSTSS Manual