manuals.online logo
Brands
  1. Home
  2. •
  3. Brands
  4. •
  5. GE
  6. •
  7. Refrigerator
  8. •
  9. GE TA11 Installation instructions

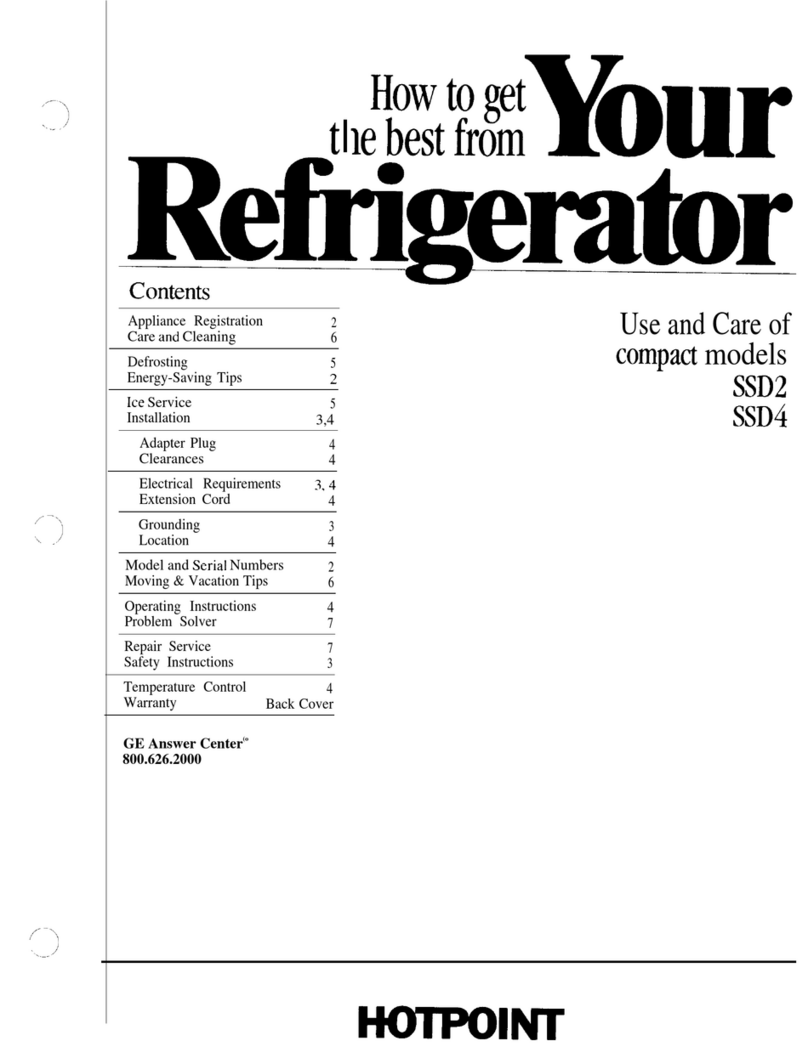
GE TA11 Installation instructions

‘. .9
,Ow.,et
the best fhm
Reti~mbr
Contents
Appliance Registration 2
Care and Cleaning 8
Defrosting Instructions 6
Energy-Saving Tips 2
Food Storage Suggestions 7
Storage Times 7
Ice Trays 6
Installation 3,4
Adapter Plug 4
Adjustable Legs 4
Clearances 4
Electrical Requirements 3
Extension Cord 4
Grounding 3
Location 4
Model and Serial Numbers 2
Problem Solver 9, 10
Repair Service 11
Safety Instructions 3
Temperature Controls 5
Chiller TrayBaffle 5
Dial 5
UseandCareof
models
TA1l
TA14
YourDirect Line to General Electric
Vacationand Moving Tips 8
Warranty Back Cover
The GE Answer Centef 800.626.2000
GE NE RAL@ ELECTRIC 4w36&pj
—-.
Help us help you... Energy-savingtips
Read this book carefully.
It is intended to help you operate
and maintain your new refrigerator
properly.
Keep it handy for answers to your
questions.
If you don’t understand something
or need more help, write (include
your phone number)
Consumer Affairs
General Electric Company
Appliance Park
Louisville, KY40225
Write downthe model and
serial numbers.
You’llsee them on alabel on
the left wall inside the fresh food
compartment.
These numbers are also on the
Consumer Product Ownership
Registration Card that came with
your refrigerator.
Before sending in this card, please
write these numbers here:
Model Number
SerialNumber
Use these model and serial
numbers in any correspondence
or service calls concerning
your refrigerator.
If you received adamaged
refrigerator, immediately contact
the dealer (or builder) that sold you
the refrigerator.
Save time and money.
Before you request service,
check the Problem Solver on
pages 9and 10.It lists causes of
minor operating problems that
you can correct yourself.
●Location of your refrigerator is ‘ ‘
important. Avoidlocating it next
toyourrange,aheatingventor where
the sun will shine directly on it.
●Don’t open the door more often
than necessary.
●Close the door as soon as
possible, particularly in hot,
humid weather.
.Defrost tie frozen food
compartment whenever frost
becomes l/4-inch thick.
●Be sure the door is closed
tightly. Before leaving the house
or retiring for the night, check to
be sure the door has not been lefl
open accidentally.
●Store only those foods requiring
refrigeration in your refrigerator.
●Wipe moisture from bottles and
cartons before putting them in the
refrigerator.
●Keep finds covered to reduce
moisture buildup inside the (
refrigerator.
●If you turn the temperature
control to the coldest position for
quick chilling or faster freezing of
ice cubes, be sure to turn it back
to the regular setting to prevent
freezing fresh fh.
●Do not overcrowd your
refrigerator. Ovemowding can
require extra electrical energy to
keep evewthin~ cod.
(“,
..-
. .
,-us’
.“
Imp&tititSaiety Instructiihs . , . “,: -.. .ii~ii~e~
.-d .“. ,..
,.,
R&d all kructions before ushq@& appliance. .. ,:.,
.!.+.’
...1. ,
?. ,. ..:J.’-.
.. ‘. X.2.,
.-.).* .?.-.:.
.>+ \,’. ,
W~G-When usingthis
appliance,alwaysexercisebasic’ ~ ~~
safetyprecautions,including the .~~‘
following:- “:.’- “-“,f
●Use this applknce only for its .
intended purpose asdescribedin
thiS Use andCareBook. ~
●❞refrigerator In&be
properly installed in accordance
with the InstaMion Instructions
before it is used. See grounding ~
instructionsbelow andon page4. .
.Never unplug your ref&eratOr
by pulling on the power cord. .
AhIVliyS grip @Ug ftiy andpU~
straightoutfrom the outlet,
cRep&or replace immediately ,
all electric”servicecords that
have become frayed or otherwise ~
damaged. Do notuse acord that ‘“
shows cracks or abrasion damage
along its length or at either the plug
or comector end. . .
...
●After YOMrefrigerator is in ,.
operation, do not-kuch the cold
surfaces, particularly when hands ‘
are damp or wet. Skinmayadhere
to theseextremelycold surfaces.
,- ”.”: .
~.
. . . . ..’ -,.
.~n~ A* f-en f~~ ~“sIf your old refrigerator is still. +
which have thawed completely. around the house but not in ~’j +
TheUnited StatesDepartment of be sum to remove the doors. This ~
Agriculture in Home and Garden will reducethe possibility of ‘.:~,$;-
Bulletin No. 69 says: .. danger to children. . . ~‘. ,;
2.%~‘
.$*:.
fti thathavethfied if theystill - -
containice crystalsor if theyare
SW cold—below40%
“.. .Thawedgroundmeats,poultry,
orfish thathaveany off-odoror
off-colorshould notbe refrozen
andshould notbe eaten. Thawed
ice cm-amshouldbe discarded.If
theodoror color of any fd is
poororquestionable, get ridofit. -
The foodmaybe dangeroustoeat. .
“Even“&trtialthawingand’mhezing
reduce.the eating quality of foods, -
particularly fruits, vegetables and
prepared fbods. The eating quality
of red meats is affected less than
“.. .Youmaysafelyrefreezefrozen ~,- --A.. .
..%,
●Unpi*“your‘refrigerator.,,”:$:.
A. Beforemaking/lilymph.. “
Note:Westronglyrecommend’~~
thatany servicingbe performed,~
by aqualified individual. ~.- =::-
~,~.
B. Befim cleaning. ~ ~:~~:.~+;;:
CBefore replacing aburned&~”
lightbulb, the refrigeratorshould
be unpluggedin orderto avoid$~
contactwith alive wire f~erit:,-,
(A burned-outlightbulb m~’?” -
breakwhen being replace+);~~~=.
-b,, .
Note: Tbrningcontrolto ~O?J;;,
position does notremovepowml’.
...<”::,.:,.
tothelight circuit. %+
,.kvt.. “
,-:w~zf
.~i..-... ~.
thatof manyotherfoods. Use’ .●Donotoperate yourref@&t&
refiwen fo6ds as soon aspossible ,in the presence of explosive,~~;: :,<:
tosave&smuchoftheireating from. $.:..”:-.‘“~‘,‘“;;$$$$:F
quality-asyou can?
..?.;....” ,
,. .‘“A -E “>’:7:3;$;
or sharp instruinent in defrosting ,INSIKLJCTIONS..jj’:i
hstdation Requirements hportant: please read
How to connect
electricity
For personal safety,
this appliance must be
properly grounded.
The power cord of this appliance
is equipped with agrounding plug
which mates with astandard
PREFERRED
METHOD
Fig. 1
INSUREPROPER
GROUNDEXISTS
BEFOREUSE
grounded wall outlet (Fig. 1)to Havethe wall outlet checked by
minimize the possibility of electric aqualified electrician to make sure
shock hazard from this appliance. the outlet is properly grounded.
carefully
Where astandard two-prong
wall outlet is encountered, it is
the personal responsibility and
obligation of the customer to have it
replaced with aproperly grounded
wall outlet.
3
h’@dlatiOnRequirements (continued)–IMPORTANT.. .Please Read Carefully
Use of adapter plug
Because of potential safety
hazards under certain conditions,
we strongly recommend against use
of an adapter plug. However, if you
still elect to use an adapter, where
local codespermit, aTEMPORARY
CONNE~ION maybe made to a
properly grounded two-prong wall
outlet by use of aUL listed adapter
(Fig. 2) available at most local
hardware stores.
TEMPORARYMETHOD
(ADAPTER PLUGS NOT
PERMITTED IN CANAOA) f%
The larger slot in the adapter
must be aligned with the larger slot
in the wall outlet to provide proper
polarity in the connection of the
power cord.
CAUTION: Attaching adapter
ground terminal to wall outlet
cover screw does not ground the
appliance unless cover screw is
metal, and not insulated, and wall
outlet is grounded through house
wiring. Youshould have the circuit
checked by aqualified electrician
to make sure the outlet is properly
grounded.
When disconnecting the power
cord from the adapter, alwayshold
the adapter with one hand. If this
is not done, the adapter ground
terminal is very likely to break
with repeated use.
Should the adapter ground
terminal break, DO NCYI’USE the
appliance until aproper ground
has again been established.
Use of extension cords
Because of potential safety
hazards under certain conditions,
we strongly recommend against the
use of an extension cord. However,
if you still elect to use an extension
cord, it is absolutely necessary that
it be aUL listed 3-wire grounding
type appliance extensioncordhaving
agrounding type plug and outlet
and that the electrical rating of the
cord be 15amperes (minimum) and
120volts. Such extension cords are
obtainable through your local
service organization.
The ref~erator should
alwaysbe plugged intoits
own individual electrical
outlet—
(115volt, 60 Hertz, or 100volt,
50 Hertz, single phase AC). This
is recommended for best
performance and to prevent
overloading house wiring circuits,
which could cause apossible fire
hazard from overheating wires.
RefrigeratorInstallation
Location
Do not install refrigerator where
temperature will go below 60”F.
because it will not run often enough
to maintain proper temperatures.
Do install it on afloor strong
enough to support afully loaded
refrigerator.
Also see Energy-Saving Tips
regarding location.
Clearances
Allow the following clearances for
ease of installation and proper air
circulation:
Sides . . . . . . . . . . . . ...5/8”
Top . . . . . . . . . . . . . . . ...2”
Back .................O
Allow the following door clearance:
Hinged side ......... 1-1/2”
Leveling Legs
Adjustable legs at the front
comers ofthe refrigerator should
be set so the refrigerator is firmly
positioned on floor and the front is
raised just enough that the door
closes easily when opened about
halfway.
Turn leveling legs clockwise to
raise refrige~to;, counterclockwise
to lower it.
4
“~. %.—. - - . . . . . . . . . . . . . . . . -,-. .-.-,./ 7
Operating Your
Temperature
Control Dial
The temperature control dial has
settings horn “l” to “9” plus
DEFROST and “0:’
Refrigerator
o
5Is NORMAL
~IS COLDEST
“l” is the warmest.. .“9” is the
coldest.. .“O’ provides no cooling.
(On some models, the no cooling
setting reads “OFF.”)
Initially set the temperature control
dial at “5.”
After using refrigerator, adjust
temperature control setting that is
best suited to your needs.
Note: llmning control to the “O”
position stops cooling but does
not shut off power to the
refrigerator.
If you turn your
household thermostat
below 60°at night
. . you may want to set the
temperature control one number
colder, as from “5” to “6.” It
should be left in this setting for the
entire period that you are turning
down your thermostat.
When you stop turning the
thermostat down, turn the
temperature control back to its
regular setting.
Chiller Thy Baffle
For cold frozen food storage
compartment temperature (and for
defrosting), chiller tray baffle
should be OUT-the normal
position-as shown below.
BAFFLE OUT—
NORMAL POSITION
AND FOR DEFROSTING
5
... ... . . . . . .
For colder fresh food
compartment tempemture during
hot weather or periods of heavy
usage, place chiller tray baffle in
the IN position.
BAFFLE lN–
FOR COLDER FRESH FOOD
COMPARTMENT TEMPERATURE
. . . . .
FrozenFood StorageCompartment
This refrigerator’s frozen food
storage compartment will make
ice and will store pre-frozen
foods for about 2weeks.
It will not effectively freeze
fresh foods or provide long term
storage for meats, poultry or fwh.
These products should be used
within several days.
Pre-frozen concentrates and
high sugar content foods, such as
fromn orangejuice and icecream,
will not remain completely solid
(frozen) and must also be used
quickly. For best possible results,
such items should be placed in
direct contact with the refrigerated
surface (where frost forms first).
If additional firmness is desired
in ice cream:
●Be sure chiller tray baffle is in the
OUT position (see page 5).
●Set temperature control to colder
position (“9” is coldest).
●Transfer ice cream from original
carton to acovered, flat-bottomed
container.
For best storage of frozen foods:
Use moisture-proof wrapping
material and bags or regular freezer
containers. (Commercially-frozen
fds are usually suitablypackaged.)
Ice Service
Ice ‘Ikays
Torelease icecubes, inverttray,
hold it overstoragebucket or bowl,
/“-
/“ P
Foronly one or two ice cubes,
leavethe tray right-side up, twist
both ends slightly and ~move
desired number of cubes.
and twist trayat l%thends.
Trays can be stacked to save
storagespace.
Forf-r ice service when you
need it, place icetrayson the frozen ““>
fbod storagecompartment floor. <-/”
Washtraysand storagebucket in
lukewarmwateronly. Do not put
them in an automatic dishwasher.
Defrosting Instructions
Defrostwhenever frostbecomes
l/4° to l/2° thick.
Neveruse asharp or pointed
instrument to removefrostas it
may result in damage tothe
cooling coih Use of aplastic
scraper is recommended.
Do not use any electricaldevicein
defrostingyour refrigerator.
Quick Method
●Removef- from frozenfbod
storagecompartment and chiller
tray.
Toreduce the amount of thawingof
frozenfbod whiledefrostingthe
frozenfd stomgecompartment,
store the food in apicniccooler or
other insulatedcontainer.
.Be sum baffle in ~r of
chiller tray is in OUT position
(see page5).
cTurn temperaturecontrol to “01’
●Place pans ofhot water in frozen
fd storagecompartment to speed
melting of ice.
After defrosting:
cEmpty waterfrom chiller tray.
sWashchilIertrayin warm water
and wipe frozenfbodstorage
compartment with adamp cloth.
●Removevegetablepan and wipe
up spills in bottom of refrigerator.
CA~ION! Do not touch
refrigeratorcoils or refrigerating
surfiices,particularly when hands
are damp or wet.
OvernightMethod
Recommended when nofmn fd
or ice cream is being stored.
Proceed same as Quick Method
exceptturn temperature control to
DEFROST. No need for hot water.
Keeprefrigeratordoor closed.
Moderate refrigerationcontinues. .-
‘J
L’. )
.,’
6
1
FoodStorageSuggestions
lkesh Food
Compartment
Unfrozen Meats, Fish and
14mltry
Meats, fish and poultry purchased
from the store vary in quality and
age; consequently, safe storage
time in your refrigerator will vary.
cAlwaysremove store wrappings.
●Rewrap in foil, film or waxpaper
and refrigerate immediately.
Cheese
Cheese should be wrapped well
with wax paper or aluminum foil,
or put in aplastic bag.
●Carefully wrap to expel air and
help to prevent mold.
●Store pre-packaged cheese in its
own wrapping if you wish.
Vegetables
The vegetable drawer has been
specially designed to preserve
natural moisture and freshness
of produce.
●Crispness can be maintained by
covering vegetables with amoist
towel.
QAs afimt.heraid to freshness, pre-
packaged vegetables can be stored
in their original wrapping.
Suggested storage times
for meat and poultry*
Eating quality IN
drops after REFRIGERA’IOR
time shown AT35°to 400F.
DAYS
Fresh Meats
Roasts (Beef and Lamb) . . . . . . . ..3t05
Roasts (I%rkand Veal) . . . . . . . . ..3to5
steaks(lkef) . . . . . . . . . . . . . . . ..3t05
Chops (Lamb) . . . . . . . . . . . . . . ..3t05
Chops (Pork) . . . . . . . . . . . . . . . ..3to5
Ground and Stew Meats . . . . . . . ..lto2
Variety Meats . . . . . . . . . . . . . . . ..lto2
Sausage (Pwk) . . . . . . . . . . . . . . ..lto2
Processed Meats
Bacon . . . . . . . . . . . . . . . . . . . . ...7
Frankfurters . . . . . . . . . . . . . . . ...7
Ham(Whole) . . . . . . . . . . . . . . ...7
Ham(Half) . . . . . . . . . . . . . . . . . ..3to5
Ham(Slices) . . . . . . . . . . . . . . . ...3
Luncheon Meats . . . . . . . . . . . . . ..3to5
Sausage (Smoked) . . . . . . . . . . ...7
Sausage
(Dryand Semi-Dry) . . . . . . . . ..14t021
Cooked Meats
Cooked Meats and
Meat Dishes . . . . . .
Gravy and MeatBroth
Fresh Poultry
Chicken and Turkey
(Whole) . . . . . . . . . .
Chicken (Pieces) . . . .
Thrkey (Pieces) .....
. . . . . . . . . .3t04
. . . . . . . . . . lto2
..........lto2
. . . . . . . . . . lto2
.........,lto2
Duck and Goose (Whole). . . . . ...1 to 2
Giblets . . . . . . . . . . . . . . . . . . . . ..lto2
Cooked Pbultry
Pieces
(Covered with Broth) . . . . . . . ..lto2
Pieces (Not Covered) . . . . . . . . . ..3to4
Cooked Poultry Dishes . . . . . . . ..3t04
Fried Chicken . . . . . . . . . . . . . . . ..3to4
New techniques are constantly
being developed. Consult the
College or County Extension
Service ofyour local Utility
Company for the latest information
on freezing and storing foods.
*U.S. Department ofAgriculture
Part No. 468300P03 Rev. 3
...
7
1
Care and Cleaning
Cleaning—Outside
The door handles and trim can
be cleaned with acloth dampened
with asolution ofmild liquid
dishwashing detergent and water.
Dry with asoftcloth. Don’tuse
waxon the door handles andtrim.
Keep the finish clean. Wipewith
aclean cloth lightly dampened
with kitchen appliance waxor mild
liquid dishwashing detergent. Dry
and polish with aclean, softcloth.
Do not wipe the refrigerator with
asoiled dishwashing cloth or wet
towel. These mayleavearesidue
that can erode the paint. Do not use
scouring pads, powdered cleaners,
bleach or cleaners containingbleach
because these products can scratch
and weakenthe paint finish.
Protect the paint finish. The finish
on the outside ofthe refrigerator is a
high quality, baked-on paint finish.
With proper care, itwill staynew-
looking and rust-free foryears.
Apply acoat ofkitchen/appliance
waxwhen the refrigerator is new
and then at least twice ayear.
Appliance Polish Wax&Cleaner
(Cat. No. WR97X216)is available
from GE Appliance Parts Marts.
Cleaning-Inside
Inside the fresh food and frozen
food storage compartments
should be cleaned at least once a
year. Unplug the refrigerator before
cleaning. Ifthis is not practical,
wring excessmoisture out ofsponge
or cloth when cleaning around
switches, lights or controls.
Use warm water and baking soda
solution—about atablespoon of
baking soda to aquart ofwater.
This both cleans and neutralizes
odors. Rinse thoroughly with water
and wipe dry.
Other parts ofthe refrigerator—
including door gasket, vegetable
drawer, icetraysand all plastic
parts-can be cleaned the same way.
Do not use cleansing powdersor
other abrasive cleaners.
Tohelp prevent odors, leave
anopen box ofbaking soda inthe
rear ofthe refrigerator, on the top
shelf. Change the box everythree
months. An open box ofbaking
soda in the freezer will absorb
stale freezerodors.
Do not wash any plastic parts
from your refrigerator in your
automatic dishwasher.
Beneath Refrigerator
In the refrigeration process, it is
normal that heat be expelled in the
area under the refrigerator. Some
synthetic floor coverings will
discolor at these normal and safe
operating temperatures. Yourfloor
covering supplier should be
consulted if you object to this
discoloration.
Behind Refrigerator
Care should be taken in moving
your refrigerator awayfrom the
wall. All types of floor coverings
can be darnaged, particularly
cushioned coverings and those
with embossed surfaces.
When yougo
onvacation
For extended vacations or
absences, shut off power to
refrigerator, turn the temperature
control to “O;’ clean interior with
baking soda solution of one
tablespoon of soda to one quart
of water. Wipe dry. Toprevent
odors, leave open box of soda in
refrigerator. Leavedoor open.
For shorter vacations, remove
perishable foods and leave control
at regular setting. However, if
room temperature is expected to
drop below 60”F., follow same
instructions as for extended
vacations.
When youmove
/. .
Disconnect power cord from wall
receptacle and remove all food.
Follow defrosting instructions (see
page 6), then clean and dry the ----,
interior. .-
Secure all loose items such as
shelves and storage pans by taping
them securely in place to prevent
damage.
Be sure refrigerator stays in upright
position only during actual moving
and in van. Refrigerator must be
secured invanto prevent movement.
Protect outside of refrigerator
with blanket.
‘L/
8
~—.
gllliiB
Questions?
-. ~- UseThis Problem Solver
~
. .
PROBLEM POSSIBLE CAUSEAND REMEDY
REFRIGEIUTOR ●Temperature control in “O” position.
DOES N~ OPERATE ●If interior light is not on, refrigerator may not be plugged in at wall outlet.
●If plug is secure and the refrigerator still fails to operate, plug alamp or asmall
appliance into the same outlet to determine if there is atripped circuit breaker or
burned out fuse.
M~R OPERATES ●Normal when refrigerator is first delivered to your home—usually requires 24
FOR LONG PERIODS hours to completely cool down.
●Large amounts of food placed in refrigerator to be cooled or frozen.
●Hot weather—frequent door openings.
●Door left open.
●Temperature control is set too cold. Referto instructions for use of
TEMPERATURE CONTROL on page 5.
●Check ENERGY SAVINGTIPS on page 2.
MOIOR STARTS& ●Temperature control starts and stops motor to maintain even temperatures.
SlOPS FREQUENTLY
VIBRATION OR ●If refrigerator vibrates, more than Iikelyit is not resting solidly on the floor
RATTLING and front leveling legs need adjusting or floor is weak or uneven. Refer to
LEVELING LEGS on page 4.
.If dishes vibrate on shelves, try moving them. Slight vibration is normal.
NORMAL OPERATING ●The high speed compressor motor mayproduce higher sound levels than your
SOUNDS old refrigerator.
●Refrigerant circulation may produce aboiling or gurgling sound in the frozen
food storage compartment. \
FRESH FOODS ●Foods not covered, wrapped or sealed properly.
DRY OUT
(continued next page)
9
., .. .
The Problem Solver(continued)
PROBLEM
FRESH FOOD
COMPARTMENT
TEMPERATURE
TOO WARM
FRESH FOOD
COMPARTMENT
TEMPERATURE
TOO COLD
SLOWICE CUBE
FREEZING
ICE CUBES HAVE
ODOR/TASTE
MOISTURE FORMS
ON OUTSIDE OF
REFRIGERAITIR
MOISTURE
COLLECI’S INSIDE
REFRIGERA’IOR
HAS ODOR
INTERIOR LIGHT
DOES NCYI’LIGHT
POSSIBLE CAUSEAND REMEDY
●Temperature control not set cold enough. Refer to TEMPERATURE CONTROL
on page 5.
●Warmweather—frequent door openings.
●Door left open for long time.
●Packagemay be holding door open.
cChiller tray baffle in OUT position—flip it IN.
●Set temperature control to alower number.
●Be sure chiller tray baffle is in OUT position,
●Door may havebeen left ajar.
QSet temperature control to ahigher number.
●Be sure ice trays are in contact with refrigerated surface.
●unseal~ packages in refrigerator ancI/or frozen food storage compartments may be
transmitting odorhaste to ice cubes.
●Interior of refrigerator needs cleaning. Refer to page 8.
●Not unusual during period of high humidity.
●Tm frequent and too long door openings.
.In humid weather air carries moisture into refrigerator when door is opened.
sFoods with strong odors should be tightly covered.
●Check for spoiled food.
●Interior needs cleaning. Refer to page 8.
●Keep open box of baking soda in refrigerator; replace every three months.
●No power at outlet.
●Light bulb needs replacing.
If you need more help.. call, toll free:
The GE Answer CenteP
800.6262000
consumer information service
,
.
10
If YouNeed Service
Toobtain service, see your warranty
on the back page of this book.
We’reproud of our service and
want you to be pleased. If for some
reason you are not happy with the
service you receive, here are three
steps to follow for fhrther help.
FIRST, contact the people who
serviced your appliance. Explain
why you are not pleased. In most
cases, this will solve the problem.
NEXT, if you are still not pleased,
write all the details-including
your phone number—to:
Manager, Consumer Relations
General Electric
Appliance Park
Louisville, Kentucky 40225
FINALLY, if your problem is still
not resolved, write:
Major Appliance
Consumer Action Panel
20 North Wacker Drive
Chicago, Illinois 60606
11
1
YOUR GENERAL ELECTRIC REFRIGERATOR
WARRANTy
Save proof of original purchase date such as your sales slip or cancelled check to establish warranty period. ,-
#
WHAT IS COVERED FULL ONE-YEAR WARRANTY
For one year from date of original
purchase, we will provide, free of
charge, parts and service labor
in your home to repair or replace
any parf of the re~rigeratorthat
fails because of amanufacturing
defect.
FULL FIVE-YEAR WARRANTY
For five years from date of original
purchase, we will provide, free of
charge, parts and service labor in
your home to repair or replace any
part of the sealed refrigerating
system (the compressor,
condenser, evaporator and all
connecting tubing) that fails
because of amanufacturing
defect.
This warranty is extended to
the original purchaser and any
succeeding owner for products
purchased for ordinary home use
in the 48 mainland states, Hawaii
and Washington, D.C. In Alaska the
warranty is the same except that it is
LIMITED because you must pay to
ship the product to the service shop
or for the service technician’s travel
costs to your home.
All warranty service will be provided
by our Factory Service Centers or
by our authorized Customer Care@
servicers during normal working
hours.
Look in the White or Yellow Pages
of your telephone directory for
GENERAL ELECXRIC COMPANY,
GENERAL ELECTRIC FACTORY
SERVICE, GENERAL ELECTRIC-
HOTPOINT FACTORY SERVICE or
GENERAL ELE~RIC CUSTOMER
CARE@ SERVICE.
WHAT IS N~ COVERED ●Service trips to your home to
teach you how to use the product.
Read your Use and Care material.
If you then have any questions
about operating the product,
please contact your dealer or our
Consumer Affairs office at the
address below, or call, toll free:
The GE Answer Center@
800.626.2000
consumer information service
●Improper installation.
If you have an installation problem,
contact your dealer or installer.
You are responsible for providing
adequate electrical, plumbing and
other connecting facilities.
●Replacement of house fuses or
resetting of circuit breakers.
sFailure of the product if it is used
for other than its intended purpose
or used commercially.
.Damage to product caused
by accident, fire, floods or acts
of God.
WARRANlOR IS NOT RESPONSIBLE
FOR CONSEQUENTIAL DAMAGES.
Some states do not allow the exclusion or limitation of incidental or consequential damages, so the above limitation or exclusion
may not apply to you. This warranty gives you specific legal rights, and you may also have other rights which vary from state to state.
To know what your legal rights are in your state, consult your local or state consumer affairs office or your state’s Attorney General.
Warrantor: General Electric Company
If further help is needed concerning this warranty, write:
Manager—Consumer Affairs, General Electric Company, Appliance Park, Louisville, KY40225
Part No. 468300P03 Rev. 3
Pub. No. 49-6308-4 GE NE RAL@ ELECTRIC TA1l
TA14
7-87
.

Other manuals for TA11

1

This manual suits for next models

1

Other GE Refrigerator manuals

GE ZIS360NM Reference manual

GE

GE ZIS360NM Reference manual

GE GTQ85PAMRLG User manual

GE

GE GTQ85PAMRLG User manual

GE Profile Arctica Series Reference manual

GE

GE Profile Arctica Series Reference manual

GE Profile 27 Series Original instructions

GE

GE Profile 27 Series Original instructions

GE Profile PDCF1NBW Operating instructions

GE

GE Profile PDCF1NBW Operating instructions

GE Profile PTS22LHS Manual

GE

GE Profile PTS22LHS Manual

GE Monogram ZIRP360NX Manual

GE

GE Monogram ZIRP360NX Manual

GE Profile PSS27NSTSS Manual

GE

GE Profile PSS27NSTSS Manual

GE Profile PNQ20KMHFES Operating instructions

GE

GE Profile PNQ20KMHFES Operating instructions

GE GE Profile Arctica CustomStyle PSC23SHN User instructions

GE

GE GE Profile Arctica CustomStyle PSC23SHN User instructions

GE 21 User manual

GE

GE 21 User manual

GE GSE23GSESS Assembly instructions

GE

GE GSE23GSESS Assembly instructions

GE GBSC3HBXWW - 23.2 cu. Ft. Bottom-Freezer... Assembly instructions

GE

GE GBSC3HBXWW - 23.2 cu. Ft. Bottom-Freezer... Assembly instructions

GE Monogram BCS42C User manual

GE

GE Monogram BCS42C User manual

GE Profile PSCF3TGX User manual

GE

GE Profile PSCF3TGX User manual

GE Profile PSCF3RGX User manual

GE

GE Profile PSCF3RGX User manual

GE GSCS3KGYSS Manual

GE

GE GSCS3KGYSS Manual

GE Monogram ZICP720 User manual

GE

GE Monogram ZICP720 User manual

GE GTZ18GCESS User manual

GE

GE GTZ18GCESS User manual

GE Profile 200D8074P017 Service manual

GE

GE Profile 200D8074P017 Service manual

GE GSHF6NGBBB Manual

GE

GE GSHF6NGBBB Manual

GE GTS16BBRELBB User manual

GE

GE GTS16BBRELBB User manual

GE Profile TFX26PPD User instructions

GE

GE Profile TFX26PPD User instructions

GE GBSL0HCXLLS Manual

GE

GE GBSL0HCXLLS Manual

Popular Refrigerator manuals by other brands

Benavent CBV20060X user manual

Benavent

Benavent CBV20060X user manual

Thetford N3185E user manual

Thetford

Thetford N3185E user manual

KitchenAid KRBL109ESS user manual

KitchenAid

KitchenAid KRBL109ESS user manual

Black & Decker BCRD32 Series instruction manual

Black & Decker

Black & Decker BCRD32 Series instruction manual

Sharp SJ-68L-T2S Service manual

Sharp

Sharp SJ-68L-T2S Service manual

Hoshizaki SafeTemp FH1-AAC Service manual

Hoshizaki

Hoshizaki SafeTemp FH1-AAC Service manual

LG LRSC26941 Specifications

LG

LG LRSC26941 Specifications

LG SXS Refrigerator user guide

LG

LG SXS Refrigerator user guide

True Manufacturing Company TMW TMW-36F installation manual

True Manufacturing Company

True Manufacturing Company TMW TMW-36F installation manual

Bosch KIR41NSE0 user manual

Bosch

Bosch KIR41NSE0 user manual

Zanussi ZI 718/12 K Instruction booklet

Zanussi

Zanussi ZI 718/12 K Instruction booklet

Waeco CoolMatic CRP-40 operating manual

Waeco

Waeco CoolMatic CRP-40 operating manual

Sibir 803K operating instructions

Sibir

Sibir 803K operating instructions

Hanseatic HSBS17990WEHEBK user manual

Hanseatic

Hanseatic HSBS17990WEHEBK user manual

Whirlpool ET16JM Use & care guide

Whirlpool

Whirlpool ET16JM Use & care guide

Sauber SC 201B user manual

Sauber

Sauber SC 201B user manual

Kenmore Kenmore Side by Side Refrigerator Use & care guide

Kenmore

Kenmore Kenmore Side by Side Refrigerator Use & care guide

Electrolux ER 1824 D Instruction booklet

Electrolux

Electrolux ER 1824 D Instruction booklet

manuals.online logo
manuals.online logoBrands
  • About & Mission
  • Contact us
  • Privacy Policy
  • Terms and Conditions

Copyright 2025 Manuals.Online. All Rights Reserved.