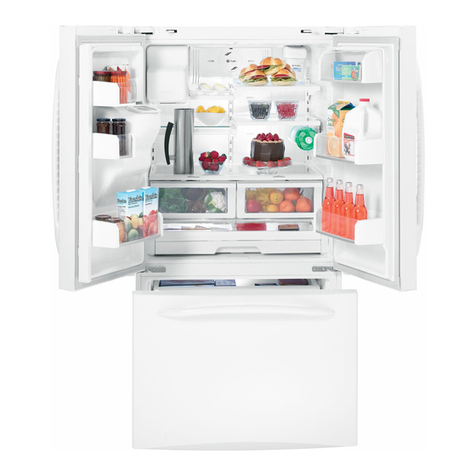
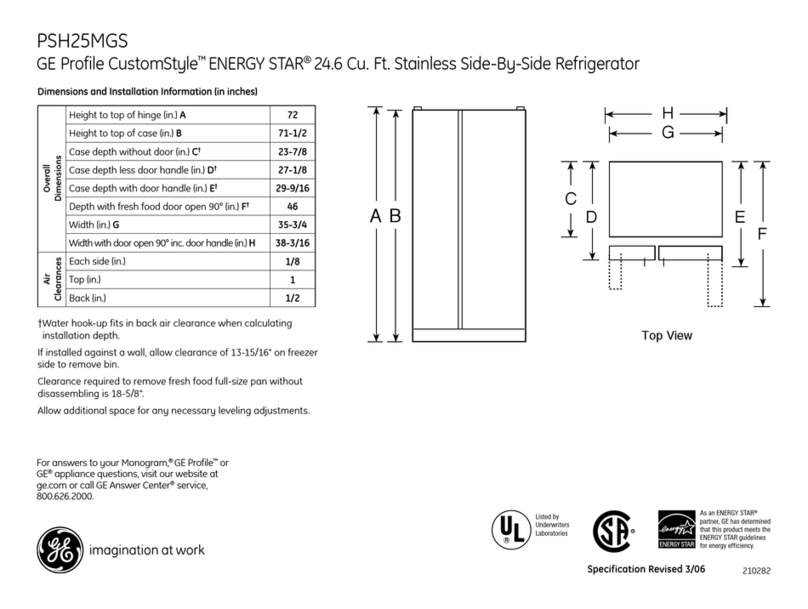
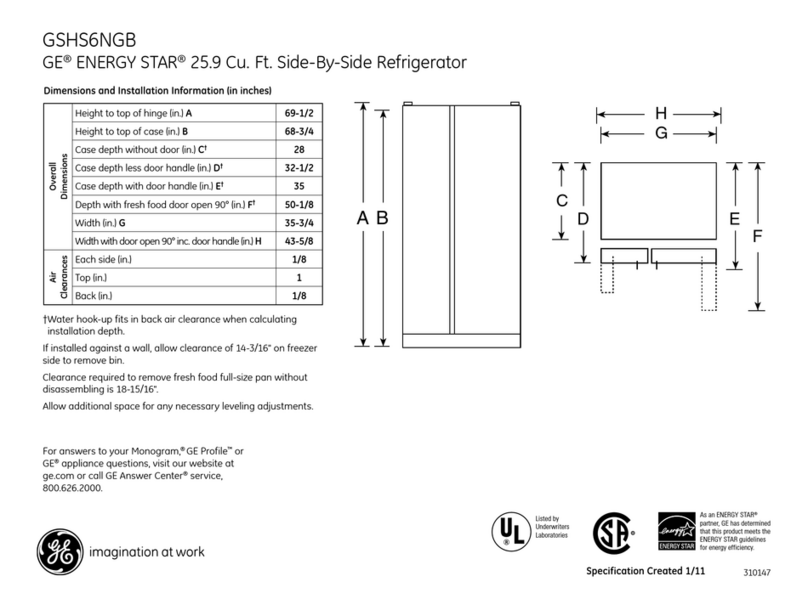
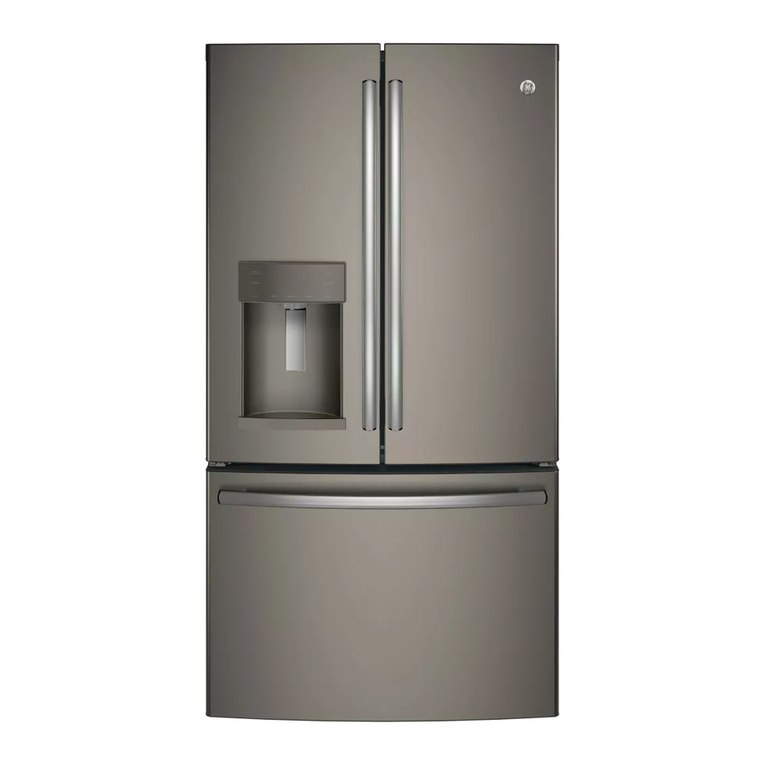
GE GTS16BBRELBB User manual

Form No. A/03/02 Part No. 12642710 MCS p/n 67001282 Litho U.S.A.
BOTTOM FREEZER REFRIGERATOR
Installer: Please leave this manual with
this appliance.
Consumer: Please read and keep this
manual for future reference. Keep sales
receipt and/or cancelled check as proof of
purchase.
In our continuing effort to improve
the quality and performance of our
appliances, it may be necessary to
make changes to the appliance
without revising this guide.
Model Number
Serial Number
Date of Purchase
Owner's Manual
Table of contents
Important Safety Instructions.....................................1
Installation ..............................................................2-5
Temperature Controls................................................6
Fresh Food Features..............................................7-8
Freezer Features.......................................................9
Care and Cleaning..............................................10-11
Normal Operating Sounds.......................................12
Before You Call ..................................................13-14
Warranty..................................................................15

1
Important safety instructions
Save these instructions
What you need to know
about safety
instructions
Warning and Important Safety Instruc-
tions appearing in this manual are not
meant to cover all possible conditions
and situations that may occur. Common
sense, caution and care must be exer-
cised when installing, maintaining or
operating refrigerator.
Always contact your dealer, distributor,
service agent or manufacturer about
problems or conditions you do not under-
stand.
DANGER – Immediate hazards which
WILL result in severe personal injury
or death.
DANGER
WARNING – Hazards or unsafe prac-
tices which COULD result in severe
personal injury or death.
WARNING
CAUTION – Hazards or unsafe prac-
tices which COULD result in minor
personal injury.
CAUTION
To reduce risk of fire, electric shock, serious injury or death when using your refrigerator, follow these basic precautions,
including the following:
WARNING
To reduce risk of injury or death,
follow basic precautions, including
the following:
IMPORTANT: Child entrapment and
suffocation are not problems of the
past. Junked or abandoned refrigera-
tors are still dangerous – even if they
sit out for “just a few days.” If you are
getting rid of your old refrigerator,
please follow the instructions below to
help prevent accidents.
Before you throw away your old refrig-
erator or freezer:
➢Take off the doors.
➢Leave the shelves in
place so children
may not easily climb
inside.
DANGER
RECOGNIZE SAFETY
SYMBOLS, WORDS,
LABELS
1. Read all instructions before using the refrigerator.
2. Observe all local codes and ordinances.
3. Be sure to follow grounding instructions.
4. Check with a qualified electrician if you are not sure this
appliance is properly grounded.
5. DO NOT ground to a gas line.
6. DO NOT ground to a cold-water pipe.
7. Refrigerator is designed to operate on a separate 103 to
126 volt, 15 amp., 60 cycle line. DO NOT modify plug on
power cord. If plug does not fit electrical outlet, have prop-
er outlet installed by a qualified electrician.
8. DO NOT use a two-prong adapter, extension cord or power
strip.
9. DO NOT remove warning tag from power cord.
10. DO NOT tamper with refrigerator controls.
11. DO NOT service or replace any part of refrigerator unless
specifically recommended in Owner’s Manual or published
user-repair instructions. DO NOT attempt service if instructions
are not understood or if they are beyond personal skill level.
12. Always disconnect refrigerator from electrical supply before
attempting any service. Disconnect power cord by grasping
the plug, not the cord.
13. Install refrigerator according to Installation Instructions. All
connections for water, electrical power and grounding must
comply with local codes and be made by licensed person-
nel when required.
14. Keep your refrigerator in good condition. Bumping or drop-
ping refrigerator can damage unit or cause unit to malfunc-
tion or leak. If damage occurs, have refrigerator checked by
qualified service technician.
15. Replace worn power cords and/or loose plugs.
16. Always read and follow manufacturer’s storage and ideal
environment instructions for items being stored in refrigerator.

2
Installation
These instructions were provided to aid
you in the installation of your refrigerator.
Measuring the opening
A1⁄2" of air space should be provided for
the top and back of the unit to allow for
proper air circulation. When installing
your unit, measure carefully.
Subflooring or floor coverings (i.e. carpet,
tile, wood floors, rugs) may make your
opening smaller than anticipated.
Some clearance may be gained by using
the leveling procedure under How to
Level Your Refrigerator.
IMPORTANT: If unit is to be installed into
a recess where top of unit is completely
covered, use dimensions from floor to top
of hinge cap to verify proper clearance.
Transporting your
refrigerator
Follow these tips when moving the unit to
final location:
•NEVER transport unit on its side. If an
upright position is not possible, lay unit
on its back. Allow unit to sit upright for
approximately 30 minutes prior to plug-
ging unit in to assure oil return to the
compressor. Plugging unit in immedi-
ately may cause damage to internal
parts.
•Use an appliance dolly when moving
unit. ALWAYS truck unit from its
side–NEVER from its front or back.
•Protect outside finish of unit during
transport by wrapping cabinet in blan-
kets or inserting padding between the
unit and dolly.
•Secure unit to dolly firmly with straps or
bungee cords. Thread straps through
handles when possible. DO NOT over-
tighten. Overtightening restraints may
dent or damage outside finish.
Selecting the best
location
Observe these points when choosing the
final location for your unit:
•DO NOT install refrigerator near oven,
radiator or other heat source. If not
possible, shield unit with cabinet mate-
rial.
•DO NOT install where temperature
falls below 55° F (13° C). Malfunction
may occur at this temperature.
•Make sure floor is level. If floor is not
level, shim rear wheels of unit with a
piece of plywood or other shim material.
•To assure proper door closure, verify
that the unit is leveled with a 1⁄4" tilt to
the back.
Removing the doors
and hinges
Some installations require door removal
to get refrigerator to final location.
To avoid electrical shock which can
cause severe personal injury or death,
observe the following:
•Disconnect power to refrigerator
before removing doors. Connect
power only after replacing doors.
WARNING
To avoid damage to walls and flooring,
protect soft vinyl or other flooring with
cardboard, rugs or other protective
material.
CAUTION
➢Unplug power cord from power
source.
➢Remove toe grille and bottom bracket
cover.
•Open freezer door as wide as
possible.
➢Remove top hinge cover from refriger-
ator door by removing Phillips screw.
•Retain screw and cover
for replacement.
➢Unscrew 5⁄16"hex head screws from
top hinge to remove hinge.
•Retain all screws for later use.
➢Lift refrigerator
door from center
hinge pin.
➢Hold freezer door in place while
removing center hinge pin with a 5⁄16"
hex nut driver. Remove freezer door.
•Retain hinge pin for later use.
3
Installation, cont.
➢Remove bottom hinge or stabilizing
bracket with 3⁄8"hex head driver.
•Lift out bottom hinge pin.
•Retain hinge pin and screws for later
use.
➢Remove Phillips
screws to remove
center hinge.
•Retain all screws
for later use.
How to reverse the
doors
➢Perform all steps listed in How to
Remove the Doors and Hinges.
➢Remove cabinet plugs with flat blade
screwdriver tip wrapped in masking
tape.
➢Transfer cabinet plugs and cabinet
screws to opposite side of cabinet.
➢Remove center mullion screws with
5⁄16"hex head driver.
➢Remove bottom mullion screws with 3⁄8"
hex head driver.
IMPORTANT: When working directly on
doors, place doors on a nonabrsive sur-
face protected by towels or rugs to avoid
damage to door finish.
➢Using a Phillips screwdriver, transfer
door stops from bottom edge of fresh
food and freezer door to opposite side
of door edge.
➢See How to Install and Remove
Handles to remove and reinstall han-
dles.
➢Proceed to How to Replace the
Doors and Hinges to mount doors.
Installing fresh food
front-mount handle
If installing handles for the first time, the
fresh food handle can be located within
the fresh food section. The handle trim
will be located in the literature package.
➢Remove 1⁄4" hex nut screws from door
face with hex nut driver.
•If reversing door,
remove door plugs
from opposite side
of door and insert
in screw holes.
➢Align handle holes with screw holes
on door face and secure with 2 door
face screws previously removed.
➢Locate handle trim in literature pack
and install over top and bottom of han-
dle.
•Secure top handle trim with remain-
ing screw removed
previously.
•Snap bottom trim
over bottom portion
of handle.
Installing freezer
handle
If installing handle for the first time, the
freezer handle can be located in the
literature package inside the refrigerator.
➢Remove Phillips screws from top edge
of freezer door opposite hinge side.
•Retain screws for later replacement.
•If reversing freezer door, remove
door plugs from top edge of door and
insert into screw holes.
➢Align handle holes with screw holes
on door edge and secure with screws
previously removed.

4
Removing freezer handle
Removing handle may be necessary
when transporting unit through tight
spaces or when reversing door.
➢Remove handle screws with Phillips
screwdriver.
•Retain screws for later replacement.
Removing fresh food
front-mounted handle
➢Remove top handle
trim by removing top
handle screw.
•Retain trim and
screw for later
replacement.
➢Pry bottom handle trim from
handle with screwdriver flat
blade wrapped in masking
tape.
•Retain trim for later
replacement.
➢Removing two remaining
handle screws and
remove handle.
•Retain screws for later
replacement.
How to replace the
doors and hinges
➢Install hinge assemblies:
•Install top hinge loosely with 5⁄16"hex
head screws.
•Install center hinge with Phillips
screws.
•Install bottom hinge with 3⁄8"hex head
screws.
➢Insert bottom hinge pin (select models)
•Locate bottom hinge hole closest to
outside edge of cabinet, and insert
bottom hinge pin. Replace any door
shims, if present.
➢Place hinge side of freezer door on
bottom hinge pin and hold freezer
door upright while installing center
hinge pin with 5⁄16"hex head driver.
•Replace any applicable door shims.
•Make sure the hinge pin fit is tight.
➢Place hinge side of refrigerator door
on center hinge pin.
➢While holding refrigerator door
upright, tighten down top hinge with
5⁄16"hex head driver and replace hinge
cover.
How to level your
refrigerator
If your refrigerator requires an ice maker
water supply connection, proceed to How
to Connect the Water Supply section,
before leveling your refrigerator.
To protect personal property or unit
from damage, observe the following:
➢Protect soft vinyl or other flooring
with cardboard, rugs or other pro-
tective materials.
➢Do not use power tools when per-
forming leveling procedure.
CAUTION
MATERIALS NEEDED:
•3⁄8" hex head driver
•Level
➢Move the refrigerator to final location
and plug the power
cord in.
➢Remove toe grille
and bottom cover.
➢Turn adjustment screws
on the left and right side to raise or
lower front of refrigerator.
•Make sure refrigerator cabinet is
level from side to side by adjusting
left and right roller adjustment
screws.
•Turn stabilizing leg clockwise until
firmly against floor.
Roller
Adjustment
Screw
Stabilizing
Leg
➢Using a level, make sure front of refrig-
erator is 1⁄4" (6 mm) or 1⁄2bubble higher
than the back of the refrigerator.
➢Replace toe grille and bracket cover.
See markings on inside of toe grille to
insure proper placement.
•Snap bottom portion into place
first. Press down on top of grille
until top portion snaps into place.

5
Installation, cont.
MATERIALS NEEDED:
•1⁄4" outer diameter flexible copper
tubing
•Shut-off valve requires a 1⁄4" hole to be
drilled into water supply before valve
attachment
•Adjustable wrench
•1⁄4" hex nut driver
NOTE: Add 8’ (2,4 m) to tubing length
needed to reach water supply for creation
of service loop.
➢Create service loop with tubing using
care to avoid kinks in tubing.
➢Remove plastic cap from water valve
inlet port.
➢Place brass nut and sleeve on copper
tube end as illustrated.
Brass
Nut Sleeve
Inlet
Port
Plastic
Cap
➢Place end of copper tubing into water
valve inlet port. Shape tubing slightly –
DO NOT KINK – so that tubing feeds
straight into inlet port.
➢Slide brass nut over
sleeve and screw nut
into inlet port. Tighten
nut with wrench. Pull on
tubing to confirm con-
nection is secure.
IMPORTANT: DO NOT overtighten.
Cross threading may occur.
➢Locate water tubing
clamp and install with
1⁄4” hex head screw.
Turn on water supply
and check for leaks and
correct, if present.
➢Monitor water connection for 24
hours. Correct leaks, if necessary.
Connecting the
water supply
(For units with optional ice maker)
To reduce the risk of injury or
death, follow basic precautions,
including the following:
➢Read all instructions before
installing device.
•DO NOT attempt installation if
instructions are not understood or
if they are beyond personal skill
level.
•Observe all local codes and ordi-
nances.
•DO NOT service device unless
specifically recommended in
Owner’s Manual or published
user-repair instructions.
•Disconnect power to unit prior to
installing device.
WARNING
To avoid property damage or possi-
ble injury, follow basic precautions,
including the following:
➢Consult a plumber to connect cop-
per tubing to household plumbing
to assure compliance with local
codes and ordinances.
➢Confirm water pressure to water
valve is between 20 and 100 PSI. If
water filter is installed, water pres-
sure to water valve must be a min-
imum of 35 PSI.
➢DO NOT use a self-piercing, or 3⁄16"
saddle valve. Both reduce water
flow, become clogged with time,
and may cause leaks if repair is
attempted.
➢Tighten nuts by hand to prevent
cross threading. Finish tightening
nuts with pliers and wrenches. DO
NOT overtighten.
➢Wait 24 hours before placing unit
into final position to check and cor-
rect any water leaks.
CAUTION

6
This refrigerator is designed to operate at
a household temperature of 55° to 110° F
(13° to 43° C).
Initial setting
➢Locate refrigerator controls at the top
of fresh food compartment and freezer
controls at top of freezer section. Set
both controls to 4.
IMPORTANT: Neither section will
cool if freezer control is set to OFF.
➢Allow 24 hours for temperature to sta-
bilize.
TEMPERATURE
ADJUSTMENTS
➢Check to see if freezer temperature is
0° to 2° F (-17° to -16° C).
•Turn control to next highest number
if too warm.
•Turn control to next lowest number
if too cold. Allow 5 to 8 hours for
adjustments to take effect.
➢Check to see if fresh food temperature
is 38° to 40° F (3° to 4° C).
•Turn control to next highest number
if too warm.
•Turn control to next lowest number
if too cold. Allow 5 to 8 hours for
adjustments to take effect.
Temperature test
MATERIALS NEEDED:
•2thermometers that measure -5° to
50° F (-21° to 10° C)
•2drinking glasses
FREEZER
➢Place thermometer in glass of
vegetable oil in middle of freezer and
continue with Temperature Adjust-
ments.
IMPORTANT: Always start tempera-
ture adjustments with freezer section.
REFRIGERATOR
➢Place thermometer in glass of water in
middle of refrigerator and continue
with Temperature Adjustments.
Temperature controls

7
Fresh food features
FULL-WIDTH AND
HALF-WIDTH SHELVES
To remove shelves:
➢Unhook shelf from rear ladder assem-
bly and pull out.
To reinstall shelves:
➢Insert shelf hooks into rear ladder
assembly and lower into place.
To avoid personal injury or property
damage, observe the following:
➢Confirm shelf is secure before plac-
ing items on shelf.
➢Handle tempered-glass shelves
carefully. Shelves may break sud-
denly if nicked, scratched or
exposed to sudden temperature
change.
CAUTION
Interior shelves Storage drawers
CRISPER DRAWERS
The crisper drawer keeps produce fresh
longer by providing an environment with
adjustable humidity.
The crisper controls regulate the amount
of humidity in the crisper drawer. Use the
low setting for produce with outer skins.
Use the high setting for leafy produce.
LOW
•apples • grapes
•cauliflower • oranges
•corn • zucchini
•cucumbers
HIGH
•asparagus • fresh herbs
•broccoli • fresh sprouts
•cabbage • lettuce
•celery • spinach
When storing produce in humidity-con-
trolled crispers:
➢DO NOT wash produce before placing
in crispers. Any additional moisture
added to the crispers may cause pro-
duce to prematurely spoil.
➢DO NOT line crispers with paper tow-
els. Towels will retain moisture.
➢Follow control instructions carefully.
Incorrect control settings may damage
produce.
CRISPER SHELF
To remove glass and frame:
➢Remove drawers.
➢Place hand beneath frame to push up
glass from underneath. Lift glass out.
➢Lift frame from refrigerator liner rails.
To reinstall glass and frame:
➢Reverse above procedure.
To remove drawers:
➢Pull drawer out to full extension. Tilt up
front of drawer and pull straight out.
To reinstall drawers:
➢Insert drawer into frame rails and push
back into place.
If refrigerator door does not open far
enough to remove drawers:
➢Remove drawer furthest from hinge
side of cabinet.
➢Remove glass as instructed previously.
➢Lift center divider from frame. Slide
existing drawer away from hinge side
of cabinet and remove.
SNACK DRAWER
This drawer can be used for storage of
food items or extra produce.

8
DOOR BUCKETS
Door buckets adjust to meet individual
storage needs.
To remove buckets:
➢Slide bucket up and pull straight out.
To reinstall buckets:
➢Reverse above procedure.
FULL WIDTH DOOR SHELF
The shelf on the door is full width and not
adjustable.
To remove door shelf:
➢Lift assembly from side liner tabs and
pull out.
To reinstall door shelf:
➢Fit ends of shelf assembly on liner
tabs and slide down.
Door storage
DAIRY CENTER
The dairy center provides convenient
storage for items such as butter, yogurt,
cheese, etc.
This compartment is an adjustable fea-
ture located in the door. It can be moved
to several different locations to accom-
modate storage needs.
To remove:
➢Open dairy door, pull upward and tilt
out.
To reinstall:
➢Reverse
above pro-
cedure.

9
Freezer features
Automatic ice maker
(SELECT MODELS)
Using ice maker for the first time:
➢Confirm ice bin is in place and ice
maker arm is down.
➢After freezer section reaches between
0° to 2° F (-18° to -17° C), ice maker
fills with water and begins operating.
➢Allow approximately 24 hours after
installation to receive first harvest of ice.
➢Discard ice created within first 12
hours of operation to verify system is
flushed of impurities.
Operating instructions:
➢Confirm ice bin is in place and ice
maker arm is down.
➢You will have a complete harvest of
ice approximately every 3 hours.
➢Stop ice production by raising ice
maker arm until click is heard.
➢Ice maker will remain in the off posi-
tion until arm is pushed down.
Shelves
ICE SERVICE RACK
(SELECT MODELS)
To install rack:
➢Slide L-shaped groove of shelf down
over back wall screw. Push rack back
until screw is stopped in L-shaped
groove (1). Slide front portion of shelf
over front wall screw (2).
1
2
FREEZER SHELF
To remove shelf:
➢Pull shelf out to full extension. Tilt up
front of shelf and pull straight out.
To reinstall shelf:
➢Insert shelf into refrigerator liner rails
and push to back of compartment.
To avoid property damage, observe
the following:
➢DO NOT force ice maker arm down
or up.
➢DO NOT place or store anything in
ice storage bin.
CAUTION
To reinstall basket:
➢Insert basket into refrigerator liner rails
and push back into place.
Door storage
TILT-OUT BIN
(SELECT MODELS)
The tilt-out bin in the freezer door tilts for-
ward for easy access to stored items.
To remove door shelf:
➢Lift assembly from side liner tabs and
pull out.
To reinstall door shelf:
➢Fit ends of shelf assembly on liner
tabs and slide down.
Drawers
WIRE BASKET
To remove basket:
➢Pull basket out to full extension. Tilt up
front of basket and pull straight out.
Accessories
ICE CUBE TRAY
(SELECT MODELS)
The ice cube tray provides an area to
freeze cubes for manual dispensing of
ice.
To release ice cubes from tray, hold tray
upside down over a storage container
and twist both ends of tray until cubes
release.
To remove rack:
➢Reverse above procedure.

10
Care and cleaning
PART DO
➢Use 4 tablespoons of baking soda dissolved in 1 quart (1 liter)
warm soapy water.
➢Rinse surfaces with clean warm water and dry immediately to
avoid water spots.
➢Use warm, soapy water and a soft, clean cloth or sponge.
➢Rinse surfaces with clean warm water and dry immediately to
avoid water spots.
➢Use a vacuum cleaner hose nozzle.
➢Use a vacuum cleaner hose nozzle with brush attachment.
➢Follow removal and installation instructions from appropriate
feature section.
➢Allow items to adjust to room temperature.
➢Dilute mild detergent and use a soft clean cloth or sponge for
cleaning.
➢Use a plastic bristle brush to get into crevices.
➢Rinse surfaces with clean warm water.
➢Dry glass and clear items immediately to avoid spots.
DO NOT USE
➢Abrasive or harsh cleaners
➢Ammonia
➢Chlorine bleach
➢Concentrated detergents or
solvents
➢Metal or plastic-textured
scouring pads
➢Abrasive or harsh cleaners
➢Ammonia
➢Chlorine bleach
➢Concentrated detergents or
solvents
➢Metal or plastic-textured
scouring pads
➢Vinegar-based products
➢Citrus-based cleaners
➢Abrasive or harsh cleaners
➢Metal or plastic-textured
scouring pads
➢Adishwasher
Textured Doors
and Exterior
Cabinet Interior
Stainless Steel Doors
and Exterior
IMPORTANT: Damage
to stainless steel finish
due to improper use of
cleaning products or
non-recommended
products is not covered
under this product’s
warranty.
Door Gaskets
Condenser Coil
Remove base grille to
access
Condenser Fan Outlet
Grille
See back of refrigerator
Accessories Shelves,
buckets, drawers, etc.
To avoid personal injury or property damage, observe the following:
•Read and follow manufacturer’s directions for all cleaning products.
•DO NOT place buckets, shelves or accessories in dishwasher. Cracking or warp-
ing of accessories may result.
CAUTION
To avoid electrical shock which can
cause severe personal injury or death,
disconnect power to refrigerator
before cleaning. After cleaning, con-
nect power.
WARNING

11
Removing odors from
refrigerator
➢Remove all food.
➢Disconnect refrigerator.
➢Clean the following items using the
appropriate instructions in the Care
and Cleaning table.
–Walls, floor and ceiling of cabinet
interior
–Drawers, shelves and gaskets
according to the instructions in this
section.
➢Pay special attention to clean all
crevices by completing the following
steps.
–Dilute mild detergent and brush
solution into crevices using a plas-
tic bristle brush.
–Let stand for 5 minutes.
–Rinse surfaces with warm water.
Dry surfaces with a soft, clean
cloth.
➢Wash and dry all bottles, containers
and jars. Discard spoiled or expired
items.
➢Wrap or store odor-causing foods in
tightly sealed containers to prevent
reoccurring odors.
➢Connect power to refrigerator and
return food to unit.
➢After 24 hours, check if odor has been
eliminated.
If odor is still present:
➢Remove drawers and place on top
shelf of refrigerator.
➢Pack refrigerator and freezer sections
– including doors – with crumpled
sheets of black and white newspaper.
➢Place charcoal briquettes randomly on
crumpled newspaper in both freezer
and refrigerator compartments.
➢Close doors and let stand 24-48
hours.
To avoid personal injury or property
damage, observe the following:
➢Allow light bulb to cool.
➢Wear gloves when replacing light
bulb.
CAUTION
To avoid electrical shock which can
cause severe personal injury or death,
disconnect power to refrigerator
before replacing light bulb. After
replacing light bulb, connect power.
WARNING
Energy saving ideas
➢When placing refrigerator into final
position, allow for 1⁄2" clearance around
the top and sides of the unit to supply
ample ventilation for optimum energy
efficiency.
➢Avoid overcrowding refrigerator
shelves. This reduces air circulation
around food and causes refrigerator to
run longer.
➢Avoid adding too much warm food to
unit at one time. This overloads com-
partments and slows rate of cooling.
➢Do not use aluminum foil, wax paper,
or paper toweling as shelf liners. This
decreases air flow and causes unit to
run less efficiently.
➢Afreezer that is 2⁄3full runs most effi-
ciently.
➢Locate refrigerator in coolest part of
room.Avoid areas of direct sunlight, or
near heating ducts, registers or other
heat producing appliances. If this is
not possible, isolate exterior by using
a section of cabinet or an added layer
of insulation.
➢Refer to Owner's Manual section on
temperature controls for recommend-
ed control settings.
➢Clean door gaskets every three
months according to Owner's Manual
cleaning instructions. This will assure
that door seals properly and unit runs
efficiently.
➢Take time to organize items in refriger-
ator to reduce time that door is open.
➢Be sure your doors are closing
securely by leveling unit as instructed
in your Owner's Manual.
➢Clean condenser coils as indicated in
the Owner’s Manual every 3 months.
This will increase energy efficiency
and cooling performance.
Remove and replace
light bulbs
Fresh food section
➢Remove
screw from
light shield.
Retain for
replacement.
➢Slide shield toward back of compart-
ment to release from light assembly.
➢Remove light bulbs.
➢Replace with appliance bulbs no
greater than 40 watts.
➢Replace light bulb cover by inserting
tabs on light shield into liner holes on
each side of light assembly. Slide
shield toward front of unit until it locks
into place. DO NOT force shield
beyond locking point. Doing so may
damage light shield.
➢Replace light shield screw.
Freezer
➢Pinch rear
tabs on light
cover and pull straight down.
➢Remove light bulb.
➢Replace bulb with appliance bulb no
greater than 40 watts.
➢Insert front tabs of light cover into
freezer liner and snap rear portion
over light assembly until rear tabs
engage.
Care and cleaning, cont.

12
Normal operating sounds
Today’s refrigerators have new features and are more energy efficient. Foam insulation is very energy efficient and has excellent insu-
lating capabilities, however, foam insulation is not as sound absorbent. As a result, certain sounds may be unfamiliar. In time, these
sounds will become familiar. Please refer to this information before calling service.
J
GA
F
C
IE
K
D
H
B
SOLUTION
➢Normal operation
➢Normal operation
➢Normal operation
➢Normal operation
➢Normal operation
➢Normal operation
➢See Installation Instructions for details on how to level your
unit.
➢Normal operation
➢Stop sound by raising ice maker arm to ‘off’ position. See
Automatic Ice Maker section in your Owner’s Manual for
details.
➢Normal operation
➢Normal operation
POSSIBLE CAUSE
➢Freezer control (A) clicks when
starting or stopping compressor.
➢Defrost timer (B) sounds like an
electric clock and snaps in and
out of defrost cycle.
➢Freezer fan (C) and condenser
fan (D) make this noise while
operating.
➢Evaporator (E) and heat
exchanger (F) refrigerant makes
this noise when flowing.
➢Ice cubes from ice maker (select
models) drop into ice bucket (G).
➢Compressor (H) makes a
pulsating sound while running.
➢Refrigerator is not level.
➢Ice maker water valve (I)
hookup (select models) buzzes
when ice maker fills with water.
➢Ice maker (J) is in the ‘on’ posi-
tion without water connection.
➢Compressor (H) can make a high-
pitched hum while operating.
➢Defrost heater (K) hisses, sizzles
or pops when operational.
TOPIC
Clicking
Air rushing or whirring
Gurgling or boiling
sound
Thumping
Vibrating noise
Buzzing
Humming
Hissing or
popping

13
PROBLEM POSSIBLE CAUSES WHAT TO DO
Freezer control and lights Refrigerator is in defrost mode. Normal operation. Wait 40 minutes to see if refrigerator restarts.
are on, but compressor
is not operating
Crisper drawer Control settings are too low. See section on Crisper drawer to adjust controls.
temperature is too warm Freezer controls are set too low. See controls section in Owner’s Manual on how to adjust your
controls.
Drawer is improperly positioned. See section on Crisper drawer to verify drawer positioning.
Refrigerator does not Refrigerator is not plugged in. Plug in unit.
operate Freezer control is not on. See controls section in Owner’s Manual.
Fuse is blown, or circuit breaker needs to be Replace any blown fuses. Check circuit breaker and reset, if.
reset. necessary.
Power outage has occurred. Call local power company listing to report outage.
Refrigerator still won’t Unit is malfunctioning. Unplug refrigerator and transfer food to another unit. If another
operate unit is not available, place dry ice in freezer section to preserve
food. Warranty does not cover food loss.
Contact service for assistance.
Food temperature Condenser coils are dirty. Clean according to your Owner’s Manual.
is too cold Refrigerator or freezer controls are set too high. See controls section in Owner’s Manual on how to adjust controls.
Food temperature Door is not closing properly. Refrigerator is not level. See How to Level Your Refrigerator
is too warm for details on how to level your unit.
Check gaskets for proper seal. Clean, if necessary, according to
cleaning instructions in Owner’s Manual.
Check for internal obstructions that are keeping door from closing
properly (i.e. improperly closed drawers, ice buckets, oversized
or improperly stored containers or foodstuffs, etc.)
Controls need to be adjusted. See the controls section in Owner’s Manual for assistance on
how to adjust your controls.
Condenser coils are dirty. Clean according to cleaning instructions in Owner’s Manual.
Rear air grille is blocked. Check the positioning of food items in refrigerator to make sure
grille is not blocked. Rear air grilles are located under crisper
drawers.
Door has been opened frequently, or has been Reduce time door is open. Organize food items efficiently to
opened for long periods of time. assure door is open for as short a time as possible.
Food has recently been added. Allow time for recently added food to reach refrigerator or freezer
temperature.
Refrigerator has an odor Compartment is dirty or has odor-causing food. Refer to Care and Cleaning in Owner’s Manual for odor removal
instructions.
Water droplets form on Check gaskets for proper seal. Clean, if necessary, according to cleaning instructions in
outside of refrigerator Owner’s Manual.
Humidity levels are high. Normal during times of high humidity.
Controls require adjustment. See the controls section in Owner’s Manual for assistance on
how to adjust your controls.
Water droplets form on Humidity levels are high or door has been See the controls section in Owner’s Manual for assistance on
inside of refrigerator been opened frequently. how to adjust your controls.
Check gaskets for proper seal. Reduce time door is open. Organize food items efficiently to
assure door is open for as short a time as possible.
Clean, if necessary, according to cleaning instructions in
Owner’s Manual.
Refrigerator or ice maker Normal operation. Refer to noise section of Normal Operating Sounds guide in
makes unfamiliar sounds Owner’s Manual.
or seems too loud
Operation
Before you call

14
PROBLEM POSSIBLE CAUSES WHAT TO DO
Crisper drawers do not Contents of drawer, or positioning of items Reposition food items and containers to avoid interference with
close freely in the surrounding compartment could be the drawers.
obstructing drawer.
Drawer is not in proper position. See Crisper drawer section for proper placement.
Refrigerator is not level. See How to Level Your Refrigerator for details on how to level
your unit.
Drawer channels are dirty or need treatment. Clean drawer channels with warm, soapy water. Rinse and dry
thoroughly.
Apply a thin layer of petroleum jelly to drawer channels.
Refrigerator runs too Doors have been opened frequently or for Reduce time door is open. Organize food items efficiently to
frequently long periods of time. assure door is open for as short a time as possible.
Allow interior environment to adjust for period the door has
been opened.
Humidity or heat in surrounding area is high. Normal operation.
Food has recently been added. Allow time for recently added food to reach refrigerator or
freezer temperature.
Unit is exposed to heat by environment or Evaluate your unit’s environment. Unit may need to be moved to
by appliances nearby. run more efficiently.
Condenser coils are dirty. Clean according to cleaning instructions in your Owner’s Manual.
Controls need to be adjusted. See controls section in your Owner’s Manual for assistance
on how to adjust your controls.
Door is not closing properly. Refrigerator is not level. See How to Level Your Refrigerator
for details on how to level your unit.
Check gaskets for proper seal. Clean, if necessary, according
to cleaning instructions in Owner’s Manual.
Check for internal obstructions that are keeping door from closing
properly (i.e. improperly closed drawers, ice buckets, oversized
or improperly stored containers or foodstuffs, etc.)
PROBLEM POSSIBLE CAUSES WHAT TO DO
Unit is leaking water Plastic tubing was used to complete water The manufacturer recommends using copper tubing for installation.
connection. Plastic is less durable and can cause leakage. The manufac
turer is not responsible for property damage due to
improper installation or water connection.
Improper water valve was installed. Check water connection procedure in your Installation
Instructions. Self-piercing and 3⁄16” saddle valves cause low water
pressure and may clog the line over time. The manufacturer is
not responsible for property damage due to improper
installation or water connection.
Ice forms in inlet tube to Water pressure is low. Water pressure must be between 20 to 100 pounds per square
ice maker inch to function properly. A minimum pressure of 35 pounds per
square inch is recommended for units with water filters.
Freezer temperature is too high. See controls section in chapter called Installing Your Refrigerator
on how to adjust your controls. Freezer is recommended to be
between 0 to 2° F (-18 to –17° C).
Water flow is slower than Water pressure is low. Water pressure must be between 20 to 100 pounds per square
normal inch to function properly. A minimum pressure of 35 pounds per
square inch is recommended for units with water filters.
Improper water valve was installed. Check water connection procedure in your Installation
Instructions. Self-piercing and 3⁄16” saddle valves cause low water
pressure and may clog the line over time. The manufacturer is
not responsible for property damage due to improper
installation or water connection.
Ice

15
Refrigerator warranty What is not covered by these warranties:
1. Conditions and damages resulting from any of the following:
a. Improper installation, delivery or maintenance.
b. Any repair, modification, alteration or adjustment not authorized by the
manufacturer or an authorized servicer.
c. Misuse, abuse, accidents or unreasonable use.
d. Incorrect electric current, voltage or supply.
e. Improper setting of any control.
2. Warranties are void if the original serial numbers have been removed,
altered, or cannot be readily determined.
3. Light bulbs.
4. Products purchased for commercial or industrial use.
5. The cost of service or service call to:
a. Correct installation errors.
b. Instruct the user on the proper use of the product.
c. Transport the appliance to the servicer.
6. Consequential or incidental damages sustained by any person as a result
of any breach of these warranties. Some states do not allow the exclusion
or limitation of consequential or incidental damages, so the above exclu-
sion may not apply.
If you need service
❚Call the dealer from whom your appliance was purchased or call Maytag
Appliances Sales Company, Maytag Customer Assistance at 1-800-688-
9900, USA or 1-800-688-2002 Canada to locate an authorized servicer.
❚Be sure to retain proof of purchase to verify warranty status. Refer to
WARRANTY for further information on owner’s responsibilities for
warranty service.
❚If the dealer or service company cannot resolve the problem, write to
Maytag Appliances Sales Company, Attn: CAIR®Center, P.O. Box 2370,
Cleveland, TN 37320-2370, or call 1-800-688-9900 U.S.A. or 1-800-688-
2002 Canada.
U.S. customers using TTY for deaf, hearing impaired or speech impaired,
call 1-800-688-2080.
NOTE: When writing or calling about a service problem, please include
the following information:
a. Your name, address and telephone number;
b. Model number and serial number;
c. Name and address of your dealer or servicer;
d. Aclear description of the problem you are having;
e. Proof of purchase (sales receipt).
Full One Year Warranty
For one (1) year from the date of original retail
purchase, any part that fails in normal home
use will be repaired or replaced free of charge.
Ice Maker - When purchased with the refriger-
ation and installed by the dealer, the ice maker
will be considered part of the refrigerator for
warranty purposes.
Limited Warranty - Major Refrigeration
Components
Second Through Fifth Year - After the first
year from the date of original purchase,
through the fifth year, the manufacturer will
repair or replace, at its option, free of charge
for parts and labor, any part of the sealed
refrigeration system (consisting of the com-
pressor, evaporator, condenser, drier and con-
necting tubing) and the cabinet liner (exclusive
of the door liner) which fail in normal home use.
Mileage and transportation charges, if
required, shall be the responsibility of the
owner.
Please note: The full warranty and the limited
warranties apply when the refrigerator is locat-
ed in the United States or Canada.
Refrigerators located elsewhere are covered
by the limited warranties only including parts
that fail during the first year.
Limitations of Liability
The warrantor shall not be liable for any inci-
dental or consequential damages, including
food loss. Some states do not allow the exclu-
sion or limitation of consequential damages, so
the above limitation or exclusion may not apply
to you.
The specific warranties expressed above are
the ONLY warranties provided by the manufac-
turer. These warranties give you specific
legal rights, and you may also have other rights
which vary from state to state.

COMBINÉ RÉFRIGÉRATEUR-CONGÉLATEUR
Installateur : Veuillez laisser ce guide
avec l’appareil.
Consommateur : Veuillez lire et
conserver ce guide pour consultation
ultérieure. Conservez la facture d’achat
ou le chèque annulé comme preuve
d’achat.
Dans le cadre de nos pratiques
d’amélioration constante de la qualité
de nos appareils, des modifications
peuvent être introduites sur les
appareils sans que cela donne lieu à
une révision de ce guide.
Numéro de modèle
Numéro de série
Date de l’achat
Manuel de l’utilisateur
Table des matières
Renseignements importants concernant votre sécurité.....17
Installation.....................................................................18-21
Réglage des thermostats...................................................22
Éléments du compartiment pour produits frais.............23-24
Éléments du compartiment congélateur ............................25
Conseils et entretien.....................................................26-27
Bruits normaux...................................................................28
Avant d’appeler le technicien........................................29-30
Garantie..............................................................................31

17
Importates consignes de sécurité
Conserver ces consignes
Avis concernant les
consignes de sécurité
Les mises en garde et les consignes de
sécurité importantes énoncées dans ce
manuel ne couvrent pas toutes les situations
susceptibles de se présenter.
Il faut donc faire preuve de bon sens, de
prudence et d’attention lors de la mise en
service, l’entretien ou la mise en marche du
réfrigérateur. En cas de problème difficile à
résoudre, toujours communiquer avec le
détaillant, le distributeur, le prestataire de
service après-vente ou le fabricant.
DANGER — Dangers immédiats qui
RÉSULTERONTen de graves blessures,
voire le décès.
DANGER
AVERTISSEMENT — Dangers ou
pratiques non-sécuritaires qui
POURRAIENT résulter en de graves
blessures, voire le décès.
AVERTISSEMENT
ATTENTION — Dangers ou pratiques non
sécuritaires qui POURRAIENT résulter en
des blessures mineures ou des dégâts
matériels.
ATTENTION
Pour éviter tout risque d’incendie, d’électrocution, de blessures graves ou de décès lors de l’utilisation du réfrigérateur, prendre les
précautions suivantes :
AVERTISSEMENT
APPRENEZ À
RECONNAÎTRE CES
SYMBOLES, MOTS ET
ÉTIQUETTES RELATIFS À
LA SÉCURITÉ
1. Lire toutes les consignes avant d’utiliser le réfrigérateur.
2. Respecter tous les codes et règlements locaux.
3. Suivre les consignes de mise à la terre.
4. Demander à un électricien qualifié de vérifier si cet appareil a été
correctement mis à la terre.
5. NE PAS raccorder à un tuyau d’alimentation en gaz.
6. NE PAS raccorder à un tuyau d’eau froide.
7. Le réfrigérateur est conçu pour fonctionner sur une prise séparée
de 103 à 126 V, 15 A, 60 cycles. NE PAS modifier la fiche du
cordon d’alimentation. Si la fiche ne convient pas à la prise de
courant, faire installer une prise adéquate par un électricien
qualifié.
8. NE PAS utiliser d’adaptateur à deux broches, de rallonge ou de
barrette de raccordement.
9. NE PAS enlever l’étiquette de mise en garde du cordon d’alimen-
tation.
10. NE PAS modifier les pièces de commande internes de l’appareil.
11. NE PAS réparer ou remplacer toute pièce du réfrigérateur à moins
que cela ne soit spécifiquement recommandé dans le manuel du
propriétaire ou les consignes de réparation à l’intention de
l’utilisateur. NE PAS chercher à réparer l’appareil si les consignes
ne sont pas comprises ou si cela va au-delà des compétences.
12. Toujours débrancher le réfrigérateur avant de procéder à une
réparation. Débrancher le cordon d’alimentation en saisissant la
fiche et non le cordon.
13. Installer le réfrigérateur conformément aux consignes de mise en
service. Tous les raccordements d’eau, d’électricité et de mise à la
terre doivent être conformes aux codes locaux et effectués par du
personnel qualifié si nécessaire.
14. Garder le réfrigérateur en bon état de fonctionnement. Lorsqu’il a
été échappé ou heurté, le réfrigérateur peut être endommagé ou il
peut s’ensuivre une fuite ou un mauvais fonctionnement. En cas
de dommages, demander à un technicien qualifié de vérifier l’état
du réfrigérateur.
15. Remplacer les cordons d’alimentation usés et/ou les fiches
desserrées.
16. Toujours lire et suivre les consignes idéales de rangement du
fabricant pour les articles à ranger dans le réfrigérateur.
Pour éviter tout risque de blessure ou
de décès, prendre les précautions
suivantes :
IMPORTANT : Les risques d’emprisonnement
et de suffocation chez les enfants ne sont
pas phénomènes du passé. Les vieux
réfrigérateurs abandonnés sont encore
dangereux, même s’ils sont entreposés
pour «quelques jours seulement». Pour se
défaire d’un vieux réfrigérateur, lire les
instructions ci-dessous afin d’éviter les
accidents.
Avant de jeter un vieux réfrigérateur ou
congélateur :
➢Démonter les portes.
➢Laisser les tablettes
en place pour que les
enfants ne puissent
pas facilement entrer
à l’intérieur.
DANGER

18
Installation
Ces explications sont fournies pour vous aider
dans la mise en service de réfrigérateur.
Comment se mesure
l’espace où sera placé
le réfrigérateur?
Un dégagement de 13 mm doit être laissé au
haut et à l’arrière de l’appareil pour permettre
une circulation d’air suffisante. Mesurer
soigneusement lors de la mise en service.
Un support de revêtement de sol ou un
revêtement de sol (moquette, carrelage,
plancher, tapis) pourront rendre l’ouverture
plus petite que prévu.
Il est possible de gagner de l’espace en
utilisant la méthode de mise de niveau
indiquée sous Mise de niveau du réfrigérateur.
IMPORTANT : Si l’appareil est placé dans un
renfoncement où le dessus est complètement
encastré, utiliser les dimensions allant du
plancher au haut du couvre-charnière pour
s’assurer qu’il y a un dégagement suffisant.
Transport de
réfrigérateur
Suivre ces conseils pour placer l’appareil à
son emplacement final:
•
NE JAMAIS transporter l’appareil couché
sur le côté. S’il n’est pas possible de le
transporter debout, le coucher sur le dos.
Une fois remis debout, ne pas le brancher
avant 30 minutes pour permettre à l’huile de
retourner dans le compresseur. S’il est
branché immédiatement, les composants
internes pourront se trouver endommagés.
•
Utiliser un diable pour déplacer l’appareil.
TOUJOURS faire reposer le côté de
l’appareil contre le diable, JAMAIS l’avant ni
l’arrière.
•
Protéger le fini extérieur pendant le
transport en l’enveloppant dans des
couvertures ou en insérant un matériau
faisant coussin entre l’appareil et le diable.
•
Fixer l’appareil solidement sur le diable.
Autant que possible, faire passer les
sangles dans les poignées. NE PAS trop
serrer. Des sangles trop serrées pourraient
laisser une indentation ou endommager le
fini extérieur.
Sélection d’un
emplacement optimum
Observer les points suivants lors du choix de
l’emplacement final de l’appareil :
•
NE PAS placer le réfrigérateur près d’un
four, d’un radiateur ou de toute autre source
de chaleur. Si cela n’est pas possible, créer
un écran entre l’appareil et la source de
chaleur à l’aide d’un pan de matériau utilisé
pour les armoires.
•
NE PAS placer l’appareil dans un endroit où
la température descend au-dessous de
13° C (55° F) car son fonctionnement
pourrait être affecté.
•
S’assurer que le plancher est de niveau. Si
ce n’est pas le cas, placer, sous les
roulettes arrière, une cale en contreplaqué
ou autre matériau de ce type.
•
Pour assurer une bonne fermeture de la
porte, vérifier que l’appareil est 6 mm plus
bas à l’arrière qu’à l’avant lors de la mise de
niveau.
Démontage des portes et
des charnières
Dans certains cas, les portes doivent être
démontées pour permettre la mise en place du
réfrigérateur à son emplacement final
Pour éviter tout risque d’électrocution, qui
pourrait provoquer de causer des
blessures graves, voire le décès, observer
les points suivants :
•
Débrancher le réfrigérateur de
l’alimentation avant de démonter les
portes. Le rebrancher une fois les portes
remontées uniquement.
AVERTISSEMENT
Pour éviter d’abîmer les murs ou le revête-
ment de sol, protéger les planchers en
vinyle souple ou autre revêtement de sol à
l’aide de carton, de moquette ou d’autre
matériau protecteur.
ATTENTION
➢
Débrancher le cordon d’alimentation de
l’alimentation électrique.
➢
Enlever la grille de ventilation et le ou les
couvre-supports du bas de l’appareil.
•
Ouvrir la porte du congélateur au
maximum.
➢
Enlever le couvre-charnière supérieur
après avoir enlevé la vis cruciforme.
•
Mettre la vis et le
couvre-charnière
de côté pour le
remontage.
➢
Enlever la charnière supérieure après avoir
dévissé les vis à six pans de 5⁄16".
•
Mettre toutes les vis de côté pour le
remontage.
➢
Enlever la porte de
la broche de
charnière centrale
en la soulevant.
➢
Soutenir la porte du congélateur pour la
maintenir en place et retirer la broche de
charnière centrale à l’aide d’un tourne-
écrou hexagonal de 5⁄16". Retirer la porte du
congélateur.
•
Mettre la broche de côté pour le remon-
tage.

19
Installation, suite
➢
Enlever la charnière
centrale après avoir
retiré les vis cruciformes.
•
Mettre toutes les vis de
côté pour le remontage.
➢
Enlever la charnière inférieure ou le
support de stabilisation à l’aide d’un
tourne-écrou hexagonal de 3⁄8".
•
Retirer la broche de charnière inférieure
en la soulevant.
•
Mettre la broche et les vis de côté pour le
remontage.
Inversion des portes
➢
Suivre les étapes indiquées sous
Démontage des portes et des charnières.
➢
Transférer les obturateurs et les vis de
l’armoire de l’autre côté de l’armoire.
➢
Enlever les obturateurs à l’aide de la pointe
d’un tournevis à lame plate recouverte de
ruban cache.
➢
Enlever les vis du meneau central à l’aide
d’un tourne-écrou hexagonal de 5⁄16".
➢
Enlever les vis du meneau inférieur à l’aide
d’un tourne-écrou hexagonal de 3⁄8".
IMPORTANT : Pour travailler directement sur
les portes, mettre celles-ci sur une surface non
abrasive protégée de serviettes ou de
moquette pour éviter d’en abîmer le fini.
➢
Transférer les butées de porte du bas des
deux portes au côté opposé des portes.
Utiliser un tournevis cruciforme pour
enlever et remettre les butées.
➢
Voir sous Démontage et pose des
poignées pour démonter et remonter les
poignées.
➢
Passer à Pose des portes et des
charnières pour le remontage des portes.
Pose d’une poignée
de compartiment pour
produits frais montée
à l’avant
S’il s’agit d’une pose de poignée initiale, la
poignée du compartiment pour produits frais
se trouve dans ce compartiment. La garniture
de la poignée se trouve
dans le paquet de
documentation.
➢
Enlever les vis à six
pans de 1⁄4"du
devant de la porte à
l’aide d’un tourne-
écrou hexagonal.
•
Pour une inversion de porte, enlever les
obturateurs du côté opposé de la porte et
les insérer dans les trous à vis.
➢
Aligner les trous de poignée sur les trous
de vis du devant de la porte et fixer la
poignée en place à l’aide des
vis du devant de la porte
enlevées.
➢
Prendre la garniture qui se trouve dans le
paquet de documentation et la poser sur le
haut et le bas de la poignée tel qu’indiqué.
•
Fixer la garniture du haut avec la vis qui
reste de celles enlevées.
•
Enclencher la garniture
du bas sur la partie
inférieure de la poignée.
Pose d’une poignée
pour compartiment
congélateur
S’il s’agit d’une pose de poignée initiale, la
poignée du compartiment congélateur se
trouve dans ce compartiment.
➢
Enlever les vis cruciformes du rebord
supérieur de la porte opposé au côté des
charnières.
•
Mettre les vis de côté pour le remontage.
•
Pour une inversion de porte, enlever les
obturateurs du rebord du haut de la porte
et les insérer dans les trous de vis.
➢
Aligner les trous de poignée sur les trous
de vis du rebord de la porte et fixer la
poignée en place à l’aide des vis enlevées.
Table of contents
Languages:
Other GE Refrigerator manuals

GE
GE Profile PFSS9SKYBSS Operating instructions

GE
GE GSH22JSXSS - Appliances 22.0 cu. ft.... Manual

GE
GE GTL21KCXBS - R 21.0 Cu. Ft. Top-Freezer... Manual

GE
GE ZIPP360NZA User manual

GE
GE GDSL3KCX Manual

GE
GE Profile PSB42LGRBV Instruction Manual

GE
GE GTN18BBBWW Manual

GE
GE GSS25QSWSS Manual

GE
GE GE Profile Arctica PSC23NHP User instructions

GE
GE Profile Operating instructions