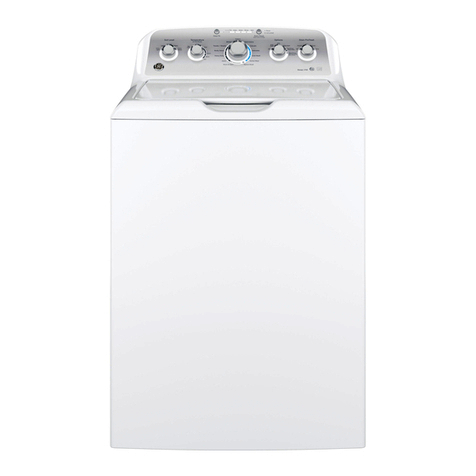
GE G017 User manual

GEAppliances.com
Safety Instructions .......... 2,s
Operating Instructions
Appliance Communication ....... 12
Careand Cleaning
of the Washer.................... 13
Features ......................... 7-9
Loading and Using
the Washer ...................... 11
Operating instructions .......... 4-6
SpecialFeatures.................. 10
Troubleshooting Tips ..... 14-16
Consumer Support
Consumer Support ................ 20
Parts and Accessories ........... 3, 20
Warranty (US)..................... 18
Warranty (Canada)................ 19
English/Fra ngais/Espa flol
Printed in the United States
ENERGYSTAR
As an ENERGYSTAR®partner,
GEhas determined that this
product meets the ENERGYSTAR®
guidelines for energy efficiency.
Write the model and serial
numbers here:
Model #
Serial #
You can find
them under
the lid of the
washer. 49-90538 03-15GE

IMPORTANT SAFETY INFORMATION.
READ ALL INSTRUCTIONS BEFORE USING.
m
Thisisthe safety alert symbol. Thissymbol alerts to potential hazards that can kill or hurt and others.All safety
you you you
messageswill follow the safety alert symbol and the word "DANGER","WARNING",or "CAUTION".Thesewords are defined as:
Indicates a hazardous situation which, if not avoided, will result in death or serious inJury.
Indicates a hazardous situation which, if not avoided, could result in death or serious inJury.
_ Indicates hazardous situation which, if not avoided, could result in minor moderate
aor inJury.
IMPORTANT SAFETYINSTRUCTIONS
To reduce the risk of death, fire, explosion,electric shock,or injury to persons when usingyour appliance,
follow basic precautions, including the following:
[] Readall instructionsbeforeusingtheappliance.
[] DONOTwash or dry articles that have been previously cleaned in,washed in,soaked in or spotted with gasoline, dry-
cleaning solvents, or other flammable or explosive substances, as they give off vapors that could ignite or explode.
[] DONOTadd gasoline, dry-cleaning solvents, or other flammable or explosive substances to the wash water. These
substances give off vapors that could ignite or explode.
[] Under certain conditions, hydrogen gas may be produced in a hot-water system that has not been used for 2 weeks
or more. HYDROGENGAS ISEXPLOSIVE.If the hot water system has not been used for such a period, before using a
washing machine, turn on all hot-water faucets and let the water flow from each for several minutes. This will release
any accumulated hydrogen gas. As the gas is flammable, DO NOTsmoke or use an open flame during this time.
[] DONOTallow children to play on or in this appliance. Close supervision of children is necessary when this appliance is
used near children. Before the washer is removed from service or discarded, remove the door or lid. Failure to follow
these instructions may result in death or injury to persons.
[] DONOTreach into the appliance if the tub or agitator is moving to prevent accidental entanglement.
[] DONOTinstall or store this appliance where it will be exposed to the weather.
[] DONOTtamper with controls, repair or replace any part of this appliance or attempt any servicing unless specifically
recommended in the user maintenance instructions or in published user repair instructions that you understand and
have the skills to carry out.
[] DONOToperate this appliance if it isdamaged, malfunctioning, partially disassembled, or hasmissing or broken parts
including a damaged cord or plug.
[] Unplug the appliance or turn off the circuit breaker before servicing. Pressingthe Power button DOESNOTdisconnect power.
[] See "Electrical Requirements" located in the Installation Instructions for grounding instructions.
SAVETHESE INSTRUCTIONS

GEAppliances.com
PROPERINSTALLATION
This washer must be properly installed and located in accordance with the Installation Instructions before it is used.
If you did not receive an Installation Instructions, you can receive one by visiting GEAppliances.com or by calling
800.GE.CARES(800.452.2757). In Canada, visit www.geappliances.ca or call 800.561.3344.
[] Ensurethat the hot water hose isconnected to the "H" [] Optional drain hoseextension recommended for
[]
[]
valve andthe cold water hoseisconnected to the "C"
valve.
Installor store where it will not be exposed to
temperatures below freezing or exposedto the weather,
which could cause permanent damage and invalidate the
warranty.
Properlyground washer to conform with all
governing codes and ordinances. Follow details
in Installation Instructions.
_ - Electrical Shock Hazard
Plug into a grounded 3 prong outlet.
DO NOT remove ground prong.
DO NOT use an adapter.
DO NOT use an extension cord.
Failure to follow these instructions can result in death
or electrical shock.
discharging heights from 60" - 96"
[] This washer does not include water supply hoses.
GEstrongly recommends the useof factory specified
parts.A list of factory hoses availablefor purchase are
listed.These hosesare manufactured and tested to meet
GEspecifications.
GEstrongly recommends the useof new water supply
hoses.Hosesdegrade over time and need to be replaced
every 5 years to reduce the risk of hosefailures and water
damage.
Parts and Accessories
Order on-line at GEApplianceparts.com today, 2/4hoursa
day or by phone at 800.626.2002during normal business
hours. InCanada, visityour localGEparts distributor or call
800.66!.16!6.
Part Number
PI!4X!O002
Or
Accessory
/4ft rubber water supply hoses
PH14X10005 /4ft braided water supply hoses
WH49X301 Drain hoseextension
4FUNCTIONALITYCHECK
[] If the lid isopened between cycles(i.e.not pausing and
restarting the current cycle, changing cycles after it
started, etc.)pushingthe Start button will cause the
washer to turn on the cold water for 5 secondsfollowed
by a 10 second delay before locking the lid and starting
the cycle.
[] If the lid isopened during this !5 second period,the word
PAUSEwill start scrolling across its display.You will have
to pushthe .Start button again to restart the cycle.
WHEN NOT IN USE
[] Turn off water faucets to minimize leakage ifa break or
rupture should occur.Checkthe condition ofthe fill hoses;
GErecommends changing the hoses every 5 years.
SAVE THESE INSTRUCTIONS

Operating instructions.
Throughout this manual, features and appearance may vary from your model.
Step 1
• Add fabric softener to the fabric
softener dispenser; see page 7.
• Add detergent. GE recommends
the use of High Efficiency
detergents such as _in your
energy efficient washer.
Controls
Start/Pause
@
Unlock Lid
Step 2
• Looselyadd items around infusor.
Overloading may negatively impact
wash performance. See page 11 for
suggested loading examples.
• Close lid.
NOTE:Washer will not fill with lid
open.
Power
0
Stain Removal Guide
Tomato Wine Grass
Step 3 ___ C_ Step 4
\W JCD
• Select wash cyde. • Press Start.
• Select wash options,
including Deep Rinse option
when using fabric softener.
• Select options including
Pretreat/Bleach option.
Pressto "wake up" the display, tfthe display is active, press to put the washer into idle mode.
NOTE:Pressing Power does not disconnect the appliance from the power supply.
Start and Unlock Lid
PressStart to beginthe cycle.NOTE:Thelid must be closed for the washer to fill and the cycle to start. Ifthe lid is open,"LID"will scroll across
the display. If the lid isclosed,the lid will lock,the LID LOCKEDlight will light,the detergent will be dispensed,and "FILL"will scroll across the
display.
PressingUnlock Lid will Pausethe cycle and the Start indicator light will blink.
Tocontinue the cycle,pressStart again. If machine ispaused more than 24 hours, the cycle will becancelled. If water remains inthe machine,
selectthe Drain &Spin cycle to drain basket and spinwater out of the washer basket.
Display and Status Lights
Display:
The display shows the approximate time remaining until the end of the cycle.
NOTE:Thecycle time isaffected by how long it takes the washer to fill.This depends on the water pressure in your home. The"smart" timer
"learns"the amount of time it takes to fillyour washer and adjusts the total time accordingly.
In addition, this display will, "scroll" the washer status:
,bALAnCINg Start of rebalancing cycle to redistribute clothes.Stops after rebalancing iscomplete.
CYCLEPrEP Sensingdry load size prior to fill (normal).
dELAY When Delay Wash isinitiated. Replacedwith estimated time when cycle starts.
End Endof current cycle.
FILL Forthe first 4S secondsof afill,the estimated end of cycle time isdisplayed. Forthe rest ofthe fill time, "FILL"isscrolled
until the fill completes.
1420SUPPLY Cannot sensewater level(valvespossibly turned off).
Lid Cyclestopped because lid isopen. Closethe lid.
LOAdSenSE Sensingwet load size(normal).
PAUSE Cyclepaused because the Start/Pause button was pressed and the washer was set to Pause. PressStart button again to
restart the cycle.
Cycle status lights:
Shows whether the washer is in the SOAK, WASH, RINSE or SPINcycle.
Feature status lights indicate (seesections F and Gfor more details):
Lid Locked - The lid is locked. See the Control Lock description.
Locked Controls - Will blink once if you press any button or turn the cycle knob.
- Washeris connected to the network and can communicate with aconnected smartphone device.
Delay Wash - A delay wash time is set.

GEAppliances.com
Wash Cycles-Cycle Selector Knob
Thewash cycle controls the type of washing process. TheCycleSelector knob can be turned in either direction. Turning the knob after
starting ucycle will stop the washer and change the cycle/options to the new selection.PressStart to begin the new cycle selection.
NOTE:When the knob isturned to another cycle,the basket light isturned on to assist in loading.
Thechart below will helpyou match the wash cycle setting with your clothing.
Speedwash* Forsmall loads of lightly soileditems that areneeded in a hurry.Provideslightwash/rinse and short high speedspin.
Delicates* For lingerieand special-curefabrics with lightto normal soil.Provideslightwash and low speedspin.
Heavy Duty* An above normal cycle for heavilysoiled or stained clothes. A soak cycle isadded and the agitate cycle is extended
for extra cleaning.This more aggressive cycle should be used sparingly.
Jeans* For washing medium to lightly soiled jeans. Providesnormal wash and medium speedspin.(Forheavily soiled
work jeans, use Whites cycle.)
Dark Colors* For non-colorfast cottons and blends or items that are labeledcold wash. Providesnormal wash and medium speed
spin.
Whites* For heavy to lightly soiled whites, household linens, work and play clothes. Provides a heavy wash and a high
speedspin.
Normal/LightColors* For heavy to lightly soiled colorfast cottons, household linens,work and play clothes. Thiscycle providesthe best
overallcleaning andshould beused for most everydayitems.Providesnormalwash andmedium speedspin.
Towels/Sheets* Provides periods of agitation and soak tailored for washing towels and sheets. Providesnormal wash and a
high speed spin.
Sanitize with oxi When combined with detergent and an Oxi laundry additive, performs aconcentrated prewash sanitization step,
followed bya hot wash step,which isdesigned to remove 99.9% of bacteria found in home laundry.
Measure the detergent and Oxiproduct carefully. Foraverage size loads,usethe recommended amounts appropriate
for a large heavily soiled load, following the detergent and Oxi product label instructions. When sanitizing large or
extra large loads, usethe maximum recommended dosage of Oxi product. Using more than one full scoop isnot
recommended. Place the detergent and Oxi product directly in the bottom of the wash basket, before adding the
clothes. Thewasher hot water supply connection must provide a minimum of !20°F to ensure the effectiveness of
this cycle.
NOTE:Thedefault Sanitize With Oxi cycle water temperature (Hot)can NOTbe changed.
TheSanitize With Oxi cycle iscertified by NSFInternational, an independent third party testing and certification
organization. The certification verified that the cycle reduced 99.9%of bacteria typically found in residential laundry
and that no significant contamination istransferred to subsequent washer loads. Onlythe Sanitize With Oxi cycle
has been designed to meet the requirements of NSFProtocol P!72 for sanitizing effectiveness.
Bulky Items/ For large coats, bed spreads, mattress covers, sleeping bags and similar large and bulky items. Large items
Comforters, Pillows such as blankets, comforters, jackets and small rugs. Provides a normal wash and an extra heavy spin.
Connect Cycle Add a cycle to your washer that fits your clothes care needs when connected to a smart device via WiFi
Connect. See the WiFi Connect section.
Drain &Spin For draining the basket and spinning water out of the clothes.
Basket Clean Use for cleaning the basket of residue and odor. Recommended use of at least once per month.
NOTE:Never load laundry while using Basket Clean. The laundry may become damaged or contaminated.
Seethe Care and Cleaning section.
*Time Saver Cycles
Reduceswashercycletime by adjustingspincycletime and!or increaseswashtemperature to deliverthe samecleaningperformancein lesstime.
Stain Removal Guide
The Stain Removal Guide feature allows you to indicate what stains are on the garments in your load. This feature can be used
with any wash cycle except Sanitize.
To use Stain Removal Guide:
1. Select the wash cycle.
2. Pressthe Stain Removal Guide button (the button will light up when it ison).
Continue to press to select Tomato stain, Wine stain, Grass stain or Dirt stain. The indicator light will show the selected stain.
Toselect a different stain, press the Stain Removal Guide button until desired stain to be removed is lit.
Toturn offStain Removal Guide, press until the light on the button turns off.
NOTE:TheSoil and Temperature levels will be changed to match each stain type. Turning off Stain Removal Guide will return the
settings to default.
Settings
Individual settings for agitation (Soil),water temperature (Tamp),and spin (Spin) can be set from the minimum (lowest in column) to
maximum (highest in column). In general, the higher up the column, the more washer energy will be used.
NOTE:Higher Spin speeds typically reduce dryer time/energy usage (i.e.reduces total energy when using both a washer and a dryer).5

Operating instructions.
Cycle Options
Deep Rinse
Setthis option to provide a deeprinse or when manually adding fabric softener to the rinsecycle.NOTE:Thisoption is not allowed for some
cycles.When allowed, it may change other settings (e.g.Spin may go to a higher setting) to maximize performance.
NOTE:Do not usefabric softener dispensing bailswith thiswasher. Theydo not work correctly in high efficiency washers.
Extra Rinse
When you useextra detergent or bleach to clean heavily soiled clothes,use the Extra Rinseoption to better remove additional residues.
NOTE:Thisoption isnot allowed for some cycles.
Soak
This option beginswith a brief agitation, soaks for a specified periodof time, then movesthrough the rest of the cycle automatically.
Repeatedpressing of the Soak button will add !S minutes, then 50 minutes and then return back to 0soak minutes.
Pretreat/Bleach
Setthis option to add liquid pretreatment - OR-liquid bleach in the next load. Press once to indicate adding pretreatment (light on above
button), twice to specify bleach (lighton below button), three times to turn off (no light).Pretreatment or bleach will be added at the optimal
time during the wash cycle (differs for pretreatment or bleach).
NOTE:Do NOTuse pretreatment and bleach in the same load.tfyou forget to dispense (didnot pressbutton once or twice),you can flush
out the dispenser by pouring water into the compartment and running a Quick Rinsecycle to remove from the basket.
Delay Wash
When the Delay Wash button isrepeatedly pressed,the delay time is setfrom 1(01H)to 9 (09H)hours and back to clear (00H)hours. Ifyou
pressand hold the Delay Wash button for 5 seconds, it will immediately reset.
Deep Clean
Increases the target temperature from the standard target. The system monitors water temperature at times during the wash cycle.
Ifthe temperature drops too much, the system will compensate by adding short soaks or extending agitation time, depending
upon the cycle, to deliver a deep clean.
Efficiency Monitor
The Efficiency Monitor lights will light to indicate that the most efficient settings are on. If you change settings, the number of Efficiency
Monitor lights will decrease (orincrease)to indicate decreased (orincreased) energy efficiency settings.
Additional Options
MY Cycle Settings
Asthe cycle selector knob isturned, the Soil, Tamp and Spin settings change to automatic pre-set default settings, tfyou desirea different
setting, selectthe desired options or changes to cycle settings. Pressand hold the My Cycle Settings button for 5seconds,the washer will
savethese settings for that cycle and the My Cycle Settings button will light when active. Inthe future, when you turn the selector knob to
that cycle,your settings will be automatically recalled. Totemporarily (i.e.for this load)return to the pre-set default settings, pressthe My
CycleSettings button for !/2 second.The button light will turn off and the options will change back to these defaults.To makethese default
settings permanent, hold the My CycleSettings button again for 5 seconds to makethem your preferred settings (the button light will turn
back on).NOTE:My Cycle Settings includes Stain Removal Guide but NOTDelay Wash or Volume - or any bulk dispense options.
Volume
Toadjust the volume of the unit, pressthe Volume button to select the desired level.Thereare four sound levelsincluding OFF.
NOTE:The volume selected is for both the buttons and the end of cycle sound.
Basket Light
The basket light will turn on when the Basket Light button is pressed,the lid is lifted,or the cycle knob isturned. It will stay on for S minutes
or until the Basket Light button or Power button ispressed.
Lock Controls
You can lock the controls to prevent any selections from being made. Oryou can lock the controls after you have started a cycle. Children
cannot accidentally start the washer by touching buttons with this option selected.
To lock/unlock the washer controls, pressand hold the Lock Controls button for 5 seconds.TheLockedControlsiconwill light upwhen it ison.
NOTE:ThePower button can still be used when the machine is locked.
SmartDispense TM
The SmartDispense TM feature allows you to set your liquid HE(High Efficiency) detergent and/or softener dispensing preferences for
your load. This feature can be used with any wash cycle, except for Quick Rinse, Drain &Spin and Basket Clean cycles.
The SmartDispense TM system automatically dispenses liquid HE(High Efficiency) detergent and/or concentrated liquid fabric
softener into each cycle at the optimal times.
To utilize the SmartDispense TM dispensers, they must first be filled. Although any liquid HE(High Efficiency) laundry detergent
and concentrated liquid fabric softener can be used in the SmartDispense TM system, all liquid HE(High Efficiency) detergents and
concentrated liquid fabric softeners are not the same.
CAUTION!, bsolutelydo not store liquid chlorine bleach, powder detergent, non-concentrated liquid fabric softener or other
laundry additives in any of the tanks. Useonly liquid detergent which has been specifically designed for use in High Efficiency washers.
6

About washer features. GEAppliances.com
Automatic Load Sensing
This provides the correct amount of water suited to the size and type of load placed in the unit. The washer will not fill with water during
automatic load sensing if the lid is open. When the lid is closed the machine is able to begin filling with water in order to sense the load
size.
NOTE:This is a high efficiency washing machine with lnfusor wash action. This system requires less water while providing effective cleaning
action. You may notice that the water level is lower than onyour previous washer. This is normal for an lnfusor-equipped washer.
Average Small Load Average Medium Load Average Large Load
ClothesLevel
WaterLevel
ClothesLevel
WaterLevel
ClothesLevel
WaterLevel
Dispensers -Laundry Additives
Liquid detergent and concentrated liquid fabric softener can be dispensed through the SmartDispense ®system. Single dosages of bleach,
pretreatment (such as OxiClean ®)or detergent are added through the dispensers in the front corners. Your option selections will determine
when each additive is automatically dispensed at its optimal time in the wash or rinse cycle.
/
/
/
/
/
/
/
F
Pretreatment OrLiquid
Bleach Compartment
@O NOTput detergent
packets in dispenser
compartments. Laundry
detergent packets should only be
added directly to the wash basket
following the manufacturer's
directions.
Single Use Pretreatment or Liquid
Bleach
Toadd either liquid pretreatment or liquid bleach
to the next load, pour only one of them in the right
front compartment and pressthe Pretreat/Bleach
button either once to light the pretreat light (above
button) or twice to light the bleach light (below
button).The liquid will beadded at the optimal time
(pretreatment - early or bleach - late)in the wash
cycle.
Pretreatment option ___
r222_
[1] Check clothing care labelsfor special
instructions.
r_ Measure liquid pretreatment carefully, following
instructions on the bottle.
r_ Beforestarting the washer, pour measured
amount of pretreatment directly into the
compartment.
Bleach option
Thewater fill / '_e_ J
dilutes liquid
chlorine bleach as the washer fillsfor the wash
cycle.
[_] Checkclothing care labelsfor special
instructions.
j-_ Measure liquid bleach carefully,following
instructions on the bottle.
[] Neverpour undiluted liquid chlorine bleach
directlyonto clothesor into the wash
basket.
%
[] Do not pour powdered bleach into bleach
compartment.
Before starting the washer, pour measured
amount of bleach directly into bleach
compartment. Avoid splashing or over-filling
dispenser, tfyou prefer to use powdered
bleach, add it into the wash basket with your
detergent.
[] Do not mix chlorine bleach with ammonia
or acidssuch asvinegar and/or rust
remover.Mixing can produce atoxic gas
which may cause death.

About washer features.
Bulk Detergent Tank
QO NOTput detergent
packets in dispenser
compartments.
Laundry detergent packets
should only be added directly
to the wash basket following
the manufacturer's directions.
Bulk Detergent Tank
The bulk detergent tank holds over a gallon (!50
ounces or 3845 ml)of liquid bulk detergent. After
filling the tank, pressthe Detergent Tank On button
to turn on its light and designate bulk (rather than
manual) detergent dispense.
The Tank Levels lights (1%)indicate how much
detergent is left.An empty tank isshown by a single
red light. A full (or nearly full)tank is shown by 5
lights.
NOTE:The initial fill of the bulk tank will require 50
ounces of detergent to prime the system, tfyou
pressthe Start button when the tank isempty, the
Detergent Tank On button and red empty Tank
Level light will blink. The machine will not start. A
beep will also sound if Variable Signal ison. To start
the machine, you must add more detergent to the
tank or turn off the bulk detergent tank.
The Detergent Cup Amount lights indicate if aLow,
Medium,or High amount will bedispensed.
Seethe Bulk Tank Special Functions Option1:Set
ConcentrationSettings on page !0 to understand
how the Low, Medium,and High amounts are
established.
Detergent will be automatically dispensed at the
optimum time at the beginning of eachfill cycle.
Set the Bulk Detergent Cup Amount Preference
When the Detergent Tank On light ison, pressing the Detergent Cup Amount button will set the Detergent
CupAmount lights (!, 2,or S).
Level ! will distribute the standard amount minus 25%.
Level2 will distribute the standard amount.
LevelS will distribute the standard amount plus 25%.
Examples:
Factorydefault standard amount is 3_.5oz(44 ml) (Concentration Setting 15).
IfDetergent CupAmount shows S lights then 1.9oz (55ml)will be dispensed.
IfDetergent CupAmount shows 2lights then 1.5oz (44ml)will be dispensed.
IfDetergent CupAmount shows ! light then !.! oz (SSml)will be dispensed.
Concentration
Setting
3 lights:
2 lights:
ilight:
15
NOTE:Each cycle knob position defaults to u different Detergent Cup Amount (including 0 if no
detergent is used). Ifyou change the Soil setting, the Detergent Cup Amount may change. You can
then manually change the Detergent Cup Amount, but your change will not be saved when you leave
this knob position or if you set a My Settings.
SingleWashDetergentDispenser
Single Use Wash Detergent Dispenser
Ifyou prefer to manually add either powder or liquid
detergent to the next wash cycle,pour it inthe left
front opening and make surethe Tank On light is
off(press button if light ison).Host detergent will
immediately enter the basket. Thewasher will flush
water through this openingjust prior to the fillcycle
to add any detergent that did not fall into the basket.
OO NOTput detergent pockets in
dispenser comportments. Laundry
detergent packets should only be
added directly to the wash basket following the
manufacturer's directions.
8

GEAppliances.com
./.I \
bottener
TankOn /
/
/ /
/
/
/
/
/
/
/
/
BulkSoftererTank
QO NOTput detergent
packets in dispenser
compartments.
Laundry detergent packets
should only be added directly
to the wash basket following
the manufacturer's directions.
Bulk Softener Tank
The bulk softener tank holds over agallon (!50
ounces or 3845 ml)of liquid non-concentrated bulk
softenen After filling the tank, pressthe Softener
Tank Onbutton to turn on its light and designate
bulkfabric softener dispense.
The Tank Levels light (1%)indicate how much
softener is left. An empty tank isshown by a single
red light. A full (or nearly full)tank is shown by B
lights.
NOTE:The initial fill of the bulk tank will require
B0ounces of softener to prime the system, tfyou
press the Start button when the tank isempty,
the Softener Tank On button and red empty Tank
Level light will blink. The machine will not start. A
beep will also sound if Variable Signal is on. To
start the machine, you must add more softener to
the tank or turn off the bulk softener tank.
TheSoftener Cup Amount lights indicate if a Low,
Medium,or High amount will bedispensed.
Seethe Bulk Tank Special Functions Option 1:Set
Concentration Settings on page !0 to understand
how the Low, Medium,and High amounts are
established.
Thespin speedwill be increased to the highest
speed and the softener will be dispensedduring
the rinsecycle.
Set the BulkSoftenerCup Amount Preference
When the Softener Tank On light ison, pressing the Softener CupAmount button will setthe Softener Cup
Amount lights(!, 2,or 3).
Level! will distribute the standard amount minus 25%.
Level2will distribute the standard amount.
Level3will distribute the standard amount plus25%.
Examples:
Factorydefault standard amount is 1.0oz(30mt)(Concentration Setting 10).
IfSoftener Cup Amount shows 3 lights then !.3 oz(37ml) will bedispensed.
IfSoftener Cup Amount shows 2 lights then !.0 oz(30ml) will bedispensed.
IfSoftener Cup Amount shows ! light then .8oz(22ml)will be dispensed.
Concentration
Setting 10
3 lights: _
2 lights:
1 light: _j_
NOTE:Softener Cup Amount is 0 for non softener knob positions or whatever was set the last time
softener was dispensed. Ifyou manually change the Softener Cup Amount, this will be used for o//
further softener cycles. It will not be (uniquely) saved if you set a My Settings.
Pour into the
washerbasket
/
/
/
/
/
/
/
Single Use Softener
Tomanually add a specific softener amount to a
single load:
[_ Hake sureSoftener Tank On button light is off.
Pressthe Deep Rinse button (andensure its
light ison)at the beginning of the cycleor
beforethe Rinselight turns on.
r_ When the Rinselight turns on, allow washer to
mostly fill with water and then pressthe Unlock
Lid button.
Open the lid and pour measured fabric softener
(welldiluted with water)into the washer basket.
Press the Start button.
(_ DO NOTput detergent pockets in
dispenser comportments. Laundry
detergent packets should only be
added directly to the wash basket following
the manufacturer's directions.

About special features.
To Enter Special Features
To Enter the Special Features mode for a specifictank:
[_] Pressthe Power button.
j2] Simultaneously pressand hold either the
Detergent Tank On and Detergent Cup Amount buttons
for 5seconds
NOTE:Special Features mode will automatically exit if
no further action is taken within i minute.
OF
Softener Tank On and Softener Cup Amount buttons for
3seconds
The My Cycle Settings and Extra Rinselights will flash to
indicate you are in the SpecialFeaturesMode.
Tank Levels_
Deter
Soft_
Empty
Option 1: Set Concentration Settings
NOTE:During initial installation, or if the household
water pressure dramatically changes, the bulk
dispenser will change to accommodate your homes'
unique water pressure. Wait a few wash cycles before
changing concentrations.
The factory default concentration setting number
for normal level of detergent (2 LED'son)is 15 (1.5oz
(or44 ml))and !0 (!.0 oz (or 30 ml))for softener. To
allow maximum user flexibility either of these can be
changed to between 0.5 and !0 ounces.
[_] To view or change the current concentration
levels, enter Special Features mode. See above.
r21 Pressthe My CycleSettings button.
Now only the My Cycle Settings light and all the
Cup Amount lights will be on and the current
concentration number will be displayed.
%Turn the cycle knob to increase or decrease the
concentration number in the display for the
Medium level. The High and Low concentrations
are scaled automatically from the concentration
setting number of this adjustable number. See
table below for allowable ranges, increments, and
number to ounces conversion.
[_] Pressthe Cup Amount button to save the newly
selected number and exit thisfunction. The display
will reflect whatever cycle the cycle knob is on.
Toexitwithout changing the setting, pressthe Power
button. Thisfunction will automatically exit (without
saving) if neither button is pressedwithin ! minute.
10
The following table shows the approximate amount dispensed (oz)at each CupAmount setting (!, 2or 3)for each
Concentration Setting:
Number of
Loads* 200 100 67 50 40 33 29 25 22 20 18 17 15 14 13 13 12 11 11 10
Concentration !X _
Setting 5_ 20 25 30 35 40 45 50 55 60 65 70 75 80 85 90 95 100
-_! 0.6 1.3 1.9 2.5 3.1 3.8 4.4 5.0 5.6 6.5 6.9 7.5 8.1 8.8 9.4 10.0 10.6 11.3 11.9 12.5
_ 0.5 2.0 2.5 3.0 3.5 4.0 4.5 5.0 5.5 6.0 6.5 7.0 7.5 8.0 8.5 9.0 9.5 10.0
[=_ 0.4 0.8 i.i 1.5 1.9 2.3 2.6 3.0 3.4 3.8 4.1 4.5 4.9 5.3 5.6 6.0 6.4 6.8 7.1 7.5
* For a i00 oz (2957 ml) bottle for normal( _ ) setting.
Option 2: SmartDispense TM Tank Cleaning
[] EnterSpecial Features mode. SeeTo Enter Special
Features section above.
[_] Removeoil articles from the washer basket.
['_ Pressthe Extra Rinse button.
The My Cycle Settings and lightswill go out. TheStart
button light will blink.Thecorresponding Tank Levels
lights will show the current tank level.
[_] Pressthe Start button.
The tank will dispense for the minutes shown in the
display to empty the selected tank. The Tank Levels
lights will cycle up and down during the flush operation.
Once finished, the Tank Levels should indicate an
empty tank with lowest level light remaining on and
the Start button light will flash. Youcan (repeatedly)
refillthe tank with water and pressthe Start button to
rinseout the tank as needed.
NOTE:Ifyou suspect that the dispenser isplugged, add
lemonjuice to make the water slightly acidic.
r_ Pressthe Power button to exit (whenthe tank is
empty).
Thisfunction will automatically exit if neither button is
pressedfor 2 hours.
NOTE:Bulk tank flush is recommended if you:
1) Change detergent or softener brands
2} Accidently add softener to the detergent tank or
vice versa
3) Put powdered detergent in the detergent tank
4} Put non-concentrated fabric softener in the
softener tank
Loading
Always follow
and using the washer.
fabric manufacturer's care label when laundering.
ProperUseof Detergent
Using too little or too much detergent is a common
cause of laundry problems.
Uselessdetergent ifyou havesoft water, a smaller load
or a lightly soiled load.
Forspots,apply pre-treatment to itemsas recommended
on the product label.Application shouldbe made in
the basketto prevent overspraywhich may causethe
coloring on the lid or graphicsto fade.
GEAppliances.com
GErecommends_.,,,,,the useof High Efficiencydetergents
such as _'.:--in your energy efficient washer.
HEdetergents are formulated to work with low
water wash and rinsesystems.HEdetergents reduce
the oversudsing problems commonly associated with
regular detergents.
When using high efficiency or concentrated detergents,
consult the product label to determine amount required
for optimum performance. Excessivedetergent will
negatively impact wash performance.
SortingWashLoads
Sort by color (whites,lights,colors),soillevel,
fabric type (sturdycottons, easy care, delicates) and whether the fabric produces lint (terry cloth,
chenille)or collects lint (velveteen,corduroy).
- Fire Hazard
Never place items in the washer that are dampened with gasoline or other flammable liquids.
Nowasher can completely remove oil.
Do not dry anything that hasever had any type of oil on it (including cooking oils).
Doing soso can result in death, explosion,or fire.
LoadingtheWasher
(/j_ Loaddry items loosely inthe washer basket. Forbest
_-k _'_ results, load items evenly and loosely around the
v_ outside of the basket.To add items after washer has
started, press Unlock Lid,lift the lid and submerge
additional items around the outside of the basket. Close
the lid and pressStart to resume.
[] Donot placelarge items such as sheets,blankets
and towels acrossthe Infusor. Loadthem around the
outside of the basket.
[] Donot put lawn or sofa cushions intothe washer as
they are too big to move. Removeouter covers and
ONLYwash them.
Loading Examples
SPEEDWASH
12-4 GARMENTS)
2 Casual Wear
Work Shirts
JEANS
3Jeans
5 Work Wear Shirts
4 Work Wear Pants
TOWELS/SHEETS
2 BathSheets
5 Bath Towels/
12 Washcloths
6 Hand Towels/
2 Terrydoth Bath Mats
OR
2 FlatQueen-Sized
Sheets
2 FittedQueen-Sized
Sheets
4 Pilloweases
NORMAL
4 Pillowcases
2 Hand Towels
2 Flat Sheets/
2 Fitted Sheets
2 Bath Towels/
4 Washcloths
OR
6 Shirts (Men's
or Women's)
4 Pair Pants (Khakis
or Twills)
5T-shirts
7Pairs of Boxers
4 Pairs of Shorts
OR
6T-shirts
4 Pairs of Sweatpants
4 Sweatshirts
2 Hoodies
7Pairs of Socks
DELICATES*
7 Bras
7 Pairs of Underwear
3 Slips
2 Camisoles
4 Nightgowns
*Using a nylon mesh
bag for small items is
recommended.
1 Pair Casual Wear
Work Pants
OR
3Soccer Uniforms
ll

About Appliance Communication.
CleanSpeak TM
This washer can communicate with a compatible
dryer (one whose Owner's Hanual contains a
CleanSpeakT"description)via WiFi Connect.
At the end of the wash cycle,the washer sends a signal
to the dryer to indicated a preferred dry cycle.When
the dryer becomes idle ("End"display times out - or-
the door is opened) "CYCLE"will scroll across its cycle
time display,its current cycleknob setting LEDwill be
lit, and (ifdifferent) a second recommended cycle LED
will blink. If "CYCLE"times out, pressingPower will
refresh it and the LEDs.Ifthe dryer cycleknob isturned,
the solid LEDwill move accordingly. Pressingthe dryer
Start will initiate the cycle knob setting (solidLED)and
turn off the recommended (blinking LED)if a different
cycle isstarted.
WiFi Connect: (for customers in the United StatesJ
Your washer is GEWiFi Connect Enabled. A WiFi
communciation card is built into the product
allowing it to communicate with your smartphone
for remote monitoring, control and notifications.
Please visit www.GEAppliances.com/connect to
learn more about connected appliance features,
to learn what connected appliance app's will work
with your smartphone.
WiFi Connectivity: Forassistance with the appliance
or the ConnectPlus network connectivity, please call
800-GE-CARES.
Thisdevicecomplies with Part!5 of the FCCRules Operation issubjectto the following two conditions.
!. Thisdevicemay not causeharmful interference,and
2. Thisdevicemust acceptany interferencereceived,includinginterferencethat may cause undesiredoperation.
Thisequipment has Seentestedand found to comply with thelimits for aClassBdigital device,pursuant to Part
!5 of theFCCRules.Theselimits are designedto provide reasonableprotection against harmful interferencein a
residential installation. Thisequipment generates usesand can radiate radio frequency energyan4 if not installed
and usedin accordance with the instructions,may causeharmful interferenceto radio communications. However,
there isno guarantee that interferencewill not occur in a particular installation. Ifthis equipment doescause
harmful interferenceto radio or televisionreception,which canbe determined byturning the equipment off and on,
the userisencouraged to try to correct theinterferenceby one or more of the following measures:
*Reorientor relocatethe receivingantenna.
.Increasethe separation between the equipment and receiver.
* Connectthe equipment into an outlet on a circuit different from that to which the receiverisconnected.
*Consultthe dealeror an experienced radio/television technician for help.
Labelling: Changesor modifications to this unit not expressly approved by themanufacturer could voidthe user's
authority to operate the equipment.
12

Care and cleaning of the washer. GEAppliances.com
Pour into the
washerbasket
Cleaning the Interior
of the Washer
/
/
/
/
To clean the interior of the washer, select the
Basket Clean feature on the control panel. This
Basket Clean cycle should be performed, at a
minimum, once per month. This cycle will use
more water, in addition to bleach, to control
the rate at which soils and detergents may
accumulate in your washer.
NOTE:Read the instructions below completely
before starting the Basket Clean cycle.
1. Remove any garments or objects from the
washer and ensure the washer basket is
empty.
2. Open the washer lid and pour one cup or 250
ml of liquid bleach or other washing machine
cleaner into the basket.
Close the lid and select the Basket Clean
cycle. Push the Start button.
When the Basket Clean cycle is working, the
display will show the estimated cycle time
remaining. The cycle will complete in about
90 minutes. Do not interrupt the cycle.
Basket Clean may be interrupted by pressing the
Start button in between cycles. A power outage
in the house might also interrupt the cycle. When
the power supply is back, the Basket Clean cycle
resumes where it had stopped. When interrupted,
be sure to run a complete Basket Clean cycle
before using the washer. Ifthe Power button is
pressed during Basket Clean, the cycle will be
lost.
IMPORTANT:
[] Run Basket Clean with ! Cup (250 ml) of
bleach once a month.
[] After the completion of a Basket Clean cycle,
the interior of your washer may have a bleach
smell.
[] It is recommended to run a light color load
after the Basket Clean cycle.
13

Before you call for service...
_., TroubleshootingTipsSavetime and money! Reviewthe chartson the following pages,or visit
GEAppliances.com. Youmay not needto call forservice.
WATER Possible Causes What To Do
Short spray and delay
after pushing the Start
button
Water level seems low
Banging sound during
drain
Too many suds
Water leaks
Lid was opened and closed
between cycle selection and
start
, This is normal. See FUNCTIONALITYCHECKin the Safety
Instructions section.
Water temperature
seems incorrect
This is normal
Drain stand pipe istoo low
Soft water
, Water may not cover the top levelof the clothes.
Thisis normal for this high efficiencywasher.
Thedrain hose must exceed 32" height at some point between
the washer back and the drain pipe.
Try lessdetergent.
Too much detergent
Type of detergent
Type of detergent
Using too much detergent
in washer
Heasure your detergent carefully. Uselesssoap if you have
soft water, a smaller load or a lightly soiledload.
Switchto HighEfficiencydetergent such as_.
Use lessdetergent. Uselesssoap ifyou havesoft water,
a smaller load or a lightly soiled load.
Fill hoses or drain hose is
improperly connected Hake sure hoseconnections are tight at faucets and
rubber washers are installed.Hake sureend of drain hose
iscorrectly inserted in and secured to drain facility.
Household drain may
be clogged , Checkhousehold plumbing. You may need to call
a plumber.
Drain hose rubs on wall Hake sure drain hosedoes not make contact with the wall.
Hay cause excessivewear on the hose.
Constant water pressure
to the fillhoses at the
water source
, Tighten hoses at the faucets.
. Checkcondition of the fill hoses;they should be replaced
every 5 years.
Cooler water temperatures
provide improved energy
efficiency
New laundry detergents have been formulated to work
with cooler water temperatures without affecting wash
performance.
Water supply is turned off
or improperly connected Turn both hot and coldfaucets fully on and make sure hoses
are connected to correct faucets. NOTE:Water valvesare marked
"H" and "C"and internal valve screensare color coded.
Water valve screens are
stopped up Turnoff the water source and remove the water connection
hosesfrom the upper back of the washer. Usea brush or
toothpick to clean the screens inthe machine. Reconnect
the hosesand turn the water back on.
Cool/Cold Water when
selecting Hot Thisis normal.Thewasher senseswater temperature and
optimizes for best results.Coldwater isadded periodically
when hot isselected.
Water pumped out before
cycle is complete
Water won't drain
Washer pauses at the
beginning of cycles
House water heater is
not set properly
Lid lifted or cycle was put in .
pause for over 8 hours
Drain hose is kinked or
im_ connected
This is normal
Hake sure housewater heater isdeliveringwater at
120OF-140OF(48oc-60oc).
Resetcycle.
Straighten drain hoseand make surewasher isnot sitting on it.
Topof drain outlet should be lessthan 6 ft (1.8m)above floor.
Thewasher issensing the load.
Washer pauses during The SoakOption , Thisis normal.The washer alternates between agitate and
wash cycle was chosen soak during these cycles to getyour clothes cleaner with
lesswear.
Washer pauses during This is normal . Thewasher may pause during the spin cycleto remove
spin cycle soapy water more efficiently.
Washer doesnot fill Thisis normal • Thelid mustbe closedfor washerto fillor operate.
when lidis open
14

GEAppliances.com
OPERATION Possible Causes What To Do
Washer won't operate Washer is unplugged • Hake sure cord is plugged securely into a working outlet.
Water supply is turned off • Turn both hot and cold faucets fully on.
Controls are not set properly o Check controls.
Lid is open--safety feature • Close lid and press Start.
prevents agitation and
spinning when lid is up
Circuit breaker/fuse is •Check house circuit breakers/fuses. Replace fuses or
tripped/blown reset breaker. Washer should have a separate outlet.
Electronics need to be reset • Unplug washer, wait 2 minutes, plug back in and press Start.
Start was not pressed •PressStart.
Lid magnet missing •Call for service.
Bulk detergent tank ison but empty - Turn off bulk detergent tank or fill bulk detergent tank with more detergent.
Bulk softener tank is on but empty • Turn off bulk softener tank or fill bulk softener tank with more softener
Dispenser not dispensing Laundry detergent packet , Laundry detergent packets should not be used in the dispensers.
properly placed in dispenser They should only be added directly to the wash basket following the
manufacturer's directions.
Unexplained time and/or Changing options • This is normal. Several options will change other options to
settings changes maximize washer performance. Detergent Cup Amount changes
are not saved.
Movement inside machine Shifting mechanism is • When the machine is manually turned off, the shifter will
when shut off disengaging the motor disengage the motor before completely shutting down.
If lid is raised before the motor isdisengaged, it will resume
when lid is closed.
Basket seems loose Basket moves or rotates freely • Washer basket does not have a traditional brake. Washer basket will
move freely. This isnormal.
PERFORMANCE Possible Causes What To Do
Clothes too wet Incorrect cycle selected. • Hake sure the cycle selected matches the load you are
washing. Somefabrics will feel wetter when rinsed with cold water.
Wash load out of balance • Redistribute load in washer and run through Drain &Spin cycle.
Colored spots Incorrect use of fabric • Check fabric softener package for instructions and follow
softener directions for using dispenser.
• Hake sure you have selected the Fabric Softener option.
•Pretreat stain and rewash using Quick Rinse or Speedwash cycle
before drying.
Sort whites or lightly colored items from dark colors.Dye transfer
Grayed oryellowed Detergent amount •Be sure to follow detergent manufacturer's directions.
clothes Hard water • Usea water conditioner like or install a water softener.
Water is not hot enough • Hake sure water heater is delivering water at
120°F-140°F (48°C-60°C).
Washer is overloaded • Loosely load clothes no higher than the top row of holes in the
washer basket. For best results, load items around the outside
of the basket.
Dye transfer • Sort clothes by color. If fabric label states wash separately,
unstable dyes may be indicated.
Lint or residue on Clothes are air or line dried • If you do not dry your clothes with a clothes do/er, your
clothes clothes may retain more lint.
Incorrect sorting • Separate lint producers from lint collectors.
Washing too long • Wash small loads for a shorter time than larger loads.
Detergent not dissolving • Rewash using Quick Rinse or Speedwash cycle with Extra Rinse option.
Try a liquid detergent.
Use warmer water temperature.
Overloading • Loosely load clothes in the washer basket. For best results, load
items around the outside of the basket.
Incorrect use of fabric
softener •Check fabric softener package for instructions
and follow directions for using dispenser.
Hake sure you have selected the Deep Rinse option. 15

Before you call for service...
Troubleshooting Tips
PERFORMANCE (cont.) Possible Causes What To Do
Pilling Result of normal wear on poly- *Whilethis is not caused by the washer, you can slow the
cotton blends and fuzzy fabrics pilling processbywashing garments insideout.
Snags, holes, tears, rips Pins, snaps, hooks, sharp .Fastensnaps,hooks,buttons and zippers.
or excessivewear buttons, belt buckles, .Removelooseitems likepins,objects in pockets and
zippers and sharp objects sharp buttons.
left in pockets • Turn knits(which snag easily)inside out.
Undiluted chlorine bleach _Checkbleach package instructions for proper amount.
,Never add undiluted bleachto wash or allow clothes to
come in contact with undiluted bleach.
Chemicals like hair bleach or . Rinseitemsthat may havechemicals on them before washing.
dye, permanent wave solution UseQuick Rinse or Speedwash cyclewith Extra Rinseoption.
Wrinkling Incorrect wash and .Match Cycleselectionto the type of fabric you are washing
dry cycles (especiallyfor easy care loads).
Improper sorting .Avoid mixing heavy items (likework clothes)with light items
(likeblouses).
Try a fabric softener.
Overloading or incorrect • Looselyloadclothesinthe washer basket.
water level
Repeated washing in , Wash inwarm or cold water.
water that istoo hot
Bleach left in dispenser Didn't start or finish cycle ,Runeither a Basket Clean,Quick Rinse or Speedwash cycle
after adding bleach (with Bleach option)to clean out the dispenser.Inthe future,
make sureto selectBleach option when adding bleach.
SOUNDS Possible Causes Reason
Washer seems This is normal • Thewasher isvery quiet during portions of the wash cycle.
too quiet
"Metallic clicking" Shifter mechanism is . Thedrive systemwill engage at the start of agitate and
engaging or disengaging disengage when agitate iscomplete. This occurs multiple
times during the wash.
Back and forth "swoosh" Electric motor reversing ,Thismachine has a drivesystem that doesn't use gears.
or light "clicking" sound direction Thissound isthe motor rotating back and forth to clean
during agitate your laundry.
Quick short agitation Clothing redistribution *Atthe end of agitate, the motor makes short agitation strokes
sounds at end of agitate to redistribute the load.
"Click" when water Relay switch *Therelay makes a click sound when activated. Thewater
stops filling levelactivates the relay and stopsfilling.
"Clicking" behind Control Automatic Temperature *Two valvesmix cold and hot water. The "clicking" iswhen either
Panel during fill Control Valve valve turns on or off to raiseor lower the fillwater temperature.
Water flow changes Automatic Temperature _ Two valvesmix cold and hot water. Theflow changes when either
during fill Control Valve valveturns on or off to raiseor lower the fillwater temperature.
Motor "whining up" or Motor ramping up/down ,Themotor will speed up incrementally during the spin cycle.
"coasting down" in spin during spin cycle When spin iscomplete, itwill coast until it stops.
"Humming" Water drain pump , Thedrain pump will make a humming sound when pumping
out water after agitation stops and continue until spin iscomplete.
"Gurgling" Water drain pump , When the pump starts drawing in air,It starts to gurgle.
Thewasher shouldthen begin spinning and the sound will
continue until it isdone spinning.
Water "swishing" This is normal • Thiswasher usesa Infusorwash action.Water swishingwhilethe
unit isagitating isnormal,especiallywith smaller loads.
Washer is noisy Washer is uneven _ Tolevelthe washer, adjust the leveling legsby rotating the
individual leg in the proper direction for up or down.
16

Notes. GEAppliances.com
17

GE Washer Warranty. Forcustomers in the United States) GEAppliances.com
All warranty service provided by our Factory Service Centers,
or an authorized Customer Care®technician. Toschedule service,
on-line, visit us at GEAppliances.com, or call 800.GE.CARES
(800.852.2737). Please have serial number and model number
available when calling for service.
Staple your receipt here.
Proof of the original purchase
date is needed to obtain service
under the warranty.
Servicing your appliance may require the use of the onboard data port for diagnostics. This gives a GE
Factory Service technician the ability to quickly diagnose any issues with your appliance and helps GE
improve its products by providing GE with information on your appliance. If you do not want your appliance
data to be sent to GE, please advise your technician NOT to submit the data to GE at the time of service.
For The Period Of'.
One Year
From the date of the
original purchase
We Will Replace:
Any factory specified part of the washer which fails due to a defect in materials or workmanship.
During this limited one-year warranty, we willalso provide, free of charge, all labor and related
service to replace the defective part.
What Is Not Covered:
[] Service trips to your home to teach you how to use
the product.
[] Improper installation, delivery or maintenance.
[] Failure of the product if it isabused, misused, or
used for other than the intended purpose or used
commercially.
[] Replacement of house fuses or resetting of circuit breakers.
[] Products which are not defective or broken, or which are
working as described in the Owner's Manual.
[] Damage to the product caused by accident, fire, floods
or acts of God.
[] Incidental or consequential damage caused by possible
defects with this appliance.
[] Defects or damage due to operation in freezing
temperatures.
[] Damage causedafter delivery.
[] Product not accessible to provide required service.
EXCLUSION OF IMPLIED WARRANTIES--Your sole and exclusive remedy is product repair as provided in this Limited
Warranty. Any implied warranties, including the implied warranties of merchantability or fitness for a particular purpose,
are limited to one year or the shortest period allowed by law.
Thiswarranty isextended to the original purchaser and any succeedingowner for products purchased for home usewithin
the USA.If the product islocated in an area where servicebya GEAuthorized Servicerisnot available,you may be responsible
for a trip chargeor you may berequired to bring the product to an Authorized GEServicelocation. InAlaska,the warranty excludesthe
costof shipping or servicecallstoyour home.
Ifyou need to order replacement parts, we recommend that you only use GEfactory specified parts. These parts are designed to work
with your appliance and are manufactured and tested to meet GEspecifications.
Somestates do not allow theexclusionor limitation of incidental or consequential damages.Thiswarranty givesyou specificlegal
rights,andyou may alsohave other rights which vary from stateto state. Toknow what your legal rights are,consultyour local or
state consumeraffairs officeoryour state'sAttorney General.
Warranton General Electric Company. Louisville, KY 40225
18

GEWasher Warrant . (ForcustomersinCanada
All warranty service provided by our Factory Service Centres or an authorized
_ technician. For service, call 1.800.561.3344.
Please have serial number and model number available when calling for service.
GEAppliances.ca
Servicing your appliance may require the use of the onboard data port for diagnostics. This gives a GE
Factory Service technician the ability to quickly diagnose any issues with your appliance and helps GE
improve its products by providing GE with information on your appliance. If you do not want your appliance
data to be sent to GE, please advise your technician NOT to submit the data to GE at the time of service.
For The Period Of'.
One Year
From the date of the
original purchase
We Will Replace:
Any pert of the washer which fails due to a defect in materials or workmanship. During this
limited one-year warranty, GEwill also provide, free of charge, all labour and related
service costs to replace the defective part.
What Is Not Covered (in Canada)'.
[] Service trips to your home to teach you how to use
the product.
[] Improper installation, delivery or maintenance.
[] Failure of the product if it is abused, misused, or used for
other than the intended purpose or used commercially.
[] Replacement of house fuses or resetting of circuit
breakers.
[] Products which are not defective or broken, or which
are working as described in the Owner's Manual.
[] Damage to the product caused by accident, fire,
floods or acts of God.
[] Incidental or consequential damage caused by
possible defects with this appliance.
[] Defects or damage due to operation in freezing
temperatures.
[] Damage after delivery.
[] Product not accessible to provide required service.
EXCLUSION OF IMPLIED WARRANTIES--Your sole and exclusive remedy is product repair us provided in this Limited
Warranty. Any implied warranties, including the implied warranties of merchantability or fitness for a particular
purpose, are limited to one year or the shortest period allowed by low.
This warranty is extended to the original purchaser and any succeeding owner for products purchased in
Canada for home use within Canada. In-home warranty service will be provided in areas where it is available
and deemed reasonable by MC Commercial to provide.
Warrantor'. h4C COMMERCIAL, BURLINGTON, ON, L7R 5B6
19

Consumer Support.
GEAppliances Website Inthe U.S.:GEAppliances.com
Have a question or need assistancewith your appliance? Trythe GEAppliancesWebsite 24 hours a day,
any day of the year! Forgreater convenience and faster service,you can now download Owner's Manuals,
order parts or even schedule serviceon-line. In Canada: www.GEAppliances.ca
Schedule Service Inthe U.S.:GEApplionces.com
Expert GErepair service is only one step away from your door. Get on-line and schedule your service at your
convenience any day of the year! Or call 800.GE.CARES(800.432.2737) during normal business hours.
In Canada, call 1.800.561.3344
RealLifeDesignStudio Inthe U.S.:GEAppliances.com
GEsupports the Universal Designconcept-products, servicesand environments that can be used by people of
all ages, sizesand capabilities.We recognize the need to design for a wide range of physical and mental abilities
and impairments. Fordetails of GE'sUniversalDesignapplications, including kitchen design ideasfor people with
disabilities,check out our Website today. Forthe hearing impaired, pleasecall 800.TDD.GEAC(800.833.4322).
In Canada, contact: Manager, Consumer Relations,MCCommercial
Suite310, ! Factory Lane
Moncton, N.B.E1C91v13
20
ExtendedWarranties Inthe U.S.:GEAppliances.com
Purchase a GEextended warranty and learn about special discounts that are available while your warranty isstill
in effect. Youcan purchase iton-line anytime, or call 800.626.2224during normal businesshours.GEConsumer Home
Serviceswill still be there after your warranty expires.In Canada, consult your local listings for an extended
warranty provider.
Partsand Accessories Inthe U.S.:GEAppliances.com
Individuals qualified to servicetheir own appliances can have parts or accessoriessent directly to their homes
(VISA,iVlasterCardand Discovercards are accepted).Order on-line today, 24 hours every day or by phone at
800.626.2002during normal businesshours.
Instructions contained in this manual cover procedures to be performed byany user.Other servicinggenerally should
be referred to qualified service personnel.Caution must be exercised,since improper servicing may cause unsafe
operation.
In Canada, consult your local listings for your nearest GE parts distributor or call 800.661.1616.
Contact Us Inthe U.S.:GEAppliances.com
Ifyou are not satisfiedwith the serviceyou receivefrom GE,contact us on our Websitewith all the details includingyour
phone number, or write to: General Manager, Customer Relations
GEAppliances,Appliance Park
Louisville,KY40225
In Canada: www.GEAppliances.ca, or write to: Director, Consumer Relations,MCCommercial
Suite310, ! Factory Lane
Moncton, N.B.E!C 9M3
Forquestions on installation call 1-800-626-2000 (US)and 1-800-561-3344 (Canada).
Register Your Appliance Inthe U.S.:GEAppliances.com
Register your new appliance on-line--at your convenience! Timely product registration willallow for enhanced
communication and prompt service under the terms of your warranty, should the need arise. You may also
mail in the pre-printed registration card included in the packing material. In Canada: www.GEAppliances.ca
Other manuals for G017
1
Table of contents
Languages:
Other GE Washer manuals

GE
GE WWA3650R User manual

GE
GE Profile PTWN8055MMS User manual

GE
GE GTWS8655DMC Assembly instructions

GE
GE WCVH6800JMS - 27" Front-Load Washer Manual

GE
GE WMCD2050J User manual

GE
GE WWA8344V Installation instructions

GE
GE Spacemaker WSXH208 Original instructions

GE
GE WSLP1500H0WW How to use

GE
GE WWA8324G User manual

GE
GE GE Profile WCCB1030B User manual