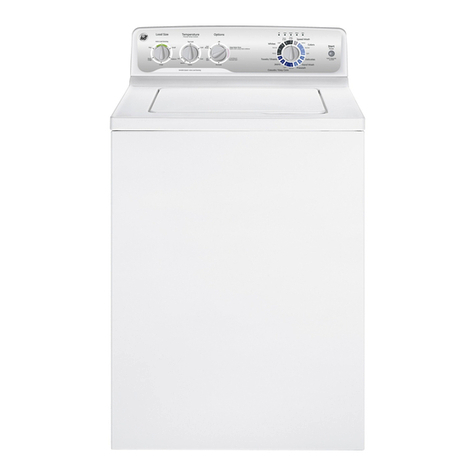
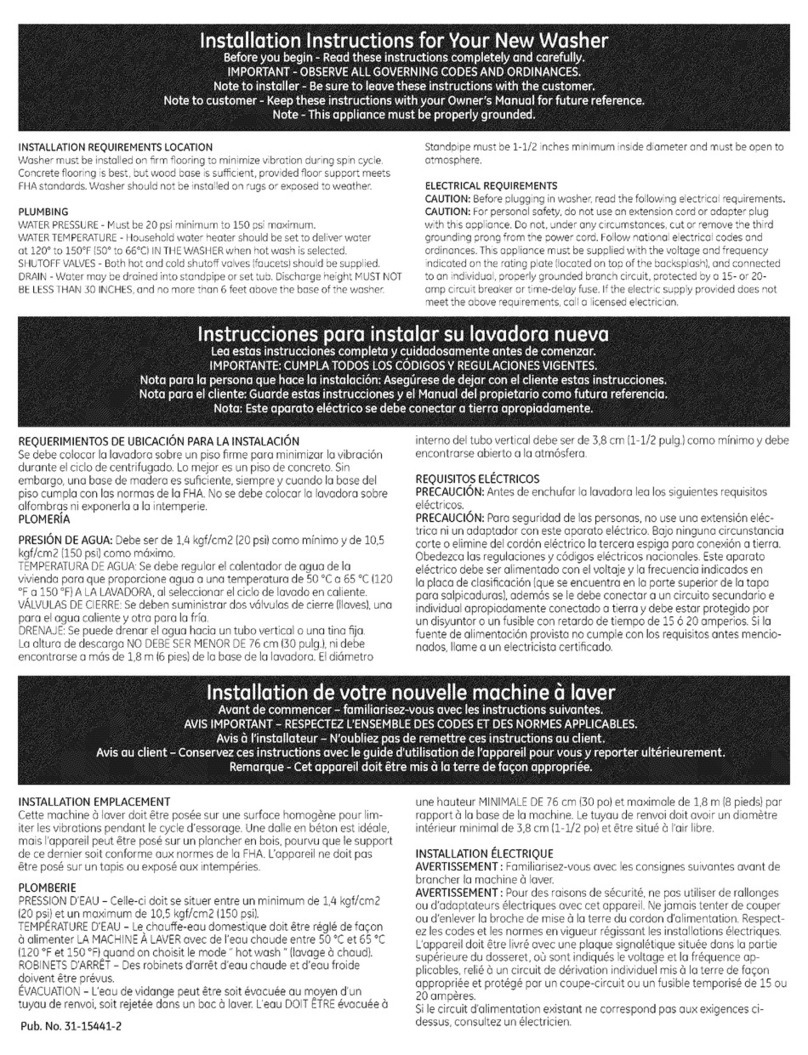
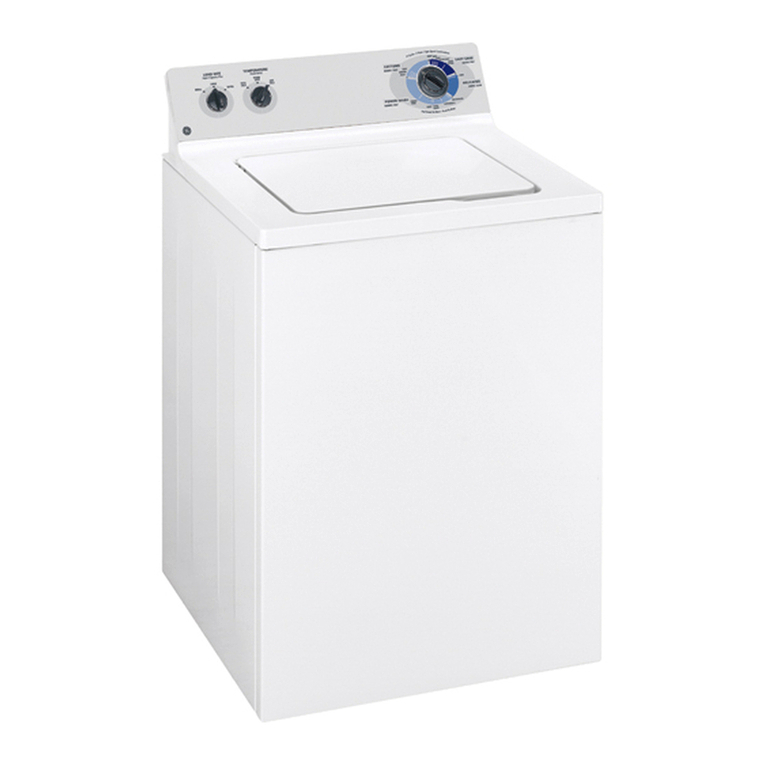
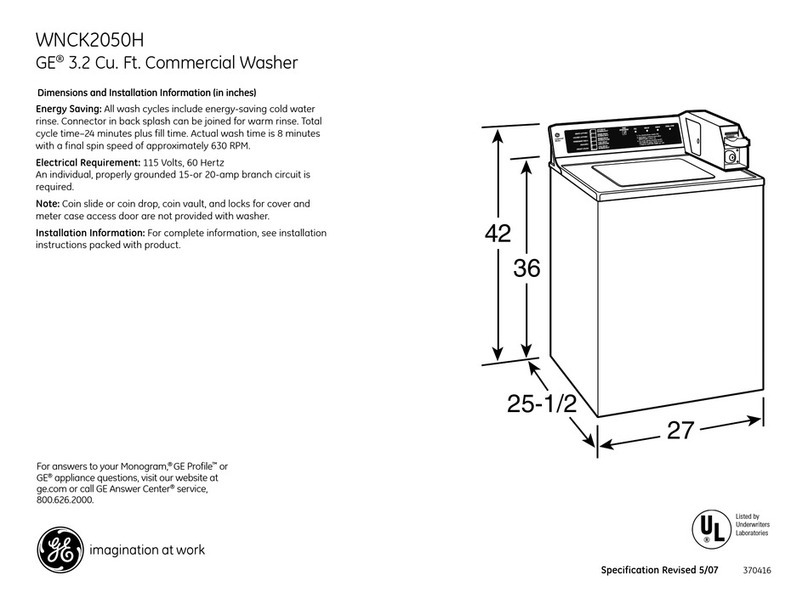
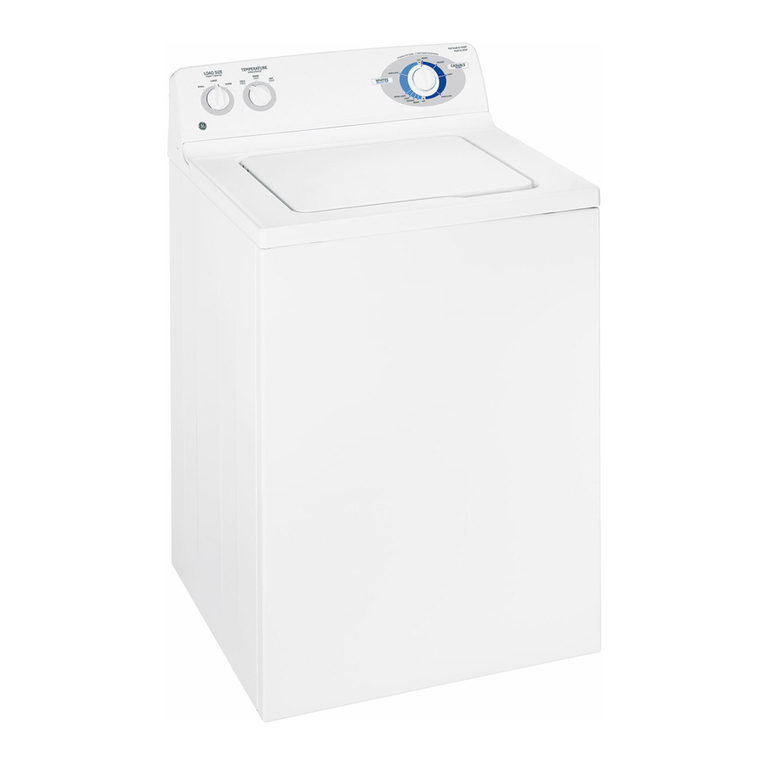
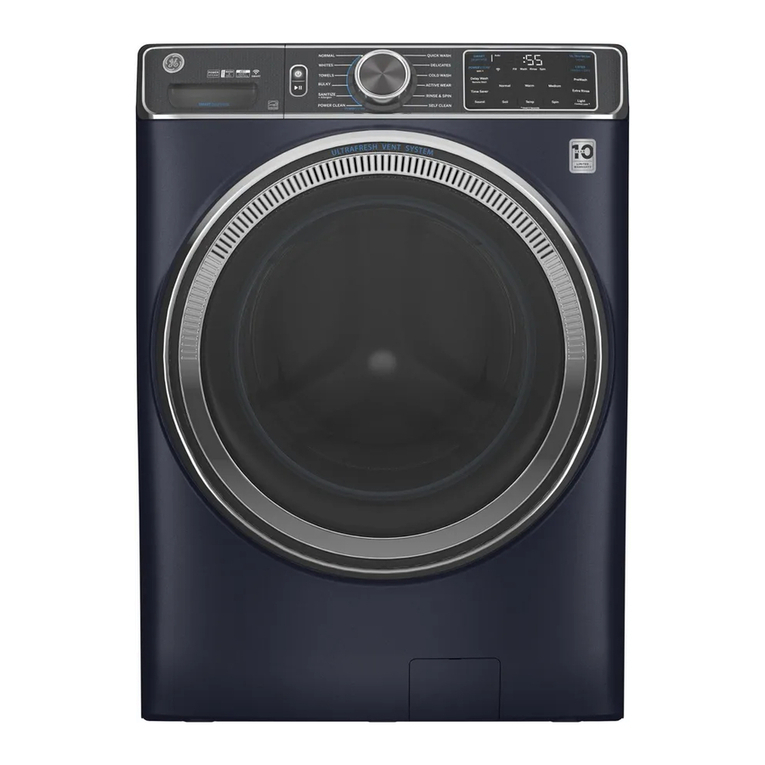
GE G018 User manual

GEAppliances.com
Safety Instructions .......... 2,s
Operating Instructions
Appliance Communication ......... 9
Care and Cleaning
of the Washer .................... 10
Features ........................... 7
Loading and Using
the Washer ........................ 8
Operating instructions .......... 4-6
Troubleshooting Tips ..... 11-13
Consumer Support
Consumer Support ................ 16
Parts and Accessories ........... 3, 16
Warranty (US)..................... 14
Warranty (Canada) ................ 15
English/Fra ngais/Espa flol
ENERGYSTAR
As an ENERGY STAR@ partner,
GE has determinedthatthis
productmeetstheENERGYSTAR@
guidelinesforenergyefficiency.
Printed in the United States
Write the model and serial
numbers here:
Model #
Serial #
You can find /-------/
them under
the lid of the
washer. 49-90537 03-15 GE

IMPORTANT SAFETY INFORMATION.
READ ALL INSTRUCTIONS BEFORE USING.
m
Thisisthe safety alert symbol.Thissymbol alerts to potential hazards that can kill or hurt and others.All safety
you you you
messageswill follow the safety alert symbol and the word "DANGER","WARNING",or "CAUTION".Thesewords are defined as:
Indicates a hazardous situation which, if not avoided, will result in death or serious inJury.
Indicates a hazardous situation which, if not avoided, could result in death or serious inJury.
_ Indicates hazardous situation which, if not avoided, could result in minor moderate
aor inJury.
IMPORTANT SAFETYINSTRUCTIONS
To reduce the risk of death, fire, explosion,electric shock,or injury to persons when usingyour appliance,
follow basic precautions, including the following:
m Read all instructions before using the appliance.
m DO NOT wash or dry articles that have been previously cleaned in, washed in, soaked in or spotted with
gasoline, dry-cleaning solvents, or other flammable or explosive substances, as they give off vapors that
could ignite or explode.
m DO NOT add gasoline, dry-cleaning solvents, or other flammable or explosive substances to the wash water.
These substances give off vapors that could ignite or explode.
m Under certain conditions, hydrogen gas may be produced in a hot-water system that has not been used for
2 weeks or more. HYDROGEN GAS IS EXPLOSIVE. If the hot water system has not been used for such a period,
before using a washing machine, turn on all hot-water faucets and let the water flow from each for several
minutes. This will release any accumulated hydrogen gas. As the gas is flammable, DO NOT smoke or use an
open flame during this time.
m DO NOT allow children to play on or in this appliance. Close supervision of children is necessary when this
appliance is used near children. Before the washer is removed from service or discarded, remove the door or
lid. Failure to follow these instructions may result in death or injury to persons.
m DO NOT reach into the appliance if the tub or agitator is moving to prevent accidental entanglement.
m DO NOT install or store this appliance where it will be exposed to the weather.
m DO NOT tamper with controls, repair or replace any part of this appliance or attempt any servicing unless
specifically recommended in the user maintenance instructions or in published user repair instructions that
you understand and have the skills to carry out.
m DO NOT operate this appliance if it is damaged, malfunctioning, partially disassembled, or has missing or
broken parts including a damaged cord or plug.
m Unplug the appliance or turn off the circuit breaker before servicing. Pressing the Power button DOES NOT
disconnect power.
m See "Electrical Requirements" located in the Installation Instructions for grounding instructions.
SAVETHESE INSTRUCTIONS
2

GEAppliances.com
PROPERINSTALLATION
This washer must be properly installed and located in accordance with the Installation Instructions before it is used.
If you did not receive an Installation Instructions, you can receive one by visiting GEAppliences.com or by calling
800.GE.CARES(800.452.2757). In Canada, visit www.geeppliences.ce or call 800.561.3344.
[] Ensurethat the hot water hose isconnected to the "H" [] Optional drain hoseextension recommended for
[]
[]
valve and the cold water hoseisconnected to the "C"
valve.
Installor store where it will not be exposed to
temperatures below freezing or exposedto the weather,
which could cause permanent damage and invalidate the
warranty.
Properlyground washer to conform with all
governing codes and ordinances. Follow details
in Installation Instructions.
'_dL
_-Electrical Shock Hazard
Plug into a grounded 3 prong outlet.
DO NOT remove ground prong.
DO NOT use an adapter.
DO NOT use an extension cord.
Failure to follow these instructions can result in death
or electrical shock.
discharging heights from 60" - 96"
[] This washer does not include water supply hoses.
GEstrongly recommends the useof factory specified
parts.A list of factory hoses availablefor purchase are
listed.These hosesare manufactured and tested to meet
GEspecifications.
GEstrongly recommends the useof new water supply
hoses.Hosesdegrade over time and need to be replaced
every 5 years to reduce the risk of hosefailures and water
damage.
Parts and Accessories
Order on-line at GEApplianceparts.com today, 24 hoursa
day or by phone at 800.626.2002during normal business
hours. InCanada, visityour localGEparts distributor or call
800.66!.16!6.
Purt Number
PHI4XI0002
Or
PH14X10005
Accessory
4ft rubberwatersupply hoses
/4ft braided water supply hoses
WH49X301 Drain hose extension
DR07X10005
PBX10W00Y0
6' Cable- CleanSpeak T"communication
WiFi ConnectPlus module
4FUNCTIONALITYCHECK
[] If the lid isopened between cycles(i.e.not pausing and
restarting the current cycle, changing cycles after it
started, etc.)pushingthe Start button will cause the
washer to turn on the cold water for 5 secondsfollowed
by a 10 second delay before locking the lid and starting
the cycle.
[] If the lid isopened during this !5 second period,the word
PAUSEwill start scrolling across its display.You will have
to pushthe Start button again to restart the cycle.
WHEN NOT IN USE
[] Turn off water faucets to minimize leakage ifa break or
rupture should occur.Checkthe condition ofthe fill hoses;
GErecommends changing the hoses every 5 years.
SAVETHESE INSTRUCTIONS

Operating instructions.
• Add fabric softener to the fabric
softener dispenser; see page 7.
• Add detergent. GE recommends
the use of High Efficiency
detergents such as @in your
energy efficient washer.
Throughout this manual, features and appearance may vary from your model.
•Loosely add items around infusor, • Select wash cycle.
Overloading may negatively impact • Select wash options,
wash performance. See page 8 for including Deep Rinse
suggested loading examples, option when using
• Close lid. fabric softener.
NOTE: Washer will not fill with lid
Step 4
• Press Start.
Controls
Stain Removal Guide
Tomato Wine Grass Dirt
Power
Pressto "wake up" the display, tfthe display is active, press to put the washer into idle mode.
NOTE:Pressing Power does not disconnect the appliance from the power supply.
Start and Pause
PressStart to beginthe cycle.NOTE:Thelid must be closed for the washer to fill and the cycle to start, tfthe lid is open,"LID"will scroll across
the display. If the lid isclosed,the lid will lock,the detergent will bedispensed, and "FILL"will scrollacross the display.
PressingStart again will Pause the cycle and the Start indicator light will blink.
Tocontinue the cycle,pressStart again. Ifmachine ispaused more than 2/4hours, the cycle will becancelled. Ifwater remains inthe machine,
selectthe Drain &Spin cycle to drain basket and spinwater out of the washer basket.
Display and Status Lights
Display:
The display shows the approximate time remaining until the end of the cycle.
NOTE:Thecycle time isaffected by how long it takes the washer to fill.This depends on the water pressure in your home. The"smart" timer
"learns"the amount of time it takes to fillyour washer and adjusts the total time accordingly.
in addition, this display will, "scroll" the washer status:
bALAnCINg Start of rebalancing cycleto redistribute clothes.Stopsafter rebalancing iscomplete.
CYCLEPrEP Sensingdry load size prior to fill (normal).
dELAY When Delay Wash isinitiated. Replacedwith estimated time when cycle starts.
End Endof current cycle.
FILL Forthe first/45 secondsof afill,the estimated end of cycle time isdisplayed. Forthe rest ofthe fill time, "FILL"isscrolled
until the fill completes.
H20 SUPPLY Cannot sense water level(valvespossibly turned off).
,Lid Cyclestopped because lid isopen. Closethe lid.
LOAdSenSE Sensingwet load size(normal).
,PAUSE Cyclepaused because the Start/Pause button was pressedand the washer was set to Pause. PressStart button again to
restart the cycle.
Cyclestatus lights:
Showswhether the washer is inthe SOAK,WASH,RINSEor SPiN cycle.
Feature status lights indicate (seesectionsFand G for more details):
Lid Locked Thewasher is locked - will blinkonce if you pressany button or turn the cycle knob.
DelayWash A delay wash time isset.
Locked Controls Thewasher controls are locked.

GEAppliances.com
Wash Cycles-Cycle Selector Knob
Thewash cycle controls the type of washing process. TheCycleSelector knob can be turned in either direction. Turning the knob after
starting acycle will stop the washer and change the cycle/options to the new selection.PressStart to begin the new cycle selection.
NOTE:When the knob isturned to another cycle,the basket light isturned on to assist in loading.
Thechart below will helpyou match the wash cycle setting with your clothing.
Speedwash Forsmall loads of lightly soileditems that areneeded in a hurry.Provideslightwash/rinse and short high speedspin.
Delicates
HeavyDuty
Jeans
Dark Colors
Whites
Normal/LightColors
Towels/Sheets
Sanitize With Oxi
For lingerieand special-carefabrics with lightto normal soil.Provideslightwash and low speedspin.
An above normal cycle for heavilysoiled or stained clothes. A soak cycle isadded and the agitate cycle is extended
for extra cleaning.This more aggressive cycle should be used sparingly.
For washing medium to lightly soiled jeans. Providesnormal wash and medium speedspin.(Forheavily
soiled work jeans, use Whites cycle.)
For non-colorfast cottons and blends or items that are labeledcold wash. Providesnormal wash and medium speed
spin.
For heavy to lightly soiled whites, household linens, work and play clothes. Provides a heavy wash and a high
speedspin.
For heavy to lightly soiled colorfast cottons, household linens,work and play clothes. Thiscycle providesthe best
overallcleaning andshould beusedfor most everydayitems. Providesnormal wash andmedium speedspin.
Provides periods of agitation and soak tailored for washing towels and sheets. Providesnormal wash and a
high speed spin.
When combined with detergent and an Oxi laundry additive, performs aconcentrated prewash sanitization step,
followed by a hot wash step,which isdesigned to remove 99.9% of bacteria found in home laundry.
Measure the detergent and Oxiproduct carefully. Foraverage size loads,usethe recommended amounts appropriate
for a large heavily soiled load, following the detergent and Oxi product label instructions. When sanitizing large or
extra large loads, usethe maximum recommended dosage of Oxi product. Using more than one full scoop isnot
recommended. Place the detergent and Oxi product directly in the bottom of the wash basket, before adding the
clothes. Thewasher hot water supply connection must provide a minimum of 120°Fto ensure the effectiveness of
this cycle.
NOTE:Thedefault Sanitize With Oxi cycle water temperature (Hot)can NOTbe changed.
TheSanitize With O×icycle iscertified by NSFInternational, an independent third party testing and certification
organization. The certification verified that the cycle reduced 99.9%of bacteria typically found in residential laundry
and that no significant contamination istransferred to subsequent washer loads.Onlythe Sanitize With Oxi cycle
has been designed to meet the requirements of NSFProtocol P172for sanitizing effectiveness.
Bulky Items/ For large coats, bed spreads, mattress covers, sleeping bags and similar large and bulky items. Large items
Comforters, Pillows such as blankets, comforters, jackets and small rugs. Provides a normal wash and an extra heavy spin.
Quick Rinse Rinsesand spins non-soiled items where a rinseonly isdesired.Provides an extra light wash and an
extra high speed spin. Fabric Softener and Extra Rinseoptions are availablewith this cycle.
Drain &Spin Fordraining the basketand spinningwater out of the clothes.
Basket Clean Use for cleaning the basket of residue and odor. Recommended use of at least once per month,
NOTE:Never load laundry while using Basket Clean. The laundry may become damaged or contaminated.
Seethe Care and Cleaning section.
Stain Removal Guide
The stain Removal Guide feature allows you to indicate what stains are on the garments in your load. Thisfeature can be used with
any wash cycle except Sanitize.
Touse Stain Removal Guide:
1. Select the wash cycle.
2. Pressthe Stain Removal Guide button (the button will light up when it is on).Continue to pressto select Tomato stain, Wine stain,
Grass stain or Dirt stain. The indicator light will show the selected stain.
To select a different stain, press the Stain Removal Guide button until desired stain to be removed is lit.
Toturn off Stain Removal Guide, press until the light on the button turns off.
NOTE:TheSoil and Temperature levelswill be changed to match each stain type. Turning off Stain Removal Guide will return the
settings to default.
Settings
Individual settings for agitation (Soil),water temperature (Tamp),and spin (Spin)can be set from the minimum (lowest in column) to
maximum (highest in column). In general, the higher up the column, the more washer energy will be used.
NOTE:Higher Spin speeds typically reduce dryer time/energy usage (i.e.reduces total energy when using both a washer and a dryer).
Operating instructions.
Cycle Options
Deep Rinse
Setthis option to provide a deeprinse or when manually adding fabric softener to the rinsecycle. NOTE:Thisoption is not allowed for some
cycles.When allowed, it may change other settings (e.g.Spin may go to a higher setting) to maximize performance.
NOTE:Do not usefabric softener dispensing boilswith this washer. Theydo not work correctly in high efficiency washers.
Extra Rinse
When you useextra detergent or bleach to clean heavily soiled clothes,use the Extra Rinseoption to better remove additional residues.
NOTE:Thisoption isnot allowed for some cycles.
Soak
This option beginswith a brief agitation, soaks for a specified period of time, then movesthrough the rest of the cycle automatically.
Repeatedpressing of the Soak button will add !S minutes,then 30 minutes and then return back to 0soak minutes.
PretreatYBleach
Setthis option to add liquid pretreatment - OR-liquid bleach in the next load. Press once to indicate adding pretreatment (light on above
button), twice to specify bleach (light on below button), three times to turn off (no light).Pretreatment or bleach will be added at the optimal
time during the wash cycle (differs for pretreatment or bleach).
NOTE:Do NOTuse pretreatment and bleach inthe same load.tfyou forget to dispense (did not pressbutton once ortwice),you can flush
out the dispenser by pouring water into the compartment and running a Quick Rinsecycle to remove from the basket.
Delay Wash
When the Delay Wash button is repeatedly pressed,the delay time isset from 1(01H)to 9 (09H)hours and back to clear (00H)hours.If you
pressand hold the Delay Wash button for 3 seconds, it will immediately reset.
Time Saver
Reduceswasher cycletime byadjusting spincycletime and!or increaseswash temperature to deliverthe samecleaning performancein lesstime.
Efficiency Monitor
The Efficiency Monitor lights will light to indicate that the mostefficient settings are on. Ifyou change settings, the number of Efficiency
Monitor lights will decrease (orincrease)to indicate decreased (orincreased) energy efficiency settings.
Additional Options
Ny Qvcle Settings
Asthe cycle selector knob isturned, the Soil, Tampand Spin settings change to automatic pre-set default settings, tfyou desirea different
setting, selectthe desiredoptions or changes to cycle settings. Pressand hold the My Cycle Settings button for 3seconds,the washer will
savethese settings for that cycle and the My Cycle Settings button will light when active. Inthe future, when you turn the selector knobto
that cycle,your settings will be automatically recalled. Totemporarily (i.e.for this load)return to the pre-set default settings, pressthe My
CycleSettings button for 1/2 second.The button light willturn off and the options will change back to these defaults. Tomake these default
settings permanent, hold the My CycleSettings button again for 3seconds to makethem your preferred settings (the button light will turn
back on).NOTE:Ply Cycle Settings includesStain Removal Guide but NOTDelay Wash or Volume.
Volume
Toadjust the volume of the unit, pressthe Volume button to select the desired level.Thereore four sound levels including OFF.
NOTE:The volume selected is for both the buttons and the end of cycle sound.
Basket Light
The basket light will turn on when the Basket Light button is pressed,the lid is lifted,or the cycleknob isturned. It will stay on for S minutes
or until the Basket Light button or Power button ispressed.
Lock Controls
You can lock the controls to prevent any selections from being made. Oryou can lockthe controls after you have started a cycle. Children
cannot accidentally start the washer by touching buttons with this option selected.
To lock/unlock the washer controls, press and hold the Lock Controls button for 5 seconds.TheLockedControlsiconwill light upwhen it ison.
NOTE:ThePower button can still be used when the machine is locked.
Automatic Load Sensing
This provides the correct amount of water suited to the size and type of load placed inthe unit. The washer will not fill with water
during automatic load sensing if the lid is open. When the lid is closed the machine is able to begin filling with water in order to
sense the load size.
NOTE: Thisis a high efficiency washing machine with lnfusor wash action. This system requires less water while providing effective
cleaning action. You may notice that the water level is lower than on your previous washer. This is normal for on lnfusor-equipped
washer. Average Small Load Average Medium Load Average Large Load
Clothes Level
Water Level
Clothes Level
Water Level
Clothes Level
Water Level
6

About washer features. GEAppliances.corn
Laundry Additives
Alladditives - detergent, fabric softener,and pretreatments (e.g.OxiClean®)areadded in the front corners.Your option selectionswill determine
when each additive isautomatically dispensed at its optimal time in the wash or rinse cycle.
PretreatmenX_ t//
DO NOTput detergent
pockets in dispenser
comportments. Laundry
detergent packets should only be
added directly to the wash basket
following the manufacturer's
directions.
Single Use Pretreatment or Liquid
Bleach
Toadd either liquid pretreatment or liquid bleach
to the next load, pour only one of them inthe left
rear compartment and pressthe Pretreat/Bleach
button either once to light the pretreat light (above
button) or twice to light the bleach light (below
button).The liquid will beadded at the optimal time
(pretreatment - early or bleach - late)in the wash
cycle.
Pretreatment option
r_ Check clothing cure labelsfor special
instructions.
r_ Measure liquid pretreatment carefully, following
instructions on the bottle.
r31 Beforestarting the washer, pour measured
amount of pretreutment directly into the
compartment.
Bleach option
Thewater fill
dilutes liquid
chlorine bleach as the washer fillsfor the wash
cycle.
r_ Checkclothing cure labelsfor special
instructions.
r_ Measure liquid bleach carefully,following
instructions on the bottle.
[] Neverpour undiluted liquid chlorine bleach
directlyonto clothesor into the wash
basket.
%
[] Do not pour powdered bleach into bleach
comportment.
Beforestarting the washer, pour measured
amount of bleach directly into bleach
compartment. Avoid splashing or over-filling
dispenser,tfyou prefer to use powdered
bleach,add it into the wash basket with your
detergent.
[] Do not mixchlorine bteoch with ammonia
or acidssuch as vinegar and/or rust
remover.Mixing con produce otoxic gas
which may cause death.
Single Use Softener
Toadd liquid fabric softener to the next load,press
the Deep Rinse button and pour the softener into
the leftcenter opening. The liquidwill be added at
the optimum time inthe rinse cycle.
NOTE:If using delay mode, add liquid softener
to the dispenser and then fill the dispenser to
the MAXfill level with water.
QO NOTput detergent pockets in
dispenser comportments. Laundry
detergent packets should only be
added directly to the wash basket following
the manufacturer's directions.
Single Use Wash Detergent Dispenser
To manually add either powder or liquid detergent
to the next wash cycle, pour it in the left front
opening. Most detergent will immediately enter
the basket.Thewasher will flush water through
this opening just prior to the fill cycle to add any
detergent that did not fall into the basket.
(_ DO NOTput detergent pockets in
dispenser comportments. Laundry
detergent packets should only be
added directly to the wash basket following
the manufacturer's directions.
Single Wash Detergent Dispenser

Loading and using the washer.
Always follow fabric manufacturer's care label when laundering.
ProperUseof Detergent
Using too little or too much detergent is a common
cause of laundry problems.
Uselessdetergent ifyou have softwater, a smaller load
or a lightly soiled load.
Forspots,apply pre-treatment to itemsas recommended
on the product label.Application shouldbe made in
the basketto preventoverspraywhich may causethe
coloring on the lid or graphicsto fade.
GErecommends,,,,,,.,the useof High Efficiency detergents
such as C,h_].--inyour energy efficient washer.
HEdetergents are formulated to work with low
water wash and rinsesystems.HEdetergents reduce
the oversudsing problems commonly associated with
regular detergents.
When using high efficiency or concentrated detergents,
consult the product label to determine amount required
for optimum performance. Excessivedetergent will
negatively impact wash performance.
SortingWashLoads
Sort by color (whites,lights,colors),soillevel,
fabric type (sturdycottons, easy care, delicates) and whether the fabric produces lint(terry cloth,
chenille)or collects lint (velveteen,corduroy).
8
- Fire Hazard
Never place items in the washer that are dampened with gasoline or other flammable liquids.
Nowasher can completely remove oil.
Do not dry anything that has everhad any type of oil on it (including cooking oils).
Doing sosocan result in death, explosion,or fire.
LoadingtheWasher
Load dry items loosely in the washer basket. Forbest
results,load itemsevenly and looselyaround the
outside of the basket.Toadd items after washer has
started, press Unlock Lid, lift the lid and submerge
additional itemsaround the outside ofthe basket. Close
the lid and pressSturt to resume.
[] Do not place large items such as sheets,blankets
and towels acrossthe Infusor. Loadthem around the
outside of the basket.
[] Donot put lawn or sofa cushions into the washer as
they are too big to move.Removeouter covers and
ONLYwash them.
Loading Examples
SPEEDWASH
(2-4 GARMENTSI
2 Casual Wear
Work Shirts
JEANS
3Jeans
5 Work Wear Shirts
4 Work Wear Pants
TOWELS/SHEETS
2 BathSheets
5 Bath Towels/
12 Washcloths
6 Hand Towels/
2 Terrydoth Bath Mats
OR
2 FlatQueen-Sized
Sheets
2 FittedQueen-Sized
Sheets
4 Pillowcases
NORMAL
4 Pillowcases
2 Hand Towels
2 Flat Sheets/
2 Fitted Sheets
2 Bath Towels/
4 Washcloths
OR
6 Shirts (Men's
or Women's)
4 Pair Pants (Khakis
or Twills)
5T-shirts
7 Pairs of Boxers
4 Pairs of Shorts
OR
6T-shirts
4 Pairs of Sweatpants
4 Sweatshirts
2 Hoodies
7 Pairs of Socks
DELICATES*
7 Bras
7 Pairs of Underwear
3 Slips
2Camisoles
4Nightgowns
*Usinganylonmesh
bagforsmallitemsis
recommended.
1 Pair Casual Wear
Work Pants
OR
3Soccer Uniforms

About Appliance Communication. GEAppliances.com
CleanSpeak TM
This washer can communicate with a compatible
dryer (one whose Owner's manual contains a
CleanSpeakTM description)via a standard Cat-Se
Ethernet cable with RJ45male connectors (not
included).This cable may be purchased separately.
Connectionpoints
model
Dryer
Washer
At the end of the wash cycle,the washer sends a
signalto the dryer to indicated a preferred dry cycle.
When the dryer becomes idle ("End"display times out
- or- the door isopened) "CYCLE"will scrollacross its
cycletime display, its current cycle knob setting LED
will be lit, and (ifdifferent) a second recommended
cycle LEDwill blink. If "CYCLE"times out, pressing
Power will refresh itand the LEDs.Ifthe dryer cycle
knob isturned, the solid LEDwill move accordingly.
Pressingthe dryer Start will initiate the cycle knob
setting (solidLED)and turn off the recommended
(blinking LED)ifa different cycle isstarted.
Order on-line at GEAppliancePerts.com today, 24
hours a day or by phone at 800.626.2002during
normal businesshours. InCanada, visityour local
GEparts distributor or call 800.66!.!6!6.
Part Number Accessory
DRO7X!O005 6' Cable - CleanSpeaM"
communication
PBX!OWOOYO WiFi ConnectPlus module
WiFi Connect (for customers in the United Statesl
Your washer is GE WiFi Connect compatible
using the optional GE ConnectPlus module.
To connect this appliance to the internet you
will need to purchase a GE ConnectPlus and
attach the module to your appliance through
the communication port in the appliance. The
GE ConnectPlus will allow your appliance to
communicate with your smartphone for remote
appliance monitoring, control and notifications.
Please visit www.GEAppliances.com/connect to
learn more about connected appliance features,
to learn what connected appliance app's will work
with your smartphone and to learn where you can
purchase a GE ConnectPlus.
WiFi Connectivity: Forassistance with the appliance
or the ConnectPlus network connectivity, please
call 800-GE-CARES.

Care and cleaning of the washer.
Pour into the
washerbasket
/
/
/
/
/
/
Cleaning the Interior
of the Washer
To cleon the interior of the washer, select the
Basket Clean feature on the control panel. This
Basket Clean cycle should be performed, at o
minimum, once per month. This cycle will use
more water, in addition to bleach, to control
the rote at which soils and detergents may
accumulate in your washer.
NOTE: Read the instructions below completely
before starting the Basket Clean cycle.
1. Remove any garments or objects from the
washer and ensure the washer basket is
empty.
2. Open the washer lid and pour one cup or 250
ml of liquid bleach or other washing machine
cleaner into the basket.
3.
4.
Closethe lid and select the Basket Clean
cycle. Push the Start button.
When the Basket Clean cycle is working, the
display will show the estimated cycle time
remaining. The cycle will complete in about
90 minutes. Do not interrupt the cycle.
Basket Clean may be interrupted by pressing the
Start button in between cycles. A power outoge
in the house might olso interrupt the cycle. When
the power supply is bock, the Basket Clean cycle
resumes where it hod stopped. When interrupted,
be sure to run o complete Basket Clean cycle
before using the wosher. Ifthe Power button is
pressed during Basket Clean, the cycle will be
lost.
IMPORTANT:
[] Run Basket Clean with ! Cup (250 ml) of
bleoch once o month.
[] After the completion of o Basket Clean cycle,
the interior of your washer may have o bleach
smell.
[] It is recommended to run o light color load
after the Basket Clean cycle.
10

Before you call for service... GEAppliances.com
Troubleshooting Tips
Save time and money! Review the charts on the following pages,
or visit GEAppliances.com. You may not need to call for service.
WATER Possible Causes What To Do
Short spray and delay Lid was opened and closed . Thisis normal. SeeFUNCTIONALITYCHECKin the Safety
after pushing the Start between cycle selection and Instructions section.
button start
Water level seems low This is normal , Water may not cover the top levelof the clothes.
Thisis normal for this high efficiencywasher.
Banging sound during Drain stand pipe istoo low , Thedrain hose must exceed 32" height at some point between
drain the washer back and the drain pipe.
Too many suds Soft water ,Try lessdetergent.
Too much detergent , Measure your detergent carefully. Uselesssoap if you have
soft water, a smaller load or a lightly soiledload.
@
Type of detergent , Switchto HighEfficiencydetergent such as ....._.
Water leaks Type of detergent , Switchto HighEfficiencydetergent such as@.
Using too much detergent , Use lessdetergent. Uselesssoup ifyou havesoft water,
in washer a smaller load or a lightly soiled load.
Fill hoses or drain hose is , Make sure hoseconnections are tight at faucets and
improperly connected rubber washers are installed.Make sureend of drain hose
iscorrectly inserted in and secured to drain facility.
Household drain may , Checkhousehold plumbing. You may need to cull
be clogged a plumber.
Drain hose rubs on wall , Make sure drain hosedoes not make contact with the wall.
May cause excessivewear on the hose.
Constant water pressure , Tighten hoses at the faucets.
to the fill hoses at the , Checkcondition of the fill hoses;they should be replaced
water source every 5 years.
Water temperature Cooler water temperatures ,New laundry detergents have been formulated to work
seems incorrect provide improved energy with cooler water temperatures without affecting wash
efficiency performance.
Water supply is turned off , Turn both hot and coldfaucets fully on and make sure hoses
or improperly connected are connected to correct faucets. NOTE:Water valvesare marked
"H" and "C"and internal valve screensare color coded.
Water valve screens are , Turnoff the water source and remove the water connection
stopped up hosesfrom the upper back of the washer. Usea brush or
toothpick to clean the screens inthe machine. Reconnect
the hosesand turn the water back on.
Cool/Cold Water when , Thisis normal.The washer senseswater temperature and
selecting Hot optimizes for best results.Coldwater isadded periodically
when hot isselected.
House water heater is , Make sure housewater heater isdeliveringwater at
not set properly 120°F-140°F(48°C-60°C).
Water pumped out before Lid lifted or cyclewas put in , Resetcycle.
cycle is complete pause for over 8 hours
Water won't drain Drain hose is kinked or , Straighten drain hoseand make surewasher isnot sitting on it.
improperly connected , Topof drain outlet should be lessthan 6ft (1.8m)
above floor.
Washer pauses at the This is normal , Thewasher issensing the load.
beginning ofcycles
Washer pauses during The SoakOption ,Thisis normal.The washer alternates between agitate and
wash cycle was chosen soak during these cycles to getyour clothes cleaner with
lesswear.
Washer pauses during This is normal , Thewasher may pause during the spin cycleto remove
spin cycle soapy water more efficiently. 11

Before you call for service...
OPERATION Possible Causes What To Do
Washer does not fill This is normal , The lid must be closed for washer to fill or operate.
when lid is open
Washer won't operate Washer is unplugged • Hake sure cord is plugged securely into a working outlet.
Water supply is turned off • Turn both hot and cold faucets fully on.
Controls are not set properly - Check controls.
Lid is open--safety feature • Close lid and press Start.
prevents agitation and
spinning when lid is up
Circuit breaker/fuse is • Check house circuit breakers/fuses. Replace fuses or
tripped/blown reset breaker. Washer should have a separate outlet.
Electronics need to be reset • Unplug washer, wait 2 minutes, plug back in and press Start.
Start was not pressed ,, PressStart.
Lid magnet missing • Call for service.
Dispenser not dispensing Laundry detergent packet , Laundry detergent packets should not be used in the dispensers.
properly placed in dispenser They should only be added directly to the wash basket following the
manufacturer's directions.
Unexplained time and/or Changing options • This is normal. Several options will change other options to
settings changes maximize washer performance.
Movement inside machine Shifting mechanism is • When the machine is manually turned off, the shifter will
when shut off disengaging the motor disengage the motor before completely shutting down.
If lid is raised before the motor isdisengaged, it will resume
when lid is closed.
Basket seems loose Basket moves or rotates freely • Washer basket does not have a traditional brake. Basket will
move freely. This is normal.
PERFORMANCE Possible Causes What To Do
Clothes too wet Incorrect cycle selected. • Hake sure the cycle selected matches the load you are
washing. Somefabrics will feel wetter when rinsed with cold water.
Wash load out of balance • Redistribute loud in washer and run through Drain &Spin cycle.
Colored spots Incorrect use of fabric • Check fabric softener package for instructions and follow
softener directions for using dispenser.
• Hake sure you hove selected the Deep Rinse option.
• Pretreat stain and rewash using Quick Rinse cycle before drying.
Dye transfer • Sort whites or lightly colored items from dark colors.
Grayed oryellowed Detergent amount • Be sure to follow detergent manufacturer's directions.
clothes Hard water • Use a water conditioner or install a water softener.
Water is not hot enough • Hake sure water heater is delivering water at
120°F-!40°F (48°C-60°C).
Washer is overloaded • Loosely load clothes no higher than the top row of holes in the
washer basket. For best results, load items around the outside
of the basket.
Dye transfer • Sort clothes by color. If fabric label states wash separately,
unstable dyes may be indicated.
Lint or residue on Clothes are air or line dried • Ifyou do not dry your clothes with a clothes dryer, your
clothes clothes may retain more lint.
Incorrect sorting • Separate lint producers from lint collectors.
Washing too long • Wash small loads for a shorter time than larger loads.
Detergent not dissolving • Rewash using Quick Rinse cycle with Extra Rinse option.
• Try a liquid detergent.
• Use warmer water temperature.
Overloading • Loosely load clothes in the washer basket. For best results, load
items around the outside of the basket.
Incorrect use of fabric • Check fabric softener package for instructions
softener and follow directions for using dispenser.
• Hake sure you have selected the Deep Rinse option.
12

GEAppliances.com
PERFORMANCE (cont.) Possible Causes What To Do
Pilling Result of normal wear on poly- • Whilethis is not caused by the washer, you can slow the
cotton blends and fuzzy fabrics pilling processbywashing garments insideout.
Snags, holes, tears, rips Pins, snaps, hooks, sharp , Fastensnaps,hooks,buttons and zippers.
or excessivewear buttons, belt buckles, ,Removelooseitems likepins,objects in pockets and
zippers and sharp objects sharp buttons.
left in pockets • Turn knits(which snag easily)inside out.
Undiluted chlorine bleach ,Checkbleach package instructions for proper amount.
,Never add undiluted bleachto wash or allow clothes to
come in contact with undiluted bleach.
Chemicals like hair bleach or ,Rinseitemsthat may havechemicals on them before
dye, permanent wave solution washing. UseQuick Rinse cyclewith Extra Rinseoption.
Wrinkling Incorrect wash and . Hatch Cycleselectionto the type of fabric you are washing
dry cycles (especiallyfor easy care loads).
Improper sorting , Avoid mixing heavy items (likework clothes)with light items
(likeblouses).
• Try a fabric softener.
Overloading or incorrect • Looselyloudclothesinthe washer basket.
water level
Repeated washing in , Wash inwarm or cold water.
water that istoo hot
Bleach left in dispenser Didn't start or finishcycle . Runeither a Basket Clean or a Quick Rinse cycle(with Bleach
after adding bleach option)to clean out the dispenser.Inthe future, make sureto
selectBleach option when adding bleach.
SOUNDS Possible Causes Reason
Washer seems This is normal . Thewasher isvery quiet during portions of the wash cycle.
too quiet
"Metallic clicking" Shifter mechanism is . Thedrive systemwill engage at the start of agitate and
engaging or disengaging disengage when agitate iscomplete. This occurs multiple
times during the wash.
Back and forth "swoosh" Electric motor reversing . Thismachine has a drivesystem that doesn't use gears.
or light "clicking" sound direction Thissound isthe motor rotating back and forth to clean
during agitate your laundry.
Quick short agitation Clothing redistribution . Atthe end of agitate, the motor makes short agitation strokes
sounds at end of agitate to redistribute the load.
"Click" when water Relay switch . Therelay makes a click sound when activated. Thewater
stops filling levelactivates the relay and stopsfilling.
"Clicking" behind Control Automatic Temperature . Two valvesmix cold and hot water. The "clicking" iswhen either
Panel during fill Control Valve valve turns on or off to raiseor lower the fillwater temperature.
Water flow changes Automatic Temperature . Two valves mix cold and hot water. Theflow changes when either
during fill Control Valve valve turns on or off to raiseor lower the fillwater temperature.
Motor "whining up" or Hater ramping up/down . Themotor will speed up incrementally during the spin cycle.
"coasting down" in spin during spin cycle When spin iscomplete, itwill coast until it stops.
"Humming" Water drain pump , Thedrain pump will make a humming sound when pumping
out water after agitation stops and continue until spin iscomplete.
"Gurgling" Water drain pump ,, When the pump starts drawing inair,It starts to gurgle.
Thewasher shouldthen begin spinning and the sound will
continue until it isdone spinning.
Water "swishing" This is normal • Thiswasher usesa Infuserwash action.Water swishingwhile the
unit isagitating isnormal,especiallywith smaller loads.
Washer is noisy Washer is uneven , Tolevelthe washer, adjust the leveling legsby rotating the
individual leg in the proper direction for up or down.
13

GE Washer Warranty. Forcustomers in the United States) GEAppliances.com
All warranty service provided by our Factory Service Centers,
or an authorized Customer Care®technician. Toschedule service,
on-line, visit us at GEAppliances.com, or call 800.GE.CARES
(800.852.2737). Please have serial number and model number
available when calling for service.
Staple your receipt here.
Proof of the original purchase
date is needed to obtain service
under the warranty.
Servicing your appliance may require the use of the onboard data port for diagnostics. This gives a GE
Factory Service technician the ability to quickly diagnose any issues with your appliance and helps GE
improve its products by providing GE with information on your appliance. If you do not want your appliance
data to be sent to GE, please advise your technician NOT to submit the data to GE at the time of service.
For The Period Of'.
One Year
From the date of the
original purchase
We Will Replace:
Any factory specified part of the washer which fails due to a defect in materials or workmanship.
During this limited one-year warranty, we willalso provide, free of charge, all labor and related
service to replace the defective part.
What Is Not Covered:
[] Service trips to your home to teach you how to use
the product.
[] Improper installation, delivery or maintenance.
[] Failure of the product if it isabused, misused, or
used for other than the intended purpose or used
commercially.
[] Replacement of house fuses or resetting of circuit breakers.
[] Products which are not defective or broken, or which are
working as described in the Owner's Manual.
[] Damage to the product caused by accident, fire, floods
or acts of God.
[] Incidental or consequential damage caused by possible
defects with this appliance.
[] Defects or damage due to operation in freezing
temperatures.
[] Damage causedafter delivery.
[] Product not accessible to provide required service.
EXCLUSION OF IMPLIED WARRANTIES--Your sole and exclusive remedy is product repair as provided in this Limited
Warranty. Any implied warranties, including the implied warranties of merchantability or fitness for a particular purpose,
are limited to one year or the shortest period allowed by law.
Thiswarranty isextended to the original purchaser and any succeedingowner for products purchased for home usewithin
the USA.If the product islocated in an area where servicebya GEAuthorized Servicerisnot available,you may be responsible
for a trip chargeor you may berequired to bring the product to an Authorized GEServicelocation. InAlaska,the warranty excludesthe
costof shipping or servicecallstoyour home.
Ifyou need to order replacement parts, we recommend that you only use GEfactory specified parts. These parts are designed to work
with your appliance and are manufactured and tested to meet GEspecifications.
Somestates do not allow theexclusionor limitation of incidentalor consequential damages.Thiswarranty givesyou specificlegal
rights,andyou may alsohave other rights which vary from stateto state. Toknow what your legal rights are,consultyour local or
state consumeraffairs officeoryour state'sAttorney General.
Warranton General Electric Company. Louisville, KY 40225
14

GEWasher Warrant . (ForcustomersinCanada
All warranty service provided by our Factory Service Centres or an authorized
_ technician. For service, call 1.800.561.3344.
Please have serial number and model number available when calling for service.
GEAppliances.ca
Servicing your appliance may require the use of the onboard data port for diagnostics. This gives a GE
Factory Service technician the ability to quickly diagnose any issues with your appliance and helps GE
improve its products by providing GE with information on your appliance. Ifyou do not want your appliance
data to be sent to GE, please advise your technician NOT to submit the data to GE at the time of service.
For The Period Of'.
One Year
From the date of the
original purchase
We Will Replace:
Any pert of the washer which fails due to a defect in materials or workmanship. During this
limited one-year warranty, GEwill also provide, free of charge, all labour and related
service costs to replace the defective part.
What Is Not Covered (in Canada)'.
[] Service trips to your home to teach you how to use
the product.
[] Improper installation, delivery or maintenance.
[] Failure of the product if it is abused, misused, or used for
other than the intended purpose or used commercially.
[] Replacement of house fuses or resetting of circuit
breakers.
[] Products which are not defective or broken, or which
are working as described in the Owner's Manual.
[] Damage to the product caused by accident, fire,
floods or acts of God.
[] Incidental or consequential damage caused by
possible defects with this appliance.
[] Defects or damage due to operation in freezing
temperatures.
[] Damage after delivery.
[] Product not accessible to provide required service.
EXCLUSION OF IMPLIED WARRANTIES--Your sole and exclusive remedy is product repair us provided in this Limited
Warranty. Any implied warranties, including the implied warranties of merchantability or fitness for a particular
purpose, are limited to one year or the shortest period allowed by low.
This warranty is extended to the original purchaser and any succeeding owner for products purchased in
Canada for home use within Canada. In-home warranty service will be provided in areas where it is available
and deemed reasonable by MC Commercial to provide.
Warrantor'. h4C COMMERCIAL, BURLINGTON, ON, L7R 5B6
15

Consumer Support.
GEAppliances Website Inthe U.S.:GEAppliances.com
Have a question or need assistancewith your appliance? Trythe GEAppliancesWebsite 24 hours a day,
any day of the year! Forgreater convenience and faster service,you can now download Owner's Manuals,
order parts or even schedule serviceon-line. In Canada: www.GEAppliances.ca
Schedule Service Inthe U.S.:GEApplionces.com
Expert GErepair service is only one step away from your door. Get on-line and schedule your service at your
convenience any day of the year! Or call 800.GE.CARES(800.432.2737) during normal business hours.
In Canada, call 1.800.561.3344
RealLifeDesignStudio Inthe U.S.:GEAppliances.com
GEsupports the Universal Designconcept-products, servicesand environments that can be used by peopleof
all ages, sizesand capabilities.We recognize the need to design for a wide range of physical and mental abilities
and impairments. Fordetails of GE'sUniversalDesignapplications, including kitchen design ideasfor people with
disabilities,check out our Website today. Forthe hearing impaired, pleasecall 800.TDD.GEAC(800.833.4322).
In Canada, contact: Manager, Consumer Relations,MCCommercial
Suite310, ! Factory Lane
Moncton, N.B.E1C91v13
16
ExtendedWarranties Inthe U.S.:GEAppliances.com
Purchase a GEextended warranty and learn about special discounts that are available while your warranty isstill
in effect. Youcan purchase iton-line anytime, or call 800.626.2224during normal businesshours.GEConsumer Home
Serviceswill still be there after your warranty expires.In Canada, consult your local listings for an extended
warranty provider.
Partsand Accessories Inthe U.S.:GEAppliances.com
Individuals qualified to servicetheir own appliances can have parts or accessoriessent directly to their homes
(VISA,iVlasterCardand Discovercards are accepted).Order on-line today, 24 hours every day or by phone at
800.626.2002during normal businesshours.
Instructions contained in this manual cover procedures to be performed byany user.Other servicinggenerally should
be referred to qualified service personnel.Caution must be exercised,since improper servicing may cause unsafe
operation.
In Canada, consult your local listings for your nearest GE parts distributor or call 800.661.1616.
Contact Us Inthe U.S.:GEAppliances.com
Ifyou are not satisfiedwith the serviceyou receivefrom GE,contact us on our Websitewith all the details includingyour
phone number, or write to: General Manager, Customer Relations
GEAppliances,Appliance Park
Louisville,KY40225
In Canada: www.GEAppliances.ca, or write to: Director, Consumer Relations,MCCommercial
Suite310, ! Factory Lane
Moncton, N.B.E!C 9M3
Forquestions on installation call 1-800-626-2000 (US)and 1-800-561-3344 (Canada).
Register Your Appliance Inthe U.S.:GEAppliances.com
Register your new appliance on-line--at your convenience! Timely product registration willallow for enhanced
communication and prompt service under the terms of your warranty, should the need arise. You may also
mail in the pre-printed registration card included in the packing material. In Canada: www.GEAppliances.ca

www.electromenagersGE.cu
S_curit_ .......................... 2 et 3
Utilisation
Caract_ristiques ......................... 7
Chargement et utilisation de la laveuse. 8
Communication avec I'appareil .......... 9
Entretien et nettoyage de la laveuse .... 11
Utilisation ............................. 4-6
D_pannage ..................... 12-14
Service _la clientele
Garantie ............................... 15
Pi_ces et accessoires ................ 3, !6
Service a la clientele .................... 16
la erie votrefa on!
ENERGYSTAR
En tant que partenaire ENERGY
STARMD,GEa d@termin6 que ce
produit satisfait aux exigences
6nergGtiques ENERGY STARMD.
Inscrivez ici les num_ros de
module et de s_rie :
N°de module
N°de sGrie
Vouspouvezles /r_- 7
trouver sousle
couverclede IG
IGveuse.

CONSIGNES DE SECURITE IMPORTANTES.
LISEZTOUTESLESINSTRUCTIONSAVANTD'UTILISERVOTREAPPAREIL.
11s'agit du symbole d'avertissement de s6curit6. IIvous avertit des dangers potentiels qui pourraient provoquer la mort
ou des blessures, 6 vous ou 6 autrui. Tousles messages de s6curit6 suivent ce symbole d'avertissement de s6curit6 et
les mots <<DANGER>>,<<AVERTISSEMENT>>ou ¢ ATTENTION>>.Voici la d6finition de ces mots •
_ ndique une situation dangereuse qui, si elle n'est pas #vit#e, entraTnera la mort ou des blessures
seneuses.
Indique une situation dangereuse qui, si elle n'est pas 6vit6e, pourrait entraTner la mort ou des
blessuress@ieuses.
Indique une situation dangereuse qui,si elle n'estpas 6vit6e, pourrait entraTnerdes blessures mineures ou
plus s@ieuses.
CONSIGNES DE SI CURITI IMPORTANTES
Pour r6duire les risques de d6c_s, d'incendie, d'explosion, de choc 61ectriqueou de blessures
Iorsque vous utilisez votre appareil, suivez les mesures de s6curit6 de base, notamment •
[] Lisez toutes les instructions avant d'utiliser I'appareil.
[] NE nettoyez et NEs_chez PASd'articles qui ont _t6 nettoy6s, lav6s, tremp6s ou tach_s avec de I'essence,du solvant
pour nettoyage 6 sec ou d'autres produits combustibles ou substances explosives, car ces derniers peuvent d6gager
des vapeurs qui pourraient s'enfiammer ou exploser.
[] N'ajoutez PASde I'essence, du solvant pour nettoyage 6 sec ou d'autres produits combustibles ou substances explosives
6 I'eau de lavage. Cessubstances peuvent d6gager des vapeurs qui pourraient s'enflammer ou provoquer une
explosion.
[] Dans certaines conditions, de I'hydrog_ne peut seformer dans un circuit d'eau chaude qui n'a pas 6t6 utilis6 pendant
deux semaines ou plus. L'HYDROGENEESTUN GAZEXPLOSIF.Si le circuit d'eau chaude n'a pas 6t6 utilis_ pendant une
telle p@iode, ouvrez tousles robinets d'eau chaude et laissez I'eau couler pendant plusieurs minutes avant d'utiliser
votre laveuse. Ainsi, I'hydrog_ne accumul_ sera 6vacu6 du syst_me. Ce gaz @ant inflammable, NEfumez PASet
n'utilisez pas de flamme nue pendant cette op@ation.
[] NE laissez PASles enfantsjouer sur ou 6 I'int@ieur de cet appareil. La pr6sence d'enfants pros de cet appareil Iorsqu'il
est en marche doit faire I'objet d'une @roite supervision. Avant de mettre la laveuse au rebut ou hors service, retirez la
porte ou le couvercle. Le non-respect de ces instructions peut entraTner le d6c_s ou des blessures.
[] NE mettez PASla main dans I'appareil Iorsque le tambour ou I'agitateur est en mouvement pour 6viter d'etre happ6
accidentellement.
[] N'installez ou n'entreposez PAScet appareil dans un endroit o_ il sera expos6 aux intemp@ies.
[] NE modifiez PASles commandes, ne r6parez ou ne remplacez pas de piece de cet appareil et ne tentez pas d'effectuer
une r_paration, saul si cette procedure est recommand6e express6ment dans les instructions d'entretien de I'utilisateur
ou dans les instructions de r6paration de I'utilisateur et que vous poss6dez les connaissances et les aptitudes requises
pour le faire.
[] N'utilisez PAScet appareil s'il est endommag6, s'il fonctionne mal, s'il est partiellement d6mont6 ou si certaines de ses
pisces manquent ou sont cass6es (y compris le cordon d'alimentation ou la fiche).
[] D6branchez I'appareil ou fermez son disjoncteur avant de proc6der 6 I'entretien. Appuyer sur le bouton d'alimentation
Power de I'appareil NEle d6connecte PASde I'alimentation.
[] Consultez la section sur le <<Branchement 61ectrique >>des instructions d'installation pour obtenir les proc6dures de
mise 6 la terre.
CONSERVEZ CES INSTRUCTIONS
2

www.electromenugersGE.cu
INSTALLATIONAPPROPRIEE
Cette laveuse dolt @treinstallde conformdment aux instructions d'installation avant d'@treutilisde.
Si vous n'avez pas requ les instructions d'installation, vous pouvez les obtenir sur le site Web www.electromenegersGE.cu
ou en appelant le 1-800-561-3344.
[] Assurez-vous que le boyau d'eau chaude est raccord#
au robinet <<H >>et que le boyau d'eau froide est
raccord6 au robinet <<C >>.
[] Installez ou entreposez I'appareil a un endroit o0 il ne
sera expos# ni a des temp@atures en dessous du point
de cong#lation ni aux intemp@ies; I'appareil pourrait
subir des dommages permanents et la garantie serait
annul#e.
[] ivlettez la laveuse a la terre conform#ment aux codes
et rSglements en vigueur. Suivez les instructions
d@aill#es de la section <<Instructions d'installation >>.
__ - Risque d'61ectrocution
Brancher a une prise de courant a 3 broches mise a
la terre.
NE PASretirer la broche de contact de mise (_la terre.
N'UTILISEZpas de rallonge #lectrique.
N'UTILISEZpas d'adaptateur de prise.
Le non-respect de ces instructions pourrait entraTner
un d#cSs ou un choc #lectrique.
[]
[]
Une rallonge de tuyau d'#vacuation optionnelle est
recommand#e pour les hauteurs d'#vacuation allant
de 60 (_96 po (152,4 (_243,8 cm).
Cette laveuse n'est pas fournie avec des boyaux
d'alimentation en eau.
GErecommande fortement d'utiliser les pisces
sp#cifi#es du fabricant. Une liste de boyaux
manufactur#s disponibles pour I'achat est indiqu#e.
Ces boyaux ant #t# fabriqu#s et test#s afin de
r#pondre aux sp#cifications de GE.
GErecommande fortement d'utiliser de nouveaux
boyaux d'alimentation en eau. Lesboyaux se
d#gradent avec le temps et doivent Stre remplac#s
tousles cinq ans afin de r#duire le risque de bris de
boyau et de d#g0ts d'eau.
Pi_ces et accessoires
Consultez votre annuaire local pour un d#taillant de
pisces authoris# ou applez-nous au 1-800-661-1616.
Num6ro de piece Accessoire
PHI4XI0002
Ou
PH14X10005
Boyaux d'alimentation en eau en
caoutchouc de 4 pi (1,2 m)
Boyaux d'alimentation en eau de type
tress# de 4 pi (1,2 m)
WH49X301 Rallonge de tuyau d'#vacuation
DR07X!0005 C0ble1,8m (6pi)- communication
CleunSpeukT.
4VERIFICATION DE FONCTIONNEIENT
[] Sile couvercle est ouvert entre les programmes (c.-(_-d.
en red#marrant le programme actuel sans I'avoir
interrompu, en changeant de programme une lois le
programme commenc#, etc.), appuyer sur le bouton
O_purt d#clenchera I'arriv#e d'eau froide pendant 5
secondes, un d#lai de 10 secondes, puis le verrouillage
du couvercle et le d#marrage du programme.
[] Si le couvercle est ouvert durant cette p@iode de 15
secondes, le mot PAUSEd#filera sur I'affichage. IIvous
faudra rappuyer sur le bouton Sturt (d#part) pour
red#matter le programme.
_LORSOUE L'APPAREILN'ESTPAS UTILIS c
[] Fermez les robinets d'eau pour r#duire les fuites
en cas de tuyau cass#. V#rifiez I'#tat des tuyaux de
remplissage. GErecommande de les remplacer tousles
5ans.
CONSERVEZ CES INSTRUCTIONS

Utilisation
Lescaractdristiques et I'apparence de la cuisini_re montrde dans cemanuel peuvent varlet salon le module.
• Ajoutez de I'assouplissant dans le distributeur • Chargez le linge sans le tasser en le r_partissant • S_lectionnez un programme de lavage.
d'assouplJssant;consultez lapage 7. autour deI'lnfusor. Charger trap de IJngepeut • S_lectJonnezlesoptions de lavage, • Appuyezsur
• Ajoutezdu d_tergent. GErecommande avoir un impact n_gatJfsur la performance de y comprJsDeepRinseIringage en Start (d_partl.
I'utilisatJonded_tergents HauteEfficacJt@tels lavage. Consultezla page8 pour obtenir des profondeurl IorsdeI'utilisation d'un
que_8_ dansvotre laveuse_co_nerg6tique. suggestions de chargement du linge, assouplissant.
• Fermezle couverde.
REHARQUE: Lalaveusene se remplJra pas sJle
Commandes couvercJeest ouvert.
Normal
Start/P .... Whites _L_?_°l°rs _-_ ToweJs/Sheets , ........ _:tr_ ........ 1
Heavy C_ High
S=k L., No,=.l Cool Meal.=
Unlock Lid wash _°"_"
Rinse cL_ Light Cold Low
s#.
Delay W.sh Exit" L_ht T_p_d NO Spin
Power
EIf_ciency Monitor I
Tomato Wine Grass Dirt r
Power (alimentation)
Appwez pour activer Paffichage. Si I'affichage est activ6, appwez sur cette touche pour mettre la laveuse en mode veille.
REHARQUE:L'alimentation 61ectrique de I'appareil n'est pas coup6e Iorsque vous appuyez sur Power (alimentation).
D_part et Pause
Appuyez sur Start (d6part) pour lancer le programme. REMARQUE:Lecouverde doit @treferm6 pour que la laveuse se remplisse et que le
programme commence. Si le couverde est ouvert, <<LID>>(couverde) d6file sur I'affichage. Si le couverde est farm& il se verrouillera, le d6tergent
sara distribu6 et <<FILL>>(remplissage) d6filera sur I'affichage.
Appuyer sur Start (d6part) mettra le programme en Pause et le voyant Start (d6part) dignotera.
Pour relancer le programme, appuyez de nouveau sur la touche Start (d6part). Si la laveuse est mise en pause pendant plus de 24 heures, le programme
sara annul& S'il reste de I'eau darts la laveuse, s61ectionnez le programme Drain & Spin (vidange et essorage) pour 6vacuer I'eau et la vidanger.
Voyants d'affichage et de progression
Affichage :
La dur6e restante estim_e avant la fin du programme s'affiche.
REPIARQUE: La dur6e du programme est affect6e par la dur6e de remplissage de la laveuse. Cela d6pend de la pression de I'alimentation en eau de
votre domicile. La minuterie <<intelligente >>apprend le temps n6cessaire au remplissage de votre laveuse et ajuste le temps total en cons6quence.
De plus, I'_tat de progression de la laveuse d_file _I'_cran :
•bALAnCINg (r_quilibrage) Au d6but du programme de r6_quilibrage visant 6 mieu× r_partir la charge. S'arr_te une lois le r_quilibrage effectu&
•CYCLEPrEP(pr_paration D@ection du volume de linge sac avant le remplissage (normal).
du programme)
•dELAY (diff_r_) ©uand la fonction Delay Wash (lavage diff@_)est s_lectionn_e. Remplac_ par la durra estim_e Iorsque le programme d_bute.
•End (fin) Fin du programme actuek
•FILL (remplissage) Pendant les 45 premieres secondes d'un remplissage, la dur6e restante estim6e du programme s'affiche. Pendant le
reste du remplissage, <<FILL>>(remplissage) d6file.
•H20 SUPPLY(alimentation IIn'est pas possible de d6tecter le niveau d'eau (les robinets sont potentiellement ferm6s).
en eau)
•Lid (couvercle) Arr_t du programme en raison de J'ouverture du couvercle. Fermez celui-ck
•LOAd SenSE(d_tection D@ection du volume de linge humide (normal).
du volume de lingo)
•PAUSE Programme mis en causesuite (_I'utilisation du bouton Start/Pause (d@part/pause)et dela miseen Pause de la laveuse.
Appwez de nouveau sur le bouton Start (d_part)pour relancer le programme.
Voyants de progression du programme :
IIindique si la laveuse est en mode SOAK (trempage), WASH (lavage), RINSE (rinqage) ou SPIN (essorage).
Les voyants de progression des fonetions indiquent ce qui suit (consultez lessections Fet Gpour plus de ddtails) :
Lid Locked (le couvercle est verrouill#) Lalaveuse est verrouill_e. Clignote une lois si vous pressezn'importe quel bouton ou tournez le bouton de s
_lection de programme.
Delay Wash flavage differS) Une fonction Delay Wash (lavage differS) a _t_ programm_e.
Locked Controls (la laveuse est verrouill_e) Les eommandes de la laveuse sont verrouill_es.
Other manuals for G018
1
Table of contents
Languages:
Other GE Washer manuals

GE
GE GTWS8655DMC User manual

GE
GE WIP4013SRW User manual

GE
GE Profile WPGT9350 Operating instructions

GE
GE Profile WPDH8900 Original instructions

GE
GE GFWS1705 Original instructions

GE
GE GFWH2400L Series Original instructions

GE
GE Profile WPRB8050 User manual

GE
GE GFWN1100LWW Assembly instructions

GE
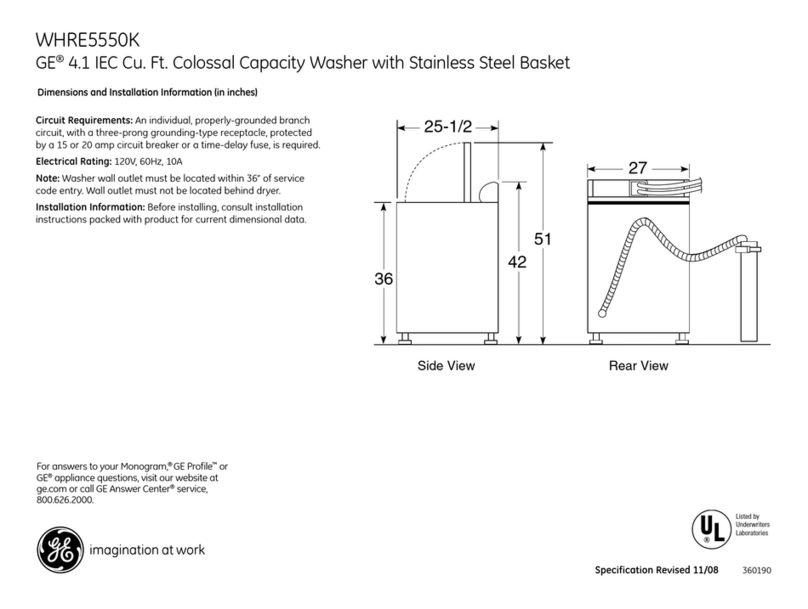
GE WHRE5550K User manual

GE
GE WWM657M User manual
Popular Washer manuals by other brands

Hotpoint
Hotpoint WLW2500A operating instructions

Zanussi
Zanussi ZWI 71000 WA user manual

Bosch
Bosch WGG254Z1ES User manual and installation instructions

Alliance Laundry Systems
Alliance Laundry Systems 33 Operation and maintenance

White-Westinghouse
White-Westinghouse WTF330HS0 Factory parts catalog

Hotpoint
Hotpoint WSR1070 owner's manual