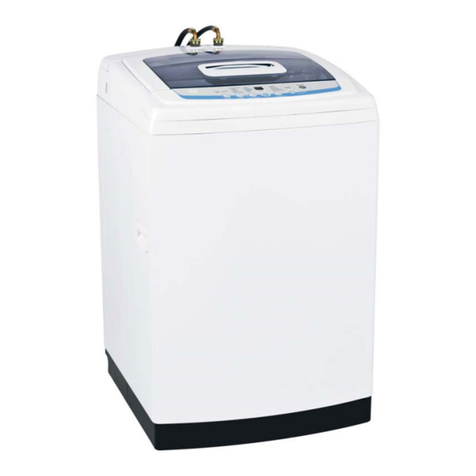
GE GTWN5550DWW User manual

Write the model and serial
numbers here:
Model # _____________
Serial #______________
You can find
them under
the lid of the
washer.
GEAppliances.com
Owner’s Manual
Washers
49-90431 02-12 GE
Safety Instructions..........2,3
Operating Instructions
Care and Cleaning
oftheWasher......................7
ControlPanel ...................... 4
Control ..........................4–5
Features.........................6,7
Loading and Using
the Washer........................7
Troubleshooting Tips.......8–10
Consumer Support
Consumer Support................12
Warranty..........................11
G150

2
Install or store where it will not be exposed to
temperatures below freezing or exposed to the
weather, which could cause permanent damage and
invalidate the warranty.
Properly ground washer to conform with all
governing codes and ordinances. Follow details
in Installation Instructions.
To ensure proper installation, run two small load size
Speed Wash cycles BEFORE washing the first load.
This washer does not include water supply hoses.
GE strongly recommends the use of factory specified
parts. A list of factory hoses available for purchase
are listed below. These hoses are manufactured and
tested to meet GE specifications.
GE strongly recommends the use of new water
supply hoses. Hoses degrade over time and need to
be replaced every 5 years to reduce the risk of hose
failures and water damage.
Parts and Accessories
Order on-line at GEAppliances.com today, 24 hours
a day or by phone at 800.626.2002 during normal
business hours.
Part Number Accessory
WH41X10207 4 ft Rubber Water Supply Hoses
OR
WX14X10005 4 ft Braided Water Supply Hoses
IMPORTANT SAFETY INFORMATION.
READ ALL INSTRUCTIONS BEFORE USING.
WARNING! For your safety, the information in this manual must be followed to minimize the risk
of fire or explosion, electric shock, or to prevent property damage, personal injury,
or loss of life.
WATER HEATER SAFETY
Under certain conditions, hydrogen gas may be produced in a water heater that has not been used
for two weeks or more. Hydrogen gas can be explosive under these circumstances.
If the hot water has not been used for two weeks or more, prevent the possibility of damage or injury by turning
on all hot water faucets and allowing them to run for several minutes. Do this before using any electrical appliance
which is connected to the hot water system. This simple procedure will allow any built-up hydrogen gas to escape.
Since the gas is flammable, do not smoke or use an open flame or appliance during this process.
PROPER INSTALLATION
This washer must be properly installed and located in accordance with the Installation Instructions
before it is used. If you did not receive an Installation Instructions sheet, you can receive one by
visiting GEAppliances.com or by calling 800.GE.CARES (800.432.2737).
YOUR LAUNDRY AREA
Keep the area underneath and around your
appliances free of combustible materials such as
lint, paper, rags, chemicals, etc.
Close supervision is necessary if this appliance is used
by or near children. Do not allow children to play on,
with or inside this or any other appliance.

3
Use this
appliance
only for its
intended
purpose as
described in
this Owner’s
Manual.
GEAppliances.com
WHEN USING THE WASHER
Never reach into the washer while it is moving.
Wait until the machine has completely stopped
before opening the lid.
Do not mix chlorine bleach with ammonia
or acids such as vinegar and/or rust remover. Mixing
different chemicals can produce a toxic gas which
may cause death.
Do not wash or dry articles that have been
cleaned in, washed in, soaked in or spotted with
combustible or explosive substances (such as
wax, oil, paint, gasoline, degreasers, dry-cleaning
solvents, kerosene, etc.). These substances give off
vapors that may ignite or explode. Do not add these
substances to the wash water. Do not use or place
these substances around your washer or dryer
during operation.
The laundry process can reduce the flame retardancy
of fabrics. To avoid such a result, carefully follow the
garment manufacturer’s
wash and care instructions.
To minimize the possibility of electric shock,
unplug this appliance from the power supply
or disconnect the washer at the building’s distribution
panel by removing the fuse or switching off the circuit
breaker before attempting any maintenance or
cleaning.
NOTE: Turning the Cycle Selector Knob to an off
position, pressing Power or pressing Start/Pause does
NOT disconnect the appliance from the power supply.
Never attempt to operate this appliance if it is
damaged, malfunctioning, partially disassembled, or
has missing or broken parts, including a damaged
cord or plug.
WHEN NOT IN USE
Turn off water faucets to minimize leakage if a break
or rupture should occur. Check the condition of the fill
hoses; GE recommends changing the hoses every 5
years.
Before discarding a washer, or removing it
from service, remove the washer lid to prevent
children from hiding inside.
Do not attempt to repair or replace any part
of this appliance unless specifically recommended
in this Owner’s Manual, or in published user-repair
instructions that you understand and have
the skills to carry out.
Do not tamper with the controls.
READ AND FOLLOW THIS SAFETY INFORMATION CAREFULLY.
SAVE THESE INSTRUCTIONS

G
T
W
N
5
9
5
0
D
W
W
-
1
7
5
D
6
8
0
5
G
0
0
1
-
1
7
5
D
6
8
0
4
G
0
0
1
-
1
7
5
D
6
9
5
7
P
0
0
1
-
R
e
v
.
4
D
e
l
a
y
S
o
a
k
W
a
s
h
R
i
n
s
e
S
p
i
n
E
n
e
r
g
y
S
m
a
r
t
NormalCasuals ColorsPerm. Press
Hand Wash
Towels / Sheets
Heavy Duty
Speed Wash
Delicates Whites
Jeans
Drain & Spin
Quick Rinse
Basket Clean
Extra
Rinse
Extra Spin
Extended
Standard
Quick
No Spin
Extra Heavy
Heavy
Normal
Light
Extra Light
Hot
Warm
Colors
Cool
Cold
Tap Cold
Signal
Delay Wash
Start
Pause
Power
Soil SpinTemp
Hold 3 secs
To Save Current Cycle
Auto
Soak
My
Settings
Hold 3 secs
to Cancel Delay
Good Better
e
wash
Fabric
Softener
On
e
monitor
A
Throughout this manual, features and appearance may vary from your model.
4
$ERXWWKHFRQWUROSDQHO³4XLFNVWDUWJXLGH
Controls
$GGIaErLFsRIWeQerRQPRGeOs
ZLWhaIaErLFsRIWeQerGLsSeQser
seeSaJeIRrGeWaLOs
$GGGeWerJeQW*(reFRPPeQGs
WheXseRI+LJh(IILFLeQF\
GeWerJeQWsLQaOO(QerJ\
6WarraWeGZashers
Step 2
6eOeFWZashF\FOe
6eOeFWZashRSWLRQs
LQFOXGLQJFabric
SoftenerRSWLRQ
6eOeFWoptions.
Auto
Soak
Extra
Rinse
Fabric
Softener Signal
Delay Wash
Hold 3 secs
to Cancel Delay
Soil SpinTemp My
Settings
Hold 3 secs
To Save Current Cycle
e
wash
Step 3
3ressStart.
Step 4
/RRseO\aGGLWePsarRXQGLQIXsRr
™
2YerORaGLQJPa\QeJaWLYeO\
LPSaFWZashSerIRrPaQFe$GMXsW
WheORaGsL]eaFFRrGLQJO\
&ORseOLG
127(WasherZLOOQRWsWarWWRILOO
ZLWhOLGRSeQ
Step 1
AWash Cycles-Cycle Selector Knob
The wash cycle controls the length of the washing process. The knob can be turned in either direction. Turning the Cycle Selector knob after
starting a cycle will stop the washer and reset the cycle to the new selection. Press Start to begin the new cycle selection.
The chart below will help you match the wash cycle setting with your clothing.
eWash* Use eWash to save energy on specific wash cycles. eWash cannot be used on %DVNHW&OHDQ, 4XLFN5LQVH, and Drain
& Spin wash cycles.
Whites
For heavy to lightly soiled cottons, household linens, work and play clothes.
This cycle provides the best overall
cleaning and should be used for most everyday items. Provides regular wash and high speed spin.
Colors For non-colorfast cottons and blends or items that are labeled cold wash. Provides gentle wash and high speed spin.
Perm. Press For wrinkle-free and permanent press items and knits. Provides gentle wash with periods of soak and low
speed spin.
Delicates
For lingerie and special-care fabrics with light to normal soil. Provides
extra gentle wash and
low speed spin.
Jeans
For washing medium to lightly soiled jeans.
Provides
gentle wash
and high speed spin. (
For heavily soiled work
jeans, use Whites/Heavy cycle.)
Hand Wash For items labeled hand washable with light soils. Provides a super gentle wash and an extra low speed spin.
7RZeOs6heeWsProvides periods of agitation and soak tailored for washing towels and sheets. Provides regular wash and high
speed spin.
Heavy DutyAn above normal cycle for heavily soiled or stained clothes. A soak cycle is added and the agitate cycle is
extended for extra cleaning. This more aggressive cycle should be used sparingly.
Speed Wash
For small loads of lightly soiled items that are needed in a hurry. Provides regular wash and high speed spin.
%DVNHW&OHDQUse for cleaning the basket of residue and odor. Recommended use of once per month. NOTE: Never load
laundry while using %DVNHW&OHDQ. The laundry may become damaged or contaminated. See the Care and
Cleaning section.
4XLFN5LQVHRinses and spins non-soiled items where a rinse only is desired. Provides a high speed spin.
Drain & Spin For draining the tub and spinning water out of the clothes. Provides a high speed spin.
* On some models
B C DEF
GHI

GEAppliances.com
BOptions
$XWRVRDN
This option begins with a brief agitation, soaks for a specified period of time, then moves through the rest of the cycle automatically. On
some models, this option is located on the Cycle Selector knob.
Extra Rinse
When you use extra detergent or bleach to clean heavily soiled clothes, use the Extra Rinse option to better remove additional residues.
Fabric Softener
Set this option when adding fabric softener to the washer or to select the enhanced Power Rinse.
NOTE: Do not use fabric softener dispensing balls with this washer. They do not work correctly in high efficiency washers.
Delay Wash
On some models, as the Delay Wash pad is repeatedly pressed, the delay time sets to 30 minutes, 1 hour, 3 hours, 6 hours, 9 hours, and
back to clear (0 minutes).
On other models, as the Delay Wash pad is repeatedly pressed, the delay time sets to 2 hours, 4 hours, 8 hours, and back to clear (0 hours).
For all models, if the Delay Wash pad is pressed for 3 seconds, it clears (regardless of the delay time).
Signal
Use the Signal pad to change the volume of the end of cycle signal. Press the pad until you reach the desired volume or off.
Settings
Individual settings for agitation (Soil), water temperature (Temp), and spin (Spin) can be set from the minimum (lowest in column) to
maximum (highest in column). In general, the higher up the column, the more energy will be used.
My Settings (on some models)
As the cycle selector knob is turned, the Soil, Temp and Spin settings change to automatic pre-set default settings. If you desire a different
setting, press the appropriate pad(s). Then press and hold the My Settings pad for 3 seconds and the washer will “remember” these settings
for that Knob Selection. In the future, when you turn the selector knob to that cycle, your settings will be automatically recalled. NOTE: Signal
volume cannot be set for My Settings.
Power
Press to “wake up” the display. If the display is active, press to put the washer into idle mode.
NOTE: Pressing POWER does not disconnect the appliance from the power supply.
Start
Press Start to begin the cycle. NOTE: The lid must be closed for the washer to fill and the cycle to start. Pressing Start again will Pause the
cycle and the Cycle indicator light will blink.
To continue the cycle, press Start again or close the lid. If machine is paused more than 24 hours, the cycle will be cancelled. To stop the
cycle, hold the pad for 3 seconds. If water remains in the machine, select the Drain & Spin cycle to drain tub and spin water out of the
washer tub.
Raising the lid will stop agitation or spin action but does not pause the cycle.
eWash (on some models) or Cold Care (on some models)
When the eWash or Cold Care pad is pressed, the cycle changes to its most energy efficient settings and all of the eMonitor lights will light
to indicate that the most efficient settings are on. If you change settings, the number of eMonitor lights will decrease (or increase) to indicate
decreased or increased energy efficiency settings.
Display (on some models)
The display shows the approximate time remaining until the end of the cycle.
NOTE: The cycle time is affected by how long it takes the washer to fill. This depends on the water pressure in your home. The “smart” timer
“learns” the amount of time it takes to fill your washer and adjusts the total time accordingly.
In addition, this display will, “scroll” the washer status:
bALANCING Start of rebalancing cycle to redistribute clothes. Stops after rebalancing is complete.
dELAY When Delayed Wash is initiated. Replaced with estimated time when cycle starts.
End End of current cycle.
FILL For the first 45 seconds of a fill, the estimated end of cycle time is displayed. For the rest of the fill time, “FILL” is scrolled
until the fill completes.
LID Cycle stopped because lid is open. Close the lid.
PAUSE Cycle paused because the Start/Pause pad was pressed and the washer was set to Pause. Press Start pad again to
restart the cycle.
Indicator lights
Five LED lights indicate the current washer status moving from left to right as the cycle progresses.
Demand Side Management (on some models) - When connected to your power company’s rate monitoring system, the washer will
automatically delay starting if the rates are high/critical. An “ES” will be displayed and the selected cycle will start after 4 hours or when
the rates drop to low/medium, whichever comes first. If the rates are not high/critical, the selected cycle will start immediately.
C
D
E
F
5
G
H
I
DSM

6
About washer features.
Cleaning the Fabric Softener Dispenser (on some models)
The Fabric Softener Dispenser is self cleaning. This dispenser should not require regular cleaning
like standard fabric softener dispensers. Wipe down exterior surfaces of the dispenser as needed. If
cleaning of the internal dispenser components is needed, follow these steps after the wash cycle is
complete:
The Fabric Softener Dispenser (on some models)
1Lift the tab on the fabric softener dispenser
top.
2Measure out fabric softener into the cap
and pour the softener into the dispenser
top. The fabric softener will drain into the
receiving cup inside the dispenser. Use only
“Ultra” or concentrated fabric softeners.
3Push down on the tab to close the
dispenser top. Make sure the tab is pushed
down fully and snaps shut.
4Select Fabric Softener on the control panel.
NOTE: Overfilling the dispenser will cause fabric
softener to drain out of the holes in the side of
the infusor when filling. Do not overfill.
NOTE: Do not use fabric softener dispensing
balls with this washer. They do not work
correctly in high efficiency washers.
The fabric softener dispenser automatically releases liquid fabric softener at the proper time.
Do not stop the washer or raise the lid during the first spin. This will cause the dispenser to
empty too soon.
Never pour fabric softener directly on clothes. This may cause stains on your clothing.
1Lift the dispenser top tab and turn the top
counterclockwise using the 2 turning tabs
shown. Lift the dispenser out of the
Infusor™.
2Clean out any buildup from inside the
Infusor™ with a soft cloth or toothbrush.
Ensure the three rectangular holes in the
bottom that allow the fabric softener to
drain are not blocked.
3Gently pull the cap away from the
dispenser cup to separate.
4Wipe surfaces with a soft cloth or soak the
parts in a solution of 1 gallon warm water,
1/4 cup liquid detergent and 1 cup bleach.
Ensure the small hole in the top surface of
the cap and its associated tube are not
obstructed.
5Reassemble the dispenser cup and cap by
snapping them together.
Place the dispenser assembly into the
Infusor™. Turn the top clockwise using the 2
turning tabs shown. Push down on the tab
to close the dispenser top. Make sure the
tab is pushed down fully and snaps shut.
1
2
3
Tab
Turning
Tabs
Turning
Tabs
1
3
5
6
This model has AUTOMATIC LOAD SENSING. This selection provides the correct amount of water suited to the size and type
of load placed in the unit. The washer will not fill with water during automatic load sensing if the lid is open. When the lid is
closed the machine is able to begin filling with water in order to sense the load size.
Note: This is a high efficiency washing machine with Infusor™ wash action. This system requires less water while providing
effective cleaning action. You may notice that the water level is lower than on your previous washer. This is normal for an
Infusor™-equipped washer. Liquid Bleach Funnel
The water fill dilutes liquid chlorine bleach as the washer fills for the wash cycle.
1Check clothing care labels for special instructions.
2Measure liquid bleach carefully, following instructions on the bottle.
Never pour undiluted liquid chlorine bleach directly onto clothes or into the wash basket.
Do not pour powdered bleach into bleach funnel.
3Before starting the washer, pour measured amount of bleach directly into bleach funnel.
Avoid splashing or over-filling dispenser. If you prefer to use powdered bleach, add it into the
wash basket with your detergent.
Do not mix chlorine bleach with ammonia or acids such as vinegar and/or
rust remover. Mixing can produce a toxic gas which may cause death.

7
GEAppliances.com
Loading and using the washer.
Always follow fabric manufacturer’s care label when laundering.
Sorting Wash Loads
Sort by color (whites, lights, colors), soil level,
fabric type (sturdy cottons, easy care, delicates) and whether the fabric produces lint (terry cloth,
chenille) or collects lint (velveteen, corduroy).
Proper Use of Detergent
Add detergent and fabric softener before adding items
so that the detergent can work effectively. Using too
little or too much detergent is a common cause of
laundry problems.
Use less detergent if you have soft water, a smaller load
or a lightly soiled load.
For spots, apply pre-treatment to items as recommended
on the product label. Application should be made in
the basket to prevent overspray which may cause the
coloring on the lid or graphics to fade.
GE recommends the use of High Efficiency
detergents in all Energy Star rated washers.
HE detergents are formulated to work with low water
wash and rinse systems. HE detergents reduce
the oversudsing problems commonly associated
with regular detergents.
When using high efficiency or concentrated detergents,
consult the product label to determine amount required
for optimum performance. Excessive detergent will
negatively impact wash performance.
Loading the Washer
Load dry items loosely in the washer basket. For best
results, load items evenly and loosely around the
outside of the basket. To add items after washer has
started, lift the lid and submerge additional items
around the outside of the basket.
Do not place large items such as sheets, blankets
and towels across the Infusor™. Load them around
the outside of the basket.
Do not wash fabrics containing flammable materials
(waxes, cleaning fluids, etc.).
Washer will not agitate or spin with the lid up,
however the timer will continue to run.
Care and cleaning of the washer.
:DVK%DVNHW Leave the lid open after washing to allow
moisture to evaporate. If you want to clean the basket,
use a clean, soft cloth dampened with liquid detergent;
then rinse. (Do not use harsh or gritty cleaners.)
Use the %DVNHW&OHDQ cycle:
Using the washing machine in a humid space for a long
period of time may lead to a buildup of black mold and
germs in the air inside the washer basket and affect your
health. If you clean the washer tub regularly on a monthly
basis using %DVNHW&OHDQ it will keep the washer basket
clean for hygienic use.
1Add tub cleaner or lime scale remover into the
detergent dispenser drawer.
Do not exceed the maximum detergent limit line
when you add it. Detergent may remain in the
washer tub after cleaning.
When you use liquid chlorine bleach, load it into the
liquid chlorine bleach compartment.
When you use a powdered cleaner, pull out the
liquid detergent cup and add it into the main wash
detergent compartment.
When you use cleaning tablets, place them directly
into the washer tub. (Do not add tablet cleaner to the
drawer.)
2Press the Power button.
3Turn the selector knob to %DVNHW&OHDQ.
4Press the Start button.
NOTES:
Never load laundry while using %DVNHW&OHDQ. The laundry
may become damaged or become contaminated. Make
sure to clean the washer basket when it is empty.
It is recommended to leave the lid open after finishing the
laundry to keep the tub clean.
It is recommended that %DVNHW&OHDQ should be repeated
monthly.
If mildew or musty smell already exists, run %DVNHW&OHDQ
for 3 consecutive weeks.
Glass Lid (on some models): Use a clean, soft cloth
dampened with a vinegar and water solution.
Fill Hoses: GE recommends changing the hoses every
5 years.
Exterior: Immediately wipe off any spills. Wipe with damp
cloth. Try not to hit surface with sharp objects.
Interior: The occasional use of a cycle that contains
bleach will keep the inside of the washer clean.
Moving and Storage: Ask the service technician to remove
water from drain pump and hoses. See the Installation
Instructions packed with product for information on how
to reinstall the shipping rod to keep the tub stationary
when moving the washer. For more information, visit
GEAppliances.com or call 800.GE.CARES (800.432.2737).
Do not store the washer where it will be exposed to weather.
Long Vacations: Be sure water supply is shut off at
faucets. Drain all water from hoses if weather will be
below freezing.
WATER Possible Causes What To Do
Water level seems low 7hLsLsQRrPaO Water may not cover the top level of the clothes.
This is normal for this high efficiency washer.
Water fills and drains 'raLQsWaQGSLSeLsWRRORZ The drain stand pipe must be above 30”.
at the same time
Too many suds 7RRPXFhGeWerJeQW Measure your detergent carefully. Use less soap if you have
soft water, a smaller load or a lightly soiled load.
7\SeRIGeWerJeQW Switch to HE detergent.
6RIWZaWer Try less detergent.
:DWHUOHDNV8sLQJWRRPXFhGeWerJeQW Use less detergent. Use less soap if you have soft water,
LQZasher a smaller load or a lightly soiled load.
7\SeRIGeWerJeQW Switch to HE detergent.
)LOOhRsesRrGraLQhRseLsMake sure hose connections are tight at faucets and
LPSrRSerO\FRQQeFWeGrubber washers are installed. Make sure end of drain hose
is correctly inserted in and secured to drain facility.
+RXsehROGGraLQPa\Check household plumbing. You may need to call
EeFORJJeGa plumber.
'raLQhRseLsORRse Make sure drain hose is fully seated in back of washer and
that the two retaining screws are fully seated.
'raLQhRserXEsRQZaOO Make sure drain hose does not make contact with the wall.
May cause excessive wear on the hose.
&RQsWaQWZaWerSressXre Tighten hoses at the faucets and turn the water off after each use.
WRWheILOOhRsesaWWhe Check condition of the fill hoses; they should be replaced
ZaWersRXrFeevery 5 years.
Water temperature &RROerZaWerWePSeraWXres New laundry detergents have been formulated to work
seems incorrect SrRYLGeLPSrRYeGeQerJ\ with cooler water temperatures without affecting wash
eIILFLeQF\ performance.
WaWersXSSO\LsWXrQeGRII Turn both hot and cold faucets fully on and make sure
RrLPSrRSerO\FRQQeFWeGhoses are connected to correct faucets.
WaWerYaOYesFreeQsare Turn off the water source and remove the water connection
sWRSSeGXS hoses from the upper back of the washer. Use a brush or
toothpick to clean the screens in the machine. Reconnect
the hoses and turn the water back on.
&RRO&ROGWaWerZheQ This is normal. PerfecTemp senses water temperature and
seOeFWLQJ+RW optimizes for best results. Cold water is added periodically
when hot is selected.
+RXseZaWerheaWerLsMake sure house water heater is delivering water at
QRWseWSrRSerO\ 120°F–140°F (48°C–60°C).
Water pumped out before /LGOLIWeGRrF\FOeZasSXWLQ Reset cycle.
cycle is completeSaXseIRrRYer24hRXrs
Water won’t drain'raLQhRseLsNLQNeGRrStraighten drain hose and make sure washer is not sitting on it.
LPSrRSerO\FRQQeFWeG Top of drain outlet should be less than 6 ft (1.8 m)
above floor.
Washer pauses during 7he$XWR6RaN2SWLRQ This is normal. The washer alternates between agitate and
wash cycleZasFhRseQsoak during these cycles to get your clothes cleaner with
less wear.
Washer pauses during 7hLsLsQRrPaO The washer may pause during the spin cycle to remove
spin cycle soapy water more efficiently.
Washer does not fill7hLsLsQRrPaOThe lid must be closed for washer to fill or operate.
when lid is open
Troubleshooting Tips
Save time and money! Review the charts on the following pages,
or visit GEAppliances.com. You may not need to call for service.
Before you call for service…
8

OPERATION Possible Causes What To Do
Washer won’t operate WasherLsXQSOXJJeGMake sure cord is plugged securely into a working outlet.
WaWersXSSO\LsWXrQeGRII Turn both hot and cold faucets fully on.
&RQWrROsareQRWseWSrRSerO\ Check controls.
/LGLsRSeQ³saIeW\IeaWXreClose lid and reset cycle, to the beginning if necessary.
SreYeQWsaJLWaWLRQaQG
sSLQQLQJZheQOLGLsXS
&LrFXLWEreaNerIXseLsCheck house circuit breakers/fuses. Replace fuses or
WrLSSeGEORZQ reset breaker. Washer should have a separate outlet.
(OeFWrRQLFsQeeGWREereseWUnplug washer, wait 2 minutes, plug back in and press Start.
6WarWZasQRWSresseGPress Start.
/LGPaJQeWPLssLQJ Call for service.
Time not shown 8QLWILOOLQJ This is normal. Estimated time remaining is updated during
on display fill time.
Movement inside machine6hLIWLQJPeFhaQLsPLsWhen the machine is manually turned off, the shifter will
when shut offGLseQJaJLQJWhePRWRrdisengage the motor before completely shutting down.
If lid is raised before the motor is disengaged, it will resume
when lid is closed.
%DVNHWVHHPVORRVH%asNeWPRYesRrrRWaWesIreeO\ Washer basket does not have a traditional brake. Basket will
move freely. This is normal.
PERFORMANCE Possible Causes What To Do
Clothes too wet,QFRrreFWF\FOeseOeFWeG Make sure the cycle selected matches the load you are
washing. Some fabrics will feel wetter when rinsed with cold water.
WashORaGRXWRIEaOaQFe
Redistribute load in washer and run through Drain & Spin cycle.
Colored spots,QFRrreFWXseRIIaErLF Check fabric softener package for instructions and follow
sRIWeQer directions for using dispenser.
Make sure you have selected the Fabric Softener option.
Pretreat stain and rewash.
'\eWraQsIer Sort whites or lightly colored items from dark colors.
Grayed or yellowed 'eWerJeQWaPRXQW Be sure to follow detergent manufacturer’s directions.
FORWhes+
arGZaWer Use a water conditioner like Calgon brand orinstall
awater softener.
WaWerLsQRWhRWeQRXJhMake sure water heater is delivering water at
120°F–140°F (48°C–60°C).
WasherLsRYerORaGeGLoosely load clothes no higher than the top row of holes in the
washer basket. For best results, load items around the outside
of the basket.
'eWerJeQWLsQRW Add detergent to the wash basket before you load clothes.
GLssROYLQJ
'\eWraQsIer Sort clothes by color. If fabric label states wash separately,
unstable dyes may be indicated.
Lint or residue on &ORWhesareaLrRrOLQeGrLeGIf you do not dry your clothes with a clothes dryer, your
clothes clothes may retain more lint.
,QFRrreFWsRrWLQJ Separate lint producers from lint collectors.
WashLQJWRRORQJ Wash small loads for a shorter time than larger loads.
'eWerJeQWQRWGLssROYLQJ Add detergent to wash basket before you load clothes.
Try a liquid detergent.
Use warmer water temperature.
2YerORaGLQJ Loosely load clothes in the washer basket. For best results, load
items around the outside of the basket.
,QFRrreFWXseRIIaErLF Check fabric softener package for instructions
sRIWeQer and follow directions for using dispenser.
Make sure you have selected the Fabric Softener option.
GEAppliances.com
9

Before you call for service…
PERFORMANCE (cont.) Possible Causes What To Do
Pilling5esXOWRIQRrPaOZearRQSRO\ While this is not caused by the washer, you can slow the
FRWWRQEOeQGsaQGIX]]\IaErLFspilling process by washing garments inside out.
Snags, holes, tears, rips 3LQssQaSshRRNssharSFasten snaps, hooks, buttons and zippers.
or excessive wear EXWWRQsEeOWEXFNOes Remove loose items like pins, objects in pockets and
]LSSersaQGsharSREMeFWssharp buttons.
OeIWLQSRFNeWsTurn knits (which snag easily) inside out.
8QGLOXWeGFhORrLQeEOeaFhCheck bleach package instructions for proper amount.
Never add undiluted bleach to wash or allow clothes to
come in contact with undiluted bleach.
&hePLFaOsOLNehaLrEOeaFhRrRinse items that may have chemicals on them before
G\eSerPaQeQWZaYesROXWLRQ washing.
:ULQNOLQJ,PSrRSersRrWLQJ Avoid mixing heavy items (like work clothes) with light items
(like blouses).
Try a fabric softener.
2YerORaGLQJRrLQFRrreFt Loosely load clothes in the washer basket.
ZaWerOeYeO
,QFRrreFWZashaQG Match Cycle selection to the type of fabric you are washing
Gr\F\FOes (especially for easy care loads).
5eSeaWeGZashLQJLQ Wash in warm or cold water.
ZaWerWhaWLsWRRhRW
SOUNDS Possible Causes Reason
´0HWDOOLFFOLFNLQJµ6hLIWerPeFhaQLsPLsThe drive system will engage at the start of agitate and
eQJaJLQJRrGLseQJaJLQJ disengage when agitate is complete. This occurs multiple
times during the wash.
%DFNDQGIRUWK´VZRRVKµ(OeFWrLFPRWRrreYersLQJ This machine has a drive system that doesn’t use gears.
RUOLJKW´FOLFNLQJµVRXQG GLreFWLRQ This sound is the motor rotating back and forth to clean
during agitate your laundry.
4XLFNVKRUWDJLWDWLRQ&ORWhLQJreGLsWrLEXWLRQ At the end of agitate, the motor makes short agitation strokes
sounds at end of agitate to redistribute the load.
´&OLFNµZKHQZDWHU 5eOa\sZLWFhThe relay makes a click sound when activated. The water
stops filling level activates the relay and stops filling.
´&OLFNLQJµEHKLQG&RQWURO $XWRPaWLF7ePSeraWXreTwo valves mix cold and hot water. The “clicking” is when either
Panel during fill&RQWrRO9aOYevalve turns on or off to raise or lower the fill water temperature.
Water flow changes $XWRPaWLF7ePSeraWXreTwo valves mix cold and hot water. The flow changes when either
during fill&RQWrRO9aOYevalve turns on or off to raise or lower the fill water temperature.
Motor “whining up” or0RWRrraPSLQJXSGRZQ The motor will speed up incrementally during the spin cycle.
“coasting down” in spinGXrLQJsSLQF\FOeWhen spin is complete, it will coast until it stops.
“Humming”WaWerGraLQSXPS The drain pump will make a humming sound when pumping
out water after agitation stops and continue until spin is complete.
“Gurgling”WaWerGraLQSXPS When the pump starts drawing in air, It starts to gurgle.
The washer should then begin spinning and the sound will
continue until it is done spinning.
Water “swishing”7hLsLsQRrPaO
This washer uses a Infusor™ wash action. Water swishing while
the unit is agitating is normal, especially with smaller loads.
Washer is noisyWasherLsXQeYeQTo level the front of the washer, adjust the front leveling legs by
rotating the individual leg in the proper direction for up or down.
To level the back of the washer, lift the back of the machine
4” (11 cm) and set down.
6hLSSLQJrRGLssWLOOassePEOeGTo remove the shipping rod from the washer, pull the yellow tag
LQWheXQLW and remove the attached rod from the bottom right hand side of
the washer.
10
Troubleshooting Tips

11
All warranty service provided by our Factory Service Centers,
or an authorized Customer Care®technician. To schedule service,
on-line, visit us at GEAppliances.com, or call 800.GE.CARES
(800.432.2737). Please have serial number and model number
available when calling for service.
For The Period Of: We Will Replace:
One Year Any factory specified part of the washer which fails due to a defect in materials or workmanship.
From the date of the During this limited one-year warranty, we will also provide, free of charge, all labor and related
original purchase service to replace the defective part.
This warranty is extended to the original purchaser and any succeeding owner for products purchased for home use within
the USA. If the product is located in an area where service by a GE Authorized Servicer is not available, you may be responsible
for a trip charge or you may be required to bring the product to an Authorized GE Service location. In Alaska, the warranty excludes the
cost of shipping or service calls to your home.
If you need to order replacement parts, we recommend that you only use GE factory specified parts. These parts are designed to work
with your appliance and are manufactured and tested to meet GE specifications.
Some states do not allow the exclusion or limitation of incidental or consequential damages. This warranty gives you specific legal
rights, and you may also have other rights which vary from state to state. To know what your legal rights are, consult your local or
state consumer affairs office or your state’s Attorney General.
Warrantor: General Electric Company. Louisville, KY 40225
6erYLFeWrLSsWR\RXrhRPeWRWeaFh\RXhRZWRXse
WheSrRGXFW
,PSrRSerLQsWaOOaWLRQGeOLYer\RrPaLQWeQaQFe
)aLOXreRIWheSrRGXFWLILWLsaEXseGPLsXseGRr
XseGIRrRWherWhaQWheLQWeQGeGSXrSRseRrXseG
FRPPerFLaOO\
5eSOaFePeQWRIhRXseIXsesRrreseWWLQJRIFLrFXLWEreaNers
3rRGXFWsZhLFhareQRWGeIeFWLYeRrErRNeQRrZhLFhare
ZRrNLQJasGesFrLEeGLQWhe2ZQer·s0aQXaO
'aPaJeWRWheSrRGXFWFaXseGE\aFFLGeQWILreIORRGs
RraFWsRI*RG
,QFLGeQWaORrFRQseTXeQWLaOGaPaJeFaXseGE\SRssLEOe
GeIeFWsZLWhWhLsaSSOLaQFe
'eIeFWsRrGaPaJeGXeWRRSeraWLRQLQIree]LQJ
WePSeraWXres
'aPaJeFaXseGaIWerGeOLYer\
3rRGXFWQRWaFFessLEOeWRSrRYLGereTXLreGserYLFe
What Is Not Covered:
Staple your receipt here.
Proof of the original purchase
date is needed to obtain service
under the warranty.
GE Washer Warranty.
(;&/86,212),03/,(':$55$17,(6³<RXUVROHDQGH[FOXVLYHUHPHG\LVSURGXFWUHSDLUDVSURYLGHGLQWKLV/LPLWHG
Warranty. Any implied warranties, including the implied warranties of merchantability or fitness for a particular purpose,
are limited to one year or the shortest period allowed by law.

Printed in the United States
Consumer Support.
Parts and Accessories GEAppliances.com
Individuals qualified to service their own appliances can have parts or accessories sent directly to their homes
(VISA, MasterCard and Discover cards are accepted). Order on-line today, 24 hours every day or by phone
at 800.626.2002 during normal business hours.
If you need to order replacement parts, we recommend that you only use GE factory specified parts. These
parts are designed to work with your appliance and are manufactured and tested to meet GE specifications.
Instructions contained in this manual cover procedures to be performed by any user. Other servicing
generally should be referred to qualified service personnel. Caution must be exercised, since improper
servicing may cause unsafe operation.
GE Appliances Website GEAppliances.com
Have a question or need assistance with your appliance? Try the GE Appliances Website 24 hours a day,
any day of the year! For greater convenience and faster service, you can now download Owner’s Manuals,
order parts or even schedule service on-line.
Schedule Service GEAppliances.com
Expert GE repair service is only one step away from your door. Get on-line and schedule your service at
your convenience any day of the year! Or call 800.GE.CARES (800.432.2737) during normal business hours.
Real Life Design Studio GEAppliances.com
GE supports the Universal Design concept³products, services and environments that can be used by
people of all ages, sizes and capabilities. We recognize the need to design for a wide range of physical and
mental abilities and impairments. For details of GE’s Universal Design applications, including kitchen design
ideas for people with disabilities, check out our Website today. For the hearing impaired, please call 800.TDD.
GEAC (800.833.4322).
Extended Warranties GEAppliances.com
Purchase a GE extended warranty and learn about special discounts that are available while your warranty
is still in effect. You can purchase it on-line anytime, or call 800.626.2224 during normal business hours.
GE Consumer Home Services will still be there after your warranty expires.
Contact Us GEAppliances.com
If you are not satisfied with the service you receive from GE, contact us on our Website with all the details
including your phone number, or write to: General Manager, Customer Relations
GE Appliances, Appliance Park
Louisville, KY 40225
Register Your Appliance GEAppliances.com
5eJLsWer\RXrQeZaSSOLaQFeRQOLQe³aW\RXrFRQYeQLeQFeTimely product registration will allow for
enhanced communication and prompt service under the terms of your warranty, should the need arise.
You may also mail in the pre-printed registration card included in the packing material.
12

GEAppliances.com
Manual del
propietario
Lavadoras
49-90431 02-12 GE
Instrucciones
de seguridad..................2,3
Instrucciones de operación
Ajustesdecontrol ...............4–5
Cómo cargar y usar
lalavadora.........................7
Cuidado y limpieza
de la lavadora. . . . . . . . . . . . . . . . . . . . . . 7
Funciones..........................6
Panel de control. . . . . . . . . . . . . . . . . . . . 4
Consejos para la solución
de problemas................8–10
Soporte al consumidor
Garantía ..........................11
Soportealconsumidor............12
Escriba el número de modelo
y de serie aquí:
No. de modelo _____________
No. de serie _______________
Puede encontrarlos
bajo la puerta
de la lavadora.
G150

2
Instale o almacene la lavadora en un lugar donde
no esté expuesta a temperaturas bajo cero ni a las
inclemencias climáticas, ya que esto puede provocar
daños irreversibles e invalidar la garantía.
Conecte correctamente a tierra la lavadora de
conformidad con todos los códigos y ordenanzas
regulatorias. Siga la información de Instrucciones
de instalación.
Para asegurar una instalación adecuada, deje
correr dos ciclos de Speed Wash (Lavado Rápido)
con tamaño de carga pequeña ANTES de realizar el
primer lavado.
Esta lavadora no incluye mangueras de suministro de
agua.
GE recomienda enfáticamente el uso de piezas
especificadas de fábrica. A continuación se encuentra
una lista de mangueras de fábrica disponibles para
la compra. Estas mangueras están fabricadas y
probadas para cumplir con las especificaciones de
GE.
GE recomienda enfáticamente el uso de mangueras
nuevas de suministro de agua. Las mangueras se
desgastan con el tiempo y deben reemplazarse cada 5
años para reducir el riesgo de fallas en las mangueras y
daños provocados por el agua.
Piezas y accesorios
Solicítelos on-line hoy mismo a GEAppliances.com,
las 24 horas del día o por teléfono al 800.626.2002 en
horario normal de trabajo.
Número de Pieza Accesorio
WH41X10207 Mangueras de goma
de suministro de agua
de 4 pies
O
WX14X10005 Mangueras trenzada
de suministro de agua
de 4 pies
INFORMACIÓN DE SEGURIDAD IMPORTANTE.
LEA TODAS LAS INSTRUCCIONES ANTES DE USAR.
¡ADVERTENCIA!
Por su seguridad, debe seguir las indicaciones de este manual para minimizar
el riesgo de incendio o explosión, descarga eléctrica, o para evitar daños a la
propiedad, lesiones personales, o muerte.
SEGURIDADDELCALENTADORDEAGUA
En determinadas condiciones, en un calentador de agua que no se haya utilizado durante un mínimo de
dos semanas se puede producir gas hidrógeno. El gas hidrógeno puede resultar explosivo
en determinadas circunstancias.
Si el agua caliente no se ha utilizado por dos semanas o más, prevenga la posibilidad de sufrir daños o lesiones
abriendo todos los grifos de agua caliente y dejándola correr durante varios minutos.
Realice este proceso antes de
utilizar cualquier electrodoméstico que se conecte al sistema de agua caliente.
Este sencillo procedimiento
le permitirá liberar todo el gas hidrógeno acumulado. Debido a que el gas es inflamable, no fume ni utilice ninguna
llama o electrodoméstico durante el proceso.
INSTALACIÓNCORRECTA
La lavadora se debe instalar y colocar correctamente de acuerdo con las instrucciones de instalación,
antes de utilizarla.
Si no recibió la hoja con instrucciones de instalación, puede obtener
una visitando GEAppliances.com o llamando al 800.GE.CARES (800.432.2737).
ZONADELAVADERO
Mantenga la zona por debajo y alrededor
de sus electrodomésticos libres de materiales
combustibles como pelusa, papel, trapos,
productos químicos, etc.
Es necesario vigilar con atención a los niños
si utilizan la lavadora o se encuentran en las
proximidades. No deje que los niños jueguen sobre
éste u otro electrodoméstico, con él o en su interior.

3
GEAppliances.com
Utilice este
electrodoméstico
sólo para el uso
que se describe
en este manual
del propietario.
AL UTILIZARLALAVADORA
Nunca introduzca las manos en la lavadora mientras
ésta se encuentre en movimiento. Espere a que la
máquina se haya detenido por completo antes de
abrir la tapa.
No mezcle blanqueadores clorados con amoníaco o
ácidos como vinagre o desoxidantes. La mezcla de
distintos productos químicos puede producir gases
tóxicos que pueden causar la muerte.
No lave ni seque prendas que se hayan limpiado,
lavado, empapado o manchado con sustancias
inflamables o explosivas (como cera, aceite, pintura,
gasolina, desengrasantes, disolventes
de limpieza en seco, queroseno, etc.) que puedan
prenderse o explosionar. No añada ninguna de estas
sustancias al agua de lavado. No utilice ni coloque
ninguna de estas sustancias en torno a la lavadora
o la secadora durante el funcionamiento.
El proceso de lavado puede reducir el tiempo previo
a la inflamación de los tejidos. Para evitar este efecto,
siga con atención las instrucciones de lavado
y cuidado del fabricante de la prenda.
Para minimizar la posibilidad de descarga eléctrica,
desenchufe el electrodoméstico de la corriente o
desconecte la lavadora en el panel de distribución de
la vivienda quitando el fusible o apagando
el interruptor antes de realizar cualquier tarea
de mantenimiento o limpieza.
NOTA: Girar la perilla Cycle Selector (Selector de Ciclo)
a la posición de apagado, presionar Power (Encender)
o presionar Start/Pause (Inicio/ Pausa) NO desconecta
el electrodoméstico del cable de corriente.
No intente en ningún caso utilizar la lavadora
si está dañada, funciona incorrectamente, está
parcialmente desmontada, le faltan piezas o algunas
están rotas, incluidos el cable o el enchufe.
CUANDONOESTÉENUSO
Cierre las llaves de paso minimizar las fugas en
caso de que se produzca una rotura o grieta.
Compruebe el estado de las mangueras de llenado;
GE recomienda el cambio de las mangueras cada 5
años.
Antes de deshacerse de una lavadora o de
desecharla, quite la puerta de la lavadora para evitar
que los niños se escondan en su interior.
No intente reparar ni sustituir ninguna pieza de este
electrodoméstico, a menos que se recomiende de
manera explícita en el manual del propietario
o en instrucciones publicadas de uso y reparación
que sean comprensibles y que pueda realizar usted.
No manipule los controles.
LEAYSIGA ESTAINFORMACIÓN
DESEGURIDADCUIDADOSAMENTE.
CONSERVE ESTAS INSTRUCCIONES

Es posible que las funciones y apariencias varíen con relación a su modelo a lo largo del manual.
AJreJXe el sXavizanWe en
modelos con dosificador para
sXavizanWe
para mis deWalles,
lea la piJina .
AJreJXe el deWerJenWe. GE
recomienda el Xso de
deWerJenWes de AlWa Eficiencia
en Wodas las lavadoras
clasificadas por EnerJy 6War.
AJreJXe las prendas sin aMXsWar alrededor
del ,nfXsor™. 6oErecarJar el WamEor
pXede prodXcir Xn impacWo neJaWivo en el
desempexo de lavado. AMXsWe el Wamaxo de
la carJa seJún corresponda.
&ierre la Wapa. N27ALa lavadora no
comienza a llenarse
con la Wapa aEierWa.
6eleccione el Wamaxo de carJa
y oWras opciones de lavado,
inclXyendo la opciyn del 6XavizanWe.
6eleccione el ciclo de lavado.
6eleccione options.
Paso 1 Paso 2 Paso 3
2prima Start.
Paso 4
4
3DQHOGHFRQWURO³*XtDGHLQLFLRUiSLGR
Perilla de Ciclos de Lavado-Selector de Ciclo
El ciclo de lavado controla la duración del proceso de lavado. La perilla se puede girar en cualquier dirección. Girar la perilla Cycle Selector
(Selector de Ciclo) luego de iniciar un ciclo detendrá la lavadora y reiniciará el ciclo en una nueva selección. Presione Start (Iniciar) para
comenzar la selección del nuevo ciclo.
El siguiente cuadro le ayudará a configurar el ciclo de lavado correcto para su ropa.
eWash* Utilice eWash para ahorrar energía en los ciclos de lavado específicos. eWash no puede ser utilizado en Basket
Clean (Limpieza de la Canasta), Quick Rinse
(Enjuague rápido), y Drain & Spin
(
Secar y Centrifugar
) ciclos de lavado.
Whites
(Blancos)
Para algodones con mucha o poca suciedad, ropa blanca, ropa de trabajo o de juego
Este ciclo brinda la mejor limpieza
general y se debería usar con la mayoría de los ítems todos los días. Brinda lavado regular y giro en alta velocidad.
Colors (Colores) Para algodones y mezclas que no se destiñen o prendas con la etiqueta de lavado en frío. Brinda un lavado suave y
con giro en alta velocidad.
Perm. Press Para prendas y tejidos sin arrugas y planchado permanente y teje. Brinda un lavado suave con períodos de remojo y
(
PresiónPermanente
)
un giro en baja velocidad.
Delicates
Para lencería y telas que requieren cuidado especial con suciedad entre suave a normal. Brinda un lavado extra suave
(Prendas Delicadas) y giro en baja velocidad.
Jeans Para lavar vaqueros poca suciedad o ligeramente sucios. Brinda un lavado suave y giro en alta velocidad. (Para
(Vaqueros)
vaqueros
usados para trabajar con mucha suciedad, use el ciclo Whites/Heavy (Blancos/Prendas Pesadas).
Hand Wash Para prendas con etiqueta de lavado a mano con poca suciedad.
Brinda un lavado súper suave y un giro en extra baja
(Lavado Manual)
velocidad
.
7oZels6heeWsProvee períodos de agitación y remojo adecuado para lavar toallas y sábanas. Brinda lavado regular y giro en alta
(Toallas/Sábanas) velocidad.
Heavy DutyUn ciclo por sobre lo normal para ropa con mucha suciedad o manchas. Un ciclo de enjuague es agregado y el ciclo
(Carga Pesada) de agitación es extendido para una limpieza adicional. Este ciclo más agresivo se debería usar con mayor moderación.
Speed Wash
Para pequeñas cantidades de prendas con poca suciedad que se necesitan de forma rápida. Brinda lavado regular y
(Lavado Rápido) giro en alta velocidad.
Basket CleanUse para limpiar la canasta de residuos y olores. Uso recomendado una vez por mes. NOTA: Nunca cargue
(Limpieza de ropa sucia mientras se esté usando Basket Clean (Limpieza de la Canasta). La ropa sucia se podrá dañar o
la Canasta) contaminar. Lea la sección de Cuidado y Limpieza.
Quick RinseEnjuaga y hace girar las prendas sin suciedad cuando sólo se desea un enjuague. Brinda un giro de alta velocidad.
(Enjuague rápido)
Drain & Spin Para drenar el tubo y el agua que gira de la ropa. Brinda un giro de alta velocidad.
(
Secar y Centrifugar
)
* En algunos modelos
G
T
W
N
5
9
5
0
D
W
W
-
1
7
5
D
6
8
0
5
G
0
0
1
-
1
7
5
D
6
8
0
4
G
0
0
1
-
1
7
5
D
6
9
5
7
P
0
0
1
-
R
e
v
.
4
D
e
l
a
y
S
o
a
k
W
a
s
h
R
i
n
s
e
S
p
i
n
E
n
e
r
g
y
S
m
a
r
t
NormalCasuals ColorsPerm. Press
Hand Wash
Towels / Sheets
Heavy Duty
Speed Wash
Delicates Whites
Jeans
Drain & Spin
Quick Rinse
Basket Clean
Extra
Rinse
Extra Spin
Extended
Standard
Quick
No Spin
Extra Heavy
Heavy
Normal
Light
Extra Light
Hot
Warm
Colors
Cool
Cold
Tap Cold
Signal
Delay Wash
Start
Pause
Power
Soil SpinTemp
Hold 3 secs
To Save Current Cycle
Auto
Soak
My
Settings
Hold 3 secs
to Cancel Delay
Good Better
e
wash
Fabric
Softener
On
e
monitor
AB C DEF
GHI
Controles
A
Auto
Soak
Extra
Rinse
Fabric
Softener Signal
Delay Wash
Hold 3 secs
to Cancel Delay
Soil SpinTemp My
Settings
Hold 3 secs
To Save Current Cycle
e
wash

GEAppliances.com
BOpciones
Autosoak (Remojo Automático)
Esta opción comienza con una breve agitación, realiza el remojo durante un período de tiempo específico, y luego realiza el resto del ciclo de
forma automática. En algunos modelos, esta opción está ubicada en la perilla Cycle Selector (Selector de Ciclo).
Extra Rinse (Enjuague Adicional)
Al usar detergente o blanqueador adicional para limpiar ropa muy sucia, use la opción Extra Rinse (Enjuague Adicional) para eliminar mejor
los residuos adicionales.
Fabric Softener (Suavizante para Tela)
Configure esta opción al agregar suavizante de tela a la lavadora o al seleccionar Power Rinse (Enjuague Intenso) mejorado.
NOTA: No use bolas de dispensador de suavizante de tela en esta lavadora. No funcionan correctamente con lavadoras con alto nivel de eficiencia.
Delay Wash (Lavado Retrasado)
En algunos modelos, al presionar de forma repetida Delay Wash (Lavado Retrasado), el tiempo de retraso se configura en 30 minutos, 1
hora, 3 horas, 6 horas, 9 horas y de nuevo a borrado (0 minutos).
En otros modelos, al presionar de forma repetida Delay Wash (Lavado Retrasado), el tiempo de retraso se configura en 2 horas, 4 horas, 8
horas, y de nuevo a borrado (0 minutos).
Con todos los modelos, si se presiona Delay Wash (Lavado Retrasado) durante 3 segundos, se borra (sin importar el tiempo de retraso).
Signal (Señal)
Use el botón Signal (Señal) para cambiar el volumen de la señal del fin del ciclo. Presione la tecla hasta que alcance el volumen deseado o se apague.
Settings (Configuraciones)
Configuraciones individuales para agitación (Soil/Suciedad), temperatura del agua (Temperature/Temperatura), y giro (Spin/Giro)
se pueden configurar de mínimo (inferior en la columna) a máximo (superior en la columna). En general, cuanto más arriba en la
columna, más energía se usará.
My Settings (Mis Configuraciones) (en algunos modelos)
A medida que la perilla del selector de ciclo es girada, las configuraciones de Soil (Suciedad), Temp (Temperatura) y Spin (Giro) cambian
a configuraciones automática preconfiguradas por omisión. Si desea una configuración diferente, presione la tecla(s) apropiada. Luego
mantenga presionada la tecla My Settings (Mis Configuraciones) durante 3 segundos y la lavadora “recordará” estas configuraciones para
esa Selección de Perilla. En el futuro, al girar la perilla del selector a ese ciclo, sus configuraciones serán reactivadas de forma automática.
NOTA: El volumen de la señal no se puede configurar para My Settings (Mis Configuraciones).
Power (Encendido)
Presione para “activar” la pantalla. Si la pantalla está activa, presione para que la lavadora quede en el modo inactivo.
NOTA: Presionar POWER (Encendido) no desconecta el electrodoméstico del suministro de corriente.
Start (Inicio)
Presione Start (Inicio) para comenzar el ciclo. NOTA: La tapa se deberá cerrar para que la lavadora se llene y el ciclo comience. Presionar
Start (Inicio) nuevamente pausará el ciclo y la luz del indicador de ciclo titilará.
Para continuar el ciclo, presione Start (Inicio) nuevamente o cierre la tapa. Si la máquina queda pausada por más de 24 horas, el ciclo será
cancelado. Para detener el ciclo, mantenga presionada la tecla durante 3 segundos. Si el agua permanece en la máquina, seleccione el ciclo
Drain & Spin (Drenar y Girar) para drenar el tubo y desagotar el agua de la lavadora.
Levantar la tapa detendrá la agitación o la acción del giro, pero no pausará el ciclo.
eWash or Cold Care (Cuidado de Frío) (en algunos modelos)
Cuando se presionan las teclas eWash o Cold Care, el ciclo cambia a las configuraciones de mayor eficiencia de la energía y todas las luces
de eMonitor se iluminarán para indicar que las configuraciones más eficientes están encendidas. Si cambia las configuraciones, la cantidad
de luces de eMonitor se reducirán (o incrementarán) para indicar que las configuraciones de eficiencia de la energía se redujeron o se incrementaron.
Display (Pantalla) (en algunos modelos)
La pantalla muestra el tiempo restante aproximado hasta el final del ciclo.
NOTA: El tiempo del ciclo es afectado por el tiempo que toma llenar la lavadora. Esto depende de la presión del agua en su hogar. El
temporizador “inteligente” “registra” la cantidad de tiempo que tarda en llenarse la lavadora y ajusta el tiempo total de forma consecuente.
Además, esta pantalla “mostrará” el estado de la lavadora:
bALANCING Comienzo del ciclo de rebalanceo para redistribuir la ropa. Se detiende una vez completado el rebalanceo.
dELAY Cuando Delayed Wash (Lavado Retrasado) es iniciado. Reemplazado con tiempo estimado cuando comienza el ciclo.
End Fin del ciclo actual.
FILL Durante los primeros 45 minutos de un llenado, se muestra el tiempo de fin de ciclo estimado. Para el resto del tiempo
de llenado, “LLENADO” se muestra hasta que el mismo se completa.
LID El ciclo se detuvo porque la tapa está abierta. Cierre la tapa.
PAUSE El ciclo fue pausado debido a que la tecla Start/ Pause (Inicio/ Pausa) fue presionado y la lavadora fue configurada en
Pause (Pausa). Presione Start (Inicio) nuevamente para reiniciar el ciclo.
Indicator lights (Luces del indicador)
Cinco luces LED indican el estado actual de la lavadora moviéndose de izquierda a derecha a medida que el ciclo progresa.
Administración Orientada Hacia la Demanda (en algunos modelos) – Al ser conectada al sistema de monitoreo del nivel de la
empresa de energía eléctrica, de forma automática la lavadora retrasará su inicio si los niveles son altos/ críticos. “ES” aparecerá
en la pantalla y el ciclo seleccionado comenzará luego de 4 horas o cuando los niveles desciendan a bajo/ medio, cualquiera surja
primero. Si los niveles no están en alto/ crítico, el ciclo seleccionado comenzará de inmediato.
C
D
E
F
G
H
I
5
DSM

6
Funciones de la lavadora.
Cómo limpiar el dosificador de suavizante de telas (en algunos modelos)
El dosificador de suavizante de telas se limpia automáticamente. Este dosificador no debe requiere de una
limpieza regular como es el caso de los dosificadores estándar de suavizante de telas. Limpie con un paño las
superficies exteriores del dosificador según sea necesario. Si se necesita la limpieza de los componentes internos
del dosificador, siga estos pasos después de finalizado el ciclo de lavado:
El dosificador de suavizante de telas (en algunos modelos)
1Levante la lengüeta de la parte superior del
dosificador de suavizante de telas.
2Mida el suavizante de telas en la tapa
y vierta el suavizante dentro de la parte superior
del dosificador. El suavizante
de telas caerá dentro de la taza de recepción
ubicada dentro del dosificador. Utilice sólo
suavizantes de telas “Ultra” o concentrados.
3Presione la lengüeta hacia abajo para cerrar la
parte superior del dosificador. Asegúrese de que
la lengüeta esté bien cerrada.
4Seleccione Fabric Softner (suavizante de telas) de
Options (opciones) del panel de control.
NOTA: La sobrecarga del dispositivo de suministro de
jabón ocasionará el desagüe del suavizante de tela
a través de los agujeros a un costado del infusor al
llenarse. No sobrecargue el mismo.
NOTA:
No utilice esferas dosificadoras de suavizante
de telas con esta lavadora. No funcionan bien en
lavadoras de alta eficiencia
.
El dosificador de suavizante de telas automáticamente libera suavizante de telas líquido
en el momento adecuado durante el ciclo.
No detenga la lavadora durante el primer centrifugado. Esto hará que el dosificador
se vacíe muy pronto.
Nunca vierta suavizante de telas directamente sobre la ropa. Esto puede generar manchas en su ropa.
Para utilizar, siga estos pasos:
1Levante la lengüeta de la parte superior del
dosificador y gire la parte superior
en sentido contrario a las agujas del reloj
utilizando las dos lengüetas de giro mostradas.
Levante y quite el dosificador del InfusorTM.
2Limpie cualquier acumulación de la parte interior
del InfusorTM con un paño suave
o un cepillo de dientes. Asegúrese de que los tres
orificios rectangulares del fondo que permiten el
drenaje de suavizante
de telas no se encuentren bloqueadas.
3Suavemente quite la tapa de la taza
del dosificador para separarlos.
4Limpie las superficies con un paño suave o
sumerja las piezas en una solución de 1 galón de
agua tibia, 1/4 taza de detergente líquido y 1 taza
de blanqueador. Asegúrese de que el orificio
pequeño de la superficie superior de la tapa y el
tubo asociado no se encuentren obstruidos.
5Vuelva a ensamblar la taza y tapa
del dosificador encastrándolas una con la otra.
Coloque el ensamblaje del dosificador dentro del
InfusorTM. Gire la parte superior en sentido de las
agujas del reloj utilizando las dos lengüetas de
giro mostradas. Presione la lengüeta hacia abajo
para cerrar la parte superior del dosificador.
Asegúrese de que la lengüeta esté bien cerrada.
Lengüeta
Lengüetas
de giro
Lengüetas
de giro
1
2
3
1
3
5
6
Este modelo cuenta con un SENSOR DE CARGA AUTOMÁTICO. Esta selección proporciona la cantidad correcta de agua que se ajusta al tamaño y tipo de carga
colocada en la unidad. La lavadora no se llenará de agua durante el ciclo de sensor de carga automático si la tapa se encuentra abierta. Cuando se cierra la tapa
la máquina puede comenzar a llenarse de agua para poder detectar el tamaño de la carga.
Nota: Esta es una lavadora de alta eficiencia con una acción de lavado Infuser™. Este sistema requiere menos agua al tiempo que brinda una acción de limpieza
excepcional. Usted puede notar que el nivel de agua es menor que el de su lavadora anterior. Esto es normal para una lavadora equipada con un Infuser™.
Embudo para el blanqueador líquido
El llenado de agua diluye el blanqueador líquido con cloro a medida que se va llenando para
el ciclo de lavado.
1Lea las etiquetas de cuidado de las prendas para determinar si hay instrucciones especiales.
2Mida la cantidad de blanqueador líquido con todo cuidado siguiendo las instrucciones de la botella.
No vierta nunca blanqueador líquido con cloro sin diluir directamente sobre la ropa ni en el cesto
de lavado.
No vierta blanqueador en polvo en el embudo del blanqueador.
3Antes de encender la lavadora, vierta la cantidad medida de blanqueador directamente
en el embudo. Evite salpicar o llenar el dosificador en exceso. Si prefiere usar blanqueador en polvo,
agréguelo en el cesto de lavado con su detergente.
No mezcle blanqueador con cloro con amoníaco o ácidos como vinagre y/o removedor deóxido.
La mezcla de químicos distintos puede producir un gas tóxico que cause la muerte.

Siempre siga las instrucciones del fabricante de la ropa cuando lave.
Separación de cargas
Separe por color (blancos, claros, colores), nivel de suciedad,
tipo de tela (algodones rústicos, limpieza fácil, delicados) y si la tela produce pelusa (tela de toalla, felpilla) o junta pelusa
(terciopelo, pana).
Uso correcto del detergente
El uso de demasiado poco o cantidades excesivas de detergente
es causa común de problemas con la colada.
Use menos detergente si tiene agua blanda, una carga más
liviana o ropa poco sucia.
Para tratar manchas, aplique pretratamiento a las prendas según
se recomienda en la etiqueta del producto. La aplicación debe
realizarse en el tambor para evitar una pulverización excesiva
que podría provocar que los colores de la tapa o de los gráficos
pierdan su intensidad.
GE recomienda el uso de detergentes de Alta Eficiencia en
todas las lavadoras clasificadas por Energy Star. Los
detergentes HE están formulados para funcionar en sistemas de
lavado y enjuague con poca agua. Los detergentes HE reducen
los problemas de espuma excesiva comúnmente asociados con
los detergentes comunes.
Cuando utilice detergentes de alta eficiencia o concentrados,
consulte la etiqueta del producto para determinar la cantidad
requerida para un desempeño óptimo. Una cantidad
excesiva de detergente puede tener un impacto negativo en
el desempeño de lavado.
Carga de la lavadora
Agregue las prendas secas sin apretar en el tambor de la
lavadora. Para mejores resultados, cargue las prendas en forma
uniforme y sin apretarlas alrededor de la parte exterior del tambor.
Para agregar prendas después de que la lavadora ha comenzado
a funcionar, levante la tapa y sumerja las prendas adicionales
alrededor de la parte exterior del tambor.
No coloque prendas grandes tales como sábanas, colchas
y toallas sobre el InfusorTM. Cárguelas alrededor de la parte
exterior del tambor.
No lave telas que contengan materiales inflamables (ceras,
líquidos de limpieza, etc.).
La lavadora no realizará la acción de agitado o el
centrifugado con la tapa levantada, sin embargo el
temporizador continuará funcionando.
Cuidado y limpieza de la lavadora.
Cómo cargar y usar la lavadora. GEAppliances.com
Cesto de lavado: Deje la tapa abierta después de lavar para
que se evapore la humedad. Si desea limpiar el cesto, use un
paño suave y limpio empapado en detergente líquido; luego
enjuáguelo. (No use limpiadores duros.)
Use el ciclo Basket Clean (Limpieza de la Canasta):
Usar la lavadora en un lugar húmedo durante un período
de tiempo prolongado podrá ocasionar la acumulación de
moho negro y gérmenes en el aire dentro de la canasta de
la lavadora y afectar su salud. Si limpia el tubo de la lavadora
en forma mensual utilizando Basket Clean (Limpieza de la
Canasta), esto mantendrá la canasta de la lavadora limpia
para un uso higiénico.
1Agregue limpiador de tubo o sarro en el cajón del
dispensador de detergente.
No supere la línea que indica el límite de detergente
máximo al agregar el mismo. Es posible que quede
detergente en el tubo de la lavadora luego de la limpieza.
Al usar blanqueador de cloro líquido, cargue el mismo
en el compartimiento del blanqueador de cloro líquido.
Al usar un limpiador en polvo, extraiga la taza
de detergente líquido y agregue la misma en el
compartimiento principal de detergente de la lavadora.
Al usar tabletas de limpieza, coloque las mismas
directamente en el tubo de la lavadora. (No agregue el
limpiadores en tableta en el cajón).
2Presione el botón Power (Encendido).
3Gire la perilla selectora a Basket Clean (Limpieza de la
Canasta).
4Presione el botón Start (Iniciar).
NOTAS:
Nunca cargue ropa sucia mientras se esté usando Basket
Clean (Limpieza de la Canasta). La ropa sucia se podrá
dañar o contaminar. Asegúrese de limpiar la canasta de la
lavadora cuando esté vacía.
Se recomienda dejar la tapa abierta luego de finalizar el
lavado para mantener el tubo limpio.
Se recomienda repetir en forma mensual Basket Clean
(Limpieza de la Canasta).
Si aún hay olor a moho o humedad, haga funcionar BasketClean
(Limpieza de la Canasta) durante 3 semanas consecutivas.
Tapa de Vidrio (en algunos modelos): Use una tela limpia y
húmeda con vinagre y solución de agua.
Mangueras de llenado: GE recomienda el cambio
de las mangueras cada 5 años.
E[WeriorSeque los derrames de inmediato. Séquelos
con un paño húmedo. Evite golpear la superficie con objetos
cortantes.
Interior: El uso ocasional de un ciclo que contiene lejía
mantendrá limpia la parte interna de la lavadora.
Traslado y almacenamiento: Pídale al técnico de servicio
que elimine el agua de la bomba y las mangueras. Consulte
las instrucciones de instalación que se incluyen con el
producto para recibir información sobre cómo reinstalar
la varilla de embarque para mantener el cesto metálico
estacionario cuando se cambie la lavadora de lugar. Para
mayor información, visite GEAppliances.com o llame al 800.
GE.CARES (800.432.2737). No guarde la lavadora donde
pudiera quedar expuesta a las condiciones climáticas.
Vacaciones prolongadas: Asegúrese de cerrar la provisión de
agua en los grifos. Drene toda el agua de las mangueras si la
temperatura llegará a valores inferiores a cero. 7

AGUA Causas posibles Qué hacer
El nivel de agua EsWo es normal El agua puede no cubrir el nivel superior de las prendas.
parece bajo Esto es normal para esta lavadora de alta eficiencia.
El agua ingresa y sale La WXEerta verWical de desaJe La tubería vertical de desagüe debe encontrarse por encima
al mismo tiempo esWi mXy EaMade los 30”.
Demasiada espuma 'emasiado deWerJenWeMida el detergente con cuidado. Use menos jabón si tiene agua
blanda, una carga más liviana o ropa poco sucia.
7ipo de deWerJenWeCambie a detergente HE .
AJXa Elanda Pruebe con menos detergente.
Fugas de agua 'emasiado deWerJenWeUse menos detegente. Use menos jabón si tiene agua blanda,
en la lavadora una carga más liviana o ropa poco sucia.
7ipo de deWerJenWeCambie a detergente HE .
La manJXera de llenado Asegúrese de que las conexiones de la manguera estén firmes
o la de desaJe esWi mal en los grifos y que las arandelas de goma estén instaladas.
conecWada Asegúrese de que el extremo de la manguera de desagüe
esté insertado como corresponde y bien seguro al desagüe.
El desaJe de la casa esWi Wapado Examine la tubería de la casa. Tendrá que llamar al fontanero.
0anJXera de desaJe floMaAsegúrese de que la manguera de desagüe esté bien
colocada en la parte trasera de la lavadora y que los dos
tornillos de retención se encuentren firmemente instalados.
La manJXera de desaJeAsegúrese de que la manguera de desagüe no haga contacto con
roza la pared la pared. Esto puede provocar un desgaste excesivo en la manguera.
Presiyn de aJXa consWanWeAjuste las mangueras a los grifos y cierre el agua después
a las manJXeras de llenado de cada uso.
en la fXenWe de aJXaVerifique la condición de las mangueras de llenado; se deben
reemplazar cada 5 años.
La temperatura del agua 7emperaWXras mis frtas Se han formulado nuevos detergentes para colada que
parece incorrecta del aJXa proporcionan trabajan con temperaturas más frías del agua sin afectar
mayor eficiencia enerJpWica el rendimiento del lavado.
La provisiyn de aJXa esWi Abra los grifos de agua caliente y fría y asegúrese de que
cerrada o mal conecWada las mangueras están conectadas a los grifos correctos.
Los filWros de malla de Cierre la fuente de agua y retire las mangueras de conexión de
la vilvXla de aJXa esWin agua de la parte superior trasera de la lavadora. Use un cepillo o
Wapados mondadientes para limpiar los filtros de malla de la lavadora.
Vuelva a conectar las mangueras y abra el agua de nuevo.
AJXa frescafrta cXando Esto es normal. PerfecTemp detecta la temperatura del agua y
se selecciona calienWe. la optimiza para mejores resultadosse . El agua fría se agrega
en forma periódica cuando se selecciona agua caliente.
El calenWador de aJXa de la casa no
Asegúrese de que el calentador esté suministrando agua
esWi confiJXrado correcWamenWea 120°F–140°F (48°C–60°C).
Agua bombeada antes La pXerWa esWi levanWada o Reconfigure el ciclo.
de completarse el ciclo el ciclo se pXso en paXsa por
mis de 24 horas
El agua no drena La manJXera de desaJe Enderece la manguera de desagüe y asegúrese de que
esWi doElada o mal conecWada la lavadora no esté apoyada sobre ella.
La parte superior de la salida del desagüe debe estar
a menos de 6 pies (1,8 m) por encima del piso.
La lavadora se interrumpe 6e seleccionyla opciyn AXWoEsto es normal. La lavadora alterna entre agitar y remojer
durante el ciclo de lavado 6oaN5emoMo AXWomiWicodurante estos ciclos para que sus prendas se limpien mejor
con menos desgaste.
La lavadora se interrumpe EsWo es normal La lavadora puede hacer pausas durante el ciclo de
durante el ciclo de centrifugado para eliminar el agua jabonosa con más
centrifugado eficiencia.
La lavadora no se llena EsWo es normal. La tapa debe estar cerrada para que la lavadora se llene
cuando la tapa se halla abierta.
o funcione.
Consejos para la solución de problemas
¡Ahorre tiempo y dinero! Consulte primero las tablas de las páginas siguientes o
visite GEAppliances.com y quizás no necesite llamar al servicio.
Antes de llamar para solicitar servicio…
8
Other manuals for GTWN5550DWW
2
Table of contents
Languages:
Other GE Washer manuals

GE
GE GTWN5650FWS User manual

GE
GE WWA8354V Installation instructions

GE
GE WDSR2120JWW User manual

GE
GE WWA7640S User manual

GE
GE WWA8314V Installation instructions

GE
GE Spacemaker WPXH214 Original instructions

GE
GE GNW128S Original instructions

GE
GE S4200 User manual

GE
GE WWA8800R User manual

GE
GE WCCB1030HWC How to use