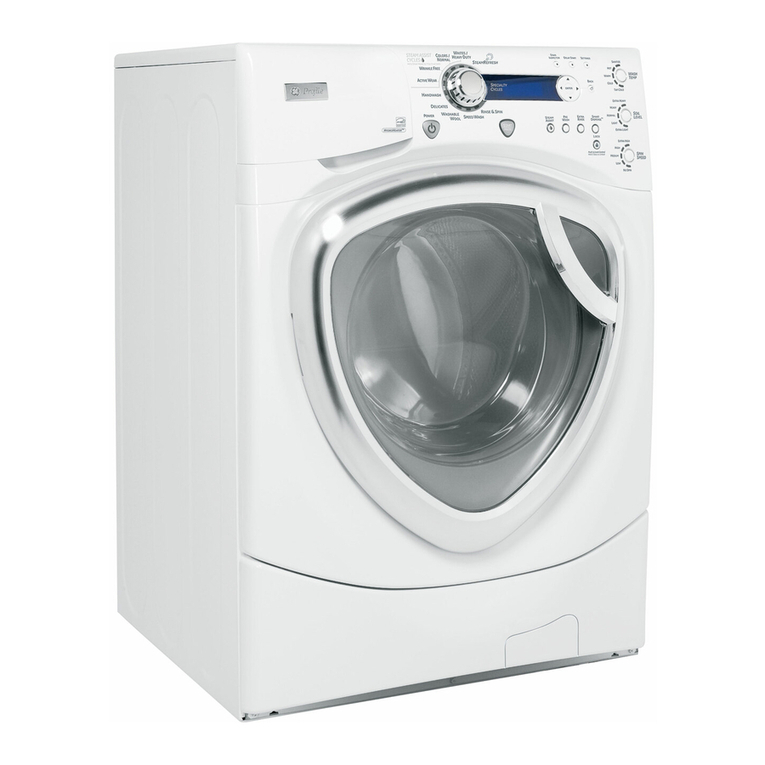
GE Profile WPGT9350 How to use

MODEL SERIES:
WPGT9350
TECHNICAL SERVICE GUIDE
GE Consumer Products
Profile Washer
B
A
C
K
H
E
L
P
H
O
M
E
S
T
O
P
S
T
A
R
T
M
Y
C
Y
C
L
E
S
P
O
W
E
R
PUB # 31-9103 07/03

– 2 –
IMPORTANT SAFETY NOTICE
The information in this service guide is intended for use by
individuals possessing adequate backgrounds of electrical,
electronic, and mechanical experience. Any attempt to repair a
major appliance may result in personal injury and property
damage. The manufacturer or seller cannot be responsible for the
interpretation of this information, nor can it assume any liability in
connection with its use.
WARNING
To avoid personal injury, disconnect power before servicing
this product. If electrical power is required for diagnosis or test
purposes, disconnect the power immediately after performing the
necessary checks.
RECONNECT ALL GROUNDING DEVICES
If grounding wires, screws, straps, clips, nuts, or washers used
to complete a path to ground are removed for service, they must
be returned to their original position and properly fastened.
GE Consumer Products
Technical Service Guide
Copyright © 2003
All rights reserved. This service guide may not be reproduced in whole or in part
in any form without written permission from the General Electric Company.

– 3 –
Backsplash ......................................................................................................................23
Basic Wash Cycle ............................................................................................................17
Bearing Housing Assembly ..............................................................................................37
Brake Resistor .................................................................................................................25
Clutch Shifter Assembly ...................................................................................................35
Component Locator Views ........................................................................................20
Consumer Help Screens ..................................................................................................15
Control Features ................................................................................................................7
Control Quick Reference Chart ........................................................................................42
Drain Pump ......................................................................................................................30
Factory Test Mode ...........................................................................................................40
Field Service Mode ..........................................................................................................38
Hall Sensor ......................................................................................................................34
Inverter .............................................................................................................................24
Inverter and Main Board Pin Connectors ........................................................................22
Main Control Board and Touch Screen LCD ....................................................................23
Membrane Keypanel ........................................................................................................24
Model Number ...................................................................................................................4
Motor Assembly ..............................................................................................................33
My Cycles ........................................................................................................................14
Nomenclature ...................................................................................................................4
Overview ............................................................................................................................6
Operation Overview .........................................................................................................17
Outer Tub and Suspension Assembly .............................................................................32
Parts 49
Protective Cover ..............................................................................................................25
Pressure Sensor (Water Level Switch) ............................................................................26
Quick Start .........................................................................................................................8
Sales Demo Mode ...........................................................................................................16
Schematic ...................................................................................................................48
Serial Number ....................................................................................................................4
Stain Inspector .................................................................................................................10
Switching the Washer and Dryer Backsplashes ..............................................................54
Summary Screen .............................................................................................................12
Temperature Conversion Table ........................................................................................58
Thermistor/ATC Control (Auto Temp) ..............................................................................32
Top Cover ........................................................................................................................28
Troubleshooting ...............................................................................................................43
Warranty ............................................................................................................................5
Water Valve Assembly .....................................................................................................27
Wash Basket ....................................................................................................................29
Washer Components .......................................................................................................23
Wash Cycle Chart Example .............................................................................................19
Wash Cycles ......................................................................................................................9
Water Valve Assembly .....................................................................................................27
Table of Contents
– 4 –
Capacity/Configuration
L = Large S = Super Capacity Plus
X = Extra-Large K = Compact
G = Giant
Back Splash
Color
The first two characters of the serial number
identify the month and year of manufacture.
Example: RF123456S = August, 2003
A - JAN 2005 - H
D - FEB 2004 - G
F - MAR 2003 - F
G - APR 2002 - D
H - MAY 2001 - A
L - JUN 2000 - Z
M - JUL 1999 - V
R - AUG 1998 - T
S - SEP 1997 - S
T - OCT 1996 - R
V - NOV 1995 - M
Z - DEC 1994 - L
The letter designat-
ing the year repeats
every 12 years.
Example:
T - 1974
T - 1986
T - 1998
Note: Model number and serial number
are located on rear of backsplash.
• The technical sheet is located inside
the control panel.
Serial Number
W P G T 9 3 5 0 B 0 W W
Model Number
GE Washer
Feature Pack
Common Brand Features
Exceptions:
H = Energy Star
P = Profile™
N = Special
Control Platform
B = Buttons (Touch Pad)
T = Touch Screen
Number of Speed
Combinations
Body Color
Engr. Revision
Model Year
Designator
Voltage
0 = US Voltage
Number of Cycles
00 = Infinite Electronic
Nomenclature
Nomenclature

– 5 –
Warranty
For The Period Of: We Will Replace:
One Year Any part of the washer which fails due to a defect in materials or workmanship. During this
From the date of the full one-year warranty,GE will also provide, free of charge, all labor and related service costs to
original purchase replace the defective part.
Second Year Any part of the washer which fails due to a defect in materials or workmanship. During this
From the date of the additional one-year limited warranty,you will be responsible for any labor or related service costs.
original purchase
Third through Fifth Year The suspension rod and spring assembly, and main electronic control board if any of these parts should
From the date of the fail due to a defect in materials or workmanship. GE will also replace the washer lid or cover if they
original purchase should rust under operating conditions. During this additional three-year limited warranty, you will be
responsible for any labor or related service costs.
Third through Tenth The direct drive motor and outer washer tub if any of these parts should fail due to a defect in materials
Year From the date of the or workmanship. During this additional eight-year limited warranty, you will be responsible for any
original purchase labor or related service costs.
Lifetime of Product The washer basket if it should fail due to a defect in materials or workmanship. During this product
From the date of the lifetime limited warranty, you will be responsible for any labor or related service costs.
original purchase
All warranty service provided by our Factory Service Centers or
an authorized Customer Care®technician. To schedule service,
on-line, 24 hours a day, visit us at www.GEAppliances.com or
call 800.GE.CARES (800.432.2737).
� Service trips to your home to teach you how to use the
product.
�Improper installation, delivery or maintenance.
�Failure of the product if it is abused, misused, or
used for other than the intended purpose or used
commercially.
� Replacement of house fuses or resetting of circuit
breakers.
� Damage to the product caused by accident, fire, floods
or acts of God.
� Incidental or consequential damage caused by possible
defects with this appliance.
� Damage caused after delivery.
What Is Not Covered:
This warranty is extended to the original purchaser and any succeeding owner for products purchased for home use within the
USA. In Alaska, the warranty excludes the cost of shipping or service calls to your home. Proof of the original purchase date is
needed to obtain service under the warranty.
Some states do not allow the exclusion or limitation of incidental or consequential damages. This warranty gives you specific
legal rights, and you may also have other rights which vary from state to state. To know what your legal rights are, consult
your local or state consumer affairs office or your state’s Attorney General.
Warrantor: General Electric Company. Louisville, KY 40225
Note: The LCD screen is part of the main electronic board and under the 5 year part warranty. The
inverter board is covered by a 2 year part warranty.

– 6 –
General
The GE Profile Harmony Washer is part of the GE
Profile Harmony Clothes Care system utilizing the
latest developments in washing technology.
The Harmony Washer does not use the typical agitator
found on conventional washers. Instead, the direct
drive motor, capable of spinning at 1010 rpm, and the
304 stainless steel wash basket create a centrifugal
force that pulls wash water through fabrics for a
thorough cleaning action. (See Operation Overview.)
Harmony Washers also utilize an automatic load
sensing system to determine load size and water
levels. The washer automatically fills the wash basket
with the appropriate amount of water needed for
optimal wash performance.
Other features include:
Communication Link to the Dryer - The washer uses
a serial cable to automatically inform the dryer about
the nature of the wash load, essentially presetting the
dryer controls so the user doesn’t have to.
Auto-Balance Suspension - The washer is
programmed to correct out of balance situations. (See
Operation Overview.)
Flow-ThruTM Dispensers - Each of the four dispensers is timed to release at the right time during the
wash cycle. Each reservoir is flushed with water to pre-dilute the product before adding it to the washer.
This flushing action removes all product to help keep the compartment clean and free flowing.
Note: The bleach dispenser fills during the main wash to dispense the bleach and refills during the
rinse cycle to flush any reaming bleach from the reservoir.
Direct Drive Motor - The washer does not use a transmission or mechanical brake. Direct drive
technology results in fewer moving parts for smooth, quiet operation. (See Motor Assembly.)
InfusorTM Wash - The washer has specific cycles that aids in mixing the detergent/water solution, and
dispersing the load evenly in the wash water. (See Operation Overview).
LCD Touch screen Display - All washer control functions, cycles, troubleshooting, and field service
diagnostics are accessed through a touch screen display. The washer can also be powered up by
touching anywhere on the touch screen or any key on the keypanel.
Centrifugal Wash - The washer uses a centrifugal washing action to clean clothes instead of an agitator.
The basket spins creating a strong flow of water under the centrifugal force. As water passes through
the fabric, its natural cleansing action washes away dirt without damaging or tangling the fabric.
Plastic Top & Backsplash - The washer top and backsplash have UV stabilizers to prevent yellowing
when exposed to sunlight.
Overview
B
A
C
K
H
E
L
P
H
O
M
E
S
T
O
P
S
T
A
R
T
M
Y
C
Y
C
L
E
S
P
O
W
E
R

– 7 –
Throughout this manual, features and appearances may vary from your model.
Control Features
P
O
W
E
R
M
Y
C
Y
C
L
E
S
B
A
C
K
H
E
L
P
S
TART
S
TOP
H
O
M
E
Features of
the washer
control
panel
1 POWER. Press to “wake up” the display. If
the display is active, press to put the washer
into standby mode. You may also press the
Touch Screen or any button to “wake up”
the display.
NOTE: Pressing POWER does not
disconnect the appliance from the power
supply.
2 MY CYCLES. Press to use, create, rename,
modify or delete custom wash cycles.
3 BACK. Press to return to the previous
screen.
4 TOUCH SCREEN. Press the graphics on
the interactive display to use the washer
features.
Do not use sharp objects to press the Touch
Screen.
NOTE: If the washer is inactive for 5
minutes, the Touch Screen will go into
standby mode, and the display will be dark.
Press the Touch Screen or any button to
“wake up” the display.
5 HOME. Press to return to the “TOUCH TO
SELECT WASH CYCLE” screen (Home
Screen).
6 START/STOP. Press to start a wash cycle.
If the washer is running, pressing once will
pause the washer. Press again to restart the
wash cycle.
NOTE: If the washer is paused and the
cycle is not restarted within five minutes,
the washer will enter standby mode and the
current wash cycle will be canceled.
7 HELP.Press to set machine preferences, to
find help using the Touch Screen or to find
troubleshooting tips for common washer
problems.

– 8 –
Getting
Started
If the Touch
Screen is
dark, press
POWER or
the Touch
Screen to
access the
wash cycles
menu.
Loosely load clothes no higher than the top
row of holes in the washer tub. Overloading
may reduce washer efficiency and possibly
increase wrinkling.
Add a low-sudsing, high-efficiency detergent.
Add diluted fabric softener, bleach or wash
boost additives as desired.
Select one of the five wash methods from the
Home Screen:
• Press BY COLOR to wash according to fabric
color.
• Press BY GARMENT to wash according to
clothing type.
• Press BY FABRIC to wash according to fabric
type.
• Press SPECIAL CYCLES to wash non-garment
items, or to select a rinse and spin or spin-
only cycle.
• Press STAIN INSPECTOR to wash items with
specific types of stains.
After selecting a wash method, use the Touch
Screen to select a specific wash cycle to match
your load.
Change any of the automatic settings, if
desired, by pressing the Touch Screen
and following the on-screen instructions.
By changing the settings you can:
• Remove heavier soil.
• Change the water temperature.
• Change the wash action to Vigorous, Normal,
Delicate or Hand Wash.
• Set a Delay Start, Extended Spin, Presoak or
Extra Rinse, or change the End-of-Cycle
Signal volume.
• Adjust time settings.
Close the lid and press START.
The washer will not fill unless the lid is closed.
After you press START, a Cycle Status screen
will appear to indicate what stage of the cycle
the washer is in and the time remaining in
the cycle.
BY COLOR
BY GARMENT
TOUCH TO SELECT WASH CYCLE
BY
FABRIC
SPECIAL
CYCLES STAIN
INSPECTOR
SUMMARY SCREEN
0:54
TIME
TEMP
OPTIONS
SOIL
NORMAL
WASH ACTION
CYCLE
COTTONS
START
STOP
Home Screen
Quick Start

– 9 –
Wash Cycles
Washing by
Color
If the Touch Screen is dark, press POWER or the Touch Screen to access the wash cycles menu.
The default cycle settings are based on standard load types. Always follow the fabric manufacturer’s
care label when laundering.
• Bright/Dark
Colors
• Light Colors
• Mixed Colors
• New Colors
• Whites
BY COLOR
Washing by
Garment
Type
• Athletic Wear
• Blouses
• Delicates
• Dress Shirts
• Easy Care
• Everyday
Wear/Casual
• Jackets/Coats
• Jeans
• Khakis
• Knits
• Lingerie
• Mixed Garments
• Play Clothes
• Sweaters
• Swimwear
• Underwear
• Silks (Washable)
BY GARMENT
Select By Color to wash loads sorted by color.
COLOR CYCLES include:
Select By Garment to wash loads sorted by garment type.
GARMENT CYCLES include:
Washing by
Fabric Type
• Blends
• Cottons
• Delicates
• Knits
• Polyester
• Silks (Washable)
BY
FABRIC
Select By Fabric to wash loads sorted by fabric type.
FABRIC CYCLES include:
Washing
Using the
Special
Cycles
• Blankets (Cotton)
• Blankets (Other)
• Comforter
• Super Clean
• Pet Bedding
(Washable)
• Handwash
Woolite®HE
• Rinse and Spin
• Sheets
• Sneakers
• Spin Only
• Throw Rugs
(Washable)
• Towels
• Quick Wash
SPECIAL
CYCLES
Select SPECIAL CYCLES to wash loads of nongarment items or to
select a rinse and spin or spin-only cycle.
SPECIAL CYCLES include:

– 10 –
Stain Inspector
Washing
Using the
Stain Inspector
The Stain Inspector provides pretreatment
tips and optimum washing for specific types
of stains.
You select the specific stain, fabric type and
color, and the washer creates the wash cycle
for treating the stain.
1Press STAIN INSPECTOR.
2Read and follow the instructions on the
Touch Screen before treating the fabric.
3Select FOOD/DAIRY/COOKING from
the list of stain categories and select
CHOCOLATE from the list of stains.
You can find additional stain categories and
stains by pressing MORE in the lower right
corner of the Touch Screen.
4Press the HELP button to find pretreatment
information for the specific type of stain.
5Select COTTONS from the list of fabric
types, and select WHITES from the list
of colors.
6Fill the detergent tray with a low-sudsing,
high-efficiency liquid detergent such as
Tide®HE. Fill the Wash Boost tray with
the proper pre-treatment additive.
7Place the stained garment(s) in the washer
first; then add the rest of the load. For best
stain removal, only wash items with stains
matching your selection.
8Press START.
The washer will run a Wash Boost presoak cycle
prior to the main wash cycle.
NOTE: For some stain cycles, the water
temperature for the presoak cycle may not be
the same as the water temperature for the main
wash cycle.
IMPORTANT: Check to make sure the stain
is completely removed before placing the
garment in the dryer.
STAIN
INSPECTOR
Example: Washing a chocolate-stained, white cotton shirt
OK
1) REFER TO FABRIC CARE LABEL FOR
INSTRUCTIONS. USE HELP FUNCTION
FOR ADDITIONAL STAIN TIPS
2) TEST STAIN REMOVAL TIPS ON HIDDEN
AREA OF FABRIC
3) DO NOT PUT STAINED ITEM INTO DRYER
(STAIN MAY BE SET INTO FABRIC)
BEFORE
TREATING
FABRIC
CHOCOLATE
- ADD AN ENZYME CONTAINING
DETERGENT, LIKE LIQUID TIDE(R) TO THE
'WASH BOOST' DISPENSER AND USE A
HIGH EFFICIENCY DETERGENT IN THE
DETERGENT DISPENSER.
MORE
CHOCOLATE
BUTTER
MARGARINE
MAYONNAISE
SALAD
DRESSING
TOMATO-BASED
FOOD/DAIRY/COOKING
Detergent Tray
Wash
Boost Tray

– 11 –
Stain Selections
Below is a listing of the stain selections
available on the washer Touch Screen. For
additional information on handling these types
of stains, visit the Tide®Stain Detective at
www.tide.com/staindetective.
Beverages
• Alcoholic beverages
• Coffee
• Fruit juice
• Kool-Aid®
• Milk
• Soda
• Tea
• Water
• Wine
School/Office/Home
• Adhesive tape
• Crayon
• Glue (synthetic)
• Glue
(white/common)
• Ink
• Mildew
• Paint (water-based)
• Paint (oil-based)
• Pencil mark
• Rubber cement
• Wite-out®
Food/Dairy/Cooking
• Animal fat
• Baby formula
• Butter/margarine
• Chocolate
• Cooking oil
• Cream/cheese sauce
• Egg
• Gravy
• Grease
• Mayonnaise
• Milk
• Mustard
• Pudding
• Salad dressing
• Tomato-based
• Vegetable oil
Heavy Oils
• Motor oil
• Ointment/salve
Outdoor
• Dingy white socks
• Grass
• Mud/dirt
• Clay
• Rust/iron
Personal
• Baby stains
• Blood
• Feces
• Perspiration
• Urine
• Vomit
Cosmetics
• Chap Stick®
• Deodorant/
antiperspirant
• Lipstick
• Lotions
• Makeup (oil-based)
• Makeup (water-
based)
Specialty Stains
• Adhesive tape
• Asphalt/tar
• Glue (synthetic)
• Ink
• Pine sap
• Rubber cement
• Silly Putty®
Waxes
• Candle wax
• Chap Stick®
• Crayon
Stain Selections
Stain Inspector

– 12 –
Summary Screen
SUMMARY SCREEN
0:54
TIME
TEMP
OPTIONS
SOIL
NORMAL
WASH ACTION
CYCLE
COTTONS
About the
Summary
Screen
After selecting a wash cycle, the Summary Screen
displays the automatic settings for the cycle you
have chosen. You can adjust these by touching the
screen location for any of the settings shown.
If you change any of the automatic settings, you
can save the new settings as a custom
“
My Cycle”
by pressing the MY CYCLES button and choosing
SAVE CURRENT SETTINGS.
SOIL LEVEL
MORE SOIL
LESS SOIL
HEAVY
LIGHT
OK
Changing the
Soil Level
Changing the soil level increases or decreases the
wash time to remove different amounts of soil.
To change the soil level, touch SOIL on the Touch
Screen; then use the arrows to select more or less
soil. Press OK when you have reached the desired
setting.
TEMPERATURE
HIGHER
LOWER
COLD
OK
Changing
the Wash
Temperature
Changing the temperature changes the wash and
presoak temperatures only. The final rinse will
always be a cold rinse.
Follow the fabric manufacturer’s care label when
selecting the wash temperature.
To change the wash temperature, touch the TEMP
pad on the Touch Screen; then use the arrows to
select a higher or lower temperature. Press OK
when you have reached the desired setting.
WASH ACTION
NORMAL
VIGOROUS
DELICATE
HAND
WASH
Changing the
Wash Action
Changing the wash action changes the wash and spin
speeds of the cycle.
Always follow the fabric manufacturer’s care label
when changing the wash action.
To change the wash action, touch WASH ACTION
on the Touch Screen; then select the desired setting.
Typically, slower spin speeds result in less water
removed from clothes.
Wash Action Wash Speed Spin Speed
Normal Medium Fast
Vigorous Fast Fast
Delicate Slow Slow
Hand Wash* Extra Slow Extra Slow
*Use a low-sudsing, high-efficiency, gentle liquid
detergent such as Woolite®HE.

– 13 –
Summary Screen
OPTIONS
ADDITIVES
MIN
15
PRE
SOAK
DELAY
START HR
1
EXTENDED
SPIN
SIGNAL
EXTRA
RINSE
OK
About
the Wash
Options
The Wash Options allow you to set options
for the current wash cycle only. After you have
made all desired changes, press OK.
Delay Start – Use to delay the start of your
washer. Press DELAY START to change the
delay time.
Presoak – Soaks the clothes before beginning
the wash cycle. Press PRESOAK to change the
soaking time.
Additives – Appears ONLY AFTER a presoak
has been selected. Uses the contents of the
Wash Boost dispenser tray for a presoak.
When selected, the washer will drain after the
presoak and fill again for the wash cycle. Press
ADDITIVES to specify if you will NOT be using
a Wash Boost additive or if you do not want the
washer to drain after presoak.
Extra Rinse – Adds an additional cold rinse to
the end of the wash cycle.
Signal – Alerts you that the cycle is complete.
The clothes should be removed when the
beeper goes off so wrinkles won’t set in. Touch
SIGNAL to select the volume or to turn the
beeper off. The new volume will be saved as
the default setting.
Extended Spin – Increases the length of the
spin time to extract more water from your
clothes.
NOTE: The water level will vary depending
on the load size and type. The washer uses
adaptive filling and load sensing to provide
the appropriate water level for effective and
efficient wash performance and energy usage.
ADJUST TIME SETTINGS
EXTENDED SPIN
CYCLE TIME DELAY TIME
Adjusting
the Time
Settings
You can adjust the length of the wash cycle by
changing the cycle time, adding a Delay Start
or adding an Extending Spin.
Cycle Time – Press CYCLE TIME; then use the
arrows to select more or less time.
Delay Time – Use to add a Delay Start to the
beginning of the wash cycle. Press DELAY
START; then set the DELAY START time in
the OPTIONS menu.
Extended Spin – Increases the length of the
spin time to extract more water from your
clothes. Press EXTENDED SPIN; then select
EXTENDED SPIN from the OPTIONS menu.
NOTE: After the wash cycle begins, you will
not be able to change the Cycle Time or Delay
Time. The washer will beep twice if you try to
change the times after the cycle begins.
YES NO
ARE YOU USING
PRESOAK ADDITIVES ?

– 14 –
My Cycles
About the
“My Cycles”
Feature
The “My Cycles” feature allows you to create,
store and reuse up to 6 custom cycles. Create
your own cycles from scratch, or adjust the
settings of a predefined wash cycle, then save
for one-touch recall.
Creating
and Using a
“My Cycle”
You can create “My Cycles” two ways, by either
modifying a predefined wash cycle or creating a
cycle from your own combination of settings
and options.
To build your own “My Cycle” from the
Home Screen:
1Press the MY CYCLES button.
2Select CREATE from the Touch Screen
menu.
3Choose whether you want to modify a
predefined cycle or create a new cycle.
4If you are modifying a predefined cycle,
select the wash cycle you wish to modify.
5Change any of the automatic settings and
select any options.
6Press SAVE on the Touch Screen.
7Using the keypad on the Touch Screen, type
the name of your “My Cycle” and press OK.
To begin using your new “My Cycle” right away,
select it from the Touch Screen menu and press
START.
To save a current cycle as a “My Cycle” from the
Summary Screen:
1After setting a wash cycle, or after a wash
cycle has just completed, press the MY
CYCLES button.
2Select SAVE CURRENT SETTINGS from the
Touch Screen menu.
3Using the keypad on the Touch Screen, type
the name of your “My Cycle” and press OK.
To begin using your new “My Cycle” right away,
select it from the Touch Screen menu and press
START.
To use a “My Cycle” from the Home Screen:
1Press the MY CYCLES button.
2Select USE from the Touch Screen menu.
3Select the cycle name from the Touch Screen
menu.
4Change any of the automatic settings and
select any options.
5Press START.
MY CYCLES
CREATE
RENAME
USE
MODIFY
DELETE
SAVE CURRENT
SETTINGS
M
Y
C
Y
C
L
E
S
Modifying,
Renaming
or Deleting
a “My
Cycle”
To modify the settings of a “My Cycle” from the
Home Screen:
1Press the MY CYCLES button.
2Select MODIFY from the Touch Screen
menu.
3Select the cycle name from the Touch Screen
menu.
4Change any of the automatic settings and
select any options.
5Press SAVE on the Touch Screen.
To rename a “My Cycle” from the Home Screen:
1Press the MY CYCLES button.
2Select RENAME from the Touch Screen
menu.
3Select the cycle name from the Touch Screen
menu.
4Using the keypad on the Touch Screen, type
the name of your “My Cycle” and press OK.
To delete a “My Cycle” from the Home Screen:
1Press the MY CYCLES button.
2Select DELETE from the Touch Screen
menu.
3Select the cycle name from the Touch Screen
menu.
4Choose YES to delete the cycle or CANCEL
to return to the list of “My Cycles.”

– 15 –
My Cycles
Consumer Help Screens
Modifying,
Renaming
or Deleting
a “My
Cycle”
To modify the settings of a “My Cycle” from the
Home Screen:
1Press the MY CYCLES button.
2Select MODIFY from the Touch Screen
menu.
3Select the cycle name from the Touch Screen
menu.
4Change any of the automatic settings and
select any options.
5Press SAVE on the Touch Screen.
To rename a “My Cycle” from the Home Screen:
1Press the MY CYCLES button.
2Select RENAME from the Touch Screen
menu.
3Select the cycle name from the Touch Screen
menu.
4Using the keypad on the Touch Screen, type
the name of your “My Cycle” and press OK.
To delete a “My Cycle” from the Home Screen:
1Press the MY CYCLES button.
2Select DELETE from the Touch Screen
menu.
3Select the cycle name from the Touch Screen
menu.
4Choose YES to delete the cycle or CANCEL
to return to the list of “My Cycles.”
TROUBLE SHOOTER
MACHINE
PREFERENCES
HOME SCREEN
HELP
About
the Help
Feature
Pressing the HELP button from the Home
Screen allows you to locate troubleshooting tips
for common washer problems, to find help with
using the Home Screen or to set machine
preferences.
Pressing the HELP button while on any other
screen allows you to find additional information
on features found on that screen. Press HELP;
then touch any pad on the Touch Screen for an
explanation of that feature. To exit the feature,
press HELP once to return to the previous
screen or twice to exit Help.
TROUBLE SHOOTER
PRESS DESCRIPTION FOR POSSIBLE CAUSES
NO INFUSOR OR BASKET MOTION
MACHINE MOVES BEFORE WATER FILL
FILLING AND DRAINING AT THE SAME
TIME
SPORADIC FILL
NO FILL OR SLOW FILL
Using the
Troubleshooter
To locate Troubleshooting Tips for common
washer problems:
1Press the HELP button.
2On the Touch Screen, select TROUBLE
SHOOTER.
3On the Touch Screen, select the problem
description from the list. You can use the
arrows at the right of the screen to scroll
up and down through the list of additional
problems.
4On the Touch Screen, select a possible cause
for the problem and follow the on-screen
instructions to find a solution.
Finding Help
Using the
Home Screen
Pressing the HELP button, then selecting
HOME SCREEN HELP allows you to find
additional information on features found on
the Home Screen. Touch any pad on the Touch
Screen for an explanation of that feature. To
exit the feature, press the BACK button.

– 16 –
The machine settings on the Help feature
allow you to control the volume of the button
beep and end-of-cycle signal, and turn the
washer/dryer communication feature on or off.
Button Beep
The button beep controls the volume of the
beep that is made when you press any of the
buttons or the Touch Screen.
To change the volume of the button beep:
1From the Home Screen, press the HELP
button.
2Select MACHINE PREFERENCES from the
Touch Screen.
3Select BUTTON BEEP from the Touch
Screen.
4Use the arrows to make the volume louder
or softer, or to turn the beep off.
5Select OK from the Touch Screen.
The new volume is now saved as the default
setting.
Washer/Dryer Communication
Washer/Dryer communication allows your
washer to send cycle information to your dryer
to create a dry cycle that matches your wash
load.
After the wash cycle is complete,
communication begins once either the washer
or dryer Touch Screen is activated.
Once the information is sent, your dryer will
create the optimal dry cycle for your load.
To turn the Washer/Dryer Communication
feature on or off:
1From the Home Screen, press the HELP
button.
2Select MACHINE PREFERENCES from the
Touch Screen.
3Select WASHER/DRYER
COMMUNICATION from the Touch
Screen.
4Touch the pad at the bottom of the Touch
Screen to select ON or OFF.
5Select OK from the Touch Screen.
End-of-Cycle Signal
The End-of-Cycle signal alerts you when the
cycle is complete.
To change the volume of the end-of-cycle
signal:
1From the Home Screen, press the HELP
button.
2Select MACHINE PREFERENCES from the
Touch Screen.
3Select END OF CYCLE SIGNAL from the
Touch Screen.
4Use the arrows to make the volume louder
or softer, or to turn the signal off.
5Select OK from the Touch Screen.
The new volume is now saved as the default
setting.
MACHINE PREFERENCES
END OF CYCLE
SIGNAL
BUTTON BEEP
WASHER/DRYER
COMMUNICATION
Setting the
Machine
Preferences
Consumer Help Screens
Pressing HOME and MY CYCLES simultaneously
for three seconds will enter into the sales
demonstration mode. This mode allows the user
to view a wash cycle. To exit the Demo Mode
press HOME and MY CYCLES simultaneously
for three seconds or disconnect the power to the
machine.
Sales Demo Mode
Harmony Clothes
Care System
START
DEMO
LEARN
MORE
TRY THE
CONTROLS
The Washer Talks, The Dryer Listens
The Result is Better Clothes Care

– 17 –
Operation Overview
Basic Wash Cycle
Note: See Component Locator Views for
identification and location of washer components.
After a load is placed in the basket, the user
selects the appropriate wash cycle on the LCD
touch screen and presses start.
Cycle time and wash patterns will vary depending
on user time adjustments, soil level adjustments,
fabric type, and wash-load weight.
Dry Load Sensing
Before an initial fill, the infusor rotates the dry
clothes load. This rotation is controlled by the
inverter which measures the amount of time it
takes for the motor to coast to a stop. The larger
the clothes load, the less momentum the motor
is capable of generating, so the faster it will stop.
The infusor will rotate back and forth up to four
times. This information is used to determine the
initial water fill level.
Water Fill
The washer automatically fills to the proper
level based on the load sensing measurements.
Depending on the cycle chosen and the quantity
of clothes, there are 27 possible water levels.
This information is stored in memory for the final
rinse at the end of the wash cycle. Water levels
are matched to load size using approximately
one-third less water than typical top load
washers.
Note: The washer can use as little as 17.5
gallons of water for small loads and has an
average water use of 27 gallons per load.
Wet Load Sensing
After the first fill, the infusor and basket lock
together and rotate to measure the clothes
load. During this time, the motor momentum
is measured again. The washer compares this
information to the previous dry load sensing
measurements and determines if additional water
is required.
Note: Dry load and wet load sensing are used on
all cycles except the following:
SNEAKERS
COMFORTERS
BLANKETS (OTHERS)
BLANKETS (COTTONS)
THROW RUGS (WASHABLE)
The SNEAKERS cycle defaults to the minimum
water level. BLANKETS, THROW RUGS and
COMFORTERS cycle default to the maximum
water level.
Wash Water Temperature
During the fill, the washer monitors and regulates
wash water temperatures within 5°F (-15°C) of
the target temperature. This accuracy is achieved
using a thermistor, located in the outer tub, which
monitors the tub water temperature during the fill
cycle.
Based on information received from the
thermistor, the inverter controls the hot and
cold inlet valves to achieve the desired wash
temperature. (See Thermistor/ATC Control Auto
Temp.)
Target Water Temperatures:
Hot - 120°F (49°C)
Warm - 105°F (41°C)
Cold - 80°F (27°C)
Very Cold - 60°F (16°C)
During the fill, the basket slowly rotates in
a clockwise direction. This action mixes the
detergent and water to assure proper distribution
and assure the thermistor is reading an accurate
basket water temperature.
Basket Wash
The infusor and wash basket lock together and
rotate clockwise and then counterclockwise.
This action mixes the detergent and water while
distributing the clothes evenly in the wash water.
The basket wash speed is based on fabric type
and load size. Delicate fabrics are gently rotated
while heavier fabrics are rotated more vigorously.

– 18 –
As water passes through the fabric, its natural
cleansing action washes away dirt without
damaging or tangling the fabric.
Water
Current
Fabric Soil
Infusor Wash
Following the centrifusion wash cycle, the basket
and infusor unlock. The infusor rotates to evenly
distribute the wash load while continuing to clean.
The redistribution of fabrics helps ensure that the
lint and dirt do not become trapped.
Spin
The infusor and wash basket lock together. The
basket spins very slowly at first. This allows dirty
wash water and lint to drain through the holes
in the bottom of the basket before a higher spin
begins. When the washer senses that the excess
water has drained, the wash basket accelerates
to a higher speed.
Spin speeds are adaptive to fabric type that is
selected by the user on the LCD touch screen.
They can be as slow as 350 rpm for hand-wash
items and up to 1010 rpm for heavier items. The
spin is designed to extract as much water and
detergent as possible without harming fabrics.
Note: During the spin cycle, excessive suds
can cause excessive torque on the motor. If the
washer detects this condition, it will run through
the rinse, drain, and spin cycle (up to three times)
in an attempt to eliminate the suds
Note: The washer is programmed to correct
out of balance situations during spins. If the
washer senses an out of balance load, the spin
is stopped. The washer then refills to allow the
infusor wash cycle to redistribute the load before
starting the spin again. The washer attempts to
rebalance the load three times before optimizing
the spin to a lower speed where balance is
sustainable.
Spray Rinse
The infusor and wash basket turn at a slow speed
while fresh, clean water is added to the wash
load. The spin cycle then drains this rinse water
and prepares the wash load for a final rinse.
Final Rinse
The washer retrieves the information it gathered
for adaptive fill cycle and uses that information
to refill the washer for the final rinse. Cold water
enters the basket through the fabric softener
dispenser to dilute the softener into the basket
and rinse the dispenser clean. The wash basket
fills to the optimal level and goes into a basket
wash cycle where the clothes and fabric softener
are mixed thoroughly. A final spin finishes the
cycle.
Note: All rinse cycles use cold water and the
(ATC) automatic temperature control is not used.
The cold rinse is the same temperature as the
incoming cold water supply.
After several seconds of clockwise spinning, the
basket slows down and stops. The wash water
pools back into the wash basket. The wash
basket starts spinning in the counterclockwise
direction creating the same cleaning action. The
washer will change direction (up to four times)
before going to the next cycle.
Centrifusion Wash
The locked infusor and wash basket begin a
clockwise spin (figure 1). The speed of the spin
is customized to the load type and fabric type. As
the basket spins faster, it creates a strong flow of
water under the centrifugal force (figure 2).

– 19 –
Wash Cycle Chart Example
User Selection of Cycle
Dry Load Sensing
Water Fill
Wet Load Sensing
Wash Process
Spin and Drain*
Spray Rinse
Final Rinse
Centrifusion Wash
Infusor Wash
Spin and Drain
Spin and Drain
Basket Wash
Adjust Water Fill (only if needed)
Adjust Water Temp
*Spin Information
Maximum spin speeds will vary depending on the cycle:
Hand-wash 350 rpm
Delicate 500 rpm
Normal 1010 rpm
Vigorous 1010 rpm
• The Delicate cycle ramps up to maximum speed by
first spinning to 400 rpm then pausing, then to 500
rpm.
• Normal and Vigorous cycles ramp up to maximum
speed by first spinning to 400 rpm and pausing, then
to 750 rpm and pausing, then to 1010 rpm.
Fill Cycle
Wash Cycle
Spin Cycle

– 20 –
Component Locator Views
Tub Cover
Balance Ring
304 Stainless Wash Basket
Infusor
Suspension Rod
Motor
Pressure Sensor Hose
Wiring Harness Drain Pump
Other manuals for Profile WPGT9350
5
Table of contents
Other GE Washer manuals

GE
GE Profile Prodigy WBSE2090 User manual

GE
GE GTW480 Original instructions

GE
GE GBSR1070 User manual

GE
GE 113D5497P183 User manual

GE
GE G011 User manual

GE
GE WSLP1100 Original instructions

GE
GE G035 Original instructions

GE
GE Profile How to use

GE
GE GTWN4950F0WW User manual

GE
GE GFWS1705 Original instructions

GE
GE WWA8300G Installation instructions

GE
GE GTW460ASJWW User manual

GE
GE Profile Harmony WPGT9360 Operating instructions

GE
GE WKSR2100T User manual

GE
GE WWA8344B Installation instructions

GE
GE WWA8850S User manual

GE
GE WWA7079V User manual

GE
GE GTW495DMNWS Original instructions

GE
GE Appliances Profile WNSE4200 User manual

GE
GE PTW605 Original instructions