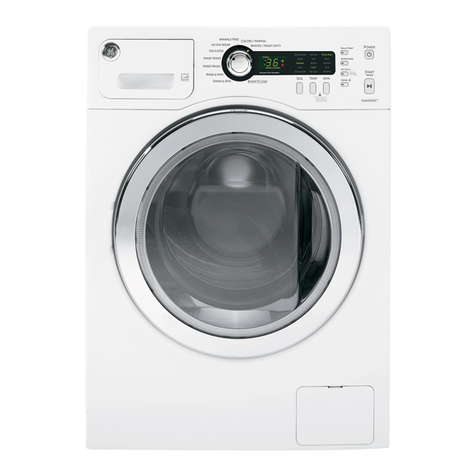
GE GUD27ESSMWW How to use

31-9292
GUD27ESSMWW
GUD27GSSMWW
GUV27ESSMWW
GUD24ESSMWW
GUD24GSSMWW
XUD27ESSMWW
XUD27GSSMWW
Technical Service Guide
24 and 27 in. Unitized Laundry
Centers
EASY CARE
COTTONS
COTTONS
DELICATES
PERMANENT PRESSS
DELICATES
S
WASHER | DRYER TIMED DRY
DRYER
TEMPERATURES LOAD SIZE
WASHER
TART
August 2018

– 2 –
Safety Information
IMPORTANT SAFETY NOTICE
The information in this service guide is intended for use by
individuals possessing adequate backgrounds of electrical,
electronic, and mechanical experience. Any attempt to repair a
major appliance may result in personal injury and property
damage. The manufacturer or seller cannot be responsible for the
interpretation of this information, nor can it assume any liability in
connection with its use.
WARNING
To avoid personal injury, disconnect power before servicing
this product. If electrical power is required for diagnosis or test
purposes, disconnect the power immediately after performing the
necessary checks.
RECONNECT ALL GROUNDING DEVICES
If grounding wires, screws, straps, clips, nuts, or washers used to
complete a path to ground are removed for service, they must be
returned to their original position and properly fastened.
GE Appliances, a Haier Company
Copyright © 2018
All rights reserved. This service guide may not be
reproduced in whole or in part in any form without written
permission from GE Appliances, a Haier Company.
For Warranty Information:
1. Go to http://products.geappliances.com
2. Search the model number.
3. Click on the Literature tab.
4. Click on Use and Care Manual.
5. Locate the Warranty page.
Warranty

– 3 –
Table of Contents
(Continued next page)
Safety Information ........................................................................................................................2
Warranty .......................................................................................................................................2
Table of Contents..........................................................................................................................3
Safety Requirements ....................................................................................................................6
Nomenclature ...............................................................................................................................7
6SHFL¿FDWLRQV ...............................................................................................................................8
Electric Dryer ........................................................................................................................8
Gas Dryer .............................................................................................................................9
Control Features ...........................................................................................................................10
Loading and Using the Dryer ........................................................................................................14
Venting the Dryer ..................................................................................................................14
Dryer Operation Overview ............................................................................................................15
$LUÀRZ ...........................................................................................................................................16
Component Locator Views ...........................................................................................................17
Washer Components ............................................................................................................17
Electric Dryer Components ...................................................................................................18
Gas Dryer Components ........................................................................................................19
Washer Main Board Connector Locator View...............................................................................20
Components .................................................................................................................................21
Shipping Rod ........................................................................................................................21
Leveling The Washer ............................................................................................................21
Service Panel .......................................................................................................................21
Control Panel ........................................................................................................................22
Washer Selector Switches ....................................................................................................22
User Interface Board ............................................................................................................23
Main Board ...........................................................................................................................23
Dryer Timer and Start Switch ................................................................................................24
Timer Voltage: Dropping Resistor .........................................................................................25
Dryer Front Panel .................................................................................................................25
Top Bearing and Bearing Slides ...........................................................................................26

– 4 –
Trap Duct Assembly ..............................................................................................................27
Door Switch ..........................................................................................................................27
Dryer Drive Belt ....................................................................................................................28
Drum .....................................................................................................................................29
Drum Shaft and Bearing .......................................................................................................29
Idler Assembly ......................................................................................................................30
Dryer Drive Motor and Blower Assembly ..............................................................................30
Long Vent and Blower Motor ................................................................................................32
Heater Assembly ..................................................................................................................34
Safety Thermostat ................................................................................................................34
Inlet Control Thermostat .......................................................................................................35
Outlet Control Thermostat ....................................................................................................35
High Limit Thermostat...........................................................................................................36
Burner Assembly and LP Conversion ...................................................................................36
Gas Valve Coils ....................................................................................................................36
Gas Valve .............................................................................................................................37
Flame Detector .....................................................................................................................39
Ignitor ....................................................................................................................................39
Ignitor Circuit Operation ........................................................................................................40
Washer Components ....................................................................................................................41
Single Action Agitator ............................................................................................................41
Front Panel ...........................................................................................................................41
Top Cover Assembly .............................................................................................................42
Drain Pump ...........................................................................................................................42
Tub Cover .............................................................................................................................43
Suspension Rods .................................................................................................................43
Drive System ................................................................................................................................45
Washer Drive Belt .................................................................................................................45
Drive/Transmission Pulleys ..................................................................................................45
Speed/Hall Sensor ................................................................................................................46
Washer Drive Motor ..............................................................................................................47
Mode Shifter .........................................................................................................................48
Platform/Transmission Assembly ..........................................................................................49
(Continued next page)
– 5 –
Washer Harnesses ...............................................................................................................50
Lid Switch .............................................................................................................................51
Lid Lock ................................................................................................................................52
Pressure Sensor ...................................................................................................................53
Spin Basket ..........................................................................................................................54
Water Valve ..........................................................................................................................56
Automatic Temperature Control (ATC) ..................................................................................57
Troubleshooting ............................................................................................................................60
Diagnostics and Service Information ............................................................................................62
Dryer Timer Chart .................................................................................................................62
Washer Field Service Mode ..................................................................................................63
Fault Code ............................................................................................................................67
Fault Code Binary Display ....................................................................................................75
Wiring Diagrams ...........................................................................................................................77
Electric Dryer ........................................................................................................................77
Electric Dryer Long Vent Blower Motor Circuit .....................................................................78
Gas Dryer .............................................................................................................................79
Washer .................................................................................................................................80
Index .............................................................................................................................................81

– 6 –
Prior to disassembly of the washer to access components, GE
Factory Service technicians are REQUIRED to follow the Lockout /
Tagout (LOTO) 6 Step Process:
Safety Requirements
Step 1
Plan and Prepare
Step 4
Apply LOTO device and lock
Step 2
Shut down the appliance
Step 5
Control (discharge) stored
energy
Step 3
Isolate the appliance
Step 6
“Try It” verify that the appliance
is locked out
GE Factory Service Employees are required to use safety glasses with side shields, safety gloves and
steel toe shoes for all repairs.
Steel Toed Work Boot
Electrically Rated Glove and
Dyneema® Cut Resistant Glove
Keeper
Dyneema®Cut Resistant
Glove
Cut Resistant Sleeve(s)
Plano Type Safety Glasses
Brazing Glasses Prescription Safety Glasses
Safety Glasses must be
ANSI Z87.1-2003 compliant

– 7 –
The nomenclature tag is located
inside the dryer on the front panel.
Note: The technical sheet is taped
on the inside of the control panel.
Nomenclature
Technical Sheet
Nomenclature
The nomenclature breaks down and explains what the letters and numbers mean in the model number.
Serial Number
7KH¿UVWWZRFKDUDFWHUVRIWKHVHULDOQXPEHULGHQWLI\WKHPRQWKDQG\HDURIPDQXIDFWXUH7KHOHWWHU
designating the year repeats every 12 years.
Example: LA123456S = June, 2013
A – JAN
D – FEB
F – MAR
G – APR
H – MAY
L – JUN
M – JUL
R – AUG
S – SEP
T – OCT
V – NOV
Z – DEC
2024 – Z
2023 – V
2022 – T
2021 – S
2020 – R
2019 – M
2018 – L
2017 – H
2016 – G
2015 – F
2014 – D
2013 – A
Model Number
G U D 2 7 E S S M W W
Brand
G: General Electric
X: Crosley
&RQ¿JXUDWLRQ
U: Unitized
Model Year
M: 2011
Product
D: Std Vent
V: Long Vent
Fuel
E: Electric
G: Gas
Product Type
S: Stationary
Color
WW: White
Partner Type
S: Standard
Series

– 8 –
6SHFL¿FDWLRQV
:LQGLQJV&RLOV5HVLVWDQFH9DOXHV
Main Drum Motor Start
Run
Blower Motor -
Heater Coils 27" Inner
Outer
Heater Coils 24" Inner
Outer
Timer Motor -
,QOHWO u t l e t
Biased Thermostats -N
Thermostat Temperature °F Temperature °C
Open Close Open Close
Drum Outlet 130 +/- 5 120 +/- 6 55 +/- 3 49 +/- 3
Control Outlet 210 +/- 5 180 +/- 6 99 +/- 3 82 +/- 3
&RQWURO,QOHW/RQJ9HQW
Only) 205 +/- 5 175 +/- 6 96 +/- 3 79 +/- 3
Safety 235 +/- 5 205 +/- 6 113 +/- 3 96 +/- 3
6DIHW\/RQJ9HQW2QO\ 225 +/- 5 195 +/- 6 107 +/- 3 91 +/- 3
+LJK/LPLW 315 +/- 8 250 +/- 15 157 +/- 6 121 +/- 9
Terminal Wire Color
CPink
UBrown/Yellow
YYellow
XYellow
AOrange
TTan
SBlue
BRed
FNot Used
Electric Dryer

– 9 –
:LQGLQJV&RLOV5HVLVWDQFH9DOXHV*DV
Main Drum Motor Start
Run
Gas Valve
Main
Booster
Safety
,JQLWHU -#
Timer Motor - 3384 - 3816
,QOHWOutlet
Biased Thermostats -9k
Thermostat Temperature °F Temperature °C
Open Close Open Close
Drum Outlet 130 +/- 5 120 +/- 6 55 +/- 3 49 +/- 3
Control Inlet 210 +/- 5 180 +/- 6 99 +/- 3 82 +/- 3
Safety 27" Models 280 +/- 5 240 +/- 12 138 +/- 4 116 +/- 7
Safety 24" Models 300 +/- 5 260 +/- 12 184 +/- 4 127 +/- 7
+LJK/LPLW 315 +/- 8 250 +/- 15 157 +/- 6 121 +/- 9
Terminal Wire Color
CPink
UBrown/Yellow
YYellow
XYellow
AOrange
TTan
SBlue
BRed
FNot Used
Gas Dryer

– 10 –
Control Features
(Continued next page)
Washer Cycles
The washer cycle controls the type of washing process. The cycle select knob can be rotated
in either direction. Turning the knob after the cycle has started will stop the washer and
change the cycle to the new selection.
Deep Rinse
The status lights show the stage the washer is in. When the selector knob is set to a new
F\FOHWKHVWDWXVOLJKWVZLOOÀDVKPRPHQWDULO\VKRZLQJWKHVWDJHVWKHF\FOHVZLOOJRWKURXJK
E
A
E
B
Washer Models:
GUD27, XUD27
GUV27
Washer Model:
GUD24

– 11 –
6WDWXV/LJKWV
The status lights show the stage the washer is in. When the selector knob is set to a new
F\FOHWKHVWDWXVOLJKWVZLOOÀDVKPRPHQWDULO\VKRZLQJWKHVWDJHVWKHF\FOHVZLOOJRWKURXJK
6WDWXV/LJKW Illuminates
On When the fabric softener option has been selected.
Wash When the washer is in the wash portion of the cycle.
Rinse When the washer is in the rinse portion of the cycle.
Spin When the washer is draining and/or spinning.
Lid Locked When the washer lid is locked. This feature prevents the lid from being
opened while the washer is in the spin cycle or coasting to a stop.
Temperature
Select the water temperature for the washer cycle (all rinses use cold water). Tap Cold uses
incoming tap water, which can provide energy savings. For all other temperature selections,
a mixture of hot and cold water is used to achieve the ideal temperature for each temperature
setting.
Load Size (on some models)
2ႇHUVDVHOHFWLRQIURPVPDOOWRVXSHURUSUHFLVH¿OOZKLFKDXWRPDWLFDOO\SURYLGHVWKHFRUUHFW
amount of water suited to the size and type of load placed in the machine. Precise Fill will
automatically measure the load size and add just the right amount of water. The GUD24
ODXQGU\FHQWHUKDVQRZDWHUOHYHORSWLRQ,WXWLOL]HVSUHFLVH¿OOIRUDOOORDGVL]HVF\FOHV
Options (on some models)
When Pre-Soak is selected, the cycle will begin with a brief agitation, soaks for approximately
PLQXWHVWKHQ¿QLVKHVWKHUHVWRIWKHF\FOH6HOHFWVHFRQGULQVHZKHQH[WUDGHWHUJHQWRU
bleach is used to better remove additional residues.
C
C
D
D
(Continued next page)
E
E
E
F

– 12 –
Pressing the Start button will begin the cycle. If the Start button is pressed again with the lid
GRZQWKLVZLOOSDXVHWKHF\FOH7KHF\FOHVWDWXVOLJKWVZLOOÀDVK7RFRQWLQXHWKHF\FOHFORVH
WKHOLGDQGSUHVV6WDUWDJDLQ:DWHU¿OOZLOOFRQWLQXHHYHQZLWKWKHOLGRSHQH[FHSWZKHQ
Precise Fill (on some models) is selected as the load size. The lid must be closed to continue
¿OOLQJZKHQ3UHFLVH)LOOLVVHOHFWHG
If the machine is paused more than 24 hours with the lid closed, the cycle will be cancelled,
and drain the water. If the machine is paused more than 15 minutes with the lid open, the
F\FOHZLOOEHFDQFHOOHGDQGWKHZDWHUZLOOGUDLQ7RVWRSWKHF\FOHWXUQWKHF\FOHNQREWRWKHRႇ
position.
E
G

– 13 –
B
B
B
B
B
B
A
A
A
Dryer Cycles
&RWWRQV+LJK+HDW For regular to heavy cottons.
Easy Care (Med Heat) For synthetics, blends, delicates and items labeled permanent
press.
Delicates (Low Heat) For delicates, synthetics and items labeled tumble dry low.
4XLFN)OXႇ1R+HDW )RUÀXႈQJLWHPVZLWKRXWKHDW8VHWKHTimed Dry cycle.
Dryer Cycles
Cottons For cottons and most linens. For most loads, select Optimum dry.
Easy Care For wrinkle-free, permanent press and delicate items, and knits.
Delicates For delicate items, special-care fabrics and knits.
Timed Dry Set the Cycle Selector at the desired drying time.
De-wrinkle For removing wrinkles from items that are clean and dry or that are very
lightly damp.
4XLFN)OXႇ )RUIUHVKHQLQJRUÀXႈQJXSDOUHDG\GU\FORWKLQJIDEULFVOLQHQVDQGSLOORZV
Use with )OXႇ1R+HDW. Provides 10 minutes of no heat tumbling.
Automatic cycles determine fabric dryness and provide automatic sensed drying. The timer
does not rotate during the cycle until the thermostats sense that the clothes are dry, then the
WLPHUURWDWHVDXWRPDWLFDOO\WR2ႇ
Select Less Dry if you want your clothes slightly damp at the end of the drying cycle.
Select More Dry if you want them to feel drier. Timed cycles run for a selected time.
Timed Cycle
Timed Dry For manual drying. The timer rotates during the entire cycle.
Start
Close the dryer door. Press Start. Opening the door during operation will stop the dryer. To
restart the dryer, close the door and select Start to complete the cycle.
NOTE: This appliance is designed so that the washer and dryer can be operated at the same time.
E
A
E
B

– 14 –
For the best drying performance, the dryer needs to be properly vented. The dryer will use more
HQHUJ\DQGUXQORQJHULILWLVQRWYHQWHGWRWKHEHORZVSHFL¿FDWLRQV&DUHIXOO\IROORZWKHGHWDLOVRQ
Exhausting in the Installation Instructions.
Use only rigid metal 4 inches in diameter ductwork inside the dryer cabinet. Use only rigid metal or
8/DSSURYHGÀH[LEOHPHWDOLQFKHVLQGLDPHWHUGXFWZRUNIRUH[KDXVWLQJWRWKHRXWVLGH
Do not use plastic or other combustible ductwork.
Use the shortest length possible.
Do not crush or collapse.
Avoid resting the duct on sharp objects.
Venting must conform to local building codes.
/RDGLQJDQG8VLQJWKH'U\HU
9HQWLQJWKH'U\HU
Correct
Venting
Incorrect
Venting

– 15 –
Dryer Operation Overview
Air enters the dryer cabinet, passing through the heating elements (gas combustion chamber for gas
models), and into the drum. The hot air heats the wet clothes and gradually removes their moisture
in the form of water vapor. The moist air is vented through the dryer exhaust. Overall heating
temperature is regulated by means of two temperature thermostats: an inlet control thermostat located
near the heating elements and an outlet control thermostat located at the blower. (NOTE: Gas models
use only an outlet control thermostat for overall temperature regulation.) A safety thermostat, located
QHDUWKHKHDWLQJHOHPHQWVGLႇXVHUIRUJDVPRGHOVF\FOHVWKHKHDWLQJHOHPHQWVEXUQHUIRUJDV
models), if overheating occurs. Also, the high limit thermostat, located near the heating elements
GLႇXVHUIRUJDVPRGHOVSURYLGHVDGGLWLRQDOVDIHW\DQGLQWHUUXSWVPRWRUDQGKHDWHURSHUDWLRQLI
temperature rises above safe limits.
The typical dryer cycle progresses as follows:
1. A cycle is selected and the Start key is pressed.
2. The motor is activated.
3. 7KHKHDWHUFRLOVEXUQHUIRUJDVPRGHOVDUHDFWLYDWHG7KHFRLOVEXUQHUF\FOHRQDQGRႇWR
achieve the desired temperature throughout the heating portion of the cycle.
4. If an Auto Dry cycle is selected, the heater coils (burner for gas models) are activated. The coils
EXUQHUF\FOHRQDQGRႇXQWLOWKHORDGKDVDFKLHYHGWKHGHVLUHGGU\QHVVOHYHO
5. If timed drying is selected, the heater coils (burner for gas models) are activated and cycle on and
RႇIRUWKHVHOHFWHGWLPHDWWKHVHOHFWHGWHPSHUDWXUH
6. The heater coils (burner for gas models) discontinue operation after the dryness level or elapsed
time has been achieved.
7. 7KHPRWRUFRQWLQXHVRSHUDWLQJXQWLOWKHFORWKHVWHPSHUDWXUHGURSVEHORZVSHFL¿HGWHPSHUDWXUH
(Cool Down).
Dryer Air Flow System
Dryer
Cabinet
'LႇXVHU
Drum Lint trap Blower Exhaust
Safety Thermostat
Safety Thermostat
Inlet Control Thermostat
t°
t°
Outlet Control Thermostat
Heater
Pan/Electric
Elements
Gas
Combustion
Chamber
High Limit Thermostat
t°
High Limit Thermostat
t°
t°
t°

– 16 –
$LUÀRZ

– 17 –
Component Locator Views
(Continued Next Page)
Pressure Chamber
Motor and Transmission
Behind Front Motor Protector
Drain Pump
Tub Cover
Pressure Hose
Washer Components

– 18 – (Continued Next Page)
High Limit
Thermostat
Inlet Control Thermostat
Safety Thermostat
Motor and Blower
Assembly
Outlet Control Thermostat
Idler Pulley
Door Switch Connector
Dryer Timer
Connector
Board Power
Supply Connector
Mica Heater
Electric Dryer Components

– 19 –
High Limit Thermostat
Safety Thermostat
I n l e t C o n t r o l
Thermostat
Motor and Blower
Assembly
Outlet Control Thermostat
Door Switch Connector Dryer Timer
Connector
Board Power
Supply Connector
Burner
Assembly
Gas Dryer Components

– 20 –
Washer Main Board Connector Locator View
J
101: 120 VAC input
J511: Washer Drive Motor
J512: Mode Shifter and Drain Pump
J513: Lid Switch and Lid Lock
J514: Water Valve
J602: Speed Sensor, RJ45 and User Interface Board
J615: Personality Jumper
J701: Thermistor
J514J511 J513
Pressure SensorJ602
J101
J512 J615J701
Other manuals for GUD27ESSMWW
1
This manual suits for next models
6
Table of contents
Other GE Washer manuals
Popular Washer manuals by other brands

Vax
Vax INFINITY V-035B instruction manual

Whirlpool
Whirlpool WTW4880AW Use and care guide

Frigidaire
Frigidaire FAFS4174NR Brochure & specs

Miele
Miele WSI 863 operating instructions

Winterhalter
Winterhalter PAY PER WASH UC V01 Series Supplementary instructions to the operating instructions

Frigidaire
Frigidaire FRFW3700LW installation instructions