manuals.online logo
Brands
  1. Home
  2. •
  3. Brands
  4. •
  5. GE
  6. •
  7. Washer
  8. •
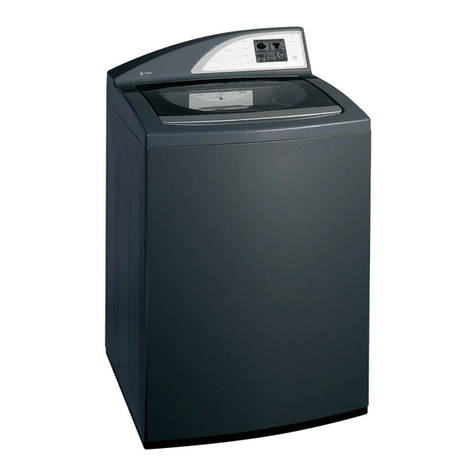
  9. GE Profile WPGT9350 How to use

GE Profile WPGT9350 How to use

Other manuals for Profile WPGT9350

5

Other GE Washer manuals

GE GFWS2600 Original instructions

GE

GE GFWS2600 Original instructions

GE Appliances GFWN1100 Original instructions

GE

GE Appliances GFWN1100 Original instructions

GE G152 User manual

GE

GE G152 User manual

GE GFWH2400 Original instructions

GE

GE GFWH2400 Original instructions

GE Zoneline 2200 User manual

GE

GE Zoneline 2200 User manual

GE GTWP2250DWW Manual

GE

GE GTWP2250DWW Manual

GE GTW755 Original instructions

GE

GE GTW755 Original instructions

GE GFWN1000 Original instructions

GE

GE GFWN1000 Original instructions

GE WSXH208HWW - 27" Front-Load Washer Original instructions

GE

GE WSXH208HWW - 27" Front-Load Washer Original instructions

GE WCCD2050D User manual

GE

GE WCCD2050D User manual

GE WPRE8320HWT User manual

GE

GE WPRE8320HWT User manual

GE GTWS8450DWS User manual

GE

GE GTWS8450DWS User manual

GE GTWN5050MWS Manual

GE

GE GTWN5050MWS Manual

GE WHRE5550K User manual

GE

GE WHRE5550K User manual

GE WWA7800M User manual

GE

GE WWA7800M User manual

GE GTWN5550DWW User manual

GE

GE GTWN5550DWW User manual

GE WWA8324B Installation instructions

GE

GE WWA8324B Installation instructions

GE MODEL WA7800R User manual

GE

GE MODEL WA7800R User manual

GE WWT2470G Installation instructions

GE

GE WWT2470G Installation instructions

GE GHWS8355H0MC User manual

GE

GE GHWS8355H0MC User manual

GE GTWN4250DWS Manual

GE

GE GTWN4250DWS Manual

GE WWA8301M User manual

GE

GE WWA8301M User manual

GE GFWN1000 Original instructions

GE

GE GFWN1000 Original instructions

GE WPSE7003 User manual

GE

GE WPSE7003 User manual
Popular Washer manuals by other brands

Zanussi ZWF 14080 W user manual

Zanussi

Zanussi ZWF 14080 W user manual

Zanussi FV 825 N Instruction booklet

Zanussi

Zanussi FV 825 N Instruction booklet

LG WM8000HVA Specifications

LG

LG WM8000HVA Specifications

Whirlpool 3RGSC9400 Use and care guide

Whirlpool

Whirlpool 3RGSC9400 Use and care guide

Zanussi TJ 1284 H instruction manual

Zanussi

Zanussi TJ 1284 H instruction manual

AEG KO-LAVAMAT 74740 User information

AEG

AEG KO-LAVAMAT 74740 User information

Beko WSRE7512PRA user manual

Beko

Beko WSRE7512PRA user manual

Whirlpool LA5OOOXP Use and care guide

Whirlpool

Whirlpool LA5OOOXP Use and care guide

Miele PW 6207 operating instructions

Miele

Miele PW 6207 operating instructions

Bush WMNB712EB instruction manual

Bush

Bush WMNB712EB instruction manual

ALLIANCE UW60AV Information manual

ALLIANCE

ALLIANCE UW60AV Information manual

Bosch WAN280H3 User manual and installation instructions

Bosch

Bosch WAN280H3 User manual and installation instructions

Maytag MAT15MNAW installation instructions

Maytag

Maytag MAT15MNAW installation instructions

LG T2109VSAL owner's manual

LG

LG T2109VSAL owner's manual

Indesit IWC 61481 Instructions for use

Indesit

Indesit IWC 61481 Instructions for use

Electrolux EWF12843 user manual

Electrolux

Electrolux EWF12843 user manual

Indesit WIN 70 Instructions for use

Indesit

Indesit WIN 70 Instructions for use

Whirlpool Cabrio WTW6400SW2 quick start guide

Whirlpool

Whirlpool Cabrio WTW6400SW2 quick start guide

manuals.online logo
manuals.online logoBrands
  • About & Mission
  • Contact us
  • Privacy Policy
  • Terms and Conditions

Copyright 2025 Manuals.Online. All Rights Reserved.

۰
9
GE
Consumer
Products
TECHNICAL
SERVICE
GUIDE
Profile
Washer
MODEL
SERIES:
WPGT9350
PUB
+
31-9103
07/03
IMPORTANT
SAFETY
NOTICE
The
information
in
this
service
guide
is
intended
for
use
by
individuals
possessing
adequate
backgrounds
of
electrical,
electronic,
and
mechanical
experience.
Any
attempt
to
repair
a
major
appliance
may
result
in
personal
injury
and
property
damage.
The
manufacturer
or
seller
cannot
be
responsible
for
the
interpretation
of
this
information,
nor
can
it
assume
any
liability
in
connection
with
its
use.
WARNING
To
avoid
personal
injury,
disconnect
power
before
servicing
this
product.
If
electrical
power
is
required
for
diagnosis
or
test
purposes,
disconnect
the
power
immediately
after
performing
the
necessary
checks.
RECONNECT
ALL
GROUNDING
DEVICES
If
grounding
wires,
screws,
straps,
clips,
nuts,
or
washers
used
to
complete
a
path
to
ground
are
removed
for
service,
they
must
be
returned
to
their
original
position
and
properly
fastened.
GE
Consumer
Products
Technical
Service
Guide
Copyright
©
2003
All
rights
reserved.
This
service
guide
may
not
be
reproduced
in
whole
or
in
part
in
any
form
without
written
permission
from
the
General
Electric
Company.
Backsplash.......
Basic
Wash
Cycle
.....
Е
Bearing
Housing
Assembly...
Brake
Resistor
Clutch
Shifter
Assembly
...
Component
Locator
Views
Consumer
Help
Screens...
Control
Features.
3
Control
Quick
Reference
Chart
....
Drain
Pump...
Factory
Test
Mode
Field
Service
Mode
..
Hall
Sensor
Inverter.
Inverter
and
Main
Board
Pin
Connectors.
Main
Control
Board
and
Touch
Screen
LCD.
Membrane
Кеурапе!
Model
Number
....
Motor
Assembly
My
Cycles
....
Nomenclature
Overview
Operation
Overview
Outer
Tub
and
Suspension
Assembly
Parts...
%
Protective
Cover...
2
Pressure
Sensor
(Water
Level
Switch)
Quick
Start
Sales
Demo
Mode
Schematic
Serial
Number
Stain
Inspector
ic
Switching
the
Washer
and
Dryer
Backsplashes
Summary
Screen
Temperature
Conversion
Table...
Thermistor/ATC
Control
(Auto
Temp)
Top
Cover
Troubleshooting
Warranty
=
Water
Valve
Assembly
Wash
Basket
Washer
Components
.
Wash
Cycle
Chart
Example
Wash
۰
Water
Valve
Assembly
.
Nomenclature
Model
Number
WPGT9350B0WW
Back
Splash
GE
Washer
rra
Feature
Pack
Common
Brand
Features
Body
Color
Exceptions:
H
-
Energy
Star
Engr.
Revision
Р
=
Profile
=
Model
Year
N
=
Special
мыны
Capacity/Configuration
L
=
Large
S
=
Super
Capacity
Plus
Voltage
X
=
Extra-Large
K
=
Compact
G
-
Giant
0=
IS
Voltage
Number
of
Cycles
Control
Platform
00
=
Infinite
Electronic
B
=
Buttons
(Touch
Pad)
T=
Touch
Screen
Number
of
Speed
Combinations
Serial
Number
The
first
two
characters
of
the
serial
number
identify
the
month
and
year
of
manufacture.
<
Nomenclature
Example:
RF123456S
=
August,
2003
A-JAN
2005
-H
D-FEB
2004-G
The
letter
designat-
F-MAR
2003-F
ing
the
year
repeats
G-APR
2002-D
every
12
years.
H-MAY
2001-A
L-JUN
2000-Z
Example:
M-JUL
1999-V
T-
1974
R-AUG
1998-T
T-
1986
Note:
Model
number
and
serial
number
are
S-
SEP
1997
-S
T-
1998
located
on
rear
of
backsplash
T-OCT
1996-R
V-NOV
1995-M
*
The
technical
sheet
із
located
inside
2
PEO
اس󰾯
the
control
panel
Warranty
All
warranty
service
provided
by
our
Factory
Service
Centers
or
an
authorized
Customer
Care
technician.
To
schedule
service,
on-line,
24
hours
a
day,
visit
us
at
шило
GEAppliances.com
or
call
800.GE.CARES
(800.432.2737).
ForThe
Period
OE
|
We
Wil
Repl
Doe Yer
TCT
TT
TTT
Pom
th
dal
f
гадае
رب󰾯
RSA
pete
ine
pak
Second
Yer
ה󰾯
From
the
da
of
יר
בר󰾯
ab
re
a
ÓN
epe
“Third
trough
With Year
|
The
سمي󰾯
ed
ond
gei
сте
d
ei
coc
a
Dr
ау
es
paras
shold
Pom
Beda
be
ee
ee
Perg
مدب󰾯
ESR
re
dion
us
under
operating
ашан
DEE
AE
Eae
E
OR
MEI
اج󰾯
E
pucr
cid
ed
RRE
EA
(|
ו󰾯
A
TR
Year
Pow
که󰾯
das
a
|
or
workmanship.
During
is
edna
erre
Enid
renis
yl
wl
be
repond
or
ny
original
purchase
labor
or
related
service
costs
Lifetime
of
Product
The
washer
basket
it
should
tail
due
to
a
defect
in
materials
or
workmanship.
During
this
product
From
the
date
of
the
lifetime
limited
warranty,
vou
will
be
responsible
for
any
labor
or
related
service
сона.
original
purchase
What
Is
Not
Covered:
18
Service
trips
to
your
home
to
teach
you
how
to
use
the
—
W
Replacement
of
house
fuses
or
resetting
of
circuit
product.
breakers.
M
Improper
installation,
delivery
or
maintenance.
WI
Damage
to
the
product
caused
by
accident,
fire,
floods
B
Failure
of
the
product
if
it
is
abused,
misused,
or
nr
used
for
other
than
the
intended
purpose
or
used
18
Incidental
or
consequential
damage
caused
by
possible
commercially.
defects
with
this
appliance.
WI
Damage
caused
after
delivery.
This
warranty
is
extended
to
the
original
purchaser
and
any
succeeding
owner
for
products
purchased
for
home
use
within
the
USA.
In
Alaska,
the
warranty
excludes
the
cost
of
shipping
or
service
calls
to
your
home.
Proof
of
the
original
purchase
date
is
needed
to
obtain
service
under
the
warranty
Some
states
do
not
allow
the
exclusion
or
limitation
of
incidental
or
consequential
damages.
This
warranty
gives
you
specific
legal
rights,
and
you
may
also
have
other
rights
which
vary
from
state
to
state.
To
know
what
your
legal
rights
ave,
consult
jour
local
or
state
consumer
affairs
office
or
your
state's
Attorney
General.
Warrantor:
General
Electric
Company.
Louisville,
KY
40225
Note:
The
LCD
screen
is
part
of
the
main
electronic
board
and
under
the
5
year
part
warranty.
The
inverter
board
is
covered
by
a
2
year
part
warranty.
Overview
General
The
GE
Profile
Harmony
Washer
is
part
of
the
GE
Profile
Harmony
Clothes
Care
system
utilizing
the
latest
developments
in
washing
technology.
The
Harmony
Washer
does
not
use
the
typical
agitator
found
on
conventional
washers.
Instead,
the
direct
drive
motor,
capable
of
spinning
at
1010
rpm,
and
the
304
stainless
steel
wash
basket
create
a
centrifugal
force
that
pulls
wash
water
through
fabrics
for
a
thorough
cleaning
action.
(See
Operation
Overview.)
Harmony
Washers
also
utilize
an
automatic
load
sensing
system
to
determine
load
size
and
water
levels.
The
washer
automatically
fills
the
wash
basket
with
the
appropriate
amount
of
water
needed
for
optimal
wash
performance.
Other
features
include:
Communication
Link
to
the
Dryer
-
The
washer
uses
a
serial
cable
to
automatically
inform
the
dryer
about
the
nature
of
the
wash
load,
essentially
presetting
the
dryer
controls
so
the
user
doesn't
have
to.
Auto-Balance
Suspension
-
The
washer
is
programmed
to
correct
out
of
balance
situations.
(See
Operation
Overview.)
Flow-Thru™
Dispensers
-
Each
of
the
four
dispensers
is
timed
to
release
at
the
right
time
during
the
wash
cycle.
Each
reservoir
is
flushed
with
water
to
pre-dilute
the
product
before
adding
it
to
the
washer.
This
flushing
action
removes
all
product
to
help
keep
the
compartment
clean
and
free
flowing.
Note:
The
bleach
dispenser
fills
during
the
main
wash
to
dispense
the
bleach
and
refills
during
the
rinse
cycle
to
flush
any
reaming
bleach
from
the
reservoir.
Direct
Drive
Motor
-
The
washer
does
not
use
a
transmission
or
mechanical
brake.
Direct
drive
technology
results
in
fewer
moving
parts
for
smooth,
quiet
operation.
(See
Motor
Assembly.)
Infusor™
Wash
-
The
washer
has
specific
cycles
that
aids
in
mixing
the
detergent/water
solution,
and
dispersing
the
load
evenly
in
the
wash
water.
(See
Operation
Overview).
LCD
Touch
screen
Display
-
All
washer
control
functions,
cycles,
troubleshooting,
and
field
service
diagnostics
are
accessed
through
a
touch
screen
display.
The
washer
can
also
be
powered
up
by
touching
anywhere
on
the
touch
screen
or
any
key
on
the
keypanel.
Centrifugal
Wash
-
The
washer
uses
a
centrifugal
washing
action
to
clean
clothes instead
of
an
agitator.
The
basket
spins
creating
a
strong
flow
of
water
under
the
centrifugal
force.
As
water
passes
through
the
fabric,
its
natural
cleansing
action
washes
away
dirt
without
damaging
or
tangling
the
fabric.
Plastic
Top
&
Backsplash
-
The
washer
top
and
backsplash
have
UV
stabilizers
to
prevent
yellowing
when
exposed
to
sunlight.
Control
Features
Throughout
this
manual,
features
and
appearances
may
vary
from your
model.
Features
of
the
washer
control
panel
1
2
POWER.
Press
to
“wake
the
display
is
active,
press
to
pu
into
standby
mode.
You
may
also
press
the
“wake
up’
Touch
Screen
or
any
but
the
display
NOTE:
Pressing
POWER
does
not
disconnect
the
appliance
from
the
power
supply
MY
CYCLES.
Press
to
use,
cr
modify
or
delete
custom
wa
BACK.
Press
to
return
TOUCH
SCREEN.
Press
ihe
graphics
on
the
interactive
display
to
use
the
washer
features,
ves
Do
not
use
sharp
objects
to
press
the
Touch
Screen.
NOTE:
If
the
washer
is
inactive
for
5
minutes,
the
Touch
Screen
will
go
into
standby
mode,
and
the
display
will
be
dark.
Press
the
Touch
Screen
or
any
button
to
"wake
up"
the
display.
5
6
HOME.
Press
to
return
to
the
"TOUCH
TO.
SELECT
WASH
CYCLE"
screen
(Home
Screen).
START/STOP.
Press
to
start
a
wash
cycle,
If
the
washer
is
running,
pressing
once
will
pause
the
washer.
Press
again
to
restart
the
wash
cycle
NOTE:
If
the
washer
is
paused
and
the
Cycle
is
not
restarted
five
minutes,
the
washer
will
enter
standby
mode
and
the
current
wash
cycle
will
be
canceled.
HELP.
Press
to
set
machine
preferences,
to
find
help
using
the
Touch
Screen
o
to
find
troubleshooting
tips
for
common
washer
problems.
Getting
Started
If
the
Touch
Screen
is
dark,
press
POWER
or
the
Touch
Screen
to
access
the
wash
cycles
menu.
Loosely
load
clothes
no
higher
than
the
top.
row
of
holes
in
the
washer
tub.
Overloading
may
reduce
washer
efficiency
and
possibly
increase
wrinkling.
Add
a
lowsudsing,
high-efficiency
detergent.
‘Add
diluted
fabric
softener,
bleach
or
wash
boost
additives
as
desired,
Select
one
of
the
five
wash
methods
from
the
Home
Screen:
*
Press
BY
COLOR
to
wash
according
to
fabric
color,
*
Press
BY
GARMENT
to
wash
according
to
clothing
type.
>
Press
BY
FABRIC
to
wash
according
to
fabric
type.
>
Press
SPECIAL
CYCLES
to
wash
non-garment
items,
or
to
selecta
rinse
and
spin
or
spin-
only
cycle.
*
Press
STAIN
INSPECTOR
to
wash
items
with
specific
types
of
stains.
After
selecting
a
wash
method,
use
the
Touch
Screen
to
select
a
specific
wash
cycle
to
match
your
load.
Change
any
of
the
automatic
settings,
if
desired,
by
pressing
the
Touch
Screen
and
following
the
on-screen
instructions.
By
changing
the
settings
you
can:
+
Remove
heavier
soil.
+
Change
the
water
temperature.
+
Change
the
wash
action
to
Vigorous,
Normal,
Delicate
or
Hand
Wash.
+
Set
a
Delay
Start,
Extended
Spin,
Presoak
or
Extra
Rinse,
or
change
the
End-of-Cycle
Signal
volume
+
Adjust
time
settings.
Close
the
lid
and
press
START.
The
washer
will
not
fill
unless
the
lid
is
closed.
After
you
press
START,
a
Cycle
Status
screen
will
appear
to
indicate
what
stage
of
the
cycle
the
washer
is
in
and
the
time
remaining
in
the
cycle.
SUMMARY
SCREEN
If
the
Touch
Screen
is
dark,
press
POWER
or
the
Touch
Screen
to
access
the
wash
cycles
menu.
The
default
cycle
settings
are
based
on
standard
load
types. Always
follow
the
fabric
manufacturer's
care
label
when
laundering.
Washing
by
Select
By
Color
to
wash
loads
sorted
by
color.
Color
COLOR
CYCLES
include:
E
*
Bright/Dark
*
Mixed
Colors
ed
few
Colors
*
Light
Colors
wish
Washing
by
Select
By
Garment
to
wash
loads
sorted
by
garment
type.
Garment.
GARMENT
CYCLES
include:
Type
+
Athletic
Wear
+
Jackets/Coats.
+
Play
Clothes.
т^
*
Blouses
*
Jeans
=
Sweaters
*
Delicates
+
Khakis
*
Swimwear
*
Dress
Shi
*
Knits
*
Underwear
*
Easy
Care
*
Lingerie
*
Silks
(Washable)
*
Everyday
*
Mixed
Garments
Wear/Casual
Washing
by
Fabric
Type
Washing
Using
the
Special
Cycles
Select
By
Fabric
to
wash
loads
sorted
by
fabric
type.
FABRIC
CYCLES
include:
*
Blends
*
Cottons
+
Knits
*
Delicates
Select
SPECIAL
CYCLES
to
wash
loads
of
nongarment
items
or to
select
a
rinse
and
spin
or
spin-only
cycle.
جح󰾯
SPECIAL
CYCLES
include:
*
Blankets
(Cotton)
*
Handwash
*
Throw
Rugs
E
+
Blankets
(Other)
Ме
HE
(Washable)
exis
+
Rinse
and
Spin
*
Towels
=
Super
Clean
*
Sheets
*
Quick
Wash
+
Pet
Bedding
*
Sneakers
(Washable)
+
Spin
Only
Washing
The
Stain
Inspector
provides
pretreatment.
Using
ihe
ipt
and
оротат
washing
for
specie
pes
Stain
Inspector.
You
select
the
specific
stain,
fabric
type
and
color,
and
the
washer
creates
the
wash
cycle
for
treating
the
stain.
Example:
Washing
a
chocolatestained,
white
cotton
shirt
2
Read
and
follow
the
instructions
on
the
Touch
Screen
before
treating
the
fabric.
BEFORE
TREATING
FABRIC
1)
REFER
TO
FABRIC
CARE
LABEL
FOR
INSTRUCTIONS.
USE
HELP
FUNCTION
FOR
ADOMONAL
STAIN
TPS
2)
TEST
STAIN
REMOVAL
TIPS
ON
HIDDEN
AREA
OF
FABRIC
3]
DO
NOT
PUT
STAINED
ITEM
INTO
DRYER.
(STAM
MAY
BE
SET
INTO
FABRIC]
3
Select
FOOD/DAIRY/COOKING
from
the
list
of
stain
categories
and
select
CHOCOLATE
from
the
list
of
stains.
FOOD/DAIRY/COOKING
=>
=
You
can
find
additional
stain
categories
and
stains
by
pressing
MORE
in
the
lower
right
corner
of
the
Touch
Screen.
-10-
4
Press
the
HELP
button
to
find
pretreatment.
information
for
the
specific
type
of
stain.
5
Select
COTTONS
from
the
list
of
fabric
types.
and
select
WHITES
from
the
list
of
colors.
6
Fill
the
detergent
tray
with
a
lowsudsing,
highfficiency
liquid
detergent
such
as
Tide®
HE.
Fill
the
Wash
Boost
tray
with
the
proper
pretreatment
additive.
7
Place
the
stained
garment(s)
in
the
washer
first;
then
add
the
rest
of
the
load.
For
best
stain
removal,
only
wash
items
with
stains
matching
your
selection.
8
Press
START.
The
washer
will
run
a
Wash
Boost
presoak
cycle
prior
to
the
main
wash
cycle.
NOTE:
For
some
stain
cycles,
the
water
temperature
for
the
presoak
cycle
may
not
be
the
same
as
the
water
temperature
for
the
main.
wash
cycle.
IMPORTANT:
Check
to
make
sure
the
stain
is
completely
removed
before
placing
the
garment
in
the
dryer.