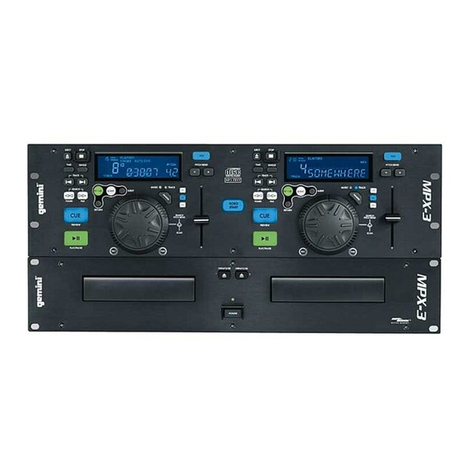
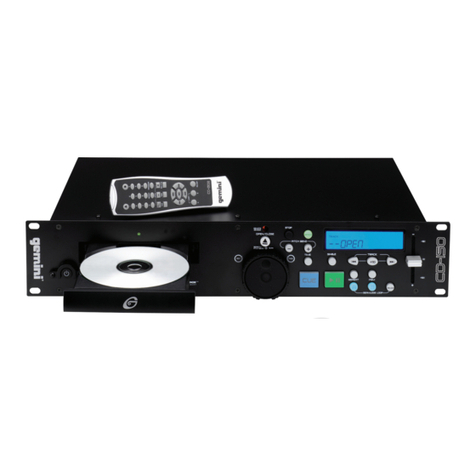
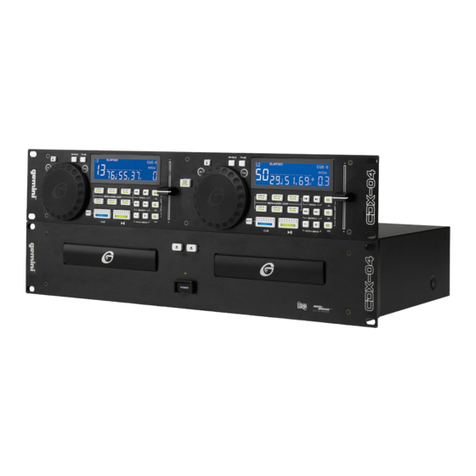
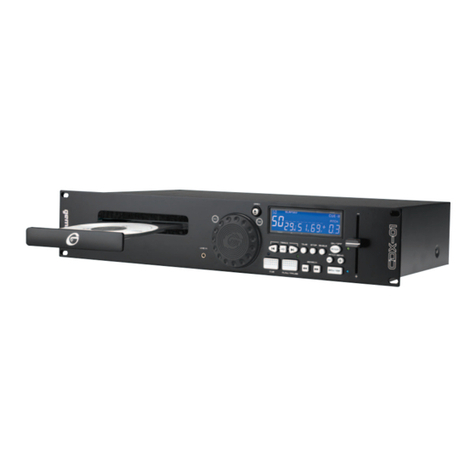
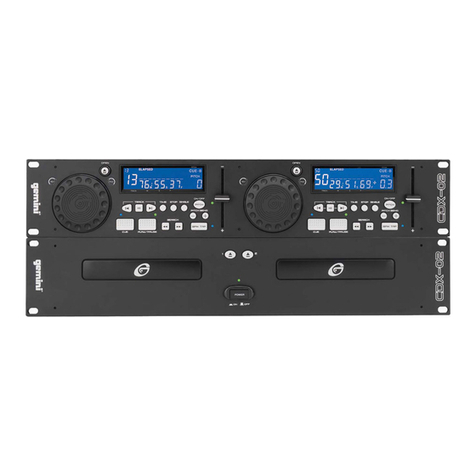
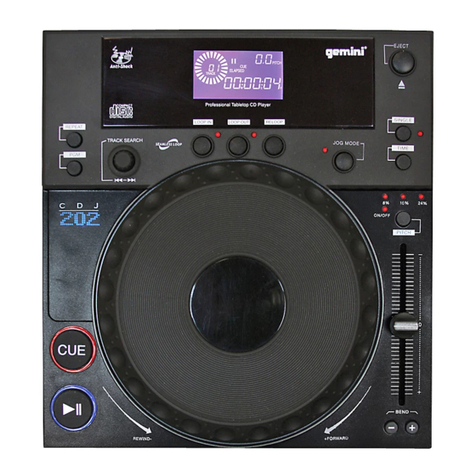
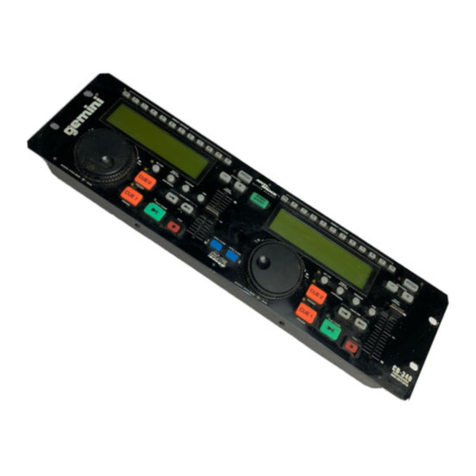
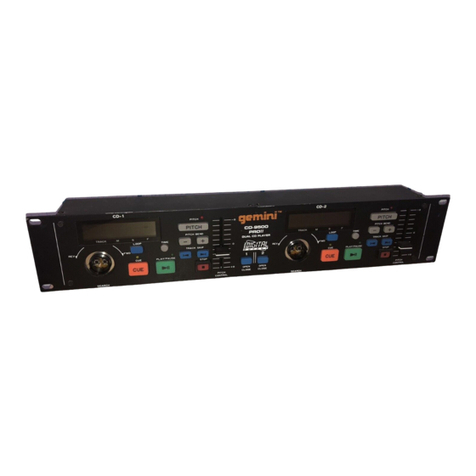
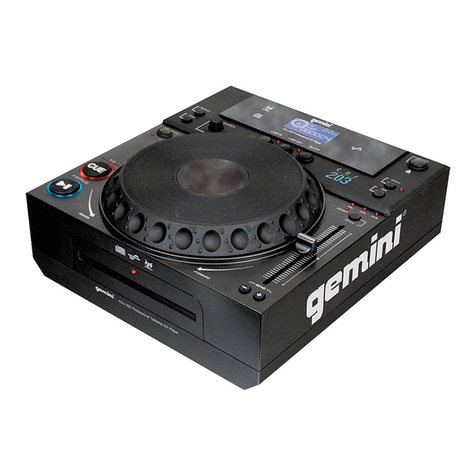
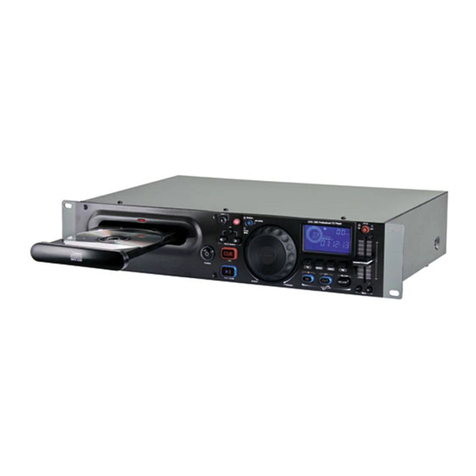
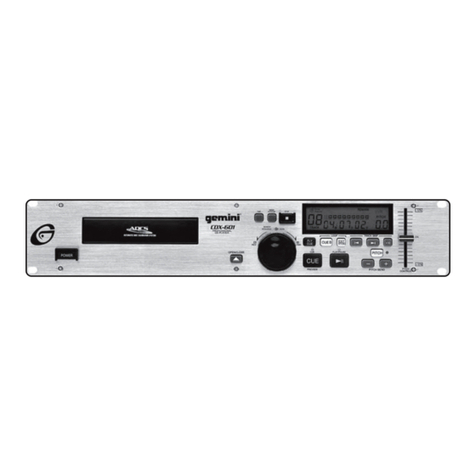
Gemini CDMP-1400 User manual

In the USA: if you experience problems with this unit,
call 732-346-0061 for GCI Technologies
customer service. Do not attempt to return
this equipment to your dealer.
Parts of the design of this product may be protected by worldwide patents. Information in this manual is subject to change without notice and does not represent a commitment on the part of the
vendor. GCI Technologies Corp. shall not be liable for any loss or damage whatsoever arising from the use of information or any error contained in this manual. No part of this manual may be re-
produced, stored in a retrieval system or transmitted, in any form or by any means, electronic, electrical, mechanical, optical, chemical, including photocopying and recording, for any purpose without
the express written permission of GCI Technologies Corp. It is recommended that all maintenance and service on this product is performed by GCI Technologies Corp. or its authorized agents. GCI
Technologies Corp. will not accept liability for loss or damage caused by maintenance or repair performed by unauthorized personnel.
Worldwide Headquarters
1 Mayeld Ave, Edison, NJ 08837, USA
Tel: (732) 346-0061 • Fax: (732) 346-0065
Latin America, Mexico, and Caribbean • GCI Technologies
8320 NW 68 Street
Miami, FL 33166, USA
Tel: (305) 592-4746 • Fax: (305) 592-4746
UK • GCI Technologies
44 The Brambles Enterprise Centre, PO7 7TH Waterlooville, UK
Tel: 087 087 00880 • Fax: 087 087 00990
Spain • GCI Technologies S.A.
Caspe, 172 - 1º A
08013 Barcelona, Spain
Tel: 34 93 436 37 00
Fax: 34 93 347 69 61
France • GCI Technologies France S.A.R.L
2bis, rue Léon Blum, 91120 Palaiseau, France
Tél: + 33 1 69 79 97 70 • Fax: + 33 1 69 79 97 80
Germany • GCI Technologies GmbH
Lerchenstraße 14, 80995 München, Germany
Tel: 089 - 319 019 8 - 0 • Fax: 089 - 319 019 8-18
© GCI Technologies Corp. 2009 All Rights Reserved.

Instruction Manual | Manual de instrucciones | Manuel d’instructions | Bedienungshandbuch
CDMP-1400
SINGLE 19” CD/MP3/USB PLAYER w/ LOOP


en | es | fr | de
Contents | Contenidos | Sommaire | Inhaltsverzeichnis
Warning | Advertencia | Avertissement | Warnungen ...............................................................................................................
Diagrams | Diagramas | Diagrammes | Darstellungen ...........................................................................................................
Introduction | Introducción | Introduction |Einleitung ...........................................................................
Connections and System Control |Conexiones y Control de sistema
Connexions & Utilisation |Anschlüsse und Systemeinstellungen .................................
Specications|Especicaciones|Caractéristiquestechniques|TechnischeDaten.................................
Product Registration | Registro de Producto | Enregistrement du produit | Produktregistrierung......
Support | Servicio al cliente | Assistance | Support Kontakt .......................................................................................
3
4
5
8
17
19
20

PLEASE READ CAREFULLY BEFORE PROCEEDING
Always follow the basic precautions listed below to
avoid the possibility of serious injury or even death
from electrical shock, short-circuiting, damages, re or
other hazards.
• READ INSTRUCTIONS:
- All the safety and operating instructions should be
read before the product is operated.
• RETAIN INSTRUCTIONS:
- The safety and operating instructions should be re-
tained for future reference.
-All the safety and operating instructions should be
read before the product is operated.
• HEED WARNINGS:
- All warnings on the product and in the operating in-
structions should be adhered to.
• FOLLOW INSTRUCTIONS:
- All operating and use instructions should be followed.
• CLEANING:
- The product should be cleaned only with a polishing
cloth or a soft dry cloth.
- Never clean with furniture wax, benzine, insecticides
or other volatile liquids since they may corrode the
cabinet.
• WATER AND MOISTURE:
- Do not use this product near water, for example, near
a bathtub, wash bowl, kitchen sink, or laundry tub; in a
wet basement; or near a swimming pool; and the like.
• DO NOT OPEN:
- Do not open the device or attempt to disassemble the
internal parts or modify them in any way. The device
contains no user- serviceable parts. If it should appear
to be malfunctioning, discontinue use immediately and
have it inspected by qualied GEMINI service person-
nel.
• REPLACEMENT PARTS:
- When replacement parts are required, be sure the ser-
vice technician has used replacement parts specied
by the manufacturer or have the same characteristics
as the original part. Unauthorized substitutions may re-
sult in re, electric shock, or other hazards.
WARNING • ADVERTENCIA • AVERTISSEMENT • WARNUNGEN
POR FAVOR LEA DETENIDAMENTE ANTES DE PROCEDER
Siguiendo siempre las precauciones básicas indica-
das a continuación para evitar la posibilidad de le-
siones serias incluso la muerte por descarga eléctrica,
cortocircuito, daños, fuego u otros peligros.
• LEA LAS INSTRUCCIONES:
- Todas las instrucciones de seguridad y funciona-
miento deben ser leídas antes de hacer funcionar el
producto.
.• CONSERVE LAS INSTRUCCIONES:
- Las instrucciones de seguridad y funcionamiento se
deben conservar para futuras consultas.Todas las in-
strucciones de seguridad y funcionamiento deben ser
leídas antes de hacer funcionar el producto.
• PRESTEN ATENCION A LAS ADVERTENCIAS:
- Todas las advertencias e instrucciones de funciona-
miento del producto deben ser tenidas en cuenta.
• SIGAN LAS INSTRUCCIONES:
- Todas las instrucciones de funcionamiento y uso de-
ben ser seguidas.
• LIMPIEZA:
- El producto debe ser limpiado solamente con un
paño limpio o un paño seco. Nunca limpien con cera
para muebles, gasolina, insecticidas u otros líquidos
volátiles que puedan corroer el recinto.
• AGUA Y HUMEDAD:
- No use este producto cerca del agua, por ejemplo,
cerca de la bañera, lavamanos, fregadero o la lava-
dora; en un sótano húmedo, o cerca de una piscina;
o parecidos.
• NO LO HABRA:
- No habrá el aparato o intente desmontar las partes
internas o modicarlas de alguna manera. El aparato
no contiene partes inservibles. Caso de que pareciera
que no funcionara, deje de usarlo inmediatamente y
haga que sea revisado por un técnico cualicado de
GEMINI.
• PIEZAS DE RECAMBIO:
- Cuando son necesarias piezas de recambio, tengan
por seguro que el servicio técnico ha usado piezas de
recambio especícas de la marca o de las mismas
características como las originales. Recambios no
autorizados pueden ocasionar incendios, descargas
eléctricas u otros peligros.
LIRE LES INSTRUCTIONS AVANT TOUTE UTILISATION
Veuillez prendre connaissance des instructions suiv-
antes an de prévenir tout accident et/ou mauvaise
utilisation du produit. Le non respect de ces principes
de base peut entraîner différents risques: blessure,
choc électrique , court-circuit, dommage & risque
d’incendie.
• LIRE LES INSTRUCTIONS:
- Toutes les notications techniques et de sécurité
doivent être lues avant utilisation du produit.
• CONSERVATION DU MANUEL D’INSTRUCTIONS:
- Le manuel d’instructions doit être conservé à l’abri
pour un usage futur. Veuillez vous y reporter en cas de
nécessité et avant toute utilisation du produit.
• MISES EN GARDE:
- Vous devez prendre connaissance de toutes les
mises en garde et y adhérer avant toute utilisation du
produit.
• SUIVI & RESPECT DES INSTRUCTIONS:
- Toutes les instructions de fonctionnement &
d’utilisation doivent être respectées.
• ENTRETIEN/NETTOYAGE:
- Cet appareil ne doit être nettoyé qu’avec un chiffon
légèrement humide ou tissu de polissage. Ne jamais
utiliser de produit de nettoyage pour meuble, benzine,
insecticide ou tout autre produit volatile qui pourrait
entraîner une corrosion de l’enceinte.
• EAU & HUMIDITE:
- Ne pas utiliser cet appareil à proximité d’un robinet,
d’un évier, d’une douche, d’une baignoire, d’une pi-
scine. Ne pas installer l’enceinte sur un sol humide.
• NE PAS OUVRIR:
- Ne pas démonter l’appareli an d’accéder aux
composants internes en vue d’une éventuelle ré-
paration/modication. Cet appareil ne contient pas
de pièces/composants qui puissent être réparés par
l’utilisateur. En cas de panne/dysfonctionnement,
veuillez contacter votre revendeur ou le service tech-
nique de GEMINI au 01 69 79 97 79 (FRANCE).
• REMPLACEMENT DE PIECES DETACHEES:
En cas d’intervention technique, veillez à ce que le
technicien n’utilise que des pièces d’origine ou re-
commandées par le constructeur. L’utilsation de com-
posants non spéciés par le constructeur pourrait en-
trainer un mauvais fonctionnement, ainsi que divers
risques (Incendies, choc électrique, court-circuit...) &
l’annulation de la garantie.
BITTE UNBEDINGT VOR INBETRIEBNAHME LESEN
Folgen Sie stets den nachfolgenden Vorsichtsmaßnah-
men, um die Möglichkeit von schweren Verletzungen
oder gar eines tödlichen elektrischen Schlages sowie
Kurzschluss, Beschädigung, Feuer oder anderer Ge-
fahren zu verhindern.
• ANWEISUNGEN LESEN:
- Lesen Sie alle Sicherheits- und Bedienungsanweisun-
gen, bevor Sie mit dem
Produkt arbeiten.
• AUFBEWAHRUNGSHINWEIS:
- Bewahren Sie alle Sicherheits- und Bedienungsan-
weisungen gut auf.
• WARNHINWEISE:
- Alle Warnhinweise für das Produkt und die
Bedienungsan weis ungen müssen
genau eingehalten werden.
• ANWEISUNGEN BEFOLGEN:
- Alle Anweisungen zum Betrieb des Produkts sollten
befolgt werden.
• REINIGUNG:
- Das Produkt sollte nur mit einem Polier- oder einem
weichen trockenen Tuch gereinigt werden. Benutzen Sie
dazu niemals Möbelwachs, Benzine, In sekten mittel oder
andere üchtige Reinigungsmittel, denn Sie könnten zur
Korrosion des Gehäuses führen.
• WASSER&FEUCHTIGKEIT:
- Benutzen Sie dieses Produkt nicht in der Nähe von
Was ser, z. B. in der Nähe einer Badewanne, einer
Waschschüssel, eines Küchenspül beckens, eines
Waschbeckens, in einem feuchten Keller, in der Nähe
eines Schwimmbeckens oder an ähnlichen Orten.
• NICHT ÖFFNEN:
- Öffnen Sie niemals das Produkt und versuchen Sie
nicht, interne Baugruppen zu entnehmen oder zu modi-
zieren. Das Produkt enthält keine vom Nutzer zu wech-
selnde Ersatzteile. Sollten Sie eine Fehlfunktion feststel-
len stellen Sie unverzüglich den Betrieb des Produktes
ein und lassen Sie es von qualiziertem GEMINI Servi-
cepersonal prüfen.
• ERSATZTEILE:
- Wenn Ihr Produkt Ersatzteile benötigt, achten Sie da-
rauf, dass der Servicetechniker nur vom Hersteller er-
laubte Ersatzteile oder Ersatzteile, die gleichen Eigen-
schaften wie die originalen Teile aufweisen, einsetzt.
Falsche Ersatzteile können zu Bränden, elektrischen
Schlägen oder anderen Risiken führen.
Warning
Advertencia•Avertissement•Warnungen
3
REPEAT
Diagrams
Diagramas•Diagrammes•Darstellungen 4
Diagrams
Diagramas | Diagrammes | Darstellungen
6
26
9
14
11
3 42 1
7
8
Tomixeroramp
Hacialatablademezclasoamplicador
Versconsoledemixageouamplicateur
Zum mixer oder verstärker
1213
181716
20 19
23
21 24
22
27
5
23
8
14
20
10
16
24
21
15
13
9
18
Front
Panel Frontal | Face Avant | Vorne
Back
PanelTrasero|FaceArriere|Rückseite
Remote
MandoADistancia|Telecommande|Fernbedienung
15
10
17
12
19
A B
25

Congratulations on purchasing a Gemini CDMP-1400 series professional 1U Single CD/
MP3/USBplayer.Thisstateoftheartunitincludesthelatestfeaturesandisbackedbya
one year limited warranty. Prior to use, we suggest that you carefully read all the instruc-
tions.
Felicidades por la compra de su Gemini CDMP-1400 Reproductor Profesional 1U de un
Lector CD/Mp3/USB. Este reproductor de CD/MP3/USB profesional está amparado por
1 año de garantía. Antes de usar le rogamos lea detenidamente estas instrucciones.
Félicitations concernant votre achat du Lecteur Gemini CDMP-1400. Ce Lecteur CD/
MP3/USB Professionnel 19’’ x 1U est couvert par une garantie durant 1 an. Nous vous
recommandonsdeprendreconnaissancedesinstructionsquisuiventavanttouteutilisa-
tion.
Glückwunsch zum Kauf des Gemini CDMP-1400 Professioneller 1 HE Single CD/MP3/
USB Player. Dieser professionelle State of the art Single CD/MP3/USB Player ist mit einer
1 Jahres Herstellergarantie versehen. Bitte lesen Sie diese Anleitung sorgfältig durch,
bevor Sie den Player verwenden.
Your Gemini CDMP-1400 series CD/MP3/USB player has been carefully inspected and
tested before packing and shipping. After unpacking your unit, carefully inspect it for
exterior damage and immediately report any physical damage during transit to your ship-
ping carrier. Save the shipping boxes and all packaging materials in case the unit needs
tobereturnedtoyourlocaldealerorGCITechnologies.
Su Gemini CDMP-1400 CD/MP3/USB Player ha sido cuidadosamente inspeccionado
yprobadoantesdeembalarseyenviarse.DespuésdedesembalarsuCDMP-1400,in-
specciónelo con cuidado para detectar daños externos e informe inmediatamente de
cualquierdañoproducidoduranteeltransporteasutransportista.Guardelascajasdel
transporteytodomaterialdeembalajeenelcasoquelaunidaddebaserdevueltaasu
vendedorlocaloaGCITechnologies.
VotreLecteurGeminiCDMP-1400abénéciédenombreuxtests&d’uncontrôlequalité
avantd’êtreemballé.Lorsquevousdéballerezcelui-ci,mercidevérierqu’iln’apasété
endommagédurantletransport.Danslecascontraire,notiertoutdommageparécrit
à votre transporteur ou revendeur. Nous vous recommandons de conserver l’emballage
d’origine complet en cas de retour de cet appareil si un problème ou une panne venait
à survenir.
Ihre Gemini CDMP-1400 Leistungsendstufe wurde vorsichtig geprüft und getestet bevor
sie verpackt und versendet wurde. Nachdem Sie den CDMP-1400 ausgepackt haben,
kontrollierenSieihnbitteaufäußerlicheBeschädigungenundmeldenSiejeglichen
TransportschadensofortIhremTransportunternehmen.BewahrenSiedenOriginalkarton
mitallemVerpackungsmaterialauf,fallsdasProduktjemalszuIhremFachhändleroder
zuGCITechnologieszurückgesendetwerdenmuss.
Additional contents
Contenidoadicional-Accessoireslivrésavecl’appareil-ZusätzlicherLieferumfang
(1) Power Cord - cable de alimentación - Cordon alimentation - Netzkabel
(1) User Manual - manual del usuario - Mode d’emploi - Bedienungsanleitung
(1) Pair of standard RCA cables - 2 cables de tipo RCA - 2 câbles du RCA -
2 RCA kabel
(1) Remote w/ 2 AAA Batteries - Mando A Distancia con 2 baterías de tipo AAA -
Telecommandeavec2pilesd’AAA-Fernbedienungmit2AAABatterien
-Audio CD, CD-R & MP3 compatible / Compatible con Audio CD, CD-R & MP3
Compatible CD-Audio, CD-R & MP3 / Spielt Audio-/MP3-CDs/CDRs
-PlaysMP3andWAVlesfromUSBstoragedevice*
ReproducecherosMP3yWAVdesdedispositivosdealmacenamientoUSB*
LecturedeschiersMP3stockéssurpériphériquesUSB*
SpieltMP3undWAVTitelvoneinemUSBSpeicherstick*
-Balanced XLR outputs, RCA output, Record output
Salida Balanceada tipo XLR, salida RCA y salida de Grabación
SortiestéréoXLR(Symétrique)&RCA(Asymétrique)-SortieenregistrementRCA
Symmetrische XLR-Ausgänge, Cinch Master- und Record-Ausgang
-¼” front MIC input, rear Combo XLR MIC input
Entrada frontal de Micro Jack de ¼” entrada posterior de Micro Combo XLR
EntréemicrophoneJack6.35mmenfaceavantdoubléepriseCombo(XLR&Jack
6.35mm)enfacearrière
6,3mmMICEingangvorne,XLR/Klinke-Comboeinganghinten
-IR Remote control / Mando Control Remoto
TélécommandeIF(Réglagevolume&vitesse)/Infrarot-Fernbedienung
-Anti-shock using RAM buffer memory / Anti-shock usando buffer de memoria RAM
Mémoireanti-choc(RAM)/AntishockRAM-Speicher
-Multifunction scroll knob for MP3 folder navigation
Botón Multifunción para navegación por carpetas MP3
Molettemultifonctionpermettantunenavigationrapide&aiséedanslesdossiersMP3
Introduction
Introducción•Introduction•Einleitung
5
Introduction•Presentación•Introduction•Einleitung
Unpacking•Desembalaje•Déballage•Auspacken
Features•Caracteristicas•Caracteristiques•Eigenschaften

Introduction
Introducción•Introduction•Einleitung 6
Drehregler zur MP3 Suche
-Instant-start & cue with preview / Reproducción instantánea y vista previa de Cue
Départdelectureinstantané&pré-écoutedupointCue/Sofortstart&CuemitVorhören
-Single & continuous play modes / Modos de reproducción Single y Contínuo
Mode lecture simple ou continue / Single & Continuos Play Modi
-Seamless loop with reloop / Seamless loop con reloop
Boucleparfaiteavecfonctionderetourautomatiqueàlaboucle(Reloop)
Seamless Loop mit Reloop
-Pitch bend buttons and rotary knob / Botones de Pitch bend
Calageviatouches+/-/PitchBendTasten
-Twomodetimeselection/Dosmodosdeseleccióndetiempo
2modesafchagetemps/2wählbareZeitanzeigemodi
-Frameaccuratesearch/Búsquedaexactadeframe
Lecture&rechercheultraprécise(1/75èmedeseconde)/FramegenauesSuchen
-Bright VFD display / Display VFD luminoso
LargeécranVFDafchagebleuhautevisibilité/Helleuoreszierende(VFD)Anzeige
-Variablepitchcontrolwiththreesettings+/-8,16&24%
Controldepitchvariablecontresajustes+/-8,16&24%
Vitessedelectureréglable+/-8-16-24%
Pitchfadermit8,16oder24%Bereich
•(FAT,FAT32,andNTFSformattedstoragedevices)
(DispositivosdealmacenamientoformateadosFAT,FAT32,yNTFS)
(UniquementlespériphériquesformatésenFAT,FAT32,etNTFS)
(nurFAT,FAT32undNTFSformatierteSpeichermedien)
We Want You Listening For A Lifetime
QueremosQueConserveSuOídoTodaLaVida
Longue vie à vos oreilles!
Wirmöchten,dassSieeinganzesLebenhören!
Selectingneaudioequipmentsuchastheunityouhavejustpurchasedisonlythestart
ofyourmusicalenjoyment.Nowit’stimetoconsiderhowyoucanmaximizethefunand
excitementyourequipmentoffers.ThisManufacturerandtheElectronicIndustriesAs-
sociation’sConsumerElectronicsGroupwantyoutogetthemostoutofyourequipment
byplayingitatasafelevel.Onethatletsthesoundcomethroughloudandclearwith-
out annoying blaring or distortion-and, most importantly, without affecting your sensitive
hearing.Soundcanbedeceiving.Overtimeyourhearing“comfortlevel”adaptstohigher
volumesofsound.Sowhatsounds“normal”canactuallybeloudandharmfultoyour
hearing.GuardagainstthisbysettingyourequipmentatasafelevelBEFOREyourhear-
ingadapts.Toestablishasafelevel:-Startyourvolumecontrolatalowsetting.-Slowly
increase the sound until you can hear it comfortably and clearly, and without distortion.
Onceyouhaveestablishedacomfortablesoundlevel:-Setthedialandleaveitthere.
Takingaminutetodothisnowwillhelptopreventhearingdamageorlossinthefuture.
After all, we want you listening for a lifetime.
Usedwisely,your newsound equipmentwillprovidea lifetimeoffun andenjoyment.
Since hearing damage from loud noise is often undetectable until it is too late, this Manu-
facturer and the Electronic Industries Association’s Consumer Electronics Group rec-
ommendyouavoidprolongedexposuretoexcessivenoise.Thislistofsoundlevelsis
included for your protection.
Seleccionarbienelequipodeaudio,comolaunidadqueacabadeadquirir,essóloel
comienzo de su disfrute musical. Ahora es el momento de considerar como se puede
maximizarladiversiónyelentusiasmoquesuequipoleofrece.EstefabricanteylaAso-
ciacióndeIndustriasElectrónicasdelGrupodeElectrónicadeConsumoquierequecon-
sigalomáximodesuequipoperoutilizándoloaunnivelseguro.Unnivelquelepermita
queelsonidolelleguealtoyclarosinestridencianidistorsiónylomásimportante,sin
afectarsusensibilidadauditiva.Elsonidopuedeserengañoso.Coneltiemposu“nivel
deconfort”deescuchaseadaptaanivelesdesonidomásaltos.Asíqueloquesuena
“normal”puedeserrealmentealtoyperjudicialparaeloído.Protéjasecontraestonive-
landosuequipoaunnivelseguroANTESdequesuoídoseadapte.Paraestablecerun
nivelseguro:-Inicieelcontroldelvolumenaunnivelbajo.–Lentamenteincrementeel
sonidohastaquepuedaescucharloconfortablemente,conclaridadysindistorsión.Una
vezhayaestablecidounniveldesonidoconfortable:-Ajusteeldialydéjeloahí.Tomarse
unminutoparahacerestoahoranosayudaráaprevenirdañosopérdidadeoídoenel
futuro.Despuésdetodo,queremosqueconservesuoídotodalavida.
Usadoprudentemente,sunuevoequipodesonidoleharádisfrutarydivertirsetodala
vida.Duranteañoseldañoporruidoenlosoídospuedeserindetectablehastaquees
demasiado tarde, por eso la Asociación de Industrias Electrónicas del Grupo de Elec-
trónica de Consumo recomienda evitar la exposición prolongada a un ruido excesivo.
Incluimos esta lista de niveles de sonido para su protección.
Choisirunéquipementaudiodequalitételqueceluidontvousvenezdefairel’acquisition,
nereprésentequ’unepartiedesréjouissancesmusicalesàvenir.Ilesttempsàprésent
dedécouvrir toutleplaisirquevous prendrezaveccetéquipement.Les fabricantset
lesindustrielsdumondedel’électroniquesouhaitentquevouspuissiezobtenirdevotre
matérielcequ’ilademeilleurtoutenl’utilisantàunniveausonoremodéré.Unniveau
permettant au son de s’exprimer à la fois fortement et distinctement, sans distorsion et,
surtout,sansfragiliservotrecapacitéd’écoute.Lesonpeutparfoiss’avérerdécevant.
Avecl’habitude,leniveaud’écouteauquelvousvous sentezà l’aisevous conduiraà

monterlevolume.C’estainsiqu’unniveausonorequipeutvoussembler“normal“est
enréalitéfortetfragilisevosoreilles.Préservez-vousdecettetendanceenréglantvotre
matérielàunniveauraisonnableAVANTquevosoreillesnes’habituent.Commenceztou-
joursavecunréglagedevolumeàfaibleniveau,puisaugmentezcelui-ciprogressivement
and’atteindreleniveauaudiodésiré.Veillezànepasatteindreunniveaudedistorsion
quiseraitpréjudiciableàlaqualitéaudio,aufonctionnementcorrectdel’amplicateur,
ainsiqu’àvoscapacitésd’écoute.Prendreletempsd’effectuercetteopérationdèsà
présent,vouspermettrad’évitertoutefragilisationoubienmêmelapertedevotrecapital
d’écoute.Aprèstout,noussouhaitonslonguevieàvosoreilles!!!
Utiliséàbonescient,votrenouveléquipementaudiovousoffriratouteuneviedeplai-
sir.Parcequeleslésionsauditivesnesontdétectéesquelorsqu’ilestdéjàtroptard,le
Fabricantetl’associationdeconsommateursdel’industriedel’électroniquevousrecom-
mandentd’évitertouteexpositionprolongéeàunniveausonoreinadapté.
DieWahlvonexzellentemAudioequipment,sowiedasGerät,fürdasSiesichentsch-
ieden haben, sind nur der Start Ihres musikalischen Vergnügens. Wenn Sie einige Dinge
beachten,werdenSienochmehrSpaßundFreudemitIhremEquipmenthaben.Dies-
er Hersteller und die Electronic Industries Association´s Consumer Electronics Group
möchten,dassSieallesausIhrenGerätenherausholen,indemSieesmiteinemsicheren
Pegel betreiben. Ein Pegel, bei dem Sie den Sound laut und klar hören, ohne lästige
StörgeräuscheundVerzerrungenund-amwichtigsten-ohneIhrGehörzuschädigen.
Soundkanntäuschen.HörenSieübereinegewisseZeitmiteinem“ordentlichenLevel”,
führtdaszugrößerenLautstärken,sodassetwas,wasSieals“normal”empnden,schon
zulautseinundIhrGehörschädigenkann.BeugenSiedemvor,indemSieIhrEquipment
aufeinensicherenLautstärkepegeleinstellen,BEVORSiemitdemHörenbeginnen.So
erreichenSieeinen sicherenPegel:- BeginnenSie beimEinstellen derLautstärke bei
einemgeringenPegel-ErhöhenSiedenPegelnurlangsambisSiedenSoundangenehm
undklarundohneVerzerrungenhören.WennSieeinenangenehmenPegelgefundenha-
ben:-BelassenSiedieReglerindergefundenenPositionNehmenSiesicheineMinute
Zeitdafür,umGehörschädeninderZukunftzuverhindern,dennwirwollen,dassSieIhr
ganzesLebenhören.
WennSieIhrEquipmentmitBedachtverwenden,werdenSiesicheinLebenlangdaraner-
freuen.DaGehörschädenauszulautenGeräuschenentstehen,dieleideroftersterkannt
werden, wenn es zu spät ist, empfehlen dieser Hersteller und die Electronic Industries
Association´s Consumer Electronics Group, sich keinesfalls länger lauten Geräuschen
auszusetzen. Wir haben zu Ihrem Schutz eine Liste mit Lautstärkepegeln zusammenges-
tellt:
Sound Level (in dB) •Nivel de sonido (en decibelios)
Niveau audio (En dB) •Lautstärken (in dB)
30 Quiet library, soft whispers
Biblioteca, susurros suaves
Bibliothèquecalme,murmures
leise Bibliothek, Flüstern
40 Livingroom,refrigerator,bedroomawayfromtrafc
Saladeestar,nevera,dormitoriolejosdeltráco
Salleàvivre,réfrigérateur,chambreàcoucheréloignéedelarue
Wohnraum, Kühlschrank, Schlafzimmer
50 Lighttrafc,normalconversation,quietofce
Trácomoderado,conversaciónnormal,ocinatranquila
Tracroutierléger,conversationnormale,bureaucalme
Leichter Verkehr, normales Gespräch, ruhiges Büro
60 Airconditionerat20feet,sewingmachine
Aireacondicionadoa6metros,máquinadecoser
Systèmedeclimatisationsituéà6-7mètres,machineàcoudre
Klimaanlage in 7 m Entfernung, Nähmaschine
70 Vacuum cleaner, hair dryer, noisy restaurant
Aspiradora, secador de pelo, restaurante ruidoso
Aspirateur, sèche-cheveux, restaurant bruyant
Staubsauger,Haarfön,lautesRestaurant
80Averagecitytrafc,garbagedisposals,alarmclockattwofeet
Trácoenciudad,trituradoradebasura,relojdespertadora60cms.
Tracroutierdense,centredetridesordures,réveilmatinà60cm
durchschnittlicherStadtverkehr,Müllhäcksler,Weckerin60cmEntfernung
Thefollowingnoisescanbedangerousatextendedexposure
Lossiguientesruidospuedesserpeligrososenexposicionesprolongadas:
Lesbruitssuivantspeuventêtredangereuxlorsdetouteexpositionprolongée
DIEFOLGENDENGERÄUSCHEKÖNNENBEILÄNGEREMKONTAKTGEFÄHRLICHSEIN
90Subway,motorcycle,trucktrafc,lawnmower
Metro,motocicleta,trácodecamiones,cortadoradecésped
Métro,moto,camion,tondeuseàgazon
U-Bahn, Motorrad, LKW Verkehr, Rasenmäher
100 Garbage truck, chain saw, pneumatic drill
Camión de la basura, motosierra, chirriar de rueda
Camionpoubelles,tronçonneuse,marteaupiqueur
Müllauto, Kettensäge, Presslufthammer
120 Rock band concert in front of speakers, thunderclap
7Introduction
Introducción•Introduction•Einleitung

Concierto de rock delante de los altavoces, trueno
Concert de rock devant les enceintes, coup de tonnerre
Rockkonzert vor den Lautsprechern, Donnerschlag
140 Gunshotblast,jetplane
Disparo de arma de fuego, avión Jet
Coup de pistolet, avion Jet
Gewehrschuss,Düsenugzeug
180 Rocket launch pad
Plataforma de lanzamiento de cohetes
Fuséeaudécollage
Raketenstart
Information courtesy of the Deafness Research Foundation.
Información cortesía de la Fundación de Investigación de la
Sordera.
NousremercionslaFondationdeRecherchecontrelaSurdité
pour ces informations.
Mit freundlicher Genehmigung der Deafness Research Founda-
tion
Laser Diode Properties / Propiedades del Diodo Laser
PropriétésDiodeLaser/LaserDiodenEigenschaften
Material/Gaz:Ga-Al-As
Wavelength/ Longitud de onda
Longueurd’Onde/Wellenlänge:755-815nm(bei25°C)
LaserOutput/SalidaLaser/NiveaudeSortie/Laserausgang:
ContinuousWave/OndaContinua
Signal Continu/ konstanter Strahl, max. 0.5 mW
1.DonotusethisCDplayerattemperaturesbelow41°F/5°Cor
higherthan95°F/35°C.
1.NoutiliceesteCDatemperaturaspordebajo41°F/5°C
osuperioresa95°F/35°C.
1.Ne pas utiliser ce lecteur CD à des températures in-
férieuresà41°F/5°Cetsupérieuresà95°F/35°C.
1.SetzenSiediesenCD-PlayerkeinenTemperaturenun-
terhalb41°F/5°Cundoberhalbvon95°F/35°Caus.
2.Theapparatusshouldnotbeexposedtodrippingorsplash-
ing,andnoobjectslledwithliquidssuchasvasesshouldbe
placed on the apparatus.
2.Este aparato no debe exponerse a chorros o salpicadu-
ras,ynodebencolocarseobjetosconlíquidoscomopor
ejemplojarrones,encimadelaparato.
2.L’appareilnedoitpasêtrepositionnéàproximitédetout
objetcontenantunliquide(Exemple:vase...).
2.Das Produkt darf keinem Spritzwasser ausgesetzt
werdenundesdürfenkeineObjektegefülltmitFlüssigkeit
(etwa Vasen) auf dem Produkt platziert werden.
3. Place the unit in a clean and dry location.
3.Coloquelaunidadenlugarlimpioyseco.
3.Placezl’appareildansunendroitpropre,sec&ventilé.
3. Stellen Sie das Produkt an einem sauberen und trock-
enenOrtauf.
4. Do not place the unit in an unstable location.
4.Nocolocarlaunidadenunasupercieinestable.
4. Placez l’appareil sur un support stable.
4. Stellen Sie das Produkt nicht auf wackelige Ober-
ächen.
5. When disconnecting the power cord from the AC outlet, al-
ways grasp it by the plug. Never pull the power cord.
5. Al desconectar el cable de corriente de la toma de pared,
siemprecojaloporelconector.Nuncatiredelcable.
5. Lorsque vous débranchez l’appareil de la prise élec-
trique,utilisezlaprise.Netirezjamaissurlecordon.
5. Wenn Sie das Netzkabel ziehen, halten Sie es stets am
Stecker selbst und nicht am Kabel fest.
6.To preventelectric shock,donot remove the coverorthe
bottom screws.
6.Paraevitarshockeléctrico,noquitelatapanilostornil-
los inferiores.
6. An de prévenir tout accident électrique éventuel,
veuilleznepasdémonterl’appareil.
6.UmeinemelektrischenSchockvorzubeugenöffnenSie
niemals das Gehäuse des Gerätes.
7.ThereareNOUSERSERVICEABLEPARTSINSIDE.Please
refertoaqualiedtechnician.
7.NOHAYPARTESREEMPLAZABLESPORELUSUARIO
enelinterior.Porfavoracudaauntécnicocualicadosi
es necesario.
7.Iln’yapasDEPIECESDETACHEESACCESSIBLESA
TOUTUTILISATEURAL’INTERIEURDEL’APPAREIL.En
cas de problème, veuillez contacter votre revendeur ou un
technicienqualié.
7.ImGerätbendensichKEINEVOMBENUTZERAUSZU-
TAUSCHENDEN TEILE. Bitte wenden Sie sich an einen
qualiziertenTechniker.
8. Do not use chemical solvents to clean the unit.
8.Nousedisolventesquímicosparalimpiarlaunidad.
8.Veillezànepasutiliserdesolvantschimiquespournet-
toyer l’appareil.
8.KeineSprühreinigeroderSchmierölanReglern,Ober-
ächeoderSchalternbenutzen.
9. Keep the laser pickup clean by keeping the tray closed.
9.Mantengaellectorlaserlimpiomanteniendolabandeja
cerrada.
9. Veillez à conserver le tiroir de chargement en position
ferméean d’évitertoute intrusionde poussièredansle
mécanismedelecture.
9. Lassen Sie die CD-Schublade geschlossen, damit der
Laser sauber bleibt
10. Keep this manual in a safe place for future reference.
10. Guarde este manual en lugar seguro para futuras ref-
erencias.
10. Conservez ce mode d’emploi dans un endroit sûr pour
tout usage futur.
10. Verwahren Sie diese Anleitung gut auf für die Zukunft.
Power •Alimentación •Alimentation •Netzanschluss
MAIN POWER RECEPTACLE (1): This is a Standard
3-prong IEC power connector. Connect the detachable
line cord (included in the box with your CDMP-1400 to the
power receptacle, and plug the other end of the line cord
intoanACoutlet.TheCDMP-1400hasauniversalpower
supply that can accept any AC voltage from 100 VAC to
SafetySpecications
Especicacionesdeseguridad
Specicationslaser
Sicherheitsinformationen
Precautions•Precauciones
Misesengarde•Vorsichtsmassnahmen
Connections and System Controls
Conexiones y Controles Sistema
Connexions & Fonctions
Anschlüsse und Bedienelemente
Connections and System Control
ConexionesyControldesistema•Connexions&Utilisation•AnschlüsseundSystemeinstellungen 8

240 VAC. No need for voltage select switches. It will work
virtually anywhere in the world. It is less susceptible to
voltage sags or spikes than conventional power supplies,
providing greater electro magnetic isolation and better
protection against AC line noise.
RECEPTÁCULOPRINCIPALDEALIMENTACIÓN(1):Este
es un conector de alimentación standard de 3 termina-
les IEC. Conecte el cable de alimentación (incluido en la
cajade suCDMP-1400)al receptáculodealimentación,
y conecte el otro extremo del cable en un enchufe AC.
El CDMP-1400 tiene una fuente de alimentación univer-
salqueaceptacualquiervoltajeACdesde100VACa240
VAC.Nonecesitadeseleccionarinterruptoresdevoltaje.
Funcionarávirtualmenteencualquierpartedelmundo.Es
menossusceptibleavariacionesdetensiónopicosque
las fuentes de alimentación convencionales, ofreciendo
mayor aislamiento electromagnético y mejor protección
contra el ruido de línea AC.
EMBASE CORDON ALIMENTATION (1): Il s’agît d’une
embase standard IEC 3 points. Connectez le cordon
d’alimentation (Livré avec l’appareil) à l’embase IEC et
l’autre extrémité à une prise électrique (AC). Le CDMP-
1400possède unealimentation àdécoupage(Switching
power supply) s’adaptant automatiquement à la tension
en vigueur dans le pays d’utilisation (De 100V à 240V AC).
Plusbesoindesélectionnercelle-cimanuellement.Cette
technologiepermetd’éviterlessautesdetensionensta-
bilisantlecourantd’alimentation&bénécieaussid’une
meilleureisolationélectromagnétiquepermettantderédu-
irelesbruitsinhérentsàunealimentationélectriqueclas-
sique.
NETZSPANNUNGSEINGANG (1): Dies eine Standard
Kaltgerätebuchse. Verbinden Sie die eine Seite des mit-
gelieferten Netzkabels mit der Netzeingangsbuchse, die
andere Seite mit Ihrer Netzsteckdose. Der CDMP-1400
verfügt über ein Universal-Netzteil welches mit jeglicher
Spannung im Bereich 100 V bis 240 V Wechselspannung
betrieben werden kann. Es ist nicht notwendig, die Netz-
spannung einzustellen und damit ist das Gerät überall auf
der Welt zu betreiben. Das Netzteil ist weniger anfällig für
Spannungsspitzenund–senkenalsnormaleNetzteile,bi-
etet erhöhte elektromagnetische Isolation und besseren
Schutz gegen Netzbrummen.
Output•Salida •Sortie •Ausgang
LINE/RECOUTPUTJACKS(2):PlugoneendoftheRCA
cableintoLINE/RECoutputjacksontherearpanel.Plug
the other end of the RCA connectors into any available
LINE/RECINin¬putjacksonyourmixer.Ifyouarecon-
necting the CDMP-1400 through a receiver, you can plug
theRCAconnectorsintotheCDorAUXINPUTJACKSon
yourreceiver.IftherearenoCDorAUXINPUTSuseany
line level inputs.
CONECTORESDESALIDALINE/REC(2):Conecteunex-
treme del cable RCA en el conector de salida LINE/ REC
del panel trasero. Conecte el otro extremo del RCA en al-
gún conector de entrada disponible LINE/REC en su mez-
clador.SiestáconectandoelCDMP-1400atravésdeun
preamplicador,puedeconectarlosRCAenlasentradas
deCDoAUXdesupreamplicador.
SORTIE ASYMETRIQUE LIGNE/ENREGISTREMENT
(REC)(2):BranchezuncordonRCAàlaSORTIELIGNE/
ENREGISTREMENT(REC)RCAsituéeenfacearrièrede
l’appareil. Branchez l’autre extrémité du cordon RCA à
l’unedesentréesLIGNEdevotreconsoledemixage.Si
vousconnectezle CDMP-1400à un amplicateurHi-Fi,
veillezàutiliserlesentréesCDouAUXILIAIRE(RCA).Si
votreamplicateurnepossèdepasd’entréesCDouAUX-
ILIAIRE(RCA), utilisezn’importe quelleentrée deniveau
ligne(Nejamaisutiliserl’entréePhono).
LINE/REC AUSGANGSBUCHSEN (2): Verbinden Sie Ihr
Cinchkabel mit den LINE/REC Ausgängen auf der Rück-
seite und mit einem Line-Eingang Ihres Mischpultes. Wenn
SiedenPlayeraneinenReceiveranschließendannkön-
nen Sie dort die Eingänge CD/AUX oder ähnliche Line-
Eingänge verwenden.
BALANCED XLR (3) outputs: The back of the unit also
contains a pair of standard 3-pin XLR outputs that accept
a balanced female XLR connector. Pin 1 = shield/ground,
pin 2 = hot or positive (+) and pin 3 = cold or negative (-) for
proinstallations.*Note:bothRCAandXLRcanbeusedat
the same time.
SALIDASBALANCEADASXLR(3):Lapartetraseradela
unidad también contiene un par de salidas standard de
3pin XLR queaceptan unconectorhembra XLR.Pin 1
= toma de tierra, pin 2 = positivo (+) y pin 3 = negativo
(-)parausoeninstalacionesprofesionales.*Nota:ambas
tomas RCA y XLR pueden utilizarse al mismo tiempo.
SORTIE SYMETRIQUE LIGNE (XLR) (3): pour les appli-
cationsprofessionnelles, vouspouvez utiliser laSORTIE
SYMETRIQUE équipée d’embases XLR femelle. Vous
trouverez à l’arrière de l’appareil le câblage standard pour
toutconnecteurXLR.Pin1:blindage/terre–Pin2:point
chaud(+)–Pin3:pointfroid(-).
*Notezqueles2sorties(RCA/XLR)peuventêtreutilisées
simultanément.
SYMMETRISCHEXLRAUSGANGSBUCHSEN(3):Aufder
Rückseite steht auch ein Pärchen 3-Pin XLR-Ausgänge
zur Verfügung, an welche symmetrische XLR-Kupplungen
angeschlossenwerdenkönnenfürprofessionelleInstalla-
tionen. Pin 1 = Abschirmung/Masse, Pin 2 = heiß/positiv
(+) und Pin 3 = kalt/negativ (-). *Beachten Sie, dass die
Cinch- und XLR-Ausgänge gleichzeitig verwendet werden
können.
Input •Entrada •Entree micro •Eingang
XLRMICIN(4):OntherearoftheunitisanXLRinputjack
that accepts a balanced male connector. Pin 1 = shield/
ground, pin 2 = hot or positive (+) and pin 3 = cold or nega-
tive (-).
1/4”(6.35mm)MICINPUT(5):Thefrontoftheunithouses
a1/4”(6.35mm)inputjackthatallowsasignaltocomein
through the front of the machine.
ENTRADAXLR DEMICRO(4):Enel paneltraserode la
unidad hay un conector XLR de entrada que acepta un
conector balanceado macho. Pin 1 = toma de tierra, pin 2
= positivo (+) y pin 3 = negativo (-).
9Connections and System Control
ConexionesyControldesistema•Connexions&Utilisation•AnschlüsseundSystemeinstellungen

ENTRADA1/4”(6.35mm)DEMICRO(5):Lapartefrontal
delaunidadcontieneunconectordeentradajackde1/4”
(6.35mm)quepermitelaentradadeseñaldesdelaparte
frontal de la unidad.
ENTRÉEMICROPHONEXLR(4):Voustrouverezenface
arrière de l’appareil une entrée XLR symétrique femelle.
Ci-après rappel du câblage standard de tout connecteur
XLR:Pin1:blindage/terre–Pin2:pointchaud(+)–Pin3:
point froid (-).
VoustrouverezenfaceavantuneENTREEMICROPHONE
surJack6.35mm(5).
XLRMIKROFONEINGANG(4): DerXLREingang aufder
Rückseite dient dem Anschluss eines symmetrischen
XLR-Steckers. Pin 1 = Abschirmung/Masse, Pin 2 = heiß/
positiv (+) und Pin 3 = kalt/negativ (-).
6,35MMMIKROFONEINGANG(5):Der6,35mmKlinke-
neingang auf der Vorderseite dient dem einfachen Eins-
peisen eines Signals über die Vorderseite des Players.
Functions •Funciones •Fonctions •Funktionen
POWER (6): Once all cables are connected, the CDMP-
1400can beturnedon bypressing thePOWER button.
PressingtheCDMP-1400’sPOWERbuttonasecondtime
will turn off the unit.
ALIMENTACIÓN(6): Una vez se hayan conectado todos
los cables , el CDMP-1400 puede ser encendido apretan-
doelbotóndePOWER.PulsandoelbotóndePOWERdel
CDMP-1400 una segunda vez apagará la unidad.
ALIMENTATION (POWER) (6): Lorsque vous avez effec-
tué tous les branchements et sélectionné la TENSION
D’ALIMENTATION ADEQUATE, mettez le CDMP-1400
sous tension en appuyant sur la touche POWER, pour
éteindre l’appareil, appuyez sur la touche POWER une
seconde fois.
NETZSCHALTER (6): Nach dem Anschließen aller Kabel
könnenSiedenCDMP-1400mitBetätigendesNetzschal-
ters einschalten. Ein erneutes Betätigen des Schalters
schaltet den Player wieder aus.
DISCSLOT(7):TheDISCSLOTiswheretheCDisload¬ed,
unloaded and stored during playback. It holds both 12 cm
and8cmCDsandreadsWAVaswell asMP3les.(DO
NOTFORCETHECDINTHESLOT.EXCE¬SIVEFORCE
WILLDAMAGETHECDMECHANISM.)
*Note:WhentheunitisONandthereisNODISCinthe
CD drive, a user will hear a brief mechanical noise com-
ingfromtheunitaftertwominutes.Thisnoisewilloccur
every two minutes until the unit is powered off or a disc is
insertedintothedrive.Thisnoiseisnotanindicationthat
the unit is malfunctioning in any way.
SLOT(7):ElSLOTespordondeserealicelacargadelCD,
ladescargaydondesealojaelCDdurantelareproduc-
ción.PermiteCD’sde12y8cmyleecherostipoWAV
asícomo MP3.(NOFUERCE ELCD ENEL SLOT. UNA
FUERZAEXCESIVADAÑARÍAELMECANISMODELCD)
*Nota:CuandolaunidadestáenposiciónONyNOHAY
DISCOenelmecanismodelCD,alcabodedosminutos
el usuario escuchará un leve ruido mecánico procedente
de la unidad. Este ruido se escuchará cada dos minutos
hastaquelaunidadseapagueoseinserteundiscode
nuevo.Esteruidonosignicadeningunamaneraquela
unidad no funcione correctamente.
SLOT-IN (7) CHARGEMENT/DECHARGEMENT CD: Per-
metlechargement,lalectureetledéchargementdetout
CD(Compatible 12cm/8cm).AFIN DENE PASENDOM-
MAGER LE MECANISME, UTILISEZ SYSTEMATIQUE-
MENTLATOUCHEOPEN/CLOSE.
Note:Lorsquel’appareilestenmarcheetqu’iln’yapas
de disque dans le lecteur de CD, l’utilisateur entendra
unléger& brefbruitmécanique provenantde l’unité au
bout de deux minutes. Ce bruit se produit toutes les deux
minutesjusqu’àcequel’appareilsoitmishorstensionou
qu’undisquesoitinsérédanslelecteur.Cebruitnecon-
stituepasuneindicationdedéfectuositédel’appareilde
quelquefaçonquecesoit.
CDEINZUGSSCHLITZ(7):DerCD-EinzugdientdemEinle-
gen und Auswerfen der CD. Er nimmt 12 und 8 cm CDs an
und das Laufwerk liest Audio-CDs, WAV und MP3 Dateien.
(WENDENSIE KEINEGEWALTAN, UMDIE CDINDAS
LAUFWERKZUZWINGEN.GEWALTEINWIRKUNGBES-
CHÄDIGTDENMECHANISMUS)
*Achtung: Wenn das Gerät eingeschaltet und keine CD
eingelegt ist wird der Anwender ein kurzes mechanisches
GeräuschinAbständenvon2Minutenhören.DerGeräusch
erlischt wenn eine CD eingelegt wird oder das Gerät aus-
geschaltet wird und stellt keine Fehlfunktion dar.
EJECT (8): Pressing the EJECT button will eject the CD
fromtheDISCSLOT(7).IfaCDisplaying,youmustpress
thePLAY/PAUSE(19)buttonbeforeejectingyourdisc.
EJECT(8):PulsandoelbotóndeEJECTexpulsaráelCD
delSLOT(7).SiunCDestáenreproducción,sedebepul-
sar el botón PLAY/PAUSE (19) antes de expulsar el disco
queestásonando.
EJECTION(8)
TOUCHEEJECTION(EJECT):Enappuyantsurlatouche
EJECT,vouséjectezleCD.Encoursdelecture,leCDMP-
1400estéquipéd’une protectionpermettantd’éviter un
déchargementaccidentelduCD.Ilvousfautd’abordap-
puyer sur la touche PLAY/PAUSE (19) avant de pouvoir
éjecterleCD.
EJECT(8):BetätigenSiedieEJECT-Taste,umdieCDaus
dem Laufwerk (7) zu entfernen. Während der Wiedergabe
müssen Sie die CD zuerst mit PLAY/PAUSE (19) anhalten,
umdieCDauswerfenzukönnen.
FOLDER TRACK SEARCH (9): The FOLDER TRACK
SEARCH allows you to navigate through folders or tracks
similarly in ei¬ther USB or CD mode.
10
Connections and System Control
ConexionesyControldesistema•Connexions&Utilisation•AnschlüsseundSystemeinstellungen

When navigating a standard CD turn the knob to the right
to advance the selection, or turn the rotary to the left to
decrease the selection.
FOLDER TRACK SEARCH (9): El control de FOLDER
TRACKSEARCHlepermitenavegaratravésdelascarpe-
tas o pistas ya sea en modo USB o modo CD.
Cuando navegue con un CD en reproducción gire el con-
trol hacia la derecha para avanzar en su selección, o gire
elcontrolhacialaizquierdaparairhaciaatrásensuselec-
ción.
POTENTIOMETRE DE SELECTION DE PLAGE (TRACK
SELECTION ROTARY) (9): Le POTENTIOMETRE DE SE-
LECTIONDEPLAGEpermetunenavigationdanslesdos-
siersoulasélectiond’uneplagesurunCD.
Cecidépend delasélectiondumode USBoudu mode
CD.Enmode CD,le potentiomètrepermet lasélection
d’uneplage. Tournez celui-cidans lesensdesaiguilles
d’unemontre(Versladroite)and’avancerdanslasélec-
tion.Tournezàl’inversedusensdesaiguillesd’unemon-
tre(Verslagauche)andereculerdanslasélection.
TITELWAHL-DREHKNOPF (9): Der TITELWAHL-DREH-
KNOPFdientder Navigation durchTitel und Ordnerauf
der CD oder dem USB-Speicher.
Bei der Suche durch eine normale Audio-CD wählen Sie
imUhrzeigersinneinenTitelweiter,gegendenUhrzeigers-
inneinenTitelzurück.
TheROTARYknobalsoallowsyoutosearchthroughmu-
sic libraries on your MP3, CD, or USB memory stick. Ro-
tate the knob until you have reached the folder you wish to
explore(folderswillbeidentiedbya(+)signbeforeand
after their name for example: +DANCE MUSIC+). If you
havenotcreatedafolderthesong(track),leswillappear
withjustthenameofthelewhichwillscrollonceacross
the display when selected, then hold for easier viewing of
track titles.
ElcontrolROTATIVOtambiénlepermiterealizarbúsqueda
atravésde libreríasensus MP3, CD, odispositivos de
memoriaUSB.Gireelcontrolhastaquehayaencontrado
lacarpetaquequieraexplorar(lascarpetasseránidenti-
cadasporunsigno(+)antesydespuésdesunombre,por
ejemplo:+DANCEMUSIC+.Sinohacreadounacarpeta,
loscherosdelascanciones(pistas)apareceránconsolo
elnombredelcheroelcualpermitiránavegaratravésdel
displaycuandoseseleccione,entoncesmanténgalopara
una visión más fácil de los títulos de las pistas.
Le potentiomètre permet aussi d’accéder aux chiers/
dossiers/morceauxsituéssurvotrebaladeurMP3,disque
CDetpériphériqueUSB.Tournezlepotentiomètrejusqu’à
atteindre le dossier désiré (Chaque dossier est identié
parlesigne(+)situéavant&aprèslenomdudossier.Ex-
emple : +DANCE MUSIC+). Si vous n’avez pas créé de
dossier(s),leschiersapparaîtrontlesunsàlasuitedes
autres.Ilvoussuftdelesfairedélerand’atteindrele
dossierdésiré.
Der Drehknopf dient auch der Navigation durch eine
Musiksammlung auf Ihrer MP3-CD oder USB-Speicher.
DrehenSiesolange,bisdergewünschteOrdnergefunden
ist(OrdnerwerdenmiteinemPluszeichen,z.B.„+DANCE
MUSIC+“dargestellt,TitelwerdenohnediesesZeichenan-
gezeigt)unddrückenSiedenTITELWAHL-DREHKNOPF,
umdenOrdnerzuöffnen.
When you have reached the desired folder, press the
FOLDERTRACKSEARCHknobtoopenit,orwhenyou
havereachedthedesiredtrack,presstheFOLDERTRACK
SEARCH knob to load it. If the unit is in SINGLE mode,
thetrackwillloadandthePLAY/PAUSEbuttonwillash
indicating that the song is ready for PLAY. If you are in
CONTINUOUSmode,thedesiredtrackwillstartplaying
immediately.
Cuando se haya llegado a la carpeta deseada, pulse el
controlFOLDERTRACKSEARCHparaabrirlacarpetao
cuando haya llegada a la canción deseada, pulse el con-
trolFOLDERTRACKSEARCHparacargarla.Silaunidad
se está utilizando en modo SINGLE, la canción se car-
garáyelbotónPLAY/PAUSE parpadearáindicandoque
la canción está lista para reproducirse. Si en cambio, está
trabajandoenmodoCONTINUOUS,lacancióndeseada
empezará a reproducirse inmediatamente.
Lorsque vous avez atteint celui-ci, appuyez sur le PO-
TENTIOMETREDESELECTIONDEPLAGEand’ouvrirle
dossier ou de le charger. Si l’appareil est en mode lecture
SIMPLE(SINGLE),lemorceaus’afcheetlatouchePLAY/
PAUSEclignoteraindiquantainsiquelemorceauestprêt
àêtrelu.Sil’appareilestmondelectureCONTINUE(CON-
TINUOUS),la lecturedumorceaudémarrerainstantané-
ment.
WennSieschließlichdengewünschtenTitelgefundenha-
ben drücken Sie wieder den TITELWAHL-DREHKNOPF,
umdenTitelzuladenundstarten.ImSINGLE-Moduswird
derTitel geladenunddiePLAY/PAUSE blinktimPause-
Modus.ImCONTINUE-Modus(Singleaus)wirdderTitel
sofort gestartet.
Once a song/track is playing you may once again navi-
gate through your folders and tracks by simply turning the
FOLDERTRACKSEARCHknob.Thedisplaywillgoback
to the last song or folder you were viewing. You may then
navigatefromthatpointuntilyoundyournextsong.The
displaywill showyour choicefor 10SECONDS thengo
back to the song infor¬mation of the song playing.
Una vez la canción está sonando puede volver a navegar
atravésdelascarpetasypistassimplementegirandoel
controlFOLDERTRACKSEARCH.Eldisplayvolveráhacia
laúltimacanciónocarpetaqueestabavisualizandoprevi-
amente. Puede entonces navegar desde ese punto hasta
queencuentresu siguientecanción. Eldisplaymostrará
suseleccióndurante10SEGUNDOSentoncesvolveráa
lapantallade informacióndela canciónqueestaba so-
nando en ese momento.
Durant la lecture d’un morceau, vous pouvez procéder
àune nouvellerecherchepar lebiais duPOTENTIOME-
TREDESELECTIONDEPLAGE.L’écranafcheraalorsle
derniermorceausurlequelvousétiezsitué.Votrerecher-
chedémarreraàpartirdecelui-ci.L’écranafcheradurant
11 Connections and System Control
ConexionesyControldesistema•Connexions&Utilisation•AnschlüsseundSystemeinstellungen

10secondeslesinformationsdumorceausurlequelvous
êtes situé puis reviendra sur l’afchage du morceau en
cours de lecture.
WenneinTitelläuftkönnenSieeinfachwiederdenTITEL-
WAHL-DREHKNOPFbedienen,umsicheinenanderenTi-
tel auszusuchen. Die Suche beginnt immer an der Stelle,
wo man zuletzt gewesen ist. Sie können dann solange
suchen, bis Sie ihren nächsten Titel gefunden haben.
Verändern Sie die Auswahl für 10 SEKUNDEN nicht, wird
wiederderaktuellwiedergegebeneTitelangezeigt.
IfyouwishtogobackandLOADthesongyouchose,sim-
plyPRESSTHEKNOBTWICE,ONCEforthedisplaytogo
backtothelastsongVIEWEDandSECONDtoLOADthat
song.Youcanalsosearchfromthatpointaswell.*NOTE:
ONCEYOUHAVESKIPPEDTOANOTHERTRACK,YOU
MAY NOT GO BACK TO YOUR PROGRAMMED CUE
POINT.YOUMUSTBEGINYOURCUESELECTIONOVER
AGAIN.THECUEWILLBEPRESETTOTHEBEINNING
OFTHENEWLYSELECTEDTRACK.
Si desea volver atrás y CARGAR la canción escogida,
simplemente PRESIONE EL CONTROL DOS VECES,
UNAparaquelapantallavuelvahacialaúltimacanción
vistayDOSparacargartalcanción.Tambiénpuedebus-
cardesdeesepunto.*NOTA:UNAVEZHAYAPASADOA
OTRACANCIÓN,NO PODRÁ VOLVER AL PUNTO CUE
PROGRAMADO. DEBE EMPEZAR SU SELECCIÓN DE
CUE DE NUEVO.EL CUE SERÁ PREESTABLECIDO AL
PUNTODECOMIENZODELANUEVACANCIÓNSELEC-
CIONADA.
Si vous souhaitez charger ce nouveau morceau, appuyez 2
FOISsurlePOTENTIOMETREDESELECTIONDEPLAGE,
unePREMIEREfoispourrevenirsurvotresélection&une
SECONDEfoispourchargerlenouveaumorceausélec-
tionné.Vouspouvezdenouveaueffectuerunerechercheà
partirdecemorceau.NOTE:LORSQUEVOUSCHANGEZ
DE PLAGE/MORCEAU, VOUS PERDEZ VOTRE POINT
CUE.VOUSDEVEZALORSENENREGISTRERUNNOU-
VEAUENRESPECTANTLAPROCEDURE.TOUTPOINT
CUEESTPROPREACHAQUEPLAGE/MORCEAU.
WennSiedanndenzuletztausgewähltenTitelstarten/lad-
enmöchtendrückenSieeinfachdenTITELWAHL-DREH-
KNOPFZWEIMAL,einmalumdenzuletztgesuchtenTitel
anzuzeigenundeinzweitesMalumdenTitelzuladen.Sie
können an dieser Stelle auch einen neuen Titel suchen.
*ACHTUNG: BEI DER ANWAHL EINES NEUEN TITELS
WIRD DER ZUVOR GESETZTE CUE-PUNKT VERWOR-
FEN.SIEMÜSSENEINENNEUENCUE-PUNKTSETZEN.
BEIM START EINES NEUEN TITELS WIRD DER CUE-
PUNKTZUNÄCHSTAUFDENANFANGDESTITELSGE-
SETZT.
BACK (10): The BACK button is used when navigating
throughfolders.WhenpressedONCEitwillnavigateone
levelBACK,TonavigatetotheROOTlevelorBeginning
PRESSandHOLDtheBACKbutton.
BACK(10):El botón BACK seutiliza cuando se navega
entre carpetas. Cuando se presiona UNA vez, navegará
un nivel hacia atrás. Para navegar hacia el nivel de RAÍZ o
inicioPULSEyMANTENGAPULSADOelbotónBACK.
RETOUR (BACK) (10): la touche BACK est utilisée lors
delanavigationdanslesdifférentdossiers.Enappuyant
une fois, vous remontez d’un niveau dans l’arborescence
de classement. En maintenant cette touche enfoncée,
vous remonterez au premier niveau de l’arborescence de
classement(ROOT).
BACK/ZURÜCK(10):DieTasteBACKwirdbeiderNaviga-
tiondurchOrdnerverwendet.EinmaligesBetätigenspringt
eineOrdnerebeneaufwärts (zurück),einDrücken+Halten
springt in die Hauptebene (Root) des Speichermediums.
VFDDISPLAY(11):TheVFDDISPLAYshowstheplayback
search bar, track number, pitch value, single on/off (off for
con¬tinuous play), loop, BPM, play/pause, time display,
repeat and USB/CD modes, track and folder name or
tracknumberaswellastwodifferentTIMEdisplaymodes.
TheseTIMEdisplaysareTIMEELAPSEDonthetrackand
TIMEREMAININGonthetrack.Timeismeasuredinmin-
utes, seconds and frames.
DISPLAYVFD(11):ElDISPLAYVFDmuestralabarrade
reproducción, el número de pista, el valor de pitch, single
on/off ( off para modo continuo de reproducción) , loop,
BPM, play/pause, repeat y modos USB/CD, nombre de
pista y carpeta así como dos diferentes modos de tiempo.
EstosmodosdeTIEMPOsonTIEMPOTRANSCURRIDO
dela canciónyTIEMPO REMANENTEdelacanción.El
tiempo se mide en minutos, segundos y frames.
ECRANHAUTEVISIBILITE(VFD)(11):L’ECRANVFDper-
metl’afchagedunombredeplages,laréglagedevitesse
(Pitch), fonction pitch bend, lecture simple ou continue,
mode play/pause, mode recherche avant/arrière, boucle
(Loop),retouràlaboucle(Reloop),PGM,moderépétition
(Repeat), barre de progression & 2 modes afchages
temps(TEMPS ECOULE,TEMPSRESTANT).L’afchage
dutempss’effectue enminutes - secondes–frames (0
:00:00).
VFDDISPLAY(11):DasVFDDISPLAYzeigtFortschritts-
balken,TitelnummeroderTitel/Verzeichnis-Namen,Pitch-
wert, Single-Modus (aus für Continue-Modus), Loop,
BPM, Play/Pause, Zeit, Repeat und USB/CD-Modus. Die
Zeit kann als ABGELAUFENE(ELAPSED) ZEIT oder als
VERBLEIBENDE(REMAIN) ZEIT DES TITELS dargestellt
werden. Die Zeit in Minuten, Sekunden und Frames an-
gezeigt.
TIME (12): The TIME button switches the time display
be¬tweentwoavailablesources:TIMEELAPSEDonthe
trackandTIMEREMAININGonthetrack.TIMEELAPSED
indicates how much time has currently gone by since
theplay buttonwas pressedandTIME REMAININGON
TRACKcountsdownthe timethatisleftbeforetheend
of the track.
12
Connections and System Control
ConexionesyControldesistema•Connexions&Utilisation•AnschlüsseundSystemeinstellungen

TIME(12):ElbotóndeTIMEpermiteseleccionarlavisual-
izacióndeltiempodedosmaneras:TIEMPOTRANSCUR-
RIDO y TIEMPO REMANENTE de la canción. TIEMPO
TRANSCURRIDOindicacuantotiempohapasadodesde
queempezólacanciónyelTIEMPOREMANENTEcuenta
haciaatráseltiemporestantehastaelnaldelacanción.
TEMPS(12): La touche TIMEpermet de modier
l’afchage temps.2types d’afchage sont disponibles:
-TEMPSECOULEsurlemorceauencoursdelecture.-
TEMPSRESTANTsurlemorceauencoursdelecture.
TIME(12):DieTIME-Tasteschaltet dasDisplayder zwei
verschiedenenZeitanzeigemodium:TIMEELAPSEDzeigt
die abgelaufene Zeit des Titels, TIME REMAIN zeigt die
verbleibendeZeitdesaktuellenTitels.
SINGLE(13):PressingtheSINGLEbuttonengagesSIN-
GLEmode.Thismodewillplayonesongandthenstop.
Press¬ing the SINGLE button again will then activate
CONTINUOUS mode, causing the unit to play continu-
ously until the last track on the CD or currently selected
FOLDER.
SINGLE(13):PulsandoelbotónSINGLEseactiveelmodo
SINGLE de reproducción. Este modo reproducirá una can-
ciónyentoncespararáalnaldedichacanción.Pulsando
denuevo elbotónSINGLE activaráel modoCONTINU-
OUS,queharáquelaunidadreproducirácontinuamente
hastalaúltimacanciónenelCDoenlaCARPETAselec-
cionada.
LECTURE SIMPLE (13): Appuyez sur la touche SINGLE
and’activerlemodeSINGLE,leCDMP-1400liraalorsla
plage une fois, puis s’arrêtera. Appuyez une seconde fois
sur la touche SINGLE an d’activer le mode CONTINU-
OUS(LECTURECONTINUE):lorsqueladernièreplageou
ledernierchierseralue,l’appareilreprendralalectureà
partirdelapremièreplagedudisqueoududossier.
SINGLE(13):EinDruckaufSINGLEschaltetindenSIN-
GLE-Modus.In dem Modusspielt der Playereinen Titel
uns stoppt dann. Erneutes Betätigen der SINGLE-Taste
aktiviert den CONTINUE-Modus, welcher solange ab-
spielt,bisderletzteTitelimaktuellenOrdneroderaufder
CD erreicht ist.
PITCH BUTTON (14 A): Pushing the PITCH button acti-
vatesthePITCHcontrolfunction.Therearethreesettings:
8%,16%and24%whichcanbetoggledbypressingthe
PITCHbuttononceforeachsetting.
PITCHROTARY(14B):InPITCHmode,movingthePITCH
rotary clockwise will raise the pitch percentage and mov-
ingthePITCHrotarycounterclockwisewilllowerthepitch
per¬centage.
BONTONDEPITCH(14A):PulsandoelbotóndePITCH
activalafuncióndecontroldePITCH.Haytresposiciones:
8%,16%y24%lascualespuedenserseleccionadaspul-
sandoelbotóndePITCHunavezparacadaposición.
PITCHGIRATORIO(14B):EnmodoPITCH,moviendoel
PITCHgiratorioenladireccióndelasagujasdelrelojau-
mentaráelporcentajedepitch ymoviendoelPITCH gi-
ratorioalainversadeladireccióndelasagujasdelreloj,
disminuiráelporcentajedepitch.
REGLAGEDEVITESSE(PITCH)(14A):Appuyezsurlatou-
chePITCHand’activerlafonctionpermettantdemodi-
erlavitessedelecture.Vouspouvezmodiercelle-cià
concurrencede+/-8%-16%-24%.Pourdésactiverla
fonctionPITCH,appuyezunenouvellefoissurcettetou-
che.
POTENTIOMETRE ROTATIF DE REGLAGE DE VITESSE
(PITCH CONTROL SLIDE) (14 B): Permet de modier la
vitessedelectureàconcurrencede+/-24%maximum.
PITCHTASTE(14A):EinDruckaufdiePITCH-Tasteak-
tiviert die Geschwindigkeitsregelung. Die Pitch-Bereiche
8,16und24%könnendurchmehrfachesBetätigender
Tasteumgeschaltetwerden.
PITCHREGLER(14B):ImPITCH-ModuswirddieWieder-
gabegeschwindigkeitimUhrzeigersinnerhöhtundgegen
den Uhrzeigersinn vermindert.
PITCHBEND(15):PushingthePITCHBENDbuttonswill
au¬tomatically bend the pitch up to +26% or bend the
pitchdownto-26%dependingonthesettingofthePITCH
(14) rotary. Releasing the buttons will return the pitch to the
original pitch setting. You can use this function to match
the beat when mixing from one song to another.
BANDADEPITCH(15):PulsandolosbotonesdeBANDA
DEPITCH,subiráautomáticamentelabandadepitchhas-
ta+26%obajarálabandadehasta-26%dependiendo
dondesitúeelPITCHgiratorio(14).Dejandodepulsarlos
botones el pitch volverá a su posición original. Puede uti-
lizar esta función para cuadrar el beat cuando está mez-
clando de una canción a otra.
TOUCHESDERATTRAPAGE (PITCH BEND) (15): Les
touchesPITCHBENDpermettentdemodierdefaçonin-
stantanée&temporairelavitessedelecturede+/-24%
en fonction du réglage de vitesse en cours. Le fait de
relâcher ces touches permet de revenir à la vitesse de lec-
ture en cours. Cette fonction permet de caler 2 morceaux
lors d’un mix
PITCH BEND (15): Ein Halten der Tasten PITCH
BEND beschleunigt oder verzögert die Wieder-
gabe auf + oder -26%, abhängig von dem gewählten
PITCHBEREICH+PITCHWERT (14). Wenn Sie die Taste
loslassen kehrt der Pitch wieder zum zuvor eingestellten
Wertzurück.NutzenSiedieseFunktion,umzweidenTitel
mit einem anderen Signal zu synchronisieren.
13 Connections and System Control
ConexionesyControldesistema•Connexions&Utilisation•AnschlüsseundSystemeinstellungen

LOOPFUNCTION(16,17,18):ALOOPrepeatsthesec-
tionbetweentheentrypointIN(16)andtheexitpointOUT
(17).Tosetaloopwhiletheunitisplaying,startbypress-
ingtheIN(16)button(theadjacentLEDwilllightup)and
whenyoureachthedesiredendlooppoint,presstheOUT
(17) button (cor¬responding LED will light up). The loop
willcontinueplayinguntilyoupresstheOUT(17)button
again allowing the music to continue from that point on,
tore-engagethe loopyou mustpressthe RELOOP(18)
button.
FUNCIONDELOOP(16,17,18):UNLOOPrepitelasec-
ciónentreelpuntodeentradaIN(16)yelpuntodesalida
OUT (17). Para marcar un loop mientras la unidad está
reproduciendo, empiece por pulsar el botón de entrada
IN (16) (el LED adyacente se iluminará) y cuando llegue
alpunto deseado denalizar el loop,pulse elbotónde
salidaOUT(17)(sucorrespondienteLEDseiluminará).El
loopcontinuaráejecutándosehastaquepulseelbotónde
salidaOUT(17)otravez,permitiendoquelamúsicacon-
tinúe desde ese punto, para reenlazar el loop debe pulsar
elbotóndeRELOOP(18).
FONCTIONBOUCLE(LOOP)(16,17,18):LaBOUCLEper-
metlarépétitiond’unpassagesélectionnéentreunpoint
d’entrée(IN)(16)&unpointdesortie(OUT)(17).Pourcréer
une boucle durant la lecture d’une plage, appuyez sur la
toucheIN (Latouches’allume) (16)&lorsquevousavez
atteint le point de sortie désiré, appuyez sur la touche
OUT (La touche s’allume aussi) (17). La boucle sera lue
jusqu’àcequevousappuyezsurlatoucheOUT(17)an
de reprendre la lecture normale, pour activer de nouveau
laboucle,appuyezsurlatoucheRELOOP(18)..
LOOPFUNKTION(16,17,18):EinLOOPwiederholtden
Titel zwischen dem gewählten IN-Punkt (16) und dem
OUT-Punkt (17). Setzen Sie einen Loop während der
Wiedergabe mit Druck auf die IN-Taste (16) (die LED IN
leuchtetauf)unddanneinemDruckaufdieOUT-Taste(17)
wenn Sie den gewünschten Endpunkt erreicht haben (LED
OUTleuchtetauf).DerLoopwirdsolangewiederholtbis
Sie erneut die OUT-Taste drücken, wonach die normale
WiedergabedesTitelsfortgesetztwird.Umwiederinden
LoopzuspringendrückenSieeinmaldieRELOOP-Taste
(18).
When you have released your loop, both lights will stay
ONtoindicatethatyourloopisstoredintheCDMP-1400
memory.PressingtheINBUTTONagainwhiletheunitis
playing will erase the previously saved loop while saving
yournewloopentrypoint.PressOUTtoexittheloopand
saveanewcom¬pleteloop.PressRELOOPtoreturnto
the beginning of the previously saved loop from normal
play.PressRELOOPre¬peatedlytocausethelooptostut-
ter.
Cuando ha editado su loop, ambas luces permanecerán
encendidasONparaindicarquesuloopsehaguardadoen
la memoria del CDMP-1400. Pulsando el botón de entrada
IN otra vez, mientras la unidad está reproduciendo se bor-
rará el loop previamente salvado, mientras está salvando
sunuevopuntodeentradadeloop.PulseOUTparasalir
de loop y salvar completamente un nuevo loop. Pulsar RE-
LOOPparavolveraliniciodelloopsalvadopreviamente
conreproducciónnormal.PulsarRELOOPrepetidamente
paracausarunefectoalloopde“tartamudeo”.
Lorsquevoussortezdelaboucle,lestouchesOUT&IN
resterontalluméesindiquantlamémorisationd’uneboucle
danslamémoireduCDMP-1400.Unenouvellepression
surlatoucheIN(16),encoursdelecture,permetd’effacer
laboucleprécédente & marquele début d’unenouvelle
boucle.AppuyezsurlatoucheOUT(17)andenaliserle
pointdesortie&créerunenouvelleboucle.Appuyezsur
latoucheRELOOP(18)pourreveniraudébutdelaboucle
durantlalecture.Appuyezdefaçonrépétéesurlatouche
RELOOPandecréeruneffetstutter
Wenn Sie den Loop verlassen haben leuchten die IN- und
OUT-LEDpermanent,umIhneneinengespeichertenLoop
anzuzeigen.ErneuteBetätigungderLoop-INTasteüber-
schreibt den zuvor gespeicherten Loop und ein neuer wird
erstellt,wennSiedieOUT-Tastedrücken.RELOOPspringt
aus der normalen Wiedergabe zurück an den Anfang des
Loops.MehrfachesAntippenderRELOOP-Tastekanner
als Stottereffekt verwendet werden.
PLAY/PAUSE (19): Each press of the PLAY/PAUSE but-
ton causes the operation to change from PLAY to PAUSE
or from PAUSE back to PLAY. The PLAY/PAUSE button
remains lit when in PLAY mode, while it blinks in PAUSE
mode.
BOTONDEPLAY/PAUSE(19):Cadapulsacióndelbotón
de PLAY/PAUSE provoca el cambio de operación de re-
producción (PLAY) a pausa (PAUSE) o de pausa (PAUSE) a
volver a la reproducción (PLAY). El botón de PLAY/PAUSE
permanece encendido cuando está en modo PLAY, mien-
tras parpadea en modo PAUSE.
PLAY/PAUSE(19):ChaquepressionsurlatouchePLAY/
PAUSEpermetdedémarreroudemettreenmodePAUSE
laLECTURE.LatouchePLAY/PAUSErestealluméedurant
laLECTUREetclignoteenmodePAUSE.
PLAY/PAUSE(19):JederDruckaufdiePLAY/PAUSETaste
wechselt zwischen Wiedergabe-(LED leuchtet) und Pause-
Modus(LED blinkt).
CUE(20):WiththeCDMP-1400,creatingandmemorizing
cue points is quick and easy. By default, when there is
no CUE Point set (or memorized), pressing the CUE but-
tonreturnstheunittothebeginningofthetrack(0:00.00)
andpauses it. Toset a CUEPoint duringplayback at a
time of your choice, simply press PAUSE, and then use the
SEARCH(27)functiontomakeanyadjustmentsbyframe.
WhenPlayispressedtoresumeplayback,theCUEPOINT
will be stored.
BOTONDECUE(20):ConelCDMP-1400,crearymemo-
rizar puntos cue es rápido y sencillo. Por defecto, cuando
no hay un punto cue seleccionado (o memorizado), pre-
sionando el botón de cue se regresa al inicio del corte
(0:00.0)yenmodopausa.ParaseleccionarunpuntoCUE
durante la reproducción a tiempo de escogerlo, simple-
mente pulse PAUSE y luego use la función SEARCH (27)
parahacer cualquierajusteporframe.Cuando sepulsa
PlayparareanudarlareproducciónelPUNTOCUEseal-
macenará.
14
Connections and System Control
ConexionesyControldesistema•Connexions&Utilisation•AnschlüsseundSystemeinstellungen

POINTCUE(20):Pardéfaut,lorsqu’iln’yaaucunpointCUE
mémorisé,lefaitd’appuyersurlatoucheCUEramènela
lectureaudébutdumorceau/chier(0:00:00)etcommute
l’appareilenmodePAUSE.LorsqueleCDMP-1400esten
mode lecture, appuyez sur la touche PAUSE et localisez
l’endroit de votre point CUE à l’aide des touches SEARCH
(27). Cette localisation s’effectue à la
frame près. Puis reprenez la lecture en appuyant sur la
touchePLAY,lepointCUEestalorsmémorisé.
CUE (20): Mit dem CDMP-1400 ist die Erstellung und
Speicherung ein Kinderspiel. Normalerweise ist kein CUE-
Punkt gesetzt. Ein Druck auf CUE führt dann zu einem
SprungandenAnfangdesTitels(0:00.00)imPause-Mo-
dus. Um einen CUE-Punkt während der Wiedergabe zu
setzen drücken Sie einfach PLAY/PAUSE und stellen den
PunktnunframegenaumittelsSUCH-FUNKTION(27)ein.
Ein erneuter Druck auf PLAY/PAUSE startet die Wieder-
gabe ab dieser Stelle und der CUE-Punkt wurde gespe-
ichert.
REPEAT(21):PresstheREPEATbuttononcetoengageor
repeattheselectedtrack.PressREPEATagaintoengage
the ALL setting which will repeat all the tracks on the CD.
Press REPEAT (21) again to disengage the repeat func-
tion.
BOTONDEREPEAT(21):PulseelbotóndeREPEATpara
enlazarorepetirelcorteseleccionado.PulseREPEATotra
vezparaenlazarTODOloseleccionadolocualserárepeti-
doentodosloscortesdelCD.PulseREPEAT(21)otravez
para desenlazar la función repeat.
REPETITION(21):Pressezlatoucheandelireunesec-
onde fois la plage en cours de lecture. Appuyez une sec-
ondefoissur latouche REPEATanderelirecomplète-
ment le CD. Appuyez une nouvelle fois sur la touche
REPEATandedésactiverlafonctionrepeat.
REPEAT (21):DrückenSie dieREPEAT-Tasteeinmal, um
den aktuellen Titel zu wiederholen. Drücken Sie erneut
REPEATerscheintALLimDisplayundderPlayerwieder-
holtalleTitelaufderCD.EinerneuterDruckaufREPEAT
schaltet die Funktion aus.
USBPORT(22):TheUSBPORTallowstheconnectionof
anyUSBmassstoragedevice*.
PUERTO USB (22): El PUERTO USB permite la conex-
ióndecualquier dispositivo dealmacenamiento externo
USB.*
PORTUSB(22):LeportUSBpermetlebranchementde
toutpériphériquedestockageUSB*.
USBANSCHLUSS(22):DerUSBANSCHLUSSdientdem
AnschlussIhresUSB-Speichermediums.*
USB/CD (23): The USB/CD select button allows you to
toggle from the CDMP-1400 internal CD drive and the
mass storage device connected to the USB port.
*Note:Toavoidcorruptingofthelesdonotremoveyour
USB device until switching the unit to CD mode by press-
ing CD/USB button.
BOTONUSB/CD (23):Elbotón deselección USB/CDle
permite alternar el reproductor de CD del CDMP-1400 y
el dispositivo de almacenamiento externo USB conectado
al puerto USB.
*Nota:Para evitardañar losarchivos,no desconectesu
dispositivo USB hasta conmutar la unidad a modo CD pul-
sando el botón CD/USB.
TOUCHEDESELECTIONUSB/CD (23):La touche USB/
CD permet de sélectionner la lecture d’un morceau à
partir d’un CD-Audio/CD-R/CD-MP3 ou à partir d’un
périphériqueconnectéauportUSBduCDMP-1400.
*Note:Pouréviterd’endommagerleschiersneretirezpas
votrepériphériqueUSBtantquevousn’avezpascommu-
tél’appareilenmodeCD(UtiliserlatoucheCD/USB).
USB/CD(23):DieWahltasteUSB/CDschaltetimPause-
Modus zwischen der Wiedergabe vom integrierten CD-
Laufwerk und vom angeschlossenen USB-Speicher um.
*Achtung:UmSchädenanDateienaufIhremUSB-Spei-
chermediumzuvermeidenwechselnSiemitderTasteCD/
USB in den CD-Modus bevor Sie das Speichermedium
vom Gerät trennen.
MASTERVOL(24):TheMASTERVOL(24)rotarygoverns
the overall volume level output by the CDMP-1400.
VOLUMEN DEL MASTER (24): El VOLUMEN DEL MAS-
TER giratorio controla el nivel de entrada/salida general
del CDMP-1400.
REGLAGE DE VOLUME MASTER (24): le potentiomètre
rotatifMASTERVOL(24)permetleréglageduniveaude
sortie du CDMP-1400.
MASTERVOL(24):DieserDrehregler(24)stelltdieGesa-
mtausgangslautstärke des CDMP-1400 ein.
MICVOL(25):TheMICVOLrotarygovernstheLEVELof
theMICINPUTsignal.
VOLUMEN DE MICROFONO (25): El VOLUMEN DE MI-
CROFONO giratorio controla el NIVEL de señal de EN-
TRADA/SALIDAdemicrófono.
VOLUMEMICROPHONE(25):lepotentiomètrerotatifMIC
VOLpermetd’ajusterleNIVEAUduMICROPHONEcon-
nectéauCDMP-1400.
MICVOL(25):DieserDrehreglerdientderAnpassungdes
MIKROFONPEGELS.
SEARCH(26):UsetheSEARCHfunctionwhenplayinga
le to fast forward or rewind. Also, this function can be
usedtonelyadjustCUEpoints.
15 Connections and System Control
ConexionesyControldesistema•Connexions&Utilisation•AnschlüsseundSystemeinstellungen

FUNCIONDEBUSQUEDA-SEARCH(26):Uselafunción
SEARCH para reproducir una pista más rápida hacia ad-
elanteohaciaatrás.Estafuncióntambiénsepuedeuti-
lizarparaacabardeajustarlospuntosCUE.
RECHERCHE (26): Utilisez la fonction RECHERCHE
(SEARCH)encoursdelectureand’effectuerunerecher-
che rapide avant ou arrière. Cette fonction sert aussi loca-
liserprécisémentlespointsCUEavantdelesenregistrer.
SEARCH (26): Nutzen Sie diese Funktion zur schnellen
SuchineinemTitel(vor-undzurückspulen).DieFunktion
dient auch der feinen Einstellung des CUE-Punktes im
PAUSE-Modus.
BPM (27): (NOTE-THE BPM FUNCTION IS AVAILABLE
ONLYONTHEREMOTECONTROL)Pressand holdthe
BPMbut¬tontoturnontheBPMreadout.Onceon,you
mayTAPthebuttontothebeatofthemusic.Afterafew
TAPStheDIS¬PLAY(11)willreadouttheaverageBEATS
PERMINUTEofthetrack.*NOTE:IfthereisaBPMvalue
present in the MP3’s ID3-tag, it will be displayed. If there is
noneitwilldisplay0untilyouTAPthevaluein.
BOTONBPM(27):(NOTA-LAFUNCIONBPMSOLOESTA
DISPONIBLE EN EL CONTROL REMOTO) Presionar y
mantener pulsado el botón de BPM para visionar la lectura
de BPM. Luego, debe PULSAR el botón siguiendo el beat
de la música. Después de algunas pulsaciones el DIS-
PLAY(11)mostraráelporcentajedeBEATSPORMINUTO
delapista.*NOTA:SihayunvalorestablecidodeBMPen
la pista MP3’S ID3-tag, este será reproducido. Si no hay
valor,reproducirá0hastaqueustedestablezcauno.
BPM(BeatParMinute)(27):(MERCIDENOTERQUELA
FONCTION BPM N’EST ACCESSIBLE QUE PAR LE BI-
AIS DE LA TELECOMMANDE) La touche BPM active la
fonctionBPMquicalculera&afcheraautomatiquement
le rythme (BPM) du morceau en cours de lecture. Cette in-
formationestafchéeàl’écran.Veuilleztaperlerythmedu
morceausurlatélécommande(TAP).Aprèsquelquesin-
stants,l’écran(11)afcheralamoyennedeBPM.Mercide
noterquesurleschiersMP3(Uniquement),sil’information
duBPMestrenseignée,celle-cis’afcheraautomatique-
ment.Sicelan’estpaslecas,l’écranafchera0àmoins
quevousnerentriezmanuellementleBPM(TAP).
BPM (27): (BEACHTEN SIE DASS DIE BPM FUNKTION
NURMITDERFERNBEDIENUNGBEDIENTWIRD)Halten
SiedieBPM-Tasteetwasgedrückt,umdasAuslesender
Geschwindigkeit zu aktivieren. Nun können Sie durch
mehrfaches kurzes Antippen im Takt (auf volle Schläge)
die abgespielte Geschwindigkeit ermitteln. Das Display
(11) zeigt nach kurzer Zeit die durchschnittliche BPM-Zahl
desTitelsan.*BEACHTEN:WennindenMP3-ID3Tagsein
BPM-Wert hinterlegt ist zeigt das Display diesen an. Wenn
keinerhinterlegtistwird0angezeigt,bisSieihnmitTippen
ermittelt haben.
*The(Atype)USBconnectionontheface ofthisunit is
forconnectingUSBstoragedevicessuchasashdrives,
MP3 players and external hard drives.
While this player is capable of connecting to and load-
ing mu¬sic from most types of USB storage devices and
MP3 players, we can not guarantee playback from all such
devices due to the varying nature of the devices and their
storage methods, most storage devices and storage class
MP3 players are com¬patible for playback. Check with the
devices manufacturer for additional compatibility informa-
tion.
Theplayerpre-readstheentiredirectorystructureandlo-
catesallvalidMP3leswithinthosefolders,thusaLARGE
CAPAC¬ITY storage device will take a LONG TIME TO
LOAD.
*La(tipoA)conexiónUSBenelfrontaldeestaunidades
para conectar los dispositivos de almacenamiento externo
USB como lápices de memoria, reproductores de MP3 o
memorias externas.
Aunqueestereproductortienelacapacidaddeconectar
y cargar música desde muchos tipos de dispositivos de
almacenamiento y reproductores MP3, no podemos ga-
rantizar la reproducción desde toda clase de dispositivos
debido a la diferente naturaleza de los dispositivos y sus
métodosdealmacenamiento,lamayoríadedispositivos
de almacenamiento y dispositivos reproductores de MP3
son compatibles para la reproducción. Comprobar con el
fabricante de los dispositivos para información adicional
de compatibilidad.
El reproductor hace una prelectura de todos los directo-
rios y localiza todos los archivos MP3 válidos dentro de
esas carpetas, por eso, un dispositivo de almacenamiento
degrancapacidadTARDARAMUCHOTIEMPOENCAR-
GARSE.
*LeportUSB(TypeA)situéenfaceavantdel’appareilau-
toriselebranchementdepériphériquedestockageUSBà
mémoireash,delecteurMP3etdedisquedurexterne.
Bienquecetappareilacceptelamajoritédespériphériques
USBdisponiblesurlemarché,nousnepouvonsgarantir
que l’intégralité d’entre eux puisse être compatible. La
nature de ces périphériques, mais aussi la façon dont
lesdonnéesMP3sontchargées,convertiesetarchivées
pourraient ne pas être compatibles. Nous vous recom-
mandons de consulter les informations du fabricant de
toutpériphériqueUSButiliséand’envérierlacompati-
bilité.
Le programme du CDMP-1400 analyse l’ensemble des
informations/données & localise la présence de chiers
MP3 valides & stockés sur le périphérique USB. Notez
queplusilyadedonnées/chiersàvérier,plusl’analyse
prendra du temps.
*Der USB-Anschluss (Typ A) auf der Frontplatte dieses
Players dient dem Anschluss von USB-Speichergeräten
wie Flashspeichern, MP3-Playern und externen Festplat-
ten.
Obgleich der Player von den meisten handelsüblichen
Speichermedien arbeiten kann garantieren wir, aufgrund
von unterschiedlichen Speichermethoden und Techni-
ken, die Wiedergabe von allen auf dem Markt erhältlichen
16
Connections and System Control
ConexionesyControldesistema•Connexions&Utilisation•AnschlüsseundSystemeinstellungen

Speichermedien nicht. Erfragen Sie gegebenenfalls beim
Hersteller Ihres Speichermediums die Kompatibilitätsin-
formationen.
DerPlayerliestvorderWiedergabediegesamteOrdner-
strukturundlokalisiertabspielbareMP3soderWAV-Titel.
Ein GROßES SPEICHERMEDIUM braucht also eventuell
SEHR LANGE ZUM LADEN.
CONSTANT BIT RATE (CBR) vs. VARIABLE BIT RATE
(VBR)MP3:Files arecreated(Encoded)usingtwo basic
methods, Constant Bit Rate (CBR) and Variable Bit Rate
(VBR).VBR leswhilesaving somespace, aredecoded
on-the-y, causinga slight lag orstutterwhen setting a
CUEpoint.Theycanalsocauseaslightskipduringplay-
backiftheunitsmemorybufferisoverrun.CBRles,con-
versely,takeupalittlemoreroombutarequicktoprocess
which means no lag in CUE setting or playback.
VBR les can easily be converted to CBR using any
com¬mercially available MP3 ripping software.
Mediasupporttypes:CD,CD-R.CD-RW,USB
Mediasupportformats:CDAUDIO,CD-MP3,andUSBWAV/MP3
USBsupportdiskformat:FAT,FAT32andNTFS
CONSTANTBITRATE(CBR)vs.VARIABLEBITRATE(VBR)
MP3:Losarchivossoncreados(codicados)usandodos
métodosbásicos,Constant BitRate (CBR) andVariable
Bit Rate (VBR). Los archivos VBR mientras ahorran algo
deespacio,soncodicadossobrela marcha,causando
unligeroretrasooefecto“tartamudeo”alseleccionarun
puntoCUE.Tambiénpuedenproducirunligerosaltodu-
rante la reproducción si las unidades de memoria buffer
están saturadas. Los archivos CBR, al contrario, ocupan
un poco más de espacio pero tienen un proceso más rápi-
do,locualsignicaningúnretrasoenlaseleccióndeCUE
o reproducción.
Los archivos VBR se pueden convertir fácilmente en CBR
usandocualquiersoftwarecomercialcompatible.
Tiposdemediosdereproducción:CD,CD-R.CD-RW,USB
Formatoscompatibles:CDAUDIO,CD-MP3,andUSBWAV/MP3
USBformatosdediscocompatible:FAT,FAT32andNTFS
MP3 CBR (CONSTANT BIT RATE / ENCODAGE A BITS
CONSTANTS) vs MP3 VBR (VARIABLE BIT RATE / EN-
CODAGE A BITS VARIABLES): l’encodage des chiers
MP3peuts’effectuersuivant2méthodes:CBRouVBR.
LeschiersencodésenmodeVBRsontmoinsvolumineux
maisdécodésinstantanément(Alalecture)etpeuvent–de
cefait–nepasêtrelusdefaçonuideexemptedetoute
coupure(Lamémoiretampondel’appareilpouvantsere-
trouver saturer d’un trop grand nombre d’informations).
Al’inverse, leschiers encodésen CBRsont plusvolu-
mineuxmaisaussiplusstablescarparfaitementnalisés.
Nousrecommandonsl’usagedecesderniersand’éviter
tout problème potentiel de lecture.
Les chiers VBR peuvent facilement & rapidement être
convertis en CBR en utilisant tout logiciel de conversion/
gravure MP3.
Médiascompatibles:CD,CD-R,CD-RW,MP3.
Formatscompatibles:CDAUDIO,CD-MP3,&USBWAV/MP3
FormatsUSBdepartitioncompatibles:FAT,FAT32&NTFS
KONSTANTEBITRATE(CBR)gegenVARIABLEBITRATE
(VBR)MP3:DateienwerdenunterVerwendungzweierun-
terschiedlicherVerfahren erstellt(kodiert): mitkonstanter
Bitrate (CBR) und variabler Bitrate (VBR). VBR-Dateien
sparenSpeicherplatz,werdenjedochOn-The-Flykodiert,
wodurch leichte Verzögerungen oder ein Stottern beim
SetzeneinesCUE-Punktesauftretenkann.Siekönneauch
Sprünge während der Wiedergabe hervorrufen, wenn der
Wiedergabepuffervollist.CBR-Dateienjedochsindzwar
etwas größer, jedoch wesentlich besser zu decodieren,
wodurchkeinerleiVerzögerungoderSprüngewährendder
Wiedergabe.
VBR-Titel können mit den meisten handelsüblichen
MP3 Software-Encodern in CBR-Dateien umgewandelt
werden.
UnterstützteDatenquellen:CD,CD-R,CD-RW,USB
UnterstützteMedien:Audio-CD,MP3-CDundUSBWav/MP3
UnterstützteUSBDateisysteme:FAT,FAT32undNTFS
TheCDMP-1400displaysanerrormessageifthemedia
deviceusedisunabletobereadproperly.Theerrorsdis-
playedareasfollows:
ElCDMP-1400muestraunmensajedeerrorsieldisposi-
tivo de los medios utilizados no puede ser leído correcta-
mente.Loserroressemuestrancomosigue:
LeCDMP-1400 afche unmessage d’erreursi le media
utilisé ne peut lire correctement (Fichier ou morceau).
Messagesd’erreurafchés:
Der CDMP-1400 gibt eine Fehlermeldung aus, sollte das
verwendete Abspielmedium nicht vernünftig gelesen
werdenkönnen.Diefolgenden Fehlermeldungenkönnen
angezeigtwerden:
17
ErrorMessage•Mensajedeerror
Messaged’erreur•Fehlermeldungen
Connections and System Control
ConexionesyControldesistema•Connexions&Utilisation•AnschlüsseundSystemeinstellungen

Specications
Especicaciones•Caractéristiquestechniques•TechnischeDaten 18
Media Err
Description
Descripción
Description
Beschreibung
Possible Solution
Posible Solución
Solution possible
Abhilfemaßnahmen
E r r o r M e s s a g e
Mensaje de error
Message d’erreur
Fehlermeldungen
(Media Error) A CD or USB device is
unreadable due to an unreckognizable
formatoracorruptedle
(Error del medio) Un CD o un disposi-
tivo USB no se puede leer debido a
un formato irreconocible o un archivo
dañado
(Erreur Périphérique) Le CD ou
périphérique USB ne peut être lu à
cause d’un format non reconnu ou
d’unchiercorrompu
(Medienfehler)Eine CD oder ein USB-
Speichermedium kann aufgrund eines
nicht unterstützen Formats oder einer
beschädigten Datei nicht gelesen
werden
Check media format and try again.
Reformat and/ or replace device and
try again if error persists
Compruebe el formato del medio e
intente otra vez. Vuelva a formatear y
/ o sustituir el dispositivo y vuelva a
intentarlo si el error persiste
Vériezleformatetessayezdenou-
veau. Changez de format et/ou rem-
placezlepériphériqueUSB,puises-
sayez de nouveau si l’erreur persiste
Prüfen Sie das Medienfomat und ver-
suchen Sie es erneut. Formatieren
und/oder ersetzen Sie das Medium,
falls der Fehler bestehen bleibt
(TrackError)Acdinplaymodecomes
acrossalethatisunreadable
(Error de Pista) El cd en modo de re-
producciónencuentraunarchivoque
no se puede leer
(Erreurdemorceau)Uneplagesituée
sur un cd ne peut être lue
(TrackErr)
Auf der eingelegten CD wird eine Datei
geladen, die nicht abspielbar ist
Change track. If this does not work,
replace and try again
Cambiar de pista. Si esto no funciona,
cambie y vuelva a intentarlo
Changez de plage. Si cela ne fonc-
tionne pas, rechargez le cd & essayez
une nouvelle fois.
WählenSieeinenanderenTitel.Falls
dies nicht hilft laden Sie das Medium
erneut und versuchen Sie es erneut
Disk Error/ No Disk) A CD is unable to
be recognized by the device
(Error de Disco/ No Disco) Un CD no
puedeserreconocidoporelequipo
(ErreurDisque/PasdeDisque)Lecd
n’est pas reconnu par l’appareil
Das Laufwerk kann eine CD nicht ein-
lesen
Check and clean disc. If this does not
work, replace entirely
Compruebe y limpie el disco. Si esto
no funciona, sustituya el disco
Vériezetnettoyezlecd.Sicelane
fonctionne pas, changez de cd.
Prüfen und reinigen Sie die CD. Falls
dies nicht hilft ersetzen Sie die
Disk Err/
No Disk
Track Err
Specications•Especicaciones
SpécicationsTechniques•TechnischeDaten
GENERAL:
Type.........................CompactDiscPlayer&USBMP3Reader
DiscType...................StandardCompactdiscs(12cm&8cm)
TimeDisplay.......TrackElapsed,TrackRemain,orTotalremain
VariablePitch.........................................................±24%Slider
PitchBend.......................................................±26%Maximum
Instant Start................................................ Within 0.03 seconds
Installation..................................................................... 19” each
Dimensions.................19”x3.5”x10”(482.6x88.9x254mm)
Weight Per Unit................................................... 5.5 lbs. (2.5 kg)
AUDIOSECTION:
Quantization........................1 Bit Linear/Channel, 3 Beam Laser
OversamplingRate.........................................................8Times
SamplingFrequency.....................................................44.1kHz
FrequencyResponse........................................20Hzto20kHz
TotalHarmonicDistortion...............................LessThan0.05%
Signal to Noise Ratio......................................................... 85 dB
Dynamic Range................................................................. 85 dB
Channel Separation.............................................. 85 dB (1 KHz)
OutputLevel.................................................2.0+/-0.2VR.M.S.
PowerSupply........................................AC115/230V,60/50Hz
SPECIFICATIONSANDDESIGNARESUBJECTTO
CHANGEWITHOUTNOTICEFORPURPOSEOF
IMPROVEMENT.
Table of contents
Other Gemini CD Player manuals

Gemini
Gemini CDX-402 User manual

Gemini
Gemini CFX-50 User manual

Gemini
Gemini CDX-01 User manual

Gemini
Gemini CDJ-20 User manual

Gemini
Gemini CD-4700 E User manual

Gemini
Gemini CDS-1000 User manual

Gemini
Gemini CDJ-600 User manual

Gemini
Gemini CD-110 User manual

Gemini
Gemini CFX-40 User manual

Gemini
Gemini CDX-02 User manual

Gemini
Gemini CDX-01 User manual

Gemini
Gemini CD-150 User manual

Gemini
Gemini CDX-1200 User manual

Gemini
Gemini CD-140 User manual

Gemini
Gemini CDJ-1200 User manual

Gemini
Gemini CDX-O4 User manual

Gemini
Gemini CDX-1250 User manual

Gemini
Gemini CD-9500 Pro III User manual

Gemini
Gemini CDX-2500G User manual

Gemini
Gemini CD-4700 PRO II User manual