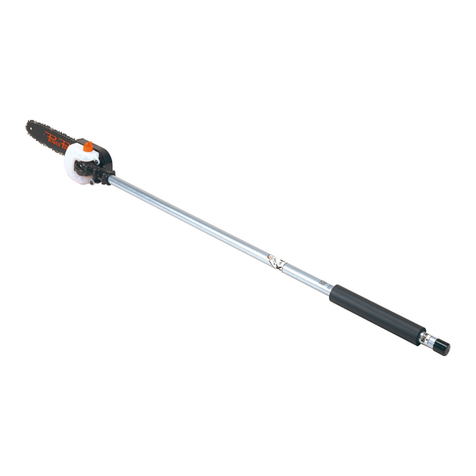
GGP ITALY TB 250J-PR-UA User manual

Dispositivo potatore - MANUALE DI ISTRUZIONI
ATTENZIONE: prima di utilizzare la macchina, leggere attentamente
il presente libretto.
Device Pruner - OPERATOR’S MANUAL
WARNING: read thoroughly the instruction booklet before
using this machine.
Dispositif d’élagueuse - MANUEL D’UTILISATION
ATTENTION: lire attentivement le manuel avant d’utiliser
cette machine.
Hochentaster - GEBRAUCHSANWEISUNG
ACHTUNG: vor Inbetriebnahme des Geräts die Gebrauchsanleitung
aufmerksam lesen.
Dispositivo podador - MANUAL DE INSTRUCCIONES
CUIDADO: antes de utilizar esta máquina, lea atentamente el manual
de instrucciones.
Snoei-inrichting - GEBRUIKERSHANDLEIDING
LET OP: Voordat u de deze machine gaat gebruiken dient u eerst deze
handleiding aandachtig door te lezen.
Dispositivo de poda - MANUAL DE INSTRUÇÕES
ATENCAO! Antes de usar a moto-roçadeira, ler com atenção
este manual de instruções.
Σύστημα κλαδευτήρι - ΕΓΧΕΙΡΙΔΙΟ ΟΔΗΓΙΩΝ
Budama aparatı - KULLANIM KILAVUZU
dikkatle okuyun.
Urządzenie do przycinania gałęzi - INSTRUKCJE OBSŁUGI
Naprava za obrezovanje - PRIROČNIK ZA UPORABU
z navodili.
Садовые ножницы - РУKОВОДСТВО ПО ЭKСПЛУАТАЦИИ
с
Obrezivač - PRIRUČNIK ZA UPORABO
Beskärningsverktyg - BRUKSANVISNING
VARNING: Läs igenom hela detta häfte innan du använder
maskinen.
Karsimissaha - KÄYTTÖOHJEET
Beskærer - BRUGSANVISNING
ADVARSEL: Læs instruktionsbogen omhyggeligt igennem,
før du tager denne maskine i brug.
Beskjæringsutstyr - INSTRUKSJONSBOK
ADVARSEL: Les denne bruksanvisningen nøye før du bruker
maskinen.
Odvětvovací zařízení - NÁVOD K POUŽITÍ
IT
EN
FR
DE
ES
NL
PT
EL
TR
PL
SL
RU
HR
SV
FI
DA
NO
CS
171501185/3 01/2015
TB 250J-PR-UA
PRS 1501


i
ITALIANO - Istruzioni Originali ..................................................................... IT
ENGLISH - Translation of the original instructions .......................................... EN
FRANÇAIS - Traduction de la notice originale ................................................ FR
DEUTSCH - Übersetzung der Originalbetriebsanleitung .................................. DE
ESPAGNOL - Traducción del Manual Original ............................................... ES
NEDERLANDS - Vertaling van de oorspronkelijke gebruiksaanwijzing .......... NL
PORTUGUÊS - Tradução do manual original ............................................... PT
ΕΛΛΗΝΙΚΑ - Μετάφραση του πρωτοτύπου των οδηγιών χρήσης ................ EL
TÜRKÇE - Orijinal Talimatların Tercümesi ...................................................... TR
POLSKI - Tłumaczenie instrukcji oryginalnej .................................................. PL
SLOVENŠČINA - Prevod izvirnih navodil ........................................................ SL
РУССКИЙ - Перевод оригинальных инструкций ....................................... RU
HRVATSKI - Prijevod originalnih uputa ........................................................... HR
SVENSKA - Översättning av bruksanvisning i original .................................... SV
SUOMI - Alkuperäisten ohjeiden käännös ...................................................... FI
DANSK - Oversættelse af den originale brugsanvisning ................................ DA
NORSK - Oversettelse av orginal bruksanvisning ........................................... NO
ČESKY - Překlad původního návodu k používání ........................................... CS

ii
IT - ATTENZIONE! - Questo accessorio può essere applicato solo sui modelli di decespuglia-
tori/tagliabordi con asta giuntabile, indicati sotto.
Per Comandi-Manutenzioni-Dati Tecnici-Avvertenze:
fare rifemento al Manuale di Istruzioni della macchina sulla quale viene montato l’accesso-
rio.
EN - WARNING! - This accessory can be applied only on models of brush cutters / trim-
mers with jointed rod, shown below.
For Commands - Maintenance - Technical Data - Warnings:
refer to the Instruction Manual of the machine on which you t the accessory.
FR - ATTENTION! - Cet accessoire peut être appliquée que sur les modèles des débrouss-
ailleuses / coupe-bordures avec une tige de xation assemblable, indiquées ci-dessous.
Pour Commandes - Maintenance - Données Techniques - Avertissements:
reportez-vous au manuel d’instructions de la machine sur laquelle vous monté l’accessoi-
re.
DE - ACHTUNG! - Dieses Zubehör kann nur bei modellen der Freischneider / Trimmer mit
Gelenkstange angebracht werden, unten gezeigt.
Für Befehle -Wartung - Technische Daten - Warnungen:
lesen Sie die Bedienungsanleitung der Maschine, auf dem Sie das Zubehör anpassen.
ES -
¡ATENCIÓN! -
Este accesorio se puede aplicar sólo en los modelos de desbrozadoras / recor-
tadoras con varilla articulada, que se muestran a continuación.
Para Comandos - Mantenimiento - Datos técnicos - Advertencias:
hacer referencia el manual de instrucciones de la máquina en la que está montado el accesorio.
NL -
LET OP! - Dit accessoire kan alleen worden toegepast op modellen van bosmaaiers /
trimmers met gelede staaf, hieronder weergegeven.
Voor Opdrachten - Onderhoud - Technisch Data - Waarschuwingen:
doen verwijzing de gebruiksaanwijzing van de machine waarop deze is gemonteerd acces-
soire.
PT - ATENÇÃO! -
Este acessório pode ser aplicada apenas em modelos de roçadeiras / apara-
dores com haste articulada, mostrados abaixo.
Para Comandos - Manutenção - Datos Técnico - Avisos:
fazer referência o manual de instruções da máquina na qual está montada acessório.
EL - ΠΡΟΣΟΧΗ! - Αυτό το εξάρτημα μπορεί να εφαρμοστεί μόνο σε μοντέλα κόφτες
βούρτσα / Ψαλίδια με συνένωση ράβδο, όπως φαίνεται παρακάτω.
για Εντολές - Συντήρηση - Τεχνική - προειδοποιήσεις:
κάνει αναφορά Εγχειρίδιο Οδηγιών της μηχανής στην οποία έχει τοποθετηθεί
αξεσουάρ.
TR - DİKKAT! - Bu aksesuar yalnızca aşağıda gösterilen fırça kesiciler / eklemli çubuk
makasları, modelleri uygulanabilir.
Için-Bakım - Teknik - Uyarıları - Komutları:
bu aksesuar monte edildiği makinenin Talimat Kılavuzu rifemento yapmak.
PL - OSTRZEŻENIE! - Ten element dodatkowy można być stosowana tylko w modelach z kosy /
nożyce z przegubowego pręta, przedstawione poniżej.
Dla Polecenia - Maintenance - Techniczno - Ostrzeżenia:
zrobić odnośnik Instrukcji obsługi maszyny, na której jest zamontowany osprzęt.
SL - POZOR! - Ta dodatek se lahko uporablja samo na modelih motorne kose / trat z
spojen palica, prikazane spodaj.
Za Ukazi - za vzdrževanje - tehnično-opozorila:
storiti referenčna navodilih za uporabo stroja, na katerem je montiran opremo.
RU - ВНИМАНИЕ! - Этот аксессуар может быть применен только на моделях
кусторезов / триммеров с сочлененной стержня, как показано ниже.
для Команды - технического - обслуживания - технико - предупреждения:
сделать ссылки руководства по эксплуатации машины, на которой он установлен
аксессуар.

iii
.
1) DATI TECNICI TB 250J-PR-UA, PRS 1501
2) Peso a secco senza barra e catena 1,18 kg
3) Passo catena 3/8” mini
4) Spessore maglia motrice 1,27 mm
5) Lunghezza barra 250 mm
6) Capacità serbatoio olio 125 cm3
7) ACCESSORI
8) Combinazione barra
Lunghezza
Larghezza Scanalatura
118801758/0
25 cm / 10”
1,27 mm / 1,20”
9) Combinazione catena (Passo 3/8” mini). 118801759/0
HR - POZOR! - Ovaj dodatak može se primijeniti samo na modele šikare / trimera s eksi-
bilna zglobna štapa, prikazane u nastavku.
Za Naredbe - Održavanje - Tehničko - Upozorenja:
učiniti upućivanje upute za uporabu stroja na kojem je montiran pribor.
SV - VARNING! - Detta tillbehör kan endast användas på modeller av röjsågar / trimmers
med ledad stång, som visas nedan.
För Kommandon - Underhåll - Tekniska - Varningar:
gör hänvisning bruksanvisningen för den maskin där den är monterad tillbehör.
FI - VAROITUS! - Tämä lisälaite voidaan soveltaa vain malleja raivaussahat / trimmerit
nivelöityjä sauva, alla.
Komennot - Huolto - Tekninen - Varoitukset:
tehdä viite Käyttöohje koneen, johon se on asennettu lisälaite.
DA - ADVARSEL! - Dette tilbehør kan kun anvendes på modeller af buskryddere / Trimmere
med ende stang, der er vist nedenfor.
Til Kommandoer - Maintenance - Teknisk - Advarsler:
gøre henvisning instruktionen for den maskine, som den er monteret tilbehør.
NO - ADVARSEL! - Dette tilbehøret kan bare brukes på modeller av ryddesager / trimmere
med leddet stang, som vist nedenfor.
For Kommandoer - Maintenance - Teknisk - Advarsler:
gjøre henvisning bruksanvisningen for maskinen der det er montert tilbehør.
CS - UPOZORNĚNĺ! - Toto příslušenství lze použít pouze na modelech křovinořezy / vyžínače s
kloubovým tyčí, je uvedeno níže.
Příkazy pro - údržba - technicko - varování:
dělat referenční návodu pro stroje, na kterém je namontována příslušenství.
TB 250J - B 26 J - T 26 J

iv
2
4
5
3
2
3
1
1
3
6 7
2
5
5
41
2
4
4
5
6
1
2
6
1
8 9
1
1
3
4
4
10
11
12
> 5 mm
13

v
2
4
5
3
2
3
1
1
3
6 7
2
5
5
41
2
4
4
5
6
1
2
6
1
8 9
1
1
3
4
4
10
11
12
> 5 mm
13

vi
2
4
5
3
2
3
1
1
3
6 7
2
5
5
41
2
4
4
5
6
1
2
6
1
8 9
1
1
3
4
4
10
11
12
> 5 mm
13

vii
1] EN - TECHNICAL SPECIFICATIONS
2] Dry weight without bar and chain
3] Chain pitch
4] Driving link thickness
5] Bar length
6] Oil tank capacity
7] ACCESSORIES
8] Bar Combination
Length
Groove width
9] Chain combination (Pitch 3/8” mini)
1] FR - CARACTÉRISTIQUES TECHNIQUES
2]
Poids à sec sans guide ni chaîne
3]
Pas de la chaîne
4]
Épaisseur du maillon moteur
5]
Longueur du guide
6]
Capacité du réservoir d’huile
7] ACCESSOIRES
8]
Combinaisons de guide chaine
Longueur
Largeur Fente
9]
Combinaisons de chaine (Pas 3/8” min.)
1] DE - TECHNISCHE DATEN
2]
Nettogewicht (ohne Kettenschwert und
Kette)
3]
Kettenteilung
4]
Stärke Antriebsglied
5]
Länge Kettenschwert
6]
Fassungsvermögen Öltank
7] ZUBEHÖR
8] Schwertkombinazion
Schwert
Breite Nut
9] Kettenkombinazion
(Teilung 3/8” Mini)
1] ES - DATOS TÉCNICOS
2]
Peso en seco sin barra ni cadena
3]
Paso cadena
4]
Grosor del eslabón motor
5]
Longitud barra
6]
Capacidad depósito de aceite
7] ACCESORIOS
8]
Combinacion de barra
barra
Anchura Ranura
9]
Combinacion de cadena (Paso 3/8”
mini)
1] NL - TECHNISCHE GEGEVENS
2]
Droog gewicht zonder kettingblad en
ketting
3]
Steek ketting
4]
Dikte drijfschalm
5]
Steek tanden
6]
Lengte kettingblad
7] TOEBEHOREN
8] Combinaties van blad
Lengte
Breedte Gleuf
9] Combinaties van ketting
(Steek 3/8”
mini)
1] PT - DADOS TÉCNICOS
2]
Peso a seco sem barra e corrente
3]
Passo da corrente
4]
Espessura do elo de tracção
5]
Comprimento da barra
6]
Capacidade do depósito de óleo
7] ACESSÓRIOS
8]
COMBINAÇÕES DA LÂMINA-
GUIA
Comprimento
Ranhura
9]
COMBINAÇÕES DA CORRENTE
(Distância
3/8” mini)
1]
2]
Βgάρος χωρίς καύσιμο, μπάρα και
αλυσίδα
3]
Βήμα αλυσίδας
4]
Πάχος κινητήριου κρίκου
5]
Μήκος μπάρας
6]
Χωρητικότητα δοχείου λαδιού
7] ΑΞΕΣΟΥΑΡ
8]
ΣΥΝΔΥΑΣΜΟΙ ΛΑΜΑΣ
Μήκος
Πλάτος Εγκοπής
9]
ΣΥΝΔΥΑΣΜΟΙ ΑΛΥΣΙΔΑΣ (Βήμα 3/8”
mini)
1]
2]
Kol ve zincir hariç boş ağırlık
3]
Zincir adımı
4]
Sürücü bakla kalınlığı
5]
Kol uzunluğu
6]
Yağ deposu kapasitesi
7] AKSESUARLAR
8]
PALA KOMBİNASYONLARI
Uzunluk
Oyuk Genişliği
9]
ZİNCİR KOMBİNASYONLARI
(Adım 3/8” mini)
[
1] PL - DANE TECHNICZNE
2]
Ciężar na sucho bez drążka i
łańcucha
3]
Rozstaw łańcucha
4]
Gęstość siatki przenośnika
5]
Długość drążka
6]
Pojemność zbiornika oleju
7] AKCESORIA
8]
KOMBINACJE SZPADY
Długość
Szerokość Wyżłobienia
9]
KOMBINACJE ŁAŃCUCHA
(Skok 3/8” minimalny)

viii
1]
2]
Ciężar na sucho bez drążka i
łańcucha
3]
Rozstaw łańcucha
4]
Gęstość siatki przenośnika
5]
Długość drążka
6]
Pojemność zbiornika oleju
7] PRIPOMOČKI
8]
KOMBINACIJA DROGA
dolžina
širina utora
9]
KOMBINACIJA VERIGE (korak
3/8” mini)
1]
2]
Вес в сухом состоянии без шины и цепи
3]
Шаг цепи
4]
Толщина ведущего звена
5]
Длина шины
6]
Объем масляного бака
7] АКСЕССУАРЫ
8]
КОМБИНАЦИИ ШИНЫ
Длина
Ширина выемки
9]
КОМБИНАЦИИ ЦЕПИ (Шаг 3/8” мини)
1]
2]
Neto težina, bez šipke i reznog noža
3]
Korak reznog noža
4]
Debljina pokretnog dijela
5]
Duljina reznog noža
6]
Obujam uljnog skladišta
7] PRIBOR
8]
KOMBINACIJE VODILICE
dužina
širina žlijeba
9]
KOMBINACIJE LANCA (korak 3/8”
mini)
1]
2]
Nettovikt utan svärd och kedja
3]
Kedjedelning
4]
Drivlänkens tjocklek
5]
Svärdlängd
6]
Oljetank, volym
7] TILLBEHÖR
8]
KOMBINATIONER AV STÅNG
längd
Rännans bredd
9]
KOMBINATIONER AV KEDJA
(min.
avstånd 3/8”)
1]
2]
Kuivapaino ilman terälevyä ja ketjua
3]
Ketjun jako
4]
Vetolenkin paksuus
5]
Terälevyn pituus
6]
Öljysäiliön tilavuus
7] TARVIKKEET
8]
TERÄLEVYN KETJUN
Pituus
Leveys Uritus
9]
TERÄLEVYN YHDISTELMÄT
(hammasväli 3/8” mini)
1]
2]
Vægt uden brændstof, sværd og
kæde
3]
Kædedeling
4]
Drivleddets tykkelse
5]
Sværdets længde
6]
Olietankens kapacitet
7] TILBEHØR
8]
KOMBINATIONER AF SVÆRD
Længde
Sporbredde
9]
KOMBINATIONER AF KÆDE (Deling
3/8” mini)
1]
2]
Tørrvekt uten sverd og kjede
3]
Kjededeling
4]
Drivleddets tykkelse
5]
Sverdets lengde
6]
Oljetankens kapasitet
7] TILBEHØR
8]
KOMBINASJONER AV SVERD
lengde
bredde åpning
9]
KOMBINASJONER AV
KJEDE (kjededeling 3/8” mini)
1]
2]
Suchá hmotnost bez vodící lišty a řetězu
3]
Rozteč řetězu
4]
Tloušťka hnací spojky
5]
Délka lišty
6]
Objem olejové nádrže
7] PŘÍSLUŠENSTVÍ
8]
KOMBINACE VODICÍ LIŠTY
Délka
Šířka drážky
9]
KOMBINACE VODICÍ
AŘETĚZU (Rozestup 3/8”
mini)

IT
9
1
23
45
6
7
1. Unità di azionamento
2. Asta di collegamento
3. Perno ferma catena
4. Barra
5. Catena
6. Copribarra
7. Tappo serbatoio olio catena
11. Nome ed indirizzo del costruttore
12. Modello
13. Potenza massima di utilizzo
14. Anno di costruzione
15. Numero di matricola
16. Codice articolo
17. Velocità massima della catena
s
Made in ChinaPruner Saw chain Attachement
Max kW
Max Chain Speed m/
ATTENZIONE: la macchina da voi acquistata è stata costruita per un uso hobbistico.
1 2 3 4 5
1) Attenzione! Pericolo
2) Prima di usare questa macchina leggere il libretto istru-
zioni.
3) Il vostro apparato uditivo è in pericolo di danno irreversi-
bile. Avvisiamo l’operatore addetto di questa macchina, che
usandola in condizioni normali per uso giornaliero continua-
tivo può venir esposto ad un livello di rumore pari o superiore
a: 85 dB (A). È obbligatorio indossare l’equipaggiamento
di protezione individuale. Indossare sempre gli occhiali di
sicurezza (rischio di proiezioni) e protezioni acustiche come
il casco antirumore (rischio di danni all’apparato auditivo)
durante l’uso della macchina. Nei casi in cui sia presente il
L’esempio della dichiarazione di conformità
si trova nella penultima pagina del manuale.

IT
rischio di caduta di oggetti, indossare il casco di protezione.
4) Portare calzature di protezione e guanti!
5) Pericolo di proiezioni! Allontanare qualunque persona
o animale domestico ad almeno 15 m durante l’impiego
della macchina!
•) Operare in zona sgombra da ostacoli, rispettare un an-
golo di circa 60° rispetto al terreno. Curare il corretto
montaggio sul decespugliatore. Curare il corretto mon-
taggio di barra e catena. Prevedere sempre una via di
fuga.
•) Operare sempre in posizioni stabili e sicure. Evitare di
lavorare su scale, gradini, ed in generale su superci non
perfettamente stabili.
•) È fatto obbligo all’utilizzatore adeguarsi alle eventuali
Normative Nazionali che possono limitare l’uso della
macchina.
PRESCRIZIONI DI SICUREZZA 10
1) Leggere attentamente le istruzioni. Prendere
familiarità con i comandi e con un uso appropriato
della macchina. Imparare ad arrestare rapidamente
il motore.
2) Utilizzare la macchina per lo scopo al quale è
destinata, cioè per “la sramatura di alberi di di-
mensioni rapportate alla lunghezza della ba-
rra” o oggetti in legno di analoghe caratteristiche.
Qualsiasi altro impiego può rivelarsi pericoloso e
causare il danneggiamento della macchina.
3) Non permettere mai che la macchina venga uti-
lizzato da bambini o da persone che non abbiano
la necessaria dimestichezza con le istruzioni. Le
leggi locali possono ssare un’età minima per l’u-
tilizzatore.
4) La macchina non deve essere utilizzata da più
di una persona.
5) Non utilizzare mai la macchina:
– con persone, in particolare bambini, o animali
nelle vicinanze;
– se l’utilizzatore è in condizioni di stanchezza o
malessere, oppure ha assunto farmaci, droghe,
alcool o sostanze nocive alle sue capacità di ri-
essi e attenzione;
– se l’utilizzatore non è in grado di tenere salda-
mente la macchina con due mani e/o di rimanere
stabilmente in equilibrio sulle gambe durante il
lavoro.
6) Ricordare che l’operatore o l’utilizzatore è re-
sponsabile di incidenti e imprevisti che si possono
vericare ad altre persone o alle loro proprietà.
1)
Prima dell’uso, procedere ad una verica generale
della macchina
2) Durante il lavoro, occorre indossare un abbiglia-
mento idoneo che non costituisca un impaccio per
l’utilizzatore.
– Indossare abiti protettivi aderenti, dotati di prote-
zioni antitaglio.
– Indossare guanti, occhiali protettivi e scarpe an-
titaglio con suola antiscivolo.
– Utilizzare le cue per proteggere l’udito.
– Non indossare sciarpe, camici, collane e comun-
que accessori pendenti o larghi che potrebbero
impigliarsi nella macchina o in oggetti e materiali
presenti sul luogo di lavoro.
– Raccogliere adeguatamente i capelli lunghi.
3) Prima di iniziare il lavoro, assicurarsi che tutte le
protezioni siano correttamente montate.
C) DURANTE L’UTILIZZO
1) Non azionare il motore in spazi chiusi, dove pos-
sono accumularsi pericolosi fumi di monossido di
carbonio.
2) Lavorare solamente alla luce del giorno o con
buona luce articiale.
3) Assumere una posizione ferma e stabile:
– evitare per quanto possibile di lavorare con suolo
bagnato o scivoloso o comunque su terreni
troppo accidentati o ripidi che non garantiscono
la stabilità dell’operatore durante il lavoro;
– evitare l’uso di scale e piattaforme instabili;
– non correre mai, ma camminare e prestare atten-
zione alle irregolarità del terreno e alla presenza
di eventuali ostacoli.
4) Controllare che il regime di minimo della mac-
china sia tale da non permettere il movimento della
catena e che, dopo un’accelerata, il motore torni
rapidamente al minimo.
5) Fare attenzione a non urtare violentemente la
barra contro corpi estranei e alle possibili proiezioni
di materiale causato dallo scorrimento della catena.
1) Mantenere serrati dadi e viti, per essere certi
che la macchina sia sempre in condizioni sicure
di funzionamento. Una manutenzione regolare è
essenziale per la sicurezza e per mantenere il livello
delle prestazioni.
2) Indossare guanti da lavoro per ogni inervento sul
dispositivo di taglio.
3) Curare l’alatura della catena. Tutte le opera-
zioni riguardanti la catena e la barra sono lavori che
richiedono una specica competenza oltre all’im-
piego di apposite attrezzature per poter essere
eseguiti a regola d’arte; per ragioni di sicurezza, è
sempre bene contattare il vostro Rivenditore.
4) Per motivi di sicurezza, non usare mai la mac-
china con parti usurate o danneggiate. I pezzi
danneggiati devono essere sostituiti e mai riparati.
Usare solo ricambi originali. I pezzi di qualità non
equivalente possono danneggiare la macchina e
nuocere alla sicurezza.
5) Riporre la macchina fuori dalla portata dei bam-
bini!
3. PRESCRIZIONI DI SICUREZZA

IT
1) Ogni volta che è necessario movimentare o tra-
sportare la macchina occorre:
– spegnere il motore, attendere l’arresto della ca-
tena e scollegare il cappuccio della candela;
– applicare la protezione copribarra;
– aerrare la macchina unicamente dalle impugna-
ture e orientare la barra nella direzione contraria
al senso di marcia.
2) Quando si trasporta la macchina con un auto-
mezzo, occorre posizionarla in modo da non costi-
tuire pericolo per nessuno e bloccarla saldamente
per evitarne il ribaltamento con possibile danneg-
giamento e fuoriuscita di carburante.
F) CAUSE DEL CONTRACCOLPO
E PREVENZIONE PER L’OPERATORE
Si può avere un contraccolpo quando la punta o
l’estremità della barra di guida tocca un oggetto,
oppure quando il legno si racchiude in sé serrando
la catena dentata nella sezione di taglio.
Il contatto dell’estremità può, in certi casi, provocare
improvvisamente una reazione inversa, spingendo
la barra di guida verso l’alto e all’indietro verso l’o-
peratore.
Il serraggio della catena dentata sulla parte supe-
riore della barra di guida può spingere rapidamente
all’indietro la catena dentata verso l’operatore.
L’una o l’altra di dette reazioni può causare una per-
dita di controllo della sega, provocando così gravi
incidenti alla persona.
AII’utilizzatore di una sega a catena, conviene pren-
dere diversi provvedimenti per eliminare rischi di
incidenti o di ferite nel corso del lavoro di taglio. Il
contraccolpo è il risultato di un cattivo uso dell’u-
tensile e/o di procedure o di condizioni di funziona-
mento non corrette e può essere evitato prendendo
le precauzioni appropriate specicate di seguito:
• Utilizzare unicamente le guide a barra e le
Guide e
catene di ricambio non adeguate possono dar
origine a una rottura della catena e/o a dei con-
traccolpi.
• Attenersi alle istruzioni del costruttore che
della sega a catena. Un decremento del livello
della profondità può portare a un aumento dei
contraccolpi.
Nel testo del manuale, alcuni paragra contenenti
informazioni di particolare importanza sono con-
trassegnati con diversi gradi di evidenziazione, il
cui signicato è il seguente:
Fornisce precisazioni o altri
elementi a quanto già precedentemente indicato,
nell’intento di non danneggiare la macchina, o cau-
sare danni.
PERICOLO! Possibilità di gravi lesioni
personali o a terzi con pericolo di morte, in
caso di inosservanza.
(se fornita separatamente) (Fig. 1)
– Introdurre l’asta (1) nel manicotto (2) facendo coin-
cidere il foro (3) con la vite (4).
– Serrare a fondo le due viti (4) e (5). Dopo il serrag-
gio, la testa della vite (4) non deve sporgere.
PERICOLO!
Lo sballaggio e il completa-
mento del montaggio devono essere eettuati su
una supercie piana e solida, con spazio su-
ciente alla movimentazione della macchina e de-
gli imballi, avvalendosi sempre degli attrezzi ap-
propriati.
Lo smaltimento degli imballi deve avvenire se-
condo le disposizioni locali vigenti.
PERICOLO!
Indossare sempre robusti
guanti da lavoro per maneggiare la barra e la ca-
tena. Prestare la massima attenzione nel mon-
taggio della barra e della catena per non compro-
mettere la sicurezza e l’ecienza della macchina;
in caso di dubbi, contattare il vostro Rivenditore.
11

PERICOLO! Durante le operazioni di
manutenzione:
– Smontare l’asta del potatore dal decespu-
gliatore.
– Usare guanti protettivi nelle operazioni ri-
guardanti la barra e la catena.
– Tenere montate le protezioni della barra,
tranne i casi di interventi sulla barra stessa
o sulla catena.
– Non disperdere nell’ambiente olii, benzina
o altro materiale inquinante.
INGRASSAGGIO (Fig. 11)
– Provvedere ad ingrassare ogni 20 ore utiliz-
zando l’apposito ingrassatore.
–Usare grasso a base di litio per alte temperature
e pressioni estreme.
12
IT
PERICOLO!
Eseguire tutte le operazioni
a motore spento.
–Svitare il dado (1) e rimuovere il carter (2), per ac-
cedere al pignone di trascinamento e alla sede della
barra (Fig. 2).
– Montare la barra (4) inserendo il prigioniero (3) nella
scanalatura e spingerla verso la parte posteriore
dell’unità di azionamento (Fig. 3).
– Montare la catena attorno al pignone di trascina-
mento e lungo le guide della barra, facendo atten-
zione a rispettare il senso di scorrimento (Fig. 4);
se la punta della barra è munita di pignone di rinvio,
curare che le maglie di trascinamento della catena
si inseriscano correttamente nei vani del pignone.
– Vericare che il per no del tendicatena (5) sia cor-
rettamente inserito nell’apposito foro della barra; in
caso contrario, agire opportunamente con un cac-
ciavite sulla vite (6) del tendicatena, no al completo
inserimento del perno (Fig. 5).
– Rimontare il carter (2), senza serrare il dado (1).
– Agire opportunamente sulla vite tendicatena (6) no
ad ottenere la corretta tensione della catena (Fig. 6).
– Tenendo la barra (4) sollevata, serrare a fondo il
dado (1) del carter (2), mediante la chiave in dota-
zione (Fig. 7).
– Controllare la tensione della catena. La tensione è
corretta quando, aerrando la catena a metà della
barra, le maglie di trascinamento non escono dalla
guida (Fig. 8).
– Con l’aiuto di un cacciavite, far scorrere la catena
lungo le guide, per assicurarsi che lo scorrimento
avvenga senza sforzi eccessivi.
– Estrarre il piolo di arresto (1) e spingere l’asta (2)
no ad avvertire lo scatto del piolo di arresto (1) nel
foro (3) dell’asta. L’inserimento può essere age-
volato ruotando leggermente la parte inferiore (2)
nei due sensi; l’inserimento completo è avvertibile
dal piolo (1) che deve risultare completamente ri-
entrato.
– Ad inserimento completato, serrare a fondo la ma-
nopola (4).
Leggere attentamente anche il manuale di Istruzioni
del decespugliatore a cui il dispositivo potatore è ap-
plicato.
Prima di iniziare il lavoro occorre:
– eettuare il rifornimento di olio, riempiendo il relativo
serbatoio.
– controllare che non vi siano viti allentate sulla mac-
china e sulla barra;
– controllare che la catena sia alata e senza segni
di danneggiamento;
– controllare che le impugnature e protezioni della
macchina siano pulite ed asciutte, correttamente
montate e saldamente ssate alla macchina;
– controllare il ssaggio delle impugnature;
– controllare la tensione della catena.
•
PERICOLO!
Assicurarsi che la barra e la
catena siano ben posizionate quando si eettua
il controllo dell’ausso dell’olio.
Avviare il motore, tenerlo sui medi regimi e controllare
se l’olio della catena viene sparso come indicato nella
gura (Fig. 10).
Il usso dell’olio della catena può essere regolato
agendo con un cacciavite sull’apposita vite di regola-
zione (1) della pompa, posta nella parte inferiore della
macchina (Fig. 10).
•
– All’avviamento del motore curare che la catena
NON appoggi sul terreno, né sia in contatto con
corpi estranei; allo scopo, posizionare l’asta in
modo opportuno. Per l’avviamento del motore se-
guire le istruzioni fornite con il decespugliatore.
– Procedere alla potatura operando un primo taglio al
di sotto della parte da tagliare, quindi procedere al di
sopra, evitando così scorticature e danni alla pianta.
– Procedere alla potatura operando al di fuori della
zona di caduta del materiale tagliato.
– In lavoro evitare sempre di avvicinare la lama ta-
gliente alle parti del corpo.
– A macchina ferma applicare sempre la protezione
barra.

PIGNONE CATENA
Presso il vostro Rivenditore, controllare periodi-
camente lo stato del pignone e sostituirlo quando
è usurato.
Non montare una catena nuova con un pignone
usurato o viceversa.
AFFILATURA DELLA CATENA (Fig. 12)
PERICOLO! Per ragioni di sicurezza ed
ecienza, è molto importante che gli organi di
taglio siano ben alati.
L’alatura è necessaria quando:
• La segatura è simile a polvere.
• Occorre una maggiore forza per tagliare.
• Il taglio non è rettilineo.
• Le vibrazioni aumentano.
• Il consumo di carburante aumenta.
PERICOLO! Se la catena non è su-
cientemente alata, aumenta il rischio di con-
traccolpo (kickback).
Se l’operazione di alatura viene adata ad un
centro specializzato, può essere eseguita con
apposite apparecchiature che assicurano una mi-
nima asportazione di materiale ed una alatura
costante su tutti i taglienti.
L’alatura “in proprio” della catena si esegue per
mezzo di apposite lime a sezione tonda, il cui dia-
metro è specico per ciascun tipo di catena (vedi
“Tabella Manutenzione Catena”, e richiede una
buona manualità ed esperienza per evitare di ar-
recare danni ai taglienti.
Per alare la catena:
– Smontare l’asta del potatore dal decespuglia-
tore e bloccare saldamente la barra con la ca-
tena montata in una morsa adeguata, assicuran-
dosi che la catena possa scorrere liberamente.
– Mettere in tensione la catena, nel caso risul-
tasse allentata.
– Montare la lima nell’apposita guida e quindi in-
serire la lima nel vano del dente, mantenendo
una inclinazione costante secondo il prolo del
tagliente.
– Dare solo pochi colpi di lima, esclusivamente in
avanti, e ripetere l’operazione su tutti i taglienti
con lo stesso orientamento (destri o sinistri).
– Invertire la posizione della barra nella morsa e
ripetere l’operazione sui rimanenti taglienti.
– Vericare che il dente delimitatore non sporga
oltre lo strumento di verica e limare l’eventuale
eccedenza con una lima piatta, arrotondando
il prolo.
– Dopo l’alatura, eliminare ogni traccia di lima-
tura e pulviscolo e lubricare la catena in bagno
d’olio.
La catena deve essere sostituita quando:
– La lunghezza del tagliente si riduce a 5 mm o
meno;
– il gioco delle maglie sui rivetti è eccessivo.
Per evitare una usura asimmetrica della barra, è
opportuno che questa venga rovesciata periodi-
camente.
Per mantenere in ecienza la barra occorre:
– Ingrassare con l’apposita siringa i cuscinetti del
pignone di rinvio (se presente).
– Pulire la scanalatura della barra con l’apposito
raschietto (non fornito in dotazione).
– Pulire i fori di lubricazione.
– Con una lima piatta, togliere le bave dai anchi e
pareggiare eventuali dislivelli fra le guide.
La barra deve essere sostituita quando:
– la profondità della scanalatura risulta inferiore
all’altezza delle maglie di trascinamento (che
non devono mai toccare il fondo;
– la parete interna della guida è usurata al punto
da fare inclinare lateralmente la catena.
Data l’evoluzione del prodotto, gli utensili potreb-
bero essere sostituiti nel tempo da altri, con carat-
teristiche analoghe di intercambiabilità e sicurezza
di funzionamento.
13
IT
Passo catena Livello del dente limitatore (a) Diametro della lima (d)
mm: 9,32
a = 0,45 mm (0,018”) d = 4 mm(5/32”)


15
EN
1) Warning! Danger.
2) Read the instruction booklet before using this
machine.
3) Your hearing is at risk of irreparable damage.
Anyone operating this machine under normal con-
ditions during continuous daily use may be expo-
sed to a noise level equal to or exceeding 85 dB
(A). The operator must wear Personal Protective
Equipment (PPE). Whenever the machine is in
use, safety goggles must be worn to safeguard
against ying objects, as must ear protectors, such
as a soundproof helmet, in order to protect the
WARNING: The machine you have purchased has been manufactured for domestic use.
1 2 3 4 5
1
23
45
6
7
1. Starter unit
2. Connecting rod
3. Chain catcher
4. Bar
5. Chain
6. Bar cover
7. Chain oil tank cap
IDENTIFICATION PLATE
11. Name and address of the manufacturer
12. Model
13. Maximum power for use
14. Year of manufacture
15. Serial number
16. Article code
17. Maximum speed of the chain
s
Made in ChinaPruner Saw chain Attachement
Max kW
Max Chain Speed m/
The example of the Declaration of Conformity is
provided on the penultimate page of the manual.

16
EN
A) TRAINING
1) Read the instructions carefully. Become ac-
quain ted with the controls and the proper use of
the machine. Learn how to stop the engine quickly.
2) Only use the machine for the purpose for which
it was designed, that is “ -
mensions suitable for the length of the bar”
or wooden objects with the same characteristics.
Any other use may be dangerous and damage
the machine.3) Never allow children or persons
unfamiliar with these instructions to use the ma-
chine. Local regulations may restrict the age of
the operator.
4) The machine must never be used by more than
one person.
5) Never use the machine :
– when people, especially children or pets are in
the vicinity;
– if the user is tired or unwell, or has taken medi-
cine, drugs, alcohol or any substances which
may slow his reexes and compromise his
judgement;
– if the user is not capable of holding the machine
rmly with two hands and/or of remaining stan-
ding on the ground whilst working.
6) Remember that the operator or user is respon-
sible for accidents or hazards occurring to other
people or their property.
B) PREPARATION
1) Before using the machine, check its general
condition.
2) Always wear adequate clothing when using the
machine which do not hamper movements in any
manner.
– Always wear slim-tting protective clothing, t-
ted with shear-proof protection devices.
– Always wear protective gloves and eye-goggles
and safety anti-shear boots with non-slip soles.
– Always wear ear and hearing protection de-
vices.
– Never wear scarves, shirts, necklaces, or any
hanging or apping accessory that could catch
in the machine or in any objects or materials in
the work area.
– Tie your hair back if it is long.
3) Before starting your work, make sure that all the
protection devices are correctly tted.
C) OPERATION
1) Do not operate the engine in a conned space
where dangerous carbon monoxide fumes can col-
lect.
2) Work only in daylight or good articial light.
3) Take on a rm and well-balanced position:
– where possible avoid working on wet slippy
ground or in any case on uneven or ripid ground
which does not guarantee stability for the oper-
ator;
– avoid using unstable ladders or platforms;
– never run, but walk carefully paying attention to
the lay of the land and any eventual obstacles.
4) Check that when the machine is running idle,
there is no movement of the chain and, after pres-
s ing the throttle trigger, the engine quickly returns
to minimum speed.
5) Take care not to hit the bar hard against foreign
objects or ying debris caused by the movement
of the chain.
1) Keep all nuts, bolts and screws tightly fastened
to be sure the equipment is in safe working con-
dition. Routine maintenance is essential for safety
and for maintaining a high performance level.
2) Always wear protective gloves when handling
the cutting device.
3) Make sure the chain is well sharpened. Any
work on the chain and bar require specic experi-
ence and special tools. For safety purposes, we
recommend you contact your dealer to ensure
work is done correctly.
4) For safety reasons, never use the machine with
worn or damaged parts. Damaged parts are to be
replaced and never repaired. Only use original
spare parts. Parts that are not of the same quality
can seriously damage the equipment and com-
promise safety.
5) Store the machine out of the reach of children!
E) TRANSPORTATION AND HANDLING
operator’s hearing. If the operator is working in an
area where there is a risk of falling objects, a safety
helmet must also be worn.
4) Wear protective footwear and gloves!
5) Danger: objects thrown up by machine! Keep
people or animals at least 15 m away from the
machine during operation!
•) Work in an obstacle-free area, choosing the
most suitable tilt of the cutting unit in relation
to the ground. Make sure it is correctly tted on
the brush cutter.
•) Always work in stable, safe positions. Do not
work on stairs, steps and, in general, on surfa-
ces that are not perfectly stable.
•) The user must comply with any National Regu-
lations which can limit machine use.

(if supplied separately) (Fig. 1)
– Insert the rod (1) in the sleeve (2) so that the
hole (3) coincides with the screw (4).
– Tighten the two screws (4) and (5) completely.
The head of the screw (4) must not stick out
when tightened.
DANGER! Unpacking and complet-
ing the assembly should be done on a at and
stable surface, with enough space for ma-
chine handling and its packaging, always
making use of suitable equipment.
Disposal of the packaging should be done in
accordance with the local regulations in force.
DANGER! Always wear heavy-duty
gloves when handling the bar and chain.
Mount the bar and chain very carefully so as
not to impair the safety and eciency of the
machine. If in doubt, contact your dealer.
injury.
Kickback is the result of tool misuse and/or in-
correct operating procedures or conditions and
can be avoided by taking proper precautions as
given below:
• Only use replacement bars and chains
Incorrect re-
placement bars and chains may cause chain
breakage and/or kickback.
•
Decreasing the depth gauge height can lead to
increased kickback.
Certain paragraphs in the manual contain particu-
larly signicant information and are marked with
various levels of highlighting with the following
meaning:
These give details or further
information on what has already been indicated,
and aim to prevent both damage to the machine,
and the machine from causing damage.
DANGER! Non-observance will re-
sult in the risk of serious injury or death to
oneself or others.
17
EN
1) Whenever the machine is to be handled or tran-
sported you must:
– turn o the engine, wait for the chain to stop and
disconnect the spark plug cap;
– mount the bar cover;
– only hold the machine using the handgrips and
position the bar in the opposite direction to that
used during operation.
2) When using a vehicle to transport the machine,
position it so that it can cause no danger to per-
sons and fasten it rmly in place to avoid it from
tipping over, which may cause damage or fuel
spillage.
F) CAUSES AND OPERATOR PREVENTION
Kickback may occur when the nose or tip of the
guide bar touches an object, or when the wood
closes in and pinches the saw chain in the cut.
Tip contact in some cases may cause a sudden re-
verse reaction, kicking the guide bar up and back
towards the operator.
Pinching the saw chain along the top of the guide
bar may push the guide bar rapidly back towards
the operator.
Either of these reactions may cause you to loose
control of the saw which could result in serious
personal injury. Do not rely exclusively upon the
safety devices built into your saw.
As a chain saw user, you should take several steps
to keep your cutting jobs free from accident or
17

– Never dispose of oils, fuel or other polluting
materials in unauthorised places.
GREASING (Fig. 11)
– Grease every 20 hours using the specic grease
gun.
– Use lithium-based grease for high temperatures
and extreme pressures.
DANGER! During maintenance oper-
ations:
– Disassemble the pruner rod from the brush
cutter.
– Use protective gloves when handling the
bar and chain.
– Keep the bar protection devices on, except
when intervening directly on the bar or the
chain.
– ll the relevant tank with oil;
– check that all the screws on the machine and the
bar are tightly fastened;
– check that the chain is sharp and there are no
signs of any damage;
– check that handgrips and protection devices
are clean and dry, correctly mounted and well
fastened to the machine;
– check that the handgrips are well fastened;
– check the chain tension.
• Checking the oil delivery
DANGER! Make sure the bar and the
chain are in place when you check the oil de-
livery.
Start the engine, keep it running at medium power
and check if the chain oil is delivered as shown in
the gure (Fig. 10).
You can adjust the chain oil ow using a screw-
driver on the adjuster screw (1) of the oiler, which
is on the bottom of the machine (Fig. 10).
• Directions for use
– When starting the motor make sure the chain is
NOT resting on the ground and does not come
into contact with foreign bodies; for this purpose,
position the rod appropriately.
– Follow the instructions supplied with the brush
cutter to start the motor.
– Prune by making a rst cut from below on the
part to be cut, then cut from above, to avoid
barking and damage to the plant.
– When pruning operate outside the area in which
cut material falls.
– Never bring the cutting blades close to body
parts while working.
– Always t the bar guard when the device is
swtched o.
DANGER! Perform all operations
with the engine o.
– Unscrew the nut (1) and remove the cover (2) to
get to the drive sprocket and point where the bar
is to be tted (Fig. 2).
– Mount the bar (4) by inserting the stud bolt (3) in
the groove and push it towards the back of the
starter unit (Fig. 3).
– Mount the chain in the right direction around the
drive sprocket and along the bar rail (Fig. 4). If
the tip of the bar has a nose sprocket, make sure
the drive links t correctly in the sprocket rims.
– Check that the chain tension adjuster pin (5) is
tted properly in the hole on the bar; if it isn’t,
turn the chain tension adjuster screw (6) using
a screwdriver until the pin is completely inserted
(Fig. 5).
– Fit the guard (2) back on without tightening the
nut (1).
– Turn the chain tension adjuster screw (6) to ad-
just the chain tension (Fig. 6).
– Raise the bar (4) and tighten the nut (1) on the
guard (2) securely using the wrench (Fig. 7).
– Check the chain tension. The tension is correct
when the drive links do not slip out of the chain
guides if you hold the chain in the middle of the
bar (Fig. 8).
– Using a screwdriver, make the chain run along
the guides to check it moves smoothly without
resistance.
ATTACHING THE PRUNER (Fig. 9)
– Pull out the stop pin (1) and push the rod (2) right
down until the stop pin (1) clicks into the hole (3)
in the rod. This is easier to do if you rotate the
bottom of the rod (2) slightly in both directions.
The pin (1) is in place when it is completely lo-
dged in the hole.
– Once inserted, tighten the knob (4) securely.
Please also read the instructions manual for the
brush cutter the device pruner is applied to.
Before starting work please:
18
EN
This manual suits for next models
1
Table of contents
Languages:
Other GGP ITALY Pole Saw manuals
Popular Pole Saw manuals by other brands

Stihl
Stihl HT 102 instruction manual

Ozito
Ozito PowerXchange PXCPRSS-018 instruction manual

Stanley
Stanley CS25 user manual

Parkside
Parkside PAHE 20-Li C3 Translation of the original instructions

Black & Decker
Black & Decker Alligator LP1000 instruction manual

MasterCraft
MasterCraft 054-0370-0 instruction manual