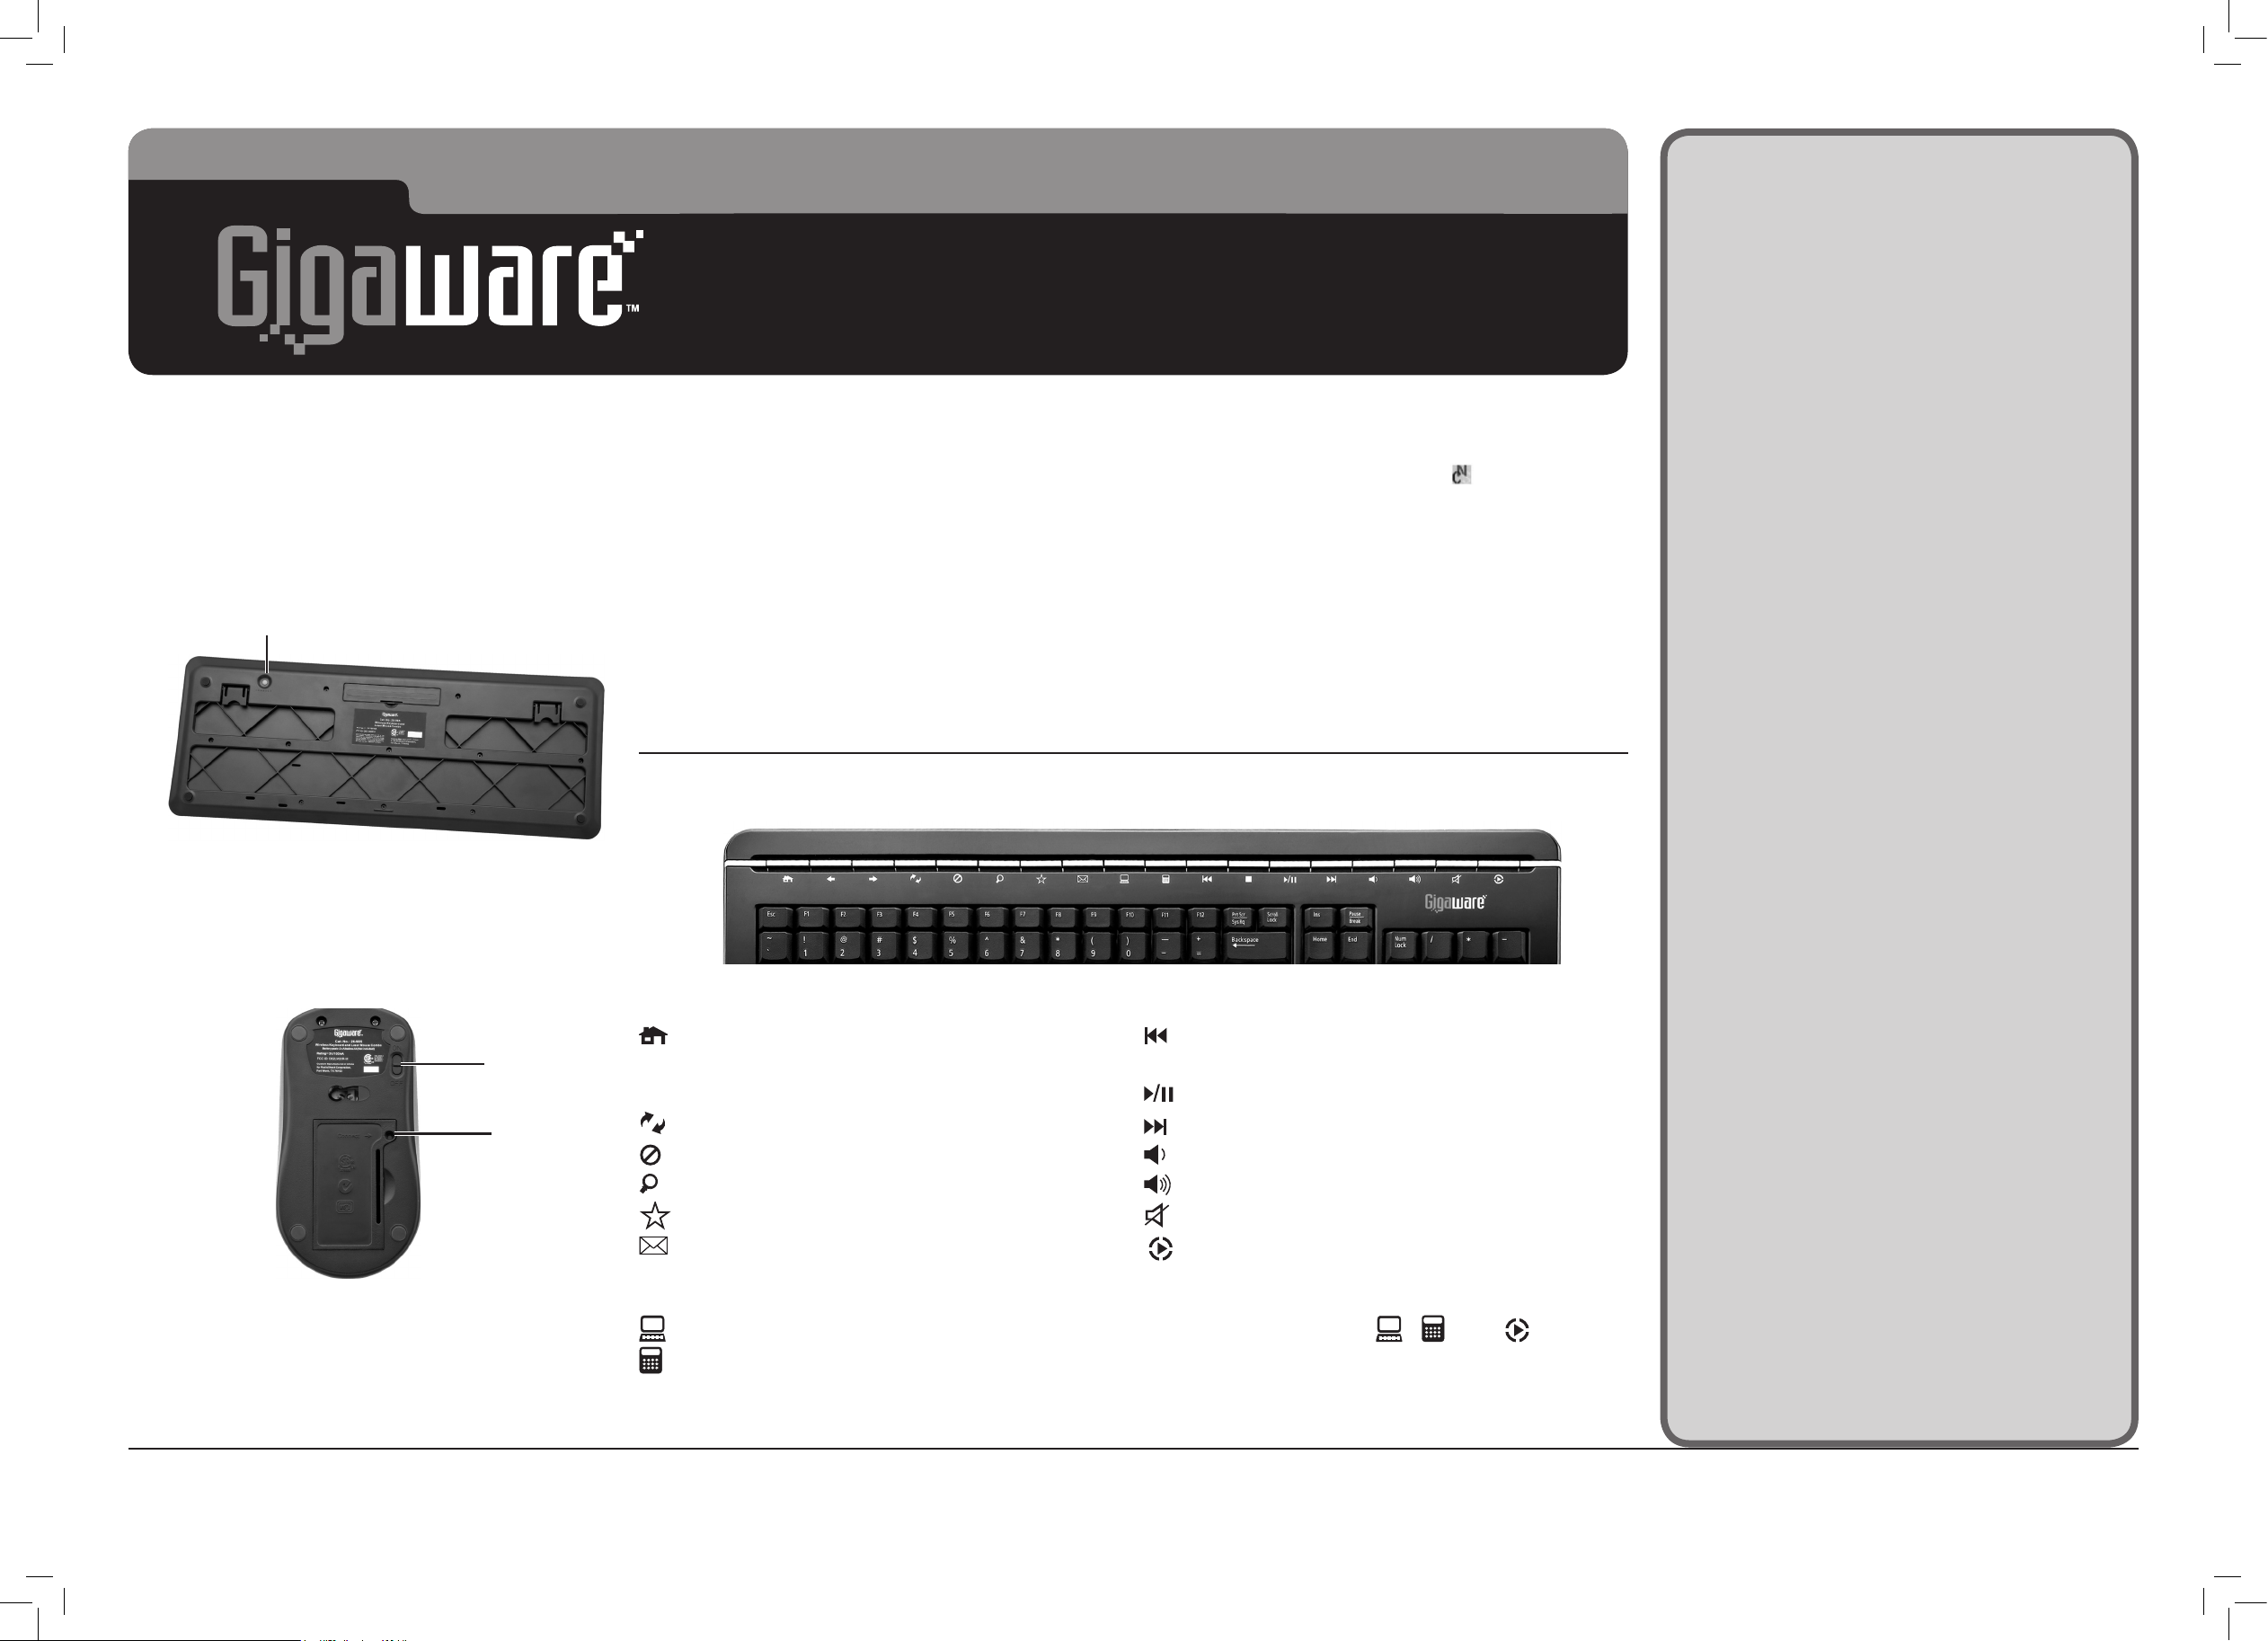
Connecting Your Mouse and Keyboard
1. Plug the receiver into an available USB port in your
computer.
2. Press CONNECT on the keyboard, and then press
the button on the receiver within 15 seconds.
The receiver’s indicator flashes to indicate the
connection is set.
3. Slide the ON/OFF switch on the mouse to ON.
Insert a clip or a pencil point to press Connect
on the mouse, and then press the button on the
receiver within 15 seconds. The receiver’s indicator
flashes to indicate the connection is set.
Notes: You only need to connect the mouse and
keyboard to the receiver for the first time. The mouse
and keyboard will store the connection into memory for
later use.
Internet Hot Keys
Launch the default web browser.
Go to the previous web page.
Go to the next web page.
Refresh the current page.
Stop loading or refreshing a web page.
Search.
Open “Favorites.”
Start a specified e-mail program.
Others
Launch My Computer.
Access the Windows calculator.
Multimedia Hot Keys
Play the previous track.
Stop playback.
Play or pause media.
Play the next track.
Lower speaker volume.
Increase speaker volume.
Mute sound. Press again to unmute.
Start a pre-selected media player.
Note:
• Windows 2000 users must install the included
Software CD to use the , and buttons.
Follow the steps under “Installing Software CD” to
install the CD.
• See your operating system’s online help for additional
information about keyboard configuration and use.
Using Scroll Lock, Num Lock, and
Caps Lock Keys
After you complete the connection between the mouse
and keyboard, you must install the included Software
CD to activate Scroll Lock, Num Lock, and Caps Lock
indictors.
Installing Software CD
1. Insert the supplied CD into your computer’s
CD-ROM drive.
2. Follow the on-screen instruction to complete
installation, then press Finish.
To activate Scroll Lock, Number Lock and Caps Lock
key indictators on the task bar:
1. Press Num Lock. The Nin the icon lights red to
indicate the Num Lock function is activated. Press
Num Lock again to turn off the function. The red N
turns off.
2. Press Scroll Lock. A yellow Slights to indicate the
Scroll Lock function is activated. Press Scroll Lock
again to turn off the function.
3. Press Caps Lock. A blue Clights to indicate the
Caps Lock function is activated. Press Caps Lock
again to turn off the function.
Using Hot Keys
Connect
ON/OFF
Connect
Windows is a registered trademark and Windows Vista is a trademark of Microsoft Corporation in the United States and/or other countries.
©2008. RadioShack Corporation. All rights reserved. Gigaware is a trademark and RadioShack is a registered trademark used by RadioShack Corporation.
26-985
04A08
Printed in China
Important Information
• To save the mouse’s battery power, slide ON/OFF
to OFF after you finish using your mouse.
• Do not place the mouse, keyboard, or receiver
on a metal surface. Metal may impair the RF
communication.
• For optimal performance, place the mouse closer
to the receiver.
• Do not place the receiver on the top of computer
or monitor to avoid interference.
• If nearby RF devices cause interference, move them
away from your mouse/keyboard and receiver.
• When your mouse is idle for about 6 or 7
minutes, the mouse will automatically swith off.
To re-activate it, press on any mouse button.
• Your mouse’s cursor is motion sensitive, with a
very fast response time. Should you want to slow
down the cursor speed, click Control Panel ->
Mouse Properties -> Pointer Options to adjust
the pointer speed in the Motion tab.
Class 1 Laser Product
This mouse uses a laser light beam and is classified
as a CLASS 1 laser product. Do not attempt to
disassemble this mouse. Laser rays from the optical
pickup are dangerous to the eyes.
WARNING: Visible and invisible laser radiation
is possible if open or if the interlock fails or is
defeated. Avoid direct exposure to the beam.
Caution: There are no user-serviceable parts inside
this mouse. Do not open the top cover. Make sure
that pins or other foreign objects do not get inside
the mouse. Only a qualified service person should
remove the cover or attempt to service this device
due to possible eye injury.
Care and Service
• If you are having trouble operating your mouse
and keyboard, move your mouse and keyboard
closer to the receiver.
• Do not use the mouse on surfaces made of
glass, black velvet, or mirror as these surfaces
may disrupt function.
• Use and store the mouse and keyboard only in
room temperature environments.
• Keep the mouse and keyboard dry; if they get
wet, wipe them dry immediately.
• Keep the mouse and keyboard away from dust
and dirt, and wipe them with a damp cloth
occasionally to keep them looking new.
• Handle the mouse and keyboard carefully; do not
drop them.
• Do not modify or tamper with your mouse’s and
keyboard’s internal components. It may cause a
malfunction and invalidate the warranty.