2
Table of Contents
About this Guide
..........................................................................................................................3
FCC Statement
............................................................................................................................3
WEEE Notice
...............................................................................................................................3
Notes on Installation
.....................................................................................................................4
Caution
.......................................................................................................................................4
1 Introduction...............................................................................................................................5
1.1
Features ...........................................................................................................................5
1.2
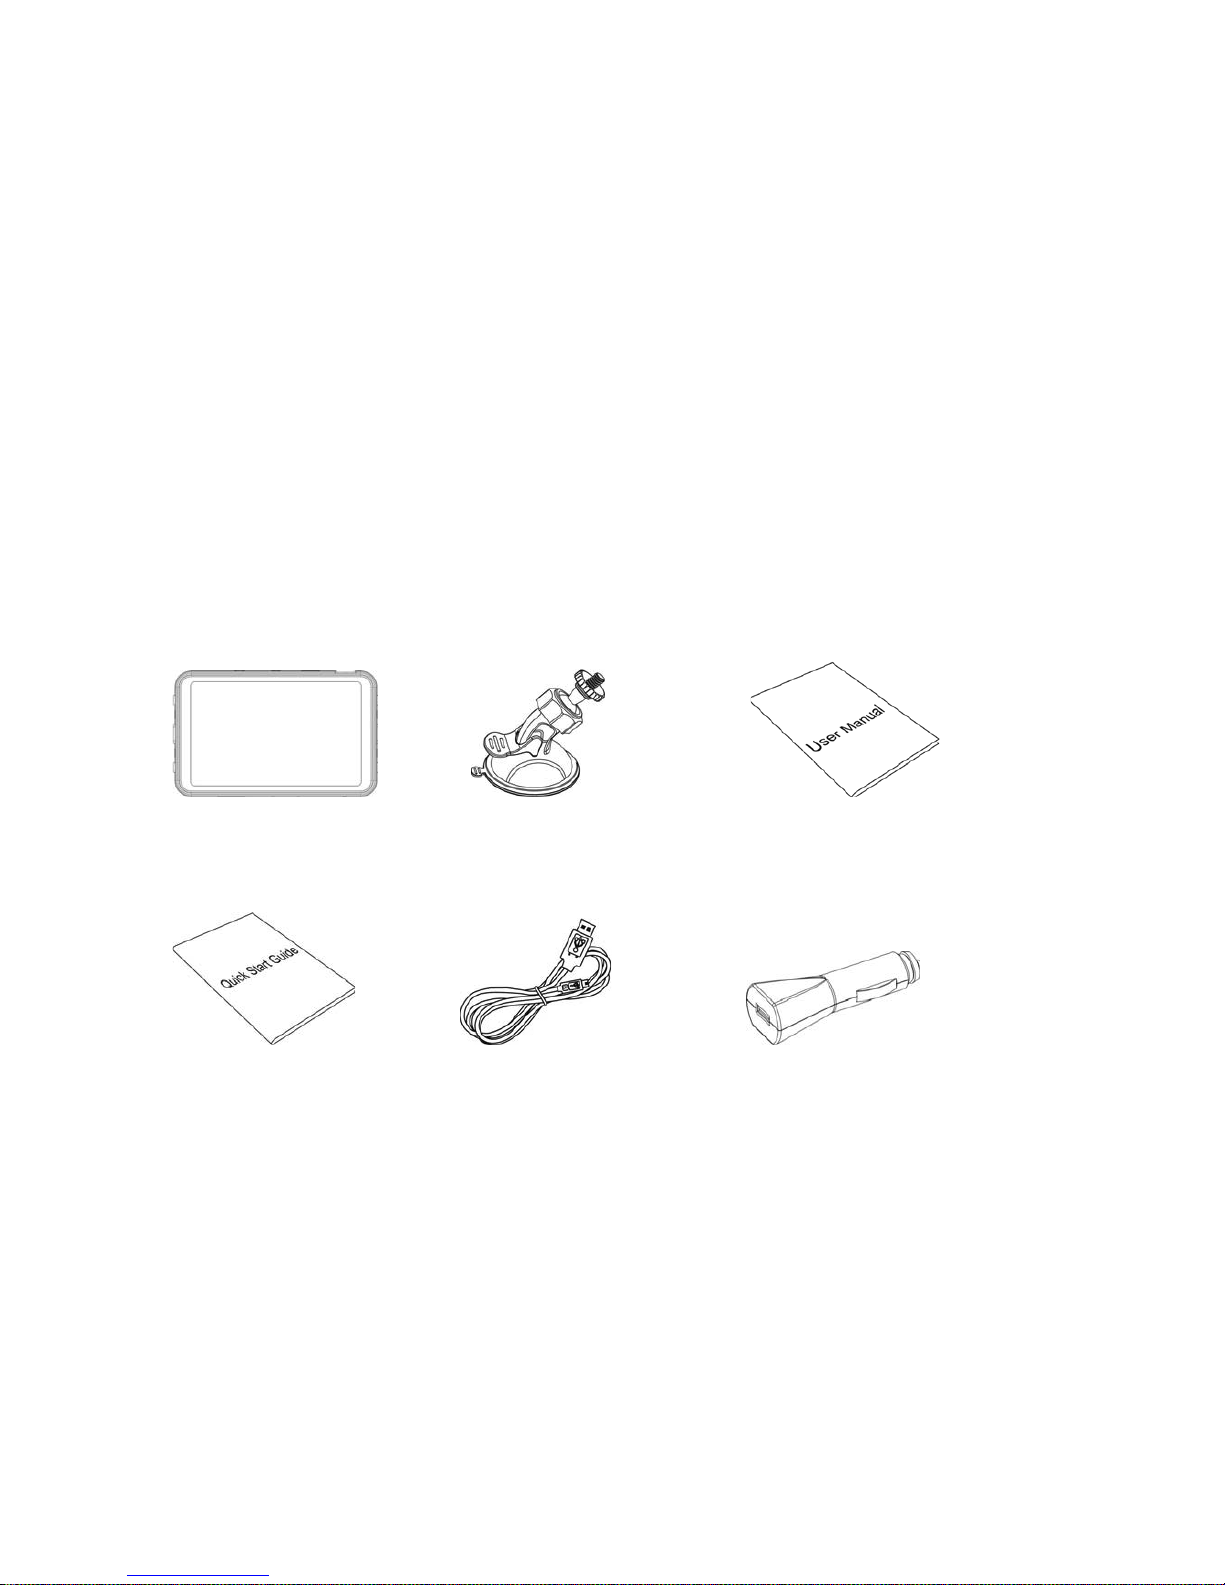
Package Contents
.............................................................................................................5
1.3
Product Overview
..............................................................................................................6
2 Getting Started...........................................................................................................................7
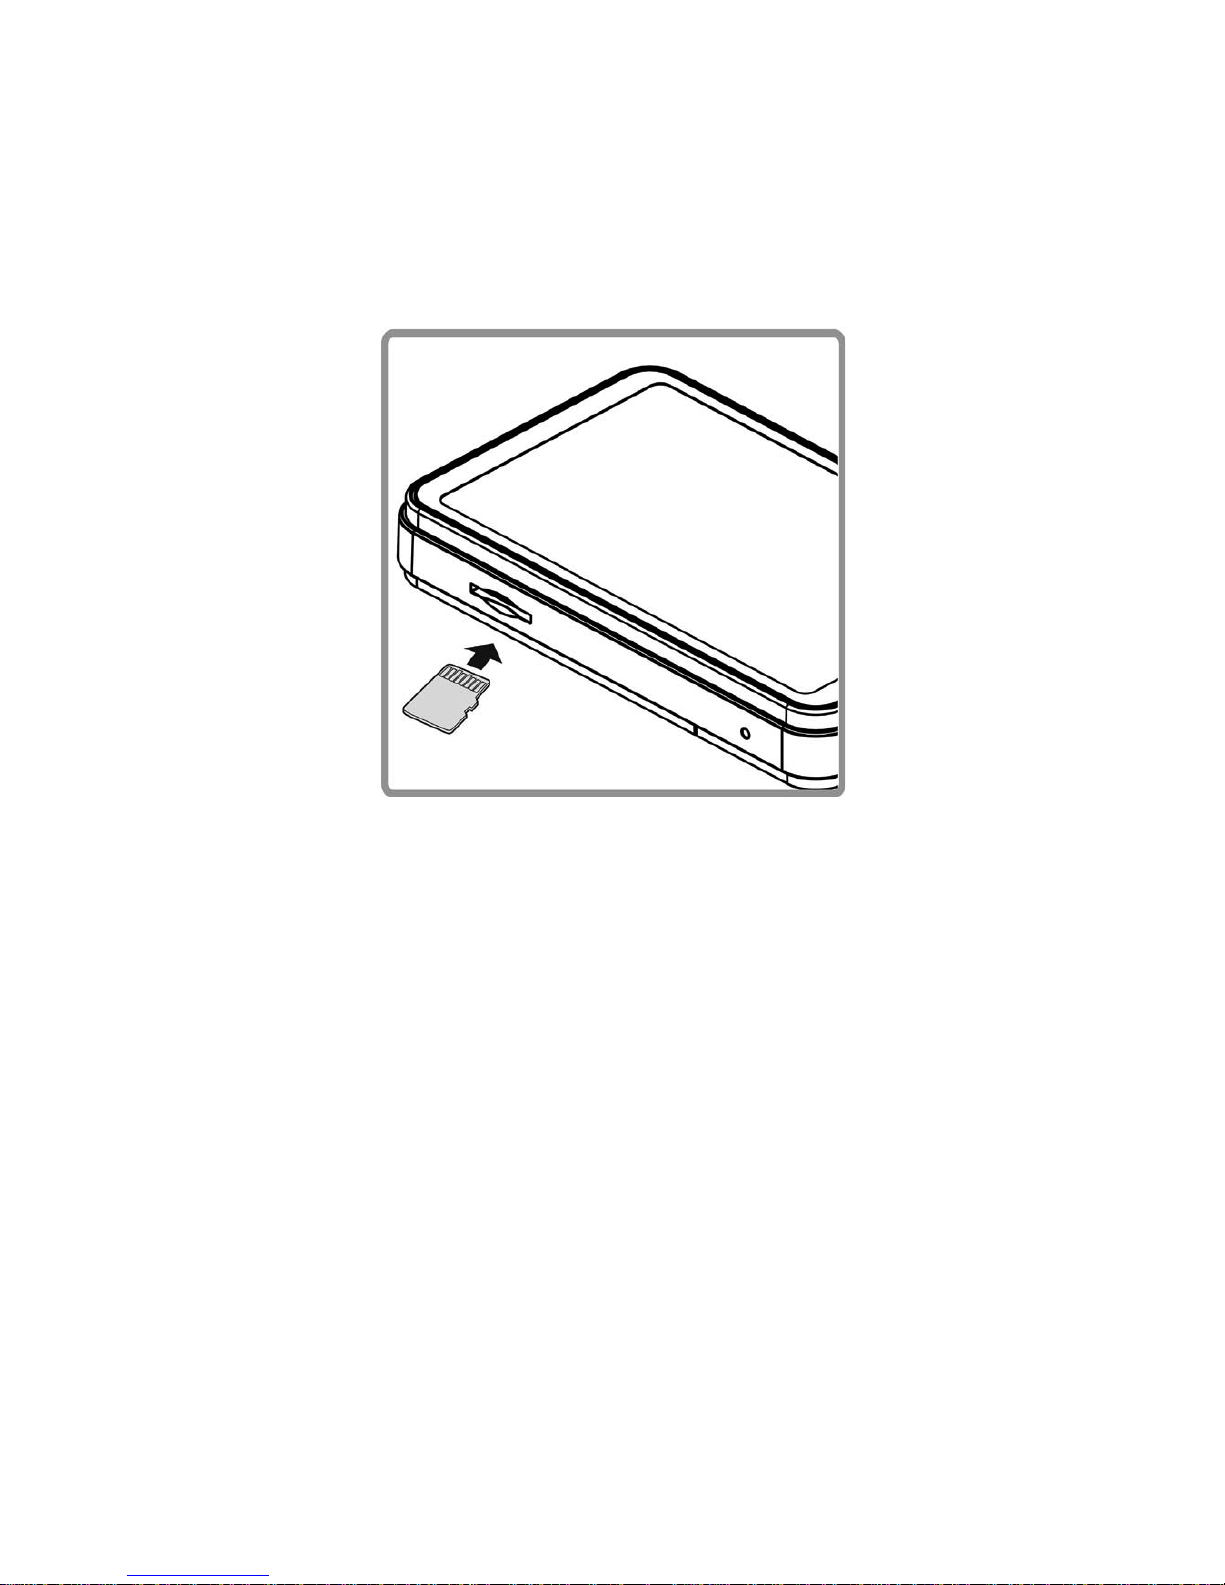
2.1
Inserting the Memory Card
.................................................................................................7
2.2
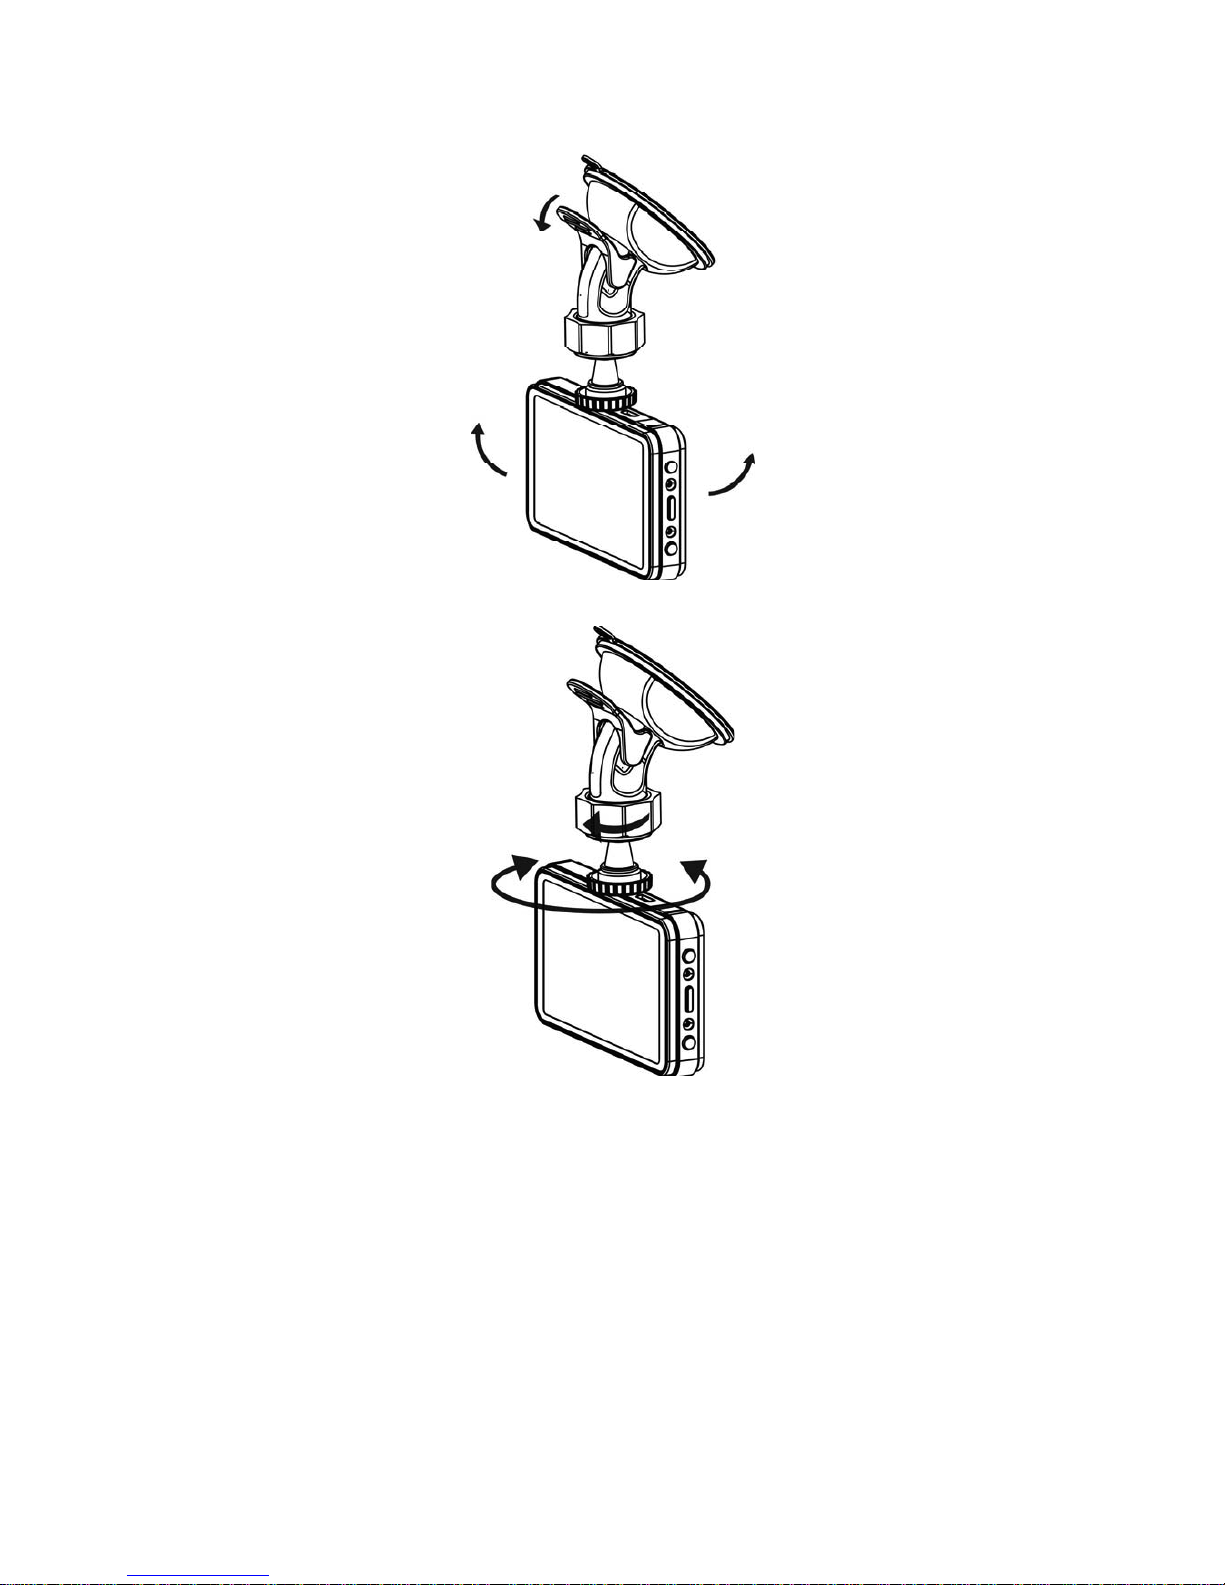
Installing in Vehicles
..........................................................................................................8
2.2.1 Mount to Windshield
...................................................................................................8
2.2.2 Adjust the device position
...........................................................................................9
2.3
Connecting to Power
.......................................................................................................10
2.4
Powering the Dash Cam On / Off
.....................................................................................10
2.4.1 Auto Power On/Off
..................................................................................................10
2.4.2 Manual Power On/Off
..............................................................................................10
2.5
Initial Settings
.................................................................................................................. 11
2.5.1 Set the Date and Time
............................................................................................ 11
3 Using the Dash Cam..............................................................................................................12
3.1
Recording Videos
............................................................................................................12
3.1.1 Record videos while driving
......................................................................................12
3.1.2 Manual Video Recording
..........................................................................................12
3.1.3 Emergency Recording
..............................................................................................12
3.1.4
The Recording Screen
...............................................................................................13
3.1.5
Taking Photos
............................................................................................................14
3.2
Playback Videos and Photos
............................................................................................14
3.2.1 Deleting Files
...........................................................................................................14
4 Adjusting the Settings ...........................................................................................................16
4.1
Using the Menu
...............................................................................................................16
4.2 Menu Tree
..........................................................................................................................17
5 Specifications...........................................................................................................................18