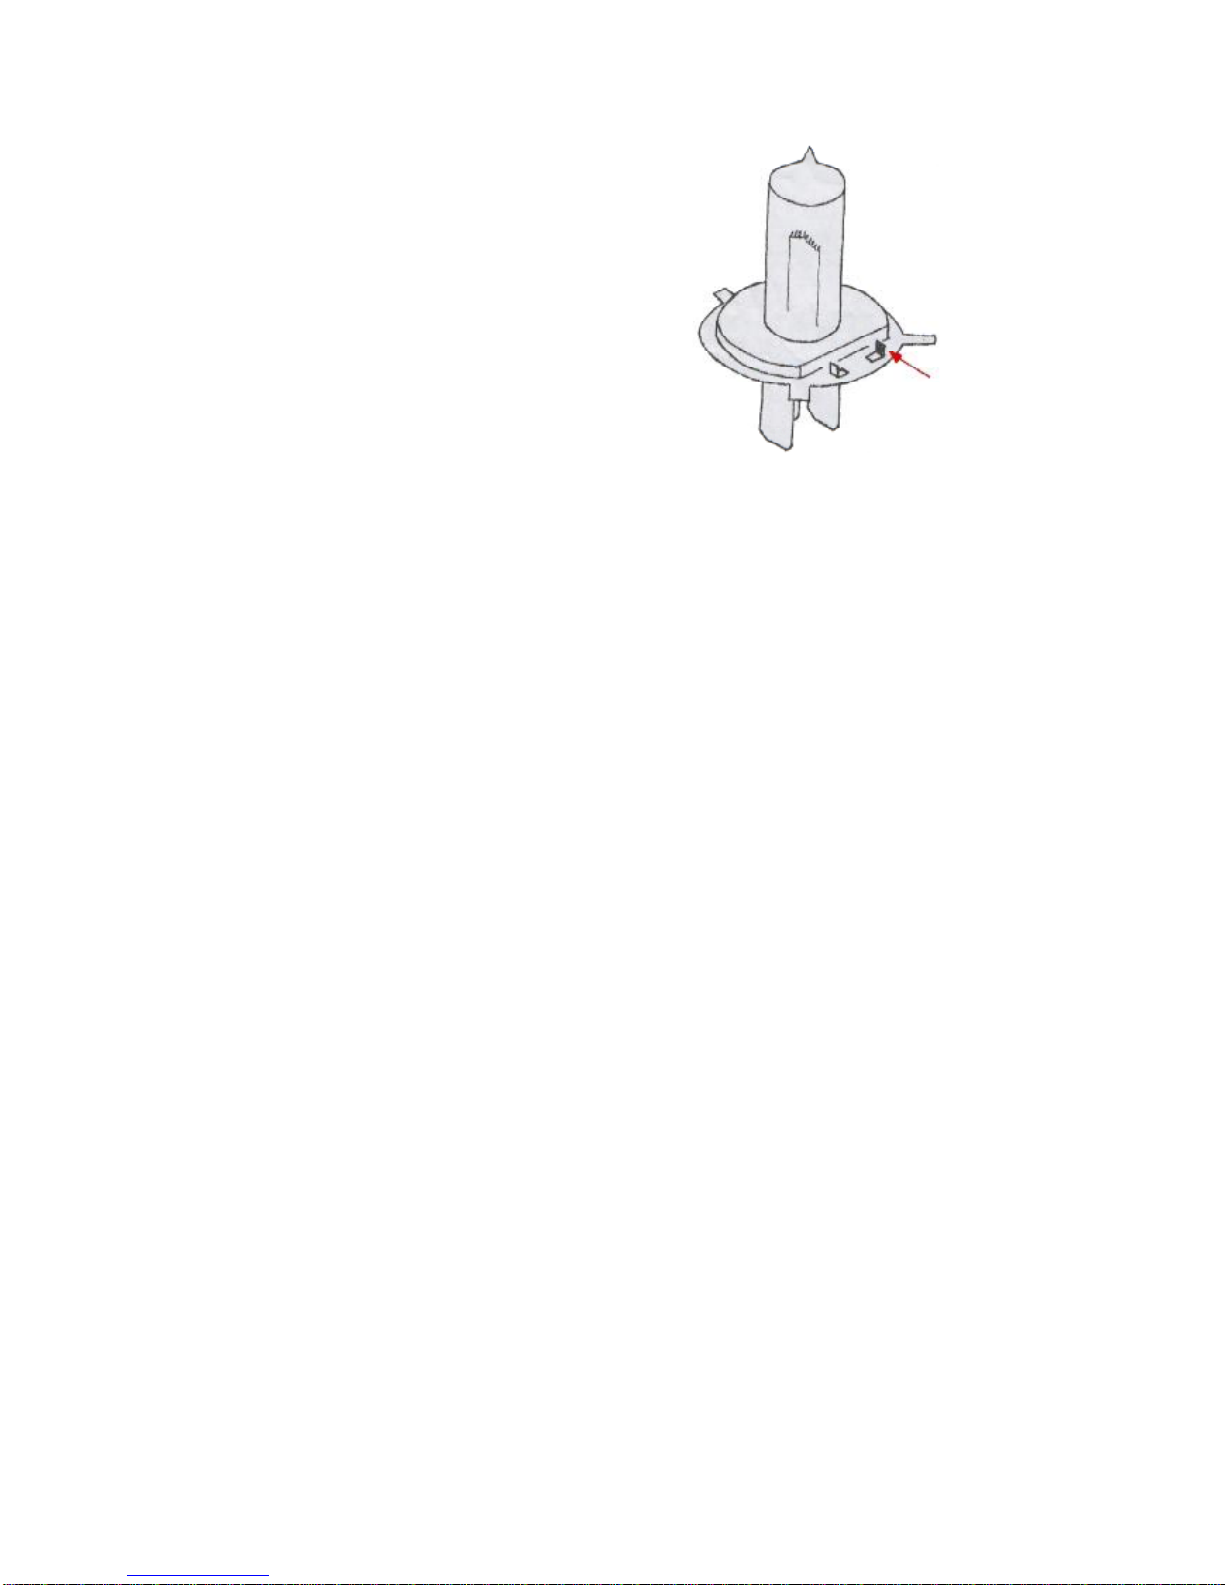
Gilera Nordwest Instruction manual

WORKSHOPMANUAL
NORDWEST
(NordcapeinGermany)

Reproduced by
OWNERSCLUB
OFBRITAIN
frominformation obtainedfromoriginalorcopied
manualsoriginallyissued by
Piaggio/Gilera
Whilsteverycarehasbeen taken toensure
accuracyofthe contents,IGottaGileradoesnot
acceptanyliabilityof anytype duetoanyerrorsor
omissions,and useofthismanualwilldenote
acceptanceofthiscondition.
NOTES:
Inaddition tothisworkshop manualstextsand picturestranscribed fromoriginal
Piaggio/Gileramanuals,thereisincluded asection on thevariousknownfaultswith
whichthe Nordwest/RC600ispronetosuffer.Whilstthesefaultswereobviously
not included inthe originalofficialmanuals, webelieved theyshouldbe apart of any
publication dealing withNordwest/RC600 maintenance.
Atthe veryrearofthemanualare5pagesofadditionalinformation,whichhave
been included toassistyou.Thisadditionalinformation wasnotintheoriginal
manual.
If you find anyerrors, pleaseemailus (gilera@igottagilera.co.uk) sothat thismanual
can be updated tobe asaccurateasispossible.

INDEX
Generalinformation -Knownfaults
Specialtools
Maintenance
ENGINES
Workingprocedures
Engine removal/installation
Generator-Timing belt -Gearboxselector
Cylinderhead-Valvetraincomponents
Cylinder-Piston
Clutch-Primarydrive-Oilpump
Crankcase-Gearbox-Crankshaft components
FRAMES
Workingprocedures
FrontWheel
Front suspension-Steering
RearSuspension-Rearwheel
Brakes
ELECTRICALSYSTEM
Battery-Charging circuit
Ignition system
Electricstarter
Switches-Horn-Lights
Troubleshooting
Circuitdiagram
ADDITIONALINFORMATION
Not included inoriginalmanual
Section
1
2
3
4
5
6
7
8
9
10
11
12
13
14
15
16
17
18
19
20
21
A

GENERALINFORMATION1
SUB INDEX
Knownfaults
Safetyprocedures
Maintenanceprocedures
ModelIdentification
Technicaldata
Engine overhauldata
Torquewrenchsettings
Cablesand wirepassage
Section-Page
1-1
1-2
1-2
1-2
1-3
1-4
1-5
1-6
1

KNOWNFAULTS1-1
Fantouches Radiator.Removetank,lookdownback ofradiator&
check thatfan shroud hasabout3mm(1/8”).The fanmountingsare
slotted butifthereisnotenoughadjustment, trimthe frontof the shroud.
Longrearengineboltscanseize. Removethe boltsone atatime,
clean off anycorrosion and coatthemin‘CopperSlip’orgreasebefore
refitting. Torque 30Nm.
Tankfillerthreadcanbebrokenoff. Overtighteningthetankcap
can causethe threaded partofthetanknecktobepulled off the neck.
Noteasy toeffectagood repair,butsomeresinsand superglue can be
used and mayrepairthe damage.
Forksealsleak. Sealson upside downforks do notlastverywell.
Fairlyeasy toreplace.‘Leakproof’sealscan beused and are
guaranteed andcan be pushed inwithyourfingers.Availablefrom
dealersselling‘bikebits’parts.
Bodypanelscrack fromfixing screwholes.Removeallscrewsand
refitoneat atimeloosely.Theymustgo inwithoutthepanelhavingtobe
stretched.If theywillnotgoin,enlargethe holesslightlythen all should
fit. Nosecrewsfirst, then tankscrews,then the bigscrewsinthe middle
ofthe panel.After228-70862 arevised systemoffixing the tankpanels
wasused tostop thecracking. Toupdatean olderbike:
Screwsonlyintherearfixingstothetank.Spacersunderthecrescentat
the front of thetanktostop it clamping thepaneltight. Cross barisintwo
pieceswithrubberwashersunderfixingbolts.Stripsofdraughtexcluder
alongtop of tankinfront of rearpanelfixingscrews.
Rearsuspensionlinkage. Thelinkage isfittedwithgreasenipples.
Don’t forget togreaseitoccasionally.
General maintenance tips
Oil filter -wascommonlyused onolderEuropean small cars, particularly
the Renault4800/850 1970s&80s.
TechnocarR-15change every2nd oilchange(ie8,000km)
Following makeswill fit:AC-DelcoX13 ChampionC116Fram
PH2874 TechocarR-15 TJFilters5300. Notethe Motoquipe filter
isalargerdiameterand willnot fit.
1-1,1

Tappetadjustment -Conventional,but limited spacemeansyou need a
specialtooltoholdtheadjusterscrewwhileyou tightenthe lock nut.
AGileratoolisavailable,butyou can makedo byusing a6mmbox
spannerforthelock nut, and ascrewdriverlong enoughtoworkthrough
the middleofthe boxspannerfortheadjuster.Asyou cannotusea
tommybarthrough the boxspanner,you willneed aring spannerthat
willfitoverthe the top end of the boxspanner.Setthe engine at TDC by
the markon the alternatorand check theclearances.You willneed to
curvethe feelergaugetogetit underthecam.
Inlet -0.05mmExhaust 0.10mmcoldTorquelocknut 10-12 Nm
Gearselectionproblem -Refusing tochange up athigh revs,
particularlybetween second and thirdareprobablydue toafaultyorworn
gearselectorpawl(partno.321536).The teethdon’tfullyengage onthe
dogsofthe selectordrumand resultinthe pawlslipping off the selector
mid-waythrough the gearchange.Onhigh mileage bikesitispossible
thattheteethand/ordogsbecomewornorthatthespringwhichlightly
pressesthepawlagainstthedogs(partno.328993)becomesabitsoft.
It appearsthatabatchofNordwestswhichwereon salefromJune 93
werefittedwithincorrectlymanufactured pawls.Thepressingwasn’t
deep enoughsothattheteethofthepawldidn’tengageon thedogsof
the selectordrum, and the edgesof the teethweren’t squaretoit’splane.
Pawl(partno.321536)Spring (partno.321176)Gasket(partno.
947243)
The pawlcan be replacedoncethe left hand engine coverhasbeen
removed.Todo thisyou willneed an alternatorpuller.Asyou will need
one ofthesetochangethe cam-beltanyway,itcouldbewell worthwhile
checkingthe pawlwhen you cometochange the cam-belteven ifyou
havenotyetexperienced the symptoms.Unless the pawlisseriously
wornorfaulty,you shouldn’thaveaproblemunless you areinthe habit
of going wellintothe red throughthe gears.
ChangingCambelt-Gilerarecommend changing the cambeltevery
12,000 km.It wouldprobablybe safeforabitlongerbutitshouldnotbe
ignored.You willneed apullerforthe alternator,butthe pullerisnot
common withotherbikes.Apatternpullerisavailablefromthe Italian
firmofBazzettiviaVenhill(the cablepeople)partno.Nordwest/RC 5343
38*1.5mm.
Supportthebikewithapaddock stand,axlestandsorwhateveryou
have.Tankoff, sparkplugout, cambeltcoveroff, rockerboxcoversoff,
sprocketcoverandgearleveroff. Nowremovethefourscrewsfromthe
alternatorcover.You willprobablynotbe abletopullitoff becauseitis
atightfit, sotapitgentlyaroundtheedgewithahide ornylonhammer
and withabitofwiggling itshouldcomeoff. DONOTLEVERITWITHA
SCREWDRIVERasyou can easilydamage themachined faces.
1-1,2

The statorisfixed tothe inside ofthe coversoitisquiteheavy.Tieitto
the biketostop ithanging onthewires.Putthebikein5thgearand
stand on the back brake, thisshouldlock the crankwell enoughforyou to
removethe boltfromthe centreoftherotor.Screwthe protectorpad
intothisthreadthen screwon the puller.Nowrotatethe engine (bythe
back wheel)untilthemarkon the rotorlinesup withthe markon the
crankcase(itisaboutone o’clock).Themarks on thecampulleywheels
shouldbeinlinewiththe horizontalbreakinthe housing(i.e.theinlet
markat3o’clock and the exhaustat9o’clock).If theyarenot,rotatethe
engine 360degreesand check again.
NowitisatTDConthefiringstroke,holdthepullerbodywithaspanner
tostop it moving andtighten the pullerbolt toremovethe rotor.
When youremovethe rotorawoodruff keyand three large washerswill
fallout.Removethe nutand spring washerfromthe bolttensionerthen
pullthe tensionerwheeloff, nowyou can removethe belt. When you fit
the newbeltitiseasy tobeone toothout becauseof the slack, soput the
beltonthe crankshaft andworkfromthe frontkeeping the belttightas
you fitit firsttothe exhaust then the inlet.
Useyourfingerinplaceofthetensionerandcheck thatthepulleymarks
areinthecorrectplace.IfOKfitthe tensionerandtorque the nutto
28-30 Nm.
You can usean OHP(overheadprojectorpen)orsimilartomakemarks
on the beltand camwheels.Then you can transferthemarks tothe new
belt when the oldone isremoved. Doublecheck bycounting the teethon
the belt.If thewheelsmoveoutofline,youcansimplyre-align tothe
marks on the newbelt.
The tensionerspring shouldhavecorrectlysetthe belttension.Bevery
carefulwiththe newbelt,makesureitisspotlesslyclean,do notkinkit
and do not useanything otherthan your(clean)fingerstofitit.
That’sit,nowyou justputitallbacktogether.The washersbehindthe
rotorgo bigwasherfirstwithit’sangled edgefacing out(awayfromthe
pulley),nextthe twodished washers,one dishinthenextdishoutso
theywillsquasheachotherabitastherotoristightenedhome.Copper
Slipthe tapper,oilthe boltand don’tforgetthewoodruff key,torque to40
Nm.
Lateamendment: Ratherthan putting itin5thgearand standing on the
footbrake,lookthrough the inspectionholesinthe rotorwhereyou can
see aconvenientcasting (about1o’clock),soinsertarod through the
inspection hole,tobearon the casting(perfectlysafeconsideringthe
relativelysmallamountoftorqueinvolved),givethe boltatwistandoff
comesthe rotor.AND/ORuseapieceofwood through the rearwheel
resting onthe swingarm.The wood beingsoft doesn’tdamage the
spokesand keepsthewheelfrommoving.
1-1,3

Headlightmodification(RH drivetoLHdrive)
If yourNordwesthasthe headlamppointingto
the rightinsteadoftheleft,asimplemodification
can correctit.
Removethe headlightbulb,taking careNOTto
touchthe Quartz-Halogenbulbglass.
Therearetwolocating tangssticking up.With
the tangspositioned nearesttoyou (i.e.looking
atthe bulb,the tangsshouldbe infrontofthe
glassbulb),flattenthetangontherighthand
side,leaving the left hand tang intact.
Re-installthe bulbintothe housing,ensuring that
the remaining tang islocatedinthe slot.Twist
the bulbclockwise(viewed fromthe back)until
the tang preventsfurtherrotation.Replaceall otherparts,reconnectand
check headlight vertical.
Chains&sprockets
Allbikesbasedonthe4valveOHC singleusethesametype offront
sprocket and 520chain.
Nordwest 14 front (part no.328016)43 rear(part no.946060)
Rearsprocketisdished(not flat),5boltfixing.
108 links
Brake fluid
ALL hydraulicbrakesonGilerabikesuseDOT4.
Nordwestspeedo cable
One froman XJ900 oran RD125LCoreven an RC600 can be usedbut
you might need to’adjust’the routing ofthe cable.
Starterclutchfailure
It isnotpossibletorepairthestarterclutch,soanewone mustbe
purchased.It is probable thatthe starterclutchfailsduetotheuseof
syntheticoilwhich,becauseofit’sreluctancetobreakdown,doesnot
allowthe metalrollerstomakedecentcontactwiththeinsideofthe metal
drum(thismetaltometalfrictioniswhatmakesthestarterclutchwork),
sosemi-syntheticoilmaybe abetteroption tohelpalleviatethispossible
problem..
Valvetimings
In12/48Ex36/26
with1mm valveclearance
1-1,4

Paioli frontforks
Sealstend toshowsignsofleakage atfairlylowmileage.Somelater
bikeshavesmallscrewsatthe top ofeachlegandifyou loosen them
you willreleasesomeairpressure.The twolegsarenotthe same.Both
haveaspring and oil(NordwesthasaspringONLYon the left leg),but
onlythe rightone hasthedampermechanism,soifyou wantto
experimentwithdifferentgradesofoil,youonlyneedtochangetheright
leg. Modified sealswerefitted tobikesafterVIN228-71037soifyou
havean olderbikeyou willneed spacerstoallowthe fitmentofthe
modified seals. Part numbersSeal952633, Spacers952737.
Acompletekitwithall seals, bushesetcisavailablepartnumber344921.
Aspecialtoolisrequired tofit the newsealsbut someSuzukimodelsuse
the sameforks sodealersshouldhaveasuitabletool.(Alternativeseals
areVesrah ref AR4104 asfitted toKX250 1989/91 size41mmX53mm
X8mm).
Supportbikewithfrontwheelclearofground.(ForNordwest, ensurethe
bikeissecured ifusing apaddock stand underthe forklegs,aswhen the
wheelspindleisremoved,therighthandlegcollapsesandthebiketends
tofallover),Disconnectspeedocable,removefairing,mudguard,brake
callipersand frontwheel.Nowyou can removethe forklegs.Takethe
top nutsoutandinvertthelegstodraintheoil.You willfindanuton top
of the damperrod inthe endof the forkleg,loosen thisnut bytapping the
spannersharply.Oncethenutisremoved,the twohalvesofthe forkleg
can be separated,butfirstremovethe dustsealand the spring ring
underneath,then holdthebottomofthe lowerleg inaviceand knock
the sealsoutbypullingthe top legupsharply.Fitthe newsealsetcwith
the specialtoolwhichwillensureit allgoesinstraight, reassembleand fill
eachleg with400ccofSAE10 forkoil.Donotforgetthelipofthe sealis
veryfragileandneedstobe inperfectcondition sotakeprecautionsto
keep it perfect during assembly.
Sparkplugs(gap 0.6to0.7mm torque to12to15 Nm)
NGK(heat range)
DPR9EA9(normal)DPR8EA9(cold)DPR9EV9(wide)
NipponDenso(heatrange)
X27 EPU-9(?)X27 EPRU-9(?)X27 EPRZU-9(wide)
Cables -oiling
Clutchand brakecablesusedtoneed oilingregularlywithengine oil.
Moderncablesarenylonlined and will workforageswithno attention.
Whentheystart toget stiff,lube themwithWD40 orsimilar.
Speedo cablesmaybe nylonlined,iftheyareyoushouldbeabletosee
aplastictube around the innercableifyou lookatthe end thatgoesinto
the clock.Disconnectthe cableatbothends,pulltheinnerout and clean
itwithWD40.Alsospraydownthe outer.Nowleavethe WD40todry,
otherwiseitwillend upgetting inthe clock. Ifit isnot nylon lined,pullthe
innerout and cleanit withasolvent. Onceitisdry, lightlygreaseit allthe
wayfromthe bottomtowithin2inchesofthe top.If you greaseitallthe
waytothe top, greasewillworkup intothe clock.
1-1,5

Choke
Yamaha SRXchokewillfit andfixestothe handlebar.
Nordwesttyres
Front120/70-17R2.1bar(30psi)solo, 2.2bar(32psi)2-up
Rear160/60-17R2.3bar(33psi)solo, 2.4bar(35psi)2-up
Torqueyourheadstuds
You willneedatorquewrenchwitharangeup to40Nmand downto
about15Nmwithasocketand anextension barthatislong enoughto
get the wrenchclearof the frame.
Slacken the fourboltsbyabout1/8ofaturneach.Thisensuresthatthey
willnotbe stuck and will accuratelybe tightened.1/8ofaturnisnot
enough tobreakthe sealthathasbeen made.
Setthe wrenchto20-22 Nmand tighten one nut. Nexttighten the
oppositenut. Nowdo the othertwonutsinthesameway.
Repeat thiswiththe wrenchsetto25-27 Nm.
Nowrepeat withasettingof 33-35 Nm.
Steeringheadraces
You need togetthefrontwheeloff the groundtocheck the condition of
the bearings.Headracesarecheckedbyraisingthefrontwheeloffthe
groundandturning thehandlebarsslowlyfromside toside.Ifyou notice
aslight‘notchy’feelespeciallyasyou passthe straightahead position,
the bearingsaredamaged. Next, stand infront of the bikeandgripthe
bottomof the forklegs. Pulland push, thereshouldbe no free playat the
head stock.If thereismovement, you need totightenthe races.You
maynotbe abletofeelanyfree playbutasadoublecheck,get
someone elsetopullandpushwhilstyou putyourfingerhalfonthe
bottomyokeand halfontheheadstock.You willbe abletofeelthe
smallest movement.
Adjusting the head races.
Loosen thepinchboltson the bottomyoke.Loosen the top nutinthe
middleofthetopyoke.Underthetopyokethereisacastellatedring.
Turnitclockwisetotighten usingaCspannerortap itroundwitha
hammerand punch.It willnotneed tobe moved much.Donotturnittill
itistight. Thetaperrollerracesarecorrectlyadjusted when thereisno
free play.It isveryeasy toovertighten themand then theywillfailquite
quickly.
Tighten themuntilthe forks willnotfallfromside undertheirownweight
when you turnthem.Nowslacken offslightlyuntiltheywillfallfreely.
Nowtightenthetopnut.You mayfind thatnowthe racesaretoo tight. If
theyare,slacken the top nut, loosen theadjusterabitand retighten the
top nut.IfitfeelsOK,tapunderthe bottomyoke(bothsides)justto
makesurethatthe forklegshavemoved inthe clampsand then tighten
the clampbolts.
1-1,6

Greasing the bearings.
Supportfrontofbikeand removefrontwheel.Takeofthe callipersand
tiethemup tothe bikesomewhere.Disconnectthe speedo.Takethe
top yokeoff.(Becarefulaswhen youdo this,theforkswill falloutand
theyarequiteheavy).The forks willcomeoutcompletewiththe bottom
yokeandonehalfofthebottombearingandthe rollers.Thetop racewill
be left completeatthe top.
Cleanrollercagesand racesinpetrolorsomething similar.Inspectthe
racesforanysignsofdentsordamage including rust. If alliswell,then
thoroughlygreasetherollers, re-assembleandadjust asabove.
Becauseyou havenotloosened thebottomyokeclamps, the forks willgo
back togethereasilyand straight.
If youhavetochangetheraces,the difficultbitsaregettingthebottom
innerraceoff thestemand getting the outerracesoutofthe steering
head.Therearetoolsdesigned todothe job and alocalrepairshop
MAY lend/hirethemtoyou.Otherwise,you’llneedalong punchwhich
you canputthroughtheheadstockandtapthe raceout, firstone side,
then theother,alittleatatime.Gettingthebottominneroff istricky.
Carefullytap aslimcoldchiselorscrewdriverunderthe race,firstone
side,then the other,butgo steady.You willprobablydamage the dust
cap whichisundertherace,sobe suretoreplaceit(verycheap).The
importantthing when refitting the racesistogetthemfullyseatedallthe
wayround.Don’thitthemdirectlywithanythingmetal,useawooden
drift. The raceswillprobablysettleabitafterabout10-20 miles,so
check the adjustments
1-1,7

SAFETYPROCEDURES
Wheneverworking withthe engine on,neverworkinclosed areas;
always havethearea wellventilated due tothe toxicgasses(carbon
monoxide)contained inthe exhaust.
The battery’selectrolytecontainssulphuricacid.Always protectthe
eyes,clothesandskin.If electrolytegetsinthe eyes,flushthoroughly
withand seekexpert medicalassistancepromptly.
Petrolishighlyflammableand incertainconditionseven explosive.
Neversmokeinworkareas;avoidsparks orflames.
The batteryproduceshydrogen whichishighlyexplosive.Neversmoke
around abatteryandavoidsparks and flames, especiallywhen charging.
MAINTENANCEPROCEDURES
Always useoriginalGilerasparepartsand recommended lubricants. The
useon non-originalpartsorpartsnotconforming toGileraspecifications
mayresult indamage tothe motorcycle.
Always usethe specialtoolsdesigned specificallyforthismotorcycle.
Always usenewgaskets,O-rings,splitpinsandsafetyplateswhen
reassembling.
Always tighten nutsorboltsstarting withthoseofgreaterdiameteror
found internally;tighten inadiagonalsequencein2or3passesand to
the recommended torque, unless otherwisenoted.
Always usemetrictoolswhen workingon thismotorcycle; metricnutsand
boltsarenotinterchangeablewiththe Britishsizes.The useofeither
non-metrictoolsand/ornutsandboltsmaycausedamage tothe
motorcycle.
Arrange all electricalwiresasindicatedinthe “Cablesand wirepassage”
paragraph.
1-2,1

MODELIDENTIFICATION
Frameand engine numbersarestamped on the Manufacturersplate,as
well asonthe frameand engine.
The engine serialnumberandenginesizearestamped on the plate(fig.
1)foundat therearof the engine.
The carburettoridentificationnumberisfound on the rightside ofthe
carburettor(fig. 2).
The frameserialnumberisstamped on steering sleeveleftside (fig.3)
Fig. 1Fig.2
Fig. 3
1-2,2

TECHNICALDATA
1-3,1
DIMENSIONS
Overalllength
Overallwidth
Overallheight
Wheelbase
Seat height
Foot pedalheight
Dryweight
FRAME
Detachabletubularsteelsinglecradle;detachabletubu-
larsteelrearframe.
Steering columnangle
Forestroke
Front suspension, Paiolitelescopicfork“upside-down”
Stroke
Stanchion diameter
Oilcapacity(eachside)
Rearsuspension,Böge monodamperPower-Drive
progressiveshock absorber
Stroke
Wheels
Front (die-cast)
Tyresize
Pressurerideronly
withpassenger
Rear(die-cast)
Tyresize
Pressurerideronly
withpassenger
Brakes
Front floatingdisc withhydraulic
controlleddoublepiston
disc diameter
disc thickness
Rear, floating disc withhydrauliccontrolled singlepiston
disc diameter
disc thickness
Fueltankcapacity
Fuelreserve
2180 mm
800 mm
1180 mm
1415 mm
870 mm
320 mm
141 kg
27°
92 mm
150 mm
41 mm
400 cm³
150 mm
3,50 x17”
120/70-17”60R
2.1bar
2.2bar
4,50 x17”
160/60-17”60R
2.3bar
2.4bar
4
Ø 25/28 mm
270 mm(2)
5mm
Ø 32 mm
240 mm
4.5mm
12 ltrs
2ltrs

1-3,2
MOTOR
Monocylinder, 4stroke, verticalcylinder
Borexstroke
Displacement
Compressionratio
Cylindercompression (usespecialtool19.1.20524)[new]
[over5,000km]
Bhp
Taxrating
Torque
Valvetrain, 2belt drivenoverhead camshaft
Lubricatingsystem, forced innergeardrivenpump
Oilcapacity
Coolingsystem,permanentcoolantwithrecirculating
pumpand by-pass thermostat
Coolant capacity
Airfilter, paper-dry
Intakevalvediameter
Exhaust valvediameter
Valveclearance(cold)between camand rockerarm
intake
Exhaust
TRANSMISSION
Clutch,wet, multiplate
Primarydrive
Gearbox, straight-toothgearsandclawcouplings
Ratios1st
2nd
3rd
4th
5th
Finaldrive
98 x74 mm
557.9cm³
10.5:1
10 -12 bar
9-11 bar
36.5kw(49.5hp)
a/at 7250g/1’rpm
8CV
52 Nm
a/at 6250g/1’rpm
2.2ltrs
1.3ltrs
36 mm
32 mm
0.05 mm
0.10 mm
33/77
13/31
18/28
20/23
23/21
25/19
14/43

1-3,3
CARBURETTORTEIKEI
Main
Choketube diameter
Mainjet
Idlejet
Chokejet
Pumpjet
Needlejet notch
Fuelnozzle
Throttlevalve
Float
Weight
Level
Thisisalmost certainlyincorrect, webelieveitshouldbe
Airmixturescrew
Secondary(vacuum)
Choketube diameter
Mainjet
Needlejet/notch
Fuelnozzle
Throttlevalve
(notethatadditional carburettorinfoison theadditionspageat rearofmanual)
ELECTRICALSYSTEM
Ignition, electroniccapacitivedischarge
Ignition timing fixed
variable
Alternator,three-phase
Batterycapacityelectricstarting
Standardsparkplug
Electrode gap
Fuses
Startermotor
Headlamp
Drivinglamp
Tail/stop lamp
Turnsignallamp
Warning indicatorlamp
E30PV2A
30
155
48
68
Ø 1.1
5C58/3^
Ø 2.60 (VOO)
4.00
10.5g
35 ±1mm
24 ± 2mm
1.5±0.5
30
145
5X7A/3^
Ø 2.60 (OO)
20°
7°
30° a4000 g1’-rpm
14 Ah
Champion A4HC
0.6÷0.7mm
15 A
0.80 kW
60/55 W
3W
5/21 W
2W
1.2W

ENGINEOVERHAULDATA(inmm)
1-3,4
Piston/cylinderclearance
Mainbearingsradialclearance
Connecting rod bearingsradialclearance
Crankshaft axialclearance
Bigendaxialclearance
Gudgeon pin/pistonclearance
Gudgeon pin/small end clearance
Bushings/smallendclearance
Mainbearingstoseat clearance
Valveguide/cylinderheadclearance
Valvestem/guideclearanceintake
exhaust
Gudgeon pindiameter
Mainjournaldiameter
Cylinderbore
Piston diameter
Camheight(theoretical)
Oilpumprotorsaxialclearance
Selectordrumaxialclearance
Innerspring valvefree length
Outerspring valvefree length
Clutchspring free length
Clutchplatesthickness
Camshaft boltsradialclearance
Axle/rockerarmradialclearance
Piston ring gap1stand 2ndring
scraperring
Ringsaxialclearance1stand 2nd ring
scraperring
Oilpressure
Waterthermostat opensat
Waterfullythermostat opensat
Coolingfan enabletemperature
Valveclearanceintake(between camshaft &rockerarm)
exhaust (between camshaft&rockerarm)
0.030 ÷0.042
0.030 ÷0.059
0.017 ÷0.060
0.05 ÷0.25
0.15 ÷0.25
0÷0.008
0.015 ÷0.030
0.049 ÷0.087
0.084 ÷0.140
0.030 ÷0.066
0.012 ÷0.042
0.025 ÷0.055
40.018 ÷40.030
39.987 ÷40.000
see tablebelow
see tablebelow
39.256
0.025 ÷0.060
0.07 ÷0.42
37.6÷38.6
38.7÷39.7
38.5
2.9÷3.0
0.035 ÷0.070
0.016 ÷0.052
0.40 ÷0.65
0.30 ÷0.60
0.035 ÷0.072
0.025 ÷0.062
4bar a/at5500g/1’-rpm
75°C
85°C
92 ±3°C
0.05
0.10
PISTON/CYLINDERMATCHING CHART(inmm)
Class
A
B
C
Piston
97.964 ÷97.970
97.970 ÷97.976
97.976 ÷97.982
Cylinder
98.000 ÷98.006
98.006 ÷98.012
98.012 ÷98.018

TIGHTENING TORQUE(inNm)
1-3,5
Engine
Cylinderhead, cylinderhead cover, cylinderfixing nuts
Timing gearsfixingscrew
Sparkplug
Crankshaft gearsfixing screw(lubricatethreadwithoil)
Countershaft gearfixing screw(lubricatethreadwithoil)
Free wheelfixing screw(lubricatethreadwithoil)
Clutchfixing screw(lubricatethread withoil)
Flywheelmagnetofixing screw(lubricatethread withoil)
Chainpinion fixingscrew
Starting engine fixing screw
Kick starterlock screw
Connecting rod smallend coverbolts
Halvescrankcaseand fixingcoversscrews
Belt tensionernut
Draining oilplug
Coolingfan thermostaticswitch
Thermistore
Oilpressureindicator
Exhaust pipe clampscrew
Frame
Engine support front
upperrear
lowerrear
cylinderhead
Lowerplatefixing screw
Upperplatefixing screw
Absorbershock fixing
Forkfixing
Suspension connecting rod support toframe
Connecting rod -suspensionlever
Suspension leversupport -absorbershock
Suspension leversupport -fork
Frontdisc brakefixing
Frontbrakecalliperclamp
Rearcalliperplatefixing
Reardisc brakefixing
Pipe union screw
Ring gearfixingscrew
Front wheelpin
Fork/pinfixing screw
Rearwheelpin
Handlebarfixing
Rearframefixing
32 ÷35
30
12 ÷15
39
39
39
39
39
54 ÷59
7÷9
18 ÷20
28 ÷32
7÷9
28 ÷30
12 ÷15
20 ÷22
8÷10
15 ÷17
18 ÷20
30 ÷34
30 ÷34
30 ÷34
25 ÷30
20 ÷25
20 ÷25
39 ÷44
79 ÷88
79 ÷88
79 ÷88
39 ÷44
39 ÷44
45 ÷50
10 ÷12
20 ÷25
10 ÷12
13 ÷17
20 ÷22
59 ÷69
9÷11
59 ÷69
20 ÷22
20 ÷22

SPECIALTOOLS2
Valveguide oilring
installation punch
19.1.20502
Con-rod small endbushing
extraction punch
19.1.20506
2.1
Flywheelpuller
19.1.20501 Con-rod small endbushing
installation punch
19.1.20505
Pullerforsteering bearinglowerrace
19.1.20109 Camshaft pulleyblocking tool
19.1.20504
Sprocketlocking wrench
19.1.20086 Camshaft oilring installation punch
19.1.20503

SPECIALTOOLS2
Mainjournalbearing extractionring
(clutchside)
19.1.20510
Timing drivegearpuller
19.1.20514
2.2
Pad forcrankshaft and
flywheelpuller
19.1.20513
Piston support
19.1.20512
Mainjournalbushingextraction punch
19.1.20507
Mainjournalbearing extractionring
(ignition side)
19.1.20511
Mainjournalbearing installation punch
(clutchside)
19.1.20508
Mainjournalbearing installation punch
(ignition side)
19.1.20509
Table of contents
Other Gilera Motorcycle manuals

Gilera
Gilera Nexus 250 i.e. User manual

Gilera
Gilera SATURNO BIALBERO 350 Instruction manual

Gilera
Gilera DNA User manual

Gilera
Gilera SMT RCR 633800 Guide

Gilera
Gilera SMT 50 User manual

Gilera
Gilera Fuoco 500ie LT User manual

Gilera
Gilera DNA 50 Instruction manual

Gilera
Gilera Fuoco 500 Guide

Gilera
Gilera Runner 125 User manual