manuals.online logo
Brands
  1. Home
  2. •
  3. Brands
  4. •
  5. gledhill
  6. •
  7. Boiler
  8. •
  9. gledhill BoilerMate HP-DEM-A User manual

gledhill BoilerMate HP-DEM-A User manual

User
Instructions
In the interest of continuously improving the BoilerMate
A-Class range Gledhill Building Products Ltd reserve the
right to modify the product without notice and in these
circumstances this booklet, which is accurate at the time
of printing, should be disregarded.
Mitsubishi will provide warranty for Approved Ecodan
Installers whom purchase the units direct from
Mitsubishi.
WARNING
• There are no user adjustable parts inside the appliance.
Tampering with sealed components will invalidate the
warranty and could also damage the appliance and
make it unsafe to use.
• If it is known or suspected that a fault condition exists
on the appliance it must be corrected as soon as
possible by a competent person.
• DON’T place any clothing or other combustible
materials against or on top of this appliance.
Page 2
CONTENTS
Welcome To Your Heating And Hot
Water System
The hot water and central heating in your
home is provided by a high specification
storage system coupled to a highly efficient
air source heat pump boiler located
outside your property. It should give you
many benefits which will be explained
in this booklet. It is simple to operate,
exceptionally efficient and is probably
different to water heating systems that you
have had previously.
You may not have seen an air source heat
pump before, as they are relatively new in
the UK market. However, they have been
fitted in very large numbers in Europe and
so the technology is well proven.
Your air source heat pump will be outside
of your property.
Your air source heat pump uses small
amounts of electricity to work and functions
by taking in large quantities of air and
extracting the heat from it.For this reason,
your heat pump is using a renewable
energy source and is exceptionally efficient
because,on average,it uses 1kW of electrical
energy and converts it into over 3kW of
heating energy output.
This unique combination of the Mitsubishi
Ecodan air source heat pump boiler and
Gledhill BoilerMate will provide a carbon
saving of up to 40% compared to a gas
condensing boiler. As such, it represents
the very latest technology to reduce
global warming by minimising the energy
consumption used in your home for
heating and hot water.
Issue 2: February 2009
What Is An Air Source Heat Pump
Boiler?
Page 3
Boilermate A-class HP-DEM-A The Gledhill BoilerMate offers several major
advantages:
It controls the operation of the air source
heat pump boiler to ensure it only
operates when needed to provide heat
for your hot water or central heating.
It controls the heat up of your property
whenever there is a demand from
the room thermostat or thermostatic
radiator valves.
It will supply heating and powerful hot
water more efficiently than conventional
systems.
It eliminates the traditional cold water
tank inthe loftand thereforeremovesthe
risk of contamination and/or freezing.
It is fitted with an electric emergency
back-up for HEATING AND HOTWATER
called ‘Switch’ which can be activated
in the unlikely event that there is a
problem with the operation of the air
source heat pump boiler,the pipework,
power supply or some other part of the
installation.
1.
2.
3.
4.
5.
Page 4
Because the air source heat pump boiler
is controlled by the BoilerMate, it will
operate only when needed to maintain
the optimum temperature both for the
hot water tank and space heating circuits.
There is no need to adjust the outside air
source heat pump boiler.
Your central heating times are controlled
by the central heating control and timer
which is fitted to the front panel of your
BoilerMate.The timer provides you with the
option of having your central heating on
constant,timed,or off.It is normal to set the
timer to suit your individual requirements.
The temperature in your house is set by
a room thermostat/thermostatic radiator
valves and these should be adjusted to suit
your individual requirements.
Your hot water is also controlled by the
timer which is fitted to the front panel of
your BoilerMate. The timer provides you
with the option of choosing constant,
timed, or off. When the timer is in the
timed position the BoilerMate will only be
heated at the times set on the timer. The
BoilerMate is extremely well insulated, the
standing loss is minimal and the boiler will
ONLY operate to meet your need for hot
water or heating.
Page 5
How Does The System Deliver Water
At High Pressure?
The water to the taps and showers in your
home is delivered at high pressure because
it uses the mains pressure of your cold
water supply.
Because it is so efficient, both high flow
rates and high pressures are available to
give the best performance for both baths
and showers.
Because the BoilerMate A-Class HP-DEM-A
system uses the pressure from your cold
water mains,these cisterns are not required,
which removes any worries about freezing
or contamination of the cold water system
from insects, dust, birds etc and leaves
more space for storage should you decide
to use it.
Depending on the height of your airing
cupboard it occasionally may be necessary
to position the small expansion tank, for
the heating system, within the loft space
e.g. in bungalows.
Why Are There No Water Cisterns In
The Loft ?
Page 6
Controlling Your
BoilerMate A-Class HP-DEM-A
Your BoilerMate is highly advanced and
incorporates the latest in microprocessor
technology to monitor your system
automatically and ensure it operates
at maximum efficiency. This includes
periodically‘spinning’the heating pump to
prevent seizing during prolonged unused
heating periods.
In normal circumstances,it should only be
required to adjust the time clock on your
BoilerMate, to suit your needs, and the
instructions for this are described in detail
later in this booklet.
If your hot water or heating system should
fail to operate satisfactorily,you will need to
operate the‘SWITCH’option which is fitted
to your BoilerMate.(See‘Switch’at the back
of this booklet) and then call an Approved
Ecodan Installer.
Page 7
UsingThe Unique‘Switch’Emergency
Electrical Back-up System
Your BoilerMate A-Class HP-DEM-A is fitted
with Gledhill’s unique‘SWITCH’emergency
electrical back-up system. You have an
instant failsafe should your air source heat
pump boiler cease to operate.
If you believe the boiler has stopped
working and you are unable to restore
heating and hot water activate‘Switch’and
call the boiler service engineer. ‘SWITCH’
technology simply and instantly introduces
an electric heating source within the
BoilerMate to ensure that your hot water
and heating continue to operate at reduced
performance until you can have your boiler
repaired.
Page 8
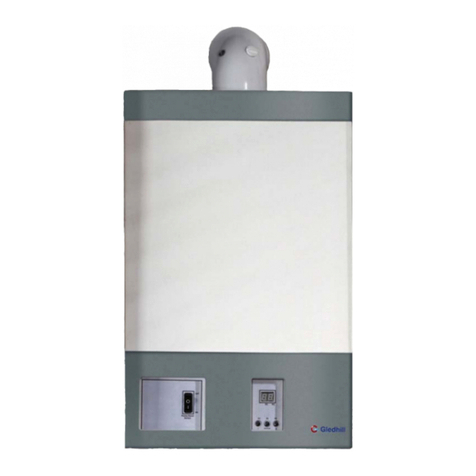
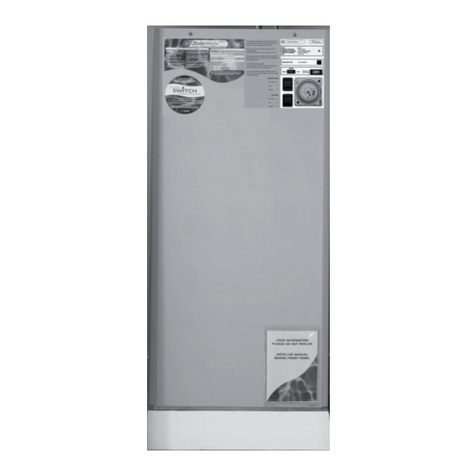
The front panel user controls are shown in
the picture below and their functions are
described opposite.
Four different windows can be displayed
in the visual display panel on the front of
the appliance.
Front Panel Controls
Page 9
Normal Operating Display Window
In normal automatic operation the display
will be as shown opposite.
Switch Operating Display Window
If a fault occurs with the heat pump, the
‘Switch’emergency electric back-up system
can be selected by pressing and holding
the ’Switch’ button below the display for
at least 5 seconds. The word ‘Normal’ will
change to ‘Switch’ and flash.
Once the problem has been resolved,
the appliance can be returned to normal
operation by pressing the ‘Switch’ button
for at least 5 seconds.
Fault Condition Display Window
If a fault occurs with the BoilerMate
appliance the window will automatically
display the fault condition. The fault
indication will flash to draw your attention.
Please give this code to an Approved
Ecodan Installer (AEI). They will have the
ability to decode this and ensure the
correct parts are obtained prior to a service
call out.
Switch operating display
Fault condition display
BoilerMate-HP-DEM
Mode Switch
BoilerMate-HP-DEM
Mode Normal Fault 10
Normal operating display
BoilerMate-HP-DEM
Mode Normal
Page 10
Press the ‘Reset’ key with a pencil or similar object to adjust any values or
enter the preset programs.
Press the ‘Menu’ key to adjust/review any existing values or enter your
own programs.
Switching Status Display
Press the +adjustment key to select timed or manual
operation in Channel 1. Press the - adjustment key to select
timed or manual operation in Channel 2.
Channel Number
1
2
3
4
5
6
7
14
16
18
20
22
24
+-
Menu OK
Res.
+1h
Timed (Automatic) Manual (Continuous)
Select summer/
winter times
Reset Confirmation
of programming
Summer/winter
clock changes
Time display
Switching
status display
(See below)
Manual/Automatic
operation modes
Weekday
display
24h or am/pm
setting
Adjustment
keys
Overview of
daily switching
programme
Preset
program
Terminates programming
and reverts to auto operation
Page 11
The timeclock fitted to the appliance has
2 channels which allows separate time
control of the hot water charge time and
central heating on times.
Use channel 1 to set the hot water charge
times required.
Use channel 2 to set the central heating on
times required.
Digital Timeswitch
Setting The Time
Thistime switch incorporatesa rechargeable
battery back-up, which will preserve the
time display and the memory for up to 150
hours in the event of a power failure.
Press the Menu button. The 24h/pm
display will start flashing. Press the +or -
adjustment key to select 24 hour or am/pm
mode, then confirm by pressing OK. The
hours symbol will then flash. Press the +
or -adjustment keys if required and then
confirm by pressing OK. Pregress in the
same way for the minutes and day (Monday
– Sunday = 1 - 7) making adjustments when
necessary.
Once time setting is complete, press the
Menu button.
If setting the time during summertime,press
the +1h button with a pencil or similar object
to put the clock in summertime mode. When
the clocks change subsequently, the +1h
button needs to be pressed to alternately
deduct or add the hour.
Setting Switching Times
This timeclock allows you to use 3 preset
programs, modify these or set your own
programs. The preset programs are as
follows:
To select the preset programs, you will
need to press the Reset key to place the
clock in reset mode and set/adjust the time
settings using the +or -adjustment keys
and OK button as described earlier, but on
completion press the OK (instead of the
menu button). The program number will
then flash. Use the +or - adjustable keys
to select the program required and then
press the menu button to confirm program
selections and activate auto operation.
The preset times can be modified by
pressing the OK key and then pressing the
+or -adjustment keys.Pressing the OK key
moves you through the existing program
or to the next free memory location and
pressing Menu confirms the program
selection and activates auto operation.
Additional switching times can be added
in the same way but in this case once you
press the OK button, you will need to set
0 24622
P01
P03
P02
ON
0 2471812 14 2220
ON ON
ON
0 2472012 14
ON ON
Page 12
the time and day in line with the ‘Setting
The Time’ procedures for each switching
required ie. on and off.
Set the channel you wish to be switched
using the +or -adjustment keys and press
the OK button to confirm.
Channel 1 is for the hot water time
settings. We recommend this to be set
to constant.
Channel 2 is for the central heating time
settings.This should be set to suit your
lifestyle requirements.
The timeclock can be set to your own
programs in the same way as described
previously by pressing the Menu button
to place the timeclock in the menu mode
instead of the reset mode.
Deleting Switching Times
To delete any switching times, press the
Menu button and then OK until you get to
the on time of the program to be deleted.
Select ‘--’ with the +or -adjustment key
and confirm with OK. The on and the
corresponding off switching time will both
be deleted.
Page 13
Page 14
Page 15



Other gledhill Boiler manuals

gledhill GB10 User guide

gledhill

gledhill GB10 User guide

gledhill mCHP BMA 225 User guide

gledhill

gledhill mCHP BMA 225 User guide

gledhill BoilerMate A-Class OV SOL Series User guide

gledhill

gledhill BoilerMate A-Class OV SOL Series User guide

gledhill TORRENT DIRECT User guide

gledhill

gledhill TORRENT DIRECT User guide

gledhill PCA 200 - SOL Installation and operating instructions

gledhill

gledhill PCA 200 - SOL Installation and operating instructions

gledhill BMA 120 SP User guide

gledhill

gledhill BMA 120 SP User guide

gledhill BM125 User guide

gledhill

gledhill BM125 User guide

gledhill BoilerMate BMBP 125 User guide

gledhill

gledhill BoilerMate BMBP 125 User guide

gledhill GB35C User guide

gledhill

gledhill GB35C User guide

gledhill BOILERMATE CP BMSCP120 User manual

gledhill

gledhill BOILERMATE CP BMSCP120 User manual

gledhill Stainless Lite HP Indirect 180-400 litres User guide

gledhill

gledhill Stainless Lite HP Indirect 180-400 litres User guide

gledhill benchmark BoilerMate A-Class OV Series User guide

gledhill

gledhill benchmark BoilerMate A-Class OV Series User guide

gledhill BoilerMate BP User manual

gledhill

gledhill BoilerMate BP User manual

gledhill Torrent GreenHeat OV TGH140 User guide

gledhill

gledhill Torrent GreenHeat OV TGH140 User guide

gledhill BoilerMate CP 150 User guide

gledhill

gledhill BoilerMate CP 150 User guide

gledhill TEC140-OV Release note

gledhill

gledhill TEC140-OV Release note

gledhill StainlessLite D120 User guide

gledhill

gledhill StainlessLite D120 User guide

gledhill BMA 200 SP-SOL Release note

gledhill

gledhill BMA 200 SP-SOL Release note

gledhill GC2000/120/E-OV User guide

gledhill

gledhill GC2000/120/E-OV User guide
gledhill BMA 200 SP Installation and operating instructions

gledhill

gledhill BMA 200 SP Installation and operating instructions

gledhill Torrent GreenHeat TGH140-OV User guide

gledhill

gledhill Torrent GreenHeat TGH140-OV User guide

Popular Boiler manuals by other brands

Viessmann Vitodens 200-W System Installation and service instructions

Viessmann

Viessmann Vitodens 200-W System Installation and service instructions

Bosch Danesmoor 12-14 User instructions & customer care guide

Bosch

Bosch Danesmoor 12-14 User instructions & customer care guide

Riello ALUDOMUS SOLAR KV/200 20 ISC SOLAR Installation and maintenance manual

Riello

Riello ALUDOMUS SOLAR KV/200 20 ISC SOLAR Installation and maintenance manual

Sime Format 34i installation instructions

Sime

Sime Format 34i installation instructions

bsg Savio FP User manual and instructions

bsg

bsg Savio FP User manual and instructions

Viessmann Vitodens 100-W Installation and service instructions

Viessmann

Viessmann Vitodens 100-W Installation and service instructions

Fondital Nias Dual Line Tech BTN 24 Installation, use and maintenance

Fondital

Fondital Nias Dual Line Tech BTN 24 Installation, use and maintenance

Navien NHB-055H User's information manual

Navien

Navien NHB-055H User's information manual

Riverside Hydronics 400 Installation & maintenance manual

Riverside Hydronics

Riverside Hydronics 400 Installation & maintenance manual

Diamond GMM/150I manual

Diamond

Diamond GMM/150I manual

Smith Cast Iron Boilers GT Series Installation & operation manual

Smith Cast Iron Boilers

Smith Cast Iron Boilers GT Series Installation & operation manual

Unical EVE 05 RTN 24 Installation, use and maintenance

Unical

Unical EVE 05 RTN 24 Installation, use and maintenance

Worcester GREENSTAR UTILITY 18/25 instruction manual

Worcester

Worcester GREENSTAR UTILITY 18/25 instruction manual

Ferroli F30E Installation, servicing and user instructions

Ferroli

Ferroli F30E Installation, servicing and user instructions

Viessmann ECV Series Installation and service instructions

Viessmann

Viessmann ECV Series Installation and service instructions

elco Trinox 1000 operating & maintenance manual

elco

elco Trinox 1000 operating & maintenance manual

U.S. Boiler Company ESC User's information manual

U.S. Boiler Company

U.S. Boiler Company ESC User's information manual

OERTLI PK 550 Assembly instructions

OERTLI

OERTLI PK 550 Assembly instructions

manuals.online logo
manuals.online logoBrands
  • About & Mission
  • Contact us
  • Privacy Policy
  • Terms and Conditions

Copyright 2025 Manuals.Online. All Rights Reserved.