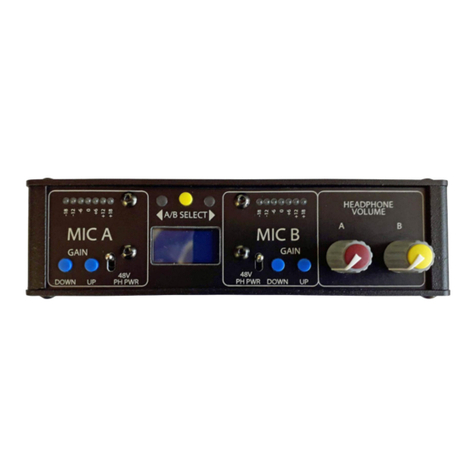
Glensound DDA 1:6 User manual

DDA1:6
Digital Distribution Amplifier
1 in 6 out AES3 (Stereo) with headphone monitor
up to 192kS/s
User Guide
Glensound
6 Brooks Place Maidstone
Kent UK ME14 1HE
Tel: +44 (0)1622 753662
www.glensound.co.uk

Page 2 of 16
Glensound Electronics Ltd
Thank you for choosing a new Glensound product.
All rights reserved.
Information contained in this manual is subject to change without notice if in
doubt please contact us for the latest product information.
If you need any help with the product then we can be contacted at:
Glensound Electronics Ltd
1 – 6 Brooks Place
Maidstone
Kent
ME14 1HE
United Kingdom
Telephone: +44 (0) 1622 753662
Fax: +44 (0) 1622 762330
EMAIL ADDRESSES
General enquires: office@glensound.co.uk
Technical enquires: techinfo@glensound.co.uk
Sales enquires: sales@glensound.co.uk

Page 3 of 16
IMPORTANT SAFETY INSTRUCTIONS
1) Read these instructions
2) Keep these instructions
3) Heed all warnings
4) Follow all instructions
5) Do not use this apparatus near water
6) Clean only with a dry cloth
7) Do not block any ventilation openings. Install in accordance with manufacturer’s
instructions
8) Do not install near any heat sources such as radiators heat registers stoves or other
apparatus (including amplifiers) that produce heat
9) Do not defeat the safety purpose of the polarized or grounding type plug. A polarized plug
has 2 blades with one wider than the other. A grounding type plug has 2 blades and third
grounding prong. The wider blade or the 3
rd
prong are provided for your safety. If the
provided plug does not fit into your outlet consult an electrician for replacement of the
obsolete outlet
10) Protect the power cord from being walked on or pinched particularly at plugs
convenience receptacles and the point where they exit from the apparatus
11) Only use attachments/ accessories specified/ supplied by the manufacturer
12) Use only with the cart stand tripod bracket or table specified by the
manufacturer or sold with the apparatus. When a cart is used use caution when moving
the cart/ apparatus combination to avoid injury from tip over
13) Unplug tis apparatus during lightning storms or when unused for long periods of time
14) Refer all servicing to qualified service personnel. Servicing is required when the apparatus
has been damaged in any way such as power supply cord or plug is damaged liquid has
been spilled or objects have fallen into the apparatus the apparatus has been exposed to
rain or moisture does not operate normally or has been dropped
15) Do not attempt to modify this product. Doing so could result in personal injury and/ or
product failure
This symbol is intended to warn that
dangerous voltages within the product are
present and constitute a risk of electric
shock.
This symbol is intended to highlight that
there are important operating &
maintenance instructions in the literature
accompanying this unit.

Page 4 of 16
IMPORTANT: MAINS PLUG IRING INSTRUCTIONS
This Signature unit is supplied with a moulded mains plug fitted to the AC mains
lead.
Mains wiring colours/ connections:
The Green/ Yellow or Green wire must be connected to the terminal in the plug
marked ‘E’ or with the Earth Symbol.
The Blue or Black wire must be connected to the terminal in the plug marked ‘N’
(Neutral).
The Red or Brown wire must be connected to the terminal in the plug marked ‘L’
(Live).
THIS UNIT MUST BE EARTHED
THIS UNIT IS FITTED ITH AN INTERNAL MAINS FUSE.
The fuse is located internally between the Live terminal of the IEC plug and the
Live input of the power supply. The fuse should only be changed by a qualified
service engineer. If replacing the fuse care should be taken to fit a correctly rated
replacement. The fuse rating can be found in the technical specifications page of
this handbook.

Page 5 of 16
CE
This equipment manufactured by Glensound Electronics Ltd of Brooks Place
Maidstone Kent ME14 1HE is CE marked and conforms to:
Low Voltage Directive: EN60065
Emissions: EN55103.1
Immunity: EN55103.2
ASTE ELECTRICAL AND ELECTRONIC EQUIPMENT
REGULATIONS 2006 ( EEE)
Glensound Electronics Ltd is registered for business to business sales of WEEE in
the UK our registration number is:
WEE/JJ0074UR
RoHS2 DIRECTIVE
EC directive 2011/65/EU restricts the use of the hazardous substances listed below
in electrical and electronic equipment.
This product conforms to the above directive and for this purposes the maximum
concentration values of the restricted substances by weight in homogenous
materials are:
Lead
0.1%
Mercury
0.1%
Hexavalent Chromium
0.1%
Polybrominated Biphenyls
0.1%
Polybrominated Diphenyl Ethers
0.1%
Cadmium
0.01%

Page 6 of 16
PRODUCT ARRANTY:
All equipment is fully tested before dispatch and carefully designed to provide you
with trouble free use for many years.
We have a policy of supporting products for as long as possible and guarantee to
be able to support your product for a minimum of 10 years.
For a period of one year after the goods have been despatched the Company will
guarantee the goods against any defect developing after proper use providing
such defects arise solely from faulty materials or workmanship and that the
Customer shall return the goods to the Company’s works or their local dealer.
All non-wear parts are guaranteed for 2 years after despatch and any defect
developing after proper use from faulty materials or workmanship will be repaired
under this warranty providing the Customer returns the goods to the Company's
works or their local dealer.

Page 7 of 16
DDA1:6 Digital AES3 Distribution Amplifier
Handbook Contents
Issue 1
Description Page No.
Contents
IMPORTANT SAFETY INSTRUCTIONS ........................................................................................................................ 3
PRODUCT WARRANTY: ...................................................................................................................................................... 6
OVERVIEW .......................................................................................................................................................................... 8
PHYSICAL INSTALLATION ................................................................................................................................................. 9
AUDIO BLOCK DIAGRAM ................................................................................................................................................ 11
EXAMPLES OF USE ........................................................................................................................................................... 12
1. Radio Station CTA ............................................................................................................................................... 12
USER CONTROLS .............................................................................................................................................................. 13
1. Power On LED ..................................................................................................................................................... 13
2. Error LED.............................................................................................................................................................. 13
3. AES Lock LED ...................................................................................................................................................... 13
4. Selector Switch ................................................................................................................................................... 13
5. Headphone Jack Socket ..................................................................................................................................... 13
6. Headphone Volume Control ............................................................................................................................. 13
CONNECTIONS ................................................................................................................................................................. 14
7. AES3 Outputs ...................................................................................................................................................... 14
8. AES3 Input ........................................................................................................................................................... 14
9. External DC Input ............................................................................................................................................... 14
10. Mains In ........................................................................................................................................................... 14
WIRING INFORMATION ................................................................................................................................................... 15
1. Standard Pin Outs............................................................................................................................................... 15
TECHNICAL SPECIFICATION ............................................................................................................................................ 16


Page 8 of 16
OVERVIE
The Glensound Signature Series DDA1:6 is a professional audio distribution amplifier. It is
manufactured using high quality components and low noise audio circuits to provide many
years of trouble free use.
Although traditionally a broadcast manufacturer Glensound’s products are equally at home
in professional and high end home studios industrial installations and live pro sound
environments. The DDA1:6 can therefore be used in a number of applications.
The DDA1:6 features one transformer balanced audio inputs on a Neutrik XLR. This input is
then routed via the front panel ‘Loop Through’ or ‘Renormalising’ switch to 6 transformer
balanced outputs also on Neutrik XLRs.
When in ‘Loop Through’ mode the AES3 input is sent straight to the 6 off AES3 outputs and
the signal present at the output will be identical to that received by the input. Loop through
is done with no delay to the signal and therefore is most useful if the AES3 signal is synced
with another source through the users’ production chain.
When in ‘Renormalising’ mode (the most common way to use the unit) the incoming signal is
cleaned up and the output signals will have clean clock edges and be as close to their initial
source as possible. The only disadvantage of renormalisong is that the incoming signal is fed
via a high quality AES3 receiver chip and it takes 1 sample to produce the cleaned up output.
The DDA1:6 works with all digital signals from 16 – 192 kS/s and up to 32 bit.
The DDA1:6 is powered from an internal switch mode mains power supply fed from a filtered
IEC mains plug suitable for use Worldwide. It has an internal fuse for safety. The unit can also
alternatively be powered from an external +/-12V DC power source (such as the Signature
Series PS1). If both mains and external DC power sources are present then if one power
source were to fail the unit would continue to work seemlessly from the other source.

Page 9 of 16
PHYSICAL INSTALLATION
The Glensound Signature Series have been designed to be highly versatile for installation and
can be installed in 19” racks with either their front or rear panels facing the front of the rack.
They can also be mounted underneath desks or work tops and can be either permananetly
mounted or stood (using the supplied feet) on top of desks or worktops.
INSTALLING SIGNATURE SERIES IN A 19” RACK
Firmly hold the signature subrack within the 19” rack and locate in 1RU of space. Use the
supplied 6mm rack screws to securly attach the unit to the rack.
INSTALLING ADHSIVE FEET FOR NON PERMANENT TABLE TOP MOUNTING
Remove the front rack ears (if they are not required) turn the unit upside down and attach
the supplied 4 sticky feet as per the above drawing.
Signature
g
Series
Keeps Working
PWR ON
PART No
CE
W
50/60Hz 2.7 Watts
100-240V
+/-12V - - -
PIN 1 = GND
PIN 3 = -12V (100mA)
PIN 2 = +12V (100mA)
Top

Page 10 of 16
S APPING RACK EARS TO ALLO THE REAR TO BE INSTALLED AT THE FRONT OF A
RACK
First remove the 4 silver button head screws that fix the rack ears onto the front of the unit as
shown in the top picture above.
Remove the rack ears and turn the unit around for access to its back panel.
Re-fit the 2 rack ears using the same 4 silver button head screws that were removed from the
front as per the bottom picture above.
USING THE MOUNTING HOLES FOR PERMANENTLY ATTACHING THE UNIT ABOVE OR
BELO A ORKTOP/ DESK
Use either the top or bottom mounting holes as indicated above to use suitable screws to
attach the signature unit to a worktop or bench. **PLEASE ENSURE THAT YOU USE SUITABLE
FIXINGS**
Series
Signature
g
Keeps Working
PWR ON
PART No
CE
W
50/60Hz 2.7 Watts
100-240V
+/-12V - - -
PIN 1 = GND
PIN 3 = -12V (100mA)
PIN 2 = +12V (100mA)
Series
Signature
g
Keeps Working
PART No
PWR ON

Page 11 of 16
AUDIO BLOCK DIAGRAM
AES3 IN
100 - 240 VAC
INTERNAL
FUSE
AC/DC PSU +12V
-12V
EXT DC +/-12V
AES TRANSMITTER
AES TRANSMITTER
AES TRANSMITTER
AES TRANSMITTER
AES TRANSMITTER
AES TRANSMITTER
AES RECEIVER
MICROCONTROLLER AES LOCK
ERROR
LOOP THROUGH
RENORMALISE
D2A CONVERTER
AES OUTPUTS
HEADPHONES

Page 12 of 16
EXAMPLES OF USE
1. Radio Station CTA
Mixer
Output
FM
Transmiter
Local
Monitoring
Digital
Services
Logging
ISDN
Backup
Headphone
DA
1 x AES3
1 x AES3
1 x AES3
1 x AES3
1 x AES3
1 x AES3
1 x AES3
In this example the main stereo programme feed from a radio station needs to be distributed
across multiple platforms. The output from the desk or automation system no longer just
heads off to the transmitter. The audio must be distributed across all of the relevant services
that require a connection of the original programme audio.
The Signature DDA 1:6 provides 6 stereo AES outputs of the main AES programme audio.
One output connects to the transmitter as the main FM broadcast feed. As multiple guest
headphones are required in the studio another output connects to a separate AES
headphone distribution amplifier. This station also broadcasts online so another output
connects to a PC to become the internet broadcast stream. Local monitoring is required so
one feed goes to the local AES monitoring system. The transmitter B chain is on ISDN so one
AES output goes to an ISDN codec. And the final output connects to another PC that
manages all of the stations logging requirements.
It’s very easy to see why multiple outputs of the main AES programme audio are required in a
typical radio station environment.

Page 13 of 16
USER CONTROLS
1. Power On LED
The front panel bright blue LED shows that the unit is powered on and functioning correctly.
2. Error LED
The error LED is fed from the output of the AES3 receiver and will be illuminated whenever
the receiver is not receiving a valid AES3 signal.
3. AES Lock LED
This LED is connected to the output of the AES3 receiver. If illuminated it indicates that the
receiver has detected a valid AES3 signal and is correctly locked onto it.
4. Selector Switch
When in the ‘Renormalising’ position the AES3 outputs of the unit will be cleaned up and
‘renormalised’ so as they have clear sharp clock edges and mirror the original AES3 signal. It
takes 1 sample to do this so the output will be sample behind the input.
When in ‘Loop Through’ mode the AES3 outputs will be identical to the input so if the input
signal has been degraded by a long cable run or noise then the output signal will reflect this
identically.
5. Headphone Jack Socket
This is a standard 6.35mm (1/4”) stereo headphone jack socket. The audio output is taken
from the AES3 input and it can be used as a monitor point to ascertain audibly the quality of
the incoming circuit.
6. Headphone Volume Control
Turning this control clockwise will increase the audio output level of the headphone
amplifier.
2.
POWER ON LED
3.
ERROR LED
1.
AES LOCK
5.
SELECTOR SWITCH
4.
HEADPHONE JACK SKT
6.
HEADPHONE
VOLUME CONTROL

Page 14 of 16
CONNECTIONS
7. AES3 Outputs
6 off identical transformer balanced AES3 outputs derived from the AES input and matching
its frequency rate.
8. AES3 Input
This transformer balanced AES3 input will accept standard AES3 signals between 16 and
192kS/s and up to 32 bit.
9. External DC Input
This DC input can be used instead or as well as the mains input. It requires a +/- 12V power
source (such as our PS1). If used in conjunction with the mains input it will seamlessly provide
a redundant power source.
10. Mains In
This AC input accepts a wide range power supply suitable for use Worldwide. If used in
conjunction with the external DC supply then a seamless redundant power supply will be
provided.
7.
AES3 OUTPUTS
8.
AES3 INPUT
9.
EXTERNAL DC IN
10.
AC MAINS INPUT

Page 15 of 16
IRING INFORMATION
1. Standard Pin Outs
HEADPHONE IRING NOTE:
The Signature Series range of products feature sophisticated headphone amplifiers whose stereo
outputs can be connected directly to mono headphone jacks without damaging the headphones
internal amplifiers.
12
3
XLR SOCKET (FEMALE)
1 2
3
XLR PLUG (MALE)
TIP
RING
SLEEVE
STANDARD XLR AUDIO PINOUTS:
1: Ground/ Earth
2: INP ASE/ POSITIVE/ MIC +
3: MATE/ NEGATIVE/ MIC -
STANDARD EADP ONE WIRING
:
TIP: A/ LEFT Ear
RING: B/ RIG T Ear
SLEEVE: Common/ Earth

Page 16 of 16
TECHNICAL SPECIFICATION
FEATURES
FEATURES
PO ER
AUDIO AES3 IN to OUT
PHYSICAL
Mains Input
Size
Internal Mains Fuse
Shipping eight
DC Input
DC Consumption
Mechanics
AC Consumption
eight
Shipping Carton
Filtered IEC 100 to 240VAC
47 - 63Hz
336 x 123 x 44mm (LxDxH) no rack ears
482mm 19” (1RU) with rack ears
20mm 1A Anti Surge
2.25kg
4 Pin Neutrik XLR plug +/- 12V
<60mA per rail
All aluminium construction anodized and
laser etched
1.4 Watts @ 230VAC
0.75kg
Rugged export quality cardboard carton
610 x 420 x 130mm LxDxH
Input Impedance
Input Type
Distortion (+8 from line up)
Headphone Clip Level
Noise Level (Unweighted 22Hz-22kHz)
Maximum & Minimum Levels
Output Impedance
Output Types
Headphone Level
Distortion (+8 from line up)
Sample Frequency Range
110 ohms
1 x 3 pin Neutrik XLR Transformer balanced
0.00005%
+18dBu
-77dBu @ Maximum gain
200mV to 10V peak to peak
110 ohms
6 x 3 pin Neutrik XLRs Transformer balanced
0dB (600 Ohms) @ -18dBfs input
100Hz: 0.006%
1kHz: 0.005%
10kHz: 0.011%
32-192 kS/s ( , , , 88.2, , 176.4, 32 44.1 48 96
S/s)192 k
Digital Resolution
Noise (unweighted 22Hz-22kHz)
Headphone Gain Range
Frequency Response (@96kS/s)
8 16 24 or 32 bit
-145.7dBfs
+6dBu to off
25Hz: -0.25dBu
32kHz: 0.25dBu
HEADPHONE MONITORING
Re-normalised
Output signal is reconstituted and signal
integrity returned to normal
Loop Through
Output signal integrity matches input signal
Table of contents
Other Glensound Amplifier manuals

Glensound
Glensound Signature Series User manual

Glensound
Glensound GS-HA013 Installation guide

Glensound
Glensound DANTE VIRGIL OB Installation guide

Glensound
Glensound Dante ATHENS 2 Installation guide

Glensound
Glensound SYMPHONY Installation guide

Glensound
Glensound Dante AOIP2M Installation guide

Glensound
Glensound Dante Comedia Installation guide

Glensound
Glensound ADA2:6 User manual

Glensound
Glensound GS-SW012 Installation guide

Glensound
Glensound GS-HA001 Quick start guide