Glion Balto User manual

Balto Electric Scooter User Manual

1
Balto
BEFORE operating
www.getglion.com
Manual s
www.getglion.com.
www.getglion.com
www.getglion.com
th Ave
WARNING: THIS MANUAL CONTAINS IMPORTANT SAFETY,
PERFORMANCE, AND SERVICE INFORMATION. Read it before you take the first ride on
your new Glion Electric Scooter, and keep it for reference.
Whenever you ride this motorized scooter, you risk death or serious injury from loss of
control, collisions, and falls. THIS IS NOT A STUNT VEHICLE, AND SHOULD NOT BE
USED AS SUCH. When riding, use common sense and good judgment: Always wear a
helmet. Ride on legal surfaces. Ride at a speed you can control. Be alert and prepared
for changes in your riding surface. Never ride intoxicated or in any other manner that
impairs your ability to drive this scooter safely. Yield to pedestrians at ALL TIMES!

2
SAFETY SPECIFICATIONS AND OWNER OBLIGATIONS ...................................................................................... 3
............................................................................................................ 7
OPEN BOX INSTRUCTIONS .............................................................................................................................................. 8
UNFOLD/FOLD INSTRUCTIONS .................................................................................................................................... 8
SEAT, LUGGAGE RACK AND BASKET INSTALLATIONS ..................................................................................... 13
............................................................................... 15
................................................................................................... 16
BATTERY AND CHARGER .............................................................................................................................................. 17
DOLLY FEATURE ............................................................................................................................................................... 19
......................................................................................................... 20
GENERAL TROUBLESHOOTING .................................................................................................................................. 21
CLEANING, STORING, AND SERVICING .................................................................................................................... 22
PRODUCT REGISTRATION ............................................................................................................................................. 22
....................................................................................................................................... 23

3
ATIONS AND S
1. Always check and obey local laws or regulations, which govern
where you can legally operate the scooter. Only operate the scooter where legally permitted, and
do so with caution. The scooter can only be operated on private property unless it is street legal in
your jurisdiction. While many state laws approve its legal use in bike lanes, some states do not
consider a motorized scooter street legal. Please familiarize yourself with the applicable laws and
regulations for electric scooters where you plan on riding it. Keep safely away from cars and
motor vehicle traffic at all times.
WARNING:
responsibili
Obs
sidew
2. SAFETY GEAR: Always wear an approved safety helmet (with chin strap securely buckled),
gloves, elbow and knee pads, appropriate shoes (lace-up with rubber soles), and bright or
reflective clothing while operating this scooter.
WARNING:while
3. CONDITIONS:
Do not operate this scooter in traffic.
Do not operate this scooter on surfaces that are wet, frozen, oily, or unpaved.
Never carry passengers or objects that can hinder your ability to safely operate this
scooter.
Never use headphones or a cell phone to talk or text while riding.
4. : Pregnant women should not operate this scooter.
5. Never use alcohol or drugs before or while operating this scooter. The
use of such hinders your ability to safely operate the scooter.
6 This scooter is not designed for stunts or tricks and should not be used as such. High
speeds, jumps, wheelies, and other trick maneuvers are dangerous and can result in loss of
control, accidents, and injury/death to self or others.
7. When climbing hills, you may need to manually kick the scooter forward to assist the
motor and maintain your speed depending on the steepness of the hill and rider weight.
heel
base speeds
. The brake is a disc brake. Always check the braking before
each ride. Always check the brake BEFORE beginning to go downhill. Never go downhill without
brake being enabled.

4
WARNING: Failure to control your speed when descending a hill
can result in serious injury or death.
8. Never permit a guest to use this scooter unless the guest has read the user manual
and all the warnings. Always provide a guest with helmet, elbow pads, and knee pads before
permitting the guest to operate the scooter. Never allow more than one person at a time to ride
the scooter.
WARNING:This product should not be used by persons unwilling
or unable to take responsibility for their own actions.
9. YOUR INSURANCE POLICIES MAY NOT PROVIDE COVERAGE FOR ACCIDENTS
INVOLVING THE USE OF THIS SCOOTER. TO DETERMINE IF COVERAGE IS PROVIDED, CONTACT
YOUR INSURANCE COMPANY OR AGENT BEFORE USING THE SCOOTER.
10. Do not allow anyone under the age of 16 to operate this scooter. This
scooter is designed for operation by and the transport of only one person age 16 or older.
11 Ride your scooter in a controlled environment away from vehicles,
obstacles, and other hazards. Never operate the scooter near steps or swimming pools.
12 This scooter is not designed or intended for stunt tricks, including but not
limited to jumps, wheelies, and curb grinding. Keep both hands on the handlebar and both feet on
the standing board while operating the scooter.
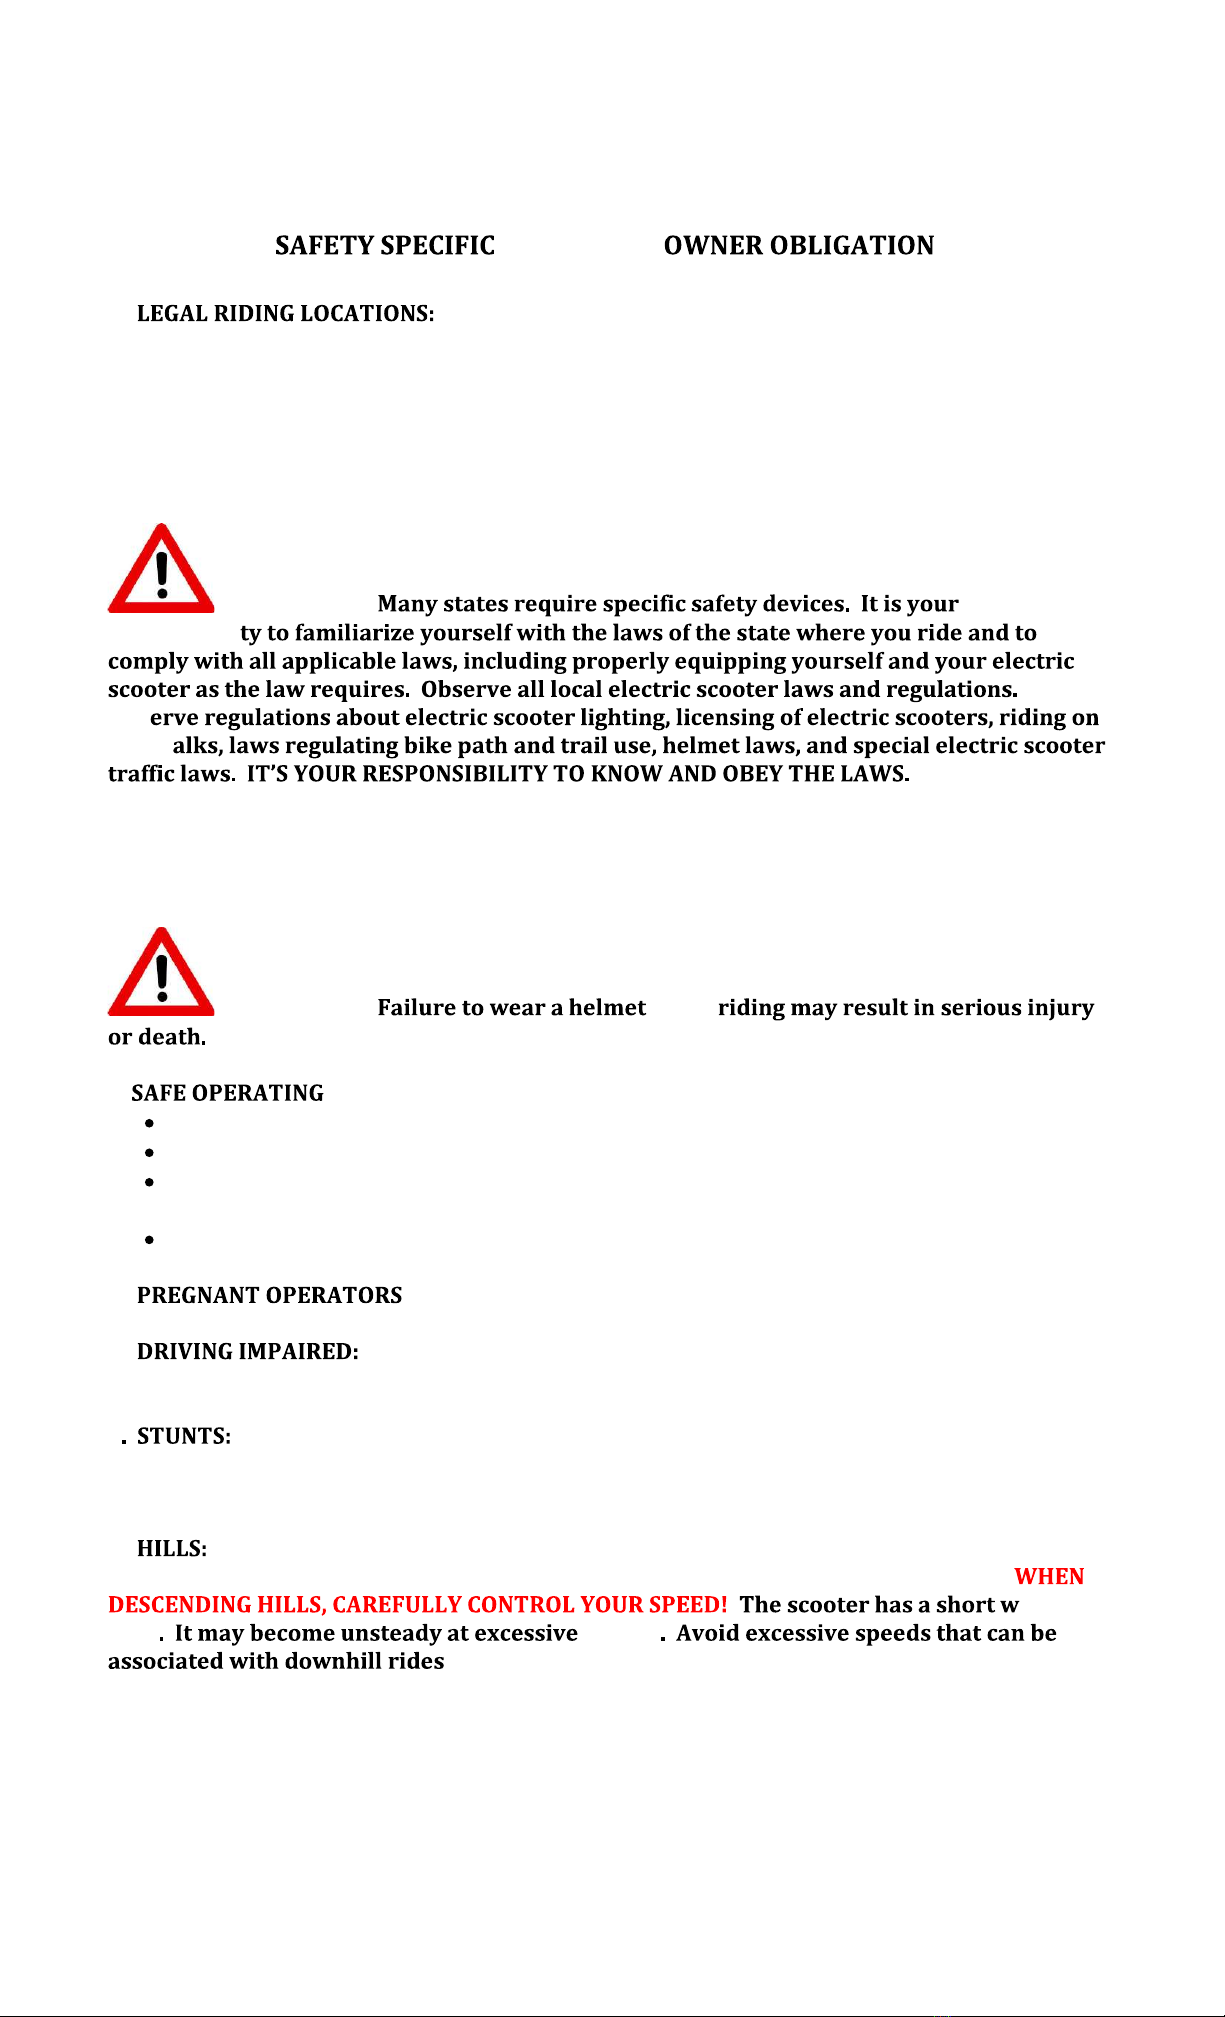
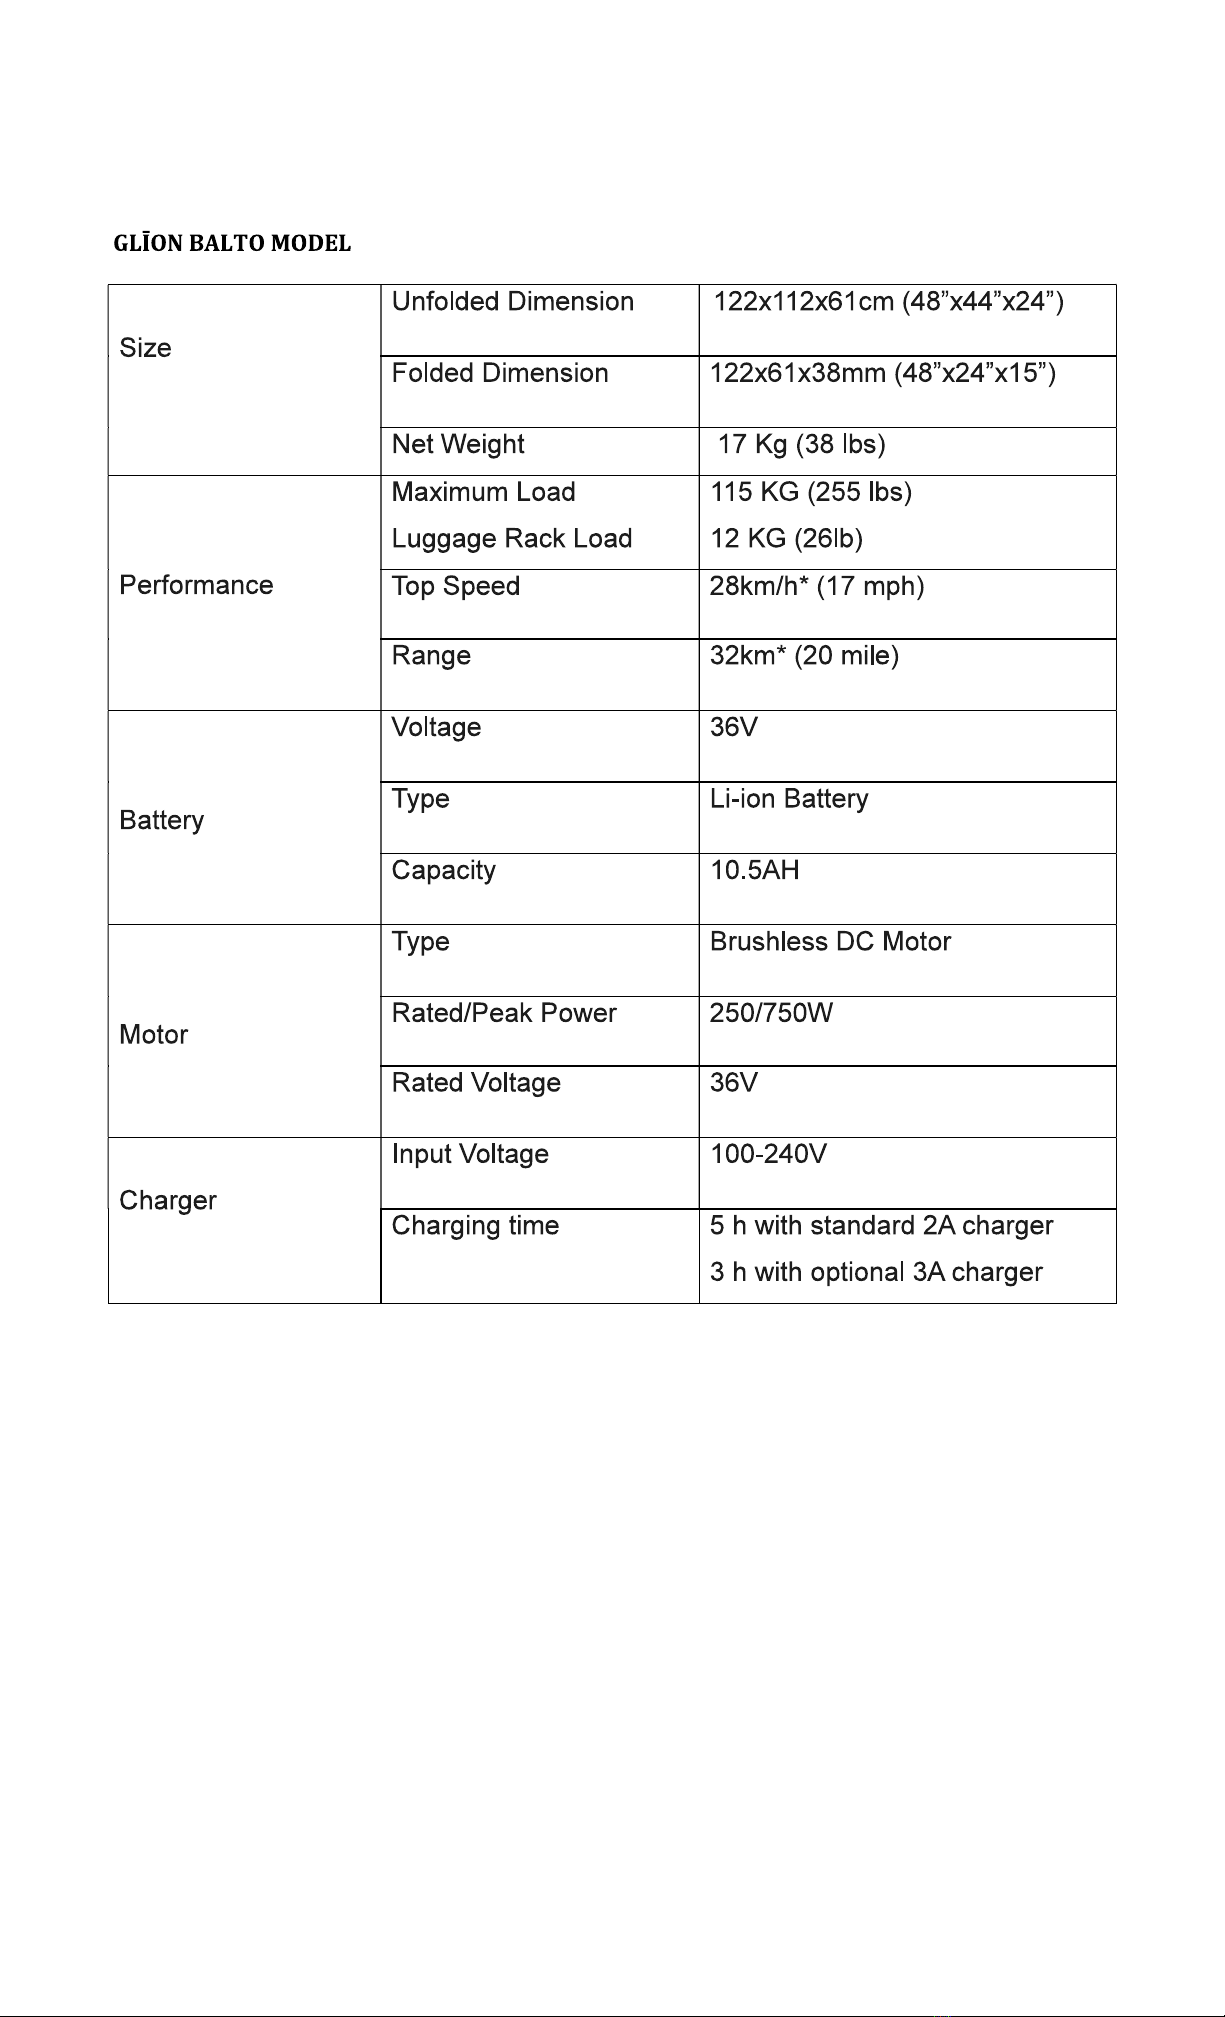
13. The s approximately 28 km/h (17 mph). For your safety,
limit the speed to not more than 20 km/h (13 mph), and be careful to control your speed when
descending hills. The scooter has a short wheel base and can become unsteady at excessive
downhill speeds.
14. Do not ride your scooter at night or in conditions of poor visibility. If riding in
such conditions is unavoidable, limit your speed to 15 km/h (10 mph) or less and always turn on
the scooter lighting. Wear reflective clothing or vest. There are aftermarket bicycle accessories
such as headlamps and reflectors that can be mounted to the scooter or worn by the rider that will
enhance safety.
WARNING: Riding at dawn, dusk, or at times of poor visibility
without a lighting system that meets state and local laws, and without
approved reflectors, is illegal, dangerous, and can result in serious injury
or death.
15. TEMPERATURE: The scooter battery is designed to have operating environmental
temperature range. Riding temperature is between -10 (14 °F) and 40 (104 °F). Charging
temperature is between 0 (32 °F) and 40 (104 °F). Storage temperature is between -10
(14 °F) and 40 (104°F). Do not operate the scooter outside of the designed temperature range.

5
16 Avoid riding in wet or icy conditions. Stop the scooter and walk it
across rough or slippery road conditions.
WARNING: Wet or icy weather impairs traction, braking, and
visibility for riders and other vehicles and pedestrians sharing the roads.
The risk of accident is dramatically increased in wet or icy conditions.
17. The scooter is intended for use on hard, flat, dry paved surfaces
without loose debris such as sand, leaves, rocks or gravel. Wet, slick, bumps, uneven or rough
surfaces may impair traction and contribute to possible accidents
Stop the scooter and carefully walk it across rough or slippery
road conditions.
18. Although some water resistance measures have been made, riding the
scooter through standing water, rain, wet or muddy conditions runs the risk of severely damaging
it. Do not immerse the scooter in water or directly spray the scooter when cleaning. When parked
outside where rain is possible, cover the handlebar controls with water resistant materials to
protect the electric controls.
19. : When the scooter is not being used for riding, place it in a safe
stable and secured environment, keep it away from fire, water and other hazards. When the
scooter is in its upright vertical self-standing mode, especially in moving public transportation or
other crowded space, pay attention to its stability as accidental tip over could cause personal
injury as well as damage to the scooter. bar
ove ing
20. Maximum rider weight is 255lb/115kg.
WARNING: The scooter is not intended for use at elevations greater than 2000m
above sea. Prolonged exposure to UV rays and rain may damage the enclosure materials.
Store indoors when not in use

6
X1 SPECIFICATIONS
* Top speed and range per charge depends on rider weight, wind speed, temperature, riding style,
riding surface, battery condition, and other factors. Actual top speed and range per charge may
vary.

7
GL X1
S
s
Mode/horn/turning signal control
Thumb throttle/battery
indicator/Power & Light Switch
Controller box
Hand brake lever
Seat
Basket
Motor Tire
Head Lamp
Folding hook
Rear view
Mirror
Detachable batter
y
Folding box
& release
lever
Kickstand
Luggage/folding
stand rack
Serial
Number

8
O INSTRUCTIONS
1.
2.
3.
4. s .
5. s
battery.
6.
.
7.
8. Eco
gear.
9.
UNFOLD/FOLD INSTRUCTIONS
www.getglion.com
unfolding/
scooter.
U ing
Step 1. Lay the folded scooter on ground or floor with head lamp facing you. The scooter
handlebar is locked to the rear fork via the folding hook. Push/pull the hook release trigger
towards the direction of handlebar to allow the folding hook to come out and the handle bar is
unlocked from the rear fork.
Hook Release
Trigger

9
Step 2. Hold the horizontal handle bar and lift it up to its while both wheels are
on the ground. At this point, the standing board is tilted and the folding box at the neck is
separated. of the standing board and step
with your body weight. You should hear a click at the folding box, which means the locking pin is
inserted in its notch and the folding box should be closed.
.
Step 3. Rotate the folding release lever (A) up so it gets into the notch in the upper section of the
folding box.
Step 4. After scooter is unfolded, bring down kickstand to have the scooter stand in unfolded
position and install the handle grips on both sides of the handle bar. First use the provided Allen
wrench to loosen the bolt (B) at the bottom side of the hand brake to adjust the handbrake
position for normal operation. Make sure you tighten the bolt after you adjust the hand brake
position.
(A)
(B)
Locking pin is secured
In notch
Step with your body
weight on the side
of the board that is
close to you.
Fully Down

10
Step 5. Install the handle grips by inserting the handle grips into the handle bar and securely
tighten the bolts inside using provided Allen wrench as shown in the pictures above.
tightened, handle grip should be securely attached to handle bar.
If provided Allen wrench does not give enough
leverage to tighten the bolt inside, add another wrench to the end of the Allen wrench to add
leverage. Also tighten the bolts on the outside of the handle grips.
Step 6. Install the review mirror on left side. Then insert the mirror as shown above into the
handle grip. Use the provided Allen wrench to tighten the mirror bolt. The mirror is foldable and
adjustable as shown. Install the provided handle grip end cap on the side with no mirror.
Step 7. Install the battery onto the battery docking station by pressing the bottom of the battery
onto the pins on the docking station (1) and then lean the upper side of the battery into the upper
side of the docking station.
Just lift the docking station cap up a little (2) so that
the battery can slide and fit into the docking station. In order to make sure the detachable battery
connection is tight and safe for road bumps, Balto has multiple designs. After sliding the battery
onto its docking station, tighten the strap around the battery and lock the battery using provided
keys. Please attery a
damaging
(2)
Tighten the bolts.
(1)

11
Step 1. Make sure the scooter is off. The LED battery indicator screen on the right handle grip
should not be lit. Fold the rear view mirror. Kick up the kickstand and put one foot on the
standing board. Use left hand to hold scooter handle bar and use right hand to lift the folding
release lever (1) and move it out of its notch (2). Hold the folding lever pin and bring it towards
you so that the pin will come out of its notch (3) and the folding box gets unlocked. Do not let go of
the folding lever pin until the folding box gets separated. Keep in mind that your foot must be on
the standing board and your left hand must hold the scooter handle bar so that your body weight
on the standing board will hold the scooter down while the upper folding box could be separated
when orce on the handle bar helps to separate the upper folding box from the
lower part of the folding box. Please refer to our online video instructions for further illustration.
Step 2. Fold the handlebar and bring it down SLOWLY to the driver side of the rear wheel. The
front wheel will rotate 90 degrees and the battery & headlight should face the right side of the
scooter. The passenger side of the board would lean on the floor. Hold the handlebar and rear
(1) (2)
(3)
(4)
Hook Release Trigger
should spring back to
its original position
after the click to
securely lock the
folding hook.

12
wheel and bring the folding hook into its locking notch. and the hook
release trigger should go back to its original position to lock the folding hook.
Failure to securely lock the handle bar could
cause the scooter to unfold and fall resulting in significant damage to the scooter when scooter is
in its vertical dolly position.
Step 3. Put the luggage/dolly rack down with dolly wheels on the floor. Lift UP both rack locking
levers (C) so they are in unlocked position.
vertically so that the front wheel is on the ground and rear wheel is up in the air. The purpose is to
get ready to put the scooter onto the luggage/dolly rack. Please notice that the battery or
headlamp must face the same direction. Use both hands to hold the folded scooter and roll the
front motor wheel into the rack via the rack opening (D) on the side with dolly wheels.
Step 4. Hold the handle grips using both hands and lift the scooter up so that the tips of the front
fork (E1) & (E2) are right above the resting slots (F) of the luggage/dolly rack. Put down the
scooter so that its front fork tips (E1 & E2) are inserted into the resting slots (F) of the rack. (TIP:
to lower the weight of the scooter and make it lighter to lift, you can take off the detachable
(C)
Facing the same
direction.
(D)
(E1)
(E2)
(F)
(C)

13
battery.)
become To take the scooter out of
the rack, reverse above steps. s
SEAT,
Step 1: The seat installation has 3 components: seat, upper seat post (black) and lower seat post
(Silver). Attach the black seat post to the seat as shown in (1) with the seat post clamped to the
seat base. You may put the bolt (G) either towards front or the back of the seat, which results in
different tilt angles and positions for the seat. Tighten the bolt (G) using provided Allen wrench.
Note you can adjust the seat position and angle by loosening the bolt. Make sure you tighten the
bolt.
Step 2: Insert the upper seat post into the lower seat post at appropriate height.
posit
release lever.
(G)
(1)
(H) Grooved
Safety Line
Mark
(H)
(G)
Fitting curves for braces are not aligned
to braces when the bolt (G) is loose. As
the bolt (G) gets tightened, braces will
get into the fitting curves.

14
Place the luggage rack above the rear wheel as shown above. Have the rack supportsfrom both
sides of the rear fork fully inserted into the resting slot (F). Make sure the tip of the rack front (I)
is fully rested on the rack support notch attached to the seat post base. Close both rack locking
levers (C) fully to lock the rack onto the scooter.
s
Place the basket on top of the luggage rack and secure each of the 4 velcro straps as shown above.
R
person .
scooter
(F)
(C)
(I)

15
SCOOTER
WARNING: For your safety, please take the time to familiarize
yourself with the handlebar controls and with its movements and balance
before attempting to ride your scooter with the motor engaged. Please see
our demonstration videos on our website: www.getglion.com.
1. /Off (J2): To turn the scooter on, you must press the GRAY on/off switch
ONCE as shown below (F). The LED display is lit when the power is on and dark if off. The
scooter rear light is turned ON when the power is turned on. The scooter will automatically
turn off after five minutes of non-use. To turn off the power of the scooter, you must press
and hold the on/off switch for 2 seconds and then release it.
2. When the scooter is turned on, the battery indicator screen is
turned on. Green means full or close to full while Red means almost empty. When green
light is off with motor off, battery has about 20% left; when the yellow light is off with
motor off, it has 5% left.
scooter.
3. Head Light On/Off (J2) The scooter rear light is always ON when the power is
turned on. To turn the headlight and side lights on or off, you must first power on the
scooter. While the scooter power is on, quickly press the on/off switch once, the headlight
and side lights should be turned on. Flash press a second time, the lights will be turned off.
Again, to turn off the scooter, press and hold for about two seconds. Turning the lights on
or off is a quick press.
4. The further you press down the thumb throttle accelerator, the more
energy you will release to the motor.
5. controls the top speed. For eco mode (switch to S), top speed is 18kmh
or 11mph. For turbo mode (switch to F), top speed is 28kmh or 17mph. Note: during
riding, if the speed mode is switched from F to S, the actual cruising speed might exceed the
top speed limit of eco mode, which will cause the accelerator not responding until cruising
speed is below top speed limit of eco mode. This is normal.
6. controls the side lights on the side of standing board. When scooter is
powered on, will have the corresponding side lights flashing to signal turning.
After turning, remember to switch it to the middle neutral position to turn off the turning
signal.
7. HActivate the horn by pressing once.
8. H: When hand brake is squeezed, motor electricity will be cut and rear disc
brake will be actuated. Rear light will be flashing when the hand brake is squeezed.
(J1)
(J2)
(J3)
(K1)
(K2)
(K3)
(K4)

16
9. Kickstand: The kickstand (I) is located in the middle underneath the standing board on
the left side. Be sure to always lift the kickstand before beginning operation of the scooter.
WARNING: For your safety and for the safety of others, please take
the time to practice accelerating, braking and familiarize yourself with the
in an open and safe area before taking your
scooter out into the general environment. IT IS YOUR RESPONSIBILITY TO
MAINTAIN CONTROL OF YOUR SCOOTER AT ALL TIMES!
GL SCOOTER
:
1. Fully charge the battery. (See Battery Charging Instructions Below).
2. Choose a controlled environment away from vehicles, obstacles, and other hazards for
riding.
etc.
3. Always check and obey all local laws and regulations. Your insurance policies may or
may not provide coverage for accidents involving the use of this motorized scooter.
To determine if coverage is provided, check with your insurance company or agent.
Do not assume your existing insurance policies provide coverage.
4. Unfold the scooter (See Unfolding Instructions above).
5. Raise the kickstand.
6. Complete a final roadworthiness safety check before operation.
a. Make sure folding mechanism, quick releases, wheel lug nuts, other nuts, bolts,
fasteners, etc., are secure.
b. Make sure tire is inflated.
c. Inspect the frame, fork and handlebars for cracks or broken connections.
7. IF RIDING YOUR ELECTRIC SCOOTER FOR THE FIRST TIME, FAMILIARIZE YOURSELF
WITH ITS MOVEMENTS AND BALANCING ON IT BY
. IN A SAFE AND CONTROLLED ENVIRONMENT, ON A FLAT
SURFACE, FACING FORWARD, WITH BOTH HANDS SECURELY ON THE HANDLEBAR
GRIPS, PLACE ONE FOOT TOWARDS THE FRONT OF THE STANDING BOARD AND THE
OTHER FOOT ON THE GROUND. USE THE GROUND LEG TO MANUALLY PUSH OR KICK
THE SCOOTER FORWARD. ONCE YOU GAIN SOME SPEED, GENTLY PLACE THE
GROUND FOOT ON THE STANDING BOARD BEHIND OR NEXT TO YOUR PIVOT FOOT.
REPEAT THE SAME MOVEMENTS ONCE THE SCOOTER SLOWS DOWN TO KEEP IT
PROPELLED FORWARD. RIDING THE SCOOTER WITHOUT THE POWER ENGAGED
DOES NOT DAMAGE IT. BRAKE WHEN NECESSARY. DO NOT OPERATE THE SCOOTER
WITH THE POWER TURNED ON UNTIL YOU FEEL CONFIDENT MANUALLY
PROPELLING THE SCOOTER.
Ri Powered
1. Raise the kickstand.
2. Press the power button on the right to turn on the scooter. The battery indicator screen
on the right handle grip should be lit when the scooter is turned on.
3. Set the speed mode to S.
4. Adjust the rear view mirror so that you can see traffic from behind.
5. With both hands on the handlebars and one foot on the standing board and one foot on
the ground, manually push the scooter forward and slowly press the accelerator.

17
.
6. As the motor begins to slowly propel the scooter forward, place the foot which pushed
off the ground onto the riding board behind your front foot. Press the thumb control
more to increase speed when feeling comfortable and safe.
Stop :
1. Squeeze the hand brake to begin the braking process. The harder and faster you
squeeze, the quicker the stopping process. The brake is located in the rear wheel. In a
safe, controlled environment, please familiarize yourself with the braking distance of
the scooter at various speeds before operating near intersections, pedestrians and other
obstacles.
1.
put your feet on the ground at any time in case of emergency. Never raise the seat
height with Safety Line of the upper seat post above the quick release on the lower seat
post.
2. Raise the kickstand.
3. Set the speed mode to S.
4. Adjust the rear view mirror so that you can see traffic from behind.
5. With both hands on the handlebars and one foot on the standing board and one foot on
the ground, slowly press the accelerator.
6. As the motor begins to slowly propel the scooter forward, place the foot on the ground
onto the riding board. Press the thumb control more to increase speed when feeling
comfortable and safe.
WARNING: Always ride at speeds you can comfortably and safely
control. Take the time to familiarize yourself with the brakes and the
distance it takes to come to a complete stop at various speeds. Keep both
hands on the handle grips while operating the scooter at all times. Never
take your eyes off the road. Failure to do so could result in serious injury or
death.
Each electric scooter is equipped with a lithium battery and a smart charger designed specifically
for each other.
Do not charge the battery with any other charging system. If the battery or
charger is damaged due to improper use, the limited manufacturer warranty shall be void. Do not
operate the charger near flammable materials such as carpet. Ensure a dry environment. Never
allow the charger or cable to come into contact with water as this may result in electric shock.
Never touch the charger or cable with wet hands. Disconnect the charger from the outlet if any
fault arises during charging. Always pull the plug, not the cable. Do not allow the charger or
cables to be damaged or crushed by sharp edges or heat. The charger supplied with the electric
scooter should be regularly examined for damage to the cord, plug, enclosure and other parts. In
the event of such damage, the scooter must not be charged until the charger has been repaired or
replaced. Unplug the charger and disconnect from the scooter when not in use.

18
1. Battery charging port is located at the bottom of the battery. Fully charge the battery
before first time operation or first time after a long period of non-usage (see
Instructions for Charging below). The battery is fully charged when the LED light on the
charger turns green. Always cover the charging port after each charge.
2. Always charge the battery in a clean, dry location, free of debris.
3. Charge the battery frequently, ideally with around 30%-50% remaining. The battery
can be recharged at any time. Do not think that you need to fully deplete the battery
before recharging it. In fact, frequent partial discharge/charge cycles will prolong the
battery life vs. full discharge/charge cycles.
4. Fully charge the battery before storing the scooter for extended periods.
5. When not in use, periodically recharge the battery once every three months.
6. Battery damage due to water immersion, collision, improper storage and other non-
normal factors is not covered by the limited manufacturer warranty.
ins
Before reattaching the battery, fold and tuck
the pocket to allow proper battery installation.
CHARGER:
1. When you plug the charger into the wall outlet and before you connect it to the scooter,
the LED light on the charge shows blue. The battery is charging the scooter when the
LED light on the charger is red. When the battery is 95% full, it will turn green. It will
continue to charge with a very small current for about 30 minutes after the LED turns
green. When battery is 100% full, the charger will stop charging.
2. The provided charger has a built in overcharge protection feature to prevent the battery
from being overcharged.
3. Charging time is approximately 5 hours for a fully discharged battery with standard 2A
charger. Optional 3A charger would finish charging around 3 hours.
4. Regularly inspect the charger for damage to the cord, plug, enclosure and other parts.
In the event of such damage, the charger must not be used until it has been repaired or
replaced.
5. Unplug the charger from the wall outlet when not in use.
6. Use only the charger supplied with this scooter or a recommended replacement
specified by .
7. Standard 2A charger supplied by
High Power Technology (KunShan) Inc. Operating temperature is 0 (32° F) ~ 40
(104° F).
WARNING: Failure to confirm compatibility, properly install,
operate and maintain any charger, component or accessory can result in
serious injury or death.

19
1. Turn the scooter off. The charge port (K) is located at the bottom of the battery. Open
the charge port rubber protective cover and securely plug the charger into the charge
port.
2. Plug the charger into the power outlet.
3. A solid red light on the charger indicates the battery is charging. A solid green light
indicates the battery is fully charged.
4.
charging socket. Secure the charge port rubber protective cover.
USAGE:
1. You will not damage the battery by riding the scooter until the battery is fully
discharged and the scooter motor shuts down. However, we do ask to promptly
recharge the battery after full discharge. Do not store your scooter with an empty
battery.
2. Avoid operating the scooter when the battery is hot.
DOLLY FEATURE
When Balto is folded and locked vertically in the dolly rack, user can dolly the scooter by grabbing
the handlebar and tilt the scooter towards the side with dolly wheels on the rack as shown below.
Make sure the dolly wheels are on the same side of the headlamp and battery.
Scooter seat can be inserted into the seat post holder on the rack.
(K)
Charger Indicator Light. Green= Near Full to Full. Blue =
Has power but not Connected to Scooter. Red=Still
Charging.
Seat Post Holder.
This manual suits for next models
1
Table of contents
Other Glion Scooter manuals