GLOBAL SPECIAL EFFECTS T-1500 Mini User manual

EVAPORATIVE SNOW MACHINE
T-1500 Mini
WWW.GLOBALSPECIALEFFECTS.COM

New and Improved Machine
* DMX WILL NOT WORK UNLESS
TERMINATOR IS PLU ED IN
* The Rotary settings are controlled by a flat head screw driver.
This is a DMX
Terminator

THE T-1500 Mini
Congratulations on your purchase of this Global Special Effects snow machine.
With your snow machine you will dazzle and entertain audiences in large or small
venues. Your T-1500 Mini snow machine is loaded with advanced features,
but at the same time it is very easy to use.
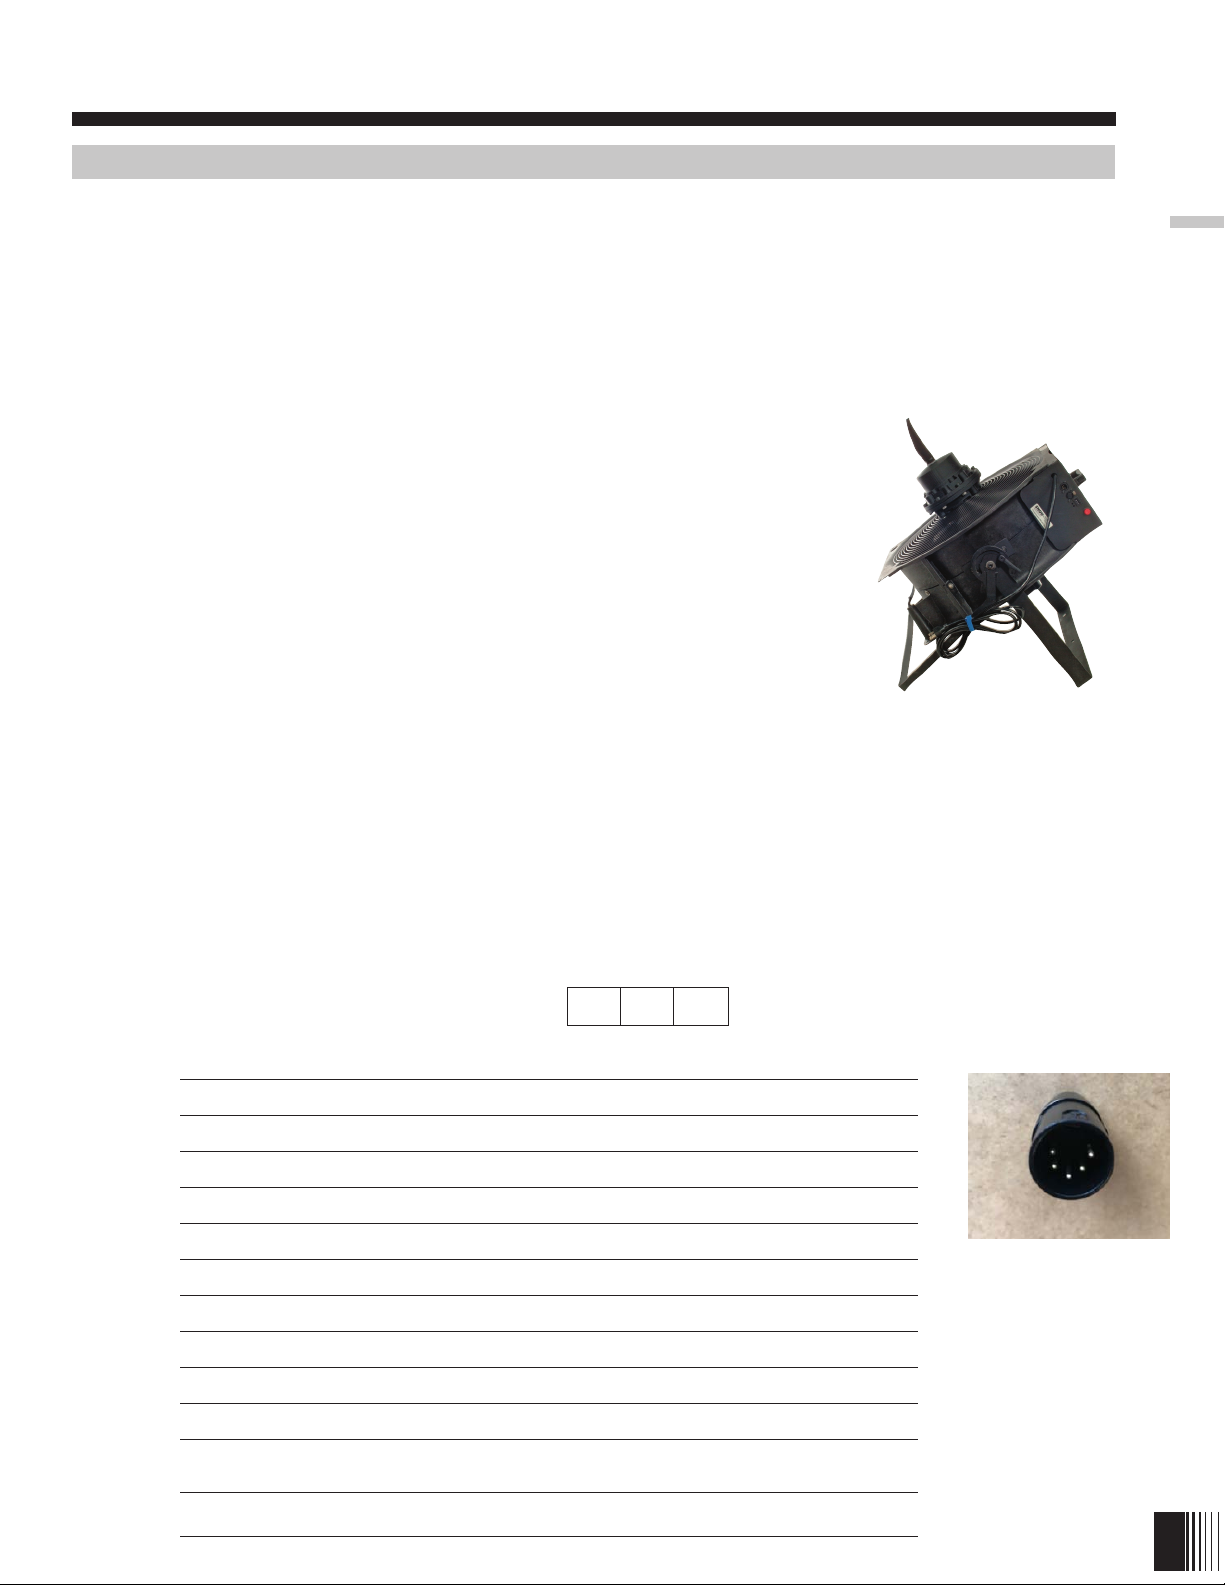
The T-1500 Mini is a modernized design in a family of special effects snow machines used for years
in Movie Productions, Theatres, Malls, and Presentations. This futuristic modeled “work-horse” sprays
evaporative snow from its nozzle section and creates a realistic snowfall effect without residue or
cold air. With its reliable and efficient design, the T-1500 Mini is a marvel for stage productions, fancy
presentations or unique weddings. The tethered remote and the DMX give the use control over snow
flake size and instant activation
CAUTION: YOU MUST READ THE FOLLOWING BEFORE
OPERATING THE T-1500 Mini
The T-1500 Mini is an Electric Product - not a Toy. To avoid the risk of re, burns, personal injury,
and electric shock, it should not be played with and should be placed out of the reach of small
children. Adult supervision is continuously necessary to avoid the risk of electric shock or personal
injury. Never remove the covers or open the enclosures.
The T-1500 Mini generates evaporative snow™ that normally disipates completely when dispensed
from the ground to 20-30 ft in the air. Mounting the T-1500 Mini at the specied elevation, relative
to the generated ake size, is key to creating a “residue free” oor below the snow machine (See
Chart 2). A wet oor or incorrectly mounted snow machine could allow a build-up of snow residue.
Since the residue is slippery, it is important to follow all the directions in this manual to avoid this
type of problem.
Never operate the T-1500 Mini without Global Special Effects evaporative snow™ in the solution bottle.
Do not run the T-1500 Mini when the Gallon Solution bottle is holding less than a pint of solution
If you do not follow these directions. the T-1500 Mini can be damaged and warranty voided.
Always mount the T-1500 Mini using the secured “C” Clamp (Not included) that is attached to the
steel yoke or secure it on a flat stable platform. Wrap a safety cable (Not included) around the yoke
brackets for secondary protection.
Never leave the T-1500 Mini unattended while operating. Do not operate it in the rain or near
standing water. Always use an outlet with an earth grounding receptacle and a Ground Fault Circuit
Interrupt (GFCI).
Never use this product for any activity other than for what it is intended.
Never add flammable liquids (oil, gas, alcohol, perfume) to the snow solution.
1
General Information
WELCOME
Important Information About your T-1500 Mini Snow Machine
IMPORTANT PRODUCT AND SAFETY INFORMATION
Failure to follow these instructions can cause serious bodily injury or property damage.

The best Evaporative Snow Machine in the world.
f 4-channel DMX control
f Remote control (rented/sold separately)
f Variable stand alone features
f Lifetime warranty -(As long as global special effects snow fluid is used)
f 24-Hour Technical Service
f Repeat Cycle Timer (5 min. and 15 min. cycles)
Voltage: q 110 60 Hz or 220v q 220v q 100v
Current: 20 Amps
Size: 22.5” Wide, 22.5” Long and 22.5” Tall (without the yoke and “C” Clamp)
Weight: 52 lbs
Materials: Predominately: Polyethylene Exterior with steel covers, bracket and yoke.
Color: Black
Snow Solution: 1 oz Solution Mixture per minute (approximate)
Usage Rate of 1 to 1.5 hrs per gallon of solution.
Solution Contains: 1 gallon or 4.3 liters
Power Cable
Length: 7 ft
Tether Length
To Remote: 30 ft
Sound: 74 db @ 9.8 feet
2
T-1500 Mini Snow Machine Features and Specifications
Features
Features and Specifications
Specifications

Global Special Effects Labs are constantly inventing and reformulating solutions in order to improve the
snow from the T-1500 Mini. Please contact Global Special Effects at 800-745-8599 for more information.
In order to prevent operation problems and observe the Warranty guidelines, always use a
Global Special Effects approved solution. The FG-100 Snow Solution comes premixed and ready
to use. You will have to pour the solution into the plastic bottle that comes with the T-1500 Mini.
FG-100 Evaporative Snow™ premixed. Recommended
Global Special Effects premixed solutions are designed with the highest grade of available water based
surfactants. The surfactant-based solution is mixed with de-ionized water to leave no residue when
using the snow machine properly. The use of de-ionized water is necessary to create a bright . uffy
snow flake. Global Special Effects Laboratories have researched and developed the driest available snow
solution on the market today. FG-100 premixed weight: 9.8 pounds.
Using Evaporative Snow™ concentrate solution FG-100C
Global Special Effects Labs have designed a concentrated version of FG-100 premixed in an attempt to save
shipping cost to our customers. The ratio mix for this snow solution is 8 oz. of solution per one gallon
of water. It is important to remember that the kind of water used will affect the quality of snow. The
recommended water to use is de-ionized water or distilled water. This form of water has no minerals,
hard properties or chlorine. De-ionized water is the base ingredient in our formulation, because it makes
the best foam and leaves no water stains. It was originally used for the movie industry, so if the snow landed
on a camera lens, it would not leave a water ring. Since this formulation has no chemical, it dries and
leaves no film. Be aware that if you use tap water, it may have hard agents that can cause poor
looking snow. In this case, order FG-100 premix. The use of tap water, city water or well water can
be used with the following warnings: Certain tap waters contain high mineral content and will produce
a minimal amount of snow. These minerals will not produce a bright white flake.
See chart below (Chart 1) for some examples of common water/solution ratios. Please read before
mixing this product with water. Make sure you adhere to the mixing proportions.
Warning if you mix water with FG-100 premixed (non-concentrate), you will not
be able to generate snow. FG-100C Concentrate 8 oz bottle weight: 0.5 lb.
Chart 1
WATER FG-100 CONCENTRATE
Tablespoons or Pints or Fluid Ounces
½ gallon 8 ¼ 4
1gallon 16 ½ 8
2 gallons 32 1 16
5 gallons 80 2 ½ 40
Lightly Shake or Stir the solution in the container
before operating the T-1500 Mini.
3
Solution Mixture
Solution Mixture:
Evaporative Snow™ Solution Mixture

The T-1500 Mini has some simple instructions that must be carefully followed in order to create
the desired evaporative snowfall, ensure the safety of the operators/participants and to protect the
equipment from damage.
PLEASE FOLLOW THESE INSTRUCTIONS CAREFULLY.
1) Prepare the area you intend to direct your snowfall. Review “Diagram 1” on page 12 which shows
approximate spread of the evaporative snow. Always prepare your snowfall area making sure it is
dry and free of obstructions. Note that if the snowfall surface area is linoleum or smooth, and if
the T-1500 Mini is mounted too low (See Chart 2), some akes can create a slippery oor. Always
locate the T-1500 Mini in a well-ventilated area. Never block or cover the intake or nozzle
discharge of the T-1500 Mini or the internal blower can be damaged.
2) Mount the T-1500 Mini on a secure, dry and level platform. Since the larger the ake size the
slower it will be to evaporate, Chart 2 recommends Rotary Switch or Remote settings to minimize
residue on the ground. For safety reasons, the T-1500 Mini should be unplugged from the electrical
outlet while placing it in your desired location. The Nozzle should be pointed in the direction you
want it to spray snow. Hang or route the 30 ft. tethered remote as required to the desired operating
location without pinching the wire. Do not operate the T-1500 Mini in the rain. The T-
1500 Mini is not waterproof. If it gets wet, unplug the snow machine and contact
“Global Special Effects™” technical support at 1-888-391-76
Chart 2
Approximate Rotary Switch or Dial Remote Settings
Relative to Mounting Height to Minimize Residue
Rotary Switch
Setting
or Remote
Setting
900s
Snowflake Size Mounting
Height
880-899 5 1/4 - 1/2 inch 30 ft
879-860 4 3/16 - 3/8 inch 25 ft
859-840 3 1/8 - 1/4 inch 20 ft
839-820 2 1/16 - 3/16 inch 15 ft
819-800 1 0 - 3/16 inch 10 ft*
* 10 ft is probably too low to prevent some residue on the ground.
3) If the snow solution is a concentrate, prepare the snow solution in the empty plastic gallon bottle
provided (located in the T-1500 Mini solution bottle well) per the “Solution Mixture” section of
this manual (See Chart 1). If the correct water/concentrate mix is not blended properly, the T-1500
Mini may not create the ideal evaporative snowakes. Place the clear tube in the container with the
“Solution Mixture” and push it down so that the open end reaches the bottom of the lled container.
The pump in the T-1500 Mini is self-priming.
4) In order to start the T-1500 Mini, plug the Snow Machine power cord into an outlet with a 3rd
lead grounded conductor (preferably a Ground Fault Circuit Interrupt -GFCI). Next, turn the power
4
General Operating Instructions
Operating Instructions:
Operating Instructions
1-800-745-8599.
RainCoversareavailable,butnotincluded

switch “ON” in the back of the T-1500 Mini. If you are using the DMX features, read the section
on DMX settings to get the proper response. If you are using the remote, set the DMX display on
the side of the T-1500 Mini unit to any number between 900-999. Press the “ON” switch on the
tethered remote to start the snowfall. Adjust the dial on the remote to set the desired snowake
size (See Chart 2). Rotate the dial clockwise to obtain larger akes and counterclockwise for smaller
akes. If the akes are sticking to the ground during an initial run, adjust the dial counterclockwise,
after drying off the ground surface (snowakes accumulate more easily on a wet surface). Press
“OFF” to turn off the snow on the tethered remote. Do not operate the
T-1500 Mini without the clear tube submerged in the lled solution
container.
5) If the solution has drained out of the clear tube during a rest period
for the T-1500 Mini, it may take a minute or two for the pump to self-
prime itself from the solution container liquid.
6) On the tethered remote, a blinking light signies that the Power is
“ON”. A constant light from the LED signies that the T-1500 Mini is
blowing evaporative snow. If the light on the remote is completely off,
the unit is not powered up and cannot be controlled from the remote.
7) To turn the power OFF, push down on the red “O” button on the back of the unit.
DMX Settings T-1500 Mini
The DMX settings are key to the operation of the T-1500 Mini. The three-digit number on the side of
the T-1500 Mini panel determines the operation mode for the T-1500 Mini. Warning: there are DMX
settings where the T-1500 Mini will appear not to operate, so always review the tables below during
setup and operation .
8 9 6
RANGE ACTIVITY
001 500 DMX Address- Outside Interface
501 599 Standby- No Activity
600 699 Short Cycles of ON/OFF Activity
700 799 Long Cycles of ON/OFF Activity
800 849 Zero to Minimal Snow-Blower Operates
850 859 Snow Flurry- Lowest Outputs
860 879 Light Snowfall- Smallest Flakes
880 889 Sub-Blizzard- Larger Snow Flakes
890 895 Ideal Range of Operation at 30 ft height
896 899 Maximum Snow Output- Largest Flakes
900 999 Remote Control Activated (Note: 5 Pin DMX
must be disconneted.)
See Chart 2 for Remote Controlled Flake Size 5
Operating Instructions
Operating Instructions:
General Operating Instructions
***THE DMX TERMINATOR MUST BE
PLUGGED IN FOR DMX FUNCTIONALITY
TO WORK PROPERLY
DMXTERMINATOR

The snow machine controller consists of one fan relay, a pump controller and control interface capable
of receiving a DMX signal or a proprietary remote control signal. The DMX address is set via a three digit
rotary switch located on the side of the device. The DMX address is set in a decimal fashion.
The DMX interface is compliant with DMX-512
standards and electrically isolated to 1000VAC. The
starting address can be set from 1 to 509. The DMX
protocol requires 4 dimmers dened as Mode, Cycle
Time, Duration and Flake Size. The Mode dimmer
denes the overall operation of the snow machine
- Off, On, and Momentary. The Mode dimmer will
correspond to the selected start address, with the Cycle
Time, Duration, and Flake Size channels in the following
order.
When the mode channel is set to one of the Momentary
positions (either 5 or 15 min cycle), the Cycle Time and
Duration channels become active. The cycle time channel
establishes the time it takes for the entire event. Duration
channel is the length of time of snow output. The minimum
time of one cycle is 18 seconds with a ten second ON
time, a four second SNEEZE, and a four second WAIT. A
sneeze is when the blower remains on without the pump
and dries the sock, preventing postnasal drip.
The following tables show all the settings that can be attained with the use of the three digit rotary
switch located on the side of the device. An ‘X’ indicates that the number in that position does not
matter for the required result to be attained. Switch A is in the hundreds position, Switch B is in the
tens position, and Switch C is in the ones position.
Table 1 shows that there are six modes in which
the device may operate: Idle, DMX, 5 minute
cycle, 15 minute cycle, always on, and remote.
6
Using the Controller
Snow Machine Controller
Using the Controller
*SELECTED START ADDRESS
Cycle
Time
Flake
Size
100 100 100 100
: : : :
0 0 0 0
100
: Always On
75
74
: 15 Min Cycle
51
50
: 5 Min Cycle
25
24
: Off
0
DMX Mode Channel Level
A B C Mode
0 0 0 Idle
001
: : : DMX
509
5 1 0
: : : Idle
599
6 X X 5 Min Cycle
7X X 15 Min
Cycle
8X X Always On
9X X Remote
Table 1- Mode Settings

Table 2 displays the settings
for the 5 minute cycle.
Within this mode, the device
cycles are dependent on
the B switch setting. The
cycle time is the total time
of the event, and the “on
time” is the length of time of
snow output, similar to the
duration in the “DMX mode”.
Otherwise, the machine is in
a WAIT state
Table 3 displays the settings
for the 15 minute cycle.
Within this mode, the device
cycles are dependent on
the B switch setting. The
cycle time is the total time
of the event, and the “on
time” is the length of time of
snow output, similar to the
duration in the “DMX mode”.
Otherwise, the machine is in
a WAIT state
Table 4 shows the use of
switch C during 5 minute
or 15 minute cycle modes
(Switch A is 6 or 7). Switch C
controls the ake size.
7
Using the Controller
Snow Machine Controller
Using the Controller
A B C ON Time WAIT Time
6 0 X 15 Seconds 4 Minutes 45 Seconds
6 1 X 30 Seconds 4 Minutes 30 Seconds
6 2 X 1 Minute 4 Minutes
6 3 X 1 Minute 30 Seconds 3 Minutes 30 Seconds
6 4 X 2 Minutes 3 Minutes
6 5 X 2 Minute 30 Seconds 2 Minutes 30 Seconds
6 6 X 3 Minutes 2 Minutes
6 7 X 3 Minute 30 Seconds 1 Minute 30 Seconds
6 8 X 4 Minutes 1 Minute
6 9 X 4 Minute 30 Seconds 30 Seconds
Table 2 – 5 Minute Cycle
A B C ON Time WAIT Time
7 0 X 45 Seconds 14 Minutes 15 Seconds
7 1 X 1 Minute 30 Seconds 13 Minutes 30 Seconds
7 2 X 3 Minutes 12 Minutes
7 3 X 4 Minutes 30 Seconds 10 Minutes 30 Seconds
7 4 X 6 Minutes 9 Minutes
7 5 X 7 Minute 30 Seconds 7 Minutes 30 Seconds
7 6 X 9 Minutes 6 Minutes
7 7 X 10 Minute 30 Seconds 4 Minute 30 Seconds
7 8 X 12 Minutes 3 Minutes
7 9 X 13 Minute 30 Seconds 1 Minute 30 Seconds
Table 3 – 15 Minute Cycle
A B C Flake Size
6/7 X 0 1
6/7 X 1 2
6/7 X 2 3
6/7 X 3 4
6/7 X 4 5
6/7 X 5 6
6/7 X 6 7
6/7 X 7 8
6/7 X 8 9
6/7 X 9 10
Table 4 – Flake Size Settings

Table 5 shows the use of switches B and C when switch A is set to 8 (Always On state). Switches
B and C work similarly to Switch C when in the 5 minute and 15 minute cycle modes. It controls the
flake size. The user then has 100 choices of flake size.
Table 5 -Always on Flake size setting.
A B C Flake Size
8 0 0 1%
8 : : :
8 9 9 100%
Note: The user should avoid configuring the ‘A’ selector to the 9 position while a DMX connection
is being used.
There is a provision on the controller board for an additional fan control relay rated at 10 amps. This
relay has a completely separate power interface.
The remote control provides a tethered remote control connection to the snow machine. The 3
rotary switches must be at 900 or greater for remote function to be enabled. The remote has control
over the on/o and flake size functions. The flake size knob provides variable settings from small (0)
to large (5) flakes. There is also a status LED to inform the user that the unit is on and powered.
When the unit is powered and the power switch on the remote is set to the o position, the red LED
on the remote will slowly pulse to inform the user that the unit is in standby. When the user changes
the switch to on, the LED will go to a solid red.
While in “remote mode”,
Rotary Switch controls the ake
size. The “remotemode” also
allows for the use of a quick
on/o switch located onthe
remote control.
8
Using the Controller and the Remote
Snow Machine Controller
Using theControllerand the Remote
Remote Control
The DMX interface is also provided as a pass
through connection. The remote interface
utilizes standard pins 4 and 5 of the 5 pin
XLR connector to supply power to the remote
control. Pins 4 and 5 are pass through when
used in a DMX configuration. Pins 4 and 5
have power applied to them only when the
DMX selector is set to the 900s and this power
is used to power the remote.
NOT INCLUDED, SOLD SEPARATELY

9
Maintenance
The T-1500 Mini is a low maintenance unit.
Cleaning and Storing the T-1500 Mini
In order to clean the T-1500 Mini, ll another plastic container half full with water and run the unit
for 3-5 minutes with the nozzle tilted downward into another container (if possible). You may clean
the plastic exterior of the T-1500 Mini with detergent and water. Do not stack other boxes or items
on top of the T-1500 Mini. Store the T-1500 Mini in a cool, dry environment between 40-80 degrees
F. If electrical wires are frayed, contact the factory at 800-745-8599 for service. Never operate the
T-1500 Mini with a frayed electrical wire.
Caution: Never remove the cover or housing screws on the Snow Machine. This action will nullify
the warranty, Unless you have been trained by a certified techniation. Contact customer service
at 800-745-8599.
General Repair: The T-1500 Mini Snow Machine has a lifetime warranty and should never
require you to disassemble the unit. Please contact Global Special Effects service at 800-745-8599
if you have questions on its operation or warranty.
Maintenance Information and Precautions
General Maintenance
Always use Global Special Effects approved snow solutions or the
Lifetime Warranty will be nullified

10
Symptoms and Cause and/or Corrective Actions
Troubleshooting
Types of Trouble and Their Solutions
2
3
1If the T-1500 Mini does not generate snow, review the following checklist.
a) When turned “ON”, is the Fan Operating? (Air is shooting out the nozzle of the T-1500 Mini).
Yes: Move on to (b)
No: Check the electric plug interface at the outlet connection, and make sure the remote connector
is connected to the main unit. Check to see if the power switch is “ON” on the main unit. A red
LED light should be illuminated on the back of the T-1500 Mini when power is “ON”. Make sure
that the DMX settings meet your desired criteria (see the DMX section of this manual-the unit
should always be operating with settings between 880-899). Also, the LED light on the remote
should be illuminated (blinking) if the main power is “ON” and the DMX setting is in the 900s.
A constant light will illuminate on the remote if snow is being generated. If the lights are not
illuminated, call customer service at 800-745-8599 or the 24 hr tech line at 888-391-SNOW.
b) Is the Pump Operating?
Yes: If you feel the clear plastic tube vibrating, then the pump is operating.
Go to (c)
No: Recheck the DMX settings per the DMX settings in the manual. The unit should always
operate and blow snow with settings between 880 and 899.
Contact customer service at 800-745-8599 or 888-391 SNOW.
c) Check to see if the tube is fully submerged in solution and is not pinched. A hole in the hose
would require replacement. It sometimes takes up to 2 minutes for the self-priming pump to
saturate the nozzle sock with liquid.
d) Set the Rotary Switch between 880 and 899 to prove that the unit operates.
e) Create a new “Solution Mixture”, per the instructions, if the nozzle sock is saturated with liquid
but no snow is being made.
Is the Snow generated very wet or light in volume? Always allow two minutes or so for the T-1500 Mini
to come to full operation after an extended storage or for the rst time operating.
f) Remake another batch of your recipe solution, and check your water to solution ratio carefully.
g) Make sure the clear tube is completely submerged in the solution.
h) Contact customer service at 800-745-8599, or call the 24 hr tech line at 888-391-SNOW.
Technical Service or Purchasing Global Special Effects Liquid Solutions:
Use customer service at 800-745-8599
24 Hour Technical Service - Off Hours 888-391-SNOW (7669)
.
1-800-745-8599..
1-800-745-8599
, 1-256-229-5551

11
What is Evaporative Snow™
Incorporating Evaporative Snow™In Your Production Design
Global Special Effects is a pioneer of the “evaporative snow” proccess. In order to help you
incorporate “evaporative snow” in your production design, we are providing you the following
explanations as to exactly what it is and how a snow machine works.
The “snow ake” starts as a clear uid in a reservoir or bottle usually found at the back of the
machine. A small plastic feed tube takes the uid from the reservoir to a small nylon sock at the
front of the machine by means of a pump. The sock is mounted to the front end of a high output
blower. The sock material is a very ne mesh weave and acts like hundreds of very tiny bubble
wands, producing clusters of bubbles appearing as “akes”. The “ake” size varies according to the
speed of the pump, and the amount of uid reaching the sock. More uid results in more and larger
clusters of bubbles or “akes”.
The “ake” size is the key to making any evaporative snow truly evaporative and residue
free. Ideally you want to set the ake size so that the snow evaporates just as the snow hits the
ground. Imagine for a moment blowing a traditional soap and water bubble with a bubble wand.
The air pressure in the bubble is greater than the surrounding air pressure, and keeps the bubble
inated, much like a latex balloon. As air currents keep it aloft, it will remain intact until enough
water evaporates from it’s surface, the thinned lm can no longer maintain surface cohesion and
the bubble’s internal air pressure causes it to burst. Evaporative snow uid contains an advanced
evaporative solution to make the “akes” disintegrate more rapidly. The combination of air presure
and solution mixture produces a very esthetically pleasing, moderate snow fall. While you can
certainly create a blizzard effect with these machines, additional safety precautions must be
considered, as the snow will build up on the oor or stage, resulting in a slippery surface.
Air ow and evaporative snow in your production design. First, all snow machines produce a
“cone” of snow which is smallest near the machine and disperses as you get farther away creating a
“curtain effect” (see the Overhead View diagram next page). You can increase the overall effected
area through the use of judiciously placed fans, both near the machine and on the ground. Fans
near the machine (some larger machines have these incorporated into their design) will help disperse
the snow into a larger area. Fans on the ground will also help with dispersion, as well as provide
beautiful updrafts and swirls. Often these machines are used in ballrooms for holiday parties and
occasionally in arenas. The key to coverage in a larger venue (or when you want to make it snow on
the audience at a theatre) is not determined as much by the number of machines as it is by the air
handler’s circulation in the room itself. Air handlers in arenas and many modern ballroom facilities
are designed to re-circulate thousands of cubic feet of air per minute. Experiment with air handler’s
currents to circulate snow around the venue. Staggering the placement and alternating the direction
of the snow machines so that the edges of the air streams from the machines interact in opposing
directions is another technique for creating a swirling effect.
Back lighting and to some extent side lighting is vital to the audience’s visual experience.
If lit from the front only, the effect’s visibility will be poor at best. Lighting can be especially
challenging in a ballroom or other “total environment” setting or venue, when your audience will be
viewing the snow from multiple angles and positions. Ideally you want your lighting to come from
above, yet below the snow machines. Obscuring the snow machines in the dark above the light
sources allows the snow to capture light, adding a sense of wonder to your event.
Noise reduction is another factor to be considered in your production design. To a large
extent it can be covered with music. Global Special Effects engineers have developed the quietest snow
machines using better sound insulation, and quieter blowers such as the T-1600 Snow Machines series.

12
What is Evaporative Snow™
What is Evaporative Snow™ & Diagram 1
OVERHEAD VIEW
The T-1500 Mini
At 0-5 feet
5 feet wide
At 20 feet
10 feet wide
At 25 feet
15 feet wide
At 30 feet
and beyond
Stays at
approximately
20 feet wide
T-1500 Mini Diagram 1
Below Diagram is of the distance of throw of the
T-1500 Mini Snow Machine.
(The T-1500 Mini distance of throw Chart is measured in
a room, with no obstruction of airflow or conflicting air
streams).
The above diagram shows
overhead view of snowfall
coverage. The T-1500 Mini
snow machine at ground
level with no obstruction
of airflow or conflicting air
streams.
Distance of Throw and Coverage of Snowfall for The T-1500 Mini

11054 County Road 71
Lexington, AL 35648
AUSTRALIA • NASHVILLE
LOS ANGELES
Sales: 256-229-5551
Fax: 256-229-5552
24 Hour Tech Support
1-888-391-7669
Limited Lifetime Warranty
1-800-745-8599

NEW SNOW BOARD
SETTINGS FOR STAND ALONE 891 TO 899
801 TO 899 THE SNOWSTORM WILL USE 1 GALLON OF FLUID IN 16 MINS
881 TO 889 - 24 MIN PER GALLON.
871 TO 879 - 27 MIN PER GALLON.
861 TO 869 - 30 MIN PER GALLON.
851 TO 859 - 36 MIN PER GALLON.
841 TO 849 - 48 MIN PER GALLON.
831 TO 839 - 57 MIN PER GALLON.
821 TO 829 - 1.5 HOURS GALLON.
811 TO 819 - 1 HOUR AND 48 MINS PER GALLON.
801 TO 809 - 3 HOURS 17 MINS PER GALLON.

Document SM-DMX2.100
Created 10/04/06 - GMS
1
Snow Machine Switch Settings
001-500 Address for machine while under DMX Control (all other functions disabled)
(See below for DMX Channel Control Information)
600’s Mode Repeat Cycle Timer Stand-Alone Mode(five minute Timer)
First digit set to “6”
The second digit controls the percentage of time on in five minutes (10%-90%)
The third digit controls the flake size (0-9)
700’s Mode Repeat Cycle Timer Stand-Alone Mode(fifteen-minute timer)
First digit set to “7”
The Second Digit controls the percentage of time on in fifteen minutes (10%-90%)
The Third Digit controls the flake size (0-9)
800’s Mode Stand-Alone Operation Continuous (ON)
First digit set to “8”
800-899 controls the flake size and amount of snow
900’s Mode Hard Wired for Remote Controller
First Digit set to “9”
All other switches disabled
Control Format for all DMX Snow Machines
Addressing
DMX starting address is manually programmed via thumb dial switches. Valid starting addresses are 001-512. The
Snow Machines utilize four channels.
The first channel has four settings:
0-63 Snow Machine is "off"
64-127 Allows for a 0 to 5 minute cycle time based on the settings of the 2nd channel
(This setting turns on the short internal timer circuit)
128-191 Allows for a 0 to 15 minute cycle time based on the settings of the 2nd channel
(This setting turn on the long internal timer circuit)
192-255 Snow Machine is set to "on"
The second channel: **
When Channel 1 is set from 64-127 then the second channel sets the overall duration of cycle time
anywhere from zero (0) to five minutes (255).
When Channel 1 is set from 128-191 then the second channel sets the overall duration of cycle time
anywhere from zero minutes (0) to 15 minutes (255).
The third channel: **
Sets the % of "on time" during the duration set by the second channel. This value is a range from 0(0) to
100%(255)
The fourth channel:
Sets the amount of snow output from minimum output (1) to 100%(255). This channel is effective anytime
the machine is “on”
**During all timer-controlled modes, internal limits enforce a minimum on time of at least 10seconds and a
minimum off time of at least four seconds.
www.globalspecialeffects.com for additional technical information
24 Hour Tech Support
888-391-7669
Sales Information
800-745-8599
Table of contents
Other GLOBAL SPECIAL EFFECTS Dj Equipment manuals

GLOBAL SPECIAL EFFECTS
GLOBAL SPECIAL EFFECTS MAGIC LAMP PRO User manual

GLOBAL SPECIAL EFFECTS
GLOBAL SPECIAL EFFECTS CANNON User manual

GLOBAL SPECIAL EFFECTS
GLOBAL SPECIAL EFFECTS Magic Lamp LITE Evaporative Snow User manual

GLOBAL SPECIAL EFFECTS
GLOBAL SPECIAL EFFECTS T-1400 User manual

GLOBAL SPECIAL EFFECTS
GLOBAL SPECIAL EFFECTS T1100 User manual
Popular Dj Equipment manuals by other brands

Konig & Meyer
Konig & Meyer 12162 INFORMATION FOR USE

Rave
Rave SL-3454 user manual

Goboservice
Goboservice DIVUM 50K instruction manual

American Audio
American Audio UCD-200 - REV 8-10 operating instructions

thomann
thomann Stairville CLB5 6P RGB WW Compact LED Bar user manual

Elation
Elation SATURA PROFILE user manual