8 9
and GCS305 are available separately as ac-
cessories.
Due to the wireless module in the gluco-com-
fort blood glucose meter BGM105, the use
of this device in certain secure areas, such as
intensive care stations or in airplanes, is not
allowed.
The original packaging of the gluco-comfort
blood glucose system with the wireless mod-
ule contains the following main components:
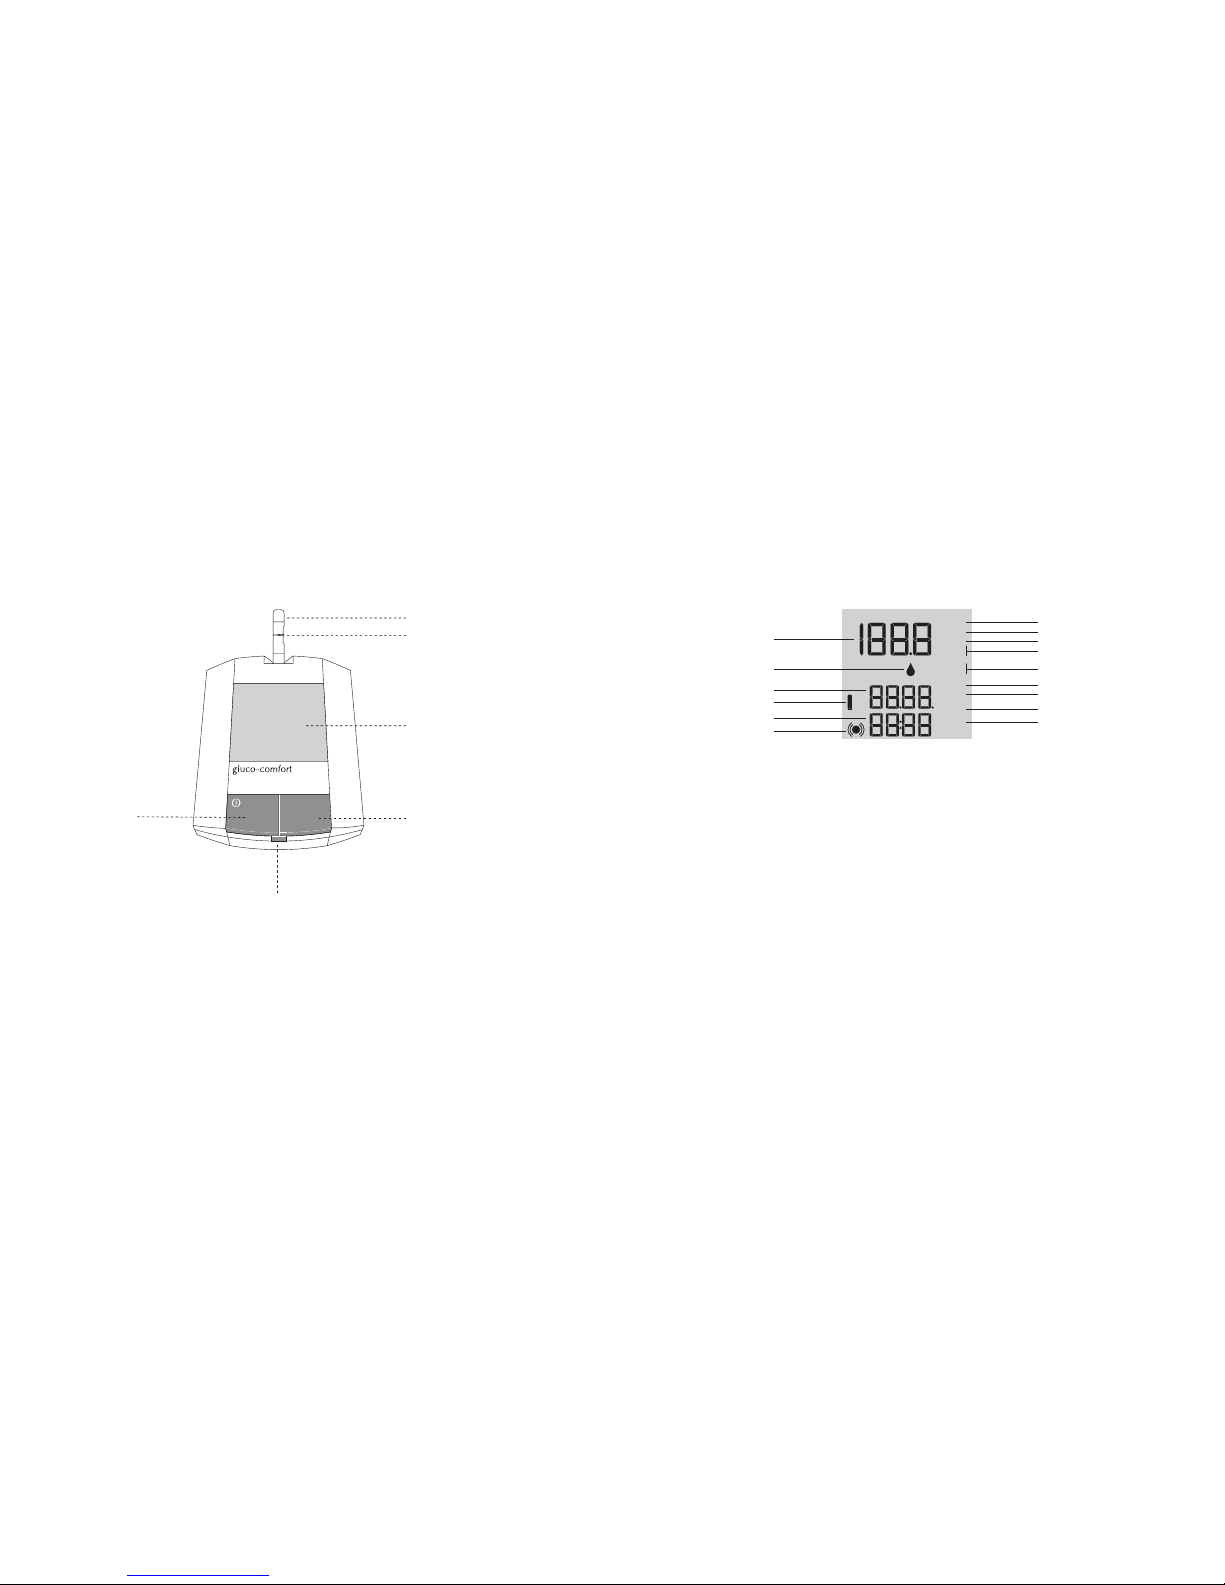
1. gluco-comfort meter BGM105
2. gluco-comfort test strips BGS105
3. gluco-comfort control solution GCS105
4. gluco-comfort lancing device LDV105
5. gluco-comfort lancets LCE105
The original packaging of the gluco-comfort
blood glucose system without the wireless
module contains the following main compo-
nents:
1. gluco-comfort meter BGM205
2. gluco-comfort test strips BGS105
3. gluco-comfort control solution GCS105
4. gluco-comfort lancing device LDV205
5. gluco-comfort lancets LCE105
In addition, further components are included:
– Battery
– Meter operating manual
– Package insert for test strips
– Package insert for control solution
– User instructions for the lancing device
– Meter short instructions
– Bag
Additional important information concern-
ing the test strips:
Please observe the separate user instructions
for the test strips.
– The test strips could be damaged by effects
of temperature and light. For this reason,
they should be used immediately after
being removed from the test strip con-
tainer.
– The test strips may not be used past the
expiration date. The test strips can be used
four months after the container has been
opened. When you open the container for
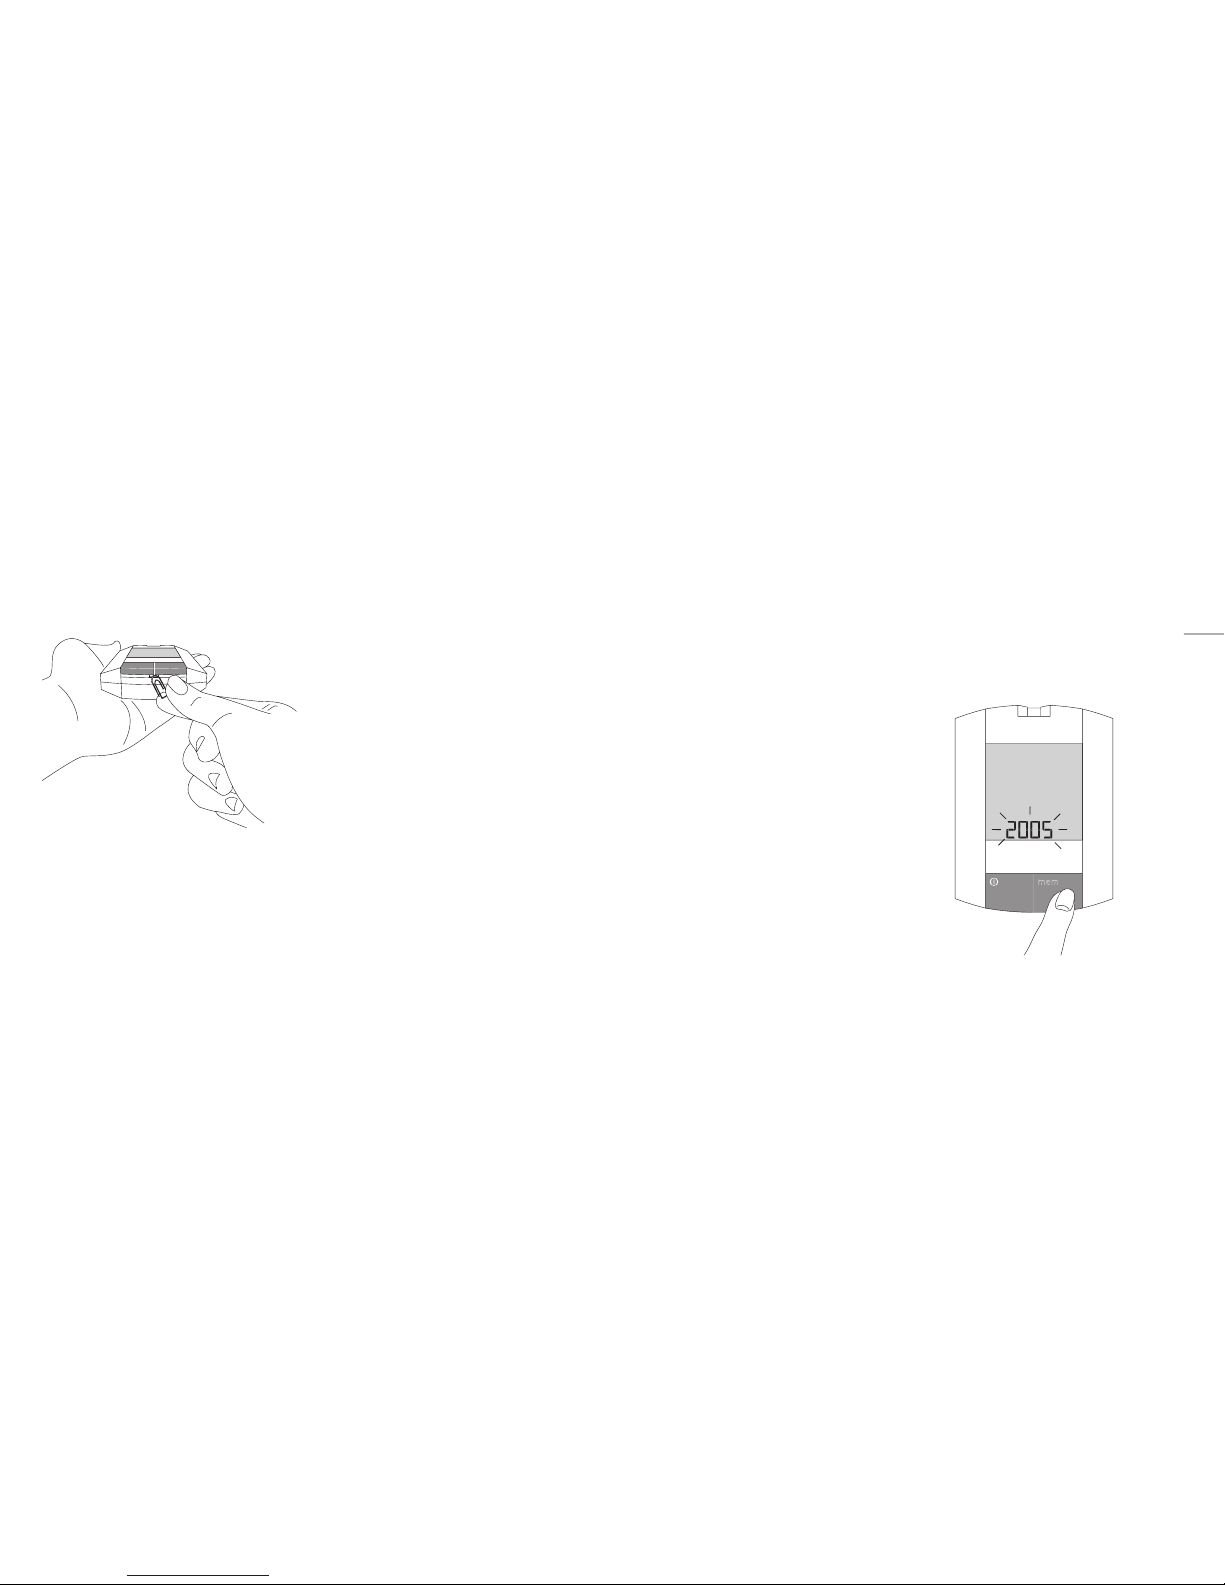
the first time, write down the date on the
container.
– Close the container carefully after remov-
ing the test strip. Always leave the contain-
er closed and keep it in a cool, dry place.
You can check your momentary blood
glucose level with high precision with the
Biocomfort blood glucose measuring system.
Only your doctor can determine whether
your blood glucose levels are an indication
of a diabetic illness requiring treatment,
however.
The Biocomfort blood glucose measuring
system includes many components, such as
test strips, the test strip container, batteries,
etc., which can be misplaced or can be
dangerous for children. For this reason, keep
your blood glucose measuring system out of
the reach of children. Also, make sure the
meter can’t be misused while in use.
If there are signs of damage or malfunctions,
the Biocomfort meter cannot be used.
Please use only the gluco-comfort test strips
BGS105 and gluco-comfort control solutions
GCS105, GCS205 or GCS305.
The gluco-comfort control solutions GCS 205
Introduction
1