IMPORTANT SAFETY INFORMATION
DON’T DRINK AND RIDE
Alcohol and riding don't mix. Even one drink can reduce your ability to respond to changing conditions, and your reaction time gets worse with every additional drink.
So don't drink and ride, and don't let your friends drink and ride either.
KEEP YOUR DIRT BIKE IN A SAFE CONDITION
It's important to keep your motorcycle properly maintained and in safe riding condition.
Having a breakdown can be dicult, especially if you are stranded o-road far from your base. To help avoid problems, inspect your motorcycle before every ride and
perform all recommended maintenance.
That's why we urge you to read this message before you let any young person ride this motorcycle. O-road riding can be fun. But, as with riding a bicycle, bad judgment
can result in injury, and we don't want that to happen! As a parent, you can help prevent accidents by making good decisions about if, when, and how your youngster
rides this motorcycle.
RIDING READINESS
The rst decision you'll need to make is whether your youngster is ready to ride. Riding readiness varies widely from one person to another, and age and size are not
the only factors. For example, riders must be big enough to hold the motorcycle up, get on, and comfortably sit on the seat with both feet touching the ground.
They should also be able to easily reach and work the brakes, throttle, and all other controls. ATHLETIC ABILITY is necessary for riding a motorcycle. Generally speaking,
your youngster should be good at riding a bicycle before getting on a motorcycle. Can your youngster judge speeds and distances while riding a bicycle and react with
proper hand and foot actions? Anyone who does not have good coordination, balance, and agility is not ready to ride this motorcycle.
To help your youngster build condence as they're learning to ride, this bike was delivered with a speed restrictor that limits top speed. We recommend that all beginning
riders start o with the speed restrictor may be adjusted to gradually increase maximum speed as the beginner becomes more familiar with riding their bike/motorcycle.
INSTRUCTION AND SUPERVISION
If you decide that your youngster is ready to safely operate this motorcycle, make sure both of you carefully read and understand the owner's manual before riding.
Also be sure that your youngster has a helmet and other appropriate riding equipment and always wears it when operating the vehicle or sitting it.
SUPERVISION is another important obligation of parents. Even after youngsters have become skilled o-road riders, they should always ride with adult supervision.
It helps to regularly remind young riders of basic safety rules and precautions. And remember, it's your responsibility to see that the motorcycle is properly maintained
and kept in safe operating condition
SAFE AND RESPONSIBLE RIDING must be an on-going commitment—by you and your youngster. When you both put safety rst, you can enjoy more peace of mind, and
your youngster can enjoy more hours of safe o¬ road riding.
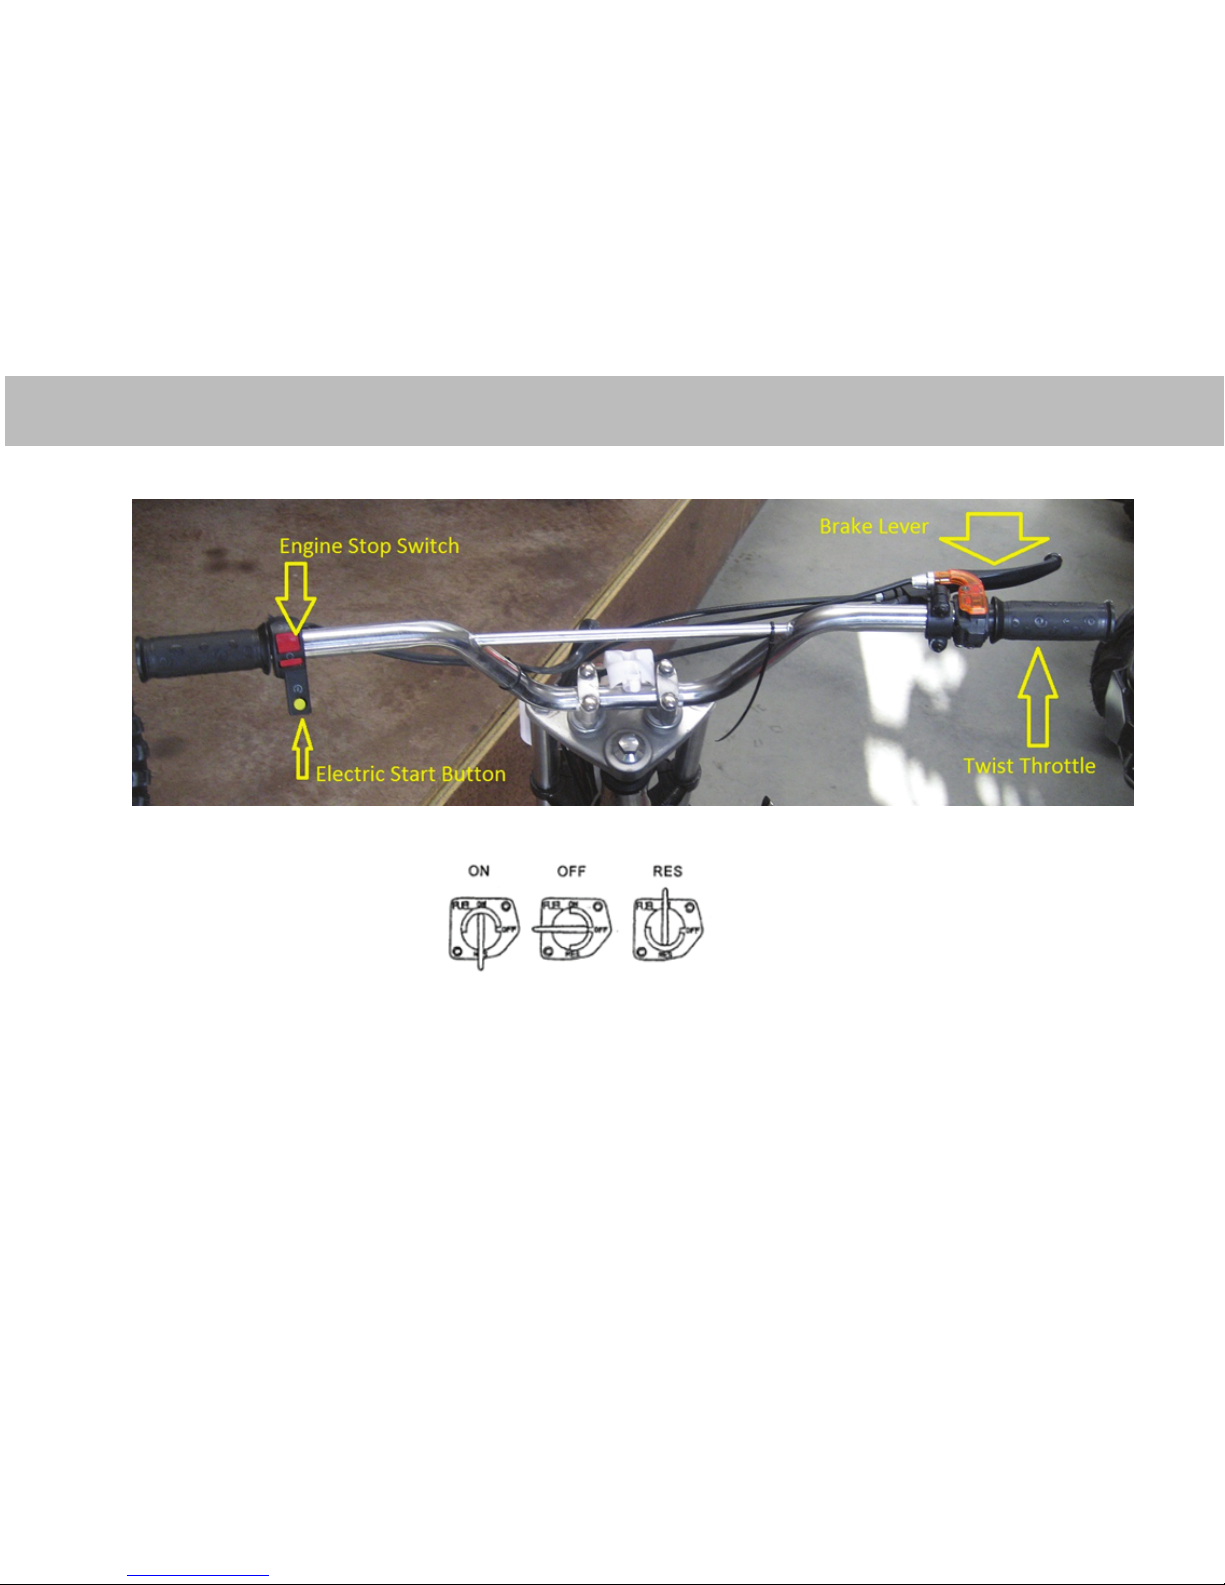
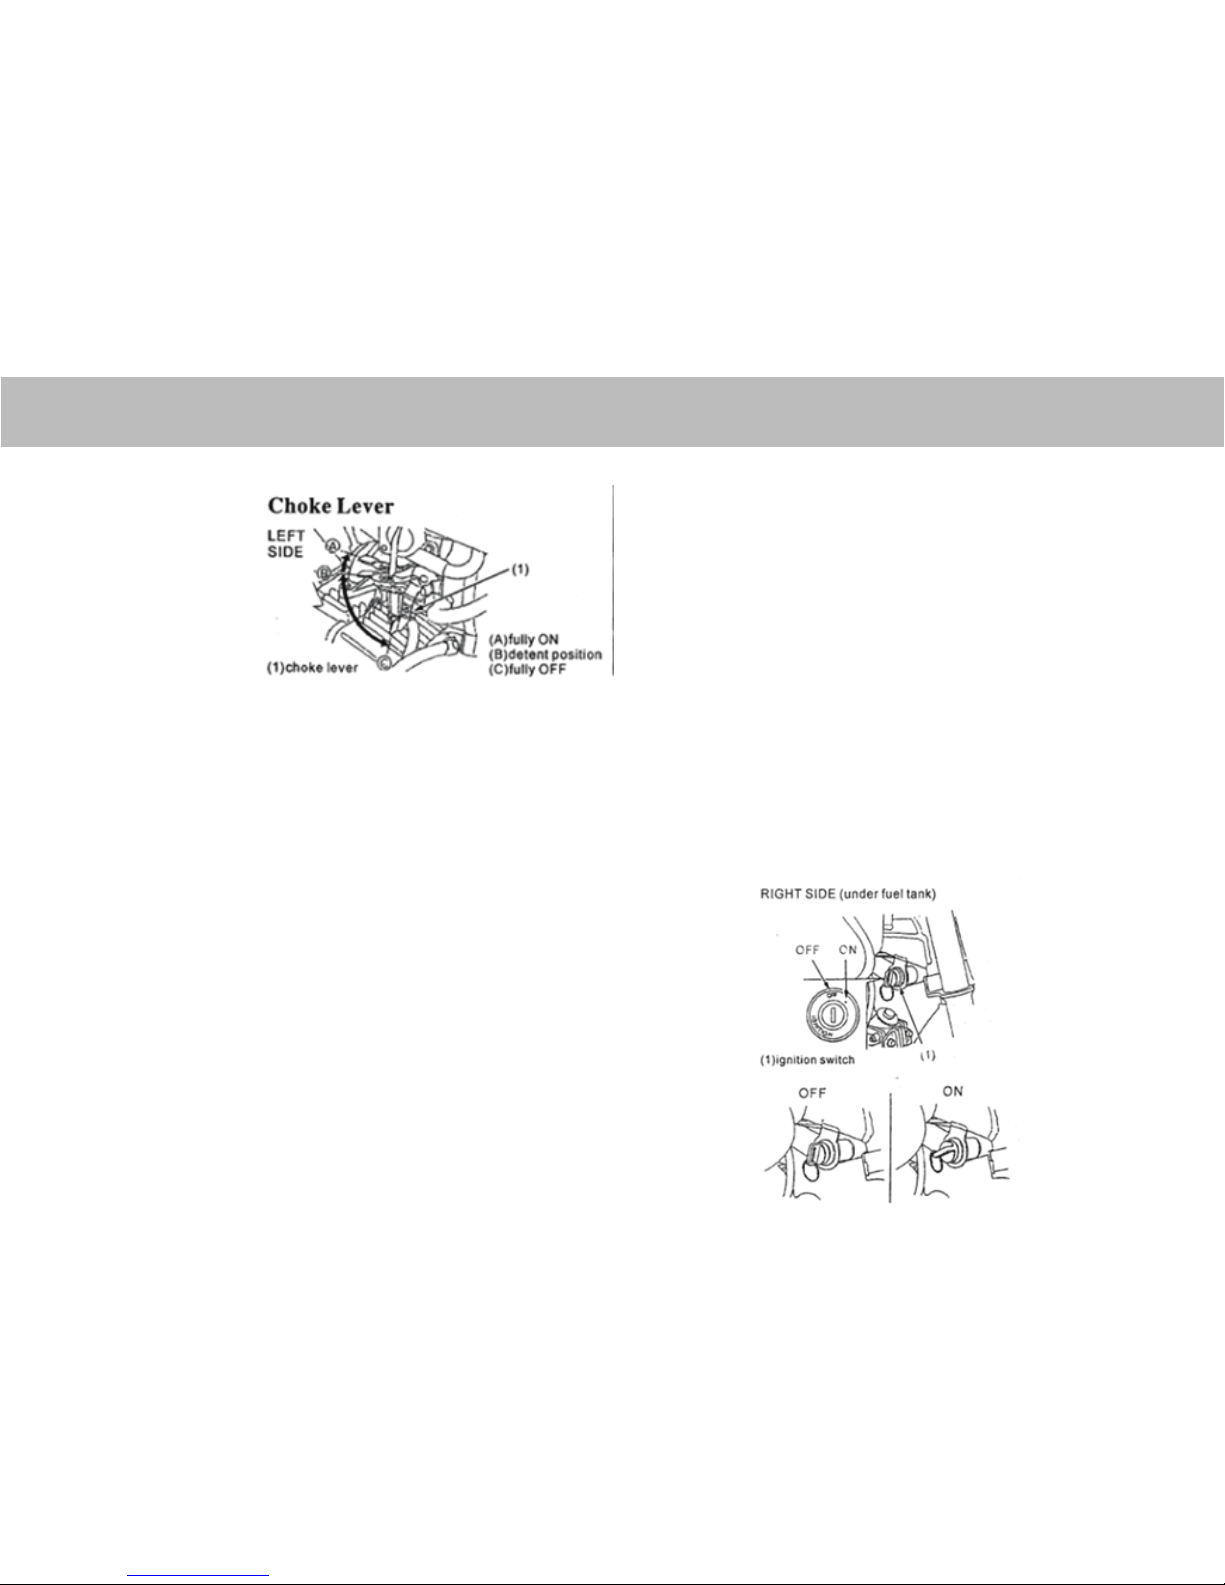
ENGINE STOP SWITCH
The engine stop switch is used to turn the engine o during normal riding situations. To operate, turn the switch to either OFF position.
The switch must be in the RUN position to start the engine
FRONT BRAKE LEVER
The front brake lever is used to slow or stop your motorcycle. To operate, pull the lever.
GEAR SHIFT LEVER
The shift lever is used to select, the next higher or lower gear in the transmission. To operate, raise the shift lever (after closing the throttle) to engage
the next higher gear or depress the shift lever to engage the next lower gear. For more information see braking techniques.
REAR BRAKE LEVER
The rear brake pedal is used to slow or stop your motorcycle and is located in front of the left foot peg. To operate, depress the pedal. For more information
see braking techniques.
THROTTLE
The throttle controls engine rpm (speed). To increase engine rpm, rotate the grip toward you. To reduce engine rpm, rotate the grip away from you.
The throttle will automatically return to the closed position (engine idle) when you remove your hand.
KICKSTARTER LEVER
The kick starter is used to start the engine. To operate, swing the kick starter out from its stored position and depress it through its entire stroke.
SIDE STAND
The side stand is used to support your motorcycle while parked. To operate, use your foot to lower the stand. Before riding, raise the stand.


 Supplementary service manual")


