CONNECTION
TO
THE
GAS
SUPPL
Y
The installation of the appliance, connection to the flue, connection to the gas supply, servicing or any adjusment must
be
carried out by a qualified gas fitter.
The installation of the appliance must
be
in
accordance with the relevant requirements of the current Gas Safety (Installation
and Use) Regulations, Building Regulations.
lt should
be
in
accordance also with any relevant requirements of the local Gas Region and Local Authority.
-ali solder joints on the gas supply pipe must comply with regulations (fusion temperature over 450°
C)
-
Ali
connections must
be
made using rigid materials of 0 12
mm
(1'
2 inch) at least.
-A
gas tap must
be
put
in
the pipe near the appliance.
CONNECTION
TO
THE
ELECTRICITY
SUPPL
Y
A high temperature cable
is
supplied with the insert. lt
is
to be connected with a plug
in
compliance with applicable
regulations, or with
an
omnipolar eut off system guaranteeing a minimum gap of 3 mm (0.12").
l'
1
:/
1 !
Fig. 4
PREPARING
THE
INSERT
BEFORE
LIGHTING
-remove ali 4 screws holding the glass window and its frame to the insert.
-carefully remove the window 1frame ensemble.
-check that the baffle
is
in
the right position.
-check that the burner's feet are correctly positionned
in
their corresponding hales.
-put the 3 ceramic logs onto their cast iron support.
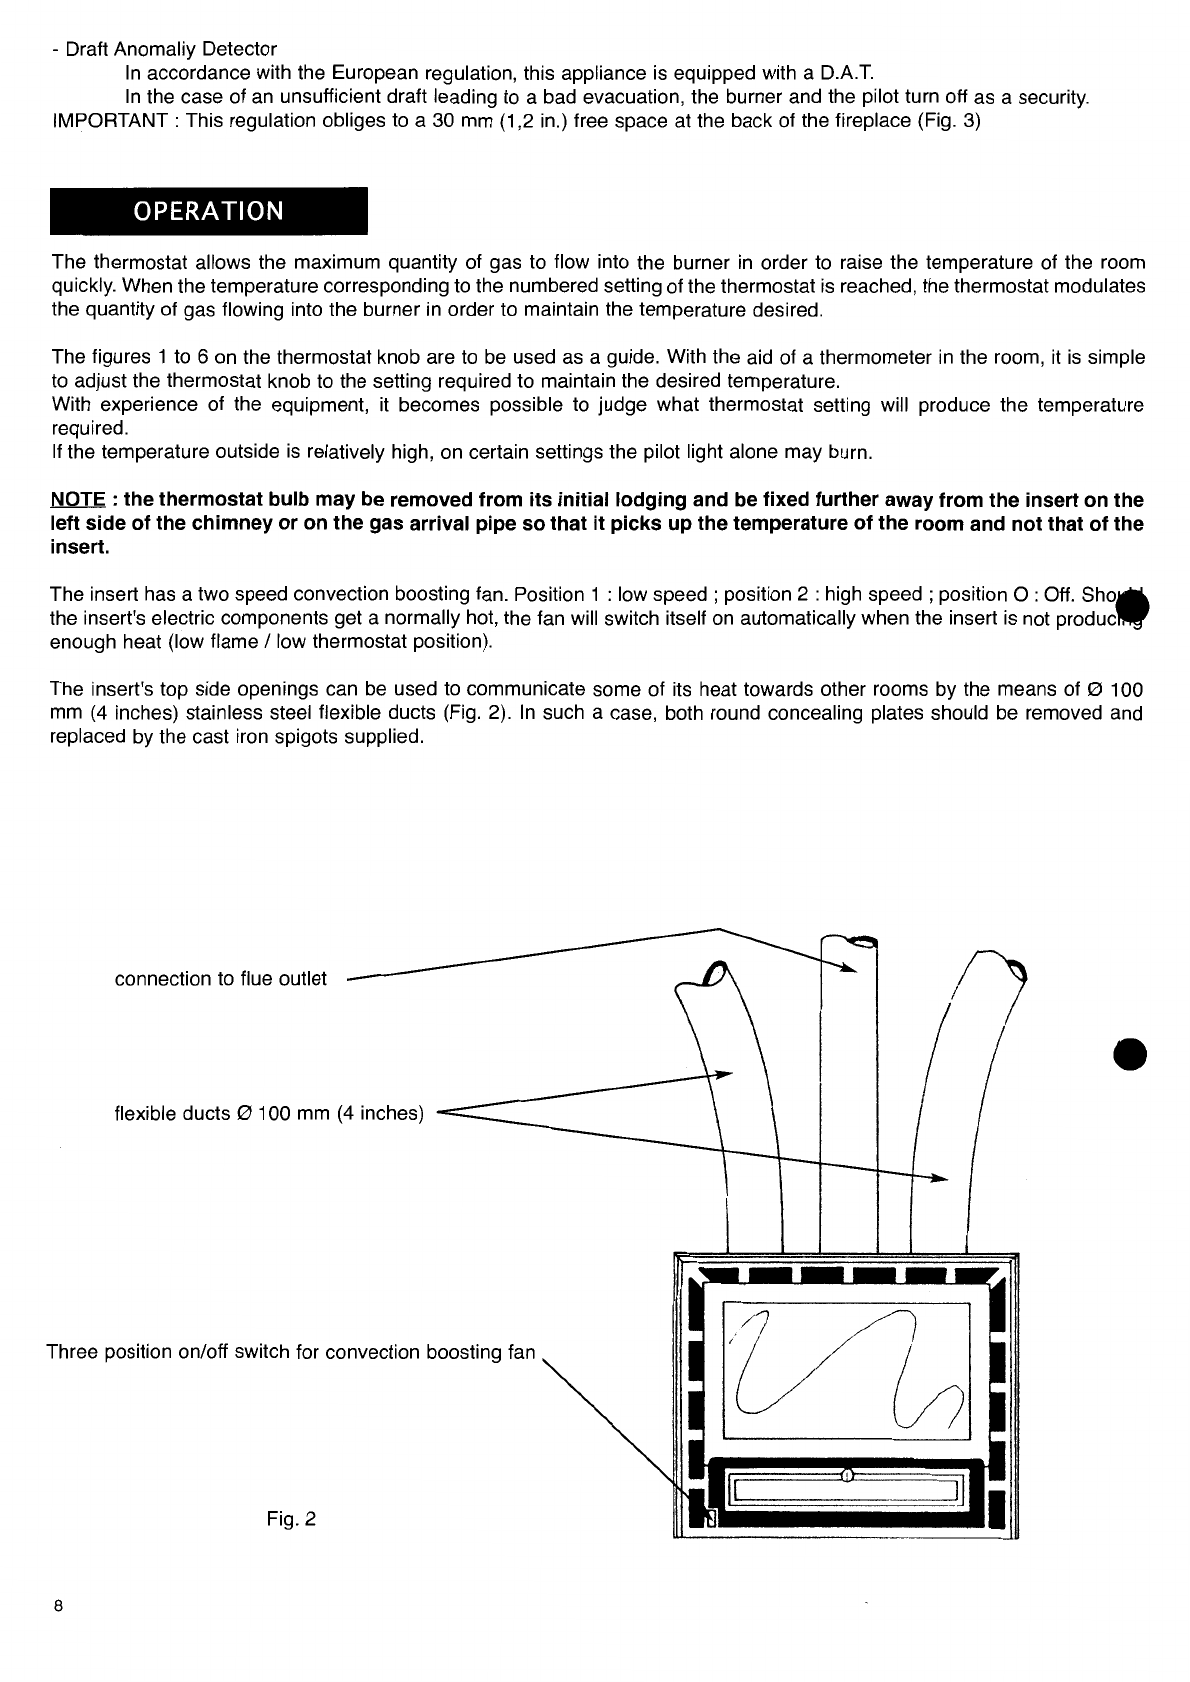
LIGHTING
THE
INSERT
-Open the tap
on
the gas supply and open the lower front cast iron panel for access to contrais
-Press the flame failure button and hold it
in,
and press the ignition button at intervals
NOTE :This operation may take several minutes when the appliance
is
fit for the first time as
it
is
necessary to evacuate the
quantity of air contained
in
the pipework through the pilot light injector
-When the pilot light
is
burning steadily release the flame failure button
This will feed the supply of gas into the burner
-Adjust the thermostat using the numbers
on
the control
NOTE :
On
ignition and especially
if
the flue
is
cold a small quantity of condensation may drip from the downdraught diverter.
This
is
not a cause for concern and will stop after a few minutes.
WARNING : Should the burner go out accidentally, allow for 5 minutes to elapse before lighting the burner again.
WARNING : Never allow the burner to burn if the window
is
broken or damaged. Always have the window replaced before
lighting the burner again.
Control knob
Automatic
gas
ignition
system
:
flame
failure
button
"OFF" button
Pressure checking connection Ignition button
Fig. 5
ORGANES
DE
COMMANDE
10