Fire Proof Floor
GOLDEN TANDOORS
GT-810925AG-2016V1-E
GT-810AG & GT-925AG Tandoor Oven Installaon & Operaon Manual
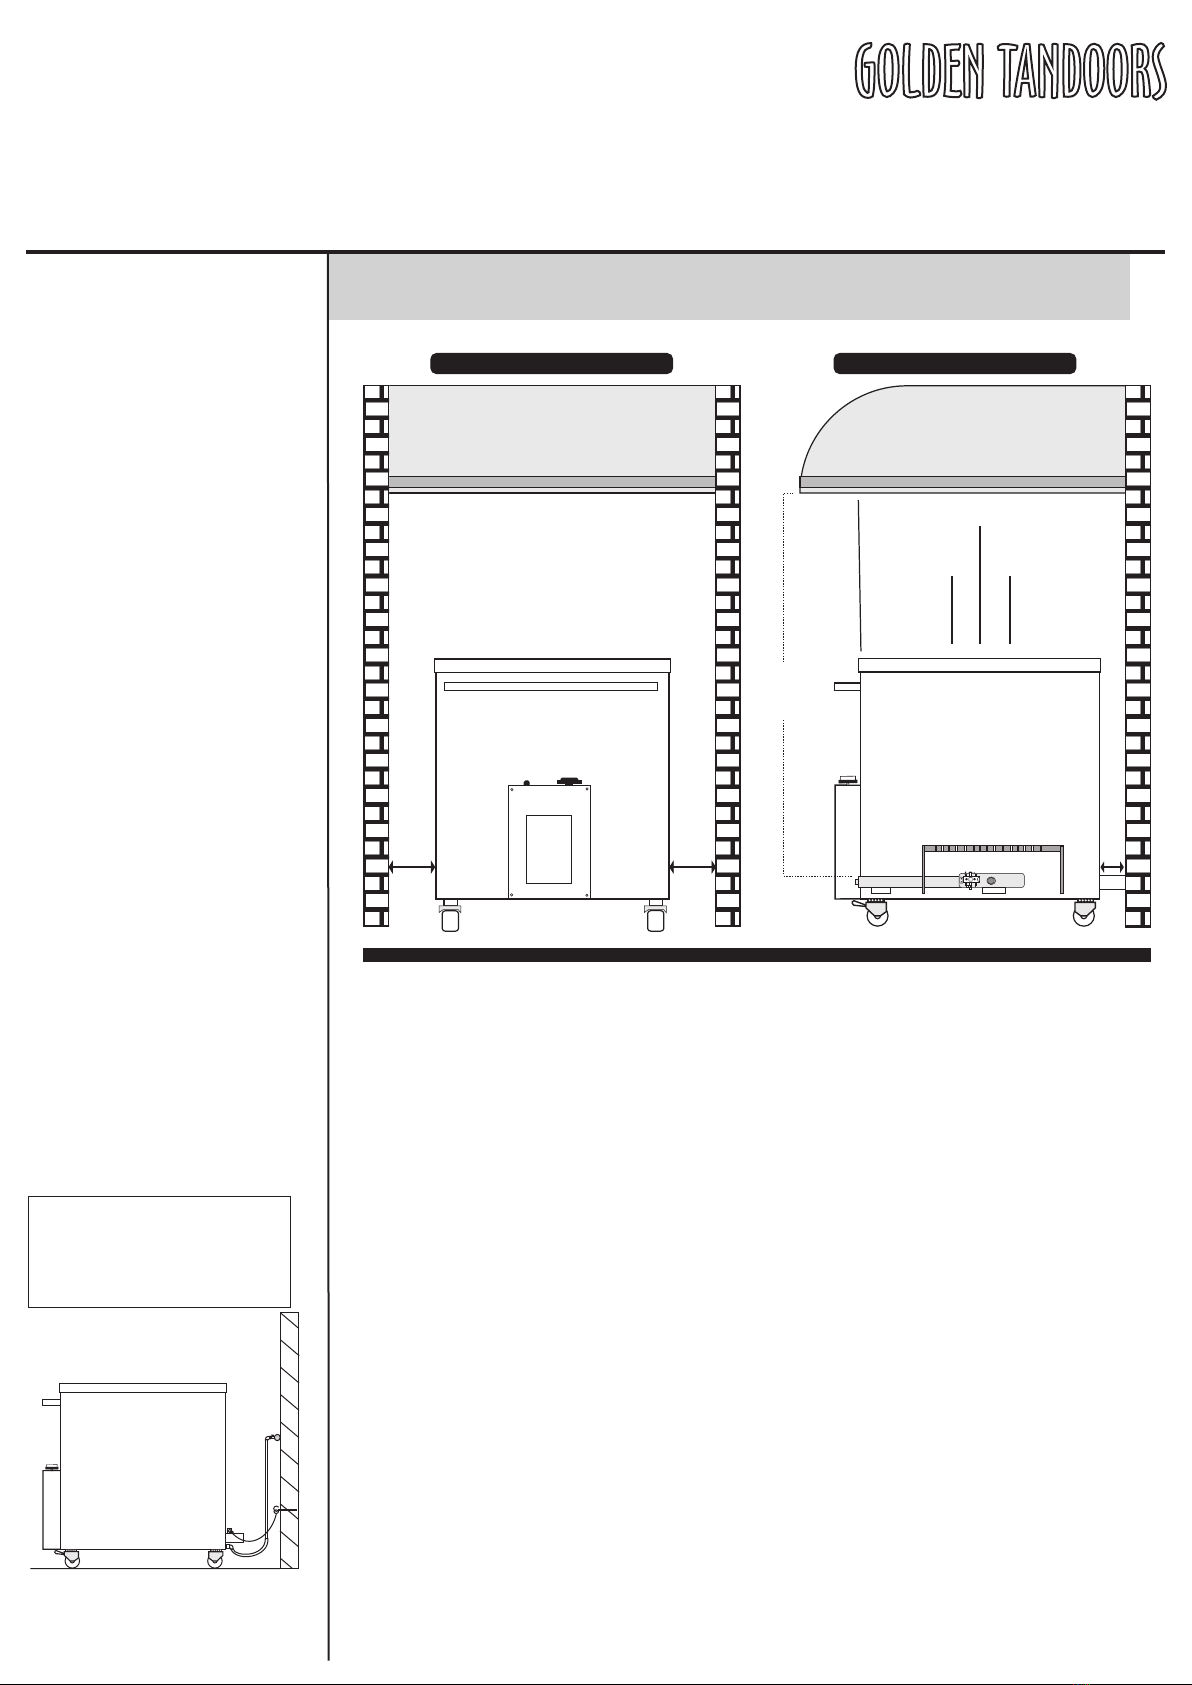
Installation Procedure
7
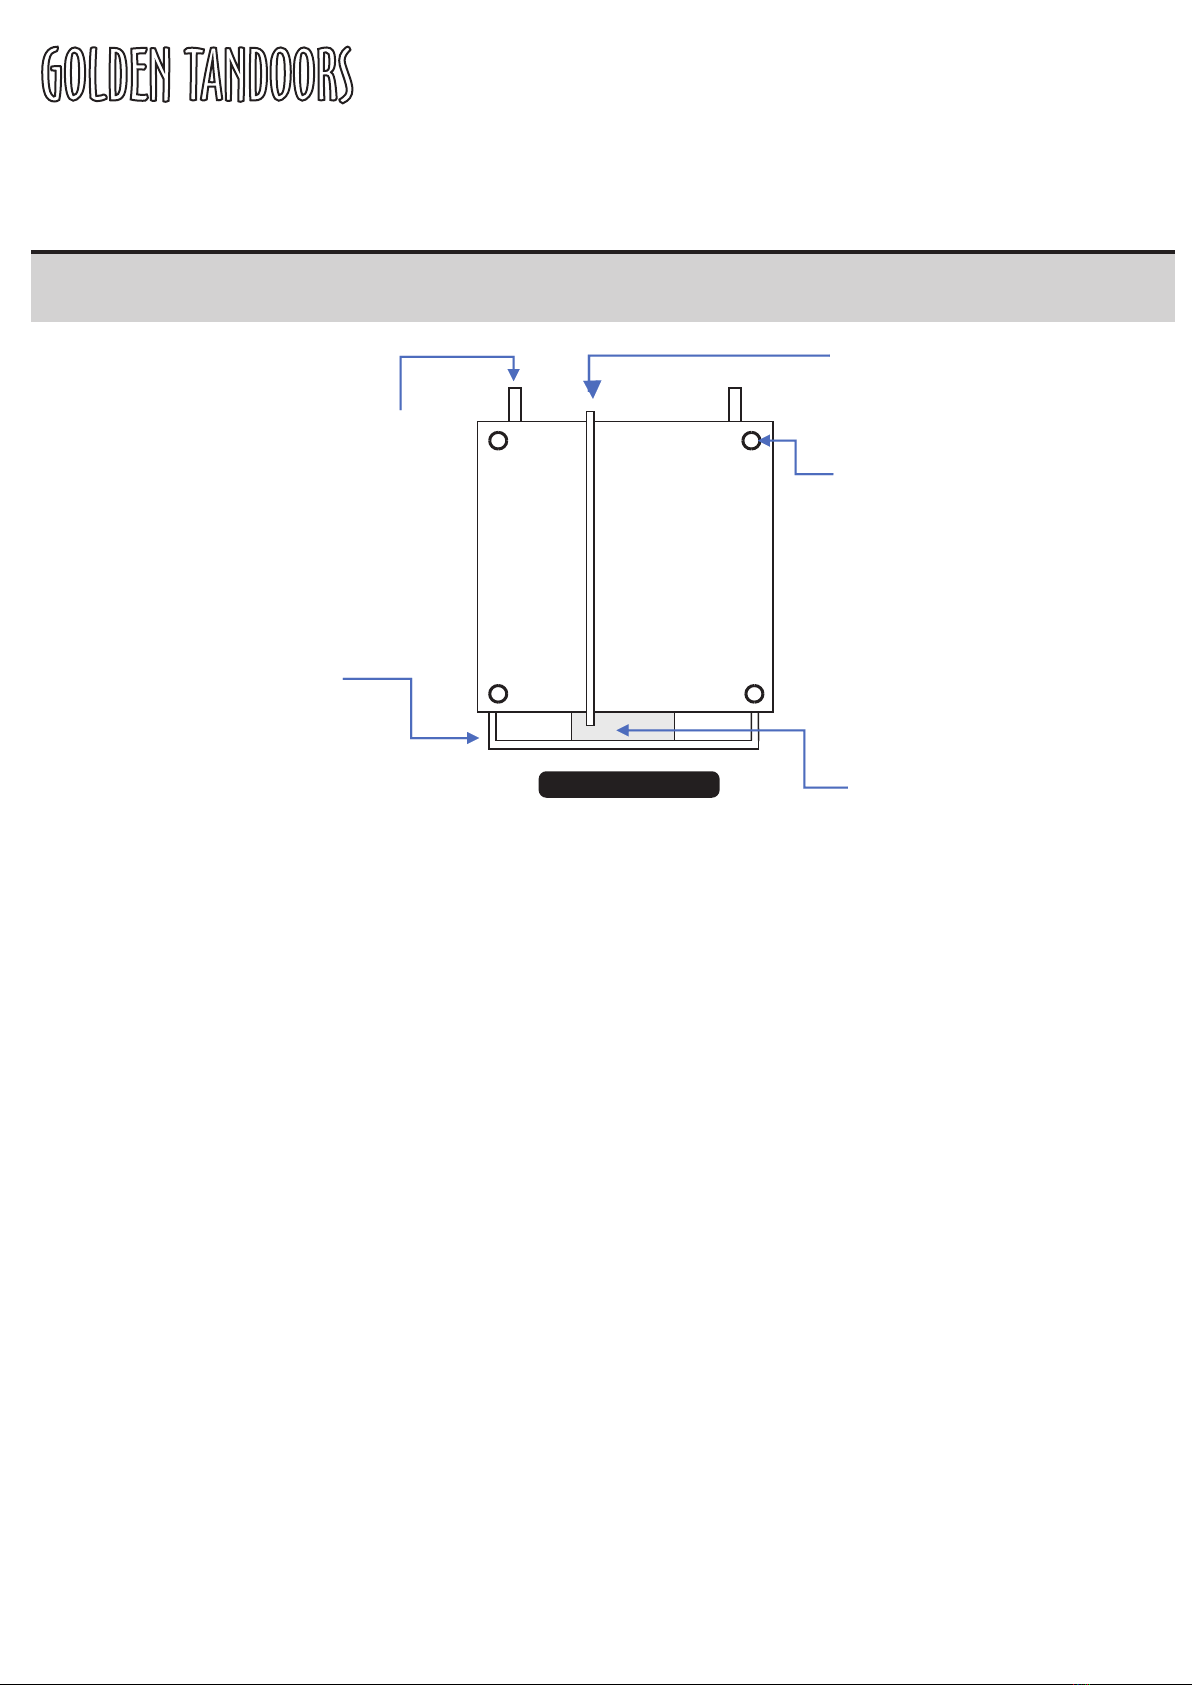
BAFFLE PLATE
MOUTH
VIEW FROM TOP
OF TANDOOR MOUTH
Diagrams for reference, not to Scale
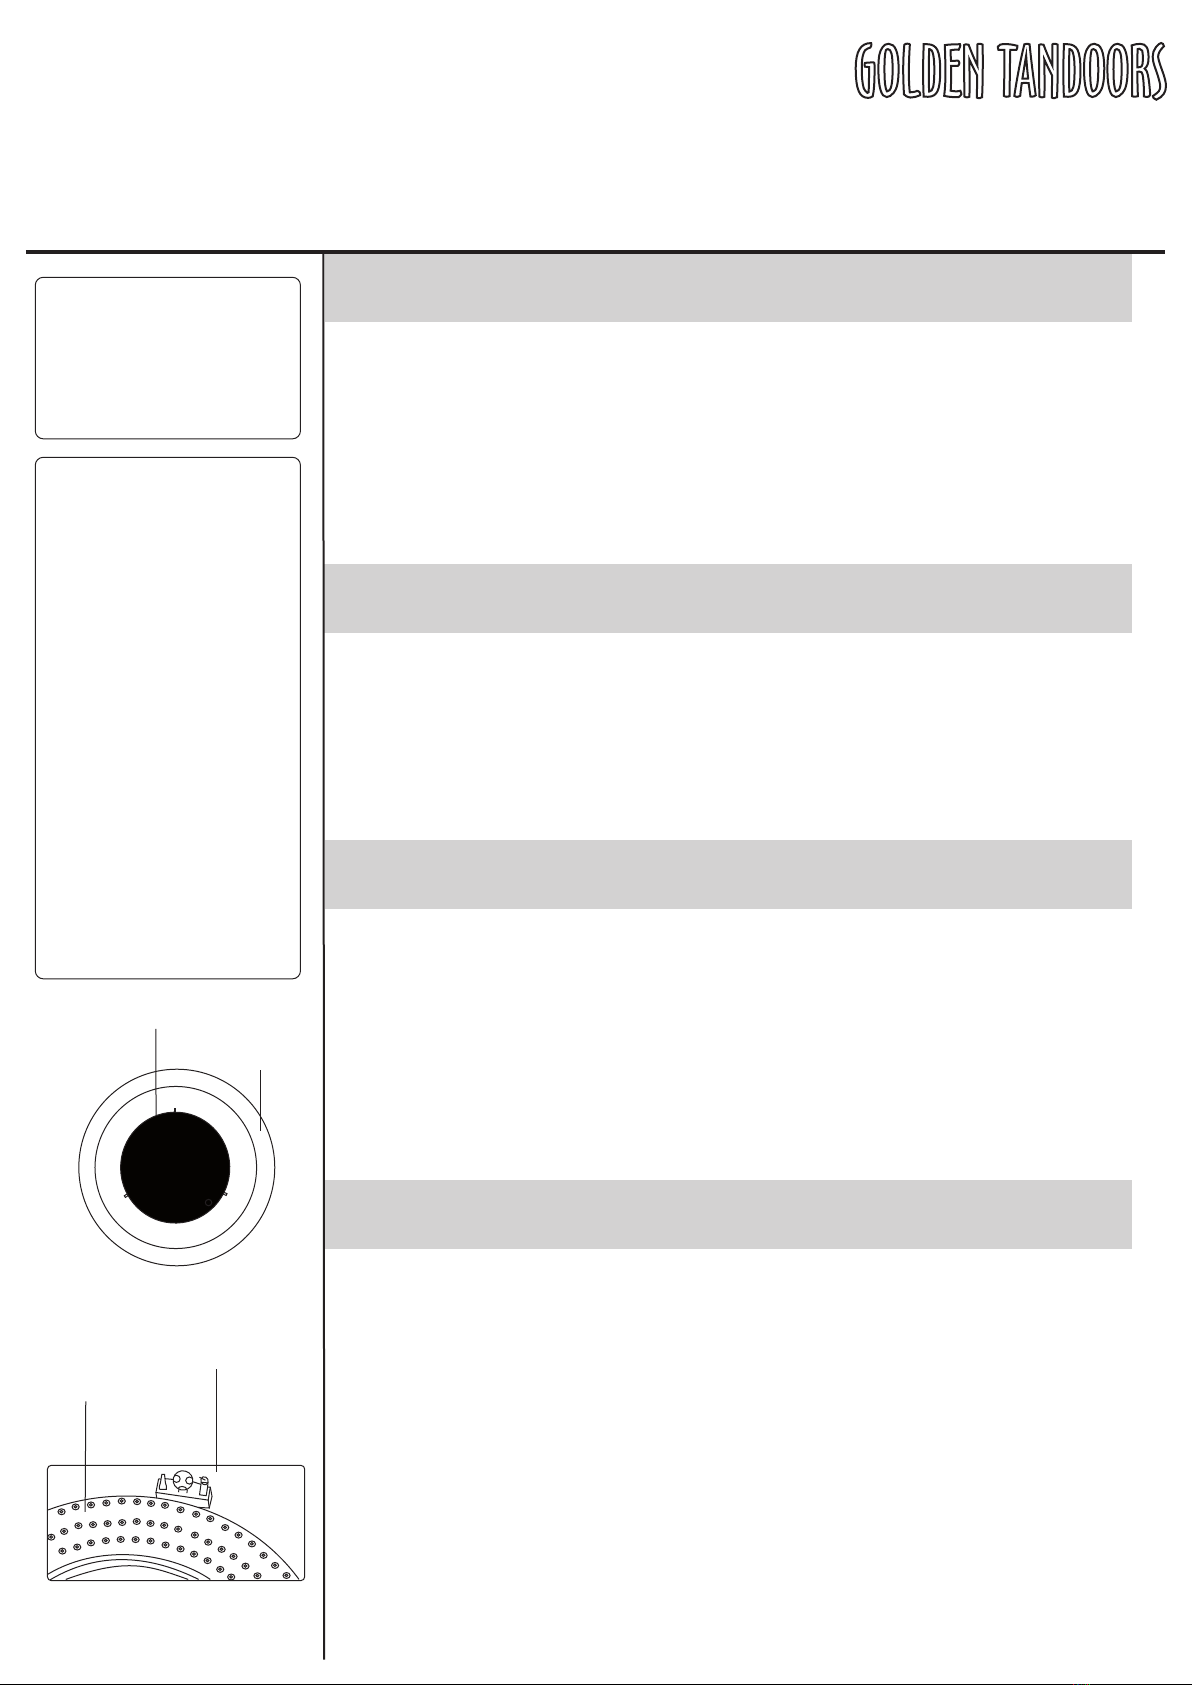
CLOSE UP VIEW OF PILOT ASSEMBLY
BURNER
PILOT ASSEMBLY
Note 1 : Gas Supply Connection
Connect the Gas Supply Pipe to the gas inlet point at the back of the
Tandoor Oven. The socket is a 3/4" BSP (F-Female) thread.
A listed and approved pipe/hose/QRCH (Quick Release Coupling
Hose) as per National Standards as governed by local law should be
used in conjunction with an isolation valve on the gas inlet. When
using hose prefer to have a 90 Degree bend at end hose for
convenience and safety.
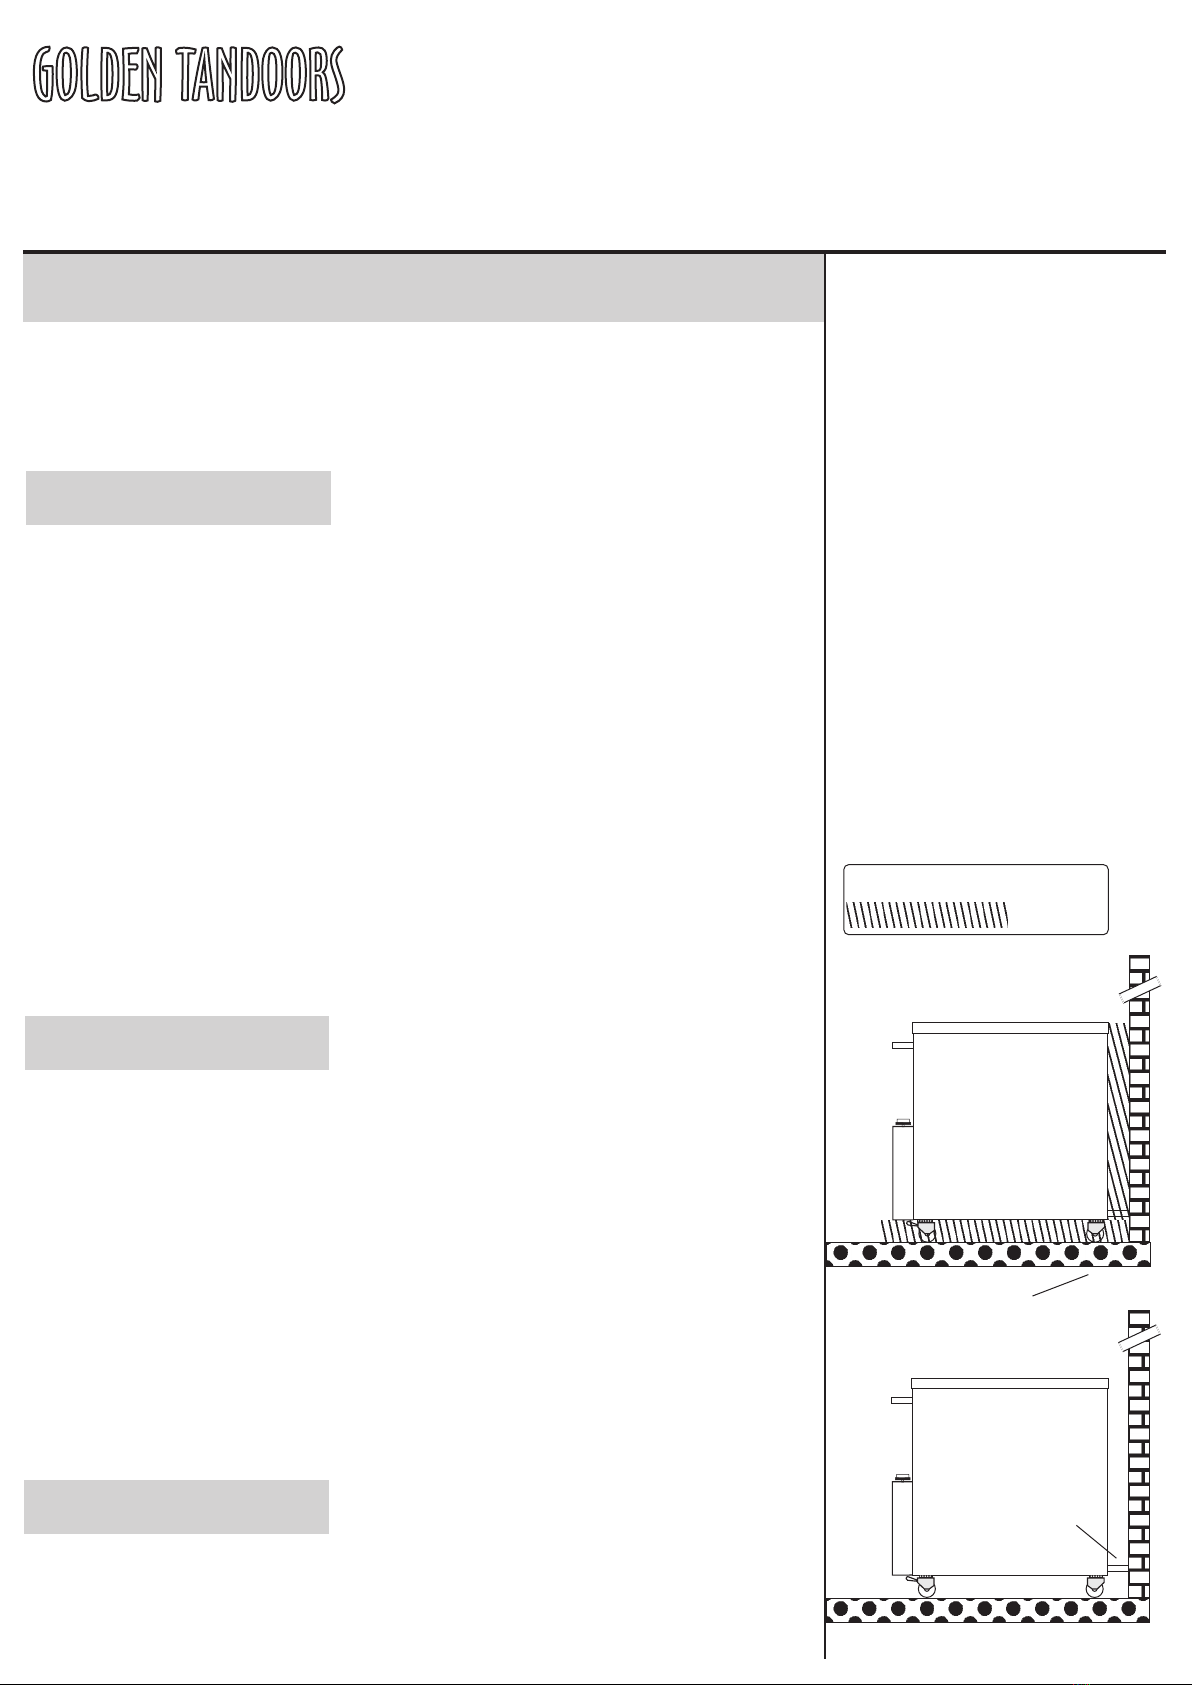
Note 2 : Leveling and Locking
IMPORTANT! Once the gas hose connection is complete, use a
spirit level to ensure the tandoor is level, or adjust the castors (see
castor adjustment nut) if necessary. Non levelled Tandoor shall
result in the burners firing erratically thus reducing performance.
The Tandoor is supplied with 2 front lockable castors for easy
access. Press the locks down using feet to prevent any movement.
Note 3 : Pre-Commissioning Checks
The Tandoor is checked for performance and tightness at high
pressure (i.e. 13 kPa/2 PSI /150mbar). Do not put pressure more
than 10kPa for checking tightness. Over Pressure shall damage the
gas valve and the pilot.
An authorized gas technician should inspect that the baffle is in
place, remove the baffle & check that the pilot with the
thermocouple are intact & not moved. The Oven must be fired and
tested for correct operation before commissioning the oven.
The appliance is tested
and adjusted before
leaving the factory,
effectively matching
them to sea level
conditions. Adjustments
to assure proper
operation may be
necessary on installation
to meet local conditions:
low or high gas pressure,
altitude change,
variation in gas
characteristics, possible
problems caused by
rough handling and
vibrations during
shipping and
transportation, are to be
performed by a qualified
service personnel. These
are responsibilities of
the customer and are
not covered by us.
(refer Restraint & Hose on page 2)
Gas Conversion Instructions (FROM NG - LPG)
Front panel opening will
reveal the gas fittings for
tightness check.
ONLY AN AUTHORIZED GAS
TECHNICIAN MAY PERFORM
THE INSTALLATION.
The following conversion may only be completed by a licensed
plumber or gas fitter. Gas Conversion is achieved by installing a new
Gas Manifold for either NG, LPG or ULPG purchased via Golden
Tandoors Australia with the correct Injectors for the desired gas type.
1. Disconnect the incoming Gas Supply.
2. Disconnect Gas Line between the valve and the Gas Manifold.
3. Remove the Burner Support Bracket and Remove Burner.
4. Install the new Burner for the desired Gas Type, repeat the above
in reverse order to connect new burner.
5. Reconnect the incoming Gas Supply and pressure test the oven.
6. Check High/Low Gas Pressure at Test Point and adjust valve to the
rating plate values. NOTE: If the Tandoor cannot be adjusted to
operate correctly, contact Golden Tandoors Australia immediately.