4. OPERATING INSTRUCTIONS
Baking
Select a temperature up to 20°C lower than used in a conventional oven and preheat until
HEATING indicator goes out. When the HEATING indicator goes out, the oven has
reached the desired temperature and food may be placed in the oven allowing air space
between cooking utensils and around the oven walls.
Roasting
Set the oven temperature to 150-170°C. The hot air circulating in the oven reduces
moisture loss and shrinkage. Roasting times are reduced by approximately 10 minutes per
kg.
Cook & Hold
This system will automatically cook food for a set time, then hold the oven at a preset
temperature indefinitely to maintain food at a serving temperature after cooking has been
completed.
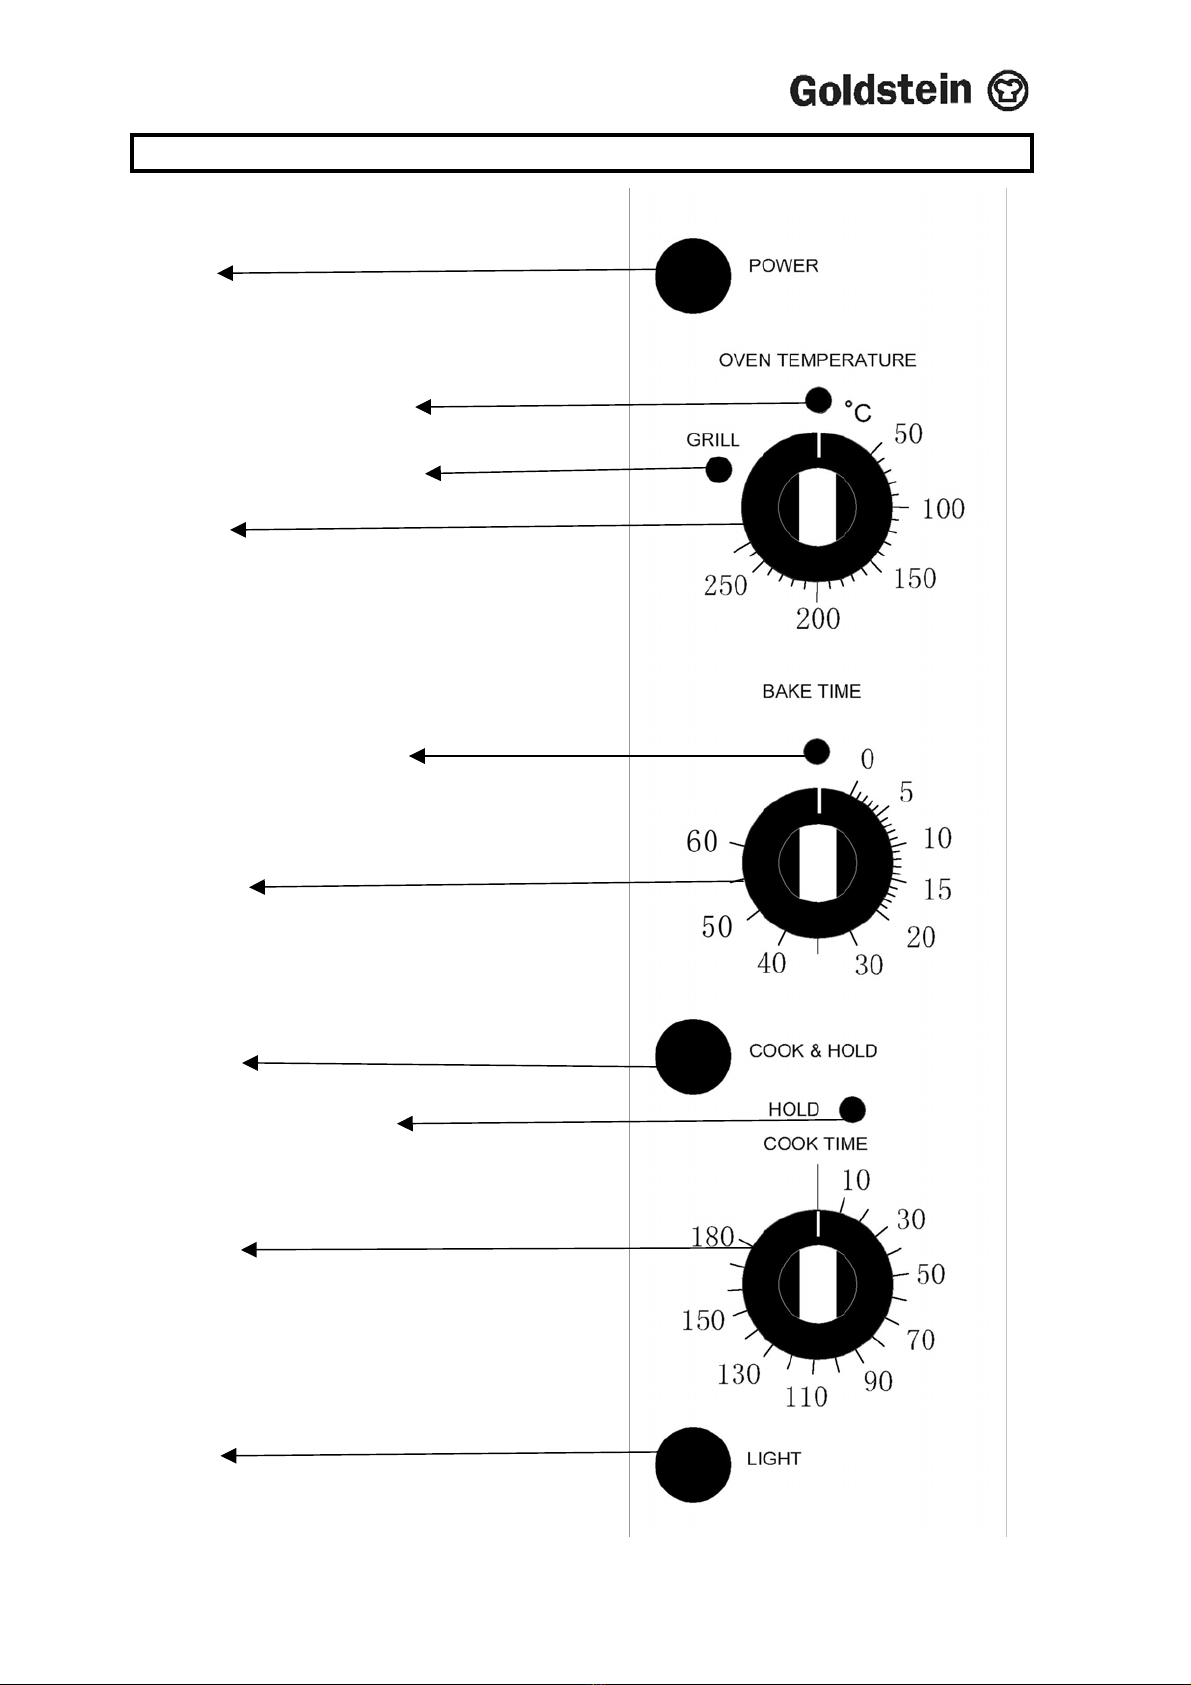
When the oven has reached the set temperature, place food in the oven, set roast cooking
time and depress the Cook' & Hold button (D). The hold indicator will come on when
cooking is complete.
To return to normal operation, push the Cook & Hold switch (D) again (switch will cease
illuminating).
Browning
Different foods may be cooked together, eg baking and roasting may be carried out at the
same time. Food which requires a slightly higher temperature or more browning should be
placed at the top of the oven, so that the broil element may be selected (with the door
shut) during the last few minutes of ' cooking. As the top element is quite powerful, keep a
close watch on browning progress.
Grilling / Broiling
Turn the oven thermostat right around to GRILL / BROIL (2). Place an oven rack normally
on the second position from the top. Place the food on a grill tray. This allows fat to drain,
to prevent smoking. When the element has reached a bright red (5 minutes) position the
dish under the GRILL / BROIL element. Heat food on one side, then turn on the other side.
Toast, sandwiches etc., on a scone tray on the top rack position.
It is not recommended to close the door when grilling / broiling.
IMB084B1/P9