Golf Buddy GolfBuddy Plus User manual

1"
"
GB Manager User
Manual
Instructions for Downloading and Using the GB Manager with
GolfBuddy Plus, Pro and Tour
Updated: 11-23-2010

2"
"
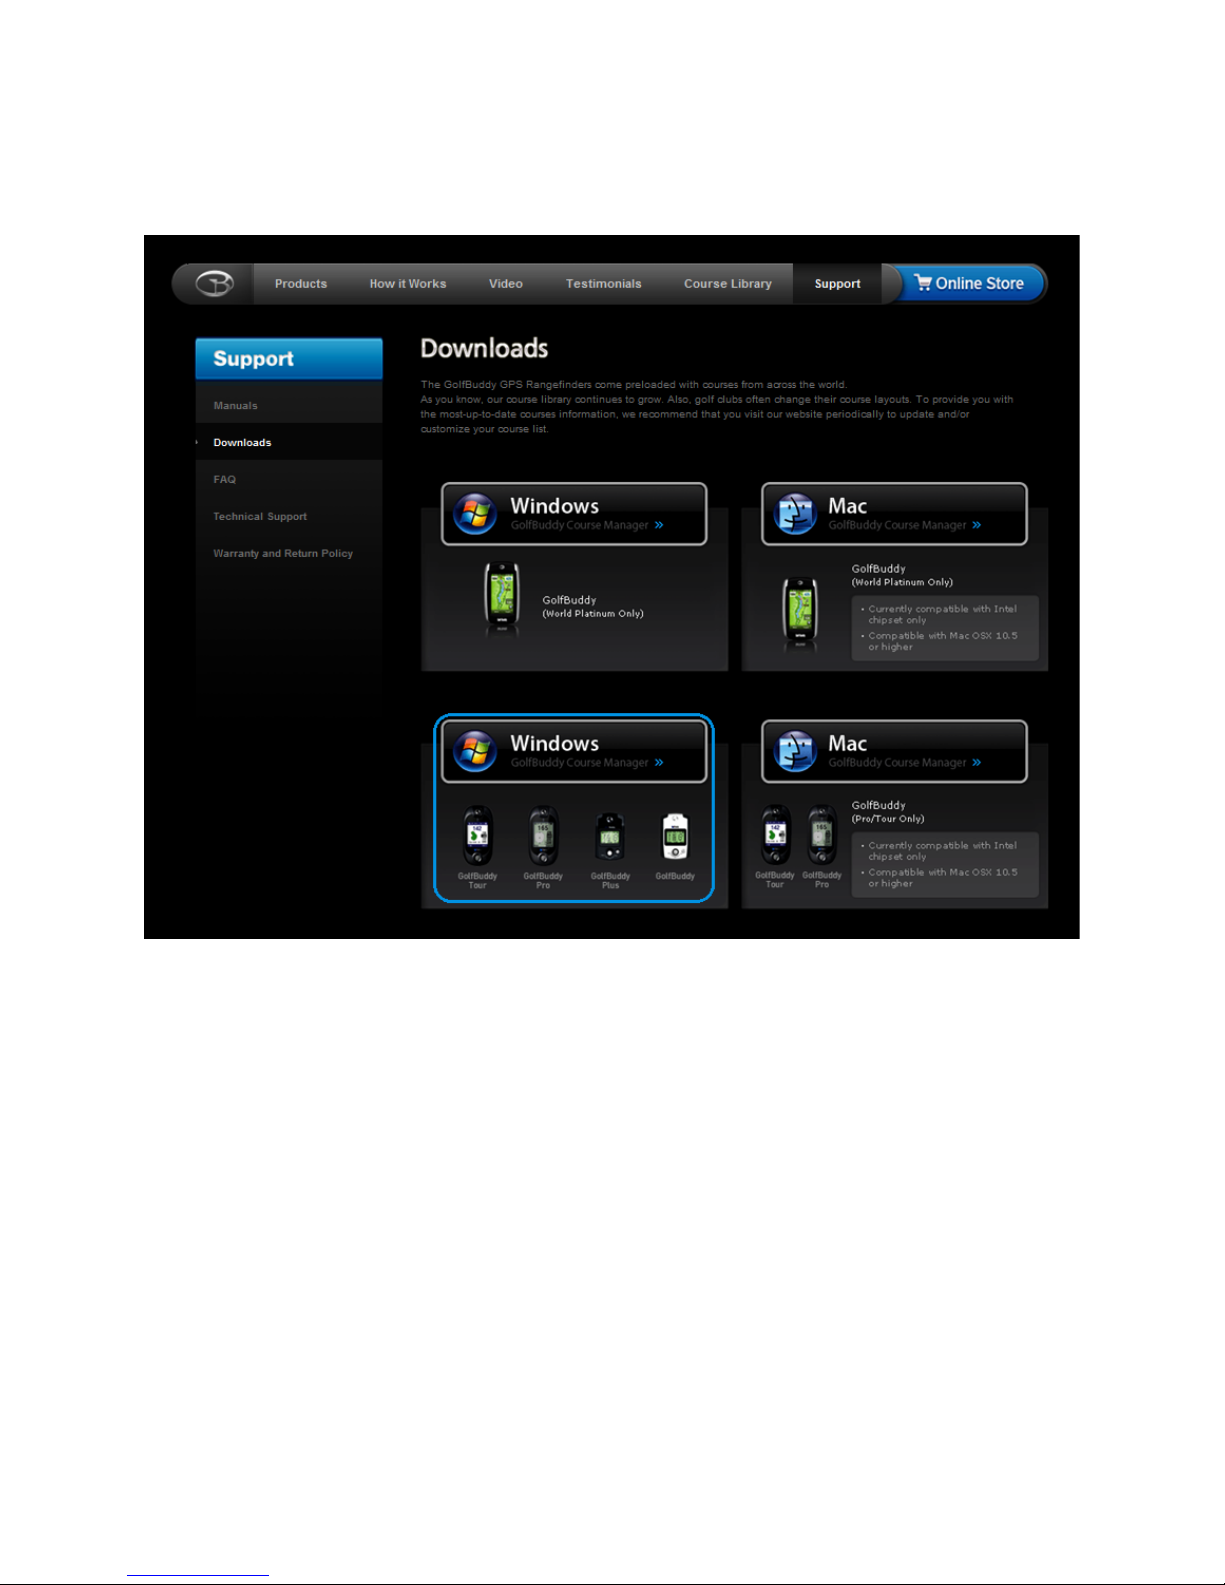
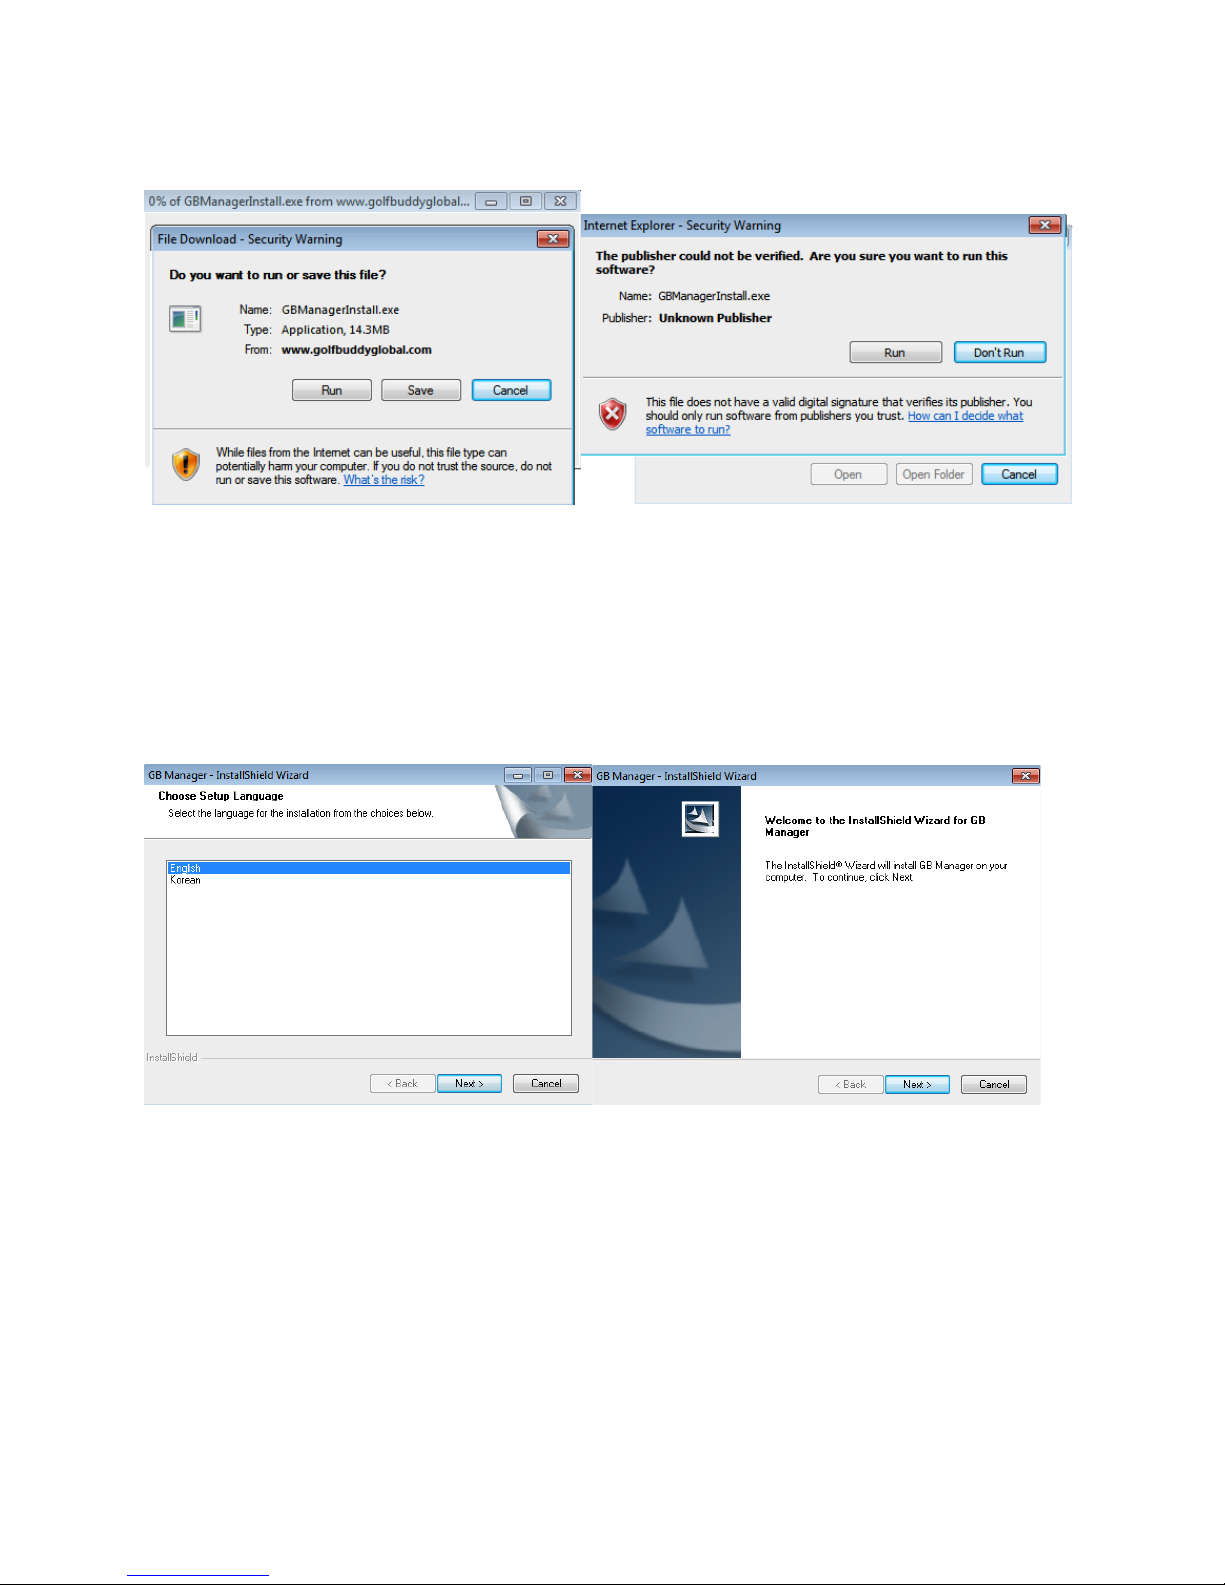
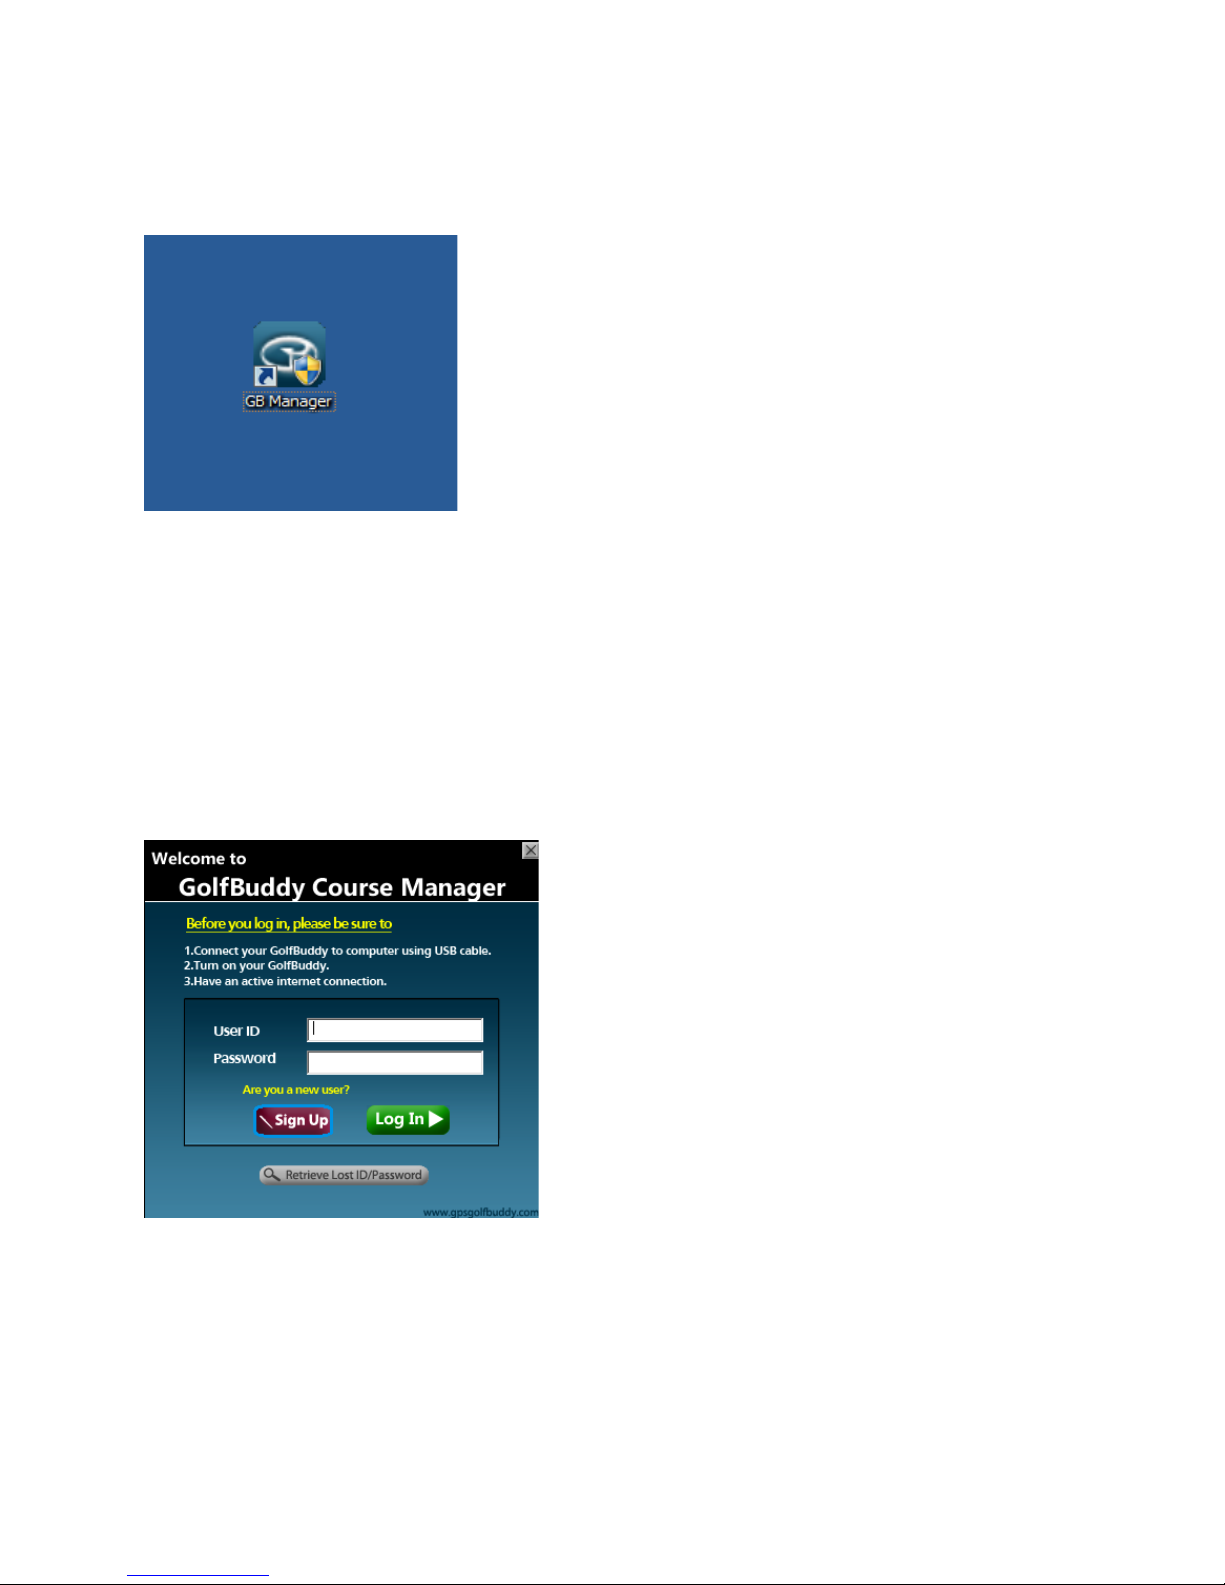
The GolfBuddy Manager (GB Manager) allows you to update the course library in your
GolfBuddy Plus, Pro or Tour GPS Rangefinder. Although the GolfBuddy comes with courses
already pre-loaded into the unit, we are continually updating our course library by adding new
courses and updating our existing ones. The GB Manager allows you to keep your GolfBuddy
GPS unit updated with the latest course data. The GB Manager also allows you to customize
your GolfBuddy by adding custom graphics and logos to your welcome screen, and allows you
to enter your personal information in case your unit is lost or misplaced. It also allows you to
view and track your scores from up to 1000 rounds of golf that you are able to store in your unit.
You can also perform firmware upgrades and module updates as they become available, to
ensure that your unit is functioning at its optimal level. This manual will guide you through the
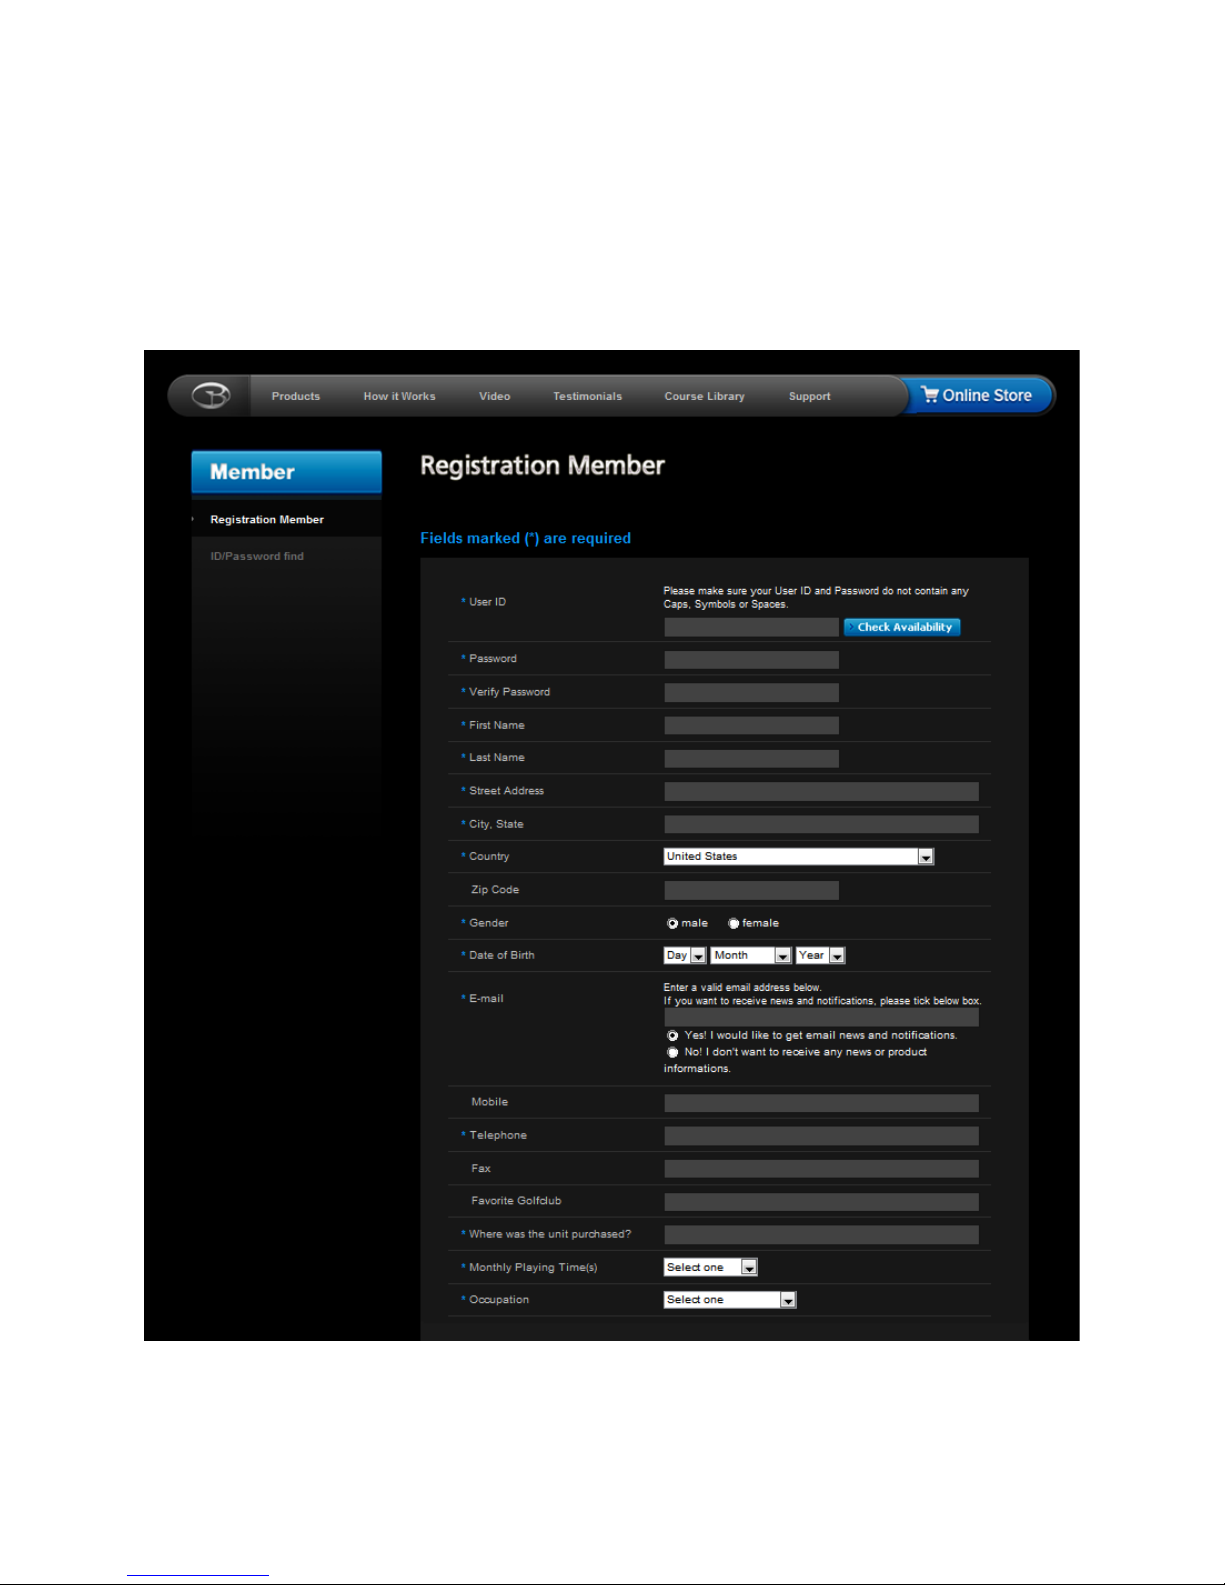
steps to download the GB Manager, set up a user name and password and will give you
instructions on how to use each function on the GB Manager. If you have any questions, please
feel free to contact our technical support department at (888) 296-1428 between the hours of
8:30 a.m. to 5:30 p.m. PST, and someone will be happy to assist you.

3"
"
Chapter 1 - Setting up the GB Manager: Installation
1.1 Go to http://www.golfbuddyglobal.com. (We highly recommend using Windows Internet Explorer).
1.2 Click on the Support link located in the top menu bar of the homepage (fig 1.1).
(fig 1.1)

4"
"
1.3 Click on the Downloads link located on the left-hand side of the page (fig 1.2).
(fig 1.2)

5"
"
1.4 Please select the box that corresponds with your Operating System and GolfBuddy. For example, if you have
Windows on your computer, and you have a GolfBuddy Tour, you would select the box on the lower left-hand
corner (fig 1.3).
(fig 1.3)

6"
"
1.4.1 Next, please select Run to begin installation. (fig 1.4 & fig 1.5)
(fig 1.4) (fig 1.5)
1.4.2 An InstallShield Wizard will appear. Please proceed with the installation by clicking on Next (fig 1.6 & 1.7).
(fig 1.6) (fig 1.7)

7"
"
1.4.3 Please finish the installation by clicking on Install (fig 1.8).
(fig 1.8)
Chapter 2 – Registration: Creating a UserID and Password
In order to access the GB Manager, you must first register and create a UserID and password.
2.1 After completing the download and install process in Chapter 1, the GB Manager log in window should have
automatically appeared on your screen (fig. 2.1).
(fig 2.1)

8"
"
2.2After the download process is complete, the GB Manager icon should have been automatically added onto your
computer’s desktop. You may double click on this icon each time you would like to access the
GB Manager (fig 2.2).
(fig 2.2)
2.3 On the GB Manager log in window (fig 2.3), click the Sign Up button towards the bottom of the window to
begin the registration process.
Note -Before accessing the registration page, please check the following:
1) Make sure you have an active internet connection.
2) Make sure your default internet browser is set to Windows Internet Explorer.
(fig 2.3)

9"
"
2.4 After you have clicked on the Sign Up button, your internet browser will open up and take you to the
registration screen on your internet browser (fig. 2.4). Fill out all of the required information to complete the process
and click submit.
Note: Please be sure to click the blue tab labeled Check Availability next to the User ID blank to check if the User
ID you have chosen has not already been taken.
Please make sure to refrain from using any punctuation marks on the registration form.
(fig 2.4)

10"
"
2.5Once you have completed the registration and Join Success appears on your screen (fig 2.5) you may close your
internet browser at this time, as you will no longer need it open in order to run the GB Manager.
(fig 2.5)
Chapter 3 - Logging in to GB Manager
After you have completed the registration process you are ready to log in to the GB Manager.
3.1 Connect your GolfBuddy unit to your computer by plugging in one end of the USB data cable into your
GolfBuddy unit (fig 3.1) and the other end into your computer’s USB port (fig 3.2).
(fig 3.1) (fig 3.2)

11"
"
GolfBuddy Plus users
If you are using a GolfBuddy Plus, you must perform an additional step before logging in to the GB Manager.
1) Make sure that your unit is powered off.
2) Plug the USB Data Cable into your unit.
3) Push in and hold the toggle button, and while you are still holding in the toggle button, push in the power button
until you see the message Sync With PC on the display (fig 3.3).
*Note: DO NOT disconnect the USB Data Cable from the device at any time, when a progress bar appears on the
GB Manager screen. Doing so will result in the unit freezing up and will require the unit to be sent in and be
serviced by one of our technicians.
(fig 3.3)
3.2 Go to your computer’s desktop and double-click the GB Manager icon (fig 2.2).The GB Manager log in window
will appear once you double-click on the icon (fig 2.3). Type in your new User ID and Password and click the Login
tab.
3.3 Once you have completed the log in process, the GB AutoUpdate window will appear and will begin
downloading (fig 3.4).
(fig 3.4)

12"
"
3.4 When the auto update is complete, you will be prompted to restart the GB Manager (fig 3.5).
Click Yes and login again.
(fig 3.5)

13"
"
Chapter 4 - Using the GB Manager
The GolfBuddy Manager (GB Manager) allows you to manage your courses, perform firmware upgrades, track your
scores, and customize your GolfBuddy by adding images or logos to your welcome screen.
Course Tab
4.1 The Course tab allows you to manage the courses in your GolfBuddy unit by adding new courses, and updating
existing courses. (fig. 4.1)
(fig 4.1)

14"
"
4.2.1 After clicking on a country along the column on the left, a list of states or provinces will appear for that
country as subfolders in the column. (fig 4.2)
(fig 4.2)
4.2.2 You can then select an individual subfolder to the left. A list of courses available for that state or province will
populate in the column to the right. (fig 4.3)
(fig 4.3)

15"
"
You may also search for individual courses by typing in a course name in the search query window. It is located
above the list of courses towards the right. (fig 4.4)
(fig 4.4)
Notice the five tabs along the top of the right column in the Course window. (All, Club, Course,
City, and Total). By clicking on these tabs, you can sort the courses by course name, city, etc. (fig 4.5)
(fig 4.5)
Notice the drop-down menu on the far right labeled Total. By clicking on this tab, you may scroll down and choose
either New, Installed, or Updated. Choosing one of these options will sort the list, by New, Installed, or Updated
(fig 4.6).
(fig 4.6)

16"
"
A total number of courses in GolfBuddy’s course library can be found towards the bottom of the window
under the right column. (fig 4.7)
New - Newly mapped courses that have been updated to GolfBuddy’s library but have not been loaded
into your unit.
Installed - Data is up to date for this course and is already loaded on your unit. No other action needs to
be taken.
Updated - This course is in your unit, but has been updated. These courses should be reloaded to
your unit to ensure that you have the most correct and accurate data for this course.
(fig 4.7)
Downloading Courses
4.2.3 Once you have located the courses you wish to download, check off the white boxes in the right column next
to the course or courses you wish to download (fig 4.8).
Note: Checking off the white box in the tab labeled All will select all the courses in the right column
(fig 4.9).
(fig 4.8) (fig 4.9)
4.2.4 After you have selected the courses, click the green icon labeled Download Selected Courses to GolfBuddy
(fig 3.10)
(fig 4.10)

17"
"
4.2.5 A pop-up window will give you the options of downloading All Files or New/Updated Only.Make sure
New/Updated Only is check-marked then click OK to begin the download (fig 4.11)
(fig 4.11)
Chapter 5 - Score
The GolfBuddy allows you to track and store scores for up to 1000 rounds in the unit. The score function on the GB
Manager makes it easy for you to view your list of scores by categorizing them into folders that are sorted by the
course name. It also allows you to add, delete and modify courses that you have recorded onto your unit. (fig 5.1)
(fig 5.1)

18"
"
5.1 Viewing Scores - To bring up a list of your recorded scores, click on the Score tab (fig 5.2)
and then click Sync with GolfBuddy (fig 5.3).
(fig 5.2) (fig 5.3)
5.2 The left column lists all the courses which you have recorded your scores on. Highlighting
Total Score will list all of the scores in the right column (fig 5.4).
(fig 5.4)
5.3 Selecting a single course on the list will bring up the scores recorded, as well as the averages of each hole on that
particular course (fig 5.5).
(fig 5.5)

19"
"
Chapter 6 - Device
Device tab is where you customize your GolfBuddy’s welcome screen with images/logos, and your user information
(name/phone number), which will appear each time your GolfBuddy is powered on. It also allows you to perform
software updates as they become available.
6.1.1 Click on the Device tab (fig 6.1) in the GB Manager, then click Sync with GolfBuddy (fig 6.2).
(fig 6.1) (fig 6.2)
6.1.2 Adding Images to the Welcome Screen - You may add up to three images that will appear each
time your GolfBuddy unit is powered on.
6.1.3 On the User Info window to the left (fig 6.3), click on the folder icon next to the My Logo drop menu.
(fig 6.3)

20"
"
6.1.4 Once you click on the icon, a search window will appear over the GB Manager window. Choose a picture from
your computer’s hard drive and click OK (fig 6.4).
(fig 6.4)
Important Note: After choosing a logo and/or inputting your name and phone number, you must click the green
button labeled Download User Information to save your logo and user information on your unit (fig 6.5).
(fig 6.5)
To set your Sub Logo and Main logo, click on the drop menu (fig 6.6) make a selection, and repeat
the steps to insert an additional logo.
(fig 6.6)
Other manuals for GolfBuddy Plus
2
This manual suits for next models
1
Table of contents
Popular Software manuals by other brands

Panasonic
Panasonic PT-D10000 Series Setup and operation manual

Nortel
Nortel VPN Client user guide

TANDBERG
TANDBERG MOVI D14409.01 user guide

Novell
Novell GROUPWISE 7 - MULTI-SYSTEM ADMINISTRATION manual

Novell
Novell LINUX ENTERPRISE DESKTOP 10 SP1 - START UP GUIDE... manual

ScanSoft
ScanSoft SCANSOFT PAPERPORT 5.0 Started guide

Lexicon
Lexicon PCM NATIVE DUAL DELAY owner's manual

Slate Digital
Slate Digital Virtual Tape Machines 1.1 user guide

Altigen
Altigen Call Detail Reporting manual

Canon
Canon 3508B001 - PowerShot D10 Digital Camera Software user's guide

Kyocera
Kyocera ECOSYS FS-1035MFP/DP user guide

Waves
Waves MultiRack SoundGrid V9.7 troubleshooting guide