Goodmans GDB7CA User manual

User manual
GGDDBB77CCAA
DDiiggiittaallTTeerrrreessttrriiaallTTVV
RReecceeiivveerr
Goodmans Product Information: www.goodmans.co.uk/support
35918570 gdb7ca um2.qxp 24/06/2005 09:56 Page 1

2
Safety information
Mains connection
This receiver is suitable for use on A.C. mains supply, 220-240 V - 50 Hz only.
It must not be connected to D.C. mains.
Note: The mains lead of the receiver is fitted with a moulded plug. If the mains sockets are not compatible or if for any reason
the plug is removed please follow the directions below.
The moulded plug cannot be rewired and if removed must be disposed of safely. Remove the fuse to make it safer.
Do NOTunder any circumstances plug the severed plug into any mains socket as this could result in an electric shock.
! The OFF button
B
on the remote control does not completely disconnect the unit from the mains supply,
but switches operating power on and off.
Important!
If the plug is removed, rewire new plug as follows: The wires in the mains plug are coloured in
accordance with the following code:
BLUE - NEUTRAL
BROWN - LIVE
As the colours of the wires in the mains lead of this apparatus may not correspond with the
coloured markings identifying the terminals in your plug, proceed as follows:
BLUE wire to the terminal coded N (Neutral) or coloured black.
BROWN wire to the terminal coded L (Live) or coloured red.
Do NOTmake any connection to the terminal in the plug which is marked by the letter E
or by the safety symbol l or coloured green and yellow.
A fused plug must be fitted with a 3A fuse approved by ASTA or BSI to BS 1362 and fuse
covers must always be securely replaced.
If the fuse blows, check the mains cable for damage or call a qualified technician. Do not
try to bridge the fuse or increase its rating!
3A
BLUE BROWN
N
E
L
3A
3A
35918570 gdb7ca um2.qxp 24/06/2005 09:56 Page 2

3
CCoonntteennttss
AAcccceessssoorriieess
3 Accessories
4 Safety information
5 Connections
6 Remote control handset
7 First Time Use
8 Basic operation
9 Menu structure
10 Tuning the receiver
Set-up
Power Cord Remote Control
SUBTITLES
GUIDE
TV/DTV
Scart Lead
11 Advanced setup
13 Parental controls
14 Channel lists
15 Timer programming
17 Programme guide
19 Trouble shooting and
information
19 Upgrading your receiver
2 x AAA
Batteries
User Manual
Guarantee card
RF Lead
35918570 gdb7ca um2.qxp 24/06/2005 09:56 Page 3

4
Congratulations on your choice of this state-of-the-art Digital Top Up TV ready and
Free to View Receiver. We hope you will enjoy all the new features this technology
brings to your home for many years. Your dealer should have checked your postcode
for reception, but the availability of Digital Signals does depend on the transmitter(s)
available to your receiving aerial. If you have any doubt about this availability, please
contact your dealer, or check the following internet websites:-
wwwwww..ttooppuuppttvv..ccoomm,,wwwwww..ffrreeeevviieeww..ccoo..uukkor wwwwww..ddttgg..oorrgg..uukk//ccoonnssuummeerr
If you experience reception problems contact our approved aerial installation partner,
SSaaffeettyyiinnffoorrmmaattiioonn
IInnttrroodduuccttiioonn
In order that you may enjoy this product for a long time it is important that you observe the
following points when installing and operating your receiver
●This receiver is intended for the reception of TV picture and sound signals. Any other
application is expressly prohibited.
●Avoid the long-term display of static images, e.g. menus or audio only channels.
●Do not expose the receiver to any moisture. The receiver is intended for use in dry rooms.
It is NOT designed for use outdoors or in WET/HUMID areas. e.g. Bathroom.
●Do not place any object filled with water (vases or similar) on the receiver.
●Place the receiver on a flat and hard surface. Do not place any objects (e.g. newspapers) on
the receiver.
●If placed in an enclosed unit, the all-round distance between the receiver and the sides of
the unit must be at least 10cm.
●Do not place the receiver in the immediate vicinity of a heat source or in direct sunlight as
this would prevent appropriate cooling.
●During a thunderstorm it is recommended that you disconnect the receiver from the mains
and aerial to prevent damage from lightning strikes.
●Never open the receiver as this will invalidate your guarantee.
●Do not dispose of used batteries in normal waste. Please dispose of them at appropriate
collection points.
●If you are not using the receiver for a long time (including overnight), please switch it off
at the mains. This saves energy. Note that any software upgrades can take place at night at
your request.
●This product has been constructed with the environment in mind. There is a minimum of
plastic parts and the packaging is largely made from recycled paper. It is also disassembly-
friendly allowing for easy recycling at the end of its life.
●CLEANING - BEFORE CLEANING DISCONNECT FROM THE MAINS SUPPLY. Dust will collect on
the unit and can be removed with dry clean cloth.
DDoonnoottspray any substance on the unit.
●DECODER CARD - Avoid removing and re-inserting the card unnecessarily, handle with care
and do not clean the card with chemicals.
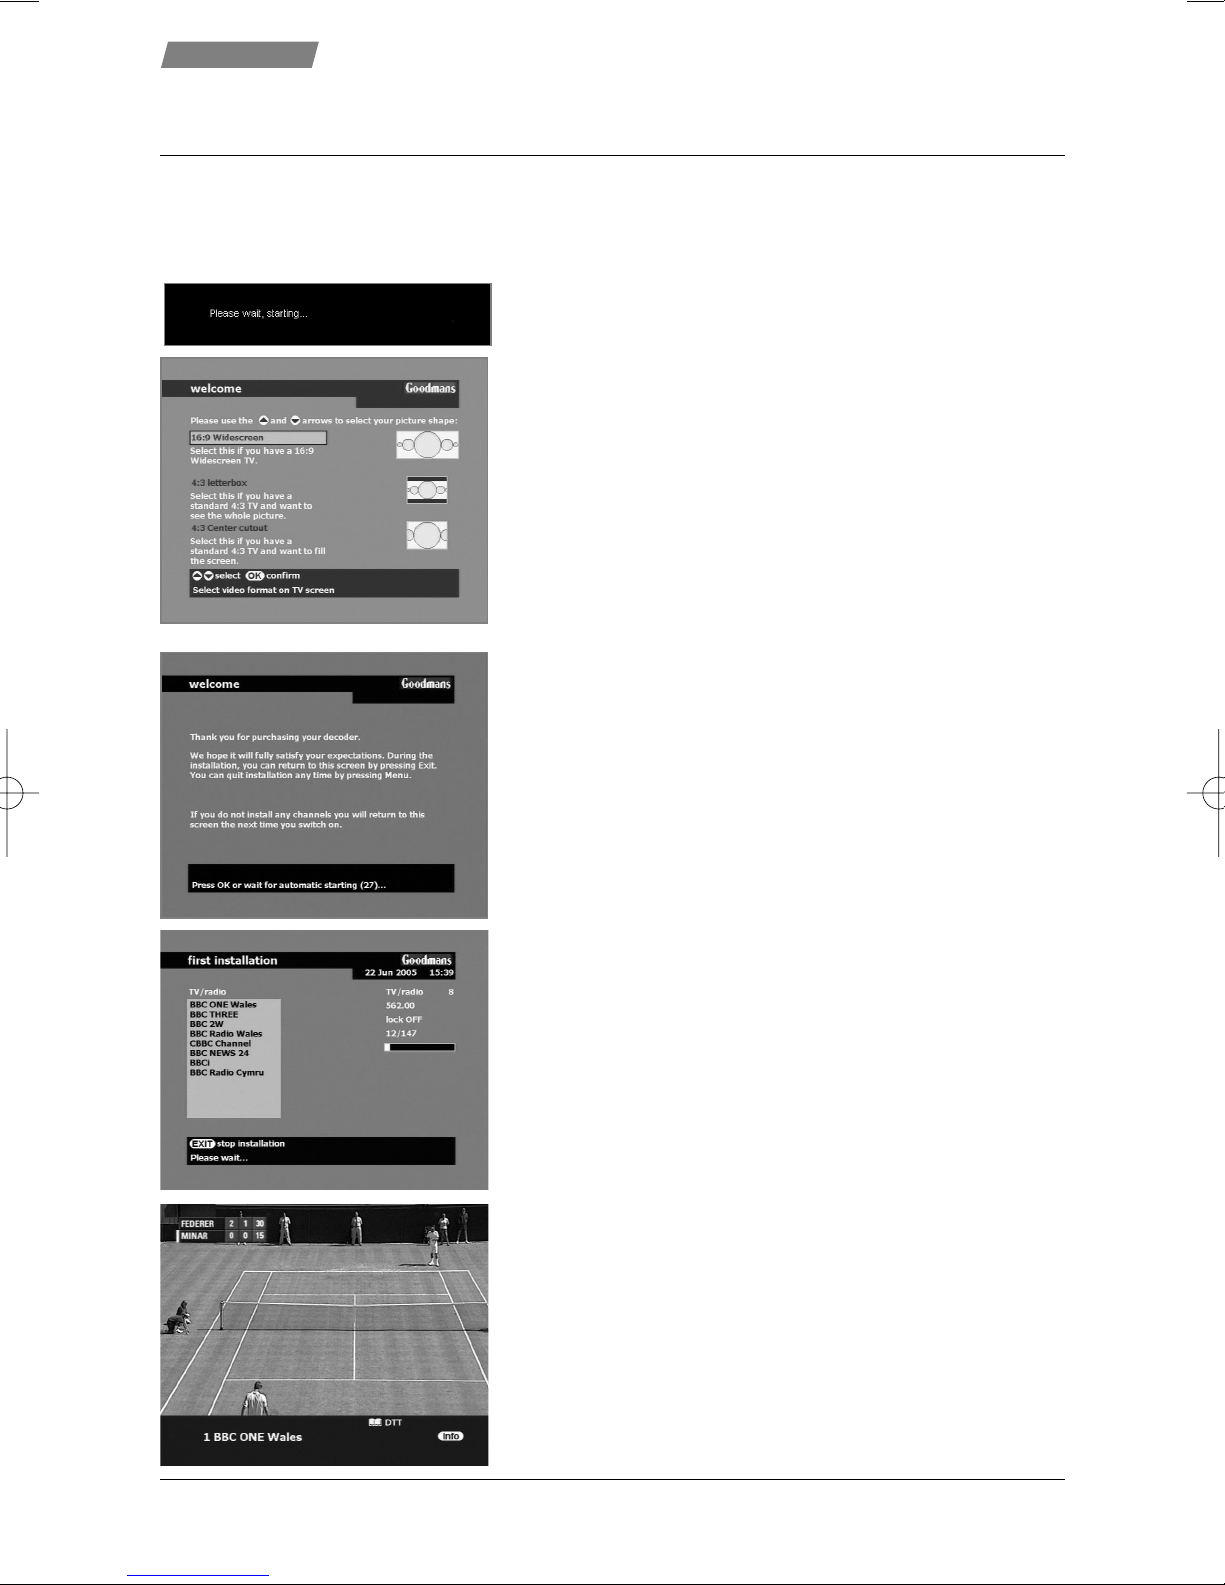
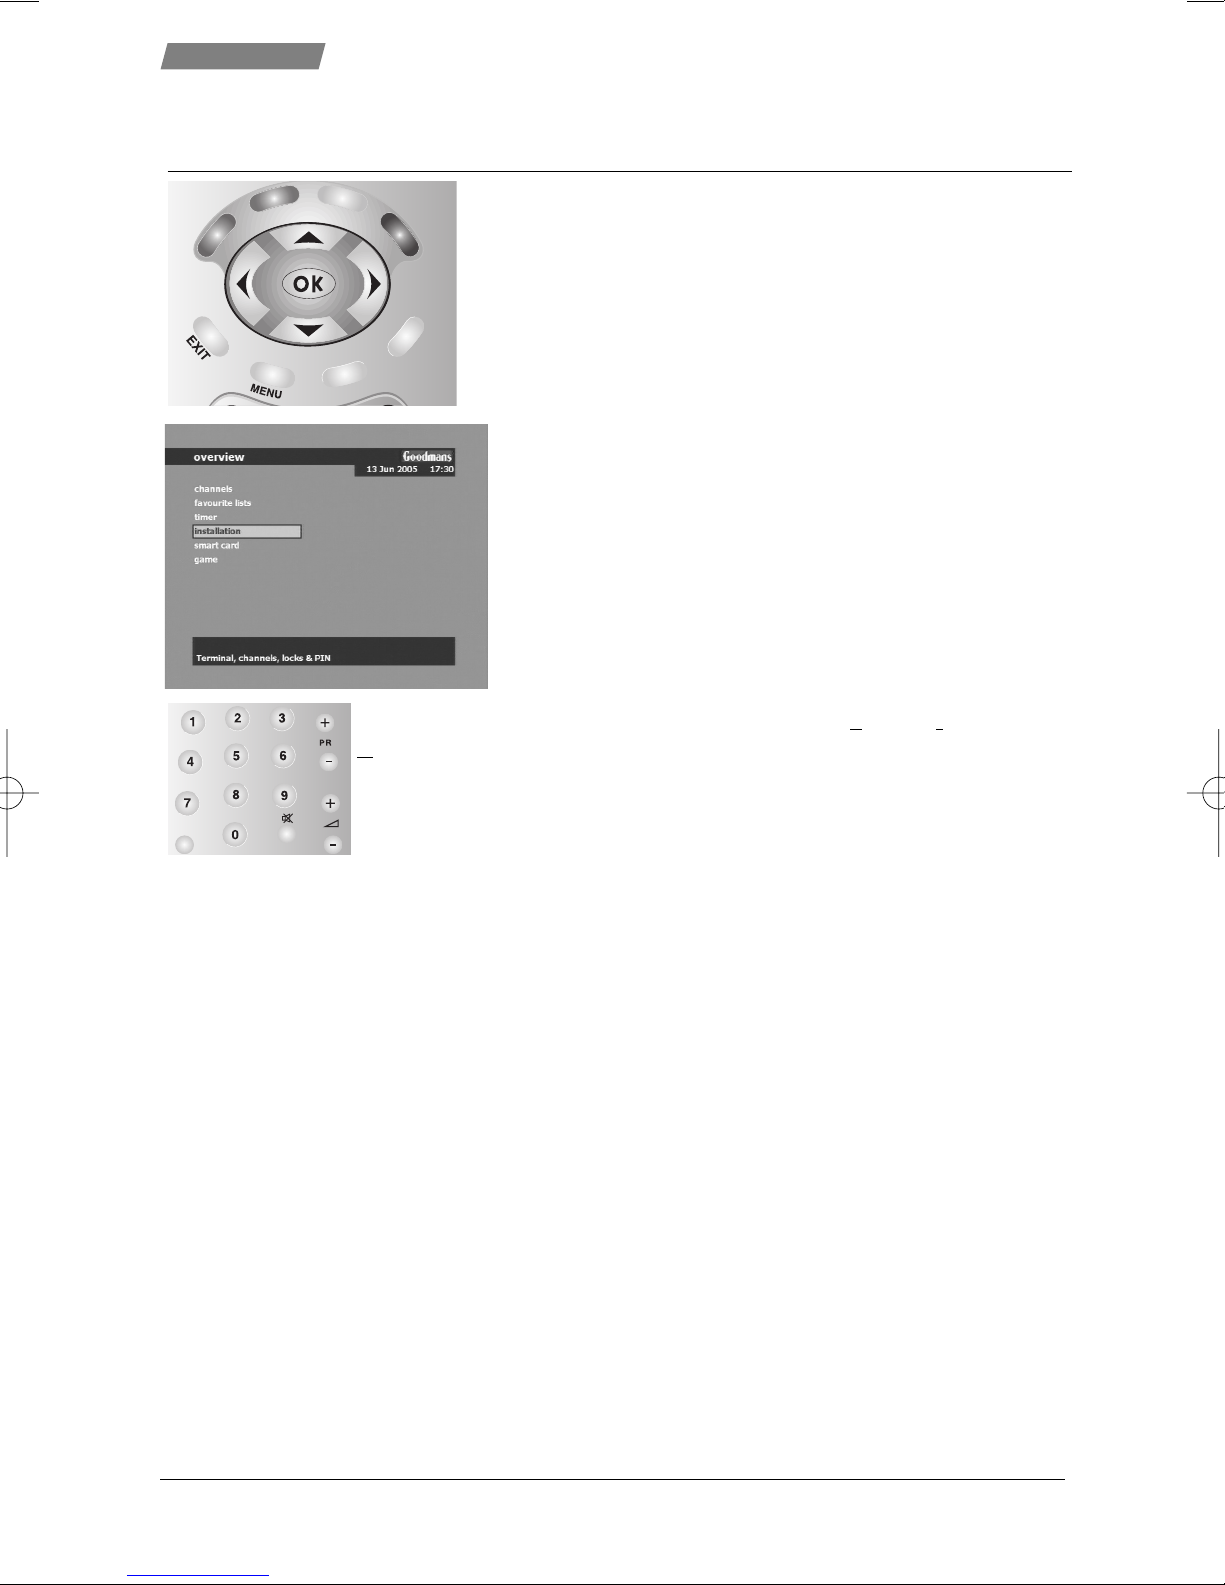
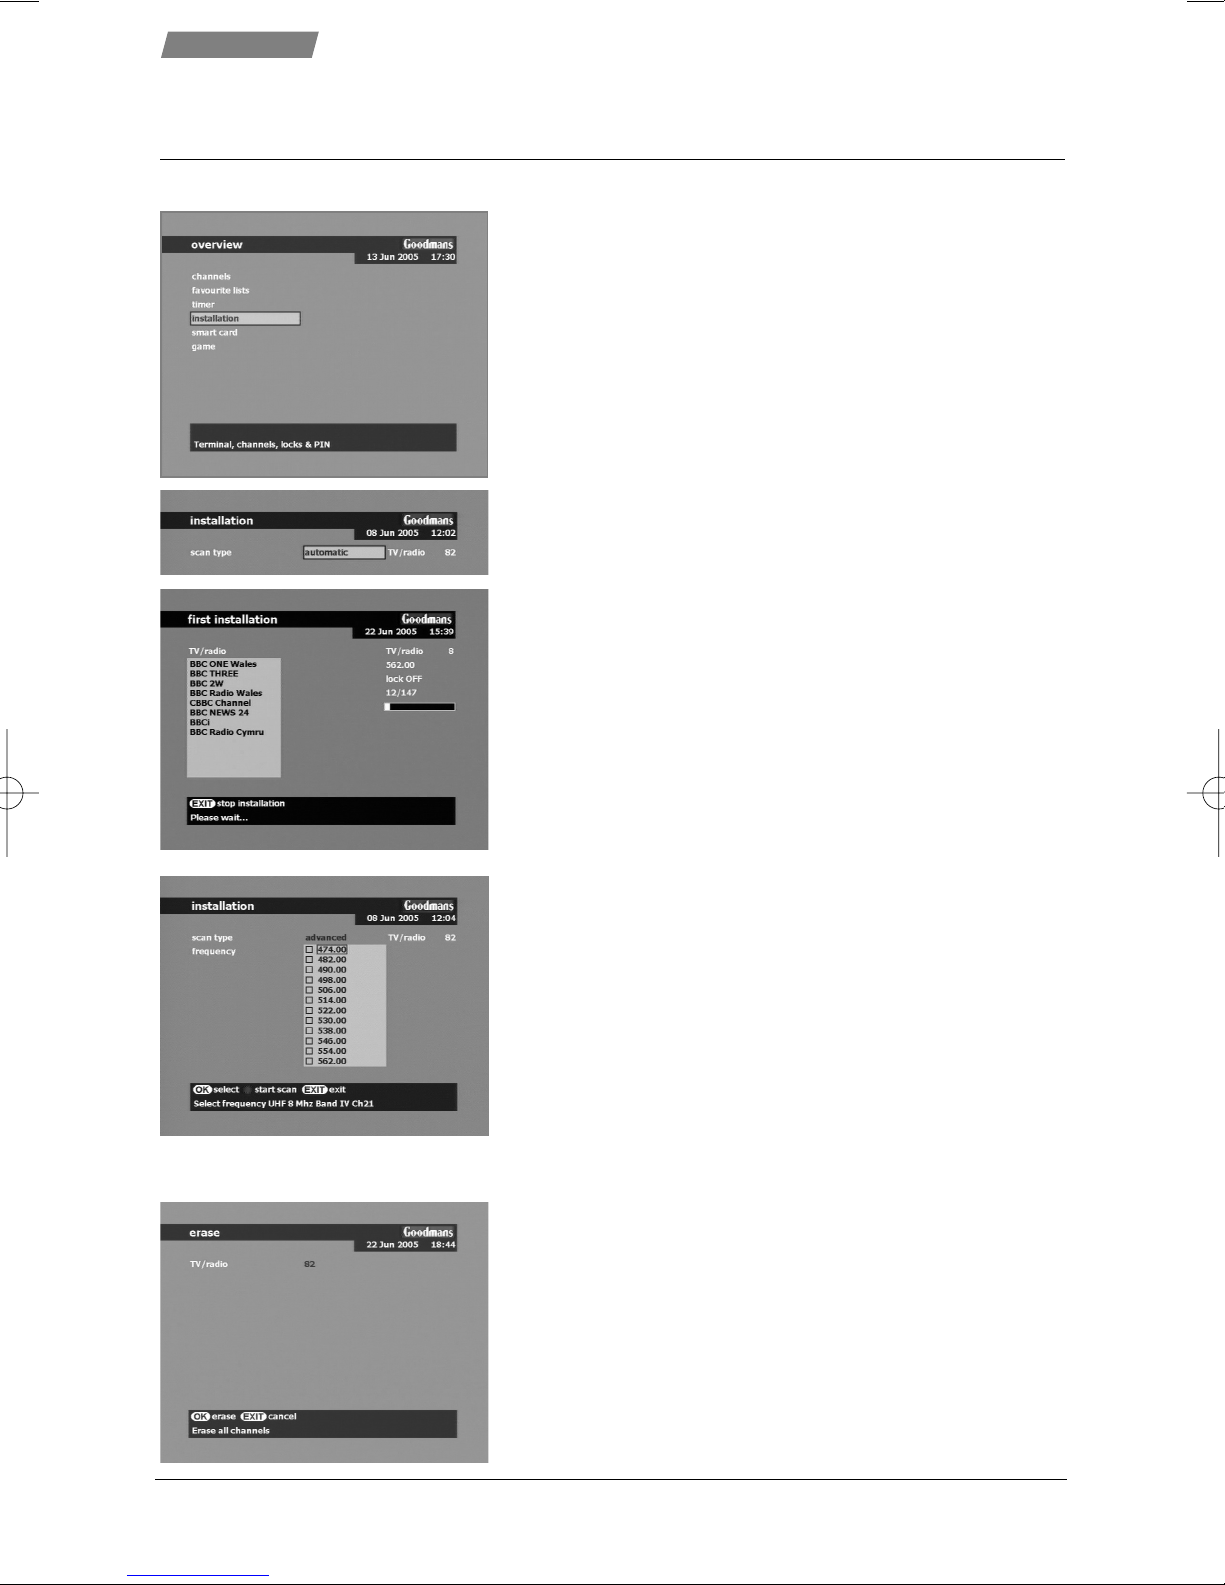
Set-up
35918570 gdb7ca um2.qxp 24/06/2005 09:56 Page 4

5
OOPPTTIIOONN11
Unplug the aerial lead from your
television and connect this to
the RF IN socket on the rear of
the receiver. Connect the aerial
cable supplied from the LOOP
THROUGH out socket on the
receiver to the TV set’s aerial
socket. Connect the TV SCART
socket on the receiver to a
SCART socket on your television.
OOPPTTIIOONN22
Use a SCART lead to connect the
receiver’s VCR SCART socket to a
SCART socket on the VCR.
Connect the aerial leads from
the receiver’s LOOP THROUGH
out socket to the VCR’s AERIAL
IN socket and from the VCR’s
AERIAL OUT socket to the TV
set’s AERIAL socket.
OOPPTTIIOONN22
Use a SCART lead to connect the
receiver’s VCR SCART socket to
SCART 1 socket on the VCR and
connect SCART 2 socket on the
VCR to TV set SCART. Also
connect aerial leads from the
receiver’s LOOP THROUGH out
socket to the VCR’s AERIAL IN
socket and from the VCR’s
AERIAL OUT socket to the TV
set’s AERIAL socket.
Additional SCART cables are available from your dealer.
IIMMPPOORRTTAANNTTNNOOTTEE::This receiver MMUUSSTTbe connected via scart leads to your TV
and/or VCR.
TV
Aerial
TV
RECEIVER
RF IN RF LOOP
THROUGH TV MAINS
INPUT
VCR
TV Aerial in
TV SCART in
IN
OUT
CCoonnnneeccttiioonnss
Set-up
TV
Aerial TV
VCR
RECEIVER
RF IN RF LOOP
THROUGH TV MAINS
INPUT
VCR
OUT
IN
IN
OUT
VCR SCART in
TV aerial in
TV SCART in
VCR aerial in
TV
Aerial TV
VCR
RECEIVER
RF IN RF LOOP
THROUGH TV MAINS
INPUT
VCR
1
21
2
OUT
IN
IN
OUT
VCR SCART 2 VCR SCART in
TV SCART in
TV aerial in
VCR aerial in
How to connect the aerial, scart and co-axial cables
Caution : Always disconnect the receiver from the mains supply before you connect it
to any other equipment.
35918570 gdb7ca um2.qxp 24/06/2005 09:56 Page 5

6
Insert the batteries into the handset making note of the polarity.
Always point the remote control at the receiver.
RReemmootteeccoonnttrrooll
Set-up
SUBTITLES
GUIDE
TV/DTV
NNuummeerriiccKKeeyyss((00--99))
Controls the numerical
operations and especially
changes programme Directly.
TTVV//DDTTVV
Switch between digital TV and
analogue TV or VCR (when VCR
is in play
UUpp//DDoowwnnaarrrroowwss
Move up and down through the
menu.
Up arrow selects info menu.
LLeefftt//RRiigghhttaarrrroowwss
Move left and right through the
menu options.
EEXXIITT
To exit a menu or get back
in a sub-menu.
MMEENNUU
Access the Main menu.
TTEEXXTT
Display text / interactive pages
if available.
BB
Turns the receiver On/Off (stand by
mode).
PPRR++//PPRR--
Programme + / Programme -
aa+ / aa-
Adjust audio volume level.
cc
Mute/Unmute audio.
CCoolloouurrkkeeyyss((44))
Context dependant function keys.
OOKK
Confirm a choice. Also displays
channel
and favourite list selection menu.
GGUUIIDDEE
Electronic Programme Guide
SSUUBBTTIITTLLEESS
Turn subtitles ON/OFF.
IINNFFOO
Display current programme info and
options.
Button has no function
Buttons have no function
35918570 gdb7ca um2.qxp 24/06/2005 09:56 Page 6

7
1. Insert the power plug. Please wait while the receiver
starts up. This takes about 20 seconds
2. Now choose your screen type.
If you have a 16:9 widescreen TV choose the top option
by pressing the OO
OOKK
KKbutton on the remote control.
If you have a 4:3 standard TV and you want to see all
the picture that is available, press the down arrow key
, to select 4:3 letterbox, and then OO
OOKK
KK. Note that
some programmes will show black bars at the top and
bottom of the picture.
If you have a 4:3 standard TV and you don’t like the
black bars, press
twice, to select centre cutout, and
then OO
OOKK
KK. Note that for some programmes you will miss
the action at the picture edges.
3. The receiver now waits for 30 seconds to allow you to
be comfortable that the aerial and other connections
have been made correctly. When you are happy, press
OO
OOKK
KKto start searching for services.
4. The receiver will now search for all available services in
your area. The list will grow in the window as services
are found. This process will take about 5 minutes to
complete so please be patient.
If no services are found, then the receiver will return to
step 3. Refer to installation difficulties at the back of
the book for possible solutions.
5. After all the services are found, you should now be
watching BBC1.
Choose another service by pressing either PP
PPRR
RR++
++or PP
PPRR
RR--
--
or by entering the service number with the numeric
keys. e.g. press 33
33
then 4
4
44for ITV3, channel 34.
After connecting you unit as shown on page 5, follow the steps below
to complete the setup process and start watching digital TV.
FFiirrssttttiimmeeuussee
Set-up
35918570 gdb7ca um2.qxp 24/06/2005 09:57 Page 7

8
Set-up
BBaassiiccooppeerraattiioonn
Menu operation
Throughout this book, we will use BB
BBOO
OOLL
LLDD
DDtext when referring to
remote control button presses, and
IITTAALLIICC
text when referring
to a particular menu.
You will be using the remote control buttons shown and the
coloured keys, take a moment to find them now.
SUBTITLES
GUIDE
To use these menus, you must first press the MM
MMEE
EENN
NNUU
UUkey
which will then display the main menu.
Choose the desired menu option (menu structure is given
in the chart on page 9)
You do this by using the UU
UUPP
PParrow (
), to move the
yellow box up the list and the DD
DDOO
OOWW
WWNN
NNarrow (
) to move
it down the list.
Once you have highlighted your choice with the yellow
box, press the OO
OOKK
KKbutton to enter the selected menu.
If the receiver states that a PIN number is required (Personal Identification
Number), enter this now.
The default number is 00
0000
0000
0000
00you can find how to change this on page 13.
TV/DTV
In each menu, there is a panel at the bottom of the screen which gives information on which
buttons to press. This could be arrow buttons (
or
) or the coloured buttons.
Finally, when you have finished making adjustments, use the EE
EEXX
XXII
IITT
TTbutton to return up one level.
To return to TV you may need to press it more than once.
Using service lists and viewing programme information
To select a channel from the channel or favourite lists while watching TV:-
1. Press the OO
OOKK
KKbutton on the handset to view the channel selection list.
2. Select the channel you want to watch from the list using the
/
buttons.
3. To choose a personal favourite list, press the GG
GGRR
RREE
EEEE
EENN
NNbutton, choose the list using the
/
buttons (DTT is for all services) and press the OO
OOKK
KKbutton.
See page 14 for details on how to set up favourite lists.
4. Press the OO
OOKK
KKbutton to preview the channel, then press OO
OOKK
KKagain to close the menu.
When viewing TV, if you press II
IINN
NNFF
FFOO
OOon the handset you will display an information banner for
the channel.
Press the II
IINN
NNFF
FFOO
OOkey again to display a synopsis of the current programme. With the synopsis
of the current programme showing, press
to view the synopsis for the next programme.
Press the II
IINN
NNFF
FFOO
OOkey once more to return to the TV picture.
35918570 gdb7ca um2.qxp 24/06/2005 09:57 Page 8

99
SSttrruuccttuurreeooffmmeennuuss
Set-up
Favourites Lists
C annels
Timer
Installation
Language
Connection
Terminal
Power on
Upgrade
Information
Factory Reset
C annels
Parental lock
PIN code
Smart card
Overview of all installed TV & Radio services
Edit favourite lists of TV / Radio services
Setup / Edit timers
Show smart card information
Re-install or add any new TV and radio services
Lock or unlock time or channel access with a specific code
Set up lan ua e choices
Set up receiver output formats
Set power ON options
Download software up rade,
(if up rade is bein broadcast)
Show receiver information
Reset all settin s to factory defaults
Set pin code (0000)
Game
•This receiver is able to evolve. As a consequence it will benefit from free automatic
software updates over the air (when available). The manufacturer reserves the right to
proceed to any software update that it would consider appropriate in order to improve
the functionality of the product, without degrading the quality level. See page 19 for
details.
••Be careful when using “
ffaaccttoorryyrreesseett
”, because it will erase all the data and parameters you
may have set earlier (including resetting the PIN code to 0000). Once you have made a
Factory Reset you will have to re-install your preferences and re-scan your channels.
35918570 gdb7ca um2.qxp 24/06/2005 09:57 Page 9

10
For first time tuning please refer to the “First Time Use”
section on page 7. If this is not the first time follow the
steps below :-
Auto tune
Once the receiver has been connected to the aerial and
television, the receiver can now be tuned in.
1. Press BB
BBon the handset to turn the receiver on.
2. Select
mmeennuu>>iinnssttaallllaattiioonn>>cchhaannnneellss>>iinnssttaallll
3. Press OO
OOKK
KKto start aauuttoommaattiiccscan.
Now wait while the receiver searches for all the available
services, this may take a few minutes.
The receiver will place the services in numerical order as
defined by the broadcasters.
4. Press EE
EEXX
XXII
IITT
TTto exit the menu.
As new services become available, they will need to be
added to the channel list. To re-scan for new channels
repeat the steps above.
Manual tune
IT IS HIGHLY RECOMMENDED THAT ONLY AN ADVANCED
USER USE THE MANUAL TUNING. It is much more simple and
quicker to use the Auto tune method described above.
1. Select
mmeennuu>>iinnssttaallllaattiioonn>>cchhaannnneellss>>iinnssttaallll
2. Press
to select advanced.
3. Press
//
or
//
to select the channel to search.
4. Press OO
OOKK
KKto mark the channel.
5. Repeat steps 3-4 until all desired channels are marked.
6. Press RR
RREE
EEDD
DDto start the scan.
Erasing channels
Should you wish to remove all the tuned services without
performing a factory reset follow. NOTE ALL CHANNELS
WILL BE ERASED AND THE UNIT WILL HAVE TO BE
REINSTALLED.
1. Select
mmeennuu>>iinnssttaallllaattiioonn>>cchhaannnneellss>>eerraassee
2. Press OO
OOKK
KKto erase all the channels.
3. Press EE
EEXX
XXII
IITT
TTwhen finished.
TTuunniinnggtthheerreecceeiivveerr
Set-up
35918570 gdb7ca um2.qxp 24/06/2005 09:57 Page 10

11
Terminal (receiver settings) Setup
Languages
You can choose your desired languages for Sound or
Subtitles if the desired language is not available the default
language for the broadcast will be used.
1. Select
mmeennuu>>iinnssttaallllaattiioonn>>tteerrmmiinnaall>>llaanngguuaaggee
2. Choose the item to change with
//
3. Choose option with
//
If you have a preferred sound or subtitle language, select it
here and when the chosen service becomes available the
sound or subtitles will appear automatically. There are 2
options in case more than one preferred language is
required. If both languages are being broadcast the receiver
will use the language 1 option. If none of the selected
languages are available the default option for the broadcast
will be used.
Connection
You can choose how your receiver works with other devices.
1. Select
mmeennuu>>iinnssttaallllaattiioonn>>tteerrmmiinnaall>>ccoonnnneeccttiioonn
2. Choose the item to change with
//
3. Choose option with
//
Notes on settings :-
• For TTVVffoorrmmaattchoose 16:9 for a widescreen TV,
4:3 letterbox for displaying a full widescreen picture on a
standard TV, (Note some programs will show black bars).
or 4:3 centre cutout to fill the screen all the time. (Note
this setting crops widescreen images so some picture
content is lost.) Choose the setting that suits you.
• For RRGGBBlleevveell, adjust the setting until the brightness level
matches your other devices (Analogue TV/VCR/Satellite)
• For TTVVoouuttppuuttchoose from RGB (however your TV may
not be able to display programmes in RGB, please check
the TV manual first) or CVBS (suitable for all other TV
sets).
AAddvvaanncceeddsseettuupp
Set-up
35918570 gdb7ca um2.qxp 24/06/2005 09:57 Page 11

12
Other options
1. Select
mmeennuu>>iinnssttaallllaattiioonn>>tteerrmmiinnaall
2. Choose the item to change with
//
3. Press OO
OOKK
KKto select the chosen option.
ppoowweerrOONN
- to decide what is the first channel tuned to on
connecting the power. The factory default is to power on
to the last viewed channel, if you wish to change this,
press
and then
, then press OO
OOKK
KK. Use
//
to select
the channel you wish to use and press OO
OOKK
KK. Next time the
receiver is switched on at the mains, it will return to the
selected channel.
uuppggrraaddee
- to check for an upgrade (explained on page 19)
iinnffoorrmmaattiioonn
- to look at certain software versions and
details for this receiver. This information may be
requested by the Customer Helpline.
ffaaccttoorryyrreesseett
- to reset the receiver to it’s factory or “out of
box” condition if required. Note the PIN code is also reset
to 0000. Once selected, press OO
OOKK
KKto execute the reset. The
receiver will restart as if it had never been used. A full
reinstallation is required.
Options in the info banner
To change the following options while watching a broadcast
press the II
IINN
NNFF
FFOO
OObutton. All these settings are only stored
until you change programme when the main options are
restored.
1. Use
//
to select the option to change.
2. Choose option with
//
3. Press exit twice to return to normal viewing.
ssuubbttiittlleess
- select a subtitle service (if available)
llaanngguuaaggee
- select an alternative language if one is available
aauuddiioo
-If you choose left or right for this option, the same
audio (from the selected channel) will be heard from
both speakers.
cchhaannnneellss
- select a different channel to view. Press OO
OOKK
KKto
change to the selected channel.
AAddvvaanncceeddsseettuuppccoonntt’’dd
Set-up
35918570 gdb7ca um2.qxp 24/06/2005 09:57 Page 12

13
You can use parental control to create viewing restrictions on your receiver. First create your
own Personal Identification Number (PIN) as shown below.
Select
mmeennuu>>iinnssttaallllaattiioonn>>tteerrmmiinnaallPPIINNccooddee
.
Enter your current PIN (default = 0000).
Now enter you new PPIINN.
Now re-enter your new PIN to confirm.
Your new PIN code is now stored. KKEEEEPPIITTSSAAFFEE!!!!
Note: When entering your PIN, if you make a mistake, press
the YY
YYEE
EELL
LLLL
LLOO
OOWW
WWbutton to try again. Press EXIT at any time to
cancel PIN change. The the below locks to work the PIN
number must be changed from the default (0000)
Now select
mmeennuu>>iinnssttaallllaattiioonn>>ppaarreennttaalllloocckk
You may be asked to enter you PIN code, do this using the
NN
NNUU
UUMM
MMEE
EERR
RRII
IICC
CCbuttons.
Select the following options using the
//
//
keys, use
//
//
to change the option and then press OO
OOKK
KK.
Activation - switch controls on/off
Turn on/off the lockout modes.
MMeennuulock requires a PIN to enter any menus.
CChhaannnneelllock allows certain channels to be locked.
MMaattuurriittyylock requires a PIN for certain programmes. (Please
note this is dependant on the programme containing the
relevant information. If the information is not being broadcast then the programmes will
be shown. For this case it is recommended that you use the channel lock instead of the
Maturity lock.)
Channels - lock specific channels
1. Select the channel you wish to lock using the
//
//
keys.
2. Press GG
GGRR
RREE
EEEE
EENN
NNto Lock/Unlock it (a padlock appears next to
the channel name when locked).
To view a locked channel, select the channel you wish to
view, then enter your PIN.
Maturity - lock by programme content
1. Enter PIN
2. Enter the age limit for programme content.
Any programmes with content above or equal to the age
selected will require a PIN number to be viewed. Enter the
number when prompted.
PPaarreennttaallccoonnttrroollss
Set-up
35918570 gdb7ca um2.qxp 24/06/2005 09:57 Page 13

14
Use
Channel List
This list contains all the channels that were found during an Auto tune or Manual tune. You
can use this list to find your services and check the signal strength to confirm the quality of
signal received.
1. Select
mmeennuu>>cchhaannnneellss
2. Select the channel you wish to check using
//
//
3. Press the OO
OOKK
KKbutton, the channel selected appears.
The 2 bars will show Green if the signal quality is good.
If they show yellow, then your aerial installation may
need some adjustment if you are getting some picture
reception problems.
If the bars show any red, then your aerial installation may
need replacing as you will not be able to watch services
in this condition.
Favourite List
This menu enables you to create and organise your Favourite channels lists. You can create up
to 7 Favourite channel lists from the current channels list.
Access the favourite list menu by following
mmeennuu>>ffaavvoouurriitteelliissttss
.
Press the TT
TTEE
EEXX
XXTT
TTkey to select the list you wish to change. The name of the current list is shown
on the right hand side of the screen under the name of the currently showing channel. (The
default names for the favourite lists are TV 1 -> TV 7)
NNaammiinngg//CCrreeaattiinnggaaFFaavvoouurriitteecchhaannnneellsslliisstt..
With the list to be changed selected press the YY
YYEE
EELL
LLLL
LLOO
OOWW
WWbutton to access the name edit menu.
1. Press RR
RREE
EED
D
DDbutton to switch between lower case and
capitals.
2. Press
//
//
keys to select the character to be changed
3. Press
//
//
keys to modify the character.
4. Press YY
YYEE
EELL
LLLL
LLOO
OOWW
WWbutton to delete the selected character.
5. Press OO
OOKK
KKto confirm changes and return to "favourites"
list.
AAddddiinnggFFaavvoouurriitteecchhaannn
neellss
1. Press the TT
TTEE
EEXX
XXTT
TTbutton to select the Favourite list to
change.
2. Using
//
//
keys, select the channel you want to add and press the GG
GGRR
RREE
EEEE
EENN
NNbutton on your
remote, the channel is marked or cleared as Favourite. A symbol will appear beside the
channel's name.
3. Repeat step 2 for all channels you want to add to your Favourite list.
4. When finished, press the EE
EEXX
XXII
IITT
TTbutton repeatedly to return to TV mode.
To select the favourite list while watching TV, press the OO
OOKK
KKbutton, then the GG
GGRR
RRE
E
EEEE
EENN
NNbutton.
Now select the list you wish to use and press OO
OOKK
KK, then choose the channel you wish to view.
Press OO
OOKK
KKto view the selected channel. NOTE while watching TV with a favourite list selected
the PP
PPRR
RR++
++and PP
PPRR
RR--
--buttons will only cycle through the channels in that list.
CChhaannnneelllliissttss
35918570 gdb7ca um2.qxp 24/06/2005 09:57 Page 14

15
TTiimmeerrpprrooggrraammmmiinngg
To record an analogue channel ensure that the aerial connections to your VCR are as shown in
the connection diagram on page 5 and use the VCR as normal.
To record a digital channel, connect the receiver directly to your VCR via the VCR scart socket
on the rear of the receiver (see connection diagram). Please consult your VCR user manual for
details on recording via AV or AUX inputs.
The timer function enables the receiver to :-
●Automatically switch to channels at pre-selected times.
●Automatically switch the receiver ON or OFF
●Start Auto Record on the VCR (where the VCR supports scart
automatic recording function, see VCR manual for details.)
1. Open the timer menu by selecting
mmeennuu>>ttiimmeerr
2. Select the timer options using the
//
//
and
//
//
keys.
--TTiimmeerrnnuummbbeerr: You can select up to 16 different events.
--SSttaattuuss: Set to "Enable" to use the timer function, or "Disable" to stop the timer functions
of the timer number you selected. (Please note to set the timer, first set this option to
enabled)
--RReeppeettiittiioonn::Choose how often the timer event is to occur (Once, Daily, Weekly).
--AAccttiioonn: select the action you want the timer to do.
VVCCRROONN//OOFFFF: The timer will switch on and off only the VCR SCART at the programmed time
(the user must set his VCR in order to record the programme.)
ZZaappttoo
cchhaannnneell:The timer will display a message to allow you to switch to a programmed
channel at the programmed time.
PPoowweerrOOFFFF:The timer will switch off the receiver at the programmed time.
PPoowweerrOONN:The timer will switch on the TV (if it is in standby and connected to the receiver
through a SCART cable; before using this option please check your TV instruction manual
to ensure that your TV supports auto turn-on via a SCART cable, not all TVs support this
functionality) and the VCR SCART at the programmed time.
PPoowweerrOONN//OOFFFF:The timer will switch on and off the TV (if it is in standby and connected to
the receiver through a SCART cable; before using this option please check your TV
instruction manual to ensure that your TV supports auto turn-on via a SCART cable, not
all TVs support this functionality) at the programmed time.
A suitably equipped VCR can record automatically during this time. Please note that unless your
VCR supports automatic scart recording YOU MUST ALSO SET THE VCR TIMER.
Use
✻
✻
35918570 gdb7ca um2.qxp 24/06/2005 09:57 Page 15

16
TTiimmeerrccoonnttiinnuueedd
DDaayyooffwweeeekk: If you selected "Weekly" in the RReeppeettiittiioonnfield,
then highlight the day option using the
//
//
keys. Then
select the day in the week that the timer should be set for
using the
//
//
keys.
DDaattee: Press OO
OOKK
KKto display the calendar then, using the
cursor buttons set the date of the timer event. Use the
//
//
keys to select the month and the
//
//
keys to
select the day.
Press OO
OOKK
KKwhen you have chosen the date.
--SSttaarrttTTiimmee:Set the start time by firstly pressing the YY
YYEE
EELL
LLLL
LLOO
OOWW
WWbutton to clear the current
entry, then using NN
NNUU
UUMM
MMEE
EERR
RRII
IICC
CCAA
AALL
LLbuttons, enter the new time.
--SSttooppTTiimmee:Set the finish time using the YY
YYEE
EELL
LLLL
LLOO
OOWW
WWand NN
NNUU
UUMM
MMEE
EERR
RRII
IICC
CCAA
AALL
LLbuttons as above.
CChhaannnneel: With the channel option highlighted, press the OO
OOKK
KK
button, select channel to be shown when the timer activates
and then press OO
OOKK
KK.
3. When you are happy with the settings, press the GG
GGRR
RREE
EEEE
EEN
N
NNbutton to save the timer setting.
TTiipp: The options available for change (those that are not available will be greyed out) change
depending on what ACTION you have set for the timer.
4. Repeat steps 2 to 4 above for each timer event. Press EE
EEXX
XXII
IITT
TT
to return to the main menu and
again to return to the TV picture.
Use
35918570 gdb7ca um2.qxp 24/06/2005 09:57 Page 16

Use
PPrrooggrraammmmeegguuiiddee
To display the TV programme guide, press the GG
GGUU
UUII
IIDD
DDEE
EEkey. This shows the programme guide data
provided by the broadcasters. This ranges from what’s on now and next to a full 7 days worth
of data. The currently showing programme is highlighted by the white box (in the screenshot
below THIS MORNING at 12:00 is the currently showing programme). Please note that not all
channels broadcast the full 7 day programme guide data, in this case the box will show “No
program information”, this is normal and not a fault with the receiver.
• To select a different channel, use the
//
//
keys.
• The highlight box (red outline box) can be moved through the programme information for
the selected channel using the
//
//
keys.
• Press GG
GGRR
RREE
EEEE
EENN
NNto view the information for the next day.
Press RR
RREE
EEDD
DDto view the information for the previous day.
• To see more information about a selected programme press YY
YYEE
EELL
LLLL
LLOO
OOWW
WW.
• To record the selected programme press BB
BBLL
LLUU
UUEE
EE. The timer details are automatically transferred
to the timer. See page 15 for details on the timers. Press GG
GGRR
RREE
EEEE
EENN
NNto save timer.
• With the currently showing programme highlighted with the red box, press the OO
OOKK
KKbutton to
view that programme.
NNoottee: There may be a delay in displaying your selected channel, this is due to the receiver
collecting the information to be displayed.
17
35918570 gdb7ca um2.qxp 24/06/2005 09:57 Page 17

18
Trouble Shooting
Not every picture or sound problem is caused by a defect in your Digital Terrestrial Receiver.
Leads having been accidentally pulled out or worn out batteries in the remote control can also
cause impairment. If your unit does something unexpected while you are using it, please refer
to the table below. If this fails to solve the problem please unplug the unit, wait a few seconds
then plug it in again. If the problem persists, please contact the Goodmans Product Information
Helpline on 00887700 88773300008800.
Technical Information
This product fulfils the European directives 89/336/EEC, 73/23/EEC and 93/68/EEC. This device
conforms to the safety regulation EN 60065 and therefore the international safety regulation
IEC 60065.
You may not open the Digital Terrestrial Receiver. The manufacturer accepts no liability for
damage resulting from improper handling
MMaaiinnssvvoollttaaggee::PPoowweerrccoonnssuummppttiioonn::
230V~, 50/60Hz Operating approx. 10W.
AAmmbbiieenntttteemmppeerraattuurree::AAuuddiiooFFoorrmmaatt::
+10°C to 35°C Analogue : Stereo Sound
DDiimmeennssiioonnssaannddwweeiigghhtt
Dimensions : W x H x D - 252 x 43 x 153mm Weight : Approx. 0.7Kg
VViiddeeo
o::AAuuddiioo::
Signal to noise : 73dB Signal-to-noise: 95dB
Video jitter : 1ns Interchannel isolation : 90dB
TTrroouubblleesshhoooottiinnggaanndd
tteecchhnniiccaalliinnffoorrmmaattiioonn
Use
FFAAUULLTTCCAAUUSSEE//RREEMMEEDDYY
Receiver does not Check or replace the remote control batteries.
respond to the Unit is in standby (Red light on). Press Standby button.
remote control Point the remote control directly at the receiver.
Remove all obstacles which may impair the path of the
remote control signal.
No Picture Check all connections at the rear of the unit
Disrupted Picture Check RF IN connection. Ensure cables to TV are inserted correctly
Select AV channel on TV set
Check Aerial Installation with a qualified installer.
No Sound Check all connections at rear of unit
Unit may be in Mute mode. Press the a+ button.
No Power Check mains plug is inserted correctly and receiver is switched on
18
35918570 gdb7ca um2.qxp 24/06/2005 09:57 Page 18

19
IInnssttaallllaattiioonnddiiffffiiccuullttiieess
What to do if your installation should fail!
• Check that all the connections have been made as shown in the diagram and the power is
switched on.
• Check the batteries are in the right way round.
• Make sure the TV aerial is connected directly to your receiver (1st in chain).
• Check any signal boosters are Digital TV compatible and switched on.
• Repeat the installation by following the tuning instructions on page 10.
• If this doesn't help, you mmaayyneed an aerial upgrade.
Reasons to upgrade your aerial installation
There are 3 main reasons why you may need to upgrade your aerial.
• Your current aerial and cabling may not be able to receive all the digital channels due to
its age and condition.
• In your location the digital channels may be transmitted on different frequencies to your
existing analogue signals and you may need a different type of aerial to receive them.
• The new digital channels may be transmitted from a new transmitter and if this is the case
the aerial would have to be re-aligned. Alternatively you could add a second aerial to your
system.
• For further information contact our approved aerial installation helpline on 00887700 00110066119944..
From time to time new services are launched which may require your receiver to be upgraded
with new software before you can use them. Sometimes new features may be introduced to
enhance your receiver. A menu is automatically displayed when a new “Over-Air Upgrade” is
detected. The receiver automatically looks for updates in standby mode.
Follow the instructions on screen to upgrade your receiver.
Check for upgrade
You can manually check to see if new software is available for download. If there is one
available, you will see it listed.
To check:-
1. Select
mmeennuu>>iinnssttaallllaattiioonn>>tteerrmmiinnaall>>uuppggrraaddee
.
2. If there is an item to download, select it using
//
//
keys
and press OO
OOKK
KK.
3. If no download is available, press RR
RREE
EEDD
DDto scan all
frequencies for a download. (please note this scan will
take several minutes). To cancel scanning for an update
press the EE
EEXX
XXII
IITT
TTbutton.
4. If the scan finds an upgrade to download, select it using
//
//
keys and press OO
OOKK
KK. If there is still no download available, press EE
EEXX
XXII
IITT
TT.
The download can take up to 30 minutes or be slow to start, so please be patient. After the
download, details about the new software may be displayed for you. There may also be a
telephone number to call in case of any difficulty.
• If the download fails, you can try again later.
• During the download, DO NOT switch off the receiver!
UUppggrraaddiinnggyyoouurrrreecceeiivveerr
35918570 gdb7ca um2.qxp 24/06/2005 09:57 Page 19

20
SUBTITLES
GUIDE
GOODMANS
35918570
TV
Aerial TV
VCR
RECEIVER
RF IN RF LOOP
THROUGH TV MAINS
INPUT
VCR
vw
x
u
Aerial Leads
Scart Leads
Note : T e TV MUST be
connected to t e receiver
using t e scart lead supplied.
AV1
EXT1
AUX1
OUT
IN
IN
OUT
Not supplied
Note : To record digital TV,
connect t e receiver to t e
VCR using a scart lead. T is
can be purc ased from your
dealer.
1 supplied
1 supplied
1. Connect as shown in the diagram steps -.
2. Switch on and wait for the green light to appear.
3. Insert batteries into the remote control handset.
4. When the menu appears, choose your TV type,
by pressing
or
on the handset.
5. Press OO
OOKK
KKto start auto setup.
QUICK START INSTRUCTIONS
SUBTITLES
GUIDE
TV/DTV
35918570 gdb7ca um2.qxp 24/06/2005 09:57 Page 20
Table of contents
Other Goodmans TV Receiver manuals