7
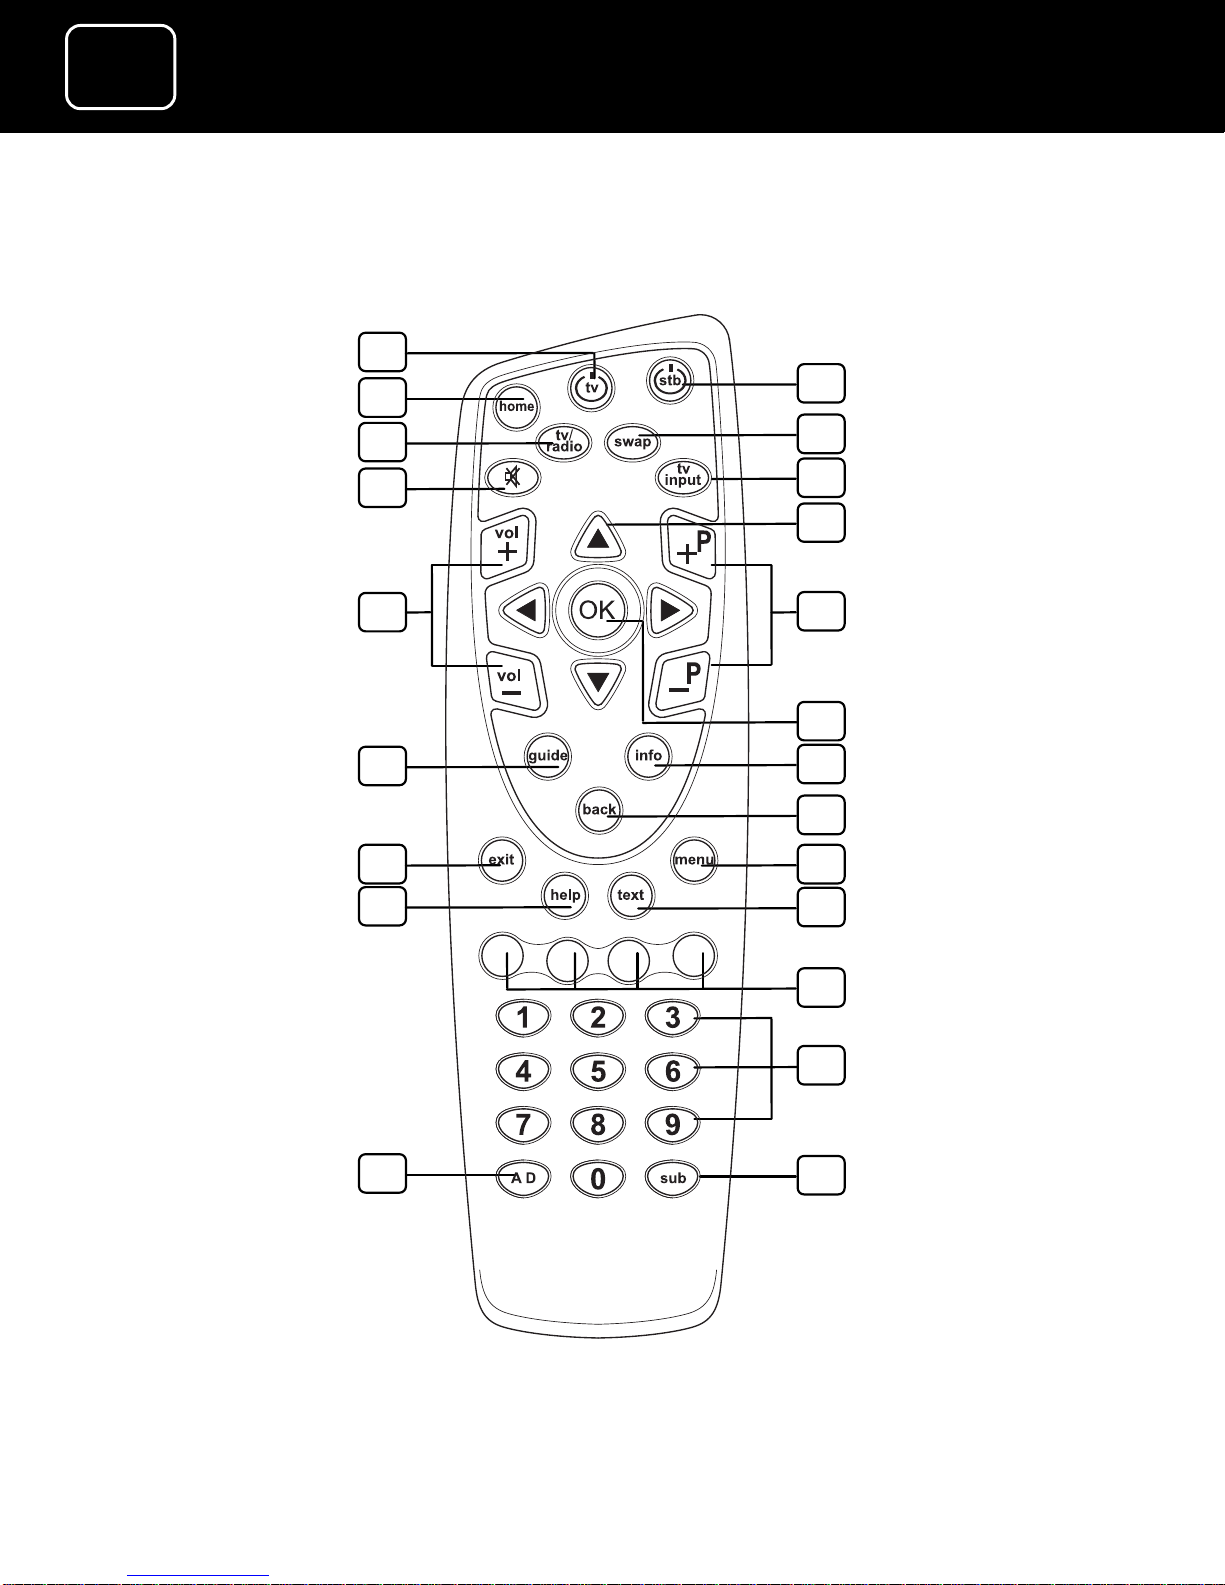
GDR11 Digital TV receiver
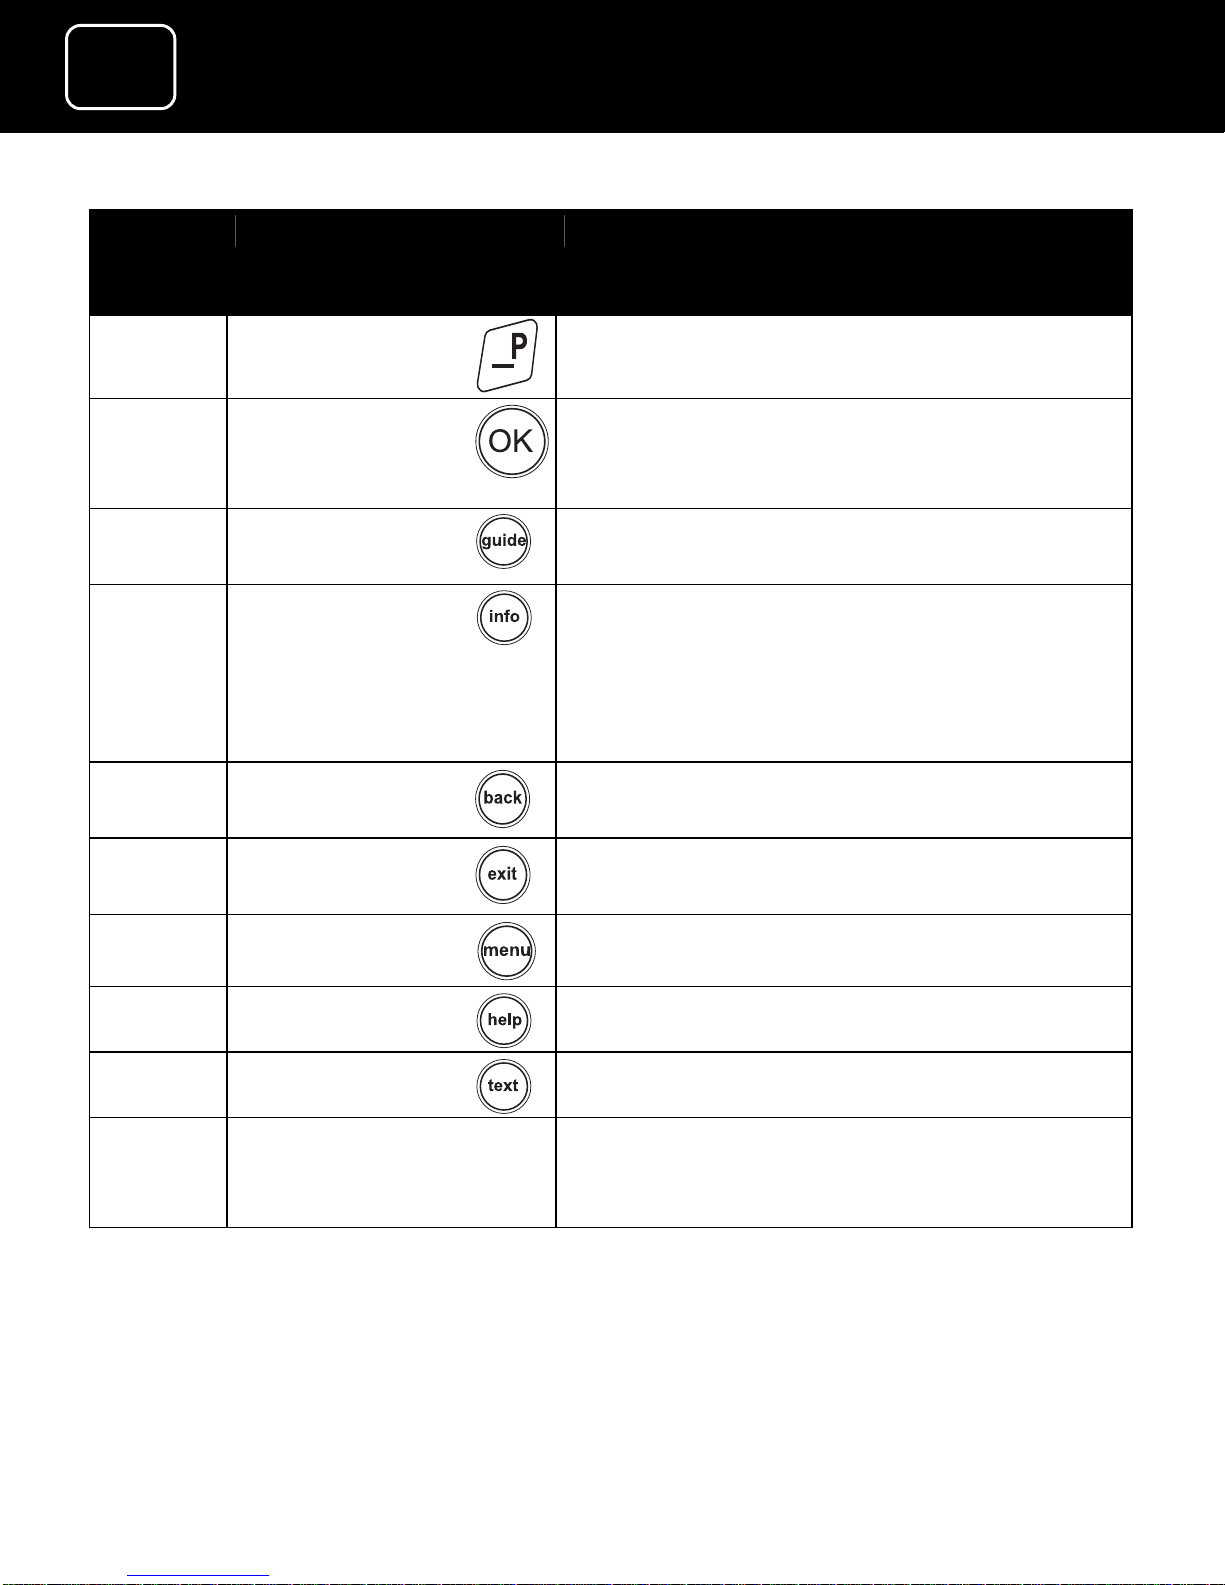
Number
on
diagram
Button name What the button does
1 <home> Goes to the first channel in your list
(usually BBC 1)
2 Switches your TV on or off (if you have
set up this feature)
3 Switches the receiver on and off (onto
standby)
4 Switches between TV and radio
5 Switches between the channel you’re
watching and the channel you were
previously watching
6 Mutes the receiver volume (it can also
mute your TV if you have set up this
feature)
7 Selects the channel the receiver is set up
on (if you have set up this feature)
8 Increases or reduces the receiver volume.
These buttons can also increase or
reduce your TV volume (if you have set
up this feature)
9 Moves around the on-screen menus
10 Goes up and down the channel list