Gordon 94202 Quick reference guide

ASSEMBLY & OPERATING INSTRUCTIONS
3491 Mission Oaks Blvd., Camarillo, CA 93011
Visit our Web Site at www.harborfreight.com
Copyright©2006 by Harbor Freight Tools®. All rights reserved. No portion of this manual or
any artwork contained herein may be reproduced in any shape or form without the
express written consent of Harbor Freight Tools.
For technical questions and replacement parts please call 1-800-444-3353.
®
94202
CHILD’S MOTORIZED
Due to continuing improvement, actual product may differ slightly from product described herein.
WOOD CAR

SKU 94202 For technical questions please call 1-800-444-3353. Page 2
THANK YOU for choosing a HARBOR FREIGHT TOOLS product. For future reference, please
complete the owner’s record below:
Model______________ SerialNo._____________ PurchaseDate_______________
SAVE THE RECEIPT, WARRANTY AND THESE INSTRUCTIONS. It is important that you read the
entire manual to become familiar with the unit BEFORE you begin assembly.
Technical Specifications
Motor: 6V
Transformer: 120V
ChargeTime: 6-8 hours
RunTime: 1-1/2 hours (when fully charged)
AC/DC Adapter: Input: 120V, AC, 60 Hz
Output: 12V, DC, 1000mA
Fuse: 20 Amp, 250V (spare included)
Battery: Non-spillable, rechargeable valve
regulated lead-acid battery
SteeringWheel Battery: (2) “AA”, 1.5V
Maximum Weight Capacity: 88 Lbs.
Age Range 4 to 6 years of age
Safety Warnings and Precautions
WARNING:When using product, basic safety precautions should always be followed to
reduce the risk of personal injury and damage to equipment.
Read all instructions before using this product!
Specific Warnings and Precautions Pertaining to Children
1. Dress Safely. Make certain that children always wear local, state, and federally approved
safety helmet, elbow pads, knee pads, shoes and safety clothing when operating the
MotorizedWood Car.
2. Direct adult supervision is required at all times while a child is learning to ride,
and while riding this Motorized Wood Car. Unsupervised driving by children can lead
to serious injury, and even death. A child must be taught the appropriate safety rules before
they attempt to use this product. Never allow a playmate to ride the car without also learning
all appropriate safety rules. The adult must be close enough at all times to intercede and
assist with the vehicle if a potentially dangerous situation arises.
3. The appropriate age range: Children 4 to 6 years of age. Do not exceed the maximum
weight capacity of 88 Lbs.
4. This product is designed for only one rider. Do not allow passengers on the Motorized
Wood Car. Sit only on the Seat and only stand on the floorboards or running boards when
entering or exiting the Car.

SKU 94202 For technical questions please call 1-800-444-3353. Page 3
WORK AREA
When assembling and working on this product, keep your work area clean and well lit.
Cluttered benches and dark areas invite accidents.
ELECTRICAL SAFETY
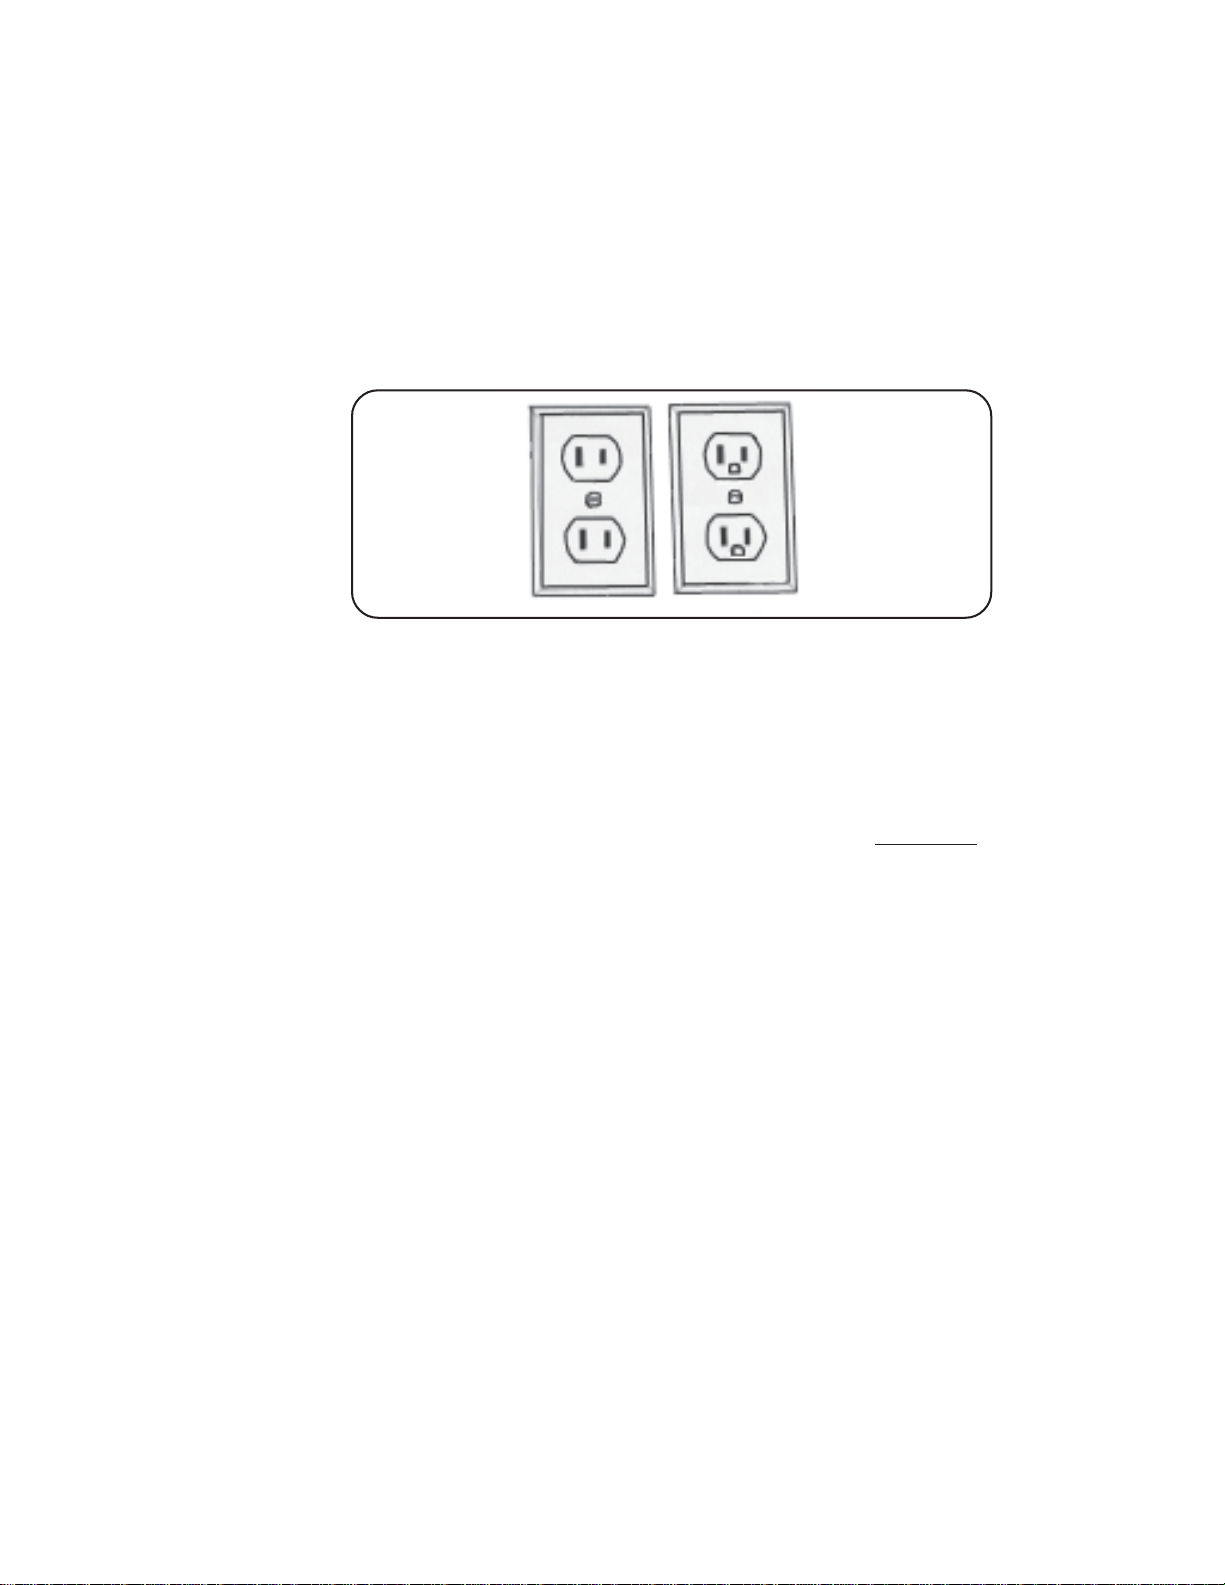
1. Grounded products must be plugged into an outlet properly installed and grounded in
accordance with all codes and ordinances. Never remove the grounding prong or
modify the plug in any way. Do not use any adapter plugs. Check with a qualified
electrician if you are in doubt as to whether the outlet is properly grounded. If a
grounded product should electrically malfunction or break down, grounding provides a low
resistance path to carry electricity away from the user.
2. Double insulated products are equipped with a polarized plug (one blade is wider
than the other). This plug will fit in a polarized outlet only one way. If the plug does
not fit fully in the outlet, reverse the plug. If it still does not fit, contact a qualified
electrician to install a polarized outlet. Do not change the plug in any way.
Double insulation eliminates the need for the three wire grounded power cord and
grounded power supply system.
3. Avoid body contact with grounded surfaces such as pipes, radiators, ranges, and
refrigerators. There is an increased risk of electric shock if your body is grounded.
5. Maintain a safe play environment. Keep the play area well lit. Keep the play area free of
obstructions, trash and other debris. Use the Car only on open, flat and level terrain. Avoid
wet or sandy areas. Do not attempt to use this product on steep inclines. Avoid sidewalks,
steps, alleys, streets, driveways and other potentially dangerous public areas.
Always keep children within a safe riding area. Never allow a child to drive near swimming
pools or other bodies of water.
6. Do not race the Motorized Wood Car and do not drive it at night or in the dark. Driving
at night could lead to unexpected obstacles, resulting in an accident.
7. Beware of emergency stops; the Motorized Wood Car is not equipped with any
brakes.
8. Properly Instruct Children. While children can quickly learn the skills needed to drive this
Motorized Wood Car, it must be noted that their judgement skills are still
developing. A responsible adult must first evaluate the driving area, and the child’s skill level
before authorizing use of this car for a particular child. Remember, children are not always
able to anticipate and recognize hazards, even after they have been properly instructed.
9. Never allow a child to drive down or across a steep slope; doing so could result in the
vehicle running at an unsafe speed, even if the driver’s foot is taken off the
Accelerator Pedal. At unsafe speed, the Motorized Car could tip over, or lose traction,
causing the driver to lose control of the car. Likewise, driving up steep slopes could result in
loss of control of the car.
10. The battery must be handled only by adults. Never allow children to charge the battery.
11. This Motorized car is only for children between the ages of 4 to 6 years old. Children
younger than 4 years should be kept away from this vehicle.
OTHER IMPORTANT SAFETY PRECAUTIONS

SKU 94202 For technical questions please call 1-800-444-3353. Page 4
SERVICE
13. When servicing the MotorizedWood Car, use only identical replacement parts. Follow
instructions in the
“Inspection, Maintenance, And Cleaning”
section of this manual.
Use of unauthorized parts or failure to follow maintenance instructions may create a risk of
electric shock or injury.
14. Always unplug the Motorized Wood Car Charger from its electrical outlet before
performing any inspection, maintenance, or cleaning procedures.
15. WARNING! People with pacemakers should consult their physician(s) before using
this product. Operation of electrical equipment in close proximity to a heart
pacemaker could cause interference or failure of the pacemaker.
4. Do not abuse the Charger Cord. Never use the Charger Cord to move the Motorized
Wood Car or pull the Plug from an outlet. Keep the Charger Cord away from heat, oil,
sharp edges, or moving parts. Replace damaged Cords immediately. Damaged
Cords increase the risk of electric shock.
5. When charging the battery outside, use an outdoor extension cord marked “W-A”
or “W”. These extension cords are rated for outdoor use, and reduce the risk of electric
shock. PERSONAL SAFETY
6. Stay alert. Adults should closely watch what the child is doing, and use common
sense when supervising the child’s driving activities.
7. Be sure the Power Switch is off before plugging in.
8. Use safety equipment. Always wear eye protection during assembly and
maintenance.
USE AND CARE
9. Do not use the Motorized Wood Car if the On/Off switch does not turn it on or off. Any
product that cannot be controlled with the On/Off Switch is dangerous and must be replaced.
10. Disconnect the Charger Cord from the power source before making any adjustments,
changing accessories, or storing the Motorized Wood Car. Such preventive safety
measures reduce the risk of turning on the product accidentally.
11. Proper Battery Care: Battery leakage may occur under extreme usage or temperature
conditions. Never allow children to handle the 6V battery. If battery flud comes in contact
with skin, wash with soap and water and rinse with lemon juice and vinegar. If the fluid
comes into contact with the eyes, flush with water for several minutes and contact a doctor
immediately. Never burn batteries, as they can explode in a fire. Do not charge with a
leaking battery. Contact local solid waste authorities for instructions on correct disposal or
recycling of the battery.
12. Maintain the Motorized Wood Car with care. Do not use if the Motorized Wood Car is not
functioning properly or if any components of the product are damaged. Tag damaged Wood
Car “Do not use” until it is repaired.

SKU 94202 For technical questions please call 1-800-444-3353. Page 5
Figure A
16. Do not expose the MotorizedWood Car to rain or wet conditions. Water entering
electrically powered equipment will increase the risk of electric shock.
GROUNDING
WARNING!
Improperly connecting the grounding wire can result in the risk of electric shock. Check with
a qualified electrician if you are in doubt as to whether the outlet is properly grounded. Do not
modify the Charger power cord plug provided with the Car. Never remove the grounding prong
from the plug. If the plug will not fit the outlet, have a proper outlet installed by a qualified
electrician.
GROUNDED TOOLS: TOOLS WITH THREE PRONG PLUGS
1. Tools marked with “Grounding Required” have a three wire cord and three prong grounding
plug. The plug must be connected to a properly grounded outlet. If the Motorized Wood Car
should electrically malfunction or break down, grounding provides a low resistance path to
carry electricity away from the user, reducing the risk of electric shock. (See Figure A.)
2. The grounding prong in the plug is connected through the green wire inside the cord to the
grounding system in the tool. The green wire in the cord must be the only wire connected to
the Motorized Wood Car’s grounding system and must never be attached to an electrically
“live” terminal. (See Figure A.)
3. A grounded appliance must be plugged into an appropriate outlet, properly installed and
grounded in accordance with all codes and ordinances. The plug and outlet should look like
those in the following illustration. (See Figure A.)

SKU 94202 For technical questions please call 1-800-444-3353. Page 6
DOUBLE INSULATED APPLIANCES: APPLIANCES WITH TWO PRONG PLUGS
NOTE: The Charger/Adapter (13) has a two-prong plug.
1. Appliances/Products marked “Double Insulated” do not require grounding. They have a
special double insulation system which satisfies OSHA requirements and complies with the
applicable standards of Underwriters Laboratories, Inc., the Canadian Standard Association,
and the National Electrical Code. (See Figure B.)
2. Double insulated tools may be used in either of the 120 volt outlets shown in the following
illustration. (See Figure B.)
EXTENSION CORDS
1.
Grounded
appliances require a three wire extension cord.
Double Insulated
products can
use either a two or three wire extension cord.
2. As the distance from the supply outlet increases, you must use a heavier gauge extension
cord. Using extension cords with inadequately sized wire causes a serious drop in voltage,
resulting in loss of power and possible tool damage. (See Figure C, next page.)
3. The smaller the gauge number of the wire, the greater the capacity of the cord. For
example, a 14 gauge cord can carry a higher current than a 16 gauge cord. (See Figure C.)
4. When using more than one extension cord to make up the total length, make sure each cord
contains at least the minimum wire size required. (See Figure C.)
5. If you are using one extension cord for more than one tool, add the nameplate amperes and
use the sum to determine the required minimum cord size. (See Figure C.)
6. If you are using an extension cord outdoors, make sure it is marked with the suffix “W-A”
(“W” in Canada) to indicate it is acceptable for outdoor use.
7. Make sure your extension cord is properly wired and in good electrical condition. Always
replace a damaged extension cord or have it repaired by a qualified electrician before using
it.
8. Protect your extension cords from sharp objects, excessive heat, and damp or wet areas.
Figure B

SKU 94202 For technical questions please call 1-800-444-3353. Page 7
Figure C
Unpacking
When unpacking your Child’s Motorized Wood Car, check to make sure all parts listed on page 10
are included. If any parts are missing or broken, please call HARBOR FREIGHT TOOLS at
1-800-444-3353.

SKU 94202 For technical questions please call 1-800-444-3353. Page 8
Assembly/ Operation
Your Motorized Wood Car will require some basic assembly. It is important that you read the entire
manual to become familiar with the product BEFORE you assemble and use the Motorized Wood
Car. Before assembling the Motorized Wood Car be sure that you have all parts described in the
Parts List and Assembly Diagram located on pages 10 and 11.
Note: The supervising adult must make certain that the child is taught and thoroughly
understands the following procedures before the child is allowed to use the Motorized Wood
Car.
The Instrument Panel
1. The Instument Panel (3) consists of a Steering Wheel (1), an On/Off Switch (17), and a
Forward/Reverse Switch (18).
The On/Off Switch (17) is located on the left of the Instrument Panel (3) -see Figure 1. Press
down on the top of the Switch to “l”, to turn on the power. Press the bottom of the On/Off
Switch (17) down to “O” to turn power off.
2. The Forward/Reverse Switch (18) is located on the right side of the Instrument Panel.
Caution: Never attempt to move this Switch while theWood Car is rolling.
Press the bottom of the Switch down to “=” to put the car in REVERSE.
Press the top of the Switch down to “-”put the car in FORWARD gear.
3. The Steering Wheel (1) has its own Steering On/Off Switch (19) which is used to activate the
horn and the buttons above the horn. Press down to “-” to turn the Steering Wheel (1) power
“ON”, and press down on the “O” side to turn power “OFF”. Press the large Button in the
center of the Steering Wheel (1) to honk the horn. Each of the individual buttons above the
“horn” will cause the Car to talk; a voice will greet the driver.
Figure 1-Instrument Panel
On/Off
Switch (17)
Steering On/Off
Switch (19)
Forward/
Reverse
Switch (18)
Changing the SteeringWheel Batteries
1. Remove the Bolt holding the Steering Wheel (1) in place. Remove the Steering Wheel
Battery Compartment Cover (20). Remove both “AA” batteries from the Battery
Compartment-see Figure 2. Dispose of the batteries in accordance with local laws and
guidelines. Replace with 2 new “AA” Batteries and replace Battery Compartment
Cover (20)-see Figure 2. Never allow children to touch or attempt to replace batteries.
Note: Batteries must be handled only by responsible adults.

SKU 94202 For technical questions please call 1-800-444-3353. Page 9
Figure 2-Steering Battery Compartment
Accelerator Pedal (10)
1. The Accelerator Pedal (10) is for starting and stopping the Wood Car. To start the Car
moving, step on and keep the Accelerator Pedal in its down position. To reduce speed and
coast to a stop, lift foot off of the Accelerator Pedal (10). Make certain that the Forward/
Reverse Switch (18) is in the desired position before pressing down on the
Accelerator Pedal (10).
Battery
Compartment Cover (20) Battery
Compartment
Changing the Main Battery and Fuse
Note: Only a responsible adult should change the battery and fuse.
1. The Main Battery (14) is located beneath the Seat. Make certain that the ON/OFF
Switch (17) is “OFF” and that the Car is unplugged. Unscrew and remove both Screws
holding the Seat into place. The Battery (14) is secured in place with a wooden bar-see
Figure 3. Unscrew the Screw holding the bar in place. Swing the bar out from above the
Battery (14).
2. Remove the two wires attached to the Battery (14). Remove the Battery (14). Dispose
of in accordance with local laws and guidelines. Replace with a 6V, lead acid battery.
3. Insert the red wire into the red connection, and black wire into blue connection.
Figure 3-Main Battery
Main Battery (14)
Bar Securing Battery (14)
Screw
4. A Fuse and spare Fuse (20 Amp 250 Volt) are also located near the Main Battery (14).
To change the Fuse, follow steps above to open the compartment. Pull up on the Fuse
to disconnect it. A spare fuse is located next to it in a small plastic case. Remove the
spare Fuse and replace the bad fuse.
WARNING: Do not replace the Fuse with another type Fuse. Failure to replace the Fuse
with an identical Fuse may result in fire and will damage the Car in addtion to
causing a serious safety hazard.

SKU 94202 For technical questions please call 1-800-444-3353. Page 10
Charging the Motorized Wood Car
1. The Motorized Wood Car has a 1-1/2 hour run time once fully charged. Before the first use
the Battery (14) will have to be fully charged.
2. Plug in the 120V Charger (13). Insert the plug end of the Charger/Adapter (13) into the
receptacle located on the Bumper (9)- see Figure 4.
3. Allow the Battery to charge six to eight hours for a full charge. After the charge is complete,
disconnect the Charger/Adapter (13) and store it in a safe location out of the reach of
children.
Figure 4
Charger/Adapter (13)
Bumper (9)
SpareTire
1. There is one spare Wheel attached to the rear Bumper (9) with a long screw. Unscrew
and remove Spare to replace a damagedWheel (12).
2. When replacing Wheels, note that the front Wheels are attached on the car differently than
the rearWheels.
3. To replace Rear Wheels, removeWasher, Cap andWheel. Secure new Wheel in place with
the same Washer and Cap.
4. To replace Front Wheels, remove the Plastic Bushings (21) and Cotter Pin (22). Secure new
Wheel in place with same Plastic Bushings (21) and Cotter Pin (22)-see Figure 5.
Figure 5-Front Wheel
Bushing (21)
Cotter Pin (22)
Inspection, Maintenance and Cleaning
1. All inspections, maintenance, and cleaning should be performed only by an adult.
2. Always make certain the Car is unplugged and OFF before performing any inspection,
adjustments, maintenance or cleaning.

SKU 94202 For technical questions please call 1-800-444-3353. Page 11
3. Before each use check for loose screws, misalignment or binding of moving parts, cracked
or broken parts, damaged housing, damaged wiring, loose wheels and any other condition
that may affect its safe operation. Make certain all four Wheels are fully secured in place. If
abnormal noise or vibration occurs, have the problem corrected before further use. Do not
use the Car if it is damaged.
4. Do not leave the Motorized Wood Car outside as prolonged exposure to the elements will
damage the varnish and exterior of the Wood Car.
5. When the child is done driving the Motorized Wood Car, a responsible adult should
disconnect the battery and store the car in a safe location where it cannot be used by an
unauthorized user.

SKU 94202 For technical questions please call 1-800-444-3353. Page 12
Parts and Assembly Diagram
22
21

SKU 94202 For technical questions please call 1-800-444-3353. Page 13
Note: Some parts are listed and shown for illustration purposes only and are not available
individually as replacement parts.
PLEASE READ THE FOLLOWING CAREFULLY
THE MANUFACTURER AND/OR DISTRIBUTOR HAS PROVIDED THE PARTS DIAGRAM IN THIS MANUAL AS A REFERENCE
TOOL ONLY. NEITHER THE MANUFACTURER NOR DISTRIBUTOR MAKES ANY REPRESENTATION OR WARRANTY OF ANY
KIND TO THE BUYER THAT HE OR SHE IS QUALIFIED TO MAKE ANY REPAIRS TO THE PRODUCT OR THAT HE OR SHE IS
QUALIFIED TO REPLACE ANY PARTS OF THE PRODUCT. IN FACT,THE MANUFACTURER AND/OR DISTRIBUTOR EXPRESSLY
STATES THAT ALL REPAIRS AND PARTS REPLACEMENTS SHOULD BE UNDERTAKEN BY CERTIFIED AND LICENSED
TECHNICIANS AND NOT BY THE BUYER. THE BUYER ASSUMES ALL RISK AND LIABILITY ARISING OUT OF HIS OR HER
REPAIRS TOTHE ORIGINAL PRODUCT OR REPLACEMENT PARTSTHERETO, OR ARISING OUT OF HIS OR HER INSTALLATION
OF REPLACEMENT PARTS THERETO.
1 SteeringWheel 1 12 Wheel (2 front, 3 rear) 5
2 Radiator 1 13 Charger/Adapter 1
3 Instrument Panel 1 14 Main Battery 1
4 Headlight 1 15 Motor 2
5 SignalLight 1 16 Frame 1
6 Windshield 1 17 On/Off Switch 1
7 Rear Mirror 1 18 Forward/Reverse Switch 1
8 Under Pan 1 19 Steering On/Off Switch 1
9 Bumper 1 20 Battery Cover 1
10 Accelarator Pedal 1 21 Plastic Bushing 2
11 Hood Ornament 1 22 Cotter Pin 2
Parts List
Table of contents
Popular Motorized Toy Car manuals by other brands

Power Wheels
Power Wheels xtreme machine 74790 owner's manual

Associated Electrics
Associated Electrics R10 instruction manual

DF-models
DF-models Crusher 2WD Buggy RTR / BT7101 manual

Jamara
Jamara Mercedes-Benz Arocs Instruction

Reely
Reely 1692233 operating instructions

Associated Electrics
Associated Electrics RC10L-Graphite instruction manual