8
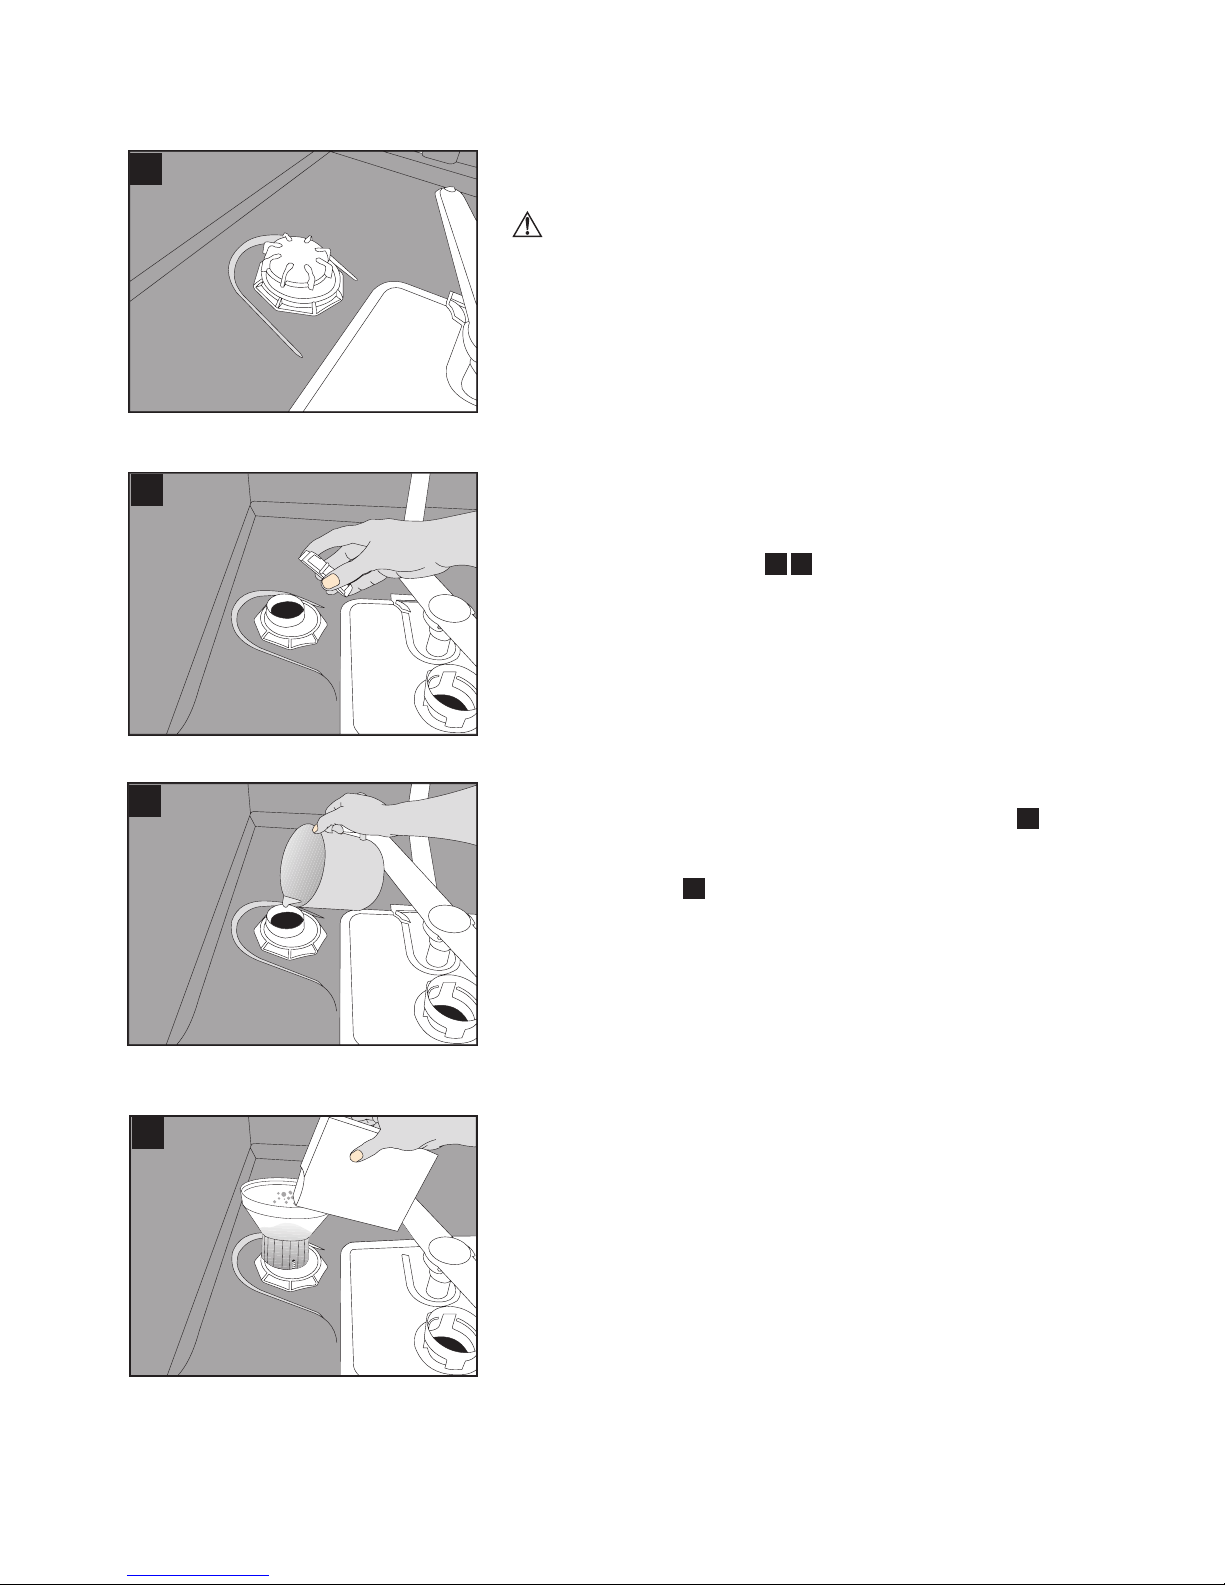
Filling the rinse aid dispenser
Rinse aids allow washing water to rinse off more cleanly
and prevent watermarks or streaks on the dishes.
Only use rinse aids suited to use in dishwashers.
- Note -
If you use 2 in 1 or 3 in 1 detergents / tabs, you do not
need an additional rinse aid.
Open the rinse aid dispenser by pressing the lock ( )
Carefully pour in rinse aid to the MAX mark.
Close the lid until it clicks in ( ).
Carefully wipe off spilled rinse aid. Excessive rinse aid
causes excessive foam formation, which may hinder
cleaning.
Set the dose of rinse aid
The dose of rinse aid to be used can be set by means of
the dispenser regulator between levels 1 and 6 ( ). Your
machine is pre-set at the factory to level 3.
Only change the setting if the following applies after
washing:
Watermarks are visible on the dishes: Set dosage
higher
Streaks are visible on the dishes: Set dosage lower
Filling the detergent dispenser
- Note -
Only use detergents suited to use in dishwashers.
Open the detergent container by pushing the lock to the
right ( ).
Marking lines on the inside of the detergent container aid
in providing the correct amount of detergent.
The detergent container holds a total of 40 cm³ of detergent
( ).
When the dishwasher is fully loaded and the dishes are
very dirty, we recommend filling the detergent container
up to the 25 cm³ mark. When the dishes are less dirty,
it is generally sufficient to fill the detergent up to the 15
cm³ mark.
If your dishes have been in the dishwasher for some time
without being washed, additionally fill the small container
up to the top ( ).
The detergent amounts for the individual cleaning
programmes are shown in the cleaning table.
Deviations are possible depending on how dirty the dishes
are and on how hard the water is in your location.
B
3
4
A
1
2
B
Turn the
lock to the
right.
A
25cm³
15cm³
5cm³
12
4
3