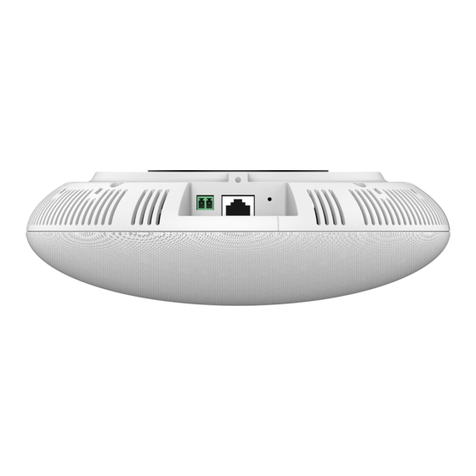
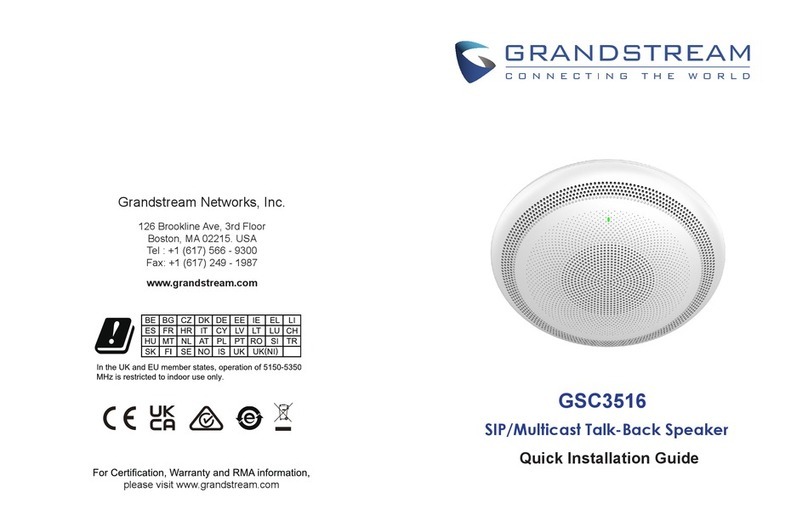
Grandstream Networks GSC3506 User manual

GSC3506
Quick Installation Guide
SIP/Multicast Intercom Speaker
Grandstream Networks, Inc.
126 Brookline Ave, 3rd Floor
Boston, MA 02215. USA
Tel : +1 (617) 566 - 9300
Fax: +1 (617) 249 - 1987
www.grandstream.com
please visit www.grandstream.com
Grandstream Networks, Inc.
126 Brookline Ave, 3rd Floor
Boston, MA 02215. USA
Tel : +1 (617) 566 - 9300
Fax: +1 (617) 249 - 1987
www.grandstream.com

Content
English................................................................................1
简体中文.........................................................................7
Español.............................................................................13
Français........................................................................19
Deutsch......................................................................25
Italiano.............................................................................31
Русскй..............................................................................37
Português..........................................................................43
Polski................................................................................49

~1~ ~2~
The GSC3506 is not pre-congured to support or make
emergency calls to any type of hospital, law enforcement
agency, medical care unit (“Emergency Service(s)”) or any
other kind of Emergency Service. You must make additional
arrangements to access Emergency Services. It is your re-
sponsibility to purchase SIP-compliant Internet telephone
service, properly congure the GSC3506 to use that ser-
vice, and periodically test your conguration to conrm that
it works as you expect. It is also your responsibility to pur-
chase traditional wireless or landline telephone services to
access Emergency Services.
GRANDSTREAM DOES NOT PROVIDE CONNECTIONS
TO EMERGENCY SERVICES VIA THE GSC3506. NEI-
THER GRANDSTREAM NOR ITS OFFICES, EMPLOY-
EES OR AFFILIATES MAY BE HELD LIABLE FOR ANY
CLAIM, DAMAGE, OR LOSS, AND YOU HEREBY WAIVE
ANY AND ALL SUCH CLAIMS OR CAUSES OF ACTION
ARISING FROM OR RELATING TO YOUR INABILITY TO
USE THE GSC3506 TO CONTACT EMERGENCY SER-
VICES, AND YOUR FAILURE TO MAKE ADDITIONAL AR-
RANGEMENTS TO ACCESS EMERGENCY SERVICES IN
ACCORDANCE WITH THE IMMEDIATELY PRECEDING
PARAGRAPH.
The GNU GPL license terms are incorporated into the de-
vice rmware and can be accessed via the Web user inter-
face of the device at my_device_ip/gpl_license. It can also
be accessed here: http://www.grandstream.com/legal/open-
source-software
To obtain a CD with GPL source code information please
submit a written request to [email protected]
• Do not attempt to open, disassemble, or modify the device.
• Do not expose this device to temperatures outside range of 0 °C to 45
°C in operation and -10 °C to 60 °C in storage.
• Do not expose the GSC3506 to environments outside of the following
humidity range: 10-90% RH (non-condensing).
• Do not power cycle your GSC3506 during system boot up or rmware
upgrade. You may corrupt rmware images and cause the unit to mal-
function.
1x GSC3506
EN
PACKAGE CONTENTS
The GSC3506 is a 1-way public address SIP speaker that allows oces,
schools, hospitals, apartments and more to build powerful public address
announcement solutions that expand security and communication. This
robust SIP speaker oers crystal clear HD audio functionality with a high-
delity 30-Watt HD speaker. The GSC3506 support built-in whitelists,
blacklists and greylists to easily block unwanted calls, SIP and multicast
paging, group paging and PTT. users can easily sculpt a state-of-the-art
security and PA announcement solution. Thanks to its modern industrial
design and rich features, the GSC3506 is the ideal SIP speaker for any
setting.
1x Quick Installation
Guide
1x Ceiling Bracket 8x Screws
(M4)
PRECAUTIONS
OVERVIEW
Ceiling Mount Kit
(optional and sold separately)
Mounting Hole Cut-Out
Template

~3~ ~4~
HARDWARE INSTALLATION
GSC3506 PORTS AND BUTTONS
NO. Port Label Description
1USB Port USB2.0, External USB Storage
2NET/PoE Ethernet RJ45 port (10/100Mbps) supporting PoE/
PoE+.
32-Pin port 2-pin switch-in input port
Alarm-in input port (Access voltage 5V to 12V)
4Reset
Factory reset button.
Press for 10 seconds to reset factory default
settings.
5Volume Sound Volume buttons.
Ceiling Mount
GSC3506 can be mounted on the ceiling or the Boom. Please refer to the following
steps for the appropriate installation.
1. Drill a round hole
with a diameter
of 230mm or use
the Mounting Hole
Cut-Out Template.
2. To ensure safety, install rst the anti-fall
ropes, then plug in the Ethernet and 2-pin
cables.
12
Ceiling
hole
3
45
1
(16~23.8in)
406~605mm
1
2
34
2
4
5
6
3. Open the front cover with a at-head screwdriver.
5. Use a screwdriver and gently rotate
clockwise the screws marked as (1), (2),
(3) and (4) in the step 5 illustration.
6. Align the notch on the front cover with the
notch on the device, press the whole front
cover to ensure that each buckle is fastened.
3
Must attach
4. Align the device with the hole and push up
slowly with two hands.
Front panel
(Mesh cover removed)
Back panel
Installation using Ceiling Bracket Kit (*sold separately)
Fix the Ceiling Bracket
using the screws from
the kit as show in the
illustration.
Warning: If you use an electric drill, make sure to adjust
it to the minimum speed gear rst.
230mm
9in or
Warning: Avoid pressing the horn with your hands.
Note: The anti-fall rope diameter must
be less than 5mm, and the pulling force
must be greater than 25kgf.

~5~ ~6~
Boom Mount
1. Fix the Boom in the ceiling.
2. To ensure safety, install rst
the anti-fall ropes.
A computer connected to the same network as the GSC3506 can discover and
access its conguration interface using its MAC address :
1. Locate the MAC address on the MAC tag of the unit, which is on the underside
of the device, or on the package.
2. From a computer connected to same network as the GSC3506, type in the
following address using the GSC3506’s MAC address on your browser: http://
gsc_<mac>.local
Example: if a GSC3506 has the MAC address C0:74:AD:11:22:33, this unit can
be accessed by typing http://gsc_c074ad112233.local on the browser.
ACCESSING THE CONFIGURATION INTERFACE
For more information, please refer to GSC3506
User Manual at: https://www.grandstream.com/support
GSC3506 can be powered on using PoE/PoE+
switch or PoE injector using following steps:
Step 1: Plug a RJ45 Ethernet cable into the
network port of the GSC3506.
Step 2: Plug the other end into the power over
Ethernet (PoE) switch or PoE injector.
POWERING AND CONNECTING GSC3506
Network Port
RJ45 Ethernet cable to
Power over Ethernet (PoE)
Switch or PoE injector.
Connecting Wiring Seat
GSC3506 supports to connect a "Normal Key"
to 2-pin port via Wiring Seat.
Step 1: Take the wiring seat from the install kits.
Step 2: Connect the Normal Key with the wiring
seat (as shown in the illustration on the right).
2-pin Port
Wiring Seat
Normal key
11
2
3
4
Note: It is recommended to use PoE+ power supply
to achieve the best audio eect.
Boom (not provided)
3. Attach the Boom with GSC3506 ceiling hole
and rotate to x it in place.
Must attach
4. Plug in the Ethernet and 2-pin
cables.
Note: The anti-fall rope diameter must
be less than 5mm, and the pulling force
must be greater than 25kgf.

~7~ ~8~
GSC3506不预设对医院,执法机构,医疗中心(
急救服务)以及各种紧急服务的紧急通话服务。
用户必须自行设定紧急通话功能。用户必须自
行购买SIP兼容的网络电话服务,正确的设定
GSC3506使用该服务,并定期测试您的配置以确
保GSC3506如预期工作,否则请购买传统无线或
有线电话服务来拨打紧急通话。
Grandstream Networks 公司的GSC3506不支持
紧急通话服务。Grandstream Networks公司、
其管理者和员工以及其相关机构对此所造成的任
何索赔、损失或者损害都不负有任何法律追究责
任。在此,您将无权对任何以及所有由于无法通
过GSC3506拨打紧急电话以及没有遵照前段文字
描述而造成紧急通话失败的事件提出诉讼。
GNU GPL许可条款已包含在设备固件中,可以通过设
备的Web用户界面 my_device_ip/gpl_license 进行访
问。
也可以通过以下链接访问:http://www.grand-
stream.com/legal/open-source-software
如果需要包含GPL源代码信息的CD,请发邮件到
[email protected] 提交请求 。
1x GSC3506
ZH
快速安装手册(1本)
1x 吊顶支架 8x 螺丝
(M4)
产品概览
GSC3506是一款功能强大的单向SIP对讲扬声器,允许办公室、学校、医
院、公寓等构建强大且安全的通信解决方案。这款优秀SIP扬声器提供了
栩栩如生的音频输出,配有高保真30瓦高清扬声器。GSC3506支持内置
黑白灰名单,以轻松阻止不需要的SIP呼叫、多播、组播对讲和PTT。用
户可以轻松构建先进且安全的公共通讯解决方案。由于其现代工业设计
和丰富的功能,GSC3506是多数场景下的理想SIP扬声器。
注意事项
请不要尝试打开,拆卸或修改设备。.
操作时请勿将本设备暴露在0°C至45°C的温度范围之外的环境中,请
勿将其存 放在-10°C至60°C的范围之外的环境中。
请勿将 GSC3506暴露在以下湿度范围之外的环境中:10-90%RH (非冷
凝) 。
系统启动或固件升级期间,请勿关闭GSC3506的电源。您可能会损坏固
件并导致 设备故障。
包装清单
吊顶安装套件
(选配,需单独购买)
安装孔切割模板

~9~ ~10~
GSC3506 接口和按钮
序号 端口 名称 描述
1USB端口 支持USB2.0,外接USB存储
2PoE网口 以太网RJ45端口(10/100Mbps),支持
PoE/PoE +供电
32-Pin 端口 2-Pin 开关输入端口
2-Pin 报警输入端口(输入电压5V至12V)
4复位键 重置按钮。长按10秒钟重置出厂默认设置
5音量+/- 音量按钮。
吊顶安装
硬件安装
GSC3506可安装在天花板或吊杆上。请参阅以下步骤进行正确的安装。
1. 钻一个直径为
230mm的圆孔或使
用安装孔切割模
板。
2. 为确保安全,请先安装防坠落,再插入网
线和2-Pin排线。
12
吊顶孔
3
45
1
(16~23.8in)
406~605mm
1
2
34
2
4
5
6
3. 用平头螺丝刀打开前盖面板。
5.使用螺丝刀,顺时针轻轻旋转步骤5图示中
标记为1、2、3、4的螺钉。
6.将前盖上的槽口与设备上的槽孔对齐,按
压整个前盖,确保每个卡扣都已紧固。
3
必须接好
4. 将设备与孔对齐,用两只手慢慢向上推。
注意:请勿用手按喇叭。
正面(面壳已拆掉)
背面
使用吊顶安装套件安装(需单独购买)
如图所示,使用套件中
的螺钉固定吊顶支架。
警告:如果使用电钻,请确保先将其调整到最低速度档位。
230mm
9in 或
注意:防坠绳直径必须小于5mm,拉力
必须大于25kgf。

~11~ ~12~
吊杆安装
1. 将吊杆固定在天花板上。
将计算机连接到与GSC3506相同网络中,通过查找GSC3506的MAC地
址访问其配置界面:
1. 从设备底部或包装上的MAC标签上找到MAC地址。
2. 将计算机连接到与GSC3506连同一网络中,在浏览器中输入GSC3506
的MAC地址 http://gsc_<mac> .local
例如:如果GSC3506的MAC地址为 C0:74:AD:11:22:33,则可通过在浏
览器上输入 http://gsc_c074ad112233.local 访问此设备。
欲获取详细的话机使用信息,请在以下链接中下载GSC3506用户手册:
https://www.grandstream.com/support
开启并连接GSC3506
网络接口将RJ45以太网电缆连接到
以太网供电(PoE)交换机
或PoE供电器。
2-Pin 接口
接线座子
普通开关
11
2
3
4
请使用以下步骤使用PoE / PoE +交换机或
PoE供电器给GSC3506上电:
步骤1:将RJ45以太网电缆插入GSC3506
的网络端口。
步骤2:将另一端插入以太网供电(PoE)
交换机或PoE供电器。
注意:建议使用PoE+电源供电,以确
保音效能达到最佳效果。
连接接线座子
GSC3506支持通过接线座将“普通开关”连
接到2-Pin接口。
步骤1: 从安装工具包中取出接线座子。
步骤2:将普通开关与接线座连接(如右图
所示)。
访问配置界面
吊杆(需自备)
3.将吊杆与GSC3506吊顶孔连接,并旋转以将
其固定到位。
必须接好
4.插入网线和2-Pin排线。
v
2.为确保安全,请先安装防坠落绳索。
注意:防坠绳直径必须小于5mm,拉力
必须大于25kgf。

~13~ ~14~
El GSC3506 no viene pre congurado ni tiene acceso a infor-
mación de ningún tipo de servicio de llamadas de emergencia,
hospitales, servicios policiales, unidades de cuidados médicos
o cualquier otro tipo de servicio de socorro. Usted deberá hac-
er las coordinaciones necesarias para poder acceder a estos
servicios. Será su responsabilidad, el contratar el servicio de
telefonía por internet compatible con el protocolo SIP, cong-
urar apropiadamente el GSC3506 para usar dicho servicio y
periódicamente probar su conguración para conrmar su fun-
cionamiento de acuerdo a sus expectativas. Si usted decide no
hacerlo, será su responsabilidad comprar servicios de telefonía
tradicional, ya sea por línea ja o inalámbrica para poder ac-
ceder a los servicios de emergencia.
GRANDSTREAM NO PROVEE CONEXIONES CON NINGUN
SERVICIO DE EMERGENCIA MEDIANTE EL GSC3506. NI
GRANDSTREAM NI SUS DIRECTORES, EMPLEADOS O
AFILIADOS, PUEDEN SER SUJETOS REPONSABLES POR
NINGUN RECLAMO, DAÑO O PERDIDA. POR LO TANTO,
USTED RENUNCIA A SU DERECHO DE RECLAMO O DE-
NUNCIA QUE PUEDA SURGIR DEBIDO A LAS LIMITACIO-
NES EN EL USO DEL GSC3506 PARA CONTACTAR A LOS
SERVICIOS DE EMERGENCIA, ASI COMO A SU NEGLIGEN-
CIA DE REALIZAR LAS COORDINACIONES NECESARIAS
PARA ACCEDER A TODOS LOS SERVICIOS DE EMERGEN-
CIA, MENCIONADOS EN EL PARRAFO PRECEDENTE.
Los términos de licencia GNU GPL son incorporados en el
rmware del dispositivo y puede ser accedido a través de la
interfaz de usuario Web del dispositivo en ip_de_mi_disposi-
tivo/gpl_license. También puede ser accedido aquí: http://www.
grandstream.com/legal/open-source-softwarePara obtener un
CD con la información del código fuente GPL, por favor, remita
una solicitud escrita a [email protected]
•No intente abrir, desarmar o modicar el dispositivo.
•No exponga el dispositivo a temperaturas fuera del rango de 0 ° C a
45 ° C en funcionamiento y de -10 ° C a 60 ° C en almacenamiento.
•No exponga el GSC3506 a entornos fuera del siguiente rango de hu-
medad: 10-90% HR (sin condensación).
•No Desenchufe su GSC3506 durante el arranque del sistema o actual-
ización del rmware. Puede dañar las imágenes de rmware y provo-
car un mal funcionamiento de la unidad.
1x GSC3506
ES
CONTENIDO DEL PAQUETE
El GSC3506 es un altavoz SIP de megafonía de 1 vía que permite
a las ocinas, escuelas, hospitales, apartamentos y más crear po-
tentes soluciones de anuncios de megafonía que amplían la seguri-
dad y la comunicación. Este robusto altavoz SIP ofrece una funcio-
nalidad de audio HD nítida con un altavoz HD de alta delidad de
30 vatios. El GSC3506 admite listas blancas, listas negras y listas
grises integradas para bloquear fácilmente llamadas no deseadas,
paginación SIP y multidifusión, paginación grupal y PTT. los usu-
arios pueden esculpir fácilmente una solución de anuncios de PA y
seguridad de última generación. Gracias a su moderno diseño in-
dustrial y sus ricas funciones, el GSC3506 es el altavoz SIP ideal
para cualquier entorno.
1x Guia de Instalación
Rápida
1x Soporte de techo 8x Tornillos
(M4)
PRECAUCIONES
INFORMACIÓN GENERAL
Kit de montaje en techo
(opcional y se vende por separado)
Plantilla de montaje para
corte de oricios

~15~ ~16~
INSTALACIÓN DE HARDWARE
GSC3506 PUERTOS Y BOTONES
Nro. Puerto Etiqueta Descripción
1Puerto
USB USB2.0, almacenamiento externo USB
2NET/PoE Puerto Ethernet RJ45 (10/100Mbps) compatible
con PoE / PoE +.
3
Puerto
de 2
pines
Puerto de entrada multipropósito de 2 pines.
Puerto de entrada de alarma (voltaje de acceso
de 5 V a 12 V)
4Reset
Botón de reinicio de fábrica. Presione durante
10 segundos para restablecer los valores
predeterminados de fábrica.
5Volumen Botones de volumen
Montaje en el
techo
El GSC3506 puede ser montado en techo o en brazo Boom. Consulte los siguien-
tes pasos para la instalación adecuada.
1. Taladre un oricio
de 230 mm de
diámetro o utilice
la plantilla de
montaje para
corte de oricios .
2. Para garantizar la seguridad, instale
primero las cuerdas anticaída y luego
conecte el cables Ethernet y el cable de
2 pin.
12
Agujero
de techo
3
45
1
(16~23.8in)
406~605mm
1
2
34
2
4
5
6
3. Abra la cubierta frontal con un destornillador de
punta plana.
5. Utilice un destornillador y gire suavemente
en el sentido de las agujas del reloj los
tornillos marcados como (1), (2),(3) y (4)
en la ilustración del paso 5.
6. Alinee la cubierta frontal usando la guia del
dispositivo, presione la cubierta para asegurar
que el dispositivo se ajuste en las guias.
3
debe adjuntar
4. Alinee el dispositivo con el oricio y empuje
hacia arriba lentamente con las dos manos.
Panel frontal
(sin cubierta)
Panel posterior
Instalación utilizando el kit de soporte de techo (* se
vende por separado)
Fije el soporte de
techo con los tornillos
del kit como se mues-
tra en la ilustración.
Advertencia: si usa un taladro eléctrico, asegúrese de
ajustar primero a la velocidad mínima.
230mm
9in or
Advertencia: Evite presionar la bocina con las
manos.
Nota: El diámetro de la cuerda
anticaída debe ser inferior a 5 mm y la
fuerza de tracción debe ser superior
a 25 kgf.

~17~ ~18~
Montaje en brazo Boom
1. Fije el brazo Boom en el techo.
2. Para garantizar la seguridad, instale
primero las cuerdas anticaída.
Una computadora conectada a la misma red que el GSC3506 puede descubrir y
acceder a su interfaz de conguración usando su dirección MAC:
1. Ubique la dirección MAC en la etiqueta MAC de la unidad, que se encuentra
en la parte inferior del dispositivo o en el paquete.
2. Desde una computadora conectada a la misma red que el GSC3506, escriba
la siguiente dirección usando la dirección MAC del GSC3506 en su navega-
dor http://gsc_<mac>.local
Example: si un GSC3506 tiene la dirección MAC C0:74:AD:11:22:33, se pu-
ede acceder a esta unidad escribiendo local en el navegador http://gsc_
c074ad112233
ACCESO A LA INTERFAZ DE CONFIGURACIÓN
Para obtener más información, descargue el Manual de usuario GSC3506 desde:
http://www.grandstream.com/support
El GSC3506 puede encenderse usando el inter-
ruptor PoE/PoE+ o el inyector PoE siguiendo los
siguientes pasos:
- Paso 1: Conecte un cable Ethernet RJ45 en el
puerto de red del GSC3506.
- Paso 2: conecte el otro extremo al interruptor de
alimentación por Ethernet (PoE) o al inyector PoE.
ENCENDIDO Y CONEXIÓN DEL GSC3506
Puerto
de red
Cable Ethernet RJ45 para
conmutador de aliment-
ación por Ethernet (PoE) o
inyector PoE.
Conectando el Mazo de Cables
El GSC3506 soporta conectar un "Interruptor sim-
ple" al puerto de 2 pines a través del conector
Paso 1: Tomar el mazo de cables desde los pa-
quetes de instalación.
Paso 2: conecte el Interruptor simple con el co-
nector (como se muestra en la ilustración de la
derecha).
Puerto de 2
pines
Mazo de
cables
Interruptor
simple
11
2
3
4
Note: Se recomienda utilizar una fuente de aliment-
ación PoE+ para lograr el mejor efecto de audio.
Brazo Boom (no provisto)
3. Fije el brazo Boom con el oricio del techo
GSC3506 y gírelo para jarlo en su lugar.
debe adjuntar
4. Conecte el cable Ethernet y el
cable de 2 pin.
Note: The anti-fall rope diameter must
be less than 5mm, and the pulling force
must be greater than 25kgf.

~19~ ~20~
Le GSC3506 n’est pas préconguré pour prendre en charge
ou faire des appels d’urgence à tout type d’hôpital, organ-
isme d’application de la loi, unité de soins médicaux (service
d’urgence) ou tout autre type de service d’urgence. Vous de-
vez prendre des dispositions supplémentaires pour accéder
aux services d’urgence. Il est de votre responsabilité d’acheter
un service téléphonique Internet compatible SIP, de congurer
correctement le GSC3506 pour utiliser ce service et de tester
périodiquement votre conguration pour conrmer qu’elle fonc-
tionne comme prévu. Il est également de votre responsabilité
d’acheter des services téléphoniques sans l ou xes tradition-
nels pour accéder aux services d’urgence.
GRANDSTREAM NE FOURNIT PAS DE CONNEXIONS AUX
SERVICES D’URGENCE VIA LE GSC3506. NI GRAND-
STREAM NI SES BUREAUX, EMPLOYÉS OU SOCIÉTÉS AF-
FILIÉES NE PEUVENT ÊTRE TENUS RESPONSABLES DE
TOUTE RÉCLAMATION, DOMMAGE OU PERTE, ET VOUS
RENONCEZ À TOUTES LES RÉCLAMATIONS OU CAUSES
D’ACTION DÉCOULANT DE VOTRE INCAPACITÉ À UTI-
LISER LE GSC3506 POUR CONTACTER LES SERVICES
D’URGENCE, ET VOTRE DÉFAUT DE PRENDRE DES DIS-
POSITIONS SUPPLÉMENTAIRES POUR ACCÉDER AUX
SERVICES D’URGENCE SELON LE PARAGRAPHE PRÉCÉ-
DANT IMMÉDIATEMENT.
Les termes de la licence GNU GPL sont incorporés dans le
micrologiciel du périphérique et sont accessibles via l’interface
utilisateur Web du périphérique à l’adresse my_device_ip/
gpl_license. Vous pouvez également y accéder ici: http://www.
grandstream.com/legal/open-source-software
Pour obtenir un CD contenant les informations du code source
GPL, veuillez envoyer une demande écrite à info@grand-
stream.com..com
•N’essayez pas d’ouvrir, de démonter ou de modier l’appareil.
•Ne pas exposer cet appareil à des températures en dehors de la plage de 0 °C
à 45 °C en opération et de -10 °C à 60 °C en stockage.
•N’exposez pas le GSC3506 à des environnements en dehors de la plage
d’humidité suivante: 10-90% HR (sans condensation).
•Ne mettez pas votre GSC3506 hors tension pendant le démarrage du système
ou la mise à niveau du micrologiciel. Vous risquez d’endommager les images du
micrologiciel et de provoquer un dysfotionnement de l’appareil.
1x GSC3506
FR
CONTENU DU PACK
Le GSC3506 est un haut-parleur SIP unidirectionnel qui permet aux bureaux,
écoles, hôpitaux, appartements et bien d'autres de créer de puissantes solu-
tions d'annonces publiques qui renforcent la sécurité et la communication.Ce
haut-parleur SIP robuste ore une fonctionnalité audio HD limpide avec un
haut-parleur HD haute-délité de 30 watts. Le GSC3506 prend en charge les
listes blanches, les listes noires et les listes grises intégrées pour bloquer facile-
ment les appels indésirables, la radiomessagerie SIP et multicast, la radiomes-
sagerie de groupe et le PTT. Les utilisateurs peuvent facilement sculpter une
solution de sécurité et de sonorisation de pointe. Grâce à son design industriel
moderne et à ses riches fonctionnalités, le GSC3506 est le haut-parleur SIP
idéal pour tout type d'environnement.
1x Guide d'installation
rapide
1x Support de
plafond
8x Vis
(M4)
PRÉCAUTIONS
APERÇU
Kit de montage au plafond
(en option et vendu séparément)
Modele de Trou de
montage a découper

~21~ ~22~
INSTALLATION MATERIELLE
GSC3506 PORTS AND BOUTTONS
NO. Port Label Description
1Port USB USB2.0, stockage USB externe.
2NET/PoE Port Ethernet RJ45 (10 / 100Mbps) prenant
en charge PoE / PoE +.
3Port à 2
broches
Port d’entrée multifonction à 2 broches.(Ac-
ces voltage 5V à 12V)
4Réinitialiser
Bouton de réinitialisation d’usine.
Appuyez pendant 10 secondes pour réinitiali-
serles paramètres d’usine par défaut.
5Volume Boutons de volume sonore.
Montage au
plafond
GSC3506 peut être monté sur le plafond ou la rampe. Veuillez vous référer aux
étapes suivantes pour l’installation appropriée.
1. Percez un
trou rond d'un
diamètre de 230
mm ou utilisez
le modèle de
découpe de trou
de montage.
2. Pour assurer la sécurité, installez d'abord
les cordes anti-chute, puis branchez les
câbles Ethernet et 2 broches.
12
Trou de
plafond
3
45
1
(16~23.8in)
406~605mm
1
2
34
2
4
5
6
3. Ouvrez le capot avant avec un tournevis à tête
plate.
5. Utilisez un tournevis et tournez doucement
dans le sens des aiguilles d'une montre
les vis marquées comme (1), (2), (3) et (4)
dans l'illustration de l'étape 5.
6. Alignez l'encoche sur le capot avant avec
l'encoche sur l'appareil, et appuyez sur
l'ensemble du capot avant pour vous
assurer que chaque boucle est fermée.
3
doit attacher
4. Alignez l'appareil avec le trou et poussez-
le lentement avec les deux mains.
Panneau d'avant
(Couverture en maille retirée)
Panneau d'arrière
Installation avec le kit de xation au plafond
(*vendu séparément)
Fixez le support de
plafond à l'aide des vis
du kit comme indiqué
sur l'illustration.
Attention: Si vous utilisez une perceuse électrique,
assurez-vous que c'est ajusté à la vitesse minimale en
premier.
230mm
9in or
Attention: évitez d'appuyer sur le klaxon avec vos
mains.
Note: Le diamètre de la corde
antichute doit être inférieur à 5 mm et
la force de traction doit être supérieure
à 25 kgf.

~23~ ~24~
Montage au Rampe
1. Fixez la rampe au plafond.
2. Pour assurer la sécurité, installez
d'abord les cordes anti-chute.
Un ordinateur connecté au même réseau que le GSC3506 peut découvrir et
accéder à son interface de conguration en utilisant son adresse MAC:
1. Localisez l’adresse MAC sur la balise MAC de l’unité, qui est sur la face inféri-
eure de l’appareil, ou sur le paquet.
2. Depuis un ordinateur connecté au même réseau que le GSC3506, tapez
l’adresse suivante en utilisant l’adresse MAC du GSC3506 dans votre naviga-
teur http://gsc_<mac>.local
Exemple: Un GSC3506 avec l’adresse MAC C0:74:AD:11:22:33 sera accessible
en tapant http://gsc_c074ad112233.local dans le navigateur.
ACCÈS À L’INTERFACE DE CONFIGURATION
Pour plus d’informations, veuillez télécharger le manuel d’utilisation du GSC3506 à partir
de: https://www.grandstream.com/support
Le GSC3506 peut être mis sous tension à
l’aide d’un commutateur PoE / PoE + ou d’un
injecteur PoE en suivant les étapes suivantes:
- Étape 1: Branchez un câble Ethernet RJ45
dans le port réseau du GSC3506.
- Étape 2: Branchez l’autre extrémité dans le
commutateur Power over Ethernet (PoE) ou
l’injecteur PoE.
ALIMENTATION ET CONNEXION DU GSC3506
Port réseau
Câble Ethernet RJ45 vers
un commutateur PoE
(Power over Ethernet) ou
un injecteur PoE.
Connexion du support de câblage
Le GSC3506 supporte la connexion d'un "Bout-
ton Normale" au port 2 broches via un Support de
câblage
Étape 1
: Prenez le support de câblage du kit
d’installation.
Étape 2
: Connectez la clé normale au siège de
câblage (comme indiqué sur l'illustration de droite).
port à 2
broches
Support de
câblage
Boutton Normale
11
2
3
4
Remarque : Il est recommandé d'utiliser une alimen-
tation PoE+ pour obtenir le meilleur eet audio.
Rampe (non fourni)
3. Fixez la perche avec le trou de plafond GSC3506 et
faites-la pivoter pour la xer en place.
doit attacher
4. Branchez les câbles Ethernet et
cable de 2 broches.
Remarque : Le diamètre de la corde
antichute doit être inférieur à 5 mm et
la force de traction doit être supérieure
à 25 kgf.

~25~ ~26~
Das GSC3506 ist nicht vorkonguriert, um Notfallrufnum-
mern jeglicher Art (Unfall, Krankenhaus, Juristisch, Med-
izinisch, usw.) automatisiert oder manuell durchzuführen.
Diese Services müssen separat bestellt und organisiert
werden. Ferner liegt es im Verantwortungsbereich des End-
verbrauchers, einen adäquaten und SIP-kompatiblen An-
schluss bereitzustellen und diesen, zusammen mit dem
GSC3506 so zu kongurieren, dass das Endgerät wunsch-
gemäß funktioniert.
GRANDSTREAM BIETET KEINE ANBINDUNG ZU
NOTRUFSERVICES ÜBER DAS GSC3506. WEDER
GRANDSTREAM, NOCH GRANDSTREAM NIEDERLAS-
SUNGEN ODER MITARBEITER SIND HAFTBAR FÜR BE-
SCHÄDIGUNGEN, VERLUSTE, ODER ALLE ANDEREN
ARTEN AN SCHADENSANSPRÜCHEN, DIE SICH AUS
DER INSTALLATION, EINSATZ UND NUTZUNG DES
GSC3506 ALS TEIL EINES NOTRUFSYSTEMS ERGE-
BEN KÖNNTEN. ES LIEGT EINZIG IN DER VERANTWOR-
TUNG DES BENUTZERS, DIE NOTWENDIGEN NOTRUF-
SERVICES, TELEKOMMUNIKATIONSANSCHLÜSSE UND
TECHNISCHEN VORAUSSETZUNGEN FÜR DIE NUT-
ZUNG DES GSC3506 ZU SCHAFFEN.
Die GNU GPL Lizenz ist in der Gerätesoftware hinterlegt
und kann über die Web-Schnittstelle unter my_device_ip/
gpl_license (Endgerät_ip/gpl_Lizenz aufgerufen werden. Die
Lizenz ist ebenfalls abrufbar unter http://www.grandstream.
com/legal/open-source-software. Um eine CD mit der Lizenz
zu erhalten, senden Sie uns bitte eine Email an info@Grand-
stream.com.
• Es ist verboten, das Produkt zu önen, Teile davon zu entfernen oder es zu
ändern bzw. zu modizieren.
• Das Gerät darf nur innerhalb folgender Temperaturbereiche genutzt werden:
Betrieb 0°C bis 45°C; Lagerung -10°C bis 60°C.
• Das Gerät darf nur innerhalb folgender Werte für die relative Luftfeuchte be-
trieben werden: 10-90% (nicht kondensierend).
• Die Stromversorgung darf während des Startvorgangs bzw. während einer
Firmwareaktualisierung nicht unterbrochen werden, Fehlfunktionen bis hin zum
Systemausfall könnten die Folge davon sein.
1x GSC3506
DE
LIEFERUMFANG
Der GSC3506 ist ein SIP-Lautsprecher, mit dem Sprachinformationen und akust-
ische Benachrichtigungen für Büros, Schulen, Krankenhäuser, Appartements usw.
realisiert werden können. Dieser robuste SIP-Lautsprecher bietet kristallklare HD-
Audioqualität durch einen leistungsstarken Hi-Fi 30-Watt-HD-Lautsprecher. Der
GSC3506 unterstützt integrierte Whitelists, Blacklists und Greylists, um eine kon-
trollierte Informationsverteilung über SIP- und Multicast-Paging, Gruppen-Paging
und PTT zu gewährleisten. Benutzer können auf einfache Weise hochmoderne
Sicherheits- und PA-Informationslösungen erstellen. Auf Grund seines modernen
Industriedesigns und den umfangreichen Funktionen, ist der GSC3506 der ideale
SIP-Lautsprecher, für viele Anwendungsszenarien.
1x Kurzbedienung-
sanleitung
1x Deckenhalterung
8x
Schrauben
(M4)
VORSICHTSMAßNAHMEN
ÜBERSICHT
Deckenhalterung
(Optional erhältlich)
Bohrschablone

~27~ ~28~
HARDWARE-INSTALLATION
GSC3506 PORTS UND TASTEN
Nr. Port Etikette Beschreibung
1USB Port USB2.0, externer Speicher
2NET/PoE RJ45 Ethernetanschluß (10/100MBit/s) Unterstüt-
zung von PoE/PoE+
32-Pin port 2-Pin multifunktionaler Eingang.
Alarm-in input port (Access voltage 5V to 12V)
4Reset
Reset-Taste. Bitte halten Sie den Button 10
Sekunden gedrückt, um das Gerät auf Werksein-
stellung zurückzusetzen.
5Lautstärke Tasten zur Lautstärkenregelung
Deckenmontage
Der GSC3506 kann an einer normalen Raumdecke oder einer abgehängten
Decke mit verlängertem Spezialhalter (nicht im Lieferumfang enthalten) wie nach-
folgend beschrieben, montiert werden.
1. Bohren Sie ein
Loch mit einem
Durchmesser von
230mm, nutzen
Sie hierzu die
Bohrschablone.
2. Zur Absicherung installieren Sie zuerst
die Fallsicherung, dann verbinden Sie das
Ethernetkabel und das 2-Drahtkabel.
12
Deckenbohrung
3
45
1
(16~23.8in)
406~605mm
1
2
34
2
4
5
6
3. Nehmen Sie die Frontabdeckung ab.
5. Drehen Sie die Schrauben (1), (2), (3), (4)
gemäß Skizze 5 fest.
6. Achten Sie auf das Übereinstimmen der
einzelnen Kerben und drücken Sie die
Frontabdeckung vorsichtig fest.
3
anhängen
muss
4. Achten Sie auf das Übereinstimmen der
Montagebohrungen und drücken Sie den
Laustprecher vorsichtig an.
Frontansicht
(Stoabdeckung entfernt)
Rückansicht
Montieren Sie die Deckenhalterung (*Optional
erhältlich)
Fixieren Sie die
Deckenhalterung mit
den beiliegenden
Schrauben wie in der
Skizze beschrieben.
Hinweis: Bei Nutzung eines elektrischen Schraubers,
beachten Sie bitte das Anziehdrehmoment!
230mm
9in or
Hinweis: Vermeiden Sie eine Berührung bzw.
Druck auf das Lautsprecherhorn.
Hinweis: Die Fallsicherung darf max.
5mm stark sein, die Mindestzugkraft
muss 25 kg betragen.

~29~ ~30~
Montage bei abgehängter Decke
1. Montieren Sie den speziellen Montagearm.
2. Zur Absicherung installieren
Sie zuerst die Fallsicherung.
Ein Computer, der sich im gleichen Netzwerk wie das GSC3506 bendet, kann
das GSC3506 über dessen MAC Adresse erkennen und Zugang zur Kongura-
tionsschnittstelle gewähren.
1. Die MAC Adresse des GSC3506 nden Sie auf der Unterseite des Gerätes
oder auf der Aussenseite des Verpackungskartons.
2. Geben Sie nun in den Browser des im selben Netz bendlichen Computers
folgende Information ein: http://gsc_<mac>.local
Beispiel: Hat ein Gsc folgende MAC Adresse, C0:74:AD:11:22:33, dann sieht die
Eingabe in den Browser so aus: http://gsc_c074ad112233.local
ZUGANG ZUR KONFIGURATION
Weitere Informationen entnehmen Sie bitte dem Benutzerhandbuch, herunterladbar unter:
http://www.grandstream.com/support
Die Stromversorgung des GSC3506 kann über
einen Netzwerkswitch mit PoE/PoE+ oder eine PoE
Injektor erfolgen.:
Schritt 1: Schließen Sie ein RJ45 Netzwerkkabel
am Netzwerkport des GSC3506 an.
Schritt 2: Verbinden Sie dieses Kabel mit dem Netz-
werkport am PoE Switch oder am PoE Injektor.
STROMVERSORGUNG UND NETZWERKANBINDUNG
DES GSC3506
Netzwerk
Port
RJ45 Ethernetkabel zur
Stromversorgung
via PoE Switch oder PoE
Injektor.
Verbinden der Anschlusskabel
Ein Standard Taster kann mit dem GSC3506
über den 2-Draht Anschluss verbunden werden.
Schritt 1: Nehmen Sie die Anschlußklemme
aus dem Installationsset.
Schritt 2: Verbinden Sie den Taster über den
Schluss-Sockel wie in der Skizze beschrieben
2 Pin
Anschluss
Kabel
Anschlußklemme
Taster
11
2
3
4
Hinweis: Es wird empfohlen, das Gerät via PoE + mit Strom zu
versorgen, um den besten Audioeekt zu erzielen.
Abgehängter Decke
(nicht vorgesehen)
3. Verbinden Sie den GSC3506 mit der speziellen
Deckenhalterung und xieren Sie den
Lautsprecher in der gewünschten Position.
anhängen
muss
4. Verbinden Sie das Ethernetkabel
und das 2-Drahtkabel.
Hinweis: Die Fallsicherung darf max.
5mm stark sein, die Mindestzugkraft
muss 25kg betragen.

~31~ ~32~
GSC3506 non è precongurato per supportare o eettuare
chiamate di emergenza a qualsiasi tipo di ospedale, strut-
tura giudiziaria, unità di assistenza medica (“Servizi di emer-
genza”) o a qualsiasi altro tipo di ervizio di emergenza. È
necessario eettuare accordi supplementari per accedere ai
Servizi di emergenza. È a Vostra esclusiva responsabilità
acquistare servizi di telefonia internet conformi con SIP, con-
gurare GSC3506 correttamente per usare tale servizio ed
eettuare test periodici della congurazione per assicurarsi
che funzioni in modo idoneo. Se non si eettua ciò, è Vos-
tra responsabilità acquistare servizi telefonici ssi o wireless
tradizionali per accedere ai Servizi di emergenza.
GRANDSTREAM NON FORNISCE COLLEGAMENTI AI
SERVIZI DI EMERGENZA ATTRAVERSO GSC3506. NÈ
GRANSTREAM NÈ I SUOI RESPONSABILI, DIPENDENTI
O AFFILIATI POSSONO ESSERE RITENUTI RESPON-
SABILI DI QUALSIASI RECLAMO, DANNO O PERDITA,
E DI QUALSIASI AZIONE LEGALE DERIVANTE DA TALI
RECLAMI O CAUSE IN RELAZIONE ALL’IMPOSSIBILITÀ
DI USARE IL GSC3506 PER CHIAMATE AI SERVIZI O DI
STRINGERE ACCORDI SUPPLEMENTARI PER ACCE-
DERE AI SERVIZI DI EMERGENZA IN CONFORMITÀ AL
PARAGRAFO PRECEDENTE.
I termini della licenza GNU GPL sono incorporati nel rm-
ware del dispositivo e sono accessibili tramite l'interfaccia
utente Web del dispositivo a: ip_dispositivo/gpl_license. È
anche possibile accedervi all'indirizzo: http://www.grand-
stream.com/legal/open-source-softwarePer ottenere un CD
con informazioni sul codice sorgente GPL, si prega di inviare
una richiesta scritta a [email protected]
• Non tentare di aprire, smontare o modicare il dispositivo.
• Non esporre il dispositivo a temperature esterne alla gamma da 0 °C a 45°C per
il funzionamento e alla gamma da -10°C a 60°C per la conservazione
• Non esporre GSC3506 ad ambienti fuori dal seguente intervallo di
umidità:10-90% UR (senza condensa).
• Non spegnere/accendere il GSC3506 durante l’avvio del sistema o
l’aggiornamento del rmware. Ciò potrebbe comportare il danneggiamento del
rmware e il malfunzionamento dell’unità.
1x GSC3506
IT
CONTENUTO DELLA CONFEZIONE
Il GSC3506 è un altoparlante SIP per l’amplicazione a 1 via che con-
sente a uci, scuole, ospedali, appartamenti e altre strutture di creare
soluzioni potenti per l’amplicazione di annunci in modo da migliorare la
sicurezza e la comunicazione. Questo resistente altoparlante SIP ore
una funzionalità di audio HD cristallino con un altoparlante HD da 30-
Watt ad alta fedeltà. Il GSC3506 supporta whitelist, liste nere e greylist
integrate per bloccare facilmente le chiamate indesiderate, il paging SIP
e multicast, il paging di gruppo e il PTT. Gli utenti possono facilmente
creare una soluzione di sicurezza e di annuncio PA all'avanguardia. Gra-
zie al suo moderno design industriale e alle sue funzionalità avanzate, il
GSC3506 è l’altoparlante SIP ideale per qualsiasi ambiente.
1x Guida installazi-
one
1x Staa per sotto 8x Viti
(M4)
PRECAUZIONI
PANORAMICA
Kit di montaggio a sotto
(opzionale e venduto separatamente)
Modello ritagliato dei fori di
montaggio

~33~ ~34~
INSTALLAZIONE HARDWARE
PORTE E PULSANTI DEL GSC3506
N° Porta Etichetta Descrizione
1Porta
USB USB 2.0, memoria USB esterna
2NET/PoE Porta Ethernet RJ45 (10/100Mbps) che supporta
PoE.
3Porta 2
pin
Porta ingresso multiuso 2 pin.
Porta di ingresso allarme (tensione di accesso da
5 V a 12 V)
4Reset
Pulsante ripristino di fabbrica.
Premere per 10 secondi per ripristinare le im-
postazioni predenite di fabbrica.
5Volume Pulsanti del volume audio
Montaggio a
softto
GSC3506 può essere montato a sotto o sul braccio. Fare riferimento ai passaggi
seguenti per la corretta installazione.
1. Praticare un foro
rotondo con un
diametro di 230
mm o utilizzare
il modello
ritagliato dei fori di
montaggio.
2. Per una maggiore sicurezza, installare
prima i cavi anticaduta, quindi collegare i
cavi Ethernet e a 2 pin.
12
Foro a
sotto
3
45
1
(16~23.8in)
406~605mm
1
2
34
2
4
5
6
3. Aprire la copertura anteriore con un cacciavite a
testa piatta.
5. Con un cacciavite, ruotare delicatamente in
senso orario le viti contrassegnate come (1),
(2),(3) e (4) nella gura del passaggio 5.
6. Allineare la tacca sulla copertura anteriore
con la tacca sul dispositivo, premere l'intera
copertura anteriore per assicurarsi che ogni
bbia sia ssata.
3
deve allegare
4. Allineare il dispositivo al foro e spingere
lentamente verso l'alto con due mani.
Pannello anteriore
(copertura in rete rimossa)
Pannello posteriore
Installazione con il Kit di stae per sotto (*venduto
separatamente)
Fissare la staa per
sotto utilizzando
le viti del kit come
mostrato nella gura.
Avvertenza: evitare di premere la tromba con le mani.
230mm
9in or
Warning: Avoid pressing the horn with your hands.
Nota: il diametro dei cavi anticaduta
deve essere inferiore a 5 mm e la forza
di trazione deve essere superiore a
25 kgf.

~35~ ~36~
Montaggio del braccio
1. Fissare il braccio al sotto.
2. Per una maggiore sicurezza, installare
prima i cavi anticaduta.
Un computer collegato alla stessa rete del GSC3506 può rilevare e accedere alla
sua interfaccia di congurazione usando il suo indirizzo MAC:
1. Individuare il mac address sull’etichetta posizionata nella parte bassa
dell’apparato o sulla confezione.
2. Da un computer collegato alla stessa rete del GSC3506, digitare il seg-
uente indirizzo usando l’indirizzo MAC del GSC3506 sul proprio browser http://
gsc_<mac>.local
Esempio: se un GSC3506 ha come indirizzo MAC C0:74:AD:11:22:33, è possibile
accedere a questa unità digitando http://gsc_c074ad112233.local sul browser.
ACCESSO ALL’INTERFACCIA DI CONFIGURAZIONE
Scaricare il manuale utente dettagliato da:
http://www.grandstream.com/support
GSC3506 possono essere alimentati usando
l’interruttore PoE/PoE+ o l’iniettore PoE medi-
ante i passi seguenti:
Passaggio 1:
Collegare il cavo Ethernet RJ45
alla porta di rete del GSC3506
Passaggio 2:
Collegare l’altra estremità
nell’interruttore con alimentazione su Ethernet
(PoE) o iniettore PoE.
ACCENSIONE E COLLEGAMENTO DEL GSC3506
Porta
di rete
Cavo Ethernet RJ45 a
interruttore con alimentazi-
one su Ethernet (PoE) o
iniettore PoE.
Collegamento dell'Alloggiamento di
cablaggio
Supporto GSC3506 per collegare una "chi-
ave normale" alla porta a 2 pin attraverso
l'alloggiamento di cablaggio.
Passaggio 1: Estrarre l'alloggiamento di
cablaggio dal kit di installazione.
Passaggio 2: collegare la chiave normale
all'alloggiamento di cablaggio (come mostrato
nella gura a destra).
porta a 2 pin
Alloggiamento
di cablaggio
Chiave normale
11
2
3
4
Nota: si raccomanda di usare un alimentatore PoE+
per ottenere le migliori prestazioni audio.
Baraccio (non fornito)
3. Connettere il braccio al foro a sotto
GSC3506 e ruotarlo per ssarlo.
deve allegare
4. Collegare i cavi Ethernet e a 2 pin.
Nota: il diametro dei cavi anticaduta
deve essere inferiore a 5 mm e la forza
di trazione deve essere superiore a
25 kgf.
Table of contents
Languages:
Other Grandstream Networks Speakers manuals

Grandstream Networks
Grandstream Networks GSC3516 User manual

Grandstream Networks
Grandstream Networks GSC3510 User manual

Grandstream Networks
Grandstream Networks GSC3516 User manual

Grandstream Networks
Grandstream Networks GSC3516 User manual

Grandstream Networks
Grandstream Networks GSC35 Series User manual