GRANULDISK Granule Combi User manual

2
Declaration of Conformity
The Manufacturer:
GRANULDISK AB
Jägershillgatan 15
SE-213 75 MALMÖ, Sweden
declares that the following machinery:
The GRANULDISK system Granule Combi®
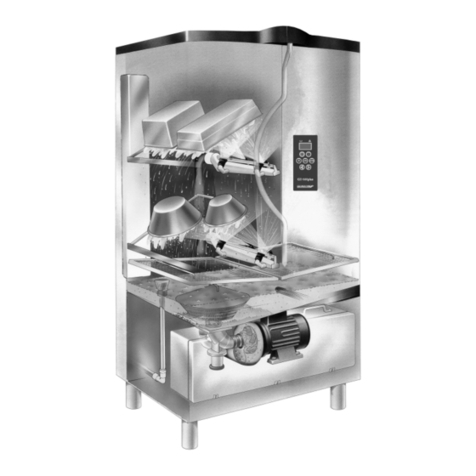
Granule Combi is a unique Combi dishwasher which combines the award winning Granule Optimised
Washing Technology with the traditional dishwashing technique for plates, cutlery and most of the
crockery.
Basic conception
a) is manufactured in conformity with the Svenska Arbetarskyddsstyrelsens Författningssamling
AFS1994:48. This law conforms with the COUNCIL DIRECTIVE of 22 June 1998 concerning harmoni-
sation of member states legislation for machinery (the Machinery Directive 98/37/EG), with particu-
lar reference to Annex 1 concerning the essential health and safety requirements relating to the
design and construction of the machinery.
b) is besides the provisions under a) manufactured according to the following directives: the EC Low
Voltage Directive 2006/95/EC and the EMC Directive 2004/108/EC
c) is manufactured in conformity with the following harmonised standards: EN 60204-1:2006, EN
55014-1, EN 60335-2-58, EN 60439-1, EN 55022, EN ISO 13850:2008, EN ISO 13857:2008,
EN 61000-6-3 and EN 61000-6-2
d) is manufactured in accordance with EN 1717 and fitted with a type AB back flow protection device
with airgap in accordance with EN 13077:2008.
Malmö, Sweden 02.04.2009
Signed on behalf of GRANULDISK AB
GRANULDISK AB Jägershillgatan 15
21375MALMÖ
Phone: 040 671 50 60
Fax: 040 21 07 21
...............................................
Peter Schön
President
DRAFT

3
To the user Safety regulations
Granule Combi is a Granule potwashing
machine – a potwashing machine for com-
mercial kitchens that is designed for wash-
ing pots and pans as well as crockery and
cutlery.
This manual is your guide for the correct
installation and use of the Granule Combi
potwashing machine.
GRANULDISK recommends that you study
the manual thoroughly to be sure that the
machine is installed and used correctly
and safely.
Ensure that the manual is always available
during the whole life of the machine.
GRANULDISK accepts no responsibility
for damage to the equipment or other
damage or injury caused by not following
the directions in this manual.
The plastic in the Granules is approved for
use in conjunction with food.
The machine uses hot water. Avoid contact
with the skin as there is a risk for scalding!
There is a risk for slipping if Granules are
left on the floor.
Formaldehyde, which is dangerous if
inhaled, may be formed if the Granules
catch fire.
Regarding the handling of detergent,
please see the detergent manufacturer’s
instructions.
Always lock the hood in its upper position
when daily cleaning is conducted.
DRAFT

4
1. Technical data
Weight.......................................................435 kg (filled machine)
Tank volume ..............................................83 litres
Granule amount .........................................8 kg
Wash power...............................................10 % Granule concentration
Wash water temperature ............................65 °C
Rinse water temperature............................85 °C
Combi mode
Wash programmes.....................................Eco 1 min, 30 s
Short 2 min (20 sec longer with steam reduction)
Normal 2 min, 30 s (20 sec longer with steam reduction)
Rinse water volume....................................4 litres/programme
Capacity (combi mode) ..............................33 baskets/hour (500 x 500 mm)
Pot-washing mode
Wash programmes w Granules ...................Eco 2 min, 20 s
Short 3 min, 30 s (30 sec longer with steam reduction)
Normal 5 min, 30 s (30 sec longer with steam reduction)
Wash programmes w/o Granules ................40 sec shorter than with Granules
Rinse water volume....................................4 litres/ECO programme
8 litres/short, normal programme
To achieve 3600 HUE according to NSF/ANSI 3 - 2007, 8 litres is necessary.
Capacity (pot wash) ...................................6 + 1 GN 1/1, 65 mm deep or 3 GN 1/1 200 mm and 4 GN 65 mm,
or equivalent in other items
Loading volume .........................................190 litres (Ø 650 mm x H 570 mm)
Design ......................................................Round rotating stainless steel basket
Voltage** ..................................................400 V (standard); 3-phase, earth
230, 415 V (option); 3-phase, earth
Fuse** ......................................................400, 415 V: 25 A (cold water option 32 A)
230 V: 40 A
Frequency .................................................50 Hz
Maximum power ........................................12,6 kW (cold water option 17,6 kW)
Wash pump motor (pot wash) .....................2,6 kW
Wash pump motor (combi mode) ................0,7 kW
Rinse pump motor .....................................0,37 kW
Wash tank element*...................................9 kW (cold water option 14 kW)
Rinse tank element*...................................9 kW (cold water option 14 kW)
Encapsulation class ...................................IP55
Hot water ..................................................½” (DN15), 55-65°C, 3-7°dH
NB! Reverse osmosis water and totally softened water must not be used.
Water pressure/flow h.w. ...........................1-6 bar, 15 litres per min
Cold water.................................................½” (DN15), 3-7°dH
Water pressure / flow c.w. .........................1-6 bar, 15 litres per min (3-6 bar when option steam reduction is fitted)
Recommended ventilation capacity.............500 m3/h (without steam reduction)
150 m3/h (with steam reduction)
Outflow .....................................................Pipe Ø 32 mm
Drain.........................................................Required capacity 100 ltr/min. The machine should not be placed directly above the drain.
* Not in use simultaneously
** For specific data regarding delivered machines, please see machine rating plate
NB; The Granule Combi is supplied with a 2,5 metres electric cable to be connected to an approved main electrical switch on the wall. Main switch is not included in the delivery.
DRAFT

Installation
All operations described in this chapter must only be carried out by
qualified staff. All electrical components described in this chapter apply to
400 volt machines. Recalculated electrical values apply to other voltages
(see technical data).
1. The Granule Gastro and Combi is delivered well packaged and placed on a pallet.
Remove the packaging so that the machine is left standing on the pallet. Undo the
fixing screws 8 pieces, remove the beams from front and back side. Lift the machine
from the front or back using a pallet truck now you can remove the beams at the
sides. Check that the machine is undamaged.
2. Place the machine in position and adjust the feet, use a spirit level to get the
machines in level.
Check that there is room for the hood to go up. Total height with the hood raised is
2400 +- 25 mm, depending on how feet have been set.
Never place anything on the hood.
3. Connect the hot water and cold water supplies. This connection is located on the
back of the machine – see the Overview diagram on page 7 – and is marked red. Use
flexible connecting hoses with an internal diameter of no less than 9 mm. Take care
to ensure that you have at least an extra 500 mm of hose so that you can move the
machine forwards for servicing. Incoming water must be at a pressure of 1-6 bar
when the solenoid valve is open. If the water pressure is in excess of 6 bar, a relief
valve should be installed.
4. Connect the drain pipe on the right to the drain. The drain capacity should be 100
litres/minute. Place the valve in open position (shown by symbols on the side plate).
Connect a plastic pipe, Ø32 mm, between the hole in the bottom plate and the drain.
See the installation drawings on page
9. The drain capacity must be at least 100 litres/minute. The machine should not be
placed directly over a floor drain. It is important for the drain to be accessible for
cleaning.
DRAFT

5. The electrical connections in the electrical cabinet must be tightened before the
input electricity supply is connected. Connect the electrical cable to the main switch
on the wall. Check that the power supply complies with the Technical Data on the
rating plate.
Detergent and rinse aid installation
To obtain the best performance of this GRANULDISK pot washer we strongly
recommend to install a sensor controlled dosing equipment and also install
appropriate rinse aid.
The machine does not need to be moved, but remove the front cover
and the right side cover
The 230V and the 24V supply as well as the control signals for the detergent and
rinse agent equipment are located in the terminal box (A) on the
right side of the wash tank. There are terminal blocks as listed
below in the junction box (see pic):
1 Emergency stop J 8-8
2 Emergency stop J 8-3
3 Operations indication J 6-4
4 Central metering (full wash tank) J 8-5/TF
5 Rinse connection 24VAC J 8-4/R
6 Detergent connection 24 VAC J 8-9/D
7 Neutral 24 VAC J 16-12
8 Constant 24 VAC 113
A Earth PE
B Rinse connection 230 VAC
C Detergent connection 230 VAC J 1-7/D
D Neutral 230 VAC J 1-6
E Constant 230 VAC J 1-2
DRAFT

1 2 3 4 5 6 7 8
A B C D E
DRAFT

The machine is prepared with a short pipe and a transparent hose (E) for detergent
inlet. This device is located on the right hand side on the back of the machine. The
transparent pipe protrudes from an opening in the back cover and it is designed to
take solid style detergent. When installing liquid detergent the transparent hose have
to be cut some 500 mm from the pipe and the liquid dosing hose have to be pushed
in to the transparent one and strapped in position.
The machine is also prepared with a rinse aid connection (F) at the same point. The
connection is 1/8” internal threads.
The pre drilled sensor hole (C) will be found on the right hand side 300 mm right of
the detergent junction box and 100 mm below.. To make it easier to find, a red
plastic blank fit in the hole
In case of that solid detergent has to be connected the hot water point (1/8”) for the
dosing equipment
is located at the machine’s hot water connection.
All lead-through from outside the machine to detergent junction box has to be done
trough the white flexI pipe (D), this to prevent leads from the dosing equipment to
get cut by the hood lifting yoke
- It is very important that the detergent supplier is using the prepared
holes so that no unnecessary holes are made in the machine.
- All dosing equipment must be fitted with a main switch.
DRAFT

DRAFT

3. Alarms and Troubleshooting
NB! Controls in this chapter may only be carried out by qualified staff.
FAULT CHECK
Machine will not fill with water 1. That the inlet water valve is open.
2. That a programme has been selected.
3. That the doors are closed and the door sensors are
activated.
4. That the level sensor is clean.
5. That the solenoid valve works.
The machine will not start 1. The door sensors are activated.
2. The overheating sensor has not tripped out.
3. That the motor sensor QF1 in the electrical cabinet has not
tripped out.
4. That the automatic sensor F3 or the glass sensors F4 and
F5 in the electrical cabinet have not tripped out.
5. That the emergency stop is not depressed.
6. That the temperature sensors are intact.
Spray pipe alarm 1.If pots or other things hinder the spray arms’ movement.
2.If the drive system is catching.
No granules when washing with granules 1.That the granule level is correct.
2.If the granule valve is seated properly.
3.That water pressure to the solenoid valve is OK.
4.That the magnetic valve for the granule valve is OK.
5.That the granule valve does not leak.
6. That the dirt filter and constriction is in place.
Granules left on the items to be washed 1.That nozzles are not blocked.
2.That pots are angled correctly.
3.That no foreign material is in the bottom of the granule
valve and
that the sealing ring is intact.
4.That the sieve cover is fixed in place.
5.That the granule valve is properly located in its thread.
6.That the SW1 switch on the circuit board is not in the man.
position,
(checked by an electrician).
7.That there is not too much foam in the machine while
washing.
8.That the spray pipe motor and link system are OK.
9.That the return water pipe is not blocked.
Machine does not wash items clean 1.That the nozzles are not blocked.
2.That the wash water temperature is approx. 65 °C.
3.That detergent dosing is correct.
4.That the right amount of granules are in the machine.
5.That there is not too much foam in the machine.
6.That the spray pipe motor and link system are OK.
7.That the pots are placed correctly.
8. That the protective grid for the pump has not been
blocked.

Wash water does not maintain 1.That automatic breaker F1 in the distribution box is in
position 1.
the right temperature 2.That the thermistor is undamaged and the temperature is
correctly set.
Final rinse water does not maintain 1.That automatic breaker F1 in the distribution box is in
position 1.
right temperature 2.That the thermistor is undamaged and the temperature is
correctly set.
3.That inlet water is approx. 55 °C.
The meaning of the error codes can be read out from the table below.
•Error code 100, 109, 116, 118, 132 are also displayed with an Error message text shown in the
Meaning column.
•When an error code is displayed, the program always is cancelled.
•After checking or taken care of the problem, the alarm can be reset by pressing the STOP-
button.
Error
code Machine Meaning Cause Remedy
001
All
Programme cancelled by
operator.
This error code is displayed only when
operating data is read in GDTdirect™
3.x.
100
Flexi
Maxi Spray pipe alarm
Something is preventing
movement of the spray
pipes.
Remove whatever is preventing
movement. Check the magnetic
proximity switch and the magnet on the
rocking arm. Check the fuse F4 on the
PCB
101 Maxi
Combi Motor circuit breaker for
wash pump right tripped The motor is overloaded
The impeller is blocked
by granules or by small
utensil
Check if the impeller turns free, reset
the motor circuit breaker, start the
machine and check the current of all
three phases Check the volume of
charged granules.
102 Maxi
Combi Motor circuit breaker for
wash pump left tripped The motor is overloaded
The impeller is blocked
by granules or by small
utensil
Check if the impeller turns free, reset
the motor circuit breaker, start the
machine and check the current of all
three phases. Check the volume of
charged granules.
103
All Motor circuit breaker for
rinse pump tripped out. The motor is overloaded
The impeller is blocked Check if the impeller turns free, reset
the motor circuit breaker, start the
machine and check the current of all
three phases

104
All Overheating protector
for rinse tank tripped
The rinse tank heater
element has overheated.
Check the function of the level sensors,
and check that the machine is filling
with water. Reset the overheating
protector located to the right of the
electrical cabinet.
105
All Overheating protector
for wash tank tripped
out.
The wash tank heater
element has overheated.
Check the function of the level sensors,
and check that the machine is filling
with water. Reset the overheating
protector located to the right of the
electrical cabinet.
106
All Overheating protector
for one of the heater
elements tripped out.
One of the heater
elements has
overheated.
Check the function of the level sensors,
and check that the machine is filling
with water. Reset the overheating
protector located to the right of the
electrical cabinet.
107
All Temperature not reached
in wash tank
The wash water in the
wash tank does not
reach its preset
temperature during the
wash process.
Check the heating element circuit
breaker and the contactor in the
electrical cabinet.
Can also be caused by low temperature
of incoming water.
108
All Temperature not reached
in rinse tank
The rinse water in the
rinse tank does not reach
its preset temperature
during the wash process.
Check the heating element circuit
breaker and the contactor in the
electrical cabinet.
Can also be caused by low temperature
of incoming water.
109
Flexi
Maxi Door switch
Someone has attempted
to open the doors during
operation.
Close the door.
110
All Temperature sensor in
wash tank or rinse tank
non operational. Most
probably in wash tank.
The temperature sensor
in the wash tank or rinse
tank is broken. Most
probably in wash tank.
Replace the temperature sensor in the
wash tank or rinse tank.
111
All Temperature sensor in
wash tank or rinse tank
non operational. Most
probably in rinse tank.
The temperature sensor
in the wash tank or rinse
tank is broken. Most
probably in rinse tank.
Replace the temperature sensor in the
wash tank or rinse tank.
112
All Water level too low in
rinse tank The level in the rinse
tank has fallen
erroneously.
Check the water connections to the rinse
tank. Check the condition (sensitivity
value) of the upper level sensor in the
rinse tank
113
All Water level too low in
wash tank
The level in the wash
tank has fallen
erroneously.
Check the water connections to the
wash tank, as well as the drainage pipe
and the drain valve

114
All Long wash tank filling
time
The level sensor in the
wash tank has not been
activated within 20
minutes of the solenoid
valve opening.
Check the water supply to the machine,
as well as the rinse pump. Clean the
rinse nozzles. Check the sensitivity of
level sensors
115
All Long rinse tank filling
time
The level sensor in the
rinse tank has not been
activated within 5
minutes of the solenoid
valve opening.
Check the water supply to the machine,
as well as the solenoid valve for rinse
tank filling. Check the condition
(sensitivity value) of level sensors in the
rinse tank.
116
All Low water level,
problem with foam
Foam forming in the
machine.
Avoid using detergent designed for
washing up by hand. Change the wash
water. Contact your detergent supplier if
you still the problems with foam
formation persist.
117
All Long rinse time
The lower level sensor
in the rinse tank has not
indicated that the correct
amount of water has
been pumped out.
Check rinse pump function. Clean the
rinse nozzles, and check if faulty signal
from lower level sensor in rinse tank.
118
All Drain valve not closed The drain valve has
opened during an active
process in the machine.
Close the drain valve.
119
Gastro
Flexi Motor circuit breaker for
wash pump tripped The motor is overloaded
The impeller is blocked
by granules or by small
utensils
Check if the impeller turns free, reset
the motor circuit breaker, start the
machine and check the current of all
three phases. Check the volume of
charged granules.
120 Gastro
Combi Basket drive device
blocked The basket is prevented
from rotating, utensils
outside of the basket.
Check if all wash gods are loaded
properly in the basket, reload I
necessary. Check the magnetic
proximity switch and two magnets on
the connection block. Check the fuse F4
on the PCB.
121 Gastro
Combi Motor circuit breaker for
the booster pump
tripped
The motor is overloaded Check if the impeller turns free, reset
the motor circuit breaker, start the
machine and check the current of all
three fazes.
122 Gastro
Combi Incorrect downwards
hood movement The hood has not
reached down within 25
seconds; the security
switch has not changed
its status.
Check the solenoid valve for lowering
of the hood.
Check the condition of the hydraulic
cylinder.

123 Gastro
Combi Incorrect upwards
movement of the hood The hood has not
reached up within 20
seconds. The alarm is
activated even if the
hood remains in the up
position.
Check if the tap for incoming cold water
is open and the water flow is sufficient.
Check the hydraulic system, especially
the booster pump and the solenoid
valve, hood up.
124 Gastro
Combi The crush protector has
been activated Something is preventing
the hood to move down.
High friction in
mechanical system of
the hood motion
Remove whatever is obstructing the
hood movement, reload the wash gods
in the basket if necessary.
Check the mechanical system of the
hood motion.
125 Gastro
Combi Incorrect hood
movement, safety sensor The safety sensor has
not signalled to the
control unit within 5
seconds of the hood
being raised from the
tank.
Check if the hood yoke can activate the
safety sensor and if the safety sensor is
intact. Check the cold water inlet to the
machine and the correct rotation of the
booster pump. Check the function of the
solenoid valve, hood up
128,
129,
130, 131
System error, control
card non operational A control card
component is broken.
132 All Clean Level sensor
The level sensor in wash
tank may be dirty, or
water in wash tank have
not been totally drained
at start up if the machine
has been shut down for
more than 4 hours.
Empty the wash tank and clean the level
sensor in the wash tank.
140 All Temperature sensor in
wash tank or rinse tank
non operational
The temperature sensor
in the wash tank or rinse
tank is broken.
Cut machine power wait 30 seconds,
turn power back on. If Error persists,
Replace the temperature sensor in the
wash tank or rinse tank.
142 Combi The sensor for detecting
of wash ware out of
order
No signal or false signal
from the proximity
switch detecting the
basket.
Check the distance between the
proximity switch and the magnets build
in the plastic basket ring. Check the
condition of the magnetic proximity
switch

How to safely disconnect the power when performing maintenance.
•A separating switch must be installed next to the machine. This must be in off-
position. The rinse aid and detergent installation must also be put out of circuit, unless it
is supplied from the GRANULDISK machine.
•The separating switch must be fitted with a safe-guard against switching on,
preferably by locking.
•A sign that is prohibiting any operation of the switch must be posted at the separation
point. The sign must be mounted securely in such a way that is remains mounted the
duration of the work.
•Ensure the machine is dead by undoing the front cover, the lid to the electrical
cabinet and measure the incoming voltage on Q1. There must not be any voltage
between any of the phases or between any of the phases and protective earth.
DRAFT

Preselected values in servicemenu 3.0
T
ex
t
no. Text Flexi Maxi MaxiSH Gastro GC
32. Eco wash time 60 60 60 60 60
33. Short wash time 180 180 180 120 120
34. Normal wash time 300 300 300 240 240
35. Eco fine wash time 60
36. Short fine wash time 90
37. Normal fine wash time 120
38. Separation time 60 60 60 30 40
39. Time control the rinse pump Potwash Eco YES YES YES YES YES
40. Time control the rinse pump Potwash Other NO NO NO NO NO
41. Eco Rinse time 20 20 20 20 20
42. Other Rinse time 40 40 40 40 40
43. Eco fine Rinse time 20
44. Other fine Rinse time 20
45. Steam reduction equipment YES YES YES NO NO
46. Steam reduction time Eco-program 00000
47. Steam reduction time Other program 60 60 60 30 30
48. Steam reduction time Fine Eco-program 0
49. Steam reduction time Fine Other program 20
50. Wash tank temperature 65 65 65 65 65
51. Rinse tank temperature 85 85 85 85 85
52. Temperature block in the wash tank YES YES YES YES YES
53. Temperature block in the rinse tank YES YES YES YES YES
54. Type of rinse aid dosage Per cycle Per cycle Per cycle Per cycle Per cycle
55. Sensitivity on level detectors 500 500 500 500 500
56. Prescavenging at program start Interval NO NO NO NO
57. Impulse time on the pump during prescavenging 200 200 200 200 200
58. Alarm Low water level 20 20 20 20 20
59. Alarm Wash temperature not reached 30 30 30 30 30
60. Alarm Rinse temperature not reached 15 15 15 15 15
61. Alarm Long fill time in the wash tank 20 20 20 20 20
62. Alarm Long fill time in the rinse tank 55555
63. Change water after 20 20 20 20 20
64. Run test program
65. Load factory settings
66. Value on the level sensors
67. Read operation data
68. Read accumulated values
DRAFT

Preselected values in servicemenu 3.0
T
ex
t
no. Text Flexi Maxi MaxiSH Gastro GC
32. Eco wash time 1:00 1:00 1:00 1:00 1:00
33. Short wash time 3:00 3:00 3:00 2:00 2:00
34. Normal wash time 5:00 5:00 5:00 4:00 4:00
35. Eco fine wash time 1:00
36. Short fine wash time 1:30
37. Normal fine wash time 2:00
38. Separation time 1:00 1:00 1:00 0:30 0:40
39. Time control the rinse pump Potwash Eco YES YES YES YES YES
40. Time control the rinse pump Potwash Other NO NO NO NO NO
41. Eco Rinse time 0:20 0:20 0:20 0:20 0:20
42. Other Rinse time 0:40 0:40 0:40 0:40 0:40
43. Eco fine Rinse time 0:20
44. Other fine Rinse time 0:20
45. Steam reduction equipment YES YES YES NO NO
46. Steam reduction time Eco-program 0:00 0:00 0:00 0:00 0:00
47. Steam reduction time Other program 1:00 1:00 1:00 0:30 0:30
48. Steam reduction time Fine Eco-program 0:00
49. Steam reduction time Fine Other program 0:20
50. Wash tank temperature 65 65 65 65 65
51. Rinse tank temperature 85 85 85 85 85
52. Temperature block in the wash tank YES YES YES YES YES
53. Temperature block in the rinse tank YES YES YES YES YES
54. Type of rinse aid dosage Per cycle Per cycle Per cycle Per cycle Per cycle
55. Sensitivity on level detectors 500 500 500 500 500
56. Prescavenging at program start Interval NO NO YES NO
57. Impulse time on the pump during prescavenging 200 200 200 200 200
58. Alarm Low water level 0:20 0:20 0:20 0:20 0:20
59. Alarm Wash temperature not reached 0:30 0:30 0:30 0:30 0:30
60. Alarm Rinse temperature not reached 0:15 0:15 0:15 0:15 0:15
61. Alarm Long fill time in the wash tank 0:20 0:20 0:20 0:20 0:20
62. Alarm Long fill time in the rinse tank 0:05 0:05 0:05 0:05 0:05
63. Change water after 0:20 0:20 0:20 0:20 0:20
64. Run test program
65. Load factory settings
66. Value on the level sensors
67. Read operation data
68. Read accumulated values
DRAFT

v
g
Sw ver. 3.0
V
ectorchoice servicemenu Bold=Preselected values (all machines)
32. Eco wash time 20 30 40 50 60 70 80 90 100
33. Short wash time 20 30 40 50 60 70 80 90 100 110 120 150 180 240 300 360
34. Normal wash time 100 120 150 180 210 240 300 360 420
35. Eco fine wash time 20 30 35 40 45 50 60 70 80 90
36. Short fine wash time 40 50 60 70 75 80 90 100 110 120 130 140
37. Normal fine wash time 80 90 100 110 120 130 140 150 160 170
38. Separation time 30 40 50 60 70 80 90 100
39. Time control the rinse pump Potwash Eco NO
Y
ES
40. Time control the rinse pump Potwash Other NO YES
41. Eco Rinse time 15 20 25 30 35 40
42. Other Rinse time 15 20 25 30 35 40
43. Eco fine Rinse time 15 20 25 30 35 40
44. Other fine Rinse time 15 20 25 30 35 40
45. Steam reduction equipment NO
Y
ES
46. Steam reduction time Eco-program 010 15 20 30 40 50 60
47. Steam reduction time Other program 0102030 40 50 60 70 80 90 100
48. Steam reduction time Fine Eco-program 010 15 20 30 40 50 60
49. Steam reduction time Fine Other program 0101520 30 40 50 60
50. Wash tank temperature 6 1020304050606162636465 66 67 68 69 70
51. Rinse tank temperature 20 30 40 50 60 70 80 81 82 83 84 85 86 87 88 89 90
52. Temperature block in the wash tank NO
Y
ES
53. Temperature block in the rinse tank NO
Y
ES
54. Type of rinse aid dosage Per c
y
Per l of water
55. Sensitivity on level detectors 300 400 500 600 700
56. Prescavenging at program start NO YES Inter Constant <--GD600
57. Impulse time on the pump during prescavengin 50 100 150 200 300 400 500 600
58. Alarm Low water level 10 20 30 40
59. Alarm Wash temperature not reached 20 30 40 50 60 70 80 90 100
60. Alarm Rinse temperature not reached 10 11 12 13 14 15 16 17 18 19 20 21 22 23 24 25 26 27 28 29
61. Alarm Long fill time in the wash tank 10 15 20 25 30 35 40 45 50 55 60 65
62. Alarm Long fill time in the rinse tank 510 15 20 25 30 35 40 45 50 55 60
63. Change water after 15 20 25 30 35 40
64. Run test program
65. Load factory settings
66. Value on the level sensors
67. Read operation data
68. Read accumulated values
DRAFT

30
DRAFT

ECO
Service manual
4. Programming
Flashloader 3.x )*
With this PC-program you can:
•Updgrade the software and language-file.
•Troubleshooting with the in- & output on the circuit board.
•Reset Granule- & Service time.
•Change date & time in the machine.
•Put in Service phone number.
Installation
The program can be supplied on a CD or by E-mail and is installed as follows:
1. Create and name a folder for the program on the hard disk. Use “Explorer” in the computer’s office
program.
2. Insert the CD and click the program file Flashloader 3.x.zip on the CD. Save the files in the folder
you have just created on your hard disk.
3. Tip: create a shortcut on the desktop to make it easier to find the program when you
need to start it
Cable Connection
Connect a serial RS-232 cable(straight) between the machine serial connector and a computer serial
port. If the computer does not have a serial port, what is known as a USB/serial adapter can be used.
For information on what is suitable for your particular computer, contact your IT specialist. The cable
is connected to the 9-pole contact at the detergent junction box for the machine. Check that the internal
cable is connected in the machine’s electrical cabinet to the J11 terminal on the control card. This cable
is then laid to the selected computer via the kitchen’s normal communication paths and connected to a
free COM port.
Use
1. Start the program by double-clicking the program file Flashloader 3.x.exe in the folder you created
on the hard disk or by clicking the icon you created on the desktop.
2. Select serialport, by click on Communication/Ports , and select the port to which the potwashing
machine is connected. (Flashloader remember this setting next time the Flashloader start.
3. Put the wash machine in stop mode by pressing STOP-button.
4. Press “Connect”.
5. For Troubleshooting:
Press “Run from Flash”, and when the field “Outports” is white you can operate the machine
manually, and at the same time see what is happen to the inputs in the “InPorts” field.
The time, temperature settings, and tank-levels is displayed at the top.
DRAFT

In this mode no info is displayed in the machine display.
For updateing and uploading:
Press “Run from Flash”.
Update date and time to the PC-settings, by pressing “Set Time”.
Upload software and language file by pressing “Program” when this button is highlighted.
Select software version e.g. Washprog 3.x.bin , and select language file e.g. SvEn 3.x.spk.
Then press “Upload”. When the programming is ready a window “Upload ready” appears.
If you will upload again close the program window, and start over by pressing “Run from Flash”.
If a wrong language file is selected or the software don’t fit the machine-type, there will be an error
message.
Update EEprom with Granule programs and wash programs, by write the right values and press
“Update”.
Updating Service phone number, by write the number and press “Save”.
After troubleshooting and updateing (not uploading), you have to press “Run from Machine” to put
the machine in the ordinary mode again.
To end Flashloader press”X” in upper right corner.
DRAFT
Other manuals for Granule Combi
5
Table of contents
Other GRANULDISK Dishwasher manuals

GRANULDISK
GRANULDISK Granule Gastro User manual

GRANULDISK
GRANULDISK Granule Combi User manual

GRANULDISK
GRANULDISK Granule Combi User manual

GRANULDISK
GRANULDISK Lean Wash Center D1 Base User manual

GRANULDISK
GRANULDISK GO TECH GD 600 User manual

GRANULDISK
GRANULDISK Granule Combi User manual

GRANULDISK
GRANULDISK Granule Combi User manual

GRANULDISK
GRANULDISK Lean Wash Center D1 Base User manual