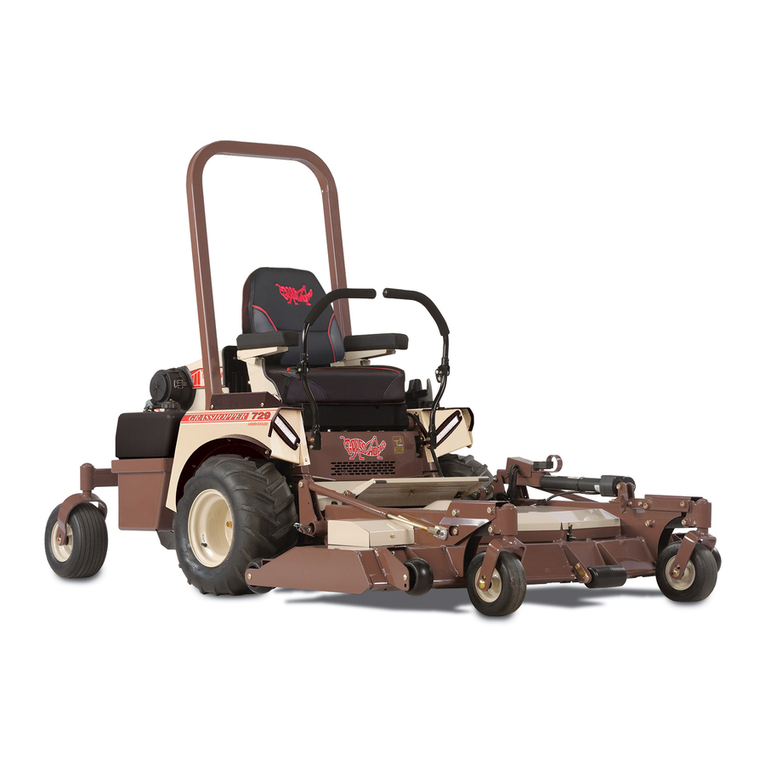
Grasshopper 721D H2 Installation and operation manual

OPERATOR’S
MANUAL & PARTS LIST
RIDING MOWER
MODEL 721D H2
THE GRASSHOPPER COMPANY
Moundridge, Kansas 67107 U.S.A.
Phone (620) 345-8621
Fax (620) 345-2301
Price $7.00
Form 172214-070207
Printed in U.S.A.

2
INTRODUCTION
Congratulations on your selection of Grasshop-
per equipment. We believe you have exercised
excellent judgment in the purchase of Grasshop-
per equipment. We are most appreciative of your
patronage.
We recommend that you carefully read this en-
tire manual before operating the unit. Time spent
becoming fully acquainted with its performance
features, adjustments and maintenance will
add a longer and more satisfactory life to your
Grasshopper.
TheGrasshopperequipmentyouhavepurchased
has been carefully engineered and manufactured
to provide dependable and satisfactory use. Like
all mechanical products it will require clean-
ing and upkeep. Lubricate it as specified in the
manual. Observe all safety information in this
manual and all safety decals on the tractor and
attachments.
The illustrations and data used in this manual
were current at the time of printing, but due
to possible in-line production changes your
machine may vary slightly in detail. The manu-
facturer reserves the right to make changes or
add improvements to its products at any time
without incurring any obligation to make such
changes to products manufactured previously.
As with all lawn and grounds equipment, if han-
dled carelessly this machine is a dangerous piece
of equipment. If used incorrectly this machine
can cause severe injury. You, the operator, are
responsible when operating it. Therefore, safety
is of the utmost importance.
ATTENTION:
• Read the instructions and warnings care-
fully before using this machine.
• Read your Grasshopper warranty, en-
closedwiththetractormanual.Tovalidate
warranty, fill in the required information
and return the warranty form within 10
days of purchase to:
THE GRASSHOPPER CO.
P.O. Box 637
Moundridge, Kansas 67107
Use only genuine Grasshopper service parts.
Substitute parts will void the warranty and may
not meet standards required for safe and satis-
factory operation. Record the model and serial
number of your mower.
MODEL:
SERIAL NUMBER:
(Serial tag is located under seat on tractor
frame by throttle.)
Provide this information to your dealer to obtain
correct repair parts.
CALIFORNIA
Proposition 65 Warning
Diesel engine exhaust and some of its
constituents are known to the State of
California to cause cancer, birth defects
and other reproductive harm.
Copyright © 2007, 2006 & 2005 by The Grasshopper Company. All
rights reserved.

3
TABLE OF CONTENTS
PAGE
SPECIFICATIONS 5
SAFETY SYMBOLS 6
SAFETY DECALS 7
SAFETY INFORMATION
Training......................................................................................................................................8
Preparation.................................................................................................................................8
Fuel Handling Safety .............................................................................................................8-9
Operational Safety .....................................................................................................................9
Maintenance Safety..................................................................................................................10
Storing Safely...........................................................................................................................10
GENERAL INFORMATION
General Information.................................................................................................................11
Measurement Conversion ........................................................................................................12
Bolt Size and Tightening Recommendations...........................................................................12
OPERATION
Controls and Switches..............................................................................................................13
Prestart Check List.............................................................................................................13-14
Starting the Engine.............................................................................................................14-15
Cold Weather Starting Tips......................................................................................................15
Uneven Terrain...................................................................................................................15-16
Stopping Engine.......................................................................................................................16
Moving Unit Without Power....................................................................................................16
Steering Lever Operation...................................................................................................16-18
LUBRICATION AND MAINTENANCE
Lubrication...............................................................................................................................19
Capacities.................................................................................................................................19
Tire Air Pressure ......................................................................................................................19
H
2Drive System.......................................................................................................................19
Crankcase Oil and Air Filter....................................................................................................19
Cooling System........................................................................................................................19
Battery Maintenance................................................................................................................20
Checking H2Drive System Fluid Level...................................................................................20
Changing H2Drive System Fluid and Filters...........................................................................20
ADJUSTMENTS AND TROUBLE SHOOTING
Loss of Power in the H2Drive System ....................................................................................21
No Positive Neutral Position....................................................................................................21
Neutral Adjustment..................................................................................................................21
H
2Belt Replacement................................................................................................................21
(continued)

4
TABLE OF CONTENTS - (CONTINUED)
Fuel Solenoid Adjustment........................................................................................................22
Testing Fuel Solenoid ..............................................................................................................22
Engine Troubleshooting.....................................................................................................22-23
Engine Removal.......................................................................................................................23
Wiring Circuit Board Removal................................................................................................23
Parking Brake Adjustment................................................................................................. 23-24
Clutch Removal/Replacement .................................................................................................24
Clutch/Brake Burnishing .........................................................................................................24
Steering Lever Adjustment ......................................................................................................24
Foot Rest Block Installation.....................................................................................................25
TRACTION KIT INSTALLATION
Adjusting Traction Spring Tension..........................................................................................26
Removing Mower Deck From Traction Kit Equipped Tractor................................................26
Rear Weight Requirements ......................................................................................................26
PARTS LIST AND ILLUSTRATION
Tractor Assembly...............................................................................................................28-29
Engine Assembly ...............................................................................................................30-31
Drive Assembly..................................................................................................................32-33
Drive Linkage Assembly.................................................................................................... 34-35
Steering Assembly ...................................................................................................................36
Reservoir & Hose Assembly....................................................................................................37
PTO Shaft & ClutchAssembly..........................................................................................38-39
ROPS & Seat Assembly.....................................................................................................40-41
Wiring Diagram ................................................................................................................. 42-43
Limited Universal Harness ......................................................................................................44
Counterweight Mount Kit........................................................................................................45
Tail Wheel Options ............................................................................................................46-47
Traction Kit..............................................................................................................................48
Optional Hydraulic Lift Wiring Diagram ................................................................................49
Optional Hydraulic Lift Assembly.....................................................................................50-51
Standard Universal Harness.....................................................................................................52
Rev. 07-05

5
SPECIFICATIONS
721D H2
Engine Kubota three cylinder
4 cycle liquid cooled
Model No. D722
Horsepower (G.I.H.P.) 20.9 (15.6 kw)
Displacement 44 cu. in. (719 cc)
No-load rpm 3600
Charging System 12VDC 12.5 amp.
negative ground
Starter Electric
Electrical System Safety interlocked
PTO 3100 r.p.m. (max.)
Electric clutch
Transmission H
2dual path
hydrostatic direct drive
Steering Dual levers independently
control speed and direction
of travel.
Zero turning radius (center of
machine is pivot point).
Speed
Forward (variable) 0 to 9 m.p.h. (14.5 km/h)
Reverse (variable) 0 to 6 m.p.h. (9.6 km/h)
Fuel Tank Capacity 4.3 U.S. gal. (16.3 l)
Tire Sizes
Front Drive Wheels
Standard 22 x 11 x 10 - 4 ply rated
Optional 22 x 10 x 10 - 4 ply rated
Tail Wheel 13 x 6.50 x 6 rib - 4 ply rated
Dimensions of Tractor
Seat Back Height 46" (1.17 m)
Seat Cushion Height 30.5" (.78 m)
Tractor Width 50.0" (1.26 m)
Tractor Length 78" (1.98 m)
Wheel Base 49.5" (1.26 m)
Weight - Uncrated 920 lbs. (416.8 kg)
Weight - Crated 1030 lbs. (467.0 kg)
Hour Meter Standard

6
SAFETY SYMBOLS
This Safety Alert Symbol means ATTEN-
TION! BECOME ALERT! YOUR SAFETY
IS INVOLVED!
Throughoutthis manual the term IMPORTANT
is used to indicate that failure to observe can
cause damage to equipment. The terms CAU-
TION, WARNING and DANGER are used
in conjunction with the Safety Alert Symbol [a
triangle with an exclamation mark] to indicate
the degree of hazard for items of personal safety.
Is used for general reminders of good
safety practices or to direct attention
to unsafe practices.
Denotes a specific potential hazard.
Denotes the most serious specific po-
tential hazard.
DANGER
CAUTION
WARNING

7
SAFETY DECALS
Replace Immediately If Damaged
Fig. 1
04075
Part No. 165024 Part No. 165345 Part No. 165661
Part No. 165679
Part No. 165721
Part No. 165340
Part No. 165540
Part No. 165090
Part No. 165090
Rev. 07-05

8
WORK SAFELY - FOLLOW THESE RULES
The designed and tested safety of this
equipmentdepends on it being operat-
ed within the limitations as explained
in this manual. Read manual before
operating.
TRAINING
• Safety instructions are important! READ
THIS MANUAL AND ALL SAFETY
RULES.
• Know your equipment’s controls and how to
stop tractor, engine and attachments quickly
in an emergency.
• To avoid accident or injury, do not allow
anyone to operate this equipment without
proper instruction.Any person who operates
this equipment MUST be instructed in and
capable of the safe operation of the unit, its
attachments and all controls.
• Do not allow children or unqualified indi-
viduals to operate equipment.
PREPARATION
• Always wear relatively tight and belted
clothing to avoid entanglement in moving
parts. Wear sturdy, rough soled work shoes.
Never operate tractor or implements in bare
feet, sandals or sneakers.
• Ensure attachments are properly mounted,
adjusted and in good operating condition.
• Make sure driveline spring-activated lock-
ing collar slides freely and is seated firmly
in the tractor PTO groove.
• Check brake action before you operate. Ad-
just or service brakes as necessary.
• Ensure all safety switches function properly.
See Operation section for details.
• Remove accumulated debris from attach-
ment and tractor to avoid fire hazard.
• Ensure all safety shielding is in good condi-
tion and properly installed.
• Ensure either the discharge shield, restric-
tion plate, or complete vacuum attachment
is installed.
• Ensure all safety decals are installed and in
good condition.
• Use correct counterweights when certain
attachments are installed (see specific acces-
sory installation instructions).
• Inspect area to be cut removing stones,
branches and other debris that might be
thrown causing injury or damage.
• Evaluate the terrain to determine what ac-
cessories and attachments are needed to
properly and safely perform the job.
• Low-hanging branches and similar obsta-
cles can injure the operator or interfere with
mowing operation. Before mowing, iden-
tify potential obstacles such as low-hanging
branches, and trim or remove those obsta-
cles.
• Never permit any person, other than the
operator, to ride or board the tractor or im-
plements at any time.
• Operate only in daylight or good artificial
light.
FUEL HANDLING SAFETY
• In certain conditions, gasoline is extremely
flammable and highly explosive. A fire or
explosion from gasoline can burn you and
others and can damage property.
• Fill the fuel tank outdoors, in an open area,
when the engine is cold. Wipe up any gaso-
line that spills.
• Do not fill the fuel tank completely full. Add
gasoline to the fuel tank until the level is ¼"
to ½" (6 mm to 13 mm) below the bottom of
the filler neck. This empty space in the tank
allows gasoline to expand.
• Never smoke when handling gasoline, and
stay away from an open flame or where gas-
oline fumes may be ignited by a spark.
• Store gasoline in an approved container and
keep it out of the reach of children. Never
buy more than a 30-day supply of gasoline.
• Always place gasoline containers on the
ground away from your vehicle before fill-
ing.
• Do not fill gasoline containers inside a ve-
hicle or on a truck or trailer bed because
interior carpets or plastic truck bed liners
may insulate the container and slow the loss
of any static charge.
• When practical, remove gas-powered equip-
CAUTION

9
DO NOT use seatbelt and drive with extra
care.
• Do not move steering levers from forward
to reverse or reverse to forward position rap-
idly. The sudden change could cause loss of
control and/or damage to equipment.
• Do not operate on steep slopes.
• Do not stop, start or change directions sud-
denly on slopes.
• Use extreme care and maintain minimum
ground speed when traveling or operating
on a hillside, over rough ground, or when
operating close to ditches and fences.
• Reduce speed on slopes and sharp turns to
minimize tipping and avoid loss of control.
Be careful when changing directions on
slopes.
• Stay alert for holes, rocks, roots and other
hidden hazards in the terrain. Keep away
from drop-offs.
• Stop mower or other attachment and tractor
immediately upon striking an obstruction.
Turn engine off, inspect attachment and
tractor. Repair any damage before resuming
operation.
• Disengage power to attachment, stop en-
gine, remove key and wait for all movement
to stop before dismounting, making adjust-
ments, cleaning, or unclogging the machine.
• Never transport attachments with PTO run-
ning.
• Watch for traffic when operating near or
crossing roadways.
• This unit is not equipped for highway use,
especially when safety lighting and marking
is required. It is not a recreational vehicle.
• This unit is not equipped with a drawbar. Do
not pull loads.
• Take all possible precautions when leaving
tractor unattended: disengage PTO, lower
attachment, place controls in neutral, set
parking brake, stop engine and remove key
from ignition.
• Move very slowly when attachment is re-
moved. Never carry passengers.
• Do not run engine in an enclosed area with-
out adequate ventilation. Exhaust gases
contain carbon monoxide, an odorless and
deadly poison.
ment from the truck or trailer and refuel the
equipment with its wheels on the ground.
• If this is not possible, then refuel such equip-
ment on a truck or trailer from a portable
container, rather than from a gasoline dis-
penser nozzle.
• If a gasoline dispenser nozzle must be used,
keep the nozzle in contact with the rim of the
fuel tank or container opening at all times
until fueling is complete.
• Never use cellular phones or other portable
electronic devices when handling fuel.
OPERATIONAL SAFETY
• Read “Operation” section of this manual be-
fore attempting to operate this unit.
• Do not operate without ROPS deployed.
• Fenders serve as shields. Do not operate
without them.
• Keep bystanders away from equipment
while it is in operation.
• Keep children and pets a safe distance away.
Never direct discharge toward anyone.
• Start engine from operator’s seat after dis-
engaging tractor power takeoff and placing
steering levers into the neutral swing-out
position.
• Keep hands and feet away from underneath
mower while engine is running. Stay clear of
all moving parts on tractor and attachments.
• Protect against noise. Wear suitable hearing
protection devices to protect against objec-
tionable noise.
• Never allow anyone behind tractor or in
front of implements when operating.
• Do not operate in reverse unless absolutely
necessary and then only after careful obser-
vation of the entire area behind you.
• If operator must dismount to make adjust-
ments the engine must not be running.
• If machine is equipped with a fixed ROPS,
always wear seatbelt.
• If machine is equipped with a foldable
ROPS,
always wear seatbelt when ROPS is de-
ployed.
• When foldable ROPS must be down (i.e.
loading or unloading on an enclosed trailer),
Rev. 10-05


10
MAINTENANCE SAFETY
• Always perform maintenance with the ma-
chine parked on a hard level surface; with
the engine stopped and the PTO disengaged;
with the park brake set; and with the key
removed from the ignition.
• Always remove the grounded (-) clamp from
the battery when performing maintenance
on the engine, clutch, or any other electrical
system.
• Never work under the machine without jack
stands or other equivalent safety blocks. Do
NOT rely solely on mechanical or hydraulic
jacks or lifts for support. Always use ad-
equate wheel chocks on tires remaining on
the ground.
• Hydraulic hoses can fail due to physical
damage, kinks, age, and exposure. Check
hoses regularly. Replace damaged hoses.
• Escaping fluid under pressure can penetrate
the skin causing serious injury. Avoid the
hazard by relieving pressure before discon-
necting hydraulic or other lines. Tighten
all connections before applying pressure.
If an accident occurs, see a doctor immedi-
ately. Any fluid injected into the skin must
be surgically removed within a few hours or
gangrene may result.
• Search for leaks with a piece of cardboard.
Protect hands and body from high pressure
fluids.
• If it is necessary to run an engine in an en-
closed area, remove the exhaust fumes from
the area with an exhaust pipe extension. If
an exhaust pipe extension is not available,
work near open doors and get outside air into
the area.
• Waste products such as used oil, fuel, cool-
ant, and batteries can harm the environment
and people. Dispose of waste products prop-
erly.
• Never attempt to disconnect or alter any part
of the safety interlock systems.
• Keep engine free of grass, leaves, or excess
grease to reduce fire hazard and minimize
engine overheating.
• Do not change engine governor settings.
• Keep tractor and attachments in good op-
erating condition and all safety devices in
place.
• Periodically tighten all bolts, nuts and
screws. Check that all cotter pins are prop-
erly installed to ensure equipment is in a safe
condition.
• Check brake operation frequently. Adjust
and service as required.
STORING SAFELY
• Never store equipment with gasoline in the
tank inside a building where fumes may
reach an open flame, spark or pilot light as
on a furnace, water heater, clothes dryer, or
other gas appliance. Allow engine to cool
before storing in an enclosure.
• If engine is to be unused for 30 days or more,
add a fuel stabilizer to the fuel system. Fuel
stabilizer (such as STA.BIL® ) is an accept-
able additive in minimizing the formation
of fuel gum deposits during storage. Add
stabilizer to gasoline in fuel tank or storage
container. Always follow mix ratio found on
stabilizer container. Run engine at least 10
minutes after adding stabilizer to allow it to
reach the carburetor.
• If draining fuel tank, drain fuel into an ap-
proved container outdoors and away from
open flame.
• Always provide adequate ventilation when
running engine indoors. Exhaust gases
contain carbon monoxide, an odorless and
deadly poison.
• Remove attachments from tractor. Remove
all accumulated debris from attachments and
tractor.
• Sand areas where paint is chipped and re-
paint to prevent rust. Lubricate all locations
to prevent moisture damage during storage.

11
The purpose of this manual is to assist the
operator in maintaining and operating GRASS-
HOPPERtractors. Read it carefully. Itfurnishes
information and instructions that will help you
achieve years of dependable performance.
These operating and maintenance instructions
have been compiled from extensive field experi-
ence and engineering data. Some information
may be general in nature due to unknown and
varying conditions. However, through experi-
ence and these instructions, you should be able
to develop operating procedures suitable to your
particular situation.
The illustrations and data used in this manual
were current at the time of printing, but due
to possible in-line production changes your
machine may vary slightly in detail. GRASS-
HOPPER reserves the right to redesign and
change the machine as necessary without noti-
fication.
Someillustrationsin thismanualshow
the equipment with safety shields re-
moved to provide a better view. The
mower should never be operated with
any safety shielding removed.
GENERAL INFORMATION
Fig. 2
Throughout this manual, references are made to
right and left directions. These are determined
by standing at the rear of the equipment and fac-
ing the direction of forward travel.
Mower blade rotation is clockwise as viewed
from the top of mower.
WARNING
04075
LEFT RIGHT

12
Bolt Head Markings
SAE Grade 2
(no dashes)
SAE Grade 5
(3 radial dashes)
SAE Grade 8
(6 radial dashes)
MEASUREMENT CONVERSION
Measurements expressed in this manual are
decimal values. Use the chart below if you are
unsure of a measurement to obtain the fractional
equivalent.
BOLT SIZE AND TIGHTENING
RECOMMENDATIONS
The chart below lists the correct tightening
torque for bolts used on Grasshopper equip-
ment. When bolts are to be tightened or replaced
refer to this chart to determine the grade of bolt
and proper torque (except when specific torque
values are assigned in the manual text).
Recommended Torque in Foot Pounds
FractionDecimal SAE Grade 2 SAE Grade 5 SAE Grade 8
Bolt Diameter in Inches
0.250
0.312
0.375
0.437
0.500
0.562
0.625
0.750
0.875
1.000
1/4
5/16
3/8
7/16
1/2
9/16
5/8
3/4
7/8
1
6
13
23
37
57
82
111
200
280
350
11
21
38
55
85
125
175
300
450
680
14
25
55
80
120
180
230
440
720
1035
Decimal
Conversion Table - Inches
Decimal Fraction
0.062
0.125
0.187
0.250
0.312
0.375
0.437
0.500
1/16
1/8
3/16
1/4
5/16
3/8
7/16
1/2
0.562
0.625
0.687
0.750
0.812
0.875
0.937
1.000
9/16
5/8
11/16
3/4
13/16
7/8
15/16
1
Fraction

13
OPERATION
The safe operation of this machine is the respon-
sibility of the operator. The operator should be
familiar with the tractor and all attachments that
will be used before starting operation. Refer to
and read safety information on pages 6 through
10.
CONTROLS AND SWITCHES
Know your controls and how to stop tractor, en-
gine and attachments quickly in an emergency.
• Stop tractor by moving steering levers
to neutral position (refer to section on
steering lever operation, page 16-18).
• Stop engine by turning key to “OFF”
position.
• Disengage power to attachments by
moving PTO switch to “OFF” (down)
position.
Operating this unit is not difficult once you mas-
ter the use of the controls. We recommend you
equip the tractor with the attachment you will
be using and practice in a flat open area at a me-
dium throttle setting until you are comfortable
with the controls.
Before operating this machine be sure
the operator-presence safety system
works. The engine should not run
without the operator in the seat if the
PTO switch is on or either steering
lever is in the run position.
Several safety switches are incorporated in the
unit’s design to prevent it from being started out
of neutral or with the PTO engaged.All controls
must be in the “OFF” or neutral position before
the unit can be started. There is a safety switch
under the operator’s seat that will cause the en-
gine to stop should the operator leave the seat
with any control engaged.
PRESTART CHECK LIST
• Place tractor on level surface.
• Check crankcase oil level (refer to “Engine
Manual” for proper level and type of oil
used).
Never attempt to check oil while en-
gine is running.
• Check radiator coolant.
Do not remove radiator cap while en-
gine is hot!
• Remove and clean air intake screen on radia-
tor.
When mowing in dusty conditions,
dry grass or long grass, it may be nec-
essary to remove and clean air intake
on the radiator frequently to prevent
engine overheating.
• Check for grass wrapped around PTO shaft.
When mowing long grass, turn off key and
check for grass wrapped around PTO shaft
every 30 minutes of operation.
Remove fuel solenoid wire to prevent
accidental engine starting before at-
temptingtoremovegrass fromaround
PTO shaft.
• Check air cleaner (refer to “Engine Manu-
al”). When mowing in dusty conditions, dry
grass or long grass, it may be necessary to
remove and clean air intake on the air clean-
er.
• Check to be sure engine is free of dirt and
debris.
• Check fuel level. Refer to “Engine Manual”
for correct fuel for your requirements.
Do not fill fuel tank while engine is
running.Allow engineto cooltwo min-
utes before refueling. If fuel is spilled
do not start engine; avoid creating any
source of ignition until the fuel has
evaporated.
IMPORTANT
CAUTION
CAUTION
WARNING
DANGER
WARNING

14
• Check tire pressure (see page 19). Improper
pressure will adversely affect traction, steer-
ing and level cutting height.
• Check that cooling fins on the transmission
are clean.
• Placeelectric clutch switchin “OFF” (down)
position.
• Set the throttle at 1/3 open.
• Insert the key into the ignition switch and
turn to “ON” (black dot on switch plate).
• Check to see that the oil lamp and battery
lamp are on.
• Turn the key switch counterclockwise to
preheat the glow plugs in the engine. This
engine is equipped with quick heat glow
plugs and the standard preheating time is
from 5-10 seconds. Preheating is not re-
quired once the engine is warmed up.
• Return the key to “START”. When engine
starts release key immediately.
• Check to see that the oil lamp and battery
lamp are off. If either lamp remains lit a
problem exists in that system.
• Warm the engine up at medium speed for
several minutes.
DANGER
Action
Left
Steering
Lever
Right
Steering
Lever PTO
Switch
Parking
Brake
Proper
Result
Start Circuits
Kill Circuits (with engine running at 1/2 throttle)
Test Safety Interlock System Daily
Try starting engine
Try starting engine
Try starting engine
Try starting engine
Raise off seat
Raise off seat
Raise off seat
Raise off seat
Move left steering
lever in
Out
Out
Out
Out
Out
Out
Out
Out
Out
Out
Out
Out
Out
Out
In
In
In
In
Off
Off
Off
Off
Off
Off
Off
Off
Off
Off
On
On
On
On
On
On
On
On
On
On
Engines Cranks
Engine will not crank
Engine does not stop
Engine Stops
Engine Stops
Engine Stops
Engine Stops
Engine Stops
Move right steering
lever in
STARTING THE ENGINE
Never start the engine in confined
rooms. Exhaust gases contain carbon
monoxide, an odorless and deadly poi-
son.
Do not allow children to approach the
machine while the engine is running.
Do not operate the machine around
open flames, i.e., trash fires.
Do not operate the engine when an
odor of fuel is present or other explo-
sive conditions exist.
• Position yourself on the tractor seat.
• Place both steering levers in swing-out neu-
tral position.

15
the stability of the machine on a given slope
based on existing conditions like: machine
speed and direction, slope variation, slip-
periness, drop-offs, holes, obstacles, etc.
• To determine stability on a slope, start at
the bottom and try to drive the machine up
the slope slowly. If you cannot drive up the
slope or if you feel uneasy on it, do not oper-
ate on it.
• Alwaysstartmowingatthe bottom of slopes.
Traveling up slopes, this machine has more
traction traveling in reverse than forward.
Be careful on slopes to avoid driving into a
position where there is not enough traction
to enable driving out or stopping.
• Tires may lose traction on slopes even
though the brakes are functioning properly.
• Avoid sudden stops and deceleration when
traveling forward downhill as mower may
tip forwards.
• Donotmowslopeswhengrassiswetbecause
slippery conditions will reduce traction and
braking which in turn affects steering.
• Use caution when making turns. Slow the
mower down before making sharp turns.
Unit can spin very rapidly by positioning
one lever too much ahead or behind the oth-
er.
• Look around you to be sure the area is clear
before turning or backing up.
• Avoid starting or stopping on a slope. If
tires lose traction, disengage the blades and
proceed slowly straight down the slope.
• Keep all movement on slopes slow and grad-
ual. Do not make sudden changes in speed
or direction.
• Passdiagonally through sharp dips and avoid
sharp drops.
• Follow manufacturer’s recommendation
for counterweights for added stability when
operating on slopes or using front or rear
mounted attachments. Remove weights
when not required.
• Use extra care with grass catchers or other
attachments. These can change the stability
of the machine. Do not use grass catcher on
steep slopes.
• Do not operate without ROPS deployed.
If the engine does not start within 10
seconds after the starter is engaged,
stop cranking the engine and wait for
30 seconds. Repeat starting sequence
(including the preheating sequence).
Also, if the engine will not start after
refueling or after setting for a pro-
longed period, refer to bleeding fuel
lines in the “Engine Troubleshooting”
section of this manual. Never allow
the starter motor to run continuously
for more than 30 seconds. Be sure to
warm engine up regardless of season.
Loading an insufficiently warmed up
engine will shorten its service life.
COLD WEATHER STARTING TIPS
Use proper viscosity oil for temperature expect-
ed (refer to “Engine Manual”).
Set throttle half open.
A warm battery has better starting capacity than
a cold one.
Use fresh winter grade fuel. It is better for winter
starting than leftover summer grade fuel.
UNEVEN TERRAIN
Be careful when operating machine on
uneven ground.
Do not operate on steep slopes. Opera-
tion on a steep slope could cause loss
of control, machine to overturn and
personal injury or death.
• Donotoperateonsteepslopes. Thismachine
was not specifically designed to operate on
steep slopes.
• Theoperatorisresponsibleforsafeoperation
on slopes. Only the operator can determine
IMPORTANT
WARNING
WARNING

16
• If machine is equipped with a fixed ROPS,
always wear seatbelt.
• If machine is equipped with a foldable
ROPS, always wear seatbelt when ROPS is
deployed.
• Be certain that the seatbelt can be released
quickly if the machine is driven or rolls into
ponds or water.
• Check carefully for overhead clearances
such as, branches, doorways, or electrical
wires, before driving under any objects and
do not contact them.
STOPPING THE ENGINE
• Set the throttle at 1/3 open. Allow engine to
idle at this setting for several minutes, then
move the throttle to slow idle.
• Move ignition switch to “OFF” position (up-
right) and remove key.
Always remove key from ignition
switch when leaving unit unattended
or when not in use.
Emergency shutdown of engine:
If the engine does not stop running with the
throttle at slow idle and the starter switch in the
“OFF” position, the following procedure will
stop the engine.
• Unplug the wires from the fuel shut-off sole-
noid (item 30, page 31).
• Push the engine stop lever forward toward
the radiator (refer to the Engine Manual’s il-
lustration showing the location of the engine
stop lever).
• It is important that the operator be familiar
with where the parts are located on the en-
gine.
MOVING UNIT WITHOUT POWER
The hydro pumps are equipped with a dump
valve (Refer to Fig. 3) that allows the unit to be
moved without power by deactivating the pump.
With the dump valve lever in normal operat-
ing position the fluid in the pump will make it
difficult to move the unit (even with the steer-
ing levers in neutral position). The dump valve
is located on the bottom toward the right front
of each hydro pump. Activate the dump valve
by rotating counter-clockwise with a .625 inch
wrench. Rotate one revolution. When BOTH
hydro pumps are deactivated the unit becomes
“freewheeling” allowing it to be moved. Before
the hydro pumps become operational the dump
valves must be returned to their normal operat-
ing position. Do not tighten above 120 in.lbs.
(10 ft.lbs.) maximum.
CAUTION
Fig. 3
Dump Valve
01096

17
IMPORTANT
WARNING
STEERING LEVER OPERATION
(refer to Fig. 4, page 18)
Do not move steering levers from for-
ward to reverse or reverse to forward
position rapidly. The sudden change
could cause loss of control or damage
to equipment.
The Grasshopper tractor is very un-
stable without an attachment. Move
very slowly when attachment is re-
moved. Never carry passengers.
Steering levers control speed and direction of
movement. Pushing the levers forward will
move the tractor forward. Pulling levers to the
rear will move tractor in reverse. The further for-
ward or rearward the steering levers are moved,
the faster the machine will move.
At half throttle move both steering levers from
swing-out neutral inward. Move both steering
levers forward. To turn right, advance left lever
further forward than right lever. To turn left,
advance right lever further forward than left
lever. If you leave one steering lever in neu-
tral and advance the other lever, the tractor will
turn a complete circle. Move the levers to the
rear and practice turning and maneuvering in
reverse. Once you learn how the controls oper-
ate, practice until you become proficient and
are comfortable with the unit before you begin
operation with an attachment.
If you become confused during opera-
tion release both steering levers, they
will automatically return to the cen-
tered neutral position and the tractor
will stop.

18
Fig. 4
93051
FORWARD REVERSE
GENTLE
LEFT
SHARP
LEFT
SHARP
RIGHT
GENTLE
RIGHT
STEERING LEVER OPERATION

19
LUBRICATION AND MAINTENANCE
CAPACITIES
Fuel Tank .......................... 4.3 U.S. gal. (16.3 l)
H2Drive System..................2.5 U.S. qt. (2.37 l)
Drive System Fluid Change
approx. ............2.0 U.S. qt. (1.89 l)
TIRE AIR PRESSURE
Drive Tires
Standard 22 x 11 x 10 ..............8 psi (55 kPa)
Optional 22 x 10 x 10...............8 psi (55 kPa)
(refer to decal on wheel for correct tire air
pressure)
Rear Tires.............. 12 to 15 psi (83 to 103 kPa)
H2DRIVE SYSTEM
Fluid Change................................... 1000 hours
Filter Change................................... 1000 hours
CRANKCASE OILAND AIR
FILTER
Refer to the “Engine Manual” for the time table
for changing or service.
COOLING SYSTEM
Remove and clean radiator screen regularly. A
dirty screen will cause the engine to overheat.
Do not use high pressure water or
steam to clean the engine or drive
compartment. Water and clean-
ing detergent may damage electrical
components and terminals, possibly
leading to component and safety cir-
cuit failure.
Use a vacuum cleaner or air blower to remove
foreign material from the engine and drive com-
partment.
Check engine coolant when the engine is cool. If
coolant is required, fill expansion tank to proper
level through radiator. A solution of 50% anti-
freeze and 50% water must be used (freezing
point about –34° F [–36° C]). Do not use 100%
antifreeze or severe damage will occur.
WARNING
CAUTION
CAUTION
Always wear safety glasses and ear
protection when performing any
maintenancefunction thatcould cause
injury to eyes or ears.
Read all safety information on pages 6 through
10.
Lower attachment to ground, shut off
tractor engine, remove key and wires
to fuel solenoid before performing any
maintenance.
LUBRICATION
Do not let excess grease collect on or around
parts, particularly when operating in sandy ar-
eas.
The chart gives the frequency of lubrication
in operating hours based on normal operating
conditions. Severe or unusual conditions may
require more frequent lubrication.
Use an SAE multipurpose type grease for all
locations shown. Be sure to clean fitting thor-
oughly before using grease gun.
For H2Drive System, use Grasshopper Fluid,
part no. 345050 for 1 quart (.94 l) container or
part no. 345055 for 1 gallon (3.76 l) container.
Lubricate Every Lubricate Every
8 Hours of Usage 80 Hours of Usage
Rear Wheel Bearings Clutch Power Shaft
(two fitting) (two fittings)
Drive Shaft
(one fitting)

20
BATTERY MAINTENANCE
Follow the procedure below for battery mainte-
nance.
• Clean battery.
• Inspect cables for loose connection.
• Clean terminals.
• Inspect battery tray and hold-down.
• Inspect battery case for cracks or leaks.
Batteries contain sulfuric acid. Avoid
contact with skin, eyes and clothing.
Batteries produce a highly explosive
hydrogen gas while being charged.
Always keep cigarettes, sparks, open
flame and other sources of ignition
away from battery. Always shield
eyes and face from battery. In the
event of accident, flush with water and
call a physician immediately. Keep
batteries and acid out of the reach of
children.
CHECKING H2DRIVE SYSTEM
FLUID LEVEL
Check fluid level in the reservoir, located un-
der the seat, with the engine turned off. This
is the fluid reservoir for both hydro pumps and
wheel motors. If fluid is required, add until
level is equal to the full mark on the reservoir
decal (shown below). Use Grasshopper Fluid
(Grasshopper part no. 345050 for 1 quart [.94 l]
container).
CHANGING H
2
DRIVE SYSTEM
FLUID AND FILTERS
Change fluid filter, mounted on the panel un-
der the seat, every 1000 hours of use. Change
fluid every 1000 hours of use. To change fluid,
loosen PTO shield (item 14, page 39) and re-
move Trash Screen (item 57, page 29). Remove
Spring Clamp (item 16, page 37) and hose (item
14, 15) from the bottom of each hydro. Use
1/4" allen wrench to also remove screw (located
behind item 12 fitting, page 37) from each hydro
casing. Allow oil to drain completely. Refill the
reservoir with approximately 2 quarts (1.89 l) of
fluid of the type and viscosity as prescribed in
the previous section. Run engine and check for
leaks. Stop engine and check the fluid level in
the reservoir and add fluid as needed.
Note: No air bleeding is necessary since the
system is self bleeding.
WARNING
Fig. 5
TRANSMISSION
FLUID
161270
COLDFILLLEVEL
SEE MANUAL FOR
SPECIFICATIONS
Table of contents
Other Grasshopper Lawn Mower manuals

Grasshopper
Grasshopper 727T6 User manual

Grasshopper
Grasshopper 721D2 Installation and operation manual

Grasshopper
Grasshopper 720 User manual

Grasshopper
Grasshopper 124/52 Installation and maintenance instructions

Grasshopper
Grasshopper 124V/48 User manual

Grasshopper
Grasshopper 623T Installation and operation manual

Grasshopper
Grasshopper 718 Installation and operation manual

Grasshopper
Grasshopper 721DT Installation and operation manual

Grasshopper
Grasshopper EDGE-Eze User manual