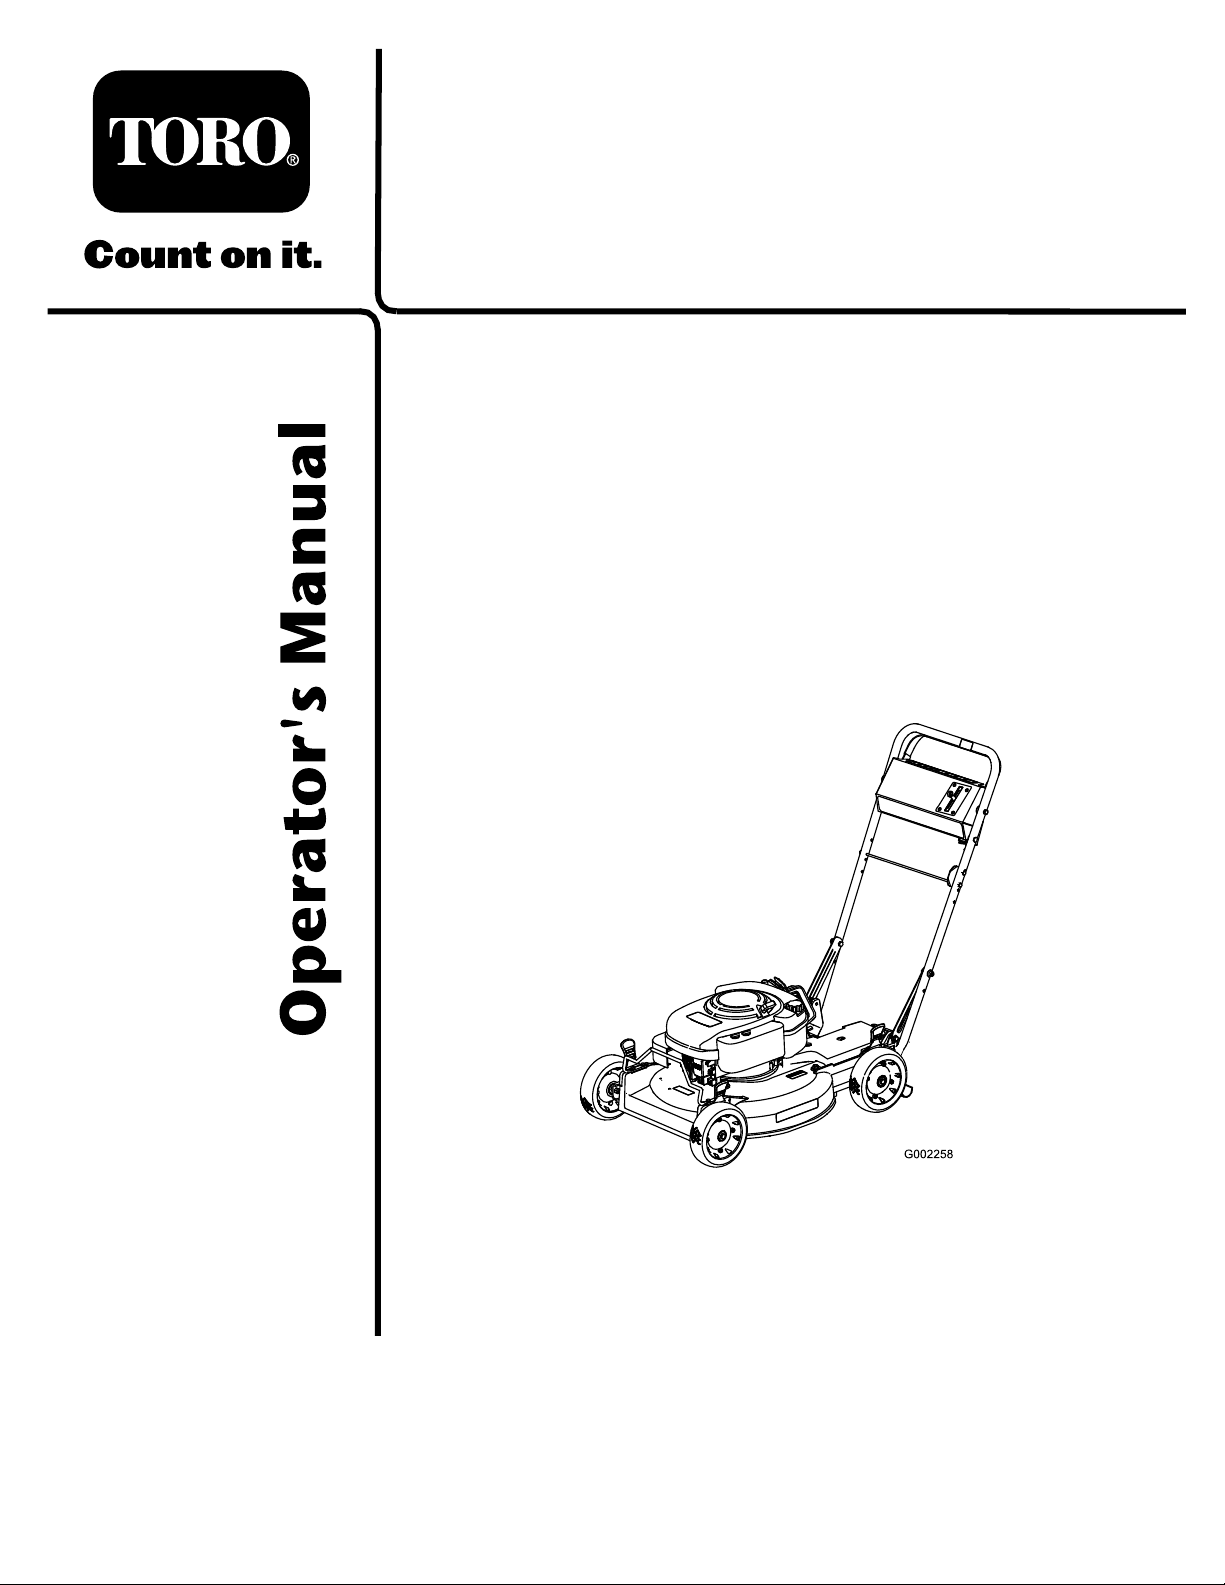
Toro 22168 User manual

Form No. 3354-320 Rev A
21in Heavy-Duty
Recycler®/Rear Bagger LawnMower
Model No. 22168 —Serial No. 260000001 and Up
Register your product at www.Toro.com Original Instructions (EN)

Warning
CALIFORNIA
Pr oposition 65 W ar ning
T he engine exhaust fr om this pr oduct
contains chemicals kno wn to the State of
Calif or nia to cause cancer , bir th defects, or
other r epr oducti v e har m.
Important: T his engine is not equipped
with a spar k ar r ester muf fler . It is a
violation of Calif or nia Public R esource Code
Section 4442 to use or operate the engine
on an y f or est-co v er ed, br ush-co v er ed, or
g rass-co v er ed land. Other states or federal
ar eas may ha v e similar la ws.
T his spark ignition system complies with Canadian
ICES-002
T he enclosed Engine Owner’ s Man ual is
supplied f or inf or mation r egarding the US
En vir onmental Pr otection Agency (EP A) and
the Calif or nia Emission Contr ol R egulation of
emission systems, maintenance, and w ar ranty .
R eplacements may be order ed thr ough the
engine man uf actur er .
Introduction
R ead this infor mation carefully to lear n ho w to
operate and maintain y our product properly and
to a v oid injur y and product damag e . Y ou are
responsible for operating the product properly
and safely .
Y ou ma y contact T oro directly at www .T oro .com
for product and accessor y infor mation, help
finding a dealer , or to register y our product.
W henev er y ou need ser vice , g en uine T oro par ts ,
or additional infor mation, contact an A uthorized
Ser vice Dealer or T oro Customer Ser vice and ha v e
the model and serial n umbers of y our product
ready . Figure 1 identifies the location of the model
and serial n umbers on the product. W rite the
n umbers in the space pro vided.
Figure 1
1. Model and serial number location
Model No.
Serial No.
T his man ual identifies potential hazards and has
safety messag es identified b y the safety aler t
symbol ( Figure 2 ), whic h signals a hazard that ma y
cause serious injur y or death if y ou do not follo w
the recommended precautions .
Figure 2
1. Safety alert symbol
T his man ual uses 2 w ords to highlight infor mation.
Impor tant calls attention to special mec hanical
infor mation and Note emphasizes g eneral
infor mation w or th y of special attention.
Contents
Introduction .......................................................2
Safety ..................................................................4
General La wn Mo w er Safety . . . . . . . . . . . . . . . . 4
Safety and Instr uctional Decals . . . . . . . . . . . . 7
Setup ..................................................................8
1 Installing the Handle .........................8
2 Installing the Disc harg e T unnel
Plug .....................................9
3 Filling the Crankcase with Oil . . . . . . . . . . . . 9
Product Ov er view ............................................. 11
Operation .......................................................... 12
Chec king the Engine Oil Lev el . . . . . . . . . . . 12
© 2005—The Toro® Company8111 Lyndale Avenue SouthBloomington, MN 55420
2
Contact us at www.Toro.com.
Printed in the USA.All Rights Reserved

Filling the Fuel T ank with
Gasoline ............................ 12
Star ting the Engine ............................ 13
Stopping the Engine .......................... 14
Operating the Self-Propel
Dri v e ................................. 14
Using the Disc harg e T unnel
Plug ................................... 14
Chec king the Blade Brak e
Clutc h ............................... 15
Adjusting the Cutting Height . . . . . . . . . . . . . 17
Using the Grass Bag ........................... 17
Operating Tips .................................. 18
Maintenance ...................................................... 20
R ecommended Maintenance
Sc hedule(s) ............................... 20
Lubrication ................................................ 21
Lubricating the Pi v ot Ar ms . . . . . . . . . . . . . . . . 21
Lubricating the Gear Case . . . . . . . . . . . . . . . . . . 21
Engine Maintenance .................................. 21
Ser vicing the Air Cleaner . . . . . . . . . . . . . . . . . . . 21
Changing the Engine Oil . . . . . . . . . . . . . . . . . . . . 22
Ser vicing the Spark Plug . . . . . . . . . . . . . . . . . . . . 22
Dri v e System Maintenance . . . . . . . . . . . . . . . . . . . . . . . . . 23
Adjusting the Self-propel
Dri v e ................................. 23
Ser vicing the W heels .......................... 23
Controls System Maintenance . . . . . . . . . . . . . . . . . . . . 24
Adjusting the Blade Brak e
Cable ................................. 24
Blade Maintenance .................................... 24
Maintaining the Blade ........................ 24
Cleaning .................................................... 26
Cleaning under the Mo w er
Housing ............................ 26
Cleaning the Disc harg e T unnel and
Plug ................................... 26
Cleaning under the Belt Co v er . . . . . . . . . . . . 27
Cleaning the Blade Brak e Clutc h
Shield ................................ 27
Storag e .............................................................. 28
Pre paring the Fuel System . . . . . . . . . . . . . . . . . . 28
Pre paring the Engine ......................... 28
General Infor mation ......................... 28
R emo ving the mo w er from
Storag e .............................. 28
T roubleshooting ................................................ 29
3

Safety
T his la wn mo w er meets or ex ceeds the
CPSC blade safety r equir ements f or
w alk-behind r otar y la wn mo w er s and the
B71.4 specifications of the American National
Standards Institute in ef fect at the time of
pr oduction.
Engine exhaust contains carbon mono xide,
an odor less, deadl y poison that can kill y ou.
Do not r un the engine indoor s or in an
enclosed ar ea.
T o ensur e maximum safety , best perf or mance,
and to gain kno wledge of the pr oduct, it is
essential that y ou and an y other operator of
the la wn mo w er r ead and under stand the
contents of this man ual bef or e the engine is
ev er star ted.
Alw a ys pa y attention to the safety aler t symbol
, whic h means Caution, W ar ning , or
Danger —“personal safety instr uction." F ailure to
comply with the instr uction ma y result in personal
injur y or death.
Improper using or maintaining this la wn mo w er
can result in injur y or death. T o reduce this
potential, comply with the follo wing safety
instr uctions .
General Lawn Mower Safety
T his la wn mo w er is capable of amputating hands
and feet and of thro wing objects . F ailure to
obser v e the follo wing safety instr uctions could
result in serious injur y or death.
Training
•R ead this Operator’ s Manual carefully . Be
thoroughly familiar with the controls and the
proper use of the la wn mo w er before star ting
it.
•Nev er allo w c hildren to operate the la wn
mo w er . Local regulations ma y restrict the ag e
of the operator .
•Nev er allo w adults unfamiliar with these
instr uctions to operate the la wn mo w er .
•Nev er mo w while people (especially c hildren)
or pets are nearb y . Stop the la wn mo w er if
any one enters the area.
•T ragic accidents can occur if the operator is
not aler t to the presence of c hildren. Children
are often attracted to the la wn mo w er and the
mo wing acti vity . Nev er assume that c hildren
will remain where y ou last sa w them.
•K ee p c hildren out of the mo wing area and
under the w atc hful care of a responsible adult.
•Be aler t and tur n the la wn mo w er off if
c hildren enter the area.
•Use extra care when approac hing blind cor ners ,
shr ubs , trees , or other objects that ma y obscure
vision.
•K ee p in mind that the operator or user is
responsible for accidents or hazards occur ring
to other people or their proper ty .
•See the man ufacturer’ s instr uctions for proper
operation and installation of accessories . Use
only the accessories that are appro v ed b y the
man ufacturer .
Preparation
•T horoughly inspect the area where y ou will use
the la wn mo w er , and remo v e all stones , stic ks ,
wires , bones , and other foreign objects .
•W hile mo wing, alw a ys w ear substantial
footw ear and long trousers .
•Do not operate the la wn mo w er when barefoot
or w earing open sandals .
•Alw a ys w ear safety g og gles or safety glasses
with side shields when operating the la wn
mo w er .
•W ar ning: Gasoline is highly flammable . T ak e
the follo wing precautions:
– Store fuel in containers specifically designed
for this pur pose .
– R efuel outdoors only and do not smok e
while refuelling .
– Add fuel before star ting the engine . Nev er
remo v e the cap of the fuel tank or add
g asoline while the engine is r unning or
when the engine is hot.
– If g asoline is spilled, do not attempt to star t
the engine . Mo v e the la wn mo w er a w a y
from the area of spillag e to a v oid creating
4

any source of ignition until the g asoline
v apors ha v e dissipated.
– R e place all fuel tank and container caps
securely .
– If y ou m ust drain the fuel from the fuel
tank, do it outdoors .
•R e place faulty m ufflers .
•Before using, alw a ys visually inspect the blades ,
blade bolts , and cutter assembly for w ear or
damag e . R e place w or n or damag ed blades and
bolts in sets to preser v e balance .
•On m ultibladed la wn mo w ers , use care as
rotating one blade can cause the other blades
to rotate .
Operation
•Do not operate the engine in a confined space
where dang erous carbon mono xide fumes can
collect.
•Mo w only in da ylight or in g ood ar tificial light.
•Alw a ys be sure of y our footing on slopes .
•W alk; nev er r un.
•K ee p a fir m hold on the handle .
•F or wheeled rotar y la wn mo w ers , mo w across
the face of slopes , nev er up and do wn.
•Ex ercise extreme caution when c hanging the
direction on slopes .
•Do not mo w ex cessi v ely stee p slopes .
•Use extreme caution when rev ersing or pulling
the la wn mo w er to w ard y ou.
•Before and while mo ving bac kw ard, look
behind and do wn for small c hildren.
•Stop the blade(s) if y ou m ust tilt the
la wn mo w er for transpor tation when
crossing surfaces other than g rass and when
transpor ting the la wn mo w er to and from the
area to be mo w ed.
•Nev er operate the la wn mo w er with damag ed
or missing guards or shields , or without safety
devices (suc h as deflectors and g rass catc hers)
in place .
•Do not c hang e the speed settings on the
engine .
•Diseng ag e all blade and dri v e clutc hes before
star ting the engine .
•Star t the engine carefully according to
instr uctions and with feet w ell a w a y from the
blade(s).
•Do not tilt the la wn mo w er when star ting the
engine , unless y ou m ust tilt the la wn mo w er
to star t it. In this case , do not tilt it more
than absolutely necessar y and lift only the par t
whic h is a w a y from the operator .
•Do not star t the engine when standing in front
of the disc harg e c hute .
•Do not put y our hands or feet near or under
rotating par ts . K ee p clear of the disc harg e
opening at all times .
•Nev er pic k up or car r y a la wn mo w er while the
engine is r unning .
•Stop the engine and disconnect the spark-plug
wire:
– before clearing bloc kag es or unclog ging
the c hute;
– before c hec king, cleaning, or w orking on
the la wn mo w er;
– after striking a foreign object. Inspect the
la wn mo w er for damag e and mak e re pairs
before star ting and operating the la wn
mo w er; and
– if the la wn mo w er star ts to vibrate
abnor mally (c hec k it immediately).
•Stop the engine:
– whenev er y ou lea v e the la wn mo w er; and
– before refuelling .
•R educe the throttle setting during engine
r un-out and, if the engine has a shutoff v alv e ,
tur n the fuel off after mo wing .
•Stop the blade(s) when crossing g ra v el dri v es ,
w alks , or roads .
•Shut the engine off and w ait until the blade
comes to a complete stop before remo ving the
g rass catc her .
•Do not operate the la wn mo w er while under
the influence of alcohol or dr ugs .
•If the la wn mo w er should star t to vibrate
abnor mally , stop the engine and c hec k
immediately for the cause . Vibration is
g enerally a w ar ning of trouble .
Slopes are a major factor related to slip and fall
accidents whic h can result in a sev ere injur y . If y ou
feel uneasy on a slope , do not mo w it.
5

•W atc h for holes , r uts , or bumps . T all g rass can
hide obstacles .
•Do not mo w near drop-offs , ditc hes , or
embankments . Y ou could lose y our footing or
balance .
•Do not mo w on w et g rass . R educed footing
could cause slipping .
Maintenance and Storage
•K ee p all n uts , bolts (especially blade attac hment
bolts), and screws tight to ensure that the la wn
mo w er is in safe w orking condition.
•Nev er store the la wn mo w er with g asoline in
the tank inside a building where fumes ma y
reac h an open flame or spark.
•Allo w the engine to cool before storing the
la wn mo w er in any enclosure .
•T o reduce the fire hazard, k ee p the engine ,
m uffler , batter y compar tment, and g asoline
storag e area free of g rass , lea v es , or ex cessi v e
g rease .
•Chec k the g rass catc her frequently for w ear or
deterioration.
•R e place w or n or damag ed par ts .
•Use extra care when handling g asoline; g asoline
v apors are explosi v e .
•Nev er tamper with safety devices . Chec k their
proper operation regularly .
•K ee p the la wn mo w er free of g rass , lea v es , or
other debris buildup . Clean up any oil or fuel
that spills .
•Stop and inspect the la wn mo w er if y ou strik e
an object. R e pair the la wn mo w er , if necessar y ,
before star ting the engine .
•Nev er attempt to mak e wheel height
adjustments while the engine is r unning .
•Grass catc her components are subject to w ear ,
damag e , and deterioration, whic h could expose
mo ving par ts or allo w objects to be thro wn.
F requently c hec k the components and re place
them with the man ufacturer’ s recommended
par ts when necessar y .
•La wn mo w er blades are shar p and can cut.
W rap the blade(s) or w ear glo v es , and use extra
caution when ser vicing them.
•Do not c hang e the speed settings on the
engine .
•If y ou m ust drain the fuel from the fuel tank,
do it outdoors .
•T o ensure the best perfor mance and safety ,
purc hase only g en uine T oro re placement par ts
and accessories .
•Maintain or re place safety and instr uction
decals when necessar y .
6

Safety and Instructional Decals
Safety decals and instr uctions are easily visible to the operator and are located near any
area of potential dang er . R e place any decal that is damag ed or lost.
43-8480
68-7410
74-1970
1. Transmission speeds 2. Neutral
92-1779
98-4387
1. Warning—wear hearing protection.
104-8582
107-4098
7

Setup
Loose Parts
Use the chart below to verify that all parts have been shipped.
Step
Description
Qty.
Use
Handle
1
Bolt (5/16 x 1-1/4 inches)
2
Washer
4
Thin locknut (5/16 inch)
2
Bolt (5/16 x 1-1/2 inches)
2
Carriage bolt
1
Locknut (5/16 inch)
2
Bag support rod
1
Bag aligning plate
1
Cap locknut
3
1
Cable tie
3
Install the handle.
2
Discharge tunnel plug
1
Install the discharge tunnel plug.
3
No parts required
–
Fill the crankcase with oil.
Note: Deter mine the left and right sides of the
mac hine from the nor mal operating position.
Step
1
Installing the Handle
Parts needed for this step:
1
Handle
2
Bolt (5/16 x 1-1/4 inches)
4
Washer
2
Thin locknut (5/16 inch)
2
Bolt (5/16 x 1-1/2 inches)
1
Carriage bolt
2
Locknut (5/16 inch)
1
Bag support rod
1
Bag aligning plate
3
Cap locknut
3
Cable tie
Procedure
1. Mount the handle to the outside of the mo w er
housing (using the bottom hole) with tw o
bolts (5/16 x 1-1/4 inc hes), w ashers , and thin
loc kn uts (5/16 inc h) ( Figure 3 ).
Figure 3
1. Bag support rod
8. Thin locknut (2)2. Carriage bolt 9. Bottom hole in housing3. Bag aligning plate
10. Washer (4)4. Cap locknuts (3) 11. Locknut (2)5. Handle
12. Bolt, (5/16 x 1-1/2 inches)(2)6. Bolt, (5/16 x 1-1/4 inches)(2)
13. Cable tie (3)
7. Handle latch (2)
2. Secure the handle latc hes to the handle with
2 bolts (5/16 x 1-1/2 inc hes), w ashers , and
loc kn uts (5/16 inc h) ( Figure 3 ).
8

Note: Y ou can adjust the handle height
for comfor table operation. Stand behind the
handle to deter mine the height. T o adjust
the handle height, position the bolts and the
loc kn uts that secure the handle latc hes to the
handle into the other mounting holes in the
latc hes .
3. Slide the bag suppor t rod through the second
from the top mounting holes in the handle , and
secure eac h end with a cap loc kn ut ( Figure 3 ).
4. Inser t the car riag e bolt through the bag
aligning plate and the top hole on the left side
of the handle , and secure it with a cap loc kn ut
( Figure 3 ).
5. Use a cable tie to secure the control cables to
the left handle belo w the bag suppor t rod.
Step
2
Installing the DischargeTunnel Plug
Parts needed for this step:
1
Discharge tunnel plug
Procedure
1. Open the disc harg e door b y pulling forw ard on
the handle and mo ving it rearw ard ( Figure 4 ).
Hold the disc harg e door handle to prev ent the
spring-loaded door from closing while y ou
inser t the plug .
Figure 4
1. Discharge door handle 2. Plug, rotated clockwise
2. Since the plug is slightly wider than the
disc harg e tunnel opening, rotate the plug
cloc kwise slightly while inser ting it ( Figure 4 ).
Note: Ensure that the ar ro w on the plug
decal points upw ard.
3. Push the plug all the w a y in until the spring clip
on the bottom of the plug clic ks into place ,
loc king the plug securely into the disc harg e
tunnel ( Figure 5 ).
Figure 5
1. Spring clip
4. R elease the disc harg e door handle to loc k the
top of the plug .
Step
3
Filling the Crankcase withOil
No Parts Required
Procedure
T he engine crankcase is shipped without
oil. T he engine crankcase can hold 22 ounces
(0.65 liters) of oil. Use only high-quality SAE
10W -30 w eight deterg ent oil that has the American
P etroleum Institute (API) ser vice classification
SH, SJ , or equi v alent.
Before eac h use , ensure that the oil lev el is betw een
the lo w er limit and upper limit marks on the
dipstic k ( Figure 6 ).
9

Figure 6
1. Dipstick 3. Lower limit mark2. Upper limit mark
Note: W hen the crankcase is empty , pour
about 3/4 of the crankcase capacity of oil in
the crankcase , then follo w the procedure in this
section.
1. Mo v e the mo w er to a lev el surface .
2. Clean around the dipstic k ( Figure 6 ).
3. R emo v e the dipstic k b y rotating the cap
countercloc kwise and pulling it out.
4. Wipe the dipstic k clean with a clean cloth.
5. Inser t the dipstic k into the filler nec k (but do
not r otate the cap clockwise to secur e it ),
then remo v e it.
6. R ead the oil lev el on the dipstic k ( Figure 6 ).
7. If the oil lev el reading is belo w the lo w er limit
mark on the dipstic k, remo v e the dipstic k and
slo wl y pour only enough oil into the filler hole
to raise the oil lev el to the upper limit mark on
the dipstic k ( Figure 6 ).
Important: Do not o v erfill the crankcase
with oil and r un the engine; engine dama ge
will r esult. Drain the ex cess oil until the oil
lev el r eaches the upper limit mar k on the
dipstick.
8. Inser t the dipstic k into the filler nec k and
rotate the cap cloc kwise until it is tight.
10

Product Overview
Figure 7
1. Discharge tunnel 7. Fuel tank cap2. Oil ll/dipstick (not shown)
8. Recoil start handle3. Mufer 9. Bag support bar4. Cutting height lever 10. Throttle5. Spark plug wire 11. Control panel6. Air cleaner 12. Blade control bar
11

Operation
Note: Deter mine the left and right sides of the
mac hine from the nor mal operating position.
Eac h time before y ou mo w , mak e sure that the
self-propel dri v e and the blade control bar operate
properly . W hen y ou release the blade control bar ,
the blade and self-propel dri v e should stop . If they
do not, contact an A uthorized Ser vice Dealer .
T his machine pr oduces sound lev els in
ex cess of 85dB A at the operator’ s ear and
can cause hearing loss thr ough extended
periods of exposur e.
W ear hearing pr otection when operating
this machine.
Figure 8
1. Warning—wear hearing protection.
Checking the Engine OilLevel
Before eac h use , ensure that the oil lev el is betw een
the lo w er limit and upper limit marks on the
dipstic k ( Figure 9 ).
Figure 9
1. Dipstick 3. Lower limit mark2. Upper limit mark
If the oil lev el is belo w the lo w er limit mark, add
oil. R efer to Filling the Crankcase with Oil.
Filling the Fuel Tank withGasoline
F or best results , use clean, fresh, lead-free g asoline
with an octane rating of 87 or higher . T o ensure
freshness , purc hase only the quantity of g asoline
that y ou expect to use in 30 da ys . Using unleaded
g asoline results in few er combustion de posits and
long er engine life . Y ou ma y use leaded g asoline if
unleaded g asoline is not a v ailable .
Important: Do not add oil to the gasoline.
Important: Do not use methanol, gasoline
containing methanol, gasohol containing
mor e than 10% ethanol, pr emium gasoline, or
white gas. Using these fuels can dama ge the
engine’ s fuel system.
Important: Do not use gasoline that has
been stor ed mor e than 30 days old.
In cer tain conditions, gasoline is extr emel y
flamma ble and highl y explosi v e. A fir e or
explosion fr om gasoline can bur n y ou and
other s and can dama ge pr oper ty .
• Fill the fuel tank outdoor s, in an open
ar ea, and when the engine is cold. W ipe
up an y gasoline that spills.
• Do not fill the fuel tank completel y full.
Add gasoline to the fuel tank until the
lev el is 1/4 to 1/2 in. (6 to 13 mm) belo w
the bottom of the filler neck. T his empty
space in the tank allo ws the gasoline to
expand.
• Nev er smok e when handling gasoline,
and stay a w ay fr om an open flame or
wher e a spar k may ignite the gasoline
fumes.
• Stor e gasoline in an appr o v ed fuel
container and k eep it out of the r each of
childr en.
• Nev er buy mor e than a 30-day suppl y of
gasoline.
12

W hen fueling , under cer tain circumstances,
a static charge can dev elop , igniting the
gasoline. A fir e or explosion fr om gasoline
can bur n y ou and other s and dama ge
pr oper ty .
• Al w ays place gasoline container s on
the g r ound and a w ay fr om y our v ehicle
bef or e filling .
• Do not fill gasoline container s inside
a v ehicle or on a tr uck or trailer bed
because interior car pets or plastic tr uck
bed liner s may insulate the container and
slo w the loss of an y static charge.
• W hen practical, r emo v e
gasoline-po w er ed equipment fr om
the tr uck or trailer and r efuel the
equipment with its wheels on the
g r ound.
• If this is not possible, then r efuel such
equipment on a tr uck or trailer fr om a
por ta ble container , not fr om a gasoline
dispenser nozzle.
• If y ou must use a gasoline dispenser
nozzle, k eep the nozzle in contact with
the rim of the fuel tank or container
opening at all times until fueling is
complete.
Use a fuel stabilizer/conditioner regularly during
operation and storag e . A stabilizer/conditioner
cleans the engine during operation and prev ents
gum-lik e v ar nish de posits from for ming in the
engine during periods of storag e .
Important: Do not use fuel additi v es other
than a fuel sta biliz er/conditioner . Do not use
fuel sta biliz er s with an alcohol base such as
ethanol, methanol, or isopr opanol.
1. Clean around the fuel tank cap ( Figure 10 ).
Figure 10
1. Fuel tank cap 4. Spark plug2. Recoil starter handle 5. Dipstick/Oil ll and drain3. Air cleaner 6. Mufer
2. R emo v e the fuel tank cap .
3. Fill the fuel tank with unleaded g asoline to
within 1/4 to 1/2 inc h (6 to 13 mm) from the
top of the tank. Do not fill into the filler
neck.
Note: T he fuel tank capacity is 2.1 quar ts .
(2.0 L).
Important: Do not fill the tank mor e
than 1/4 inch (6 mm) fr om the top of the
tank because the gasoline must ha v e r oom
to expand.
4. Install the fuel tank cap and wipe up any spilled
g asoline .
Starting the Engine1. Connect the wire to the spark plug .
2. Open the fuel v alv e b y mo ving the lev er to the
right ( Figure 11 )
Figure 11
1. Fuel valve
3. Mo v e the throttle control to the Chok e
position.
Note: Do not use the c hok e when the engine
is w ar m.
13

4. Hold the control bar to the handle .
5. Pull the star ter handle lightly until y ou feel
resistance , then pull it shar ply . Allo w the rope
to retur n to the handle slo wly .
6. W hen the engine star ts , mo v e the throttle
control to the F ast position, and set the g round
speed control as desired.
Note: If the engine fails to star t after 3 pulls ,
re peat ste ps 4 through 6 .
Stopping the Engine
R elease the control bar . Both the engine and the
blade should stop within 3 seconds . If they do not,
contact an A uthorized Ser vice Dealer .
Note: Close the fuel v alv e b y mo ving the lev er to
the left if y ou will not be star ting the engine soon
afterw ard.
Operating the Self-PropelDrive
T he mo w er has three g round speeds . 1 is slo w , 2 is
medium, and 3 is fast. T he g round speed control
is located at the rear of the belt co v er ( Figure 12 ).
Figure 12
1. Ground speed control
1. Mo v e the g round speed control to the Neutral
position.
2. Star t the engine .
3. Squeeze the blade control bar ag ainst the
handle to the R un/Dri v e position ( Figure 13 ).
Figure 13
1. Run/Drive position
3. Stop position2. Run/Shift position
Note: Do not shift speeds while squeezing
the blade control bar ag ainst the handle in
the R un/Dri v e position; this can damag e the
transmission. Mo v e the blade control bar to
the R un/Shift position when y ou c hang e the
g round speed.
Note: Y ou can v ar y the g round speed b y
increasing or decreasing the distance betw een
the blade control bar and the handle . Lo w er
the blade control bar to decrease the g round
speed when y ou are making a tur n or if the
mo w er is mo ving too fast for y ou. If y ou lo w er
the blade control bar too far , the mo w er stops
self-propelling . Squeeze the blade control bar
closer to the handle to increase the g round
speed. W hen y ou hold the blade control bar
tight ag ainst the handle , the mo w er self-propels
at the maxim um g round speed. Mo v e the
g round speed control to the Neutral position
when y ou use the mo w er for trimming or
whenev er y ou lea v e the mo w er .
Using the Discharge TunnelPlug
1. Stop the engine and w ait for all mo ving par ts
to stop .
2. Inser t the plug; refer to Installing the Disc harg e
T unnel Plug .
3. T o remo v e the plug, mo v e the disc harg e door
handle rearw ard and lift up the spring clip
on the bottom of the plug . W hen the plug is
unloc k ed, pull it out of the disc harg e tunnel.
Note: W hen g rass is thic k and lush, clippings
ma y collect on and around the disc harg e
tunnel plug . T his ma y mak e remo ving the plug
difficult. Clean the plug thoroughly after eac h
use .
14

Checking the Blade BrakeClutch
Chec k the blade control bar before eac h use
to ensure that the blade brak e clutc h system is
operating properly .
Normal Test
1. Stop the engine and w ait for all mo ving par ts
to stop .
2. Mo v e the mo w er onto a pa v ed surface in a
non-windy area.
3. Set all 4 wheels in to the 2-1/2 inc h (64 mm)
cutting height setting .
4. Set the g round speed selector to the Neutral
position.
5. T ak e a half sheet of newspaper and cr umple
it into a ball small enough to g o under the
housing (about 3 inc hes or 76 mm in diameter).
6. Place the ball of newspaper 5 inc hes (12.7 cm)
in front of the mo w er ( Figure 14 ).
Figure 14
1. 5 inches (12.7 cm)
7. Star t the engine .
8. Mo v e the blade control bar do wn to its lo w est
position ( Figure 15 ).
Figure 15
9. Lift the blade control bar up to about one inc h
(2.5 cm) belo w the handle; refer to position A
in Figure 16 .
Note: T he fan-lik e noise indicates that the
mo w er blade is tur ning .
Figure 16
1. 1 inch (2.5 cm)
10. R elease the blade control bar; refer to position
B in Figure 17 . Y ou should hear a “bang . ” T he
blade should stop in 3 seconds .
Figure 17
11. Immediately push the mo w er o v er the
newspaper ball.
12. Stop the engine and w ait for all mo ving par ts
to stop .
15

13. W alk around the mo w er to c hec k for the
newspaper ball. If the ball did not g o under the
housing, re peat ste ps 6 through 12 .
14. Pull the mo w er a w a y from the newspaper . If
the newspaper ball unra v els or is shredded,
the blade has not properly stopped, resulting
in an unsafe operating condition. Contact an
A uthorized Ser vice Dealer .
T o c hec k for a problem with the blade brak e clutc h
system bef or e it affects its nor mal operation, y ou
can perfor m the Special T est that follo ws .
Special Test
1. F ollo w ste ps 1 through 7 from the Nor mal
T est.
2. Mo v e the blade control bar do wn to its lo w est
position (P osition B in Figure 17 ).
3. Bring the blade control bar up into the middle
position about 5 inc hes (12.7 cm) belo w the
handle cross bar (P osition C in Figure 18 ).
Figure 18
Note: T his inter mediate position (C) is not
the nor mal operating position of the blade
control bar . Ho w ev er , it helps to detect a
stic king blade brak e clutc h system early enough
to prev ent an unsafe condition later .
4. R elease the blade control bar (P osition B in
Figure 18 ).
Note: If y ou hear a loud “bang, ” y ou ha v e
raised the blade control bar too high. R e peat
ste ps 2 through 4 abo v e , but do not raise the
blade control bar as high as in ste p 3 .
5. Immediately push the mo w er o v er the
newspaper ball.
6. Stop the engine and w ait for all mo ving par ts
to stop .
7. W alk around the mo w er to c hec k for the
newspaper ball. If the ball did not g o under
the housing:
A. Place the ball of newspaper 5 inc hes (12.7
cm) in front of the mo w er ( Figure 14 ).
B . Star t the engine .
C . F ollo w ste ps 2 through 6 abo v e .
8. Pull the mo w er a w a y from the newspaper . If
the newspaper ball unra v els or is shredded,
the blade brak e clutc h system could be
deteriorating to the point where it could result
in an unsafe operating condition. Contact an
A uthorized Ser vice Dealer for an inspection
and re pair of y our mo w er .
If the blade brak e clutch system is
inoperati v e, the blade will contin ue to r otate
when y ou r elease the blade contr ol bar .
Contact with blade could occur , causing
serious injur y .
• Check the blade brak e clutch operation
bef or e each use.
• Nev er use a blade brak e clutch-equipped
mo w er with an inoperati v e safety system.
• T ak e y our mo w er to an Authoriz ed
Ser vice Dealer f or r epair if the safety
system f ails to operate pr oper l y .
Test Using the Grass Bag
Y ou can use the g rass bag to perfor m an additional
test to c hec k the blade brak e clutc h:
1. Install the empty g rass bag on the disc harg e
tunnel.
2. Star t the engine .
3. Push the blade control bar do wn to its lo w est
position.
4. Lift the blade control bar to the nor mal blade
eng ag ed position about one inc h (2.5 cm)
belo w the handle . T he bag should begin to
inflate , indicating that the blade is eng ag ed and
rotating .
5. R elease the blade control bar . If the bag does
not immediately deflate , it indicates that the
blade is still rotating . T he blade brak e clutc h
ma y be deteriorating, and, if ignored, could
result in an unsafe operating condition. Ha v e
the mo w er inspected and ser viced b y an
A uthorized Ser vice Dealer .
16

Adjusting the CuttingHeight
Eac h wheel is adjusted indi vidually with a wheel
height adjustment lev er . Cutting heights are 3/4
inc h (19 mm), 1-1/4 inc hes (32 mm), 1-3/4 inc hes
(44 mm), 2-1/4 inc hes (57 mm), 2-3/4 inc hes
(70 mm), and 3-1/4 inc hes (83 mm).
Adjusting the cutting height lev er s could
bring y our hands into contact with a mo ving
blade and r esult in serious injur y .
• Stop the engine and w ait f or all
mo v ement to stop bef or e adjusting the
cutting height.
• Do not put y our finger s under the
housing when adjusting the cutting
height.
1. Pull the wheel height adjustment lev er to w ard
the wheel ( Figure 19 ) and mo v e it to the
desired setting .
Figure 19
1. Wheel height adjustment lever
2. R elease the wheel height adjustment lev er and
seat it securely in the notc h.
3. Adjust all the wheels to the same cutting height
setting .
Using the Grass Bag
Occasionally , y ou ma y wish to use the g rass bag
for bag ging extra long g rass , lush g rass , or lea v es .
Installing the Grass Bag
1. Stop the engine and w ait for all mo ving par ts
to stop .
2. Ensure that the disc harg e door handle is fully
forw ard and that the pin is eng ag ed in the
catc h ( Figure 20 ).
Figure 20
1. Bag frame on retainingpost
3. Handle fully forward;discharge door closed2. Pin engaged in catch
3. Slide the hole in the bag frame onto the
retaining post on the disc harg e tunnel
( Figure 20 ).
4. Set the rear of the bag frame onto the bag
suppor t rod.
5. Pull the disc harg e door handle forw ard until
the pin clears the catc h, and mo v e the handle
rearw ard until the pin loc ks in the bag notc h
( Figure 21 ).
Figure 21
1. Pin locked in bag notch
Note: T he disc harg e door in the mo w er
housing is no w open.
17

Mowing with the Grass Bag
A w or n g rass ba g could allo w small stones
and other similar de bris to be thr o wn in the
operator’ s or bystander’ s dir ection and r esult
in serious per sonal injur y or death to the
operator or bystander s.
Check the g rass ba g fr equentl y . If it is
dama ged, install a new T or o r eplacement
ba g .
Removing the Grass Bag
1. Stop the engine and w ait for all mo ving par ts
to stop .
2. Raise the disc harg e door handle and mo v e
it forw ard to eng ag e the pin with the catc h
( Figure 20 ).
3. Grasp the handles at the front and the rear of
the bag and lift the bag off the mo w er .
4. Gradually tip the bag forw ard to empty the
clippings .
5. T o install the bag, refer to Installing the Grass
Bag .
If the discharge door does not close
completel y , the mo w er could thr o w objects,
causing serious per sonal injur y or death.
If y ou cannot close the door because the
g rass clippings clo g the discharge ar ea, stop
the engine and gentl y mo v e the discharge
door handle back and f or th until y ou can
close the door completel y . If y ou still cannot
close the door , r emo v e the obstr uction with
a stick, not y our hand.
T he mo w er can thr o w g rass clippings and
other objects thr ough an open discharge
tunnel. Objects thr o wn with enough f orce
could cause serious per sonal injur y or death
to the operator or bystander .
Nev er open the door on the discharge tunnel
when the engine is r unning .
Operating Tips
General Tips
•R eview the safety instr uctions and read this
man ual carefully before operating the mo w er .
•Clear the area of stic ks , stones , wire , branc hes ,
and other debris that the blade could hit and
thro w .
•K ee p ev er y one , especially c hildren and pets ,
a w a y from the area of operation.
•A v oid striking trees , w alls , curbs , or other solid
objects . Nev er deliberately mo w o v er any
object.
•If the mo w er strik es an object or star ts
to vibrate , immediately stop the engine ,
disconnect the wire from the spark plug, and
examine the mo w er for damag e .
•Maintain a shar p blade throughout the cutting
season. P eriodically file do wn nic ks on the
blade .
•R e place the blade when necessar y with an
original T oro re placement blade .
•Mo w only dr y g rass or lea v es . W et g rass and
lea v es tend to clump on the yard and can cause
the mo w er to plug or the engine to stall.
W et g rass or lea v es can cause serious
injur y if y ou slip and contact the blade.
Mo w onl y in dr y conditions.
•Clean under the mo w er housing after eac h
mo wing . See Cleaning under the Mo w er
Housing .
•K ee p the engine in g ood r unning condition.
•Set the engine speed to the fastest position for
the best cutting results .
18

Operating a mo w er with its engine
r unning at a speed g r eater than the
f actor y setting can cause the mo w er to
thr o w a par t of the blade or engine into
the operator’ s or bystander’ s ar ea and
r esult in serious per sonal injur y or death.
– Do not change the engine speed
setting .
– If y ou suspect the engine speed
is f aster than nor mal, contact an
Authoriz ed Ser vice Dealer .
•Clean the air filter frequently . Mulc hing stirs
up more clippings and dust whic h clogs the air
filter and reduces engine perfor mance .
Cutting Grass
•Grass g ro ws at different rates at different times
of the year . In the summer heat, it is best to
cut g rass at the 2-1/4 inc h (57 mm), 2-3/4 inc h
(70 mm), or 3-1/4 inc h (83 mm) cutting height
settings . Cut only about a third of the g rass
blade at a time . Do not cut belo w the 2-1/4
inc h (57 mm) setting unless the g rass is sparse
or it is late fall when g rass g ro wth begins to
slo w do wn.
•W hen cutting g rass o v er 6 inc hes (15 cm) tall,
first mo w at the highest cutting height setting
and w alk slo w er; then mo w ag ain at a lo w er
setting for the best la wn appearance . If the
g rass is too long and the lea v es clump on top
of the la wn, the mo w er ma y plug and cause the
engine to stall.
•Alter nate the mo wing direction. T his helps
disperse the clippings o v er the la wn for ev en
fer tilization.
If the finished la wn appearance is unsatisfactor y ,
tr y one or more of the follo wing:
•Shar pen the blade .
•W alk at a slo w er pace while mo wing .
•Raise the cutting height on y our mo w er .
•Cut the g rass more frequently .
•Ov erlap cutting sw aths instead of cutting a full
sw ath with eac h pass .
•Set the cutting height on the front wheels one
notc h lo w er than the rear wheels . F or example ,
set the front wheels at 2-1/4 inc hes (57 mm)
and the rear wheels at 2-3/4 inc hes (70 mm).
Cutting Leaves
•After cutting the la wn, ensure that half of the
la wn sho ws through the cut leaf co v er . Y ou
ma y need to mak e more than one pass o v er
the lea v es .
•F or light leaf co v erag e , set all the wheels at the
same cutting height setting .
•If there are more than 5 inc hes (12.7 cm) of
lea v es on the la wn, set the front cutting height
1 or 2 notc hes higher than the rear cutting
height. T his mak es it easier to feed the lea v es
under the mo w er housing .
•Slo w do wn y our mo wing speed if the mo w er
does not cut the lea v es finely enough.
•If y ou mo w o v er oak lea v es , y ou can add lime
to the g rass in the spring to reduce the acidity
of the oak lea v es .
19

Maintenance
Note: Deter mine the left and right sides of the mac hine from the nor mal operating position.
Recommended Maintenance Schedule(s)
Maintenance ServiceInterval
Maintenance Procedure
After the rst 5 operating
hours
• Change the engine oil.
Before each use or daily
• Check the engine oil level.• Check the operation of the blade brake clutch.• Inspect the air cleaner elements.• Inspect the mower blades for wear or damage.• Clean under the mower housing.• Clean the discharge tunnel and plug.• Check the stopping time of the blade brake. The blade must stop within3 seconds of releasing the blade control bar; if it does not, contact anAuthorized Service Dealer for repair.• Check the engine oil level.
Every 25 hours
• Lubricate the pivot arms.• Clean the air cleaner elements (more often in dusty conditions).
Every 50 hours
• Change the engine oil (more often in dusty conditions).• Adjusting the self-propel drive.• Sharpen or replace the blade.• Clean under the belt cover.• Clean the blade brake clutch shield.• Have an authorized engine servicing dealer check the ywheel brakeoperation.
Every 100 hours
• Lubricate the gear case.• Check the spark plug.• Service the wheels.• Adjust the blade brake cable.• Have an authorized engine servicing dealer check and adjust the ywheelbrake pad.
Every 250 hours
• Replace the air cleaner elements (more often in dusty conditions).• Replace the spark plug.• Have an authorized engine servicing dealer check for leaks in the fuelsystem and/or a deteriorating fuel hose. Replace parts if necessary.• Have an authorized engine servicing dealer check and adjust the engineidle speed, check and adjust the valve clearance, and clean the fuel tankand lter.
Important: R efer to y our Engine Operator’ s Man ual f or additional maintenance pr ocedur es.
If y ou lea v e the wir e on the spar k plug , someone could accidentl y star t the engine and
seriousl y injur e y ou or other bystander s.
Disconnect the wir e fr om the spar k plug bef or e y ou do an y maintenance. Set the wir e aside so
that it does not accidentl y contact the spar k plug .
20
Other manuals for 22168
1
Table of contents
Other Toro Lawn Mower manuals

Toro
Toro 30859 User manual

Toro
Toro 73552-9900001 User manual

Toro
Toro TimeCutter MX3400T User manual

Toro
Toro GrandStand 74553 User manual

Toro
Toro 74722 User manual

Toro
Toro Greensmaster Flex21 04021 User manual

Toro
Toro 30340 User manual

Toro
Toro Greensmaster 3000 Series Manual

Toro
Toro Sand Pro 3040 User manual

Toro
Toro TimeCutter HD XS4850 User manual