manuals.online logo
Brands
  1. Home
  2. •
  3. Brands
  4. •
  5. Green Air Designs
  6. •
  7. Toy
  8. •
  9. Green Air Designs Su-27 Flanker User manual

Green Air Designs Su-27 Flanker User manual

Su-27 Flanker Instruction Manual
We would like to thank you for purchasing our Green Air Designs Su-27
Flankers and hope you have as much fun building and flying yours as we
have ours.
Parts not supplied
•Glue
•Lightweight filler
•Velcro
•Paints – Water based acrylics/enamel LOW VOC applied thinly (no
responsibility for paints will be held by Green Air Designs.)
•Micro Rx – i.e. Schultz 535, Corona 6ch
•Micro servos – i.e. 9g Servos x 2
Power Train – Single pusher set-up:-
GAD 21g Brushless + 3s 1000-1500 Lipos
Micro 6 outrunner
Note: Our set-ups are a safe recommendation to give a fun safe aircraft. We
do not take any responsibility for damage to aircraft, persons or items, in the
use of this kit!
Step 1 – Basic Fuse Construction
Refer to Drawings on page “step one” for basic build.
1. Glue the carbon tube/Ally Box spar in to wing slot (trim to length If
required).
2. Shape wing to aerofoil (shown on wing shaping page).
3. Dry fit fuse parts FB1, FB2, and wing.
4. Lay F2, F3 and F4 on to place using drawings provided, and check for
alignment.
5. When happy, glue, or use the glueless method, the parts into place.
6. Rough shape the lifting section to shape shown.
What we are attempting to do here is to build the model into modules for
assembly later. It is also a good idea to sand the majority of shapes in when
building the modules so less shaping is required later.
FB1
FB2
WING
F2
F3
F4
Step 2 – Main Fuse Fitment
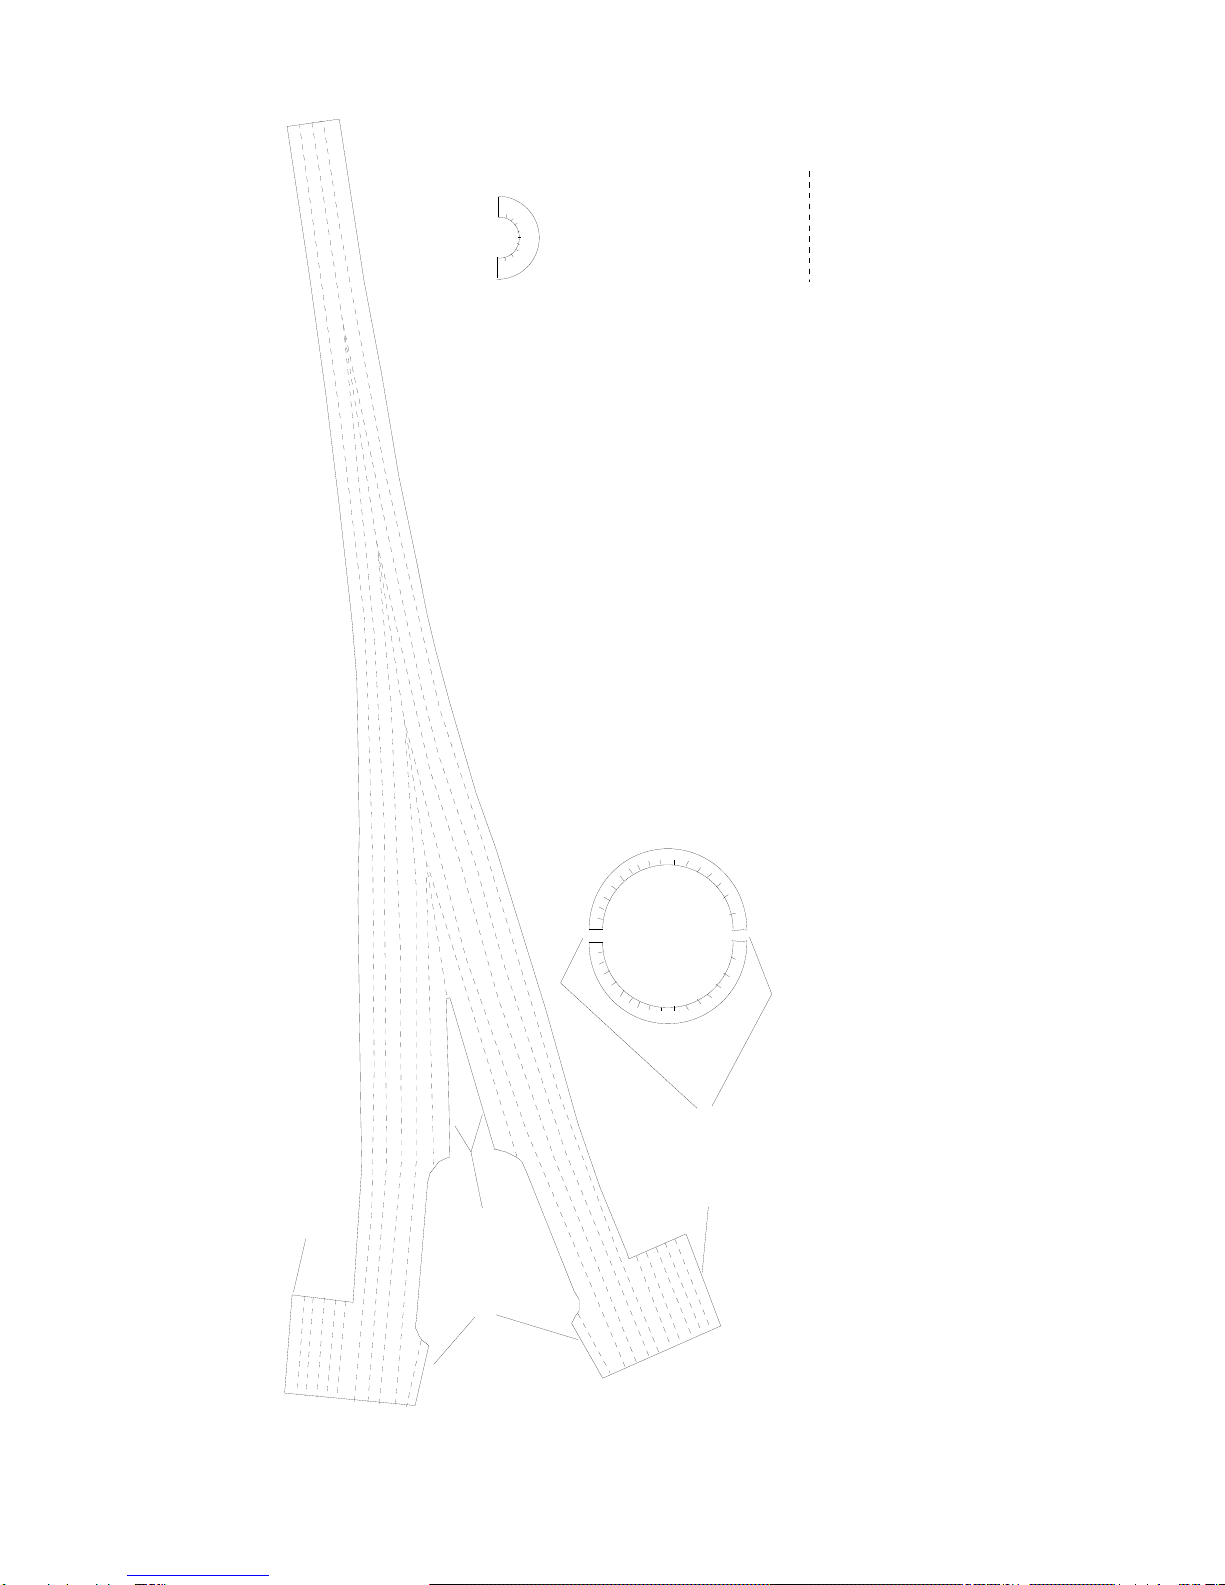
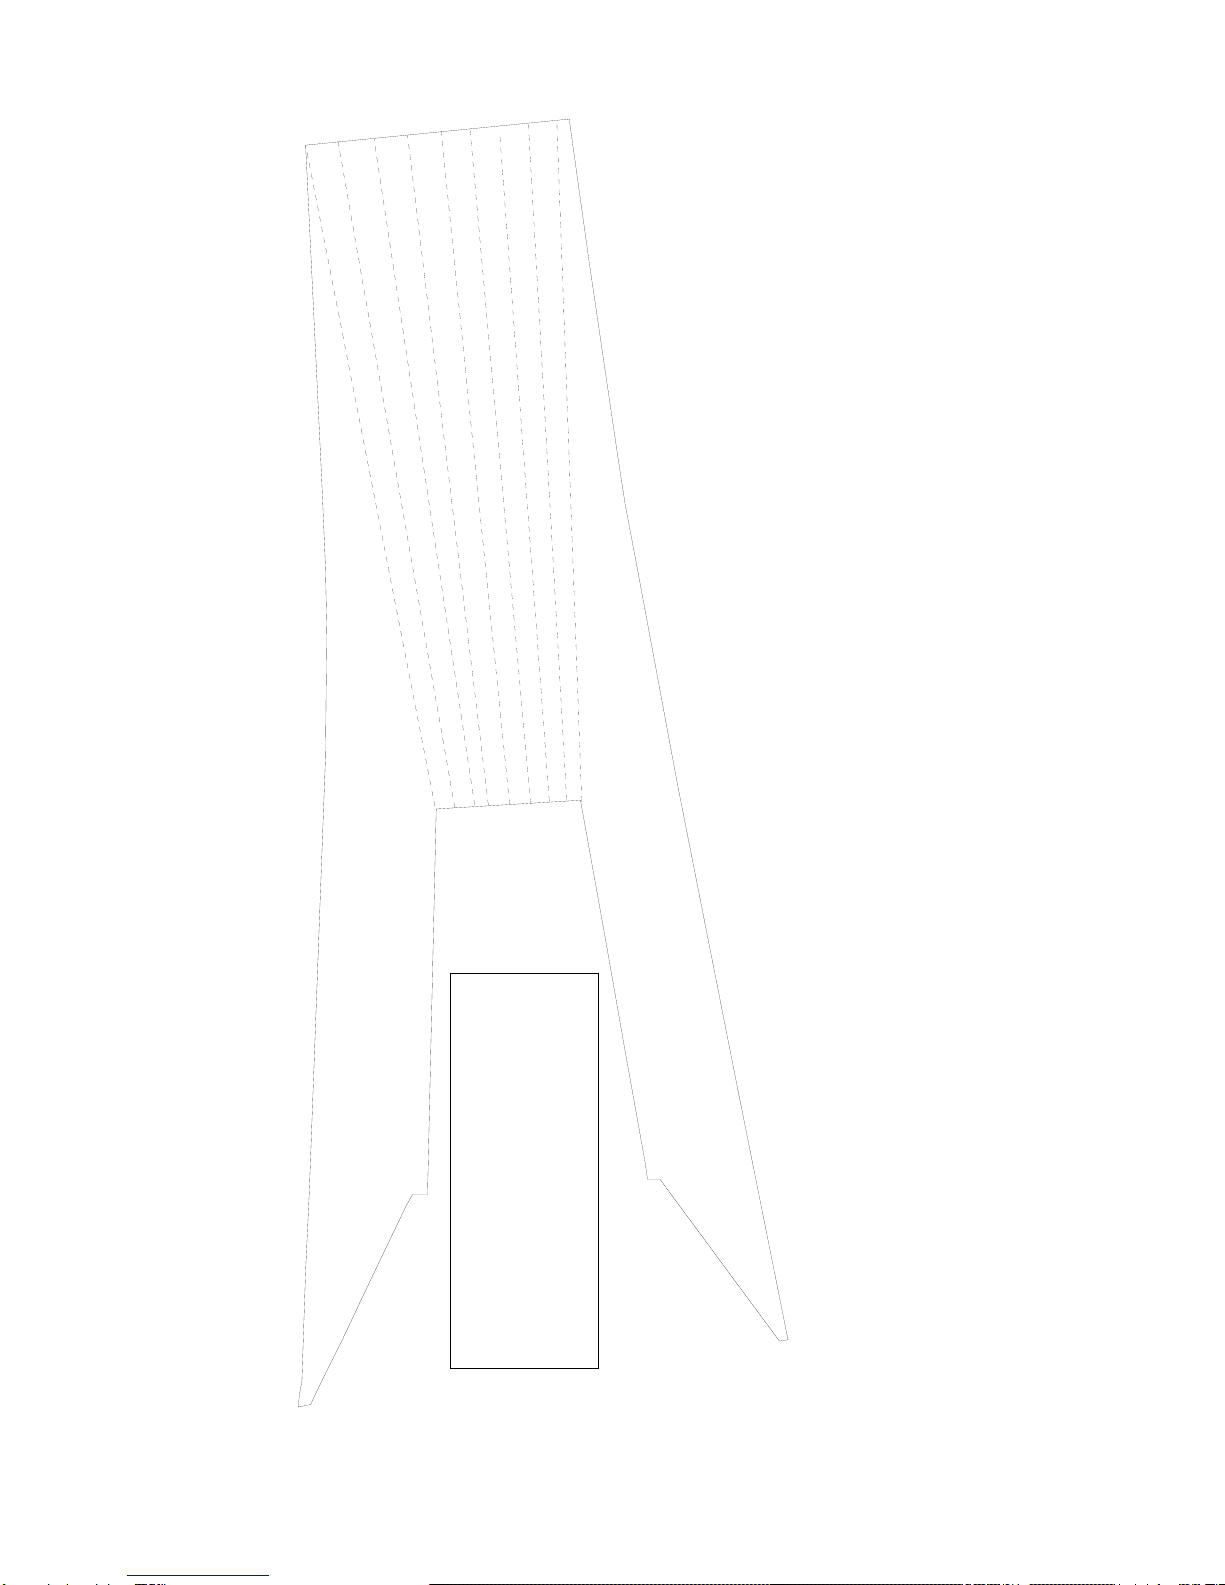
Refer to drawings on page “step 2” for basic build.
Our next task is to make up the main fuse section.
1. Tape up main fuse with packing tape on the outside only (stops the
Depron from cracking when rolling and forming).
2. Groove the inside of the fuse to allow them to roll. (Refer to drawings If
Not Laser cut).
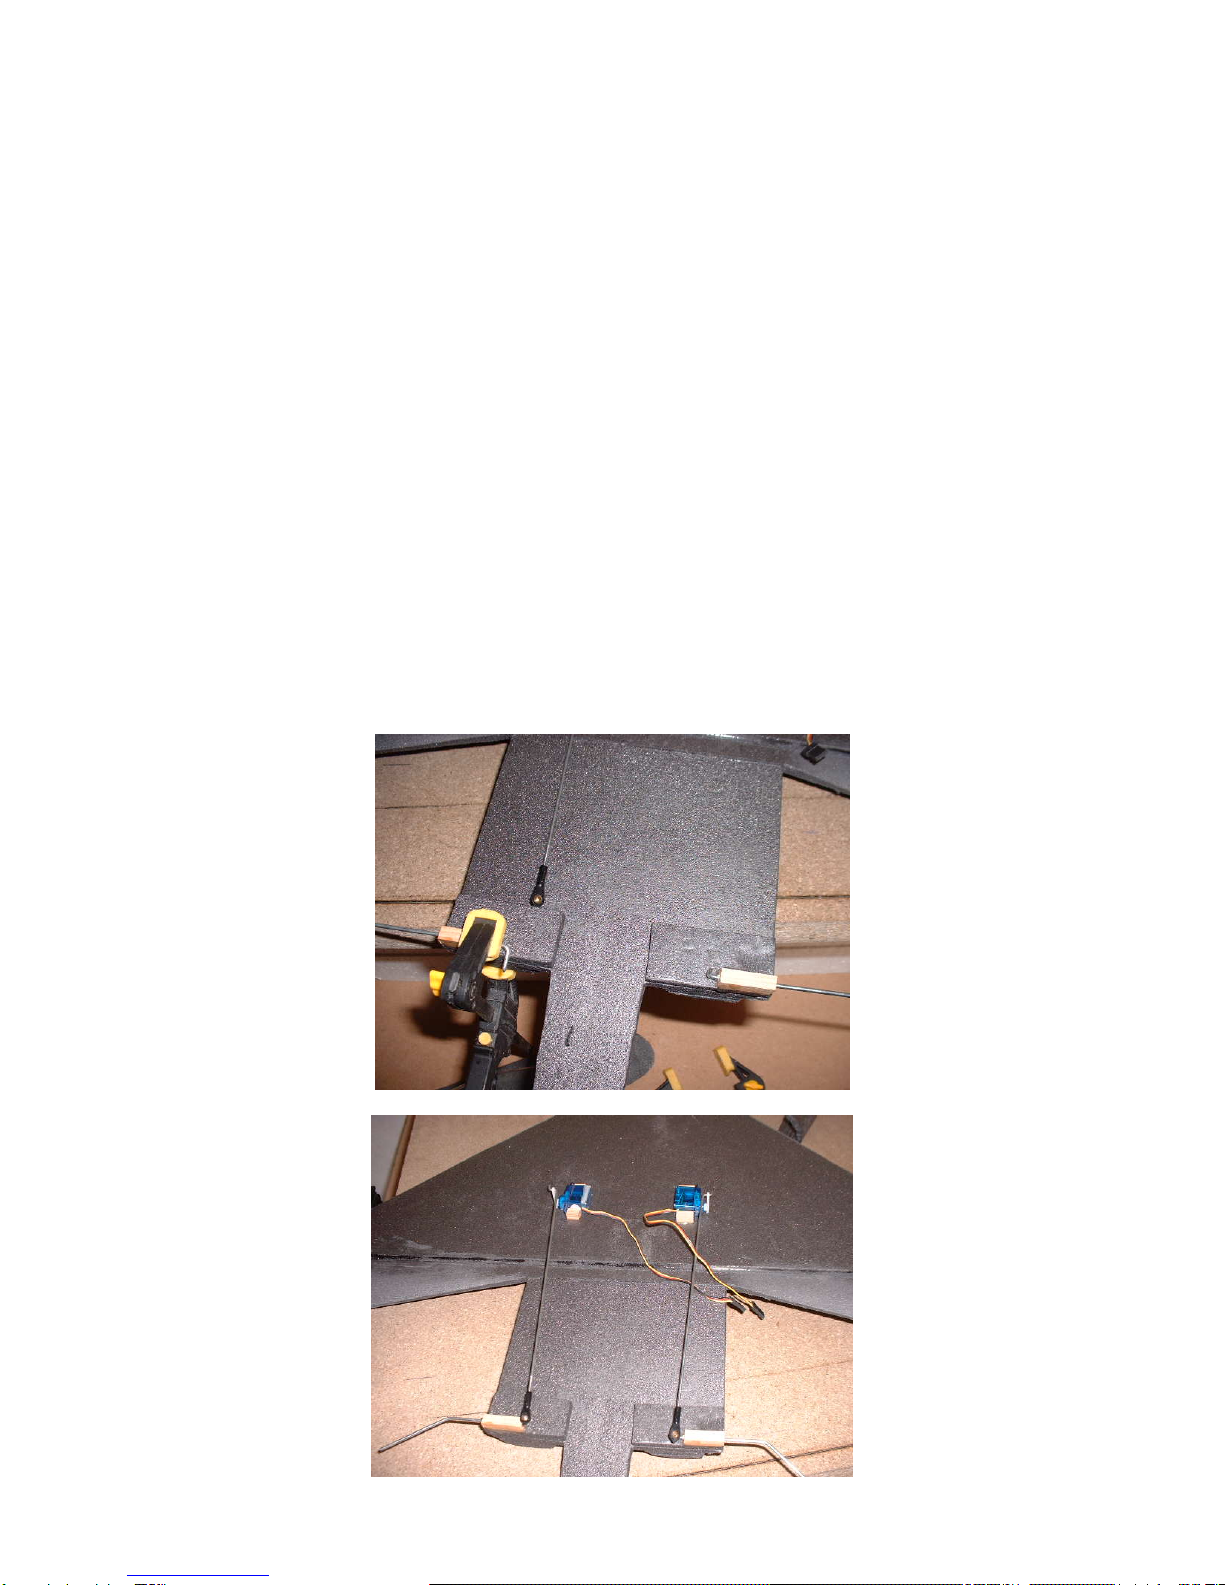
3. Hand form the fuse to nicely curved shape and tape into position.
4. Roll the nose section of the fuse into a circle, epoxy both top and
bottom joints and tape together at correct angle, allow to set.
5. You can use fairly warm water (NOT BOILING) to set the shape into
fuse. Alternatively, just tape the shape and leave over night. You will
cause hysterisis in the foam and take the shape over time.
6. Glue top of fuse together and sand as necessary to make nice fit.
7. Once set, trial fit the fuse to the base. Sand any inaccuracies so fuse
fits snugly, pin, tape and then glue into place, allow to set completely
before removing pins, tape etc.
Great now you the basis of your Su-27 Flanker!!!!!
Front View
Side View
Step 2A
Sandusinga block, Suggest80gritforbasicshapethen240forfinish.
Step 2B
Groovetheinsidetoallowthefusetoroll.
GLUE
GLUE
GLUE
Shape once rolled.
Step 3 – Taileron Mounts and Servos
Refer to drawings on page “Step 3” for basic build.
Fitting the business end of the flanker.
1. Glue in cross piece at rear of fuse.
2. Drill CENTRALY the wooden blocks for the taileron rods, 2mm drill.
3. Put bends in 12mm from ends (see drawings for clarity).
4. Fit ball link to top of rod. You may need to sand the ends of the rods to
get the ball links on. Make sure they are fitted at the top of rod. Use
just a spot of epoxy to secure.
5. Put bends in control rods for servo horns, centralise servos and trial fit.
6. You will need to thread the rods into the ball links about half their travel
to allow adjustment before ducts fitted.
7. Glue on the servo blocks with the servos centralised and rods attached
to get distance from tailerons.
Cross piece
Step 3
Wooden taileron blocks
2mm drill required
12mmGap
12.00
Step 4 – Ducts
Refer to drawings on page “Step 4” for basic build.
Ducting and the art of ZEN!
1. Groove the inside of the ducts to allow them to roll.
2. Tape up ducts on the outside to stop cracking.
3. Roll to approx shape and tape to shape. Glue on the bottom of the
duct, either leave over night or use warm water to form.
4. Notch rear of duct to accept the taileron mount and cross piece. You
will have to fiddle with this piece and it is quite tricky to get the right
shape, so take a little time over this. You may also have to sand using
a block to get nice snug fitment.
5. Once happy that it all fits ok, remember that the ducts are handed,
longest part of ducts go to the centre of the plane.
6. Glue the ducts into place, again using pins and tape, leave to set.
Step 4
Groove the inside of the ducts and roll to exhaust shape at rear, square at front.
Bottom piece to be glued on
once shape is formed.
Step 5 – Rear Fuse
Refer to drawings on page “Step 5” for basic build.
1. Sand basic shape into engines before fitting to rear fuse. Refer to
drawings.
2. Glue the 2 engines together and glue into place.
3. Sand rough shape into exhaust to match profile.
4. Sand and glue rudders into place.
Note: DO NOT remove all material from sides as these are the guides for
the side pieces and rudders!!!!!!
Only a couple of steps to go!
Step 5
Wing
RearFuseSidePieces
Fuse Side Pieces
Cross Piece.
Sand this shape in
Rear View of Fuse
Enginefitmentandshaping.
DONOTREMOVEALLOFTHIS!!!
Step 6 – Noses and Tails!!!
Refer to drawings on page “Step 6” for basic build.
1. Sand shape into tailerons. You must complete all sanding to these as
it is very difficult to sand them once they are fitted.
2. Dry fit tailerons to plane.
3. Mark tailerons and groove the bottom, epoxy into place.
Note: Tailerons must be horizontal to plane!!!!
4. Glue the two nose bottoms together and glue to bottom of fuse in line
with the front.
5. Trial fit the nosecone and sand the front of the fuse to flow in.
6. Sand the nosecone to approx shape, then glue to fuse.
7. Once cone set, sand into fuse to flow the lines…
8. Trim canopy, epoxy in the 4 magnets to attach the canopy making sure
you get north to south on the magnets…or it won’t stick!
Note: Magnets have to be “face to face” for them to work properly or the
canopy may come off in flight.
9. Cut and roll up card exhausts and tape up.
10.Cut slot in between ducts to allow wires for ESC to pass through.
11.Cut slot behind the first slot about an inch for RX to be pushed into
flush.
12.Trim 3mm depron to fit into slot and fit between ducts, this will cover up
all the wires etc.
13.Fit motor with 2 zip ties, no side or down thrust required.
14.Fit 3mm Depron cover over all electrics and tape down using invisible
tape.
15.Shape and glue on wing tip rails.
16.Shape and fit dummy U.C covers.
Plane is now built and just needs painting and setup.
Step 6a
Rudder
Side piece
Taileron Shape
WING ROOT
WING TIP
Epoxyinmotorsupports
Motorhole
trim out as required
Nose Bottom
Nose Bottom
Step 6b
Step 7 – Setup and Painting
Note: Vtail/Elevon mixer or computer Tx required
Throws
3” / 75mm Top to bottom for aileron movement.
2” / 50mm Top to bottom for elevator movement.
With this setup the plane is agile and responsive. You may want to turn down
the aileron movement for first flight, depending on your ability.
Centre of Gravity
35mm back from where the leading edge of the wing meets the straight part at
the root.
Finishing
We usually use light weight filler (polyfiller, “onefill” or spackle) watered down
with water and slopped on……left to dry then sanded to fill all dents and
sanding marks.
Once to the right smoothness, give the surface 2 coats of 50% watered down
PVA and a light sand then paint!
We recommend water based acrylics and some enamels…..but be careful as
some enamels have a high VOC and will eat the foam! We take no
responsibility for damage to planes through unsuitable paints used!
DO NOT USE CELLULOSE BASED PAINTS!!
We at Green Air Designs wish you many hours of fun with your new Su-27
Flanker.
Step 7
C`o`G 35mm

Popular Toy manuals by other brands

KIDdesigns Trolls World Tour DJ Trollex Party Mixer... manual

KIDdesigns

KIDdesigns Trolls World Tour DJ Trollex Party Mixer... manual

Beyblade Wyborg instructions

Beyblade

Beyblade Wyborg instructions

Hasbro MARVEL IRON MAN 2 MISSION HELMET 82802 quick start guide

Hasbro

Hasbro MARVEL IRON MAN 2 MISSION HELMET 82802 quick start guide

Rollplay Spyder manual

Rollplay

Rollplay Spyder manual

Laser Dollhouse Designs Glenrose Assembly instructions

Laser Dollhouse Designs

Laser Dollhouse Designs Glenrose Assembly instructions

LEGO CITY 60014 Building instructions

LEGO

LEGO CITY 60014 Building instructions

VolantexRC TW-759-1 instructions

VolantexRC

VolantexRC TW-759-1 instructions

Playskool Humbah instructions

Playskool

Playskool Humbah instructions

Airigami Papier Avion Boeing P-8A instructions

Airigami

Airigami Papier Avion Boeing P-8A instructions

VTech Baby Cuddle & Swing Monkey 5134 Parents' guide

VTech Baby

VTech Baby Cuddle & Swing Monkey 5134 Parents' guide

Eduard Su-34 1/72 quick start guide

Eduard

Eduard Su-34 1/72 quick start guide

Mattel Barbie CLD94 instructions

Mattel

Mattel Barbie CLD94 instructions

Carrera Ferrari Arno XI 300005 Assembly and operating instructions

Carrera

Carrera Ferrari Arno XI 300005 Assembly and operating instructions

Horejsi Long Shot 3 Building instructions

Horejsi

Horejsi Long Shot 3 Building instructions

arf EXTRA300L instruction manual

arf

arf EXTRA300L instruction manual

Lansay BLOpens instructions

Lansay

Lansay BLOpens instructions

Meccano 18203 instructions

Meccano

Meccano 18203 instructions

USA Toyz GALAXY LIGHT SWORD quick start guide

USA Toyz

USA Toyz GALAXY LIGHT SWORD quick start guide

manuals.online logo
manuals.online logoBrands
  • About & Mission
  • Contact us
  • Privacy Policy
  • Terms and Conditions

Copyright 2025 Manuals.Online. All Rights Reserved.