H8508 Hydraulic Impact Wrench
Greenlee / A Textron Company 84455 Boeing Dr. • Rockford, IL 61109-2988 USA • 815-397-7070
Operation
1/2" Socket Drive Adapter and Sockets
(See Figure 1)
1. Inspect quick-change chuck (7). Remove any dirt or
other contamination that may have accumulated in
the chuck.
2. To insert 1/2" socket drive adapter, slide and hold
quick-change chuck (7) away from tool. Insert socket
drive adapter into chuck and release chuck.
3. USE SOCKETS APPROVED FOR IMPACT
WRENCH USE ONLY. Inspect 1/2" drive socket to
be installed. DISCARD SOCKET IF CRACKS,
CHIPS OR GOUGES ARE EVIDENT. Install socket
on socket drive adapter.
4. To remove socket drive adapter, remove socket from
adapter. Slide and hold quick-change chuck (7)
away from tool. Remove socket drive adapter.
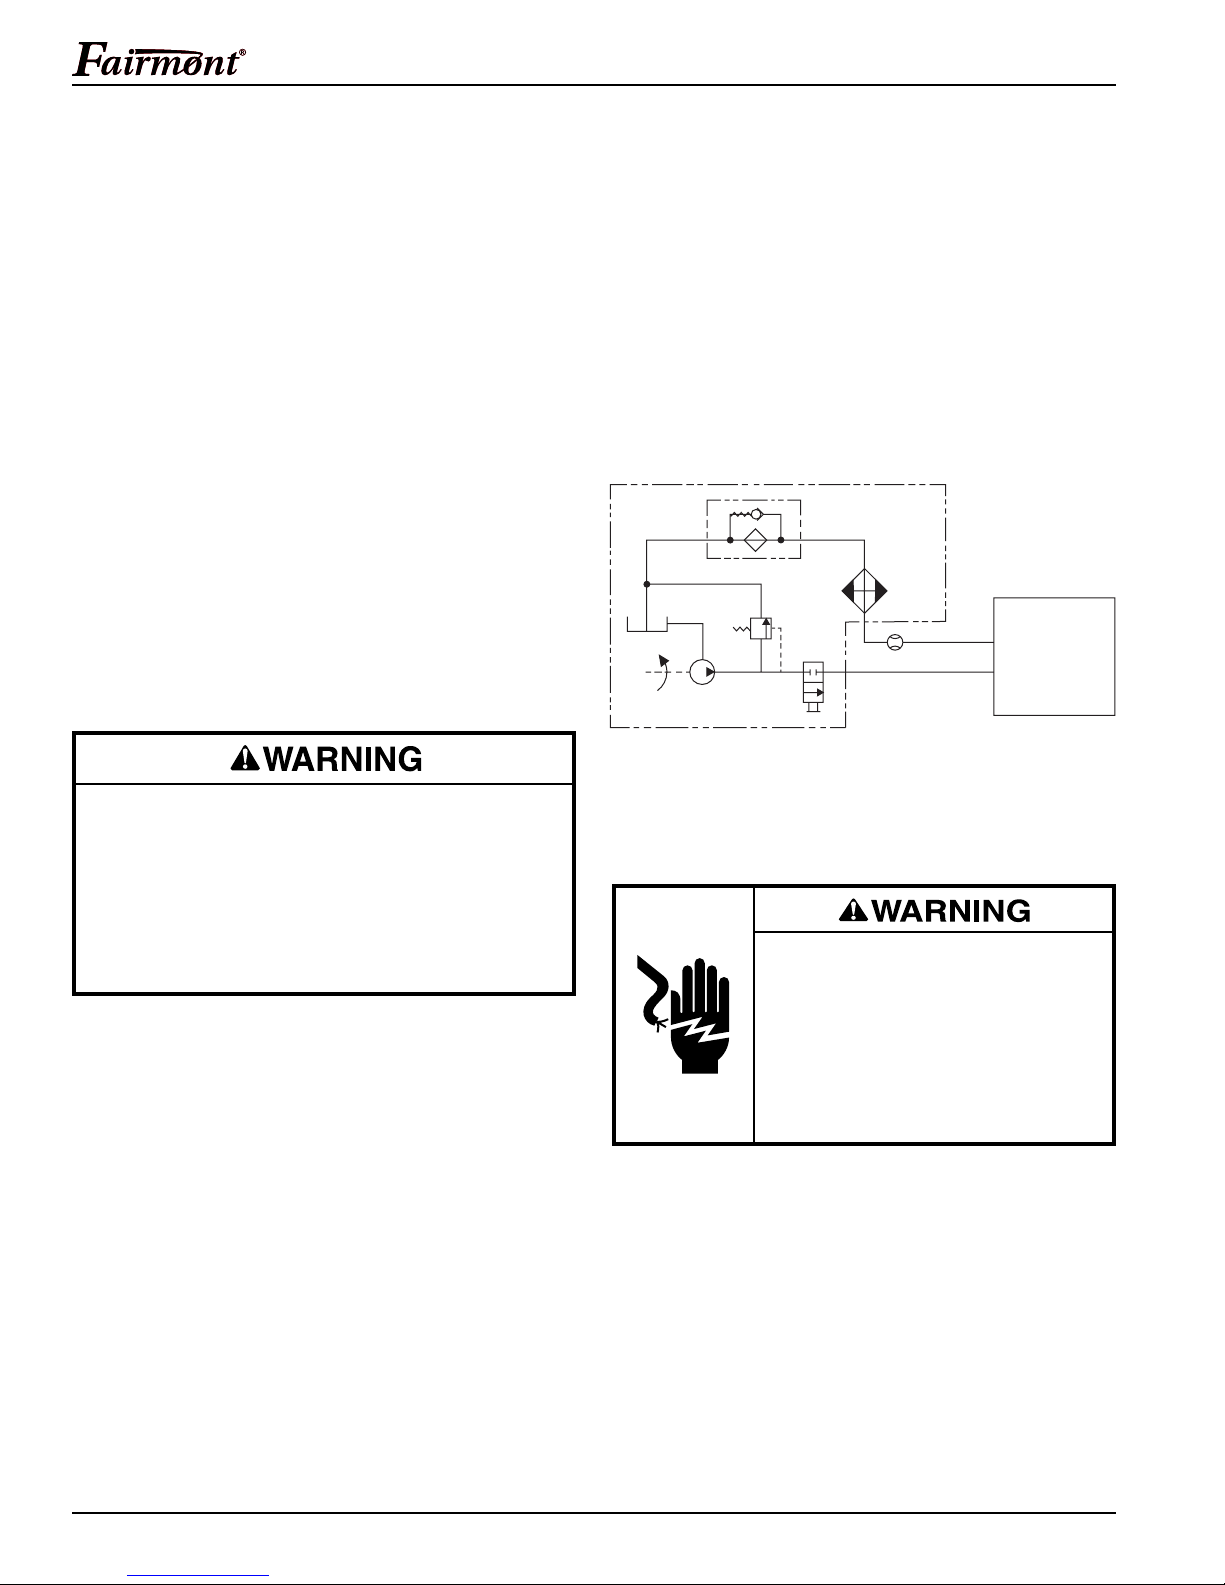
Setting Tool for Open-Center or
Closed-Center Operation
All H8508 models are equipped to allow the tool to be
used with either an open-center or closed-center hydrau-
lic power system.
Closed-Center Hydraulic System
Hold the tool as you would when operating, observe
rear of trigger spool, turn center spool in trigger spool
(Figure 1, Item 4) clockwise until spool stops. The tool is
now ready for closed-center operation.
Open-Center Hydraulic System
Hold the tool as you would when operating, observe rear
of trigger spool (Fig. 1, Item 4), turn center spool in
trigger spool counterclockwise until spool backs out to
snap-ring. The tool is now ready for open-center opera-
tion.
Open-Center/Closed-Center Hydraulic System
(for tools with serial numbers through 199)
Turn center spool in trigger spool (Figure 1, Item 4) so
spring pin indicator points upward at the letter “C”. The
tool is now ready for closed-center operations. Turn
center spool in trigger spool so spring pin indicator
points downward at the letter “O”. The tool is now ready
for open-center operation.
Impact Bits
Fairmont recommends using Greenlee Impact Style Bits.
Some impact bits with a long spiral or wide flute
spacing may not be acceptable to use with this
tool. These bits can whip or bend under sideload.
Do not use bits exhibiting these characteristics
with the H8508 Impact Wrench.
Failure to observe this warning could result in
severe injury or death.
1. Inspect the drill bit to be installed. Discard the bit if
cracks, chips or gouges are evident.
2. Inspect the quick-change chuck (7). Remove any dirt
or other contamination that may have accumulated
in the chuck (7).
3. Slide and hold quick-change chuck (7) away from
tool and remove drive shank (8).
4. Insert desired bit into hex socket of tool and release
chuck (7).
5. To remove drill bit, slide and hold quick-change
chuck (7) away from tool and remove bit.
UPC No. Hole Dia. Overall Length Hex Shank Weight
78-3310- inch mm inch mm inch mm lb g
37868 9/16 14.3 18 457 7/16 11.1 0.9 409
37869 11/16 17.5 18 457 7/16 11.1 1.1 499
37870 13/16 20.6 18 457 7/16 11.1 1.4 636
37871 15/16 23.8 18 457 7/16 11.1 1.5 681
37872 1-1/16 27.0 18 457 7/16 11.1 1.7 772
37873 9/16 14.3 22 559 7/16 11.1 1.2 545
37874 11/16 17.5 22 559 7/16 11.1 1.5 681
37875 13/16 20.6 22 559 7/16 11.1 1.8 817
37876 15/16 23.8 22 559 7/16 11.1 2.1 953
37877 1-1/16 27.0 22 559 7/16 11.1 2.2 998