GreenWorks Commercial CZ32S8X User manual

EN OPERATOR MANUAL
FR MANUEL D’OPÉRATEUR
ES MANUAL DEL OPERADOR
ZERO-TURN MOWER
TONDEUSE À RAYON DE BRAQUAGE ZÉRO
CORTADORA DE CÉSPED DE RADIO DE GIRO CERO
CZ32S8X /
CZ36S8X
ZTB442 /
ZTB503
commercial.greenworkstools.com
greenworksgear.com


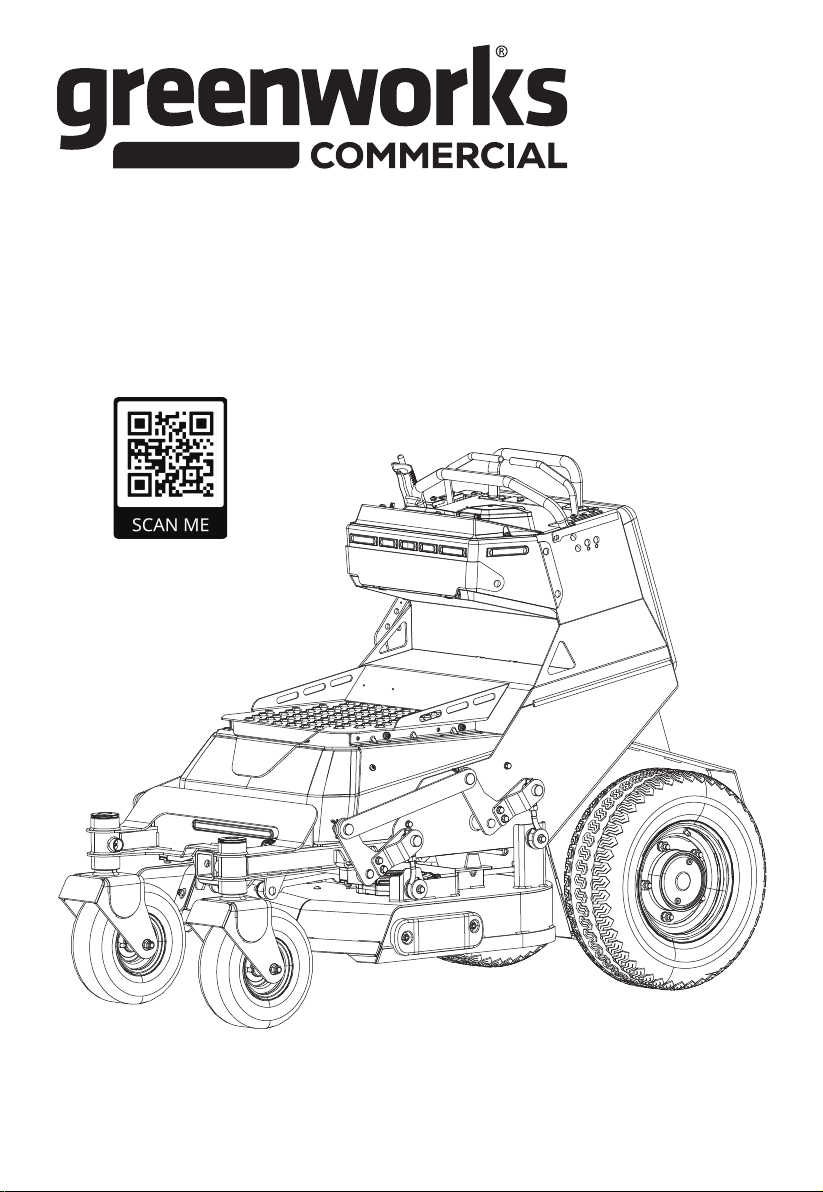
1 Description...................................3
1.1 General information....................................3
1.2 Overview.................................................... 4
2 General machine safety
warnings.......................................4
2.1 Work area safety........................................ 5
2.2 Electrical safety.......................................... 5
2.3 Personal safety...........................................5
2.4 Machine use and care................................ 5
2.5 Battery tool use and care........................... 6
2.6 Service....................................................... 6
3 Lawn mower safety warnings.... 6
4 Safe practices for stand-on
mowers.........................................7
4.1 General information....................................7
4.2 Preparation before operating......................7
4.3 Operating....................................................7
4.4 Children specific......................................... 7
4.5 Slope specific............................................. 8
4.6 Hauling....................................................... 8
4.7 Towing........................................................ 8
4.8 Service....................................................... 8
5 Symbols on the product............. 8
6 Risk levels..................................10
7 Environmentally safe battery
disposal...................................... 11
8 Proposition 65............................11
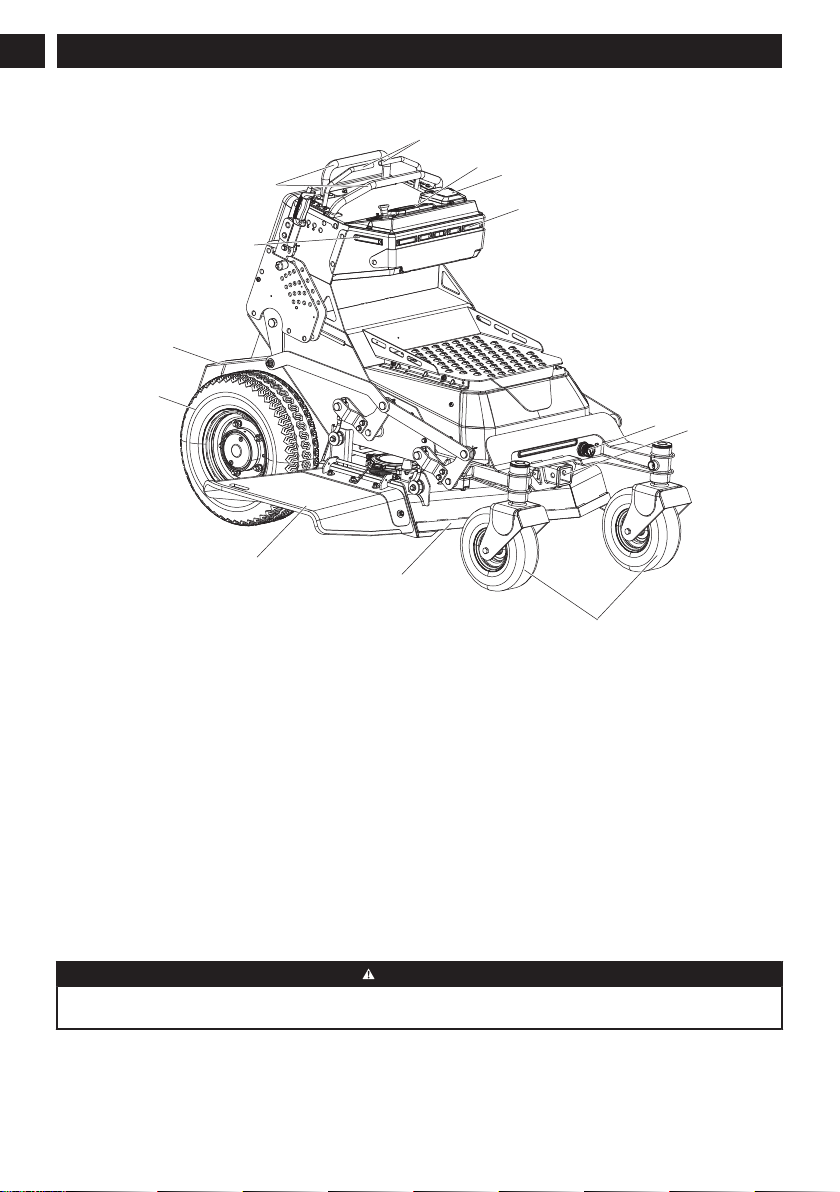
9 Know your machine.................. 12
9.1 Control panel............................................ 12
9.2 Steering control levers..............................12
9.3 Safety start interlock system.................... 12
9.4 Electric take off (ETO) socket for
connecting accessories............................ 13
10 Operation................................... 13
10.1 Before operation.......................................13
10.2 Operate the machine................................13
10.3 Slope operation........................................ 15
11 Operation suggestions............. 15
12 Electrical system....................... 17
12.1 Electrical system safety............................17
12.2 Electrical system information....................17
12.3 Battery and charger..................................17
12.4 Digital display........................................... 18
13 App operation tips.....................22
13.1 Registration and Login............................. 22
14 Errors..........................................23
14.1 Display screen error code........................ 23
14.2 BMS Error code........................................24
14.3 Battery charger error code....................... 27
14.4 Right wheel motor controller error code... 28
14.5 Left wheel motor controller error code......35
14.6 Left blade motor controller error code...... 41
14.7 Middle blade motor controller error code..43
14.8 Right blade motor controller error code....45
15 Maintenance...............................46
15.1 Mower blade maintenance....................... 46
15.2 Tires..........................................................46
15.3 Torque values........................................... 47
15.4 Battery pack maintenance........................47
15.5 Service..................................................... 47
16 Transportation and storage......48
16.1 Transporting the lithium-Ion batteries....... 48
16.2 Transporting the machine.........................48
16.3 Cleaning and storage............................... 49
17 Troubleshooting........................ 50
18 Technical data............................50
19 Limited warranty........................51
19.1 What is covered by this warranty............. 51
19.2 Who must perform the warranty service...51
19.3 What is not covered by this warranty....... 51
19.4 Disclaimer of warranty..............................52
19.5 Limitation of remedies.............................. 52
19.6 Time limit.................................................. 52
19.7 No other warranties.................................. 52
19.8 Owner's responsibility...............................52
19.9 Allocation of risks..................................... 53
19.10Warranty registration................................ 53
1
English EN

2
English
EN

1 DESCRIPTION
1.1 GENERAL INFORMATION
This manual applies to the following greenworkscommercial lines: CZ32S8X / CZ36S8X.
1.1.1 TO THE NEW OWNER
The purpose of this manual is to assist owners and operators in maintaining and operating this
greenworkscommercial mower. Please read the entire manual carefully; the information and instructions provided
can help you achieve years of dependable machine performance.
It is the owner’s responsibility to make certain that the operators and mechanics read and understand this manual
and all decals before operating this machine. It is also the owner’s responsibility to make certain that the operators
and mechanics are qualified and physically able to operate this equipment. All operators and mechanics must
become familiar with the safe operation of this equipment, its controls and safety signs.
Never let children or untrained people operate or service this equipment. Please note that local regulations may
restrict the age of the operator.
1.1.2 USE THIS MANUAL
General operation, adjustment and maintenance guidance is outlined for both the experienced and novice
greenworkscommercial mower user. Operating conditions vary considerably and cannot all be addressed individually.
Through experience, however, operators should have no difficulty developing good operating skills suitable to most
conditions.
Directions used in this manual (e.g., "RIGHT" or "LEFT") refer to directions from the perspective of the operator when
using the machine (seated on the mower or standing facing forward), unless otherwise stated.
Photographs and illustrations used were current at the time of printing, but subsequent production changes may
cause your machine to vary slightly in detail. greenworkscommercial products reserves the right to redesign and
change the machine as deemed necessary, without notification. If a change has been made to your machine which is
not reflected in this operator manual or the parts manual, see your greenworkscommercial products dealer for current
information and parts.
1.1.3 WARRANTY REGISTRATION
The owner must register the unit by filling out the Warranty Registration Form, provided in the owner’s packet, to
validate warranty protection. As the new equipment owner, you are expected to see that this is done at the time of
delivery. If using the Warranty Registration Form, it MUST be completed and signed by the authorized dealer and
original purchaser. Be sure to register the mower plus each attachment that displays a model and serial identification
number with greenworkscommercial.
WARNING
Any unauthorized modification, alteration, or use of non-approved attachments voids the warranty and releases
greenworkscommercial from any liability arising from subsequent use of this equipment.
1.1.4 SERIAL NUMBER
The mower serial number is found on the date label. The serial number and model are required on the Warranty
Registration Form. They will also ensure that you receive the correct parts when replacement becomes necessary.
1.1.5 PARTS AND SERVICE
All warranty repair and service must be handled through an authorized greenworkscommercial products dealer.
Arrangements should be made through your local service center.
Have your stand-on lawn mower serviced by a qualified repair person using only identical replacement parts. This will
ensure that the safety of the stand-on lawn mower is maintained.
3
English EN

1.2 OVERVIEW
1
12
9
2
3
13
4
5
6
78
10
11
1Steering control levers
2Hand stabilizer bar
3Control panel
4USB port
5LED light
6Warning light
7ETO socket
8Attachment port
9Front caster wheels
10 Deck
11 Discharge chute
12 Drive wheel
13 Foot pad
2 GENERAL MACHINE SAFETY WARNINGS
WARNING
Read all safety warnings, instructions, illustrations and specifications provided with this machine. Failure to
follow all instructions listed below may result in electric shock, fire and/or serious injury.
Save all warnings and instructions for future reference.
The term "machine" in the warnings refers to your mains-operated (corded) machine or battery-operated (cordless)
machine.
4
English
EN

2.1 WORK AREA SAFETY
•Keep work area clean and well lit. Cluttered or dark areas invite accidents.
•Do not operate the machine in explosive atmospheres, such as in the presence of flammable liquids,
gases or dust. The machine create sparks which may ignite the dust or fumes.
•Keep children and bystanders away while operating the machine. Distractions can cause you to lose control.
2.2 ELECTRICAL SAFETY
•Machine plugs must match the outlet. Never modify the plug in any way. Do not use any adapter plugs
with earthed (grounded) machine. Unmodified plugs and matching outlets will reduce risk of electric shock.
•Avoid body contact with earthed or grounded surfaces, such as pipes, radiators, ranges and
refrigerators. There is an increased risk of electric shock if your body is earthed or grounded.
•Do not expose the machine to rain or wet conditions. Water entering a machine will increase the risk of
electric shock.
•Do not abuse the cord. Never use the cord for carrying, pulling or unplugging the machine. Keep cord
away from heat, oil, sharp edges or moving parts. Damaged or entangled cords increase the risk of electric
shock.
•When operating the machine outdoors, use an extension cord suitable for outdoor use. Use of a cord
suitable for outdoor use reduces the risk of electric shock.
•If operating the machine in a damp location is unavoidable, use a residual current device (RCD) protected
supply. Use of an RCD reduces the risk of electric shock.
2.3 PERSONAL SAFETY
•Stay alert, watch what you are doing and use common sense when operating the machine. Do not use the
machine while you are tired or under the influence of drugs, alcohol or medication. A moment of inattention
while operating the machine may result in serious personal injury.
•Use personal protective equipment. Always wear eye protection. Protective equipment such as a dust
mask, non-skid safety shoes, hard hat, or hearing protection used for appropriate conditions will reduce personal
injuries.
•Prevent unintentional starting. Ensure the switch is in the off-position before connecting to power source
and/or battery pack. Energizing the machine that have the switch on invites accidents.
•Remove any adjusting key or wrench before turning the machine on. A wrench or a key left attached to a
rotating part of the machine may result in personal injury.
•Do not overreach. Keep proper footing and balance at all times. This enables better control of the machine in
unexpected situations.
•Dress properly. Do not wear loose clothing or jewellery. Keep your hair, clothing and gloves away from
moving parts. Loose clothes, jewellery or long hair can be caught in moving parts.
•If devices are provided for the connection of dust extraction and collection facilities, ensure these are
connected and properly used. Use of dust collection can reduce dust-related hazards.
•Do not let familiarity gained from frequent use of tools allow you to become complacent and ignore tool
safety principles. A careless action can cause severe injury within a fraction of a second.
2.4 MACHINE USE AND CARE
•Do not force the machine. Use the correct machine for your application. The correct machine will do the job
better and safer at the rate for which it was designed.
•Do not use the machine if the switch does not turn it on and off Any machine that cannot be controlled with
the switch is dangerous and must be repaired.
•Disconnect the plug from the power source and/or remove the battery pack, if detachable, from the
machine before making any adjustments, changing accessories, or storing the machine. Such preventive
safety measures reduce the risk of starting the machine accidentally.
•Store an idle machine out of the reach of children and do not allow persons unfamiliar with the machine
or these instructions to operate the machine. A machine is dangerous in the hands of untrained users.
•Maintain the machine and accessories. Check for misalignment or binding of moving parts, breakage of
parts and any other condition that may affect the operation of the machine. If damaged, have the machine
repaired before use. Many accidents are caused by poorly maintained machine.
5
English EN

•Keep cutting tools sharp and clean. Properly maintained cutting tools with sharp cutting edges are less likely to
bind and are easier to control.
•Use the machine, accessories etc. in accordance with these instructions, taking into account the working
conditions and the work to be performed. Use of the machine for operations different from those intended
could result in a hazardous situation.
•Keep handles and grasping surfaces dry, clean and free from oil and grease. Slippery handles and grasping
surfaces do not allow for safe handling and control of the tool in unexpected situations.
2.5 BATTERY TOOL USE AND CARE
•Recharge only with the charger specified by the manufacturer. A charger that is suitable for one type of
battery pack may create a risk of fire when used with another battery pack.
•Use the machine only with specifically designated batteries. Use of any other battery packs may create a
risk of injury and fire.
•When battery pack is not in use, keep it away from other metal objects, like paper clips, coins, keys,
nails, screws or other small metal objects, that can make a connection from one terminal to another.
Shorting the battery terminals together may cause burns or fire.
•Under abusive conditions, liquid may be ejected from the battery; avoid contact. If contact accidentally
occurs, flush with water. If liquid contacts eyes, additionally seek medical help. Liquid ejected from the
battery may cause irritation or burns.
•Do not use a battery pack or machine that is damaged or modified. Damaged or modified batteries may
exhibit unpredictable behaviour resulting in fire, explosion or risk of injury.
•Do not expose a battery pack or tool to fire or excessive temperature. Exposure to fire or temperature above
130°C (265°F) may cause explosion.
•Follow all charging instructions and do not charge the battery pack or tool outside the temperature range
specified in the instructions. Charging improperly or at temperatures outside the specified range may damage
the battery and increase the risk of fire.
2.6 SERVICE
•Have your machine serviced by a qualified repair person using only identical replacement parts. This will
ensure that the safety of the machine is maintained.
•Never service damaged battery packs. Service of battery packs should only be performed by the manufacturer
or authorized service providers.
3 LAWN MOWER SAFETY WARNINGS
•Do not use the lawnmower in bad weather conditions, especially when there is a risk of lightning. This
decreases the risk of being struck by lightning.
•Thoroughly inspect the area for wildlife where the lawnmower is to be used. Wildlife may be injured by the
lawnmower during operation.
•Thoroughly inspect the area where the lawnmower is to be used and remove all stones, sticks, wires,
bones, and other foreign objects. Thrown objects can cause personal injury.
•Before using the lawnmower, always visually inspect to see that the blade and the blade assembly are
not worn or damaged. Worn or damaged parts increase the risk of injury.
•Check the grass discharge chute frequently for wear or deterioration. A worn or damaged grass discharge
chute may increase the risk of personal injury.
•Keep guards in place. Guards must be in working order and be properly mounted. A guard that is loose,
damaged, or is not functioning correctly may result in personal injury.
•Keep all cooling air inlets clear of debris. Blocked air inlets and debris may result in overheating or risk of fire.
•While operating the lawnmower, always wear non-slip and protective footwear. Do not operate the
lawnmower when barefoot or wearing open sandals. This reduces the chance of injury to the feet from
contact with the moving blade.
•While operating the lawnmower, always wear long trousers. Exposed skin increases the likelihood of injury
from thrown objects.
•Do not operate the lawnmower on excessively steep slopes. This reduces the risk of loss of control, slipping
and falling which may result in personal injury.
6
English
EN

•Do not mow from side-to-side when operating mowers on unlevel or sloped ground. Always mow slopes
in the up-and-down direction. This reduces the risk of loss of control, slipping and falling which may result in
personal injury.
•Do not touch blades and other hazardous moving parts while they are still in motion. This reduces the risk
of injury from moving parts.
•When clearing jammed material or cleaning the lawnmower, make sure all power switches are off and the
key fob is pulled out. Unexpected operation of the lawnmower may result in serious personal injury.
•When clearing jammed material or cleaning the lawnmower, make sure all power switches are off and
remove (or activate) the disabling device. Unexpected operation of the lawnmower may result in serious
personal injury.
4 SAFE PRACTICES FOR STAND-ON MOWERS
This machine is capable of amputating hands and feet and throwing objects. Failure to observe the following safety
instructions could result in serious injury or death.
4.1 GENERAL INFORMATION
• Read, understand, and follow instructions and warnings in this manual and on the machine, and attachments.
• Only allow operators, who are responsible, trained, familiar with the instructions, and physically capable to
operate the machine.
• Do not carry passengers and keep bystanders away.
• Do not operate the machine while under the influence of alcohol or drugs.
• Follow the manufacturer’s recommendation for wheel weights or counterweights.
4.2 PREPARATION BEFORE OPERATING
• Clear the operating area of any objects which could be thrown by or interfere with operation of the machine.
• Keep the area of operation clear of all bystanders, particularly small children. Stop the machine and
attachment(s) if anyone enters the area.
• Do not operate the machine without the entire grass discharge chute, or other safety devices in place and
functioning properly. Check frequently for signs of wear or deterioration and replace as needed.
• Wear appropriate personal protective equipment such as safety glasses, hearing protection, and footwear.
4.3 OPERATING
• Always drive with both hands. Do not drive with just one hand.
• Only operate the machine in daylight or good artificial light.
• Avoid holes, ruts, bumps, rocks, or other hidden hazards. Uneven terrain could overturn the machine, or cause
operator to lose their balance or footing.
• Do not put hands or feet near rotating parts or under the machine. Keep clear of the discharge opening at all
times.
• Do not direct discharge material toward anyone. Avoid discharging material against a wall or obstruction. Material
may ricochet back toward the operator. Stop the blade(s) when crossing gravel surfaces.
• Do not leave a running machine unattended. Always park on level ground, disengage the attachment, set parking
brake, and stop machine.
• Do not mow in reverse unless absolutely necessary. Always look down and behind before and while backing.
4.4 CHILDREN SPECIFIC
• Tragic accidents can occur if the operator is not alert to the presence of children. Children are often attracted to
the machine and the mowing activity. Never assume that children will remain where you last saw them.
• Keep children out of the operating area and under the watchful care of a responsible adult other than the
operator.
• Do not operate the machine without the entire grass discharge chute, or other safety devices in place and
functioning properly. Check frequently for signs of wear or deterioration and replace as needed.
• Do not carry children, even with the blade(s) shut off. Children could fall off and be seriously injured or interfere
with safe machine operation. Children who have been given rides in the past could suddenly appear in the
mowing area for another ride and be run over or backed over by the machine.
7
English EN

4.5 SLOPE SPECIFIC
Slopes are a major factor related to accidents. Operation on slopes requires extra caution.
• Travel in the manufacturer recommended direction on slopes. Use caution while operating near drop-offs.
• Do not operate machine under any condition where traction, steering, or stability is in question. Tires could slide
even if the wheels are stopped.
• Always keep the machine in gear when going down slopes. Do not coast downhill.
• Avoid starting and stopping on slopes. Avoid making sudden changes in speed or direction. Make turns slowly
and gradually.
• Use extra care while operating machine with a grass discharge chute or other attachment(s). They can affect the
stability of the machine.
4.6 HAULING
Use full width ramps for loading and unloading a machine for transport.
4.7 TOWING
Follow the manufacturer’s recommendation for weight limits for towed equipment and towing on slopes.
4.8 SERVICE
• Keep machine in good working order. Replace worn or damaged parts.
• Use caution when servicing blades. Wrap the blade(s) or wear gloves. Replace damaged blades. Do not repair or
alter blade(s).
•Have your stand-on lawn mower serviced by a qualified repair person using only identical replacement
parts. This will ensure that the safety of the stand-on lawn mower is maintained.
•Recharge only with the charger specified by the manufacturer.A charger that is suitable for one type of
battery pack may create a risk of fire when used with another battery pack.
• Do not charge stand-on mower in rain, or in wet locations.
• Do not use battery-operated stand-on mower in rain.
• Store Idle Stand-on Mower Indoors - When not in use, stand-on mower should be stored in an indoor dry and
locked-up place - out of reach of children.
• Turn off and remove key fob before servicing, cleaning, or removing material from the stand-on mower.
Save all warnings and instructions for future reference.
5 SYMBOLS ON THE PRODUCT
Some of the following symbols may be used on this tool. Please study them and learn their meaning. Proper
interpretation of these symbols will allow you to operate the tool better and safer.
8
English
EN

Symbol Name Explanation
Recycle Symbols This product use lithium-ion (Li-ion) batteries. Local,
state, or federal laws may prohibit disposal of batter-
ies in ordinary trash. Consult your local waste authori-
ty for information regarding available recycling and/or
disposal options.
IPX4 Ingress Protection Degree Protection from splashing water.
V Volt Voltage
A Amperes Current
Hz Hertz Frequency (cycles per second)
W Watt Power
Direct Current Type or a characteristic of current
mm Millimeter Length of size
in. Inch Length or size
Ft-lb Foot-pound Torque
Nm Newton meter Torque
kg Kilogram Weight
lb Pound Weight
°C Celsius Temperature
°F Fahrenheit Temperature
MPH Miles Per Hour Velocity
km/h Kilometers Per Hour Velocity
RPM Revolutions per minute Rotational speed
PSI Pounds per square inch Intensity of pressure
kPa Kilopascal Intensity of pressure
min Minutes Time
/min Per Minute Revolutions, strokes, surface speed, orbits etc., per
minute
n
o
No Load Speed Rotational speed, at no load
Safety Alert Indicates a protential personal injury hazard.
Read & Understand Opera-
tor’s Manual
To reduce the risk of injury, user must read and under-
stand operator’s manual before using this product.
Ear Protection Wear ear protection.
Eye Protection
Always wear safety googles or safety glasses with
side shields and a full face shield when operating this
product.
WARNING --- Wet Condi-
tions
Do not expose the product to rain or moist conditions.
9
English EN

Symbol Name Explanation
Maintain Safety Devices Do not open or remove safety shields while the prod-
uct is running.
KEEPHANDS AND FEET AWAY MANTENGA
LASMANOS Y LOS PIES LEJOS
GARDEZLES MAINS ET LES PIEDS À L'ÉCART
DANGER/PELIGRO
WARNING --- Keep Hands
and Feet Away
To reduce the risk of injury, keep hands and feet away
from rotating parts. Do not operate unless discharge
cover or grass bag is in its proper place. If damaged,
replace immediately.
DANGER --- Keep Bystand-
ers Away
Do not mow when children or others are around.
Never Carry Children Never carry children or anyone, even when the blades
are off.
Look behind while backing. Always look down and behind you when maneuvering
in reverse or turning around. Make sure children, by-
standers, and pets are clear of the area.
DANGER --- Steep Slope
Hazard
Use extra caution on slopes. Do not mow slopes
greater than 15 degrees. Do not use on slopes near
open water.
DANGER --- Thrown Ob-
jects
Remove objects that can be thrown by the blade in
any direction. Wear safety glasses.
DANGER --- Keep Bystand-
ers Away Keep all bystanders at least 30m (100ft.) away.
Load Bearing.
Do Not Step.
The maximum load-bearing capacity is . Do not step.
Lamp Alert CAUTION --- Do not stare at operating lamp.
Do Not Tow Do not tow this machine, it may cause damage to the
drive system.
Neutral Bypass Lever Pull the neutral bypass lever down to release the
drive brake. Never unlock the neutral bypass lever on
slopes. It can cause a loss of control.
6 RISK LEVELS
The following signal words and meanings are intended to explain the levels of risk associated with this product.
SYMBOL SIGNAL MEANING
DANGER Indicates an imminently hazardous situation, which, if not
avoided, will result in death or serious injury.
WARNING Indicates a potentially hazardous situation, which, if not
avoided, could result in death or serious injury.
CAUTION Indicates a potentially hazardous situation, which, if not
avoided, may result in minor or moderate injury.
CAUTION (Without Safety Alert Symbol) Indicates a situation that
may result in property damage.
10
English
EN

7 ENVIRONMENTALLY SAFE BATTERY DISPOSAL
The toxic and corrosive materials below are in the batteries used in this machine: Lithium-ion, a toxic material.
WARNING
Discard all toxic materials in a specified manner to prevent contamination of the environment. Before discarding
damaged or worn-out Lithium-ion battery, contact your local waste disposal agency, or the local Environmental
Protection Agency for information and specific instructions. Take the batteries to a local recycling and/or disposal
center, certified for Lithium-ion disposal.
WARNING
If the battery pack cracks or breaks, with or without leaks, do not recharge it and do not use. Discard it and replace
with a new battery pack. DO NOT TRY TO REPAIR IT! To prevent injury and risk of fire, explosion, or electric
shock, and to avoid damage to the environment:
• Cover the terminals of the battery with heavy-duty adhesive tape.
• DO NOT try to remove or destroy any of the battery pack components.
• DO NOT try to open the battery pack.
• If a leak develops, the released electrolytes are corrosive and toxic. DO NOT get the solution in the eyes or on
skin, and do not swallow it.
• DO NOT put these batteries in your regular household trash.
• DO NOT incinerate.
• DO NOT put them where they will become part of any waste landfill or municipal solid waste stream.
• Take them to a certified recycling or disposal center.
8 PROPOSITION 65
WARNING
This product contains a chemical known to the state of California to cause cancer, birth defects or other
reproductive harm. Some dust created by power sanding, sawing, grinding, drilling, and other construction activities
contains chemicals known to cause cancer, birth defects or other reproductive harm. Some examples of these
chemicals are:
• Lead from lead-based paints;
• Crystalline silica from bricks and cement and other masonry products;
• Arsenic and chromium from chemically treated lumber.
Your risk of exposure to these chemicals varies depending on how often you do this type of work. To reduce your
exposure to these chemicals, work in a well-ventilated area, and work with approved safety equipment, such as
dust masks that are specially designed to filter out microscopic particles.
Save these instructions.
11
English EN

9 KNOW YOUR MACHINE
9.1 CONTROL PANEL
2
4
3
567
1
8
# Name Function
1 Digital dis-
play
This display shows important electri-
cal system information. Refer to the
Electrical section for complete infor-
mation.
2 Switch
page - UP
Switching between pages, direction
up.
3 Home/back
button
Return to prior screen. Press and
hold down to return to the home
screen.
4 Switch
page -
DOWN
Switching between pages, direction
down.
5 Deck
blades
On/Off
switch
(PTO)
Pull the PTO switch up to activate
the mower’s cutting blades. Push the
knob down to stop the cutting blades.
6 Push but-
ton
The push button is used to turn the
mower on and off.
7 Key fob The key fob must be inserted before
the push button can be operated.
# Name Function
8 USB port The USB port provides charging
power of 5 Voltage DC at up a draw
of 3 Amperes for your cell phone,
MP3 player, or other USB devices.
NOTE
The USB port is powered only
when the mower is not in charging
mode. Attempting to charge devi-
ces whose combined draws exceed
3 amps could damage the USB port
and/or the mower. Always close the
storage box cover when not in use
to prevent debris from becoming
trapped in the USB port.
2&
4
Lock
screen
To lock and unlock the touch screen
(this disables the touch screen's
functions), press and hold the UP
and DOWN buttons for 3s.
9.2 STEERING CONTROL LEVERS
1
2
Forward and reverse hand stabilizer bars (2): To
stabilize operator’s hands while positioning steering
control levers.
Steering control levers (1):The two levers control the
mower’s speed, direction, stopping, neutral lock, and
parking brake. Levers are used to steer, accelerate,
decelerate, stop, and change direction. When the
control levers are in the park brake position, the mower
will not move.
9.3 SAFETY START INTERLOCK
SYSTEM
The machine is equipped with a safety start interlock
system consisting of the parking brake switches,
operator presence control switch, and PTO switch.
12
English
EN

NOTE
The operator presence control switch includes
platform switch and steering control levers switch. It
can be activated if any of the following conditions are
met:
1. The operator stands on the platform, the platform
switch is engaged.
2. Either of the steering control levers is not in the
park brake position.
The mower’s safety start interlock system is also
designed to protect the operator and others from
accidental injury due to unintentional traction drive
system starting.
Check mower safety start interlock system daily, prior
to operation. This system is an important mower
safety feature. It should be repaired immediately if
it malfunctions. The machine incorporates a separate
operator presence control switch which will stop the
drive system and blade motors when the operator is not
in place for any reason while the mower is operating.
This is a safety feature designed to prevent runaway or
accidental entanglement.
WARNING
The safety interlock system must not be disconnected
or bypassed. Doing so could cause the machine to
operate unexpectedly, resulting in personal injury.
To inspect the system:
1. The operator must be in place when testing the
operator presence control switch.
2. Press the push button switch with the key fob
inserted.
3. Push the steering control levers to the neutral
position.
4. Pull the PTO switch ON to engage the motor.
5. Slowly leave the place. The deck blade system
should stop.
6. If the deck blade system fails to stop when the
operator is not in place and if the cause cannot
be determined, contact your greenworkscommercial
dealer immediately.
9.4 ELECTRIC TAKE OFF (ETO)
SOCKET FOR CONNECTING
ACCESSORIES
The machine can be used together with other
attachments such as the blower.
10 OPERATION
10.1 BEFORE OPERATION
10.1.1 ADJUST THE DECK CUTTING HEIGHT
DANGER
Never attempt to make any adjustments to the mower
deck while the traction drive system is on or with the
deck clutch engaged. Mower blades cannot be seen
and are located very close to deck housing. Fingers
and toes can be cut off instantly.
Deck height is adjustable from 1”- 5 inches in ¼ inch
increments with 17 deck height adjustments.
2
3
1
1. Pull the deck height handle (1) back to the top
position and lock in place.
2. Remove Deck Height Adjustment Pin (2).
3. Insert the Deck Height Adjustment Pin into desired
Height Adjustment Hole.
4. Release pressure on Deck Height Handle to release
the deck height lock switch (3) and allow handle to
rest back onto pin.
NOTE
To lock deck height adjustment in highest position
for travel or loading/unloading – Pull Deck Height
Adjustment Handle completely rearward until handle
locks in highest position. To lower deck from highest
position – pull rearward on Deck Height Adjustment
Handle with one hand until rearward on Deck Height
Locking switch to the position, proceed to lower Deck
Height Adjustment Handle to desired height.
10.2 OPERATE THE MACHINE
10.2.1 START THE MACHINE
NOTE
Here are two working modes you can choose:
1. Put down the platform and stand on it.
2. Raise the platform and stand on the ground.
1. With the key fob inserted, press the push button
start for the mower to turn ON.
2. Check for the appropriate speed mode by pressing
drive speed control button to low speed. The speed
button is on the digital display.
13
English EN

NOTE
It is always recommended to start out in low mode/
slow speed.
3. Push right and left steering control levers inward
until stops are contacted.
4. Pull up on deck blades ON/OFF switch (PTO) to
start cutting blades for mowing.
NOTE
Only engage blades when steering control levers
are in the NEUTURAL position! NEVER engage
blades when moving!
5. Push steering control levers forward for forward
motion and pull for reverse motion.
NOTE
Electric brake will engage after steering control
levers are returned to neutral.
10.2.2 DRIVE THE MACHINE
After starting the traction drive system, engage the
steering control levers and steer as follows:
WARNING
Always be aware of what is behind the machine before
backing up. Do not mow in reverse unless absolutely
necessary. Always look down and behind before and
while backing up.
WARNING
Rapid movement of steering control levers is not
recommended as damage to the electrical system
components may occur.
•To go forward, push steering control levers forward
an equal distance.
•To go in reverse, pull steering control levers
rearward an equal distance.
•To turn left, move the right steering control lever
farther forward from neutral than the left steering
control lever.
•To turn right, move the left steering control lever
farther forward from neutral than the right steering
control lever.
•To execute a zero-radius turn, move one steering
control lever forward and the other steering control
lever rearward. This will allow the drive wheels to
counter-rotate.
•To stop or decrease speed, move steering control
levers to neutral. When going forward, pull back
gently on steering control levers. When going in
reverse, push forward gently on steering control
levers.
•For an emergency stop, there are two methods
that can be used:
• When traveling forward or in reverse, place the
steering control levers in the park brake position
immediately. When moving in the rearward
direction, push forward gently on steering control
levers and avoid sudden movement. Any sudden
movement could cause the front of the mower
to come off of the ground, resulting in possible
loss of control, thereby causing serious injury or
death.
• Press push button to turn mower OFF. This will
shut down the traction drive system and the
deck drive system.
•To make a three-point turn to the right, move
the left steering control lever farther forward from
neutral than the right steering control lever and start
the turn. Next, pull back on the steering control
levers until they are past neutral and the machine
starts to go rearward. Pull the right steering control
lever farther rearward from neutral than the left
steering control lever until the rear of the machine
has pivoted around. Then, push the steering control
levers forward until they are both past neutral and
the machine starts to go forward. Push the left
steering control lever farther forward from neutral
than the right steering control lever and finish the
turn.
•To increase speed, increase steering control
lever’s distance from neutral. The farther forward
steering control levers are from neutral, the faster
the machine will travel forward. The farther back
steering control levers are from neutral, the faster
the machine will go in reverse.
10.2.3 STOP THE MACHINE
DANGER
Never make sudden stops or reverse direction,
especially when maneuvering on a slope. The steering
is designed for sensitive response. Rapid movement
of the steering control levers in either direction could
result in a reaction of the machine that can cause
serious injury.
1. Return steering control levers to the Neutral
position. Push the steering control levers outward
into park brake position.
14
English
EN

NOTE
The PTO switch will disengage automatically when
the operator stands on the ground and steering
control levers are in the park brake position.
2. Push down on deck blades ON/OFF switch (PTO) to
turn off the blades.
3. Press push button to turn the mower OFF.
10.3 SLOPE OPERATION
• Use extreme caution when operating on slopes.
• Do not remove or modify any wheels.
• Watch for holes, ruts, bumps, rocks or other hidden
objects. Uneven terrain could overturn the machine.
Tall grass can hide obstacles.
• Remove obstacles such as rocks, tree limbs,
garbage etc.
• Keep all movement on slopes slow and gradual. Do
not make sudden changes in speed or direction.
• Avoid starting and stopping on a slope. If tires lose
traction, disengage the blades and proceed slowly
straight down the slope.
• Mow a safe distance (minimum of 10 feet) away
from drop-offs, retaining walls, drainage ditches,
embankments, water, and other types of hazards
to avoid a wheel dropping over the edge or the
ground breaking away. This will reduce the risk
of the machine suddenly rolling over, which could
cause either serious injury or death.
• Use a walk-behind, push mower or hand-held
trimmer on slopes and near drop-offs, retaining
walls, drainage ditches, embankments and water.
• Do not mow on wet grass. Reduced traction could
cause sliding and loss of steering control.
• Do not tow on slopes. The weight of the towed
equipment may cause loss of traction and control.
• If the mower’s tires lose traction when operating on
slopes, disengage the deck drive, place the steering
control levers in the park brake position, press push
button to turn mower OFF, remove the key fob and
get help.
• Never make sudden starts, stops, turns, or reverse
direction, especially when maneuvering on slopes.
The steering is designed for sensitive response.
Rapid movement of the steering control levers in
either direction could result in a reaction of the
machine that can cause serious injury.
• Never stop suddenly while backing down slopes.
This action may result in a reaction of the machine
that can cause serious physical injury.
• Do not mow from side-to-side when operating
greenworkscommercial mowers on unlevel or
sloped ground. Always mow slopes in the up-and-
down direction. When operating on slopes up to 15
degrees, be aware of any conditions that may cause
the mower drive tires to lose traction, resulting in a
possible loss of control of the machine. An operator
should not operate on a slope until he is thoroughly
familiar with the equipment.
Do not operate on slopes greater than 15
degrees.
Refer to Slope Guide, when determining the degree
of slope to be mowed. It is strongly recommended
that the operator drive the machine off of the slope,
using extreme caution, if any sign of loss of traction
is detected. Wait until the condition that caused the
problem is resolved before attempting to operate
on the slope again. Terrain conditions can affect
traction, resulting in possible loss of control of the
machine. Some of the conditions to be aware of are:
1. Wet terrain
2. Depressions in the ground (e.g., holes, ruts,
washouts)
3. Mounds of dirt
4. Certain types of soil (e.g., sand, loose dirt,
gravel, clay)
5. Grass type, density, and height
6. Extremely dry conditions
7. Tire pressure
The attachments mounted to the mower will also
affect the way it handles on a slope. Be aware that
each attachment’s characteristics vary.
These are just a few examples of situations where
caution must be used when operating on a slope.
There are many other possibilities too numerous
to mention. Remember to always exercise extreme
caution while operating on any slope.
11 OPERATION SUGGESTIONS
DANGER
Prior to operation, the operator should be thoroughly familiar with the proper use and operation of the equipment,
should read the manual completely and thoroughly, and should have attempted slow moving maneuvers to become
familiar with the operation of the equipment before attempting normalspeed operation. An inexperienced operator
should not mow on slopes or on uneven terrain.
15
English EN

WARNING
If you lose steering control while operating the machine, place the steering control levers in the park brake
position immediately and press push button to turn the mower OFF. Inspect the machine and consult your
greenworkscommercial dealer to resolve the problem before continuing to operate.
WARNING
The unit’s steering control levers are very responsive. For smooth operation, move levers slowly, avoiding sudden
movements. Skill and ease of operation come with practice and experience. The machine can spin very rapidly.
Use caution when making turns and slow down before making sharp turns.
Inexperienced operators may have a tendency to oversteer and lose control. Slow-moving practice maneuvers are
recommended to become familiar with these characteristics before attempting normal-speed operation.
WARNING
Sharp depressions or raised obstacles (such as gutters or curbs) should not be directly approached at high speed
in an attempt to “jump” them as the operator could be thrown from the equipment. Approach at a slow speed and
angle one drive wheel at the obstruction. Continue at an angle until the wheel clears and then pivot the opposite
wheel around.
When turning on soft or wet turf, keep both wheels rolling either forward or backward. Pivoting on one stopped wheel
can damage turf. Keep blades sharp. Many problems with incorrect cutting patterns are due to dull blades or blades
which have been sharpened incorrectly. Blade sharpness should be checked daily.
DANGER
Never work with blades while key fob is in place. Always place deck blades switch (PTO) in the disengaged
position, place steering control levers in the park brake position and press push button to turn the mower OFF and
remove key fob from switch. Block up mower when you must work under it. Wear gloves when handling blades.
Always check for blade damage if mower strikes a rock, branch, or another foreign object during mowing.
•Direct grass discharge to right, away from unmowed area. Select a mowing pattern that directs grass
discharge towards the outside the mowing area. Generally, this means using a pattern utilizing left turns because
side discharge is to the right. In any case, avoid throwing grass discharge onto unmowed area because grass is
then mowed “twice.” Mowing twice puts an unnecessary load on the unit and reduces mowing efficiency.
•When mowing a lawn for the first time, cut grass slightly longer than normal to avoid scalping uneven terrain.
When possible, it is best to use the cutting height that was used in the past. When cutting grass taller than six
inches, you may want to mow the lawn twice to achieve a better quality of cut.
•During normal mowing, cut only about 1/3 of the grass blade. Cutting more than that is not recommended
unless grass is sparse or it is the end of the mowing season.
•Alternate mowing pattern between cuts to keep the grass growing straight and better dispersion of the
clippings.
•Remember, grass grows at different rates at different time of the year. Mow more often in the early spring to
maintain the same cutting height. As the growth rate slows in mid summer, mow less frequently. If you cannot
mow at a regular interval, mow at a high cutting height at first, then mow again two days later at a lower cutting
height.
•Raise the cutting height of the mower if the cutting width of the mower is wider than the previous mower. This
ensures that uneven turf is not cut too short.
•Raise the cutting height of the mower if the grass if slightly taller than normal or if it contains a high degree of
moisture. Then mow it again with the cutting height set lower.
•If the machine’s forward motion must be stopped while mowing, a clump of grass clippings may drop onto
your lawn. To avoid this, move onto a previously cut area with the blades engaged.
•Charge the battery immediately.
16
English
EN

Model No. Battery capacity Action Battery capacity Action
CZ32S8X /
CZ36S8X 5% -10%
The unit will in low blade
mode. The maximum
drive speed will be 4
mph when the operator
stands on the platform,
and 2.25 mph when the
operator stands on the
ground.
<10%
The working blade will
stop automatically. The
unit should immediately
be returned to the bat-
tery charging area and
the unit connected to the
battery charger.
•Allow motors 30 minutes to cool down. If drive motor exceeds programmed temperature, the motor speed will
decrease. If temperature continues to increase, drive will shut down at a higher programmed temperature.
12 ELECTRICAL SYSTEM
12.1 ELECTRICAL SYSTEM SAFETY
• Remove the key fob, disconnect battery cables
(C+/C-) in battery box compartment and read
operator manual before adjusting or repairing unit.
• Always remove the key fob, and disconnect battery
cables (C+/C-) in battery box compartment before
working on this unit.
• Always disconnect battery cables (C+/C-) in battery
box compartment when transporting unit.
• Keep unit free of grass clippings, leaves and other
debris. DO NOT spray water to clean unit. Use only
compressed air. Wear adequate eye and hearing
protection when cleaning the unit.
• Always wear safety glasses and protective gear
near battery. Use insulated tools.
• Clean battery compartment, drive motor
compartment, mower deck, etc., of all dirt and
debris. Do not use solvents, hard cleaners or
abrasives.
• With the mower is ON, mower blade can engage
when deck blades ON/OFF switch (PTO) is
engaged, even if drive motor is not turning. Keep
area clear of bystanders when engaging deck
blades ON/OFF switch (PTO).
• Never allow flames, sparks or smoking near
batteries.
• Keep batteries out of reach of children.
• Always keep protective shields, covers and guards
in place and securely fastened. If they become
damaged, repair or replace immediately. Never
modify or remove safety devices.
12.2 ELECTRICAL SYSTEM
INFORMATION
The greenworkscommercial mower is powered by an
82-volt electrical system. It consists of the following
components:
1. Blade controller (1)
2. Blade motor (2)
3. Drive controller (2)
4. Accelerator - right (1)
5. Accelerator - left (1)
6. Digital display (1)
7. Wheel motor with PGR (Planetary Gear Reduction)
(2)
8. Battery pack (1)
9. PBS switch (Push button start switch) (1)
10. PTO switch (Deck blades ON/OFF switch) (1)
11. Lower headlight (1)
12. Sidelight - right (1)
13. Sidelight - left (1)
14. Upper headlight (1)
15. USB (1)
12.3 BATTERY AND CHARGER
WARNING
Maintenance for the various electrical components
found on the greenworkscommercial Mower should
only be performed by a greenworkscommercial Mower
trained technician.
WARNING
When battery voltage becomes low, the mower blades
will stop, although the drive motors will continue to
run, enabling driver to continue to drive unit. When
the batteries discharge to this point, they require
recharging. The unit should immediately be returned
to the battery charging area and the unit connected to
the battery charger.
WARNING
Do not attempt to cross roads or railways with low
battery levels.
12.3.1 BATTERY CHARGING PORT
The battery charging port is located on the back housing
of the machine. Press the release button (1) to open the
port cover (2) to charge.
17
English EN

2
1
CAUTION
Use only with greenworkscommercial chargers: .
12.3.2 CHARGING RECOMMENDATIONS
WARNING
Do Not Use An Extension Cord To Charge Mower!
If an extension cord must be used, it must have a
minimum of 10 AWG wires and be of the shortest
length possible (10-25 ft long). Never leave any cords
coiled as excessive heart can build up and melt
insulation of extension cord wires.
WARNING
Do not smoke while servicing the batteries.
WARNING
Always wear safety glasses and protective clothing
near battery. Use insulated tools.
CAUTION
Charging recommendations
• Battery packs do not develop a memory and need
not be fully discharged before recharging.
• Batteries left uncharged will slowly discharge.
Before initial use each spring season, be sure
batteries have a full charge before mowing.
• If charger is not left plugged in, the batteries
should be fully charged every 30 days to maintain
battery life. Never allow charger to charge more
than 15 hours.
• When charging, be sure charger cooling fan inlet
and outlet are not blocked.
12.3.3 CHARGE THE BATTERY
WARNING
More details of charger are referred to in the charger
manual. Read and understand all its safety warnings
and instructions. Failure to follow them may result in
electrical shock, fire and/or serious injury.
1. Turn the ignition power switch to the “OFF” position.
2. Remove the key and make sure the machine comes
to a complete stop.
3. Remove the dust cap from the battery charging port
on the mower.
4. Plug the charger into the port.
5. Plug other end of charger into household GFCI
protected outlet.
WARNING
Always turn charger “OFF” before disconnecting
charger from mower. Disconnect charger cord from
wall outlet.
WARNING
Cover the battery charging port with the dust cap
before operation.
12.4 DIGITAL DISPLAY
The function of the digital display, located on the control
panel, is to provide electrical system information to the
operator. It gives detailed information in the form of
pattern, codes and number.
1245678
9
10
11
12
14
13
16
15
3
Energy use: very high
18
English
EN
This manual suits for next models
1
Table of contents
Other GreenWorks Commercial Lawn Mower manuals

GreenWorks Commercial
GreenWorks Commercial GM 210 User manual

GreenWorks Commercial
GreenWorks Commercial CZ60R24X User manual

GreenWorks Commercial
GreenWorks Commercial 2502007 User manual

GreenWorks Commercial
GreenWorks Commercial CZ52R User manual

GreenWorks Commercial
GreenWorks Commercial GMS 250 User manual

GreenWorks Commercial
GreenWorks Commercial Zero Turn Mower User manual

GreenWorks Commercial
GreenWorks Commercial GMS 210 User manual

GreenWorks Commercial
GreenWorks Commercial CZ48S User manual

GreenWorks Commercial
GreenWorks Commercial 82SP25M User manual

GreenWorks Commercial
GreenWorks Commercial 2528102 User manual