Ablowoutwhichseparates
thetyrefromtheweelrimcancauseserious
iniuryoreven
death.
Laseparazìone
fra
pneumatico
ecerchione,
causatadall'esplosione
del
pneumalico,puo
provocare
serie
ferite
o addirittura
lamorte.
Laséparationentre
le
pneu
et
Ia
jante,
déooulant
del'explosiondu
pneu,peut
causer
des
dommagesblessures
ou
lamorl.
DasPlatzeneinesReìfenshat dessen
Abspringen
von der Felgezur Folge,
und kann
schwere
odersogartódliche
Verletzungen
verursachen.
La separQción
entreel
'neumético
y la llanta
produc-ida
porla explosióndel neumàtico
puedeprovocargraves
heridas
eincluso
lamuerte.-
;&*g,xsgsi #l{îsa;txwffiiffi xsssi{l$g*it
3:ssi*{lxs$*fltffit3
H.ft il-t
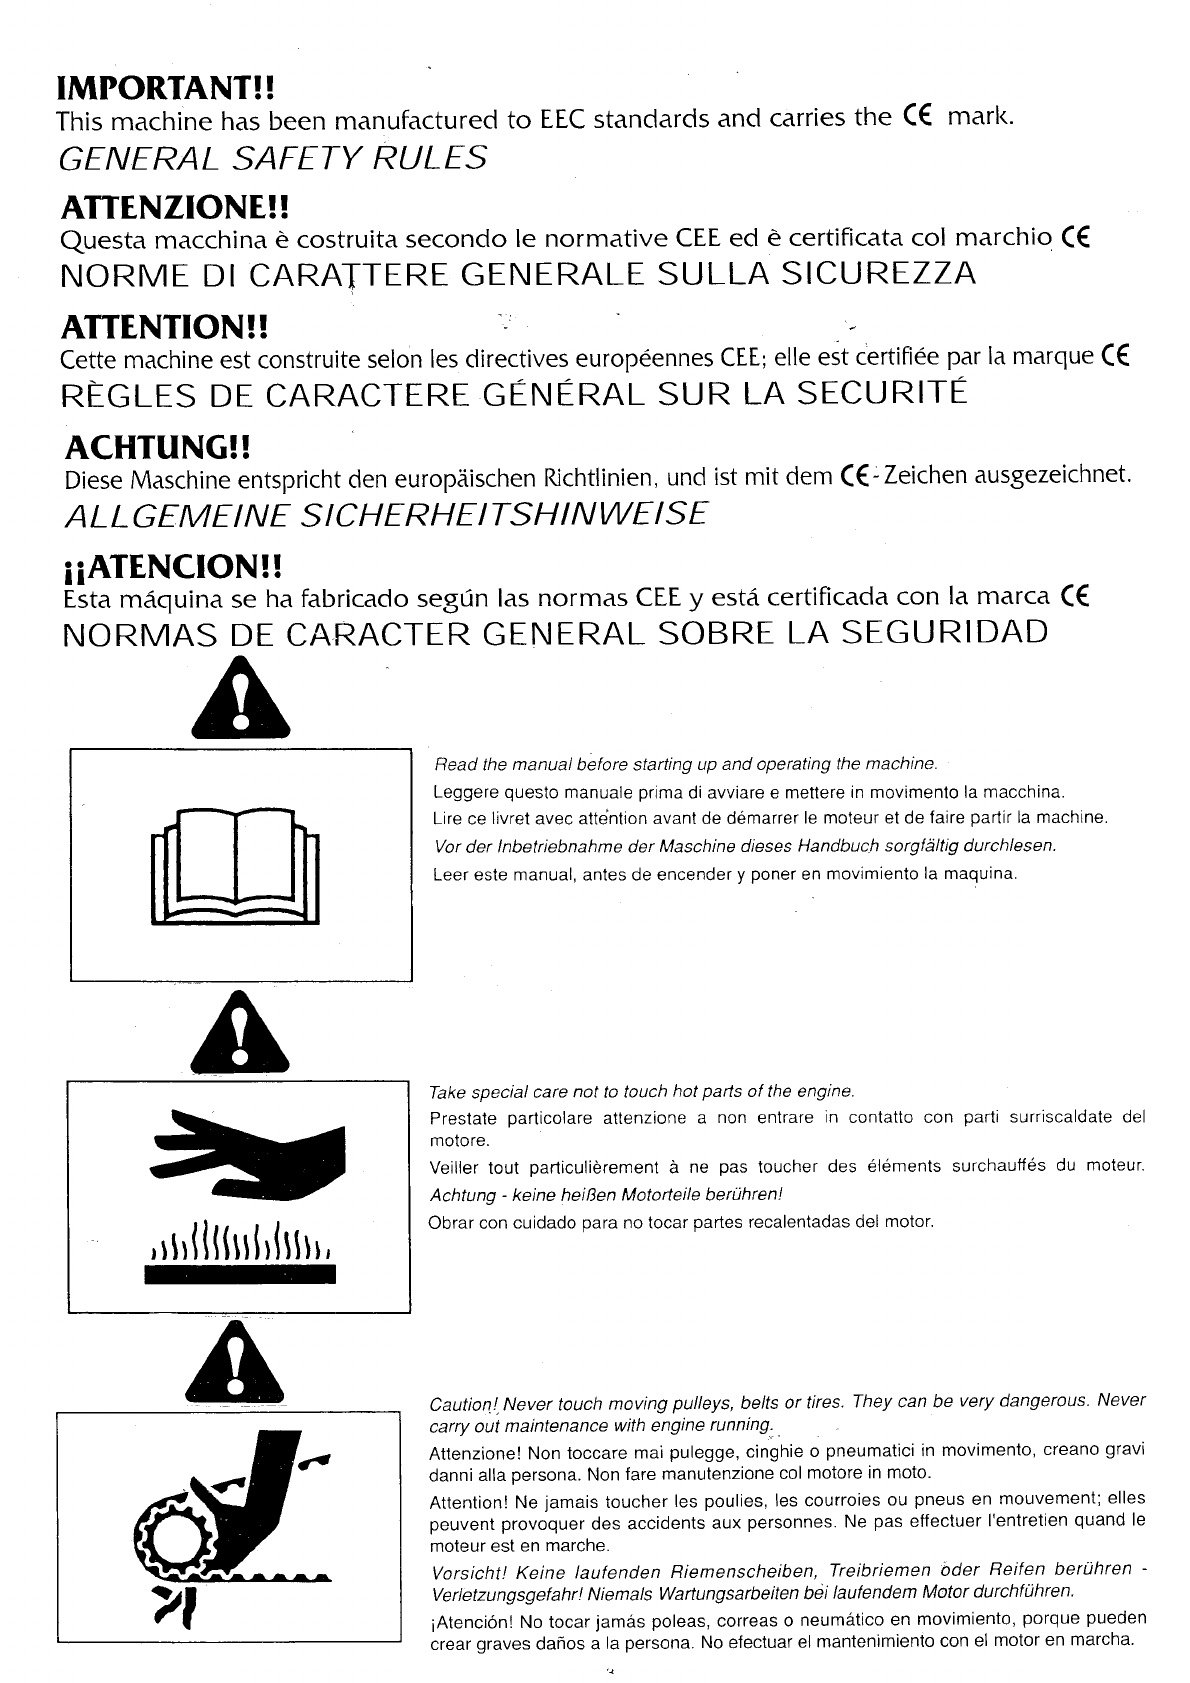
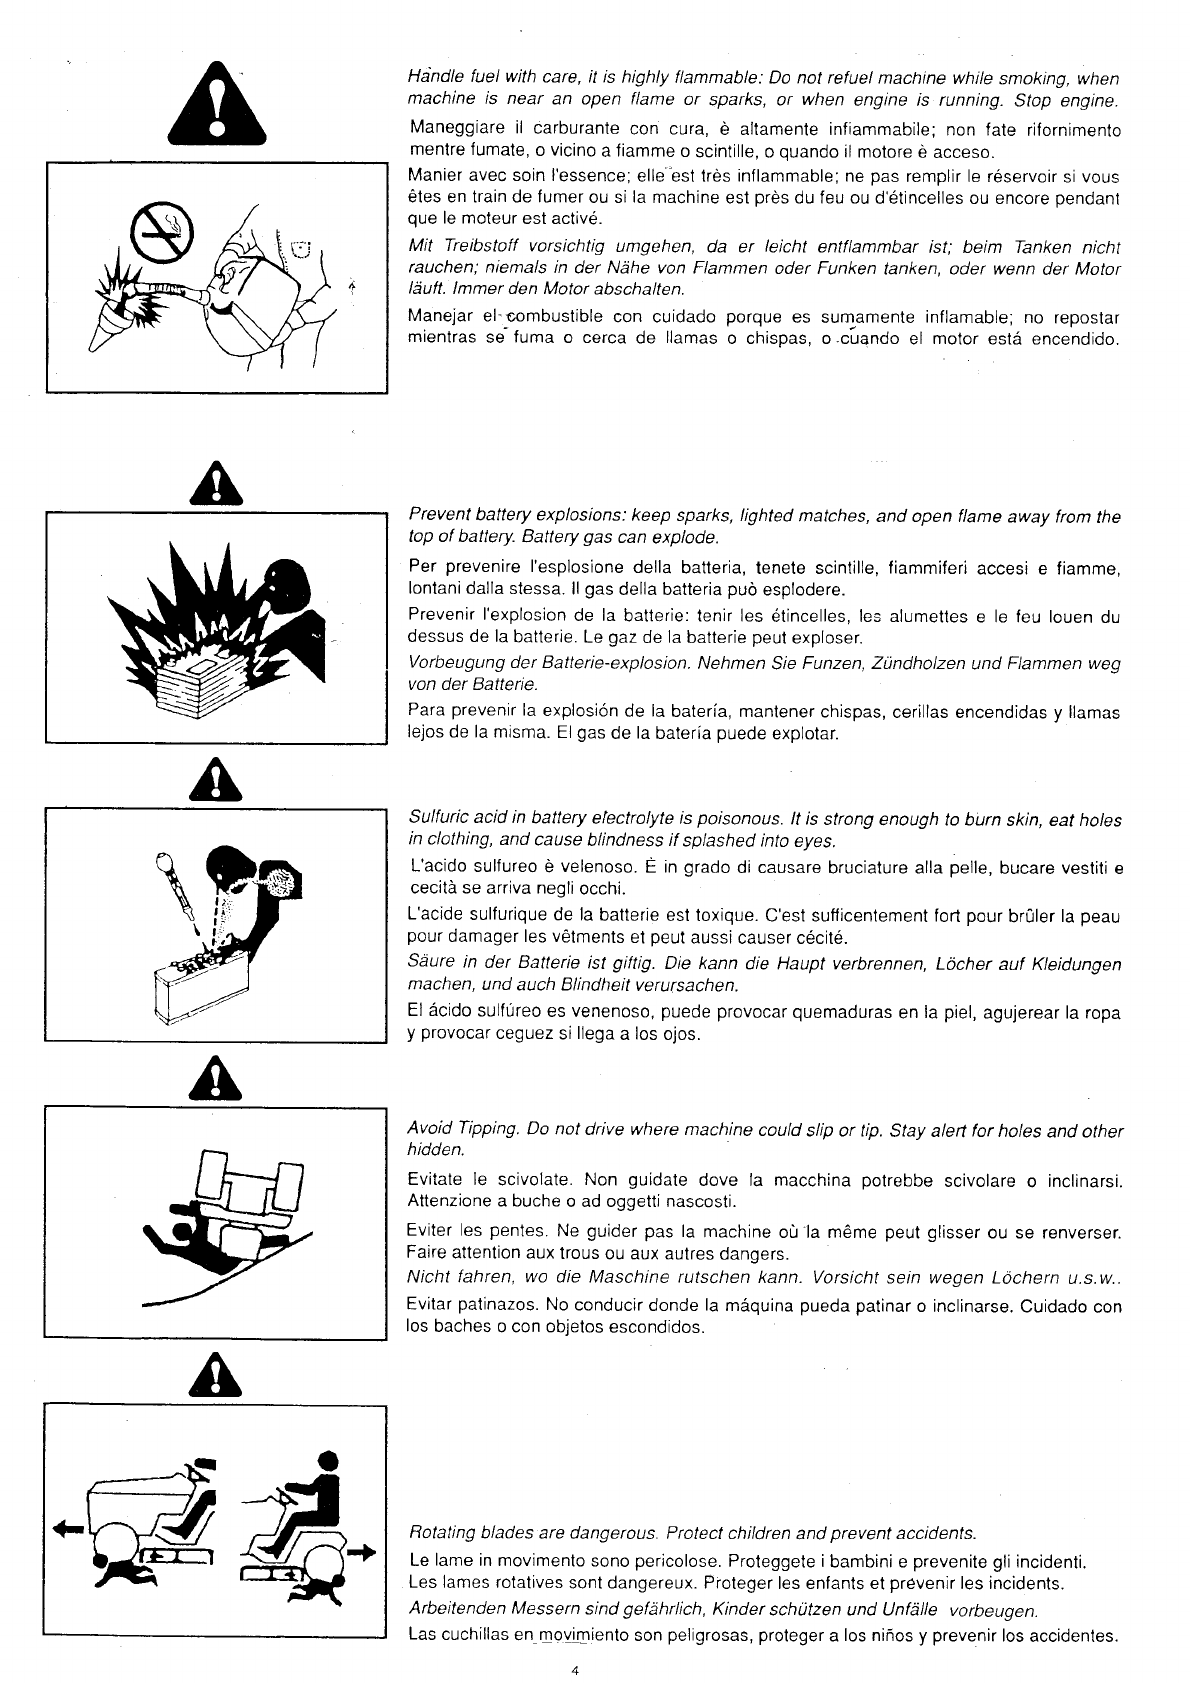
WARNINGI
SHARPPARTS.Keephandsandfeetawav.Donot
ooeratethemower
overoravel
or
foreign
bodieswhich
maybesuckedupandejectedbytheblades,
generaling
adànger
Keep
people
away.removethekeyandreadtheinstructionmanual
beforeattempting
tocarry
outanymaintenance
orrepairs
to
the
machine.
ATTENZI0NE!
ORGANOTAGLIENTE.Tenerelontanomanieoiedi.
Nonlavorare
colrasaerba
sopra
alla
ghiaia
o
corpiestranei
che
possono
essereaspiratiecentrifugatidallelamerisultando
molto
pericolosi,
tenerelontanole
persone.
Toglierelachiaveeleggereleistruzioni
prima
di
effettuare
qualsiasi
operazionedimanutenzione
eriparazione.
ATTENTI0N!
ORdANETRANCHANT.Eloignerlesmains
et
les
pieds.
Ne
pas
utitisertatondeuse
sur
le
gravier
ousurdescorps
quipeuvent
ètreaspirésetcentrifugés
par
leslames
etdevenir
trèsdangereux.
Les
personnes
doiventsetrouver
àunecertainedistance.Enleverlacléet
lirelesinstructions
avanttoute
opérationdemaintenanceetderéparation.
ACHTUNG!
SCHARFEKLINGEN.Hànde
und
Fússefernhalten.
Beim
Màhen
nichtùber
Schotrer,
Steineoder
andereFremdkórperfahren.dadiese
durchdieDrehbeweounoderMesser
angesaugt
undweggeschleudeitwerdenkónnen(Verletzungsgefahr).
Nichiin-derNàhevon
anderenPersonen
màhen.Vor
jedem
Wartungs-bzw.Reparatureingriff
denStartschlússel
abnehmenund
dieGebrauchsanleitungdurchlesen.
iPELIGRb!
ÓnenruO
CORTANTE.Mantenerlejoslos
piesylasmanos.Nolimpiarlaherramienta
c0nel
motorenmarcha,
lPeligro!
Expulsión
deobjetos:manleneralejadaslas
personas.
Atención:
quitar
lallave
y
leerlasinstrucciones
antesdeefectuarcualquieroperaciónde
mantenimiento
o
reoaración.
DANGER!
Machinerollover:
Donot
usethismachineon
slopes
greater
then13,5'
(24%).
PERIC0L0!Riballamento
della
macchina:
Non
usare
questa
macchinasu
pendii
superiorìai13,5"
(24%).
DANGER!
Renversemenlde
la
machine:
Ne
pas
utilisercettemachinesurdes
pentes
supérieuresà
13,5'
(24"/").
GEFAHR!UmstiirzenderMaschine:
Die
Maschine
nicht
an
Hàngenmit
einer
Neigung
ùber13,5"
(24%)
einsetzen.
;PELIGR0!
Volcado
de
laméquina:
Noutilizar
esta
méquina
en
pendientes
superioresa13,5"
(24"k).
t*riiÉil*tllN&èWit;.A:y:îitt!tJ*i.-9tÈ!lAèrt#;ìg;t;lttliwtpJ*#**f;ú? àt:: .t:p:|.taì4:+:5A.-4
FÍTTIl\ !
tf{= il
f