manuals.online logo
Brands
  1. Home
  2. •
  3. Brands
  4. •
  5. Grundig
  6. •
  7. Security Camera
  8. •
  9. Grundig GCI-K1555Z User manual

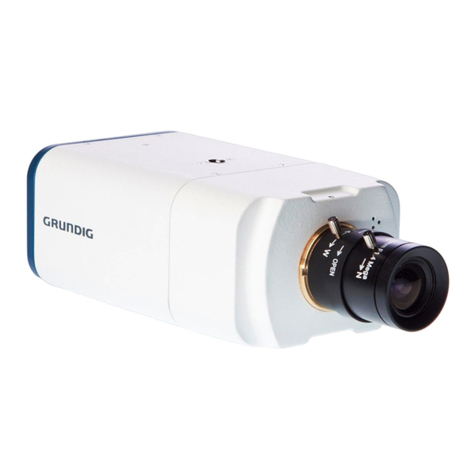
Grundig GCI-K1555Z User manual

GCI-K1555Z.124.1.12.08.2013
Owner's Manual
© ASP AG
IP Cameras
GCI-K1555Z 2 Megapixel Full HD 18x Zoom Box IP Camera ICR
Content:
1. Introduction 2
2. Important Safety Instructions 2
3. Package Contents 2
4. Installation 2
1. Camera Overview 3
2. System Requirements 3
4. Power Connection 4
5. Ethernet Cable Connection 4
6. Alarm Application 4
5. Accessing the Camera 4
6. Video Resolution Setup 9
7. Browser-based Viewer Introduction 9
8. Home Page 10
9. System Related Settings 13
1. Host Name & System Time Setting 13
2. Security 14
3. Network 24
4. DDNS 31
5. Mail 32
6. FTP 33
7. HTTP 34
8. Application (Alarm Settings) 35
9. Motion Detection 40
10. Network Failure Detection 44
11. Periodical Event 46
12. Tampering 48
13. Storage Management (on Camera) 50
14. Recording (on Camera) 53
15. Schedule 54
16. File Location (on PC) 55
17. View Information 56
18. Factory Default 57
19. Software Version 58
20. Software Upgrade 59
21. Maintenance 60
10. Streaming Settings 61
1. Video Format 61
2. Video Compression 63
3. Video ROI 64
4. Video OCX Protocol 65
5. Video Frame Rate 66
6. Video Mask 67
7. Audio (Audio and Bit Rate Settings) 68
11. Camera Settings 69
1. Exposure Setting 69
2. White Balance Setting 70
3. Picture Adjustment 71
4. Backlight Setting 72
5. Digital Zoom Setting 72
6. IR Function 72
7. WDR Function 72
8. Noise Reduction 72
9. TV System Setup 73
12. Pan/Tilt 73
1. Preset 74
2. Sequence 75
3. Pan/Tilt Control 76
13. Logout 77
14. CMS Software Introduction 77
15. Internet Security Settings 78
16. GRUNDIG Viewer Download Procedure 81
17. Install UPnP Components 83
18. Deleting the Existing GRUNDIG Viewer 85
1
English
1. Introduction
The 18x Zoom AF IP Camera integrates a superior CMOS sensor with 18x auto-focus zoom lens. This IP Camera
offers strengthened support for surveillance application that demands consistent precision zoom control while
high resolution and superior video quality are requisite.
2. Important Safety Instructions
Be sure to use only the standard adapter that is specified in the specification sheet. Using any other adapter
could cause fire, electrical shock, or damage to the product. Incorrectly connecting the power supply may cause
explosion, fire, electric shock, or damage to the product. Do not connect multiple products to one single adapter.
Exceeding the capacity may cause abnormal heat generation or fire.
Do not place conductive objects (e.g. screwdrivers, coins or any metal items) or containers filled with water on
top of the product. Doing so may cause personal injury due to fire, electric shock, or falling objects.
If any unusual smells or smoke comes out of the unit, stop using the product. In this case, immediately
disconnect the power source and contact the service center. Continued use in such a condition may cause fire or
electric shock.
If this product fails to operate normally, contact the nearest service center. Never disassemble or modify this
product in any way. (GRUNDIG is not liable for problems caused by unauthorised modifications or attempted
repair.)
To prevent fire or electric shock, do not expose the inside of this device to rain or moisture.
3. Package Contents
These parts are included:
4. Installation
Do not install the product in a location subject to high temperature (over 50°C), low temperature (below -10°C),
or high humidity. Doing so may cause fire or electric shock. Keep out of direct sunlight and heat radiation
sources. This may cause fire. Avoid aiming the camera directly towards extremely bright objects such as the sun,
as this may damage the image sensor.
Do not install the unit in humid, dusty or sooty locations. Doing so may cause fire or electric shock. Install it in a
place with good ventilation.
When installing the unit, fasten it securely and firmly. A falling unit may cause personal injury.
If you want to relocate the already installed product, be sure to turn the power off and then move or reinstall it.
2
English
4.1. Camera Overview
4.2. System Requirements
To perform the IP Camera via web browser, please ensure your PC is in good network connection, and meets the
system requirements as described below.
Personal Computer :
1.) Intel Pentium M, 2.16 GHz or Intel Core 2 Duo, 2.0 GHz
2.) 2 GB RAM or more
Operating System :
Windows XP / Windows VISTA / Windows 7
Web Browser :
Microsoft Internet Explorer 6.0 or later
Firefox
Chrome
Safari
Network Card :
10Base-T (10 Mbps) or 100Base-TX (100 Mbps) operation
Viewer :
ActiveX control plug-in for Microsoft IE
3
English
4.4. Power Connection
To power up the IP Camera, please plug the camera’s DC 12V cable into the power outlet. Alternatively, connect
the Ethernet cable to the camera’s PoE port and plug the other end of the cable into a PoE switch. If you use PoE,
make sure the Power Sourcing Equipment (PSE) is in use in the network.
4.5. Ethernet Cable Connection
Use of Category 5 Ethernet cable is recommended for network connection. To have the best transmission quality,
the cable length shall not exceed 100 meters. Connect one end of the Ethernet cable to the RJ45 connector of the
IP Camera, and the other end of the cable to the network switch or PC.
NOTE: In some cases, you may need to use an Ethernet crossover cable when connecting the IP Camera directly
to the PC.
Check the status of the link indicator and the activity indicator LEDs. If the LEDs are unlit, please check the LAN
connection.
Green Link Light indicates good network connection.
Orange Activity Light flashes for network activity indication.
4.6. Alarm Application
The camera is equipped with one alarm input and one relay output for alarm application. Please refer to the
alarm pin definition below for the connection of alarm devices to the IP Camera if needed.
Alarm Pin Definition :
PIN 1: Output+
PIN 2: Output-
PIN 3: Input+
PIN 4: Input-
PIN 5: GND
PIN 6: D-
PIN 7: D+
5. Accessing the Camera
For initial access to the IP Camera, users can search the camera through the installer program: GRUNDIG
Finder.exe, which can be found on the supplied CD.
GRUNDIG Finder Software Setup :
Step 1: Double-click on the program GRUNDIG Finder.exe (see the desktop icon below). Its window will appear as
shown below. Then click on the “Find Device” button.
4
English
Step 2: The security alert window will pop up. Click “Unblock” to continue.
Device Search :
Step 3: Click “Find Device” again, afterwards all IP devices found will be listed on the page, as shown in the
picture below. The IP Camera’s default IP address is: 192.168.1.1.
5
English
Step 4: Double-click or right-click and select “Browse” to access the camera directly via the web browser.
Step 5: Then the dialogue box for entering the default user name and password (as shown below) will appear
for login to the IP Dome Camera.
The default login ID and password for the Administrator are:
Login ID: admin
Password: 1234
NOTE: ID and password are case sensitive.
It is strongly advised to alter the administrator’s password due to security concerns. Please refer to section 9.2.
Security for further details.
Additionally, users can change the IP Camera’s network property, either to DHCP or Static IP, directly in the
device finding list. Please refer to the following section for changing the IP Camera’s network property.
Example of changing the network property of the IP Camera :
Users can directly change an IP Camera’s network property, e.g. from static IP to DHCP, in the finding device list.
The procedure to change the IP Camera’s network property is explained below:
6
English
Step 1: In the finding device list, click on the IP Camera of which you would like to change the network property.
Right-click on the selected item, and select “Network Setup”. Meanwhile, record the IP Camera’s MAC address
for future identification.
Step 2: The “Network Setup” page will come out. Select “DHCP,” and click on the “Apply” button at the bottom
of the page.
Step 3: Click on “OK” in the Note of setting the change. Wait for one minute to search again for the IP Camera.
Step 4: Click on the “Find Device” button to search all the devices. Then select the IP Camera with the correct
MAC address. After double-clicking on the IP Camera, the login window will appear.
7
English
Step 5: Enter User name and Password to access the IP Camera.
Installing the GRUNDIG Viewer Software Online :
For initial access to the IP Camera, a client program, GRUNDIG Viewer, will be automatically installed to your PC
when connecting to the IP Camera.
If the Web browser does not allow the GRUNDIG Viewer installation, please check the Internet security settings
or ActiveX controls and plug-ins settings (see 15. Internet Security Settings) to continue the process.
The Information Bar (just below the URL bar) may come out and ask for permission to install the ActiveX Control
for displaying video in browser (see the picture below). Right-click on the Information Bar and select “Install
ActiveX Control…” to allow the installation.
Then the security warning window will pop up. Click “Install” to carry on with the software installation.
Click on “Finish” to close the GRUNDIG Viewer window when download is finished. For the detailed software
download procedure, please refer to chapter 16. GRUNDIG Viewer Download Procedure.
NOTE: If the Live Video Pane on the Home Page cannot be shown to the users who have installed the GRUNDIG
Viewer on the PC previously, please refer to the procedure in chapter 18. Deleting the Existing GRUNDIG Viewer.
Once logged in to the IP Camera, users will see the Home page as shown below:
Administrator/User Privileges :
“Administrator” represents the person who can configure the IP Camera and who authorises users to have
access to the camera; “User” refers to someone who has access to the camera with limited authority, i.e. to
enter the Home and Camera setting pages.
8
English
Image and Focus Adjustment :
Adjust zoom and focus of the lens as necessary to produce a clear image. To set the correct angle of view and
focus, you can use the BNC output on the camera. For this, please connect a PAL monitor to the BNC output.
6. Video Resolution Setup
Users can set up the Video Resolution on the Video Format page of the user-friendly browser-based
configuration interface. The page “Video Format” can be found in the IP camera menu under the path:
Streaming > Video Format.
Under the Video Resolution section in the menu page “Video Format”, please select your preferred resolution
setting.
7. Browser-based Viewer Introduction
The picture below shows the Home page of the IP Camera’s viewer window.
There are five tabs on the left (System, Streaming, Camera, Pan/Tilt and Logout) and one tab on the right
(Languages).
System setting :
The administrator can set host name, system time, admin password, network related settings, etc. Further
details will be interpreted in chapter 9. System Related Settings.
Streaming setting :
The Administrator can configure a specific video resolution, video compression mode, video protocol, audio
transmission mode, etc. in this page. Further details will be interpreted in chapter 10. Streaming Settings.
Camera setting :
Users can adjust various camera parameters. Further details will be interpreted in chapter 11. Camera Settings.
Pan/Tilt :
Here you find the settings for the Pan/Tilt function.
9
English
Logout :
Click on this tab to re-login to the IP Camera with another user name and password. Further details will be
interpreted in chapter 13. Logout.
Languages :
Please choose one of the supported languages (German, English, French, Italian or Russian).
8. Home Page
In the Home page, there are several function buttons that are specified below.
Display Mode (Screen Size Adjustment) :
The display size of the image can be adjusted to x1/2 and full screen.
Talk Button (on/off) :
Talk function allows the local site to talk to the remote site. Click on this button to switch it on/off. Please refer to
section 9.2. Security: User >> Add user >> Talk/Listen for further details. This function is only open to the “User”
who has been granted this privilege by the Administrator.
Please note that additional equipment will be necessary.
Speaker Button (on/off) :
Click on the Speaker button to mute/activate the audio.
Snapshot Button :
After clicking this button, the JPEG snapshots will be automatically saved in the appointed place. The default
place of saving snapshots is: C:\. For changing the storage location, please refer to section 9.16. 'File Location
(on PC)' for further details.
10
English
NOTE: Users with the Windows 7 operating system on their PC need to follow the following procedure to be able
to use the Snapshot function. First you need to log on to your computer as an Administrator. Then please go to
Windows Start menu, click with the right mouse button on your Internet Browser and select in the appearing pop-
up window “Run as Administrator”. Afterwards you can log in to your camera as usual (as an administrator or
user).
Video Streaming Pause/Restart Button (pause/restart) :
If you click on the stop button to disable video streaming, the live video will be displayed as black. Click on the
restart button to show the live video again.
Recording Button (on/off) :
When you click on this button, the recordings from the Live View will be saved to the location specified in the “File
Location” page. The default storage location for the recordings is: C:/. See section 9.16. 'File Location (on PC)'
for further details.
NOTE: Users with the Windows 7 operating system on their PC who want to use the Recording function, need to
follow the procedure in the NOTE below the “Snapshot button” section in this chapter.
Multiple Languages Support :
Multiple languages are supported for the viewer window interface.
NOTE: The following functions are not available for the Browsers Firefox, Chrome, Safari and Opera: Full Screen
Mode, Audio talk/listen, Snapshot, Playback and Recording.
The following functions are additional in the camera model GCI-K1555Z with RS-485 Interface:
Pan/Tilt :
Here you find the settings for the Pan/Tilt function.
Pan/Tilt Control, Optical/Digital Zoom, Zoom Adjustment, Focus Adjustment and Iris Adjustment are only
available if Pan/Tilt Equipment is connected to the cameras. In the following you find details about these
functions.
Pan/Tilt Control :
Users can implement the pan/tilt control by first moving the cursor to the live video pane. Then click with the left
mouse button, hold the click and drag the pointer in any direction.
NOTE: You can access the Pan/Tilt Control only after you selected "On" under Pan/Tilt > Pan/Tilt control.
11
English
Optical/Digital Zoom Control :
In Normal View display mode, users can implement zoom in/out by clicking in the zoom setting bar and adjusting
the zoom manually or by clicking on the "Wide" / "Tele" buttons. In Full Screen mode, users can rotate the
mouse wheel to zoom in/out on the image. When the camera reaches the limit of its optical range, it will
automatically switch to digital zoom.
Zoom Adjustment :
Click on the buttons "Wide"/ "Tele" to control zoom in/out.
Focus Adjustment :
Users can adjust the focus manually via the "Near" and "Far" buttons.
- Push AF:
The one-push AF function is for fixing the focus on the target using Auto Focus (AF). After one click on the button,
AF will be implemented.
AF Mode:
- Manual (Manual Focus):
After clicking on the “Manual” button, users can adjust the focus manually via the “Near” and “Far” buttons. The
status will also be displayed above the screen as shown below.
- Cont. (Continuous AF):
Click on the “Cont.” button to enable AF mode. In this mode, the camera will keep in focus automatically and
continuously regardless of zoom changes or any other view changes. The Focus status will also be displayed
above the live video pane as shown below.
- Zm Trig:
The Zoom Trigger function is for fixing the focus everytime the Zoom is adjusted.
12
English
9. System Related Settings
The picture below shows all categories under the “System” tab. Each category in the left column will be explained
in the following sections.
NOTE: The “System” configuration page is only accessible by the Administrator.
9.1. Host Name & System Time Setting
Click on the first category <System> in the left column; the page is shown below.
13
English
Host Name :
The name is for camera identification (max. 30 characters). If the alarm function (see section 9.8. 'Application
(Alarm Settings)') is enabled and is set to send an alarm message by Mail/FTP, the host name entered here will
be displayed in the alarm message.
Time Zone :
Select the time zone you are in from the drop-down menu.
Enable Daylight Saving Time :
To enable DST, please check the item and then specify the time offset and DST duration. The format for time
offset is [hh:mm:ss]; for instance, if the amount of time offset is one hour, please enter “01:00:00” into the field.
Time format:
Choose a time format (yyyy/mm/dd or dd/mm/yyyy) from the drop-down menu.
The time format for “PC date” and “Date” under <Sync with Computer Time> and <Manual> will be changed
according to the selected format.
Sync with Computer Time :
After selecting this item, the video date and time display will be synchronised with the PC.
Manual :
The Administrator can set the date, time and day manually. Entry format should be identical with the format
shown next to the enter fields.
Sync with NTP server :
Network Time Protocol (NTP) is an alternative way to synchronise your camera’s clock with a NTP server. Please
specify the server you wish to synchronise the camera with in the enter field. Then select an update interval from
the drop-down menu. For further information about NTP, please see the web site: www.ntp.org.
NOTE: Click on < Save > to confirm the new setting.
9.2. Security
When you click on the category <Security>, there will be a drop-down menu with several tabs including <User>,
<HTTPS>, <IP Filter>, and <IEEE 802.1X>.
14
English
<User> :
When you click on the <User> tab under the category <Security>, the <User> page will be shown as in the picture
below.
NOTE: The following characters are valid: A-Z, a-z, 0-9, !#$%&’-.@^_~.
Admin Password :
Change the administrator’s password by putting in the new password in the “Admin password” and “Confirm
password” text boxes. The input characters/numbers will be displayed as dots for security purposes. After
clicking <Save>, the web browser will ask the Administrator for the new password for access. The maximum
length of the password is 14 digits.
Add User :
Type in the new user name and password and click <Add> to add the new user. The user name can have up to 16
characters, the password up to 14 characters. The new user will be displayed in the user name list. A maximum
of 20 user accounts can be set. To each user the privileges “Camera control”, “Talk” and “Listen” can be assigned
.
- I/O access:
This item supports fundamental functions that enable users to view the video when accessing the camera.
- Camera control:
This item allows the specified User to change the camera's parameters on the Camera Setting page.
- Talk/Listen:
Talk and Listen functions allow the appointed user on the local site (PC site) to communicate, for instance, with
the administrator on the remote site.
15
English
Manage User :
To delete a user, pull down the user list, and select the user name you wish to delete. Then click <Delete> to
remove it.
To edit a user, pull down the user list and select a user name. Click <Edit> to edit the user’s password and
privileges.
NOTE: It is required to enter the User password and to select the functions that will be open to the user. When
finished, click <Save> to modify the account authority.
Streaming Authentication Setting :
The Network Camera provides two types of security settings for an HTTP transaction: basic and digest. Please
choose the one that meets your network security requirements.
- Disable: To inactivate the function.
- Basic: In this mode, the password is sent in plain text format and there can be potential risks of the password
being intercepted.
- Digest: User credentials are encrypted using an MD5 algorithm and thus provide better protection against
unauthorised accesses.
16
English
<HTTPS> :
<HTTPS> allows secure connections between the IP Camera and the web browser using the <Secure Socket
Layer (SSL)> or the <Transport Layer Security (TLS)>, which prevent others from snooping on your camera
settings or Username/Password. It is required to install a self-signed certificate or a CA-signed certificate for
implemention of <HTTPS>.
After clicking on the <HTTPS> tab, the HTTPS setting page will be shown as in the figure below.
To use HTTPS on the IP Camera, a HTTPS certificate must be installed. The HTTPS certificate can be obtained by
either creating and sending a certificate request to a Certificate Authority (CA) or creating a self-signed HTTPS
certificate, as described below.
17
English
Create self-signed certificate :
Before a CA-issued certificate is obtained, users can create and install a self-signed certificate first.
Click on the <Create> button under “Create self-signed certificate” and provide the requested information to
install a self-signed certificate for the IP Camera. Please refer to the last part of this section: "Provide the
Certificate Information" for more details.
NOTE: The self-signed certificate does not provide the same high level of security as when using a CA-issued
certificate.
18
English

Other Grundig Security Camera manuals

Grundig GD-CT-CP2837V User manual

Grundig

Grundig GD-CT-CP2837V User manual

Grundig GD-CI-CC2616V User manual

Grundig

Grundig GD-CI-CC2616V User manual

Grundig GD-CI-AP2627T User manual

Grundig

Grundig GD-CI-AP2627T User manual

Grundig GCI-N0503B User manual

Grundig

Grundig GCI-N0503B User manual

Grundig GD-CT-AC2126V User manual

Grundig

Grundig GD-CT-AC2126V User manual

Grundig GD-TI-BP1603T User manual

Grundig

Grundig GD-TI-BP1603T User manual

Grundig GU-CI Series User manual

Grundig

Grundig GU-CI Series User manual

Grundig GD-CI-AP6637T User manual

Grundig

Grundig GD-CI-AP6637T User manual

Grundig GD-CI-BC2615M User manual

Grundig

Grundig GD-CI-BC2615M User manual

Grundig GCA-B3323V User manual

Grundig

Grundig GCA-B3323V User manual

Grundig GCI-K0512W User manual

Grundig

Grundig GCI-K0512W User manual

Grundig GD-CI-AP2605B User manual

Grundig

Grundig GD-CI-AP2605B User manual

Grundig GD-CI-AT4747P User manual

Grundig

Grundig GD-CI-AT4747P User manual

Grundig GD-CI-BP8637T User manual

Grundig

Grundig GD-CI-BP8637T User manual

Grundig GCI-K1523V User manual

Grundig

Grundig GCI-K1523V User manual

Grundig GD-TI-AP4507T User manual

Grundig

Grundig GD-TI-AP4507T User manual

Grundig GCI-K1505B User manual

Grundig

Grundig GCI-K1505B User manual

Grundig GD-CI-BC2626T User manual

Grundig

Grundig GD-CI-BC2626T User manual

Grundig GD-CI-DT4637T User manual

Grundig

Grundig GD-CI-DT4637T User manual

Grundig GD-CI-AC4637P User manual

Grundig

Grundig GD-CI-AC4637P User manual

Grundig GCH-K0323D User manual

Grundig

Grundig GCH-K0323D User manual

Grundig GD-CI-AT2505B User manual

Grundig

Grundig GD-CI-AT2505B User manual

Grundig GCA-B1005B User manual

Grundig

Grundig GCA-B1005B User manual

Grundig GCA-B1322D User manual

Grundig

Grundig GCA-B1322D User manual

Popular Security Camera manuals by other brands

Santec VTC-375IRHG Quick installation guide

Santec

Santec VTC-375IRHG Quick installation guide

Mobotix Mx-SD1A-230-LL Quick installation

Mobotix

Mobotix Mx-SD1A-230-LL Quick installation

D-Link DCS-2310L Quick installation guide

D-Link

D-Link DCS-2310L Quick installation guide

Panasonic BB-HCM381A - Network Camera Service manual

Panasonic

Panasonic BB-HCM381A - Network Camera Service manual

AWS MotionCam System installation manual

AWS

AWS MotionCam System installation manual

Weldex WDN-1003XP Operation manual

Weldex

Weldex WDN-1003XP Operation manual

Optiview 27X Varifocal Zoom Module Camera CM27X Specifications

Optiview

Optiview 27X Varifocal Zoom Module Camera CM27X Specifications

Digisol DG-SC7100P-10 user manual

Digisol

Digisol DG-SC7100P-10 user manual

Concept Pro AIR8010-AHD-Z user manual

Concept Pro

Concept Pro AIR8010-AHD-Z user manual

Vitek VTC-IRT40-2812 manual

Vitek

Vitek VTC-IRT40-2812 manual

Sony BRC-300 Brochure & specs

Sony

Sony BRC-300 Brochure & specs

Hanwha Vision PNM-C16013RVQ quick start guide

Hanwha Vision

Hanwha Vision PNM-C16013RVQ quick start guide

Reolink RLC-1010A/B4K11 Operational Instruction

Reolink

Reolink RLC-1010A/B4K11 Operational Instruction

Panasonic WVCL920 - COLOR CAMERA operating instructions

Panasonic

Panasonic WVCL920 - COLOR CAMERA operating instructions

DW DWC-MV95WiATW user manual

DW

DW DWC-MV95WiATW user manual

Vivotek IP8336W Technical specifications

Vivotek

Vivotek IP8336W Technical specifications

GeoVision GV-EBDP5800 user manual

GeoVision

GeoVision GV-EBDP5800 user manual

Lorex LKE353A SERIES quick start guide

Lorex

Lorex LKE353A SERIES quick start guide

manuals.online logo
manuals.online logoBrands
  • About & Mission
  • Contact us
  • Privacy Policy
  • Terms and Conditions

Copyright 2025 Manuals.Online. All Rights Reserved.