ESPECIFICACIONES TÉCNICAS TECHNISCHE DATEN
SUPPLIED MATERIAL MATERIAL SUMINISTRADO
Palo Alto
Design by Xuclà
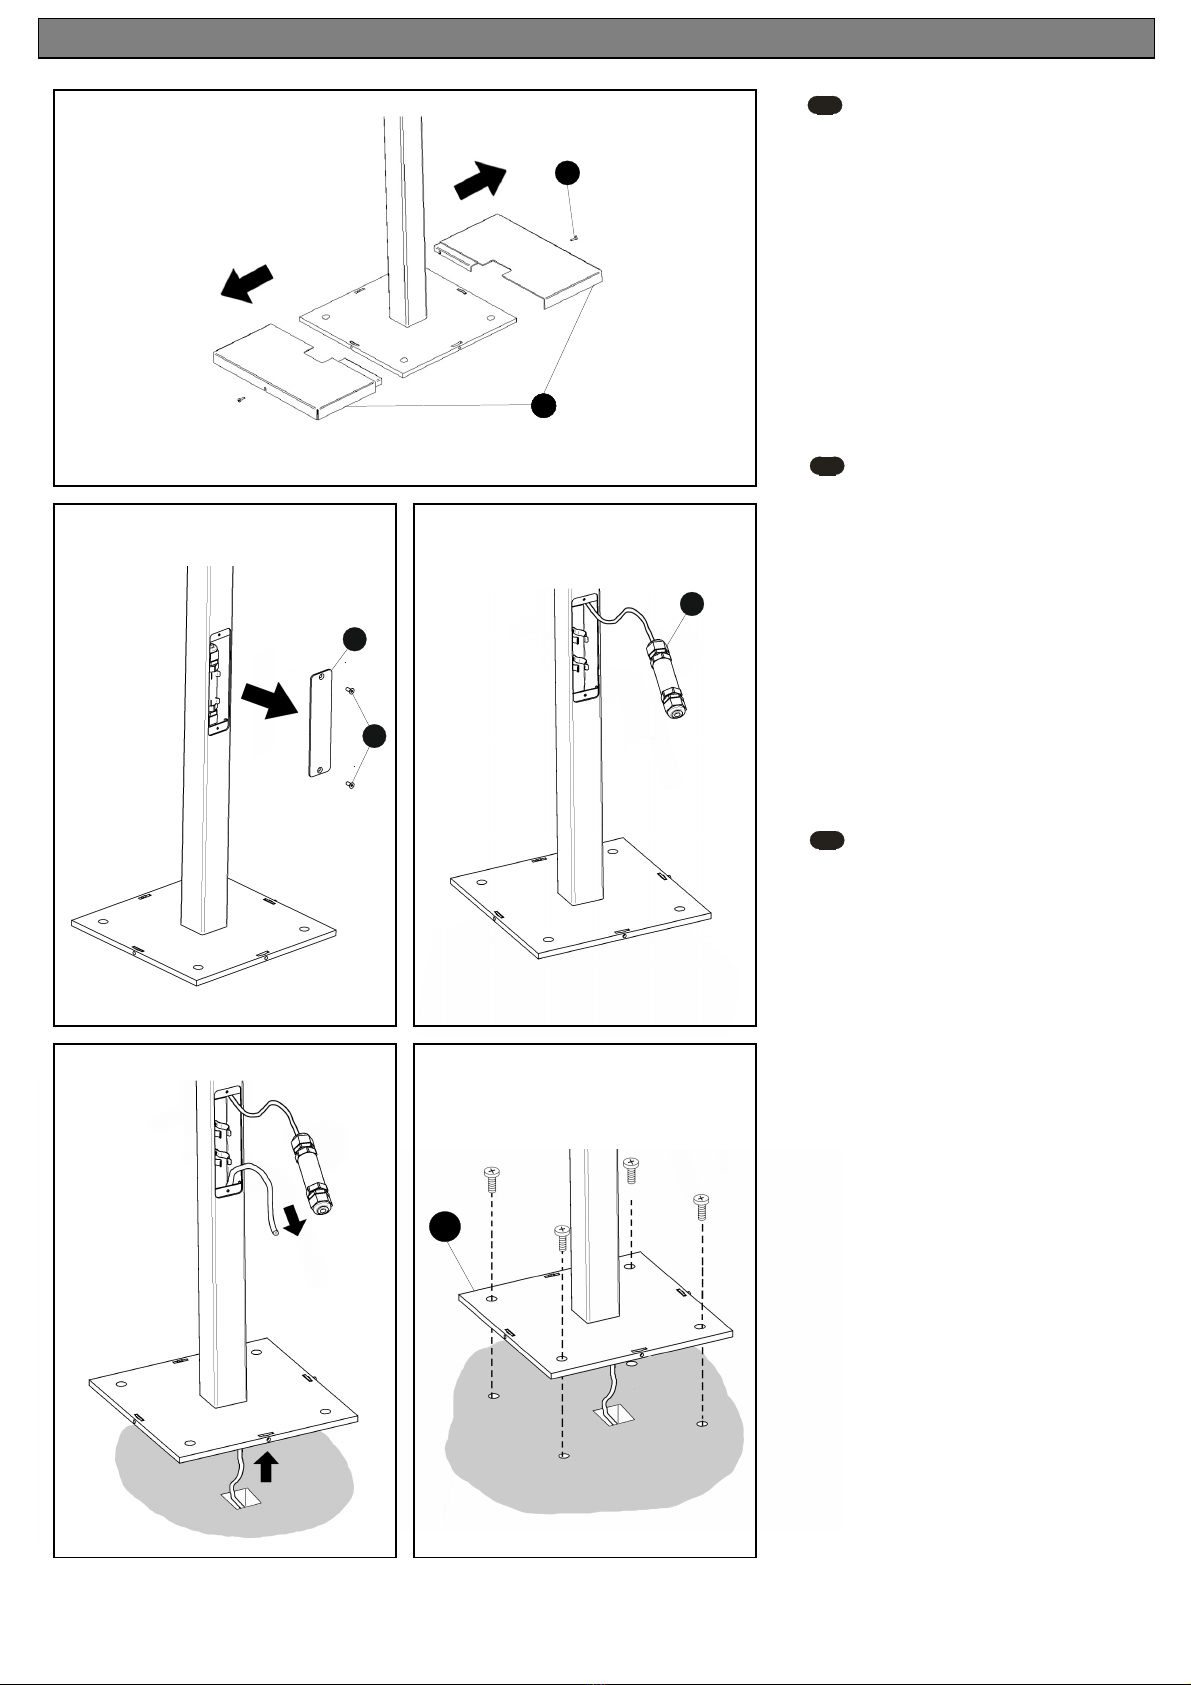
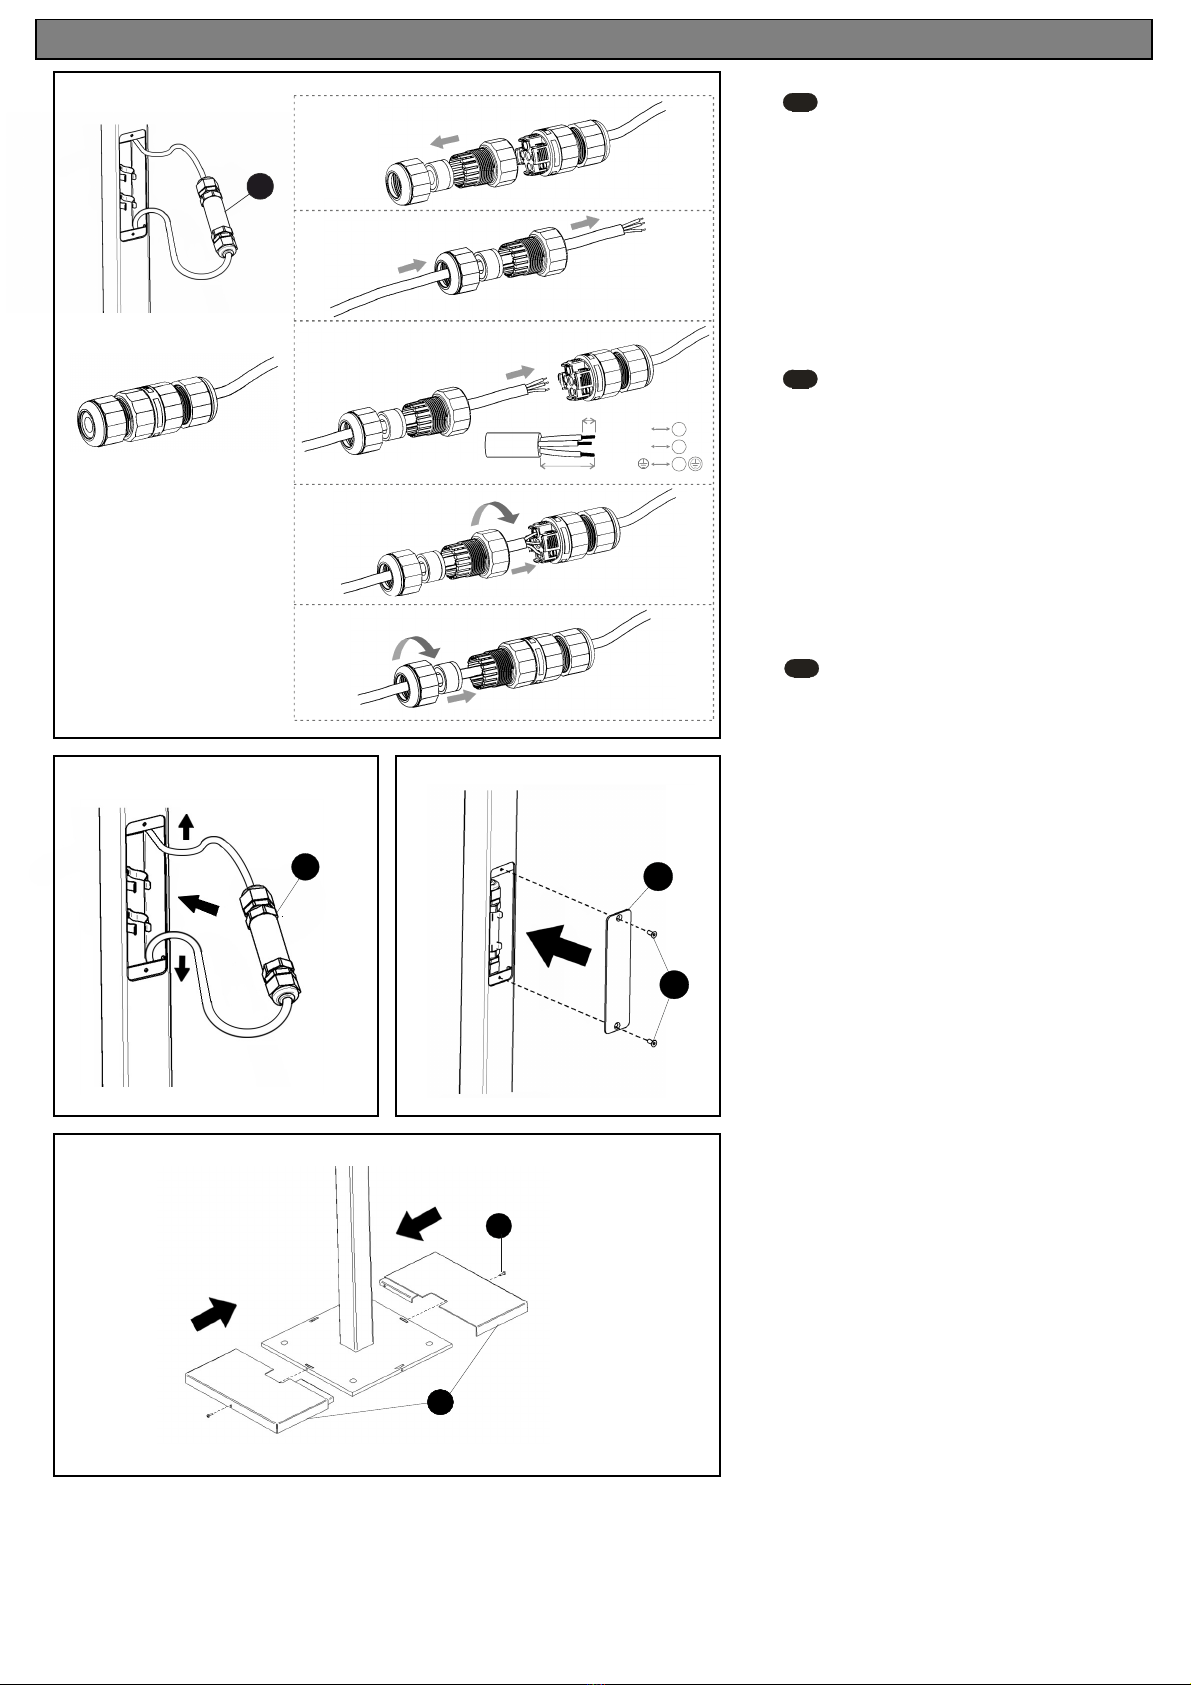
ASSEMBLY INSTRUCTIONS
INSTRUCCIONES DE MONTAJE
MONTAGEANELITUNG
Before assembling and installing this product, carefully
read the following:
Antes de proceder al monta e e instalación de esta
luminaria, leer detenidamente las siguientes
consideraciones.
Bevor Sie mit der Montage dieser Leuchte beginnen,
sollten Sie die folgenden Hinweise in aller Ruhe lesen und
berücksichtigen.
-Switch of the ains before installing the la p. -Desconectar el su inistro eléctrico antes de proceder a la
instalación de la lu inaria.
- Schalten Sie vor de elektrischen Anschluss den Stro ab.
-If you wish to fix the la p to the ground, choose the ost
adequate plugs and screws depending on the surface.
-Si se desea fijar la lu inaria al suelo elegir los ele entos de
fijación as adecuados en función del soporte de instalación.
-Sollten Sie die Leuchte fix auf de Boden befestigen wollen,
wählen Sie für die vorgesehene Vorrichtung das dafür
geeigneste Begestigungs aterial.
-Before the installation, ake sure the installation surface will
not be da aged. If this happens, it will be the installator´s
responsibility.
-Asegurarse antes de realizar esta operación que no se
producirán daños irreparables en el soporte de instalación. En
caso contrario la responsabilidad será del instalador.
-Vergewissern Sie sich vor diese Prozess, dass die
Vorrichtung hierduch nicht dauerhaft beschädigt wird. I
entgegengesetzten Falle wäre der Installateur hierfür
verantwortlich.
-If the steel cable or the power cord of this la p is da aged, it
ust be replaced only by the anufacturer or their technical
service or by a person capacitated to this effect to avoid any
risk.
-Si el cable flexible o cordón de esta lu inaria está dañado,
deberá sustituirse exclusiva ente por el fabricante o su
servicio técnico, o por una persona con cualificación
equivalente con objeto de evitar cualquier riesgo
- Wenn das Kabel dieser Leuchte beschädigt werden sollte,
uss es ausgetauscht werden. Dies darf ausschliesslich nur
durch den Fabrikanten, seine Kundendienst oder einer
hierfür qualifizierten Person geschehen, u jegliche Gefahr
ausschliessen zu können.
-We reco end reading the anual before installaing the
la p. Keep this instructions for future reference.
-Reco enda os leer el anual antes de iniciar la instalación
de la lu inaria. Guardar estas instrucciones para futuras
consultas.
-Wir e pfehlen vor Montagebeginn die Anleitung zu lesen.
Bewahren Sie die Anleitung für etwaige zukünftige Fragen auf.
-At least two people are needed to install and desinstall the
la p.
-Para el ontaje y des ontaje de esta lu inaría se
reco ienda la participación de un íni o de dos personas.
-Für Montage und De ontage dieser Leuchte wird die
Beteiligung von indestens 2 Personen e pfohlen.
Caution / Precaución / Vorsicht
Class I. Product with an additional protection cable (grounds).
Clase I. Aparato con un cable protector adicional (to a de tierra).
Klasse I. Apparat it zusätzlichen Schutzleiter (Erdkabel).
Dust-tight product. Protected against water trickles.
Producto total ente estanco al polvo. Protegido contra los chorros
de agua.
Staubdicht. Schutz gegen das Eindringen von Strahlwasser.
Product that CAN be in contact with nor ally-fla able aterials
(wood or others).
Está per itido que producto con este distintivo esté en contacto
con ateriales nor al ente infla ables ( aderas u otros).
Es ist erlaubt Produkte it diese Etikett auf nor al entfla baren
Oberflächen (Holz usw.) zu ontieren.
Alternating current
Corriente alterna
Wechselstro
4525.
Net Weight / Peso Neto / Netto-Gewicht 11 Kg
50 Hz
4530.
Net Weight / Peso Neto / Netto-Gewicht 11 Kg
50 Hz
4525 4530
1
La p structure / Estructura lu inaria / Leuchten-Struktur 1 un. 1 un.
2
Profiles set / Conjunto perfiles / Profile-Verbund 2 un. 2 un.