manuals.online logo
Brands
  1. Home
  2. •
  3. Brands
  4. •
  5. urban ambiance
  6. •
  7. Outdoor Light
  8. •
  9. urban ambiance UQL1273 User manual

urban ambiance UQL1273 User manual

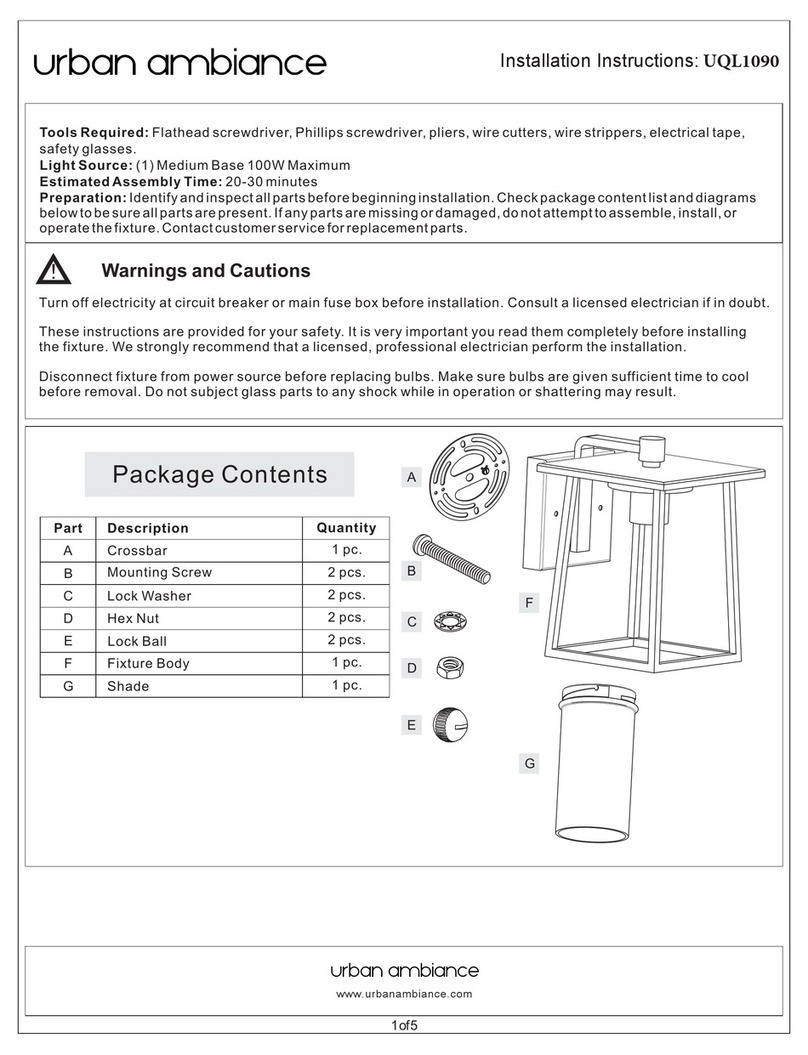
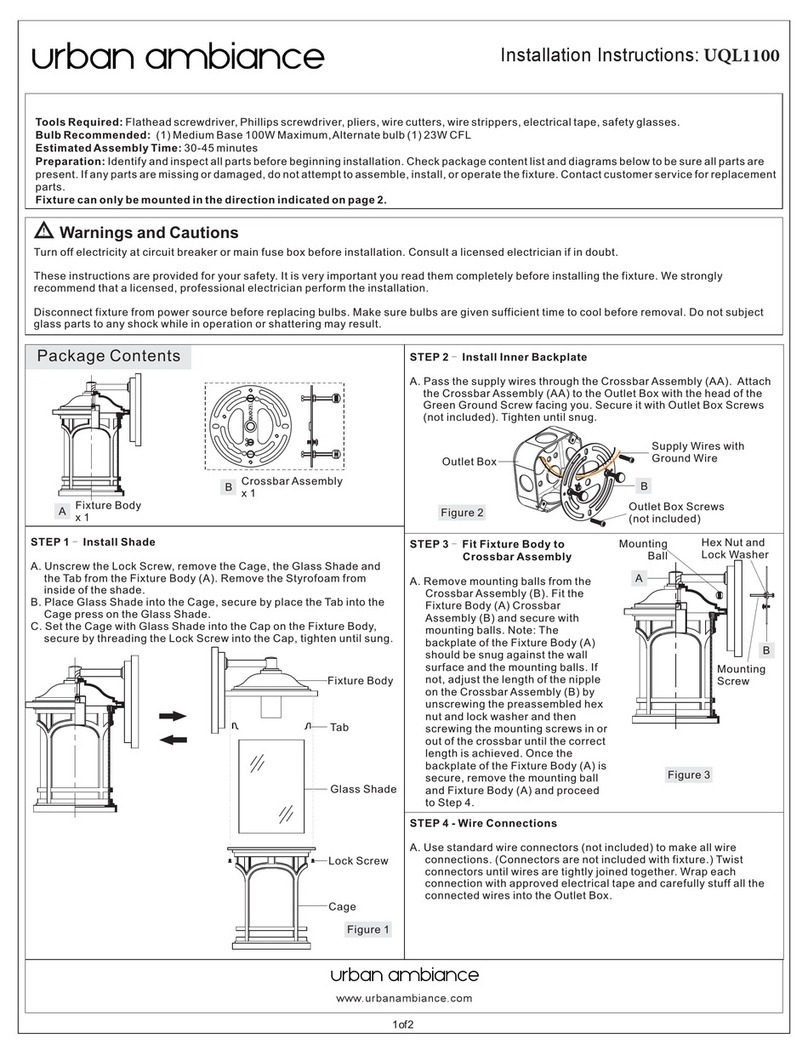
Package Contents
Warnings and Cautions
1of2
Turn off electricity at circuit breaker or main fuse box before installation. Consult a licensed electrician if in doubt.
These instructions are provided for your safety. It is very important you read them completely before installing the fixture. We strongly
recommend that a licensed, professional electrician perform the installation.
Disconnect fixture from power source before replacing bulbs. Make sure bulbs are given sufficient time to cool before removal.
ACrossbar Assembly
x1
(1)A21MediumBasebulb150WMaximum
or(1)MediumBaseVintageBulbisrecommendedbutnotsupplied.
20-30minutes
Identifyandinspectallpartsbeforebeginninginstallation.Checkpackagecontentlistanddiagramsbelowtoensureallpartsare
present.Ifanypartsaremissingordamaged,donotattempttoassemble,install,oroperatethefixture.Contactcustomerserviceforreplacement
parts.
LightSource:
EstimatedAssembly Time:
Preparation:
Fixturecanonlybemountedinthedirectionindicatedonpage2.
Tools Required: Flathead screwdriver, Phillips screwdriver, pliers, wire cutters, wire strippers, electrical tape, safety
glasses.
C
Fixture Body
x1
E
Glass Shade
x1
B
STEP 1 Install Glass Shade-
A. Place the Glass Shade (E) and
the Steel Sleeve (B) over the
socketintheFixtureBody(D)as
shown. Secure by threading the
Socket Collar (C) onto the socket.
Hand tighten until snug.
Figure 1
STEP 2 Installing the Crossbar Assembly-
A. Pass the supply wires through the Crossbar Assembly (A). Attach
the Crossbar Assembly (A) to the Outlet Box with the head of the
Green Ground Screw facing you. Secure the Crossbar Assembly (A)
with Outlet Box Screws (not included). Tighten until snug.
Supply Wires
with Ground Wire
Outlet Box Screws
(not included)
Outlet Box
A
STEP 3 Test Fit the Backplate to the Crossbar Assembly-
A. Remove the mounting balls from the Crossbar Assembly (A). Place
the backplate and Fixture Body (D) onto the Crossbar Assembly (A)
and secure with mounting balls. Note: The backplate and Fixture
Body (D) should be snug against the wall and held tight with the
mounting balls. If it is not, adjust the length of the mounting screws
on the Crossbar Assembly (A) by unscrewing the preassembled hex
nut and lock washer and then screwing the mounting screws in or
out of the crossbar until the correct length is achieved. Once the
backplate and Fixture Body (D) is secure, remove the mounting ball
and Fixture Body (D) and proceed to Step 4.
Mounting Ball
A
Backplate
Hex Nut and
Lock Washer
Figure 3
Mounting Screw
Steel Sleeve
x1
D
Socket Collar
x1
D
B
Socket
C
E
Figure 2
D
Installation Instructions: UQL1273
www.urbanambiance.com
2of2
Socket
Vintage Bulb
(recommended
but not Supplied)
Exterior
Grade
Caulk
Backplate
Exterior
Grade
Caulk
STEP 6 -Install the Bulb and
Apply Silicone Sealer
A. Insert the bulb onto socket
and screw snugly into place.
B. Make sure the exterior wall
surface and fixture backplate
arefreeofdirtbefore
applying caulk. Using exterior
grade caulk, caulk over top of
backplate and down both
sides. Do not caulk the
bottom of the fixture
backplate to ensure proper
moisture drainage.
Your fixture is now assembled
and ready to use. Enjoy!
UQL1273
NOTE: ALL DIMENSIONS ARE ROUNDED
UP TO THE NEAREST 1/4"
STEP 4 - Wire Connections
A. Use standard wire connectors (not included) to make all wire
connections. Twist connectors until wires are tightly joined together.
Wrap each connection with approved electrical tape and carefully
stuff all the connected wires into the Outlet Box.
Figure 4
White wire
from outlet box White wire
from fixture
Black wire from
outlet box (or Red)
Black wire
from fixture
Bare, or Green
Ground wire
from outlet box
Ground wire
from fixture
Bare, or Green
Ground wire
from outlet box
OR
Ground wire
from fixture
Green Ground Screw
on the Crossbar
STEP 5 -Install the Fixture Body
A. Position the backplate and Fixture Body (D) onto the Crossbar
Assembly (A). Place the holes in the backplate over the mounting
screws. Secure the Fixture Body by using the mounting balls and
hand tighten the mounting balls until snug.
Figure 5
Figure 6
Fixture can
only be
mounted in
the direction
indicated
Mounting Ball
A
Backplate
Mounting Screw
D
6.5" Dia.
19.5"
6.25” Dia.
9.75”
14"
9” Dia.
www.urbanambiance.com

Other urban ambiance Outdoor Light manuals

urban ambiance UQL1191 User manual

urban ambiance

urban ambiance UQL1191 User manual

urban ambiance UQL1104 User manual

urban ambiance

urban ambiance UQL1104 User manual

urban ambiance UQL1101 User manual

urban ambiance

urban ambiance UQL1101 User manual

urban ambiance UQL1143 User manual

urban ambiance

urban ambiance UQL1143 User manual

urban ambiance UQL1402 User manual

urban ambiance

urban ambiance UQL1402 User manual

urban ambiance UQL1120 User manual

urban ambiance

urban ambiance UQL1120 User manual

urban ambiance UQL1154 User manual

urban ambiance

urban ambiance UQL1154 User manual

urban ambiance UHP3952 User manual

urban ambiance

urban ambiance UHP3952 User manual

urban ambiance UQL1244 User manual

urban ambiance

urban ambiance UQL1244 User manual

urban ambiance Manchester UQL1170 User manual

urban ambiance

urban ambiance Manchester UQL1170 User manual

urban ambiance UQL1172 User manual

urban ambiance

urban ambiance UQL1172 User manual

urban ambiance UQL1103 User manual

urban ambiance

urban ambiance UQL1103 User manual

urban ambiance UHP1311 User manual

urban ambiance

urban ambiance UHP1311 User manual

urban ambiance UQL1380 User manual

urban ambiance

urban ambiance UQL1380 User manual

urban ambiance UQL1092 User manual

urban ambiance

urban ambiance UQL1092 User manual

urban ambiance UQL1222 User manual

urban ambiance

urban ambiance UQL1222 User manual

urban ambiance UQL1091 User manual

urban ambiance

urban ambiance UQL1091 User manual

urban ambiance Cambridge UQL1142 User manual

urban ambiance

urban ambiance Cambridge UQL1142 User manual

urban ambiance UQL1130 User manual

urban ambiance

urban ambiance UQL1130 User manual

urban ambiance UHP4054 User manual

urban ambiance

urban ambiance UHP4054 User manual

urban ambiance UHP1290 User manual

urban ambiance

urban ambiance UHP1290 User manual

urban ambiance UQL1162 User manual

urban ambiance

urban ambiance UQL1162 User manual

urban ambiance Cambridge UQL1146 User manual

urban ambiance

urban ambiance Cambridge UQL1146 User manual

urban ambiance UQL1413 User manual

urban ambiance

urban ambiance UQL1413 User manual

Popular Outdoor Light manuals by other brands

MOOD LIV Installation Notice

MOOD

MOOD LIV Installation Notice

OttLite CSF05WGZ-UK quick start guide

OttLite

OttLite CSF05WGZ-UK quick start guide

Principal LED Street Wrap Gen 2 installation guide

Principal LED

Principal LED Street Wrap Gen 2 installation guide

Philips CityMood BSP672 manual

Philips

Philips CityMood BSP672 manual

Halo AL7550LPC Series instruction manual

Halo

Halo AL7550LPC Series instruction manual

Maxim Lighting 40912CLBO manual

Maxim Lighting

Maxim Lighting 40912CLBO manual

TEKA ILLUMINATION BEACON WALL MOUNT manual

TEKA ILLUMINATION

TEKA ILLUMINATION BEACON WALL MOUNT manual

Portfolio 00744 manual

Portfolio

Portfolio 00744 manual

Designplan ALDER 400 manual

Designplan

Designplan ALDER 400 manual

Surya BCH100-TBL Assembly instructions

Surya

Surya BCH100-TBL Assembly instructions

Bailey Compact GX53 quick start guide

Bailey

Bailey Compact GX53 quick start guide

Briloner MAL 3437 Mounting instructions

Briloner

Briloner MAL 3437 Mounting instructions

LIGMAN GANDALF 22 installation manual

LIGMAN

LIGMAN GANDALF 22 installation manual

TaoTronics TT-DL23 user guide

TaoTronics

TaoTronics TT-DL23 user guide

LIGMAN VANCOUVER 67 installation manual

LIGMAN

LIGMAN VANCOUVER 67 installation manual

LIGMAN LBX 4 installation manual

LIGMAN

LIGMAN LBX 4 installation manual

BEGA 84 299 Installation and technical information

BEGA

BEGA 84 299 Installation and technical information

LIGMAN BENTON 12 installation manual

LIGMAN

LIGMAN BENTON 12 installation manual

manuals.online logo
manuals.online logoBrands
  • About & Mission
  • Contact us
  • Privacy Policy
  • Terms and Conditions

Copyright 2025 Manuals.Online. All Rights Reserved.