Hakki Pilke Eagle User manual

Hakki Pilke
Eagle
SIRCULAR SAW
- ASSEMBLY INSTRUCTIONS
- OPERATING INSTRUCTIONS
- SAFETY INSTRUCTIONS
- SERVICE INSTRUCTIONS
- SPARE PART LIST
- WARRANTY TERMS
- EC DECLARATION
OF CONFORMITY
These instructions must be read before
operating the machine!
ENGLISH
MAASELÄN KONE OY
Valimotie 1, 85800 Haapajärvi, Finland
Tel. +358 8 7727300

2 (29)
Hakki Pilke Eagle Translation Version 5
TABLE OF CONTENTS
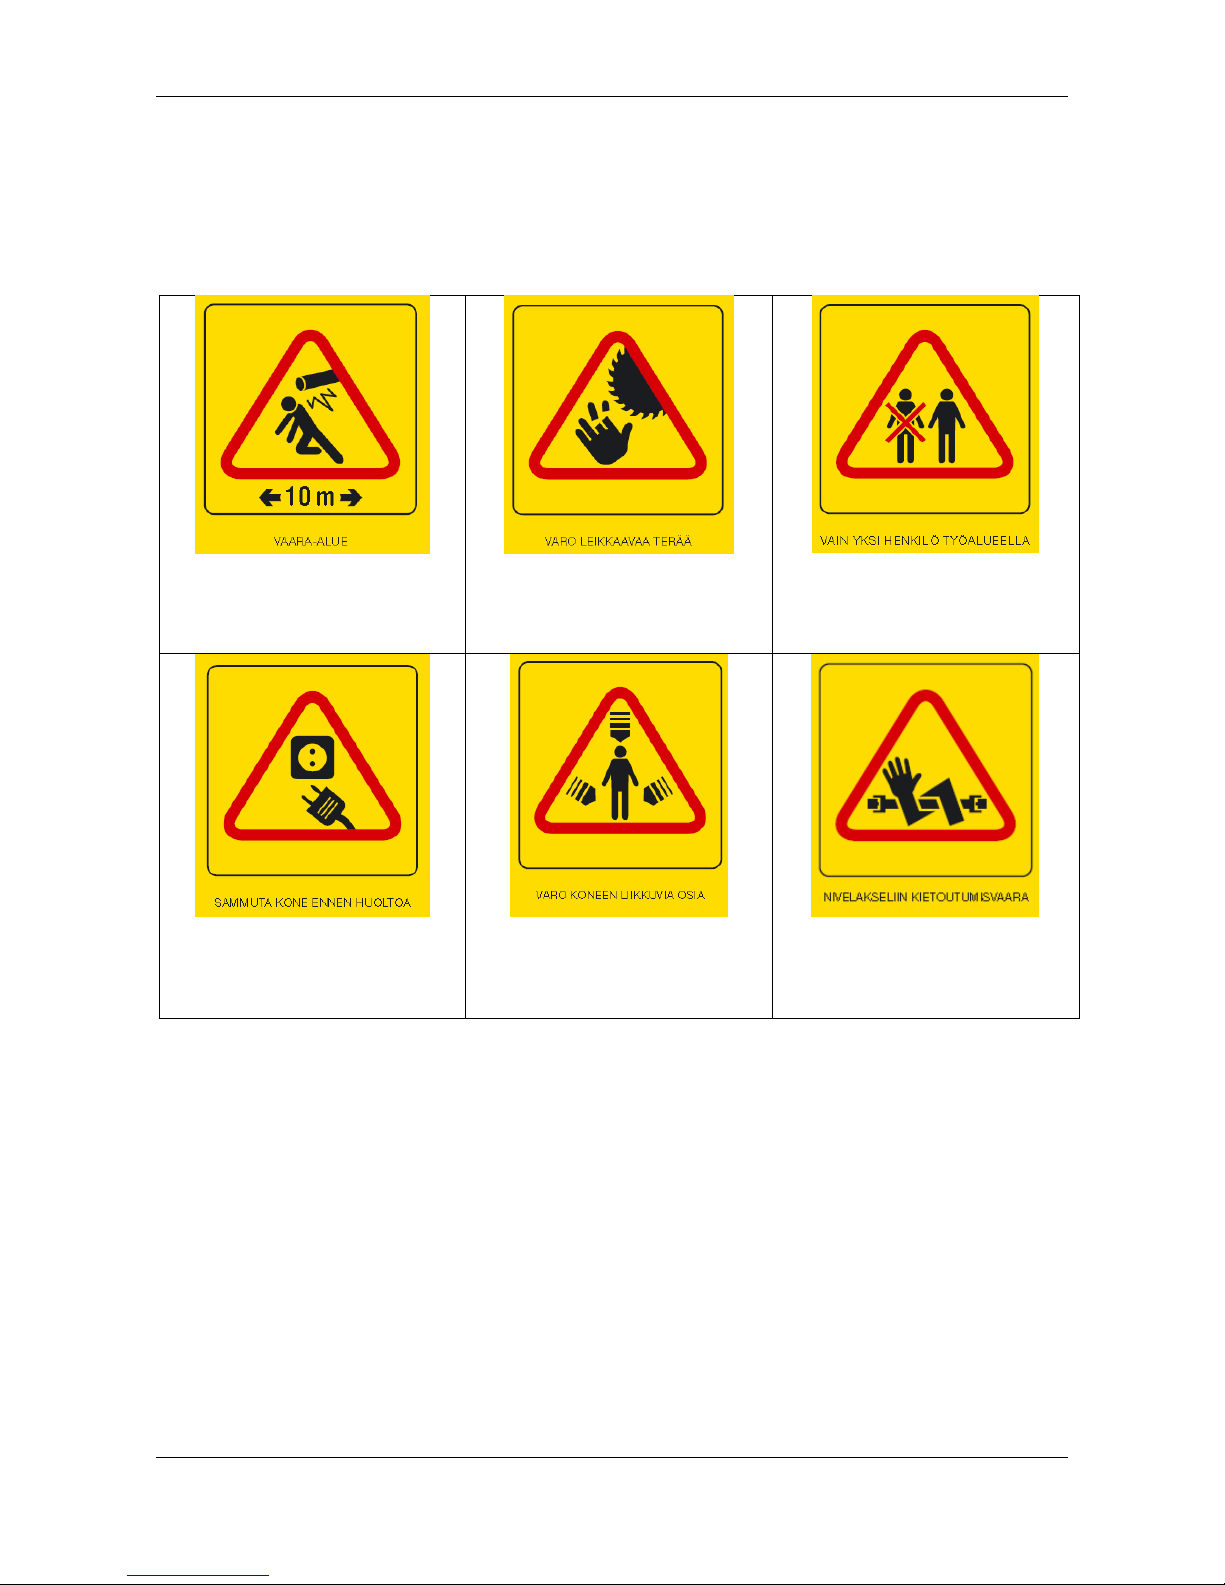
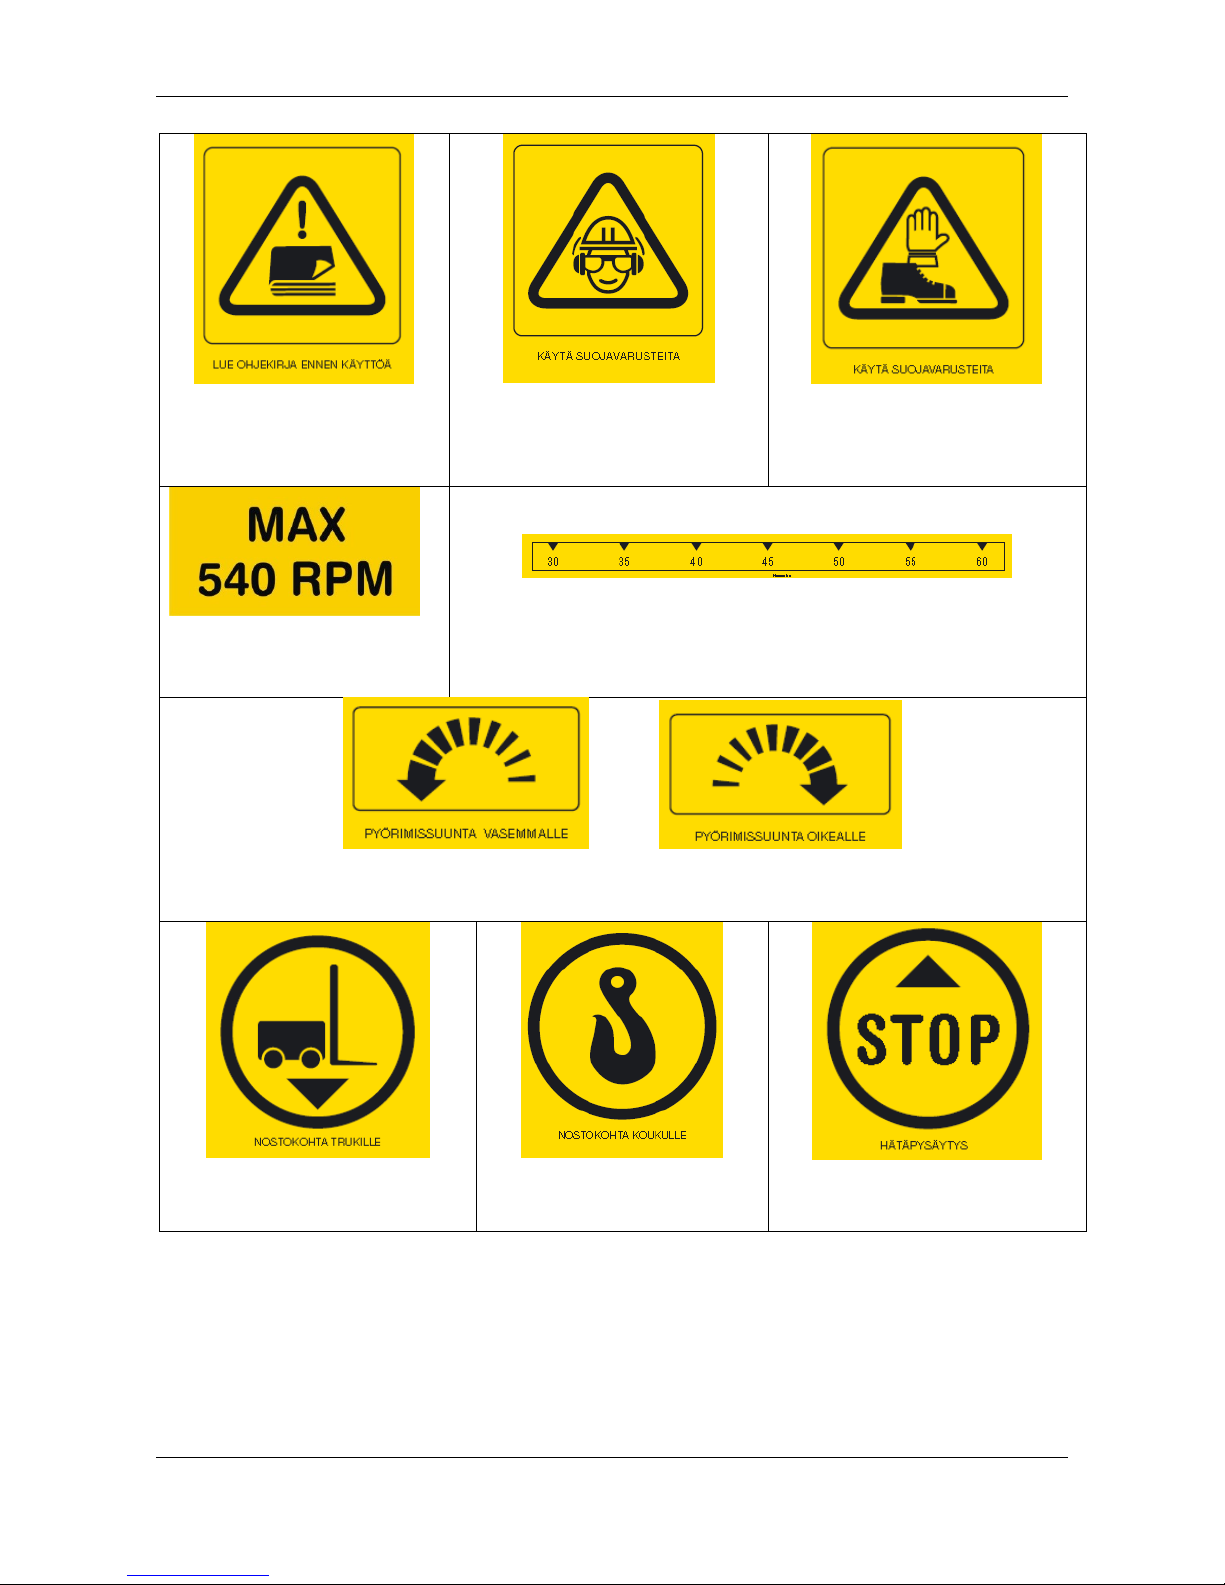
The machine carries following markings ...................................................................... 3
GENERAL SAFETY INSTRUCTIONS ...................................................................... 5
Commissioning a New Machine ................................................................................... 6
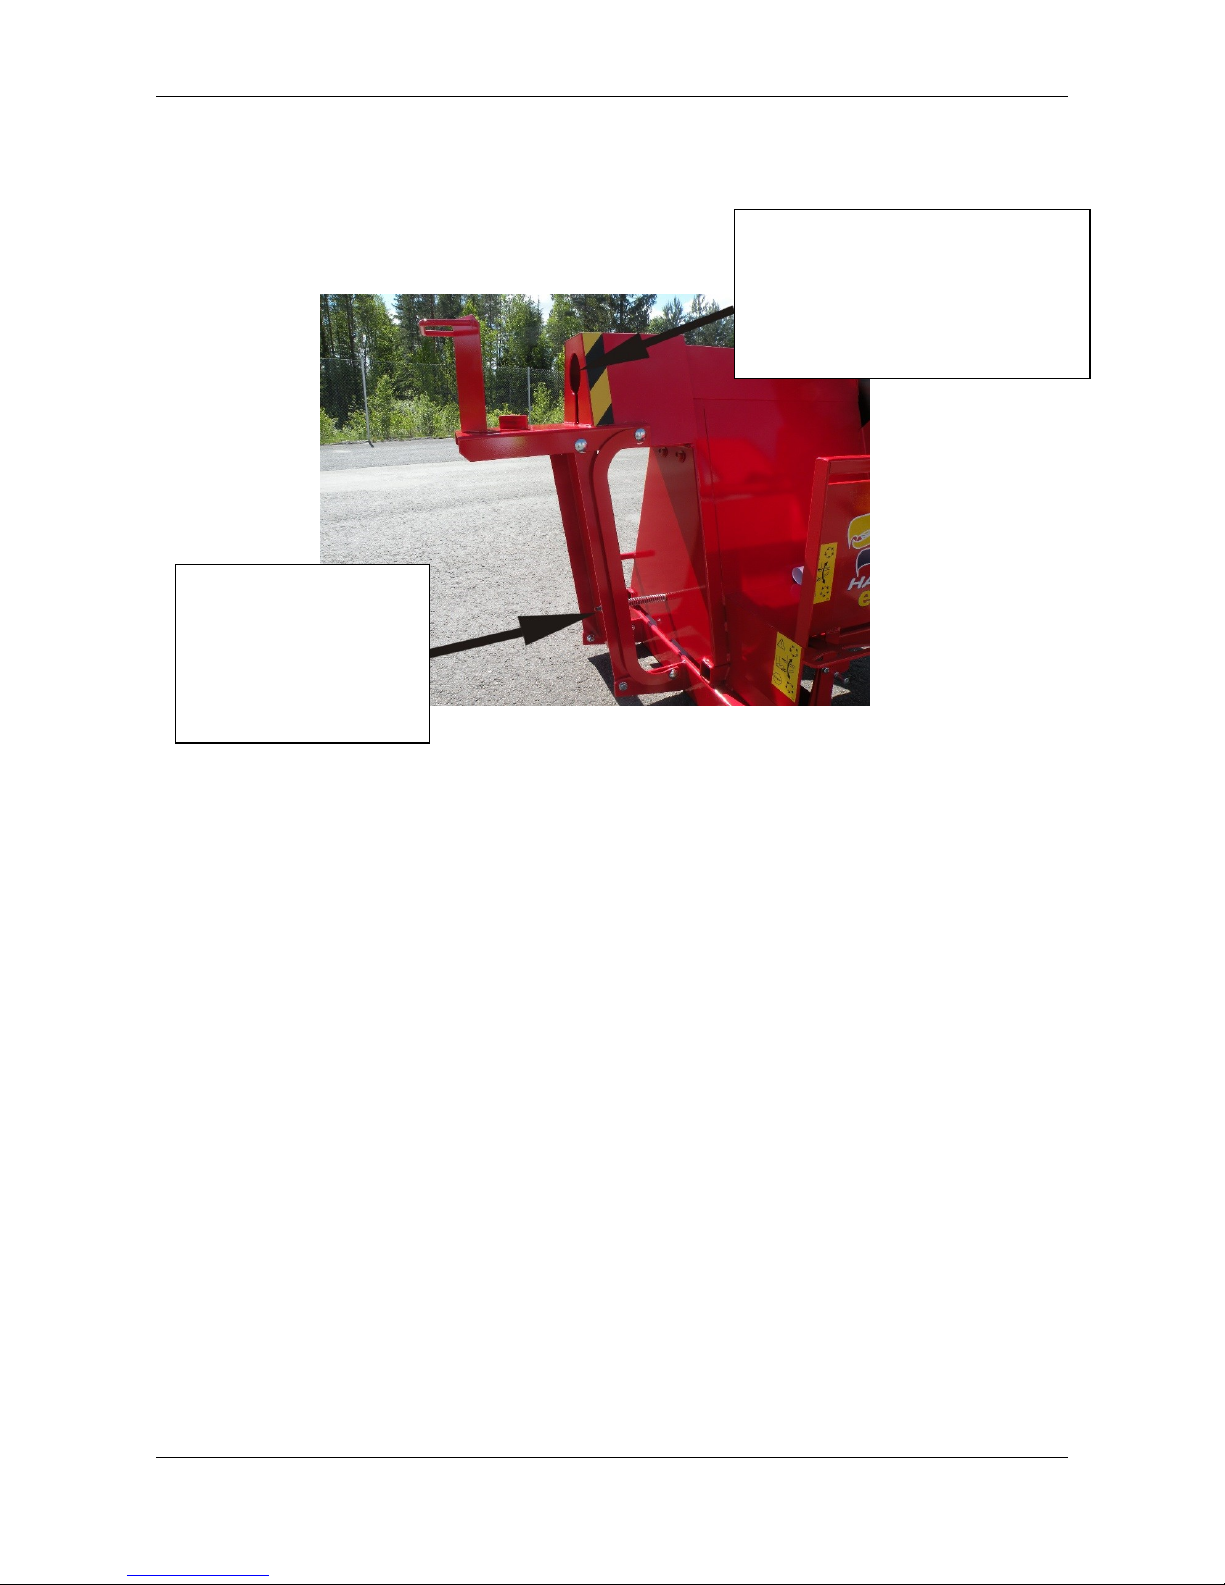
Installing the Cross-cut Cradle Extension..................................................................... 6
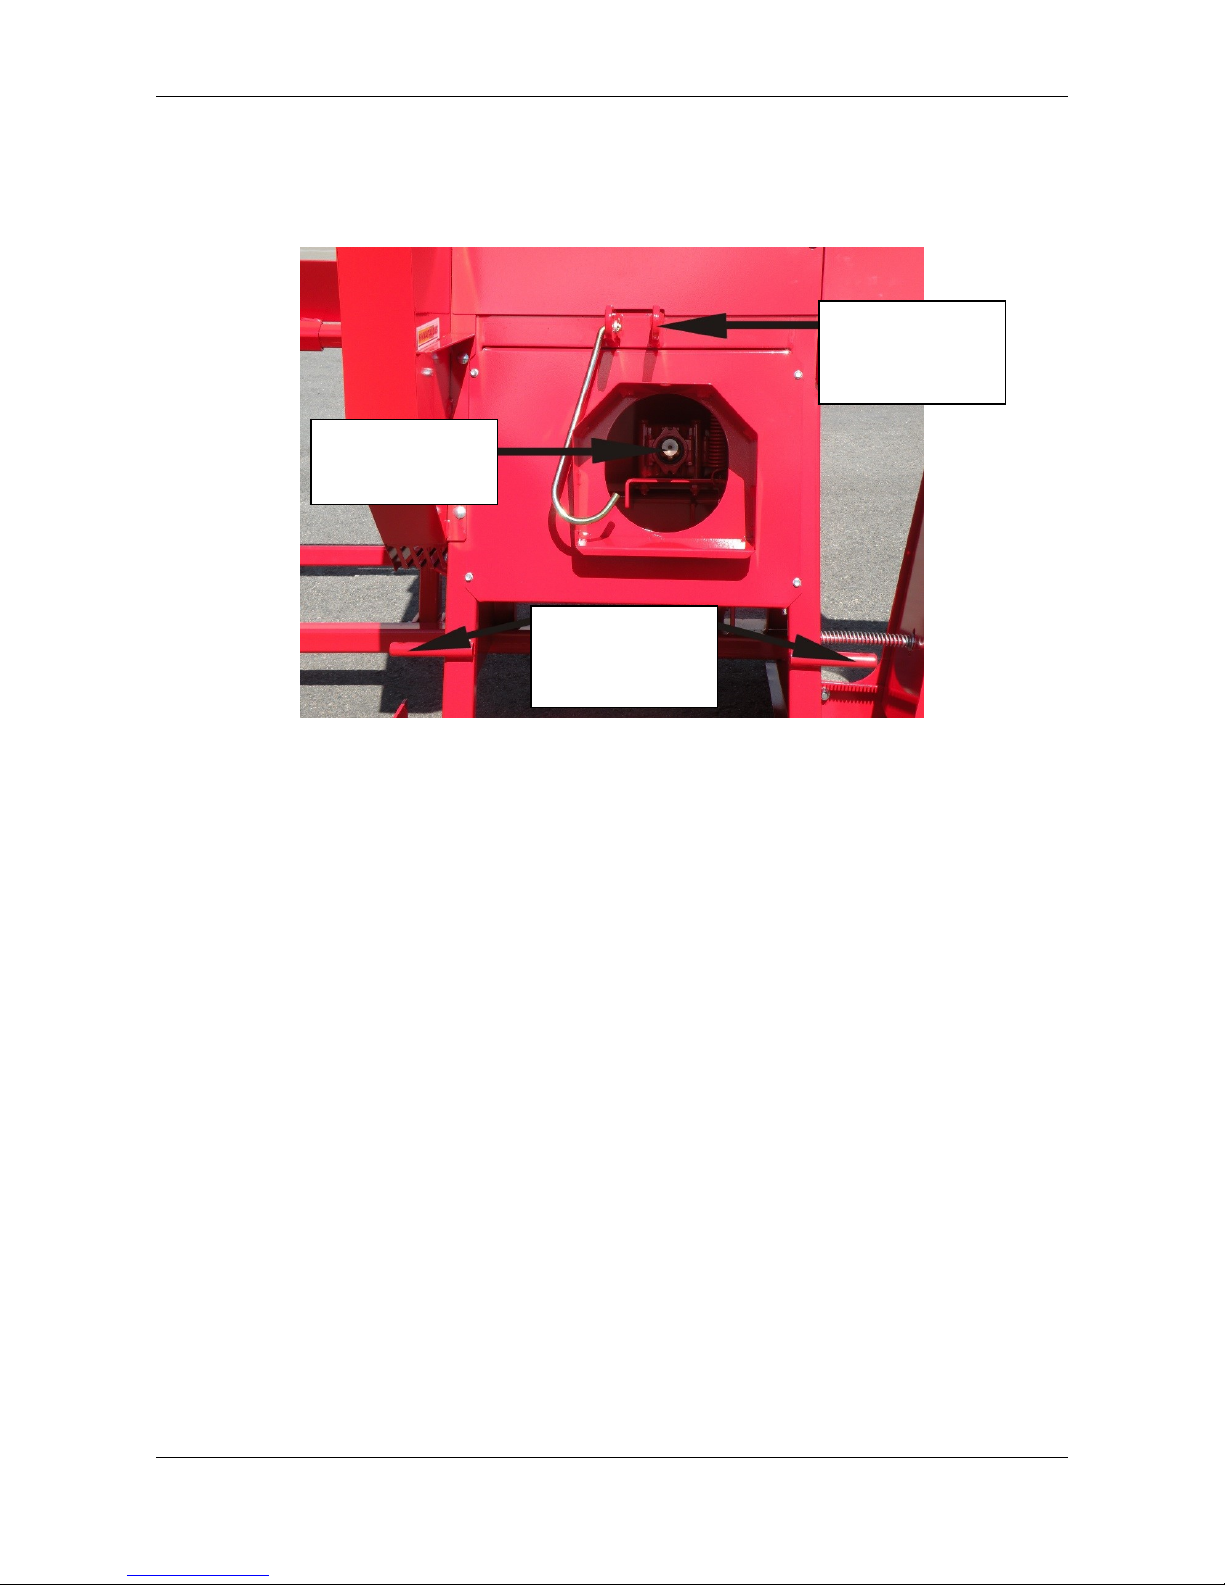
Adjusting the Cross-cut Cradle Inclination................................................................... 6
Adjusting the Splitting Table ........................................................................................ 7
Connecting the Machine to a Tractor............................................................................ 7
Electrically Driven Circular Saw with Splitting Device ............................................... 8
Start and Stop Buttons of the Electrically Driven Model ............................................. 9
Test Run....................................................................................................................... 10
Processing Firewood –General................................................................................... 11
Safety Precautions for Cutting: ................................................................................... 11
Processing Firewood ................................................................................................... 13
Splitting ....................................................................................................................... 14
EMERGENCY STOP Device ..................................................................................... 16
Removing a Log Stuck on the Splitting Cone............................................................. 18
Maintenance ................................................................................................................ 18
Sharpening the Saw Blade........................................................................................... 18
Blade setting ............................................................................................................ 19
Pre-stressing the Blade ................................................................................................ 19
Removing the Saw Blade ............................................................................................ 19
Installing the Saw Blade.............................................................................................. 21
Adjusting the V-belts and emergency stop device...................................................... 22
Lubrication .................................................................................................................. 24
Transporting the Machine ........................................................................................... 24
Storing the Machine .................................................................................................... 24
Technical Specifications.............................................................................................. 26
Tractor-driven Circular Saw –Exploded View........................................................... 27
Tractor-driven Circular Saw –Part List...................................................................... 27
Emergency Stop Device .............................................................................................. 27
Emergency Stop Device –Spare Part List .................................................................. 27
Electrically Driven Circular Saw –Exploded View ................................................... 27
Electrically Driven Circular Saw –Spare Part List .................................................... 27
Transfer Wheels –Exploded View ............................................................................. 27
Spare Part List / Installing the Wheels on the Circular Saw ....................................... 27
EC Declaration of Conformity on the Machine .......................................................... 27
WARRANTY TERMS: .............................. Virhe. Kirjanmerkkiä ei ole määritetty.

3 (29)
Hakki Pilke Eagle Translation Version 5
The machine carries following markings
DANGER ZONE
BEWARE OF THE CUTTING BLADE
ONLY ONE PERSON AT A TIME IN
THE WORK AREA
SHUT DOWN BEFORE
MAINTENANCE
BEWARE OF MOVING PARTS
RISK OF ENTANGLEMENT WITH
THE CARDAN SHAFT

4 (29)
Hakki Pilke Eagle Translation Version 5
READ THE MANUAL BEFORE
USE
USE PROTECTIVE EQUIPMENT
MAX RPM
SCALE
LEFT ROTATION RIGHT ROTATION
LIFTING POINT FOR FORKLIFT
LIFTING POINT FOR HOOK
EMERGENCY STOP

5 (29)
Hakki Pilke Eagle Translation Version 5
GENERAL SAFETY INSTRUCTIONS
To avoid damage or injury, exercise extreme caution when operating this machine and when
connecting the machine to a power source such as a tractor.
To avoid accidents, the machine must not be operated by persons who are intoxicated, under
the influence of drugs, excessively tired, or otherwise not in sufficient control of their actions.
Connection of the machine to the power source, such as a tractor, must be carried out by only
one person at any one time. The danger zone around the machine is 10 metres. Except for the
person connecting the machine or the operator, no other person is allowed within this area
during connection and operation. Do not leave the machine running unsupervised!
If a person other than the operator remains within the risk zone, the operator must make them
aware of the dangers related to the operation of the machine.
The work area, including the ground surface, must be prepared prior to operating the machine
to ensure safe working conditions.
The Hakki Pilke circular saw with splitting device is designed for making firewood from
delimbed trees or other pre-processed wood, such as pre-cut logs. Do not use wood that has
been processed in any other way, such as construction waste. The machine manufacturer is
not liable for any damage or injury to the machine or operator caused by processing such
wood.
The required log length for splitting is 30–40 cm.
The maximum thickness for both splitting and cutting is 25 cm.
The maximum log length for cutting is 4 metres.
The machine may be operated only by persons who are:
- familiar with these instructions;
- familiar with the risk situations that may occur during operation of the machine;
- familiar with what to do in the event of a dangerous situation during operation.
If the machine is faulty or contains a broken part that the operator is not able to repair or
replace, the operator must contact the seller, manufacturer or importer of the machine.
The operator must always check all components before connecting the machine to the tractor
or operating it. Under no circumstances should the machine be used if wear or cracks are
detected in its structure or components.
Any faulty parts must be repaired or replaced with new ones.

6 (29)
Hakki Pilke Eagle Translation Version 5
Commissioning a New Machine
Dispose of all machine packaging in an environmentally responsible manner.
Installing the Cross-cut Cradle Extension
Adjusting the Cross-cut Cradle Inclination
1. Slot the cross-cut
cradle extension into
the square pipe on
the cradle frame.
2. Adjust the
extension to the
desired length and
secure it in place
with the locking nut.
Cradle
cover
Rocking cover
Adjust the cradle's extreme position (towards
the user) using the nut on the lower part of the
cradle. There should be approx. 3 mm between
the cradle cover and the rocking cover.
Approx. 3 mm

7 (29)
Hakki Pilke Eagle Translation Version 5
Adjusting the Splitting Table
Connecting the Machine to a Tractor
Always make sure you are on your own when connecting the machine. Make sure that the
tractor cab is free of people or animals (e.g. dog) which might accidentally nudge the controls
during connection. Before connection, check all connection components of the tractor and
machine. Any faulty parts must be repaired or replaced with new ones. Connecting the
machine to faulty devices or parts is strictly forbidden. To avoid human error, always carry
out the connection carefully and systematically without interruption, making sure nothing is
missed. Secure the connection pins with the appropriate cotters. After finishing the
connection, check that the procedure has been completed successfully. When connecting the
PTO shaft, follow the instructions for safe connection provided by the shaft manufacturer.
Connecting an unshielded shaft to the machine is strictly forbidden!
The splitting table
distance can be
adjusted using the
adjustment nut at the
bottom of the table.
Never set the splitting table
distance so that the tip of the
splitting cone protrudes from the
table cover! Set it as shown in
the figure!

8 (29)
Hakki Pilke Eagle Translation Version 5
The following figure shows the tractor attachment points and the PTO input shaft location.
Electrically Driven Circular Saw with Splitting Device
In addition to the operation, maintenance, and safety instructions presented in this manual,
the following must also be considered when commissioning and operating an electrically
driven circular saw with splitting device:
The machine must be placed on a secure base to prevent tipping.
Operating the machine on a slope or otherwise inclined surface is forbidden.
The machine is equipped with a 4 kW electric motor and is fitted with a safety switch and
start/stop switch. The plug current rating of the machine is 16 A, and the required fuse rating
is 10 A (slow). Use of a residual-current device is recommended.
Lift arm
attachment
points
Push arm
attachment
point
PTO input shaft
location

9 (29)
Hakki Pilke Eagle Translation Version 5
Ensure safe electric connection of the machine:
- The extension cord must be of sufficient rating and must be intact.
- If the extension cord is in danger of being walked on or driven over, it must be buried or
covered with an appropriate protective material across the entire width of the route.
- Always route the power cord to the side that the machine's power plug is located.
If the extension cord is routed to the machine via the side you are working, the cord must be
buried carefully and covered so that it cannot be touched while working.
- The cord coming to the machine must be long enough, and it must not be strained when the
machine is moved.
Start and Stop Buttons of the Electrically Driven Model
The start box is on top of the shaft cover, to the left of the blade.
Start box.
Machine
power plug

10 (29)
Hakki Pilke Eagle Translation Version 5
The machine start button is the green button on the box.
The red button is the stop button.
Make sure that the motor starts running in the correct direction when you start it!
The correct direction of rotation is marked on the blade cover.
After replacement of the power plug, the machine must always be started so that it can
be stopped immediately if the motor's direction of rotation is incorrect.
The motor's rotation direction may be reversed only by persons authorised to do so.
Never move a running machine! The machine must always be stopped before moving it!
Never stop a rotating saw blade or splitting cone with wood, other object or with your hand.
The blade shaft will rotate for a while after the motor is switched off. Let it rotate and wait
until the machine has stopped completely.
The machine must always be stopped for service or cleaning.
Test Run
A test run must always be carried out before putting the machine into operation.
1. Without using wood, check that the splitting cradle moves freely to the end of its
travel distance, and then returns to the initial position by itself. For adjusting the
splitting cradle, see page 5!
2. Check that the cross-cut cradle moves freely to the end of its travel distance, and
then returns to the initial position by itself. For adjusting the cross-cut cradle, see
page 4! If the cradles do not operate properly despite adjustments, contact the
manufacturer or the seller of the machine.
3. Start the machine. If the machine is tractor-driven, set the machine to correct rotation
speed by adjusting the tractor's engine speed (PTO shaft speed: 540 rpm ). An
electrically driven machine rotates automatically at the correct speed!
4. Check that the emergency stop functions properly. See the instructions on
operation/testing (page 13) and adjustment (pages 19–20).

11 (29)
Hakki Pilke Eagle Translation Version 5
Processing Firewood – General
You can begin making firewood if:
- You know how the machine operates.
- You are familiar with all operational safety aspects of the machine.
- You are wearing the following appropriate protective clothing and equipment:
- safety boots with non-slip soles;
- gloves that give a firm, secure grip on the wood;
- suitable clothes that are not too loosely fitting;
Beware! Loose clothing can get caught in the wood, machine, etc., and cause
accident!
- appropriate face and eye shields and hearing protectors.
- You have prepared and maintained the work site such that it is level and safe to work on.
- You have taken appropriate precautions if working in extreme hot/cold temperature
conditions.
- You are certain that the weather conditions, such as rain or snowfall, pose no risk to yourself
or the machine.
- You are certain that the wind conditions pose no risk to yourself or the machine during
operation.
- You have ensured that the work environment is sufficiently illuminated to prevent accidents
during connection, operation, transportation, and storing of the machine.
Safety Precautions for Cutting:
- Only lift logs onto the cross-cut cradle that you are able to lift safely.
- Lift larger logs onto the cross-cut cradle in two steps, as described below.
1. Lift the stump end onto the rollers (always
feed large logs stump end first)!
2. Lift the top end. Lift with your legs, not
with your back!

12 (29)
Hakki Pilke Eagle Translation Version 5
- Cutting more than one log at a time, e.g. log bundles, is strictly forbidden!
- Never stop the saw blade by forcing a piece of wood or other object against the side or teeth
of the saw blade.
3. Push the tree forward on the rollers.

13 (29)
Hakki Pilke Eagle Translation Version 5
Processing Firewood
Once you have connected the machine to the power source as described in these instructions
and have familiarised yourself with all of the safety precautions required for operating the
machine, you can begin making firewood.
1. Check that the cross-cut cradle and splitting table are adjusted as instructed on page 4.
2. Adjust the log length measuring device as follows:
3. With the tractor's engine idling, engage the PTO by lifting the clutch pedal up smoothly.
Increase the engine speed but keep the PTO speed no higher than 540 rpm.
4. Choose a log that is light enough to lift safely, and lift it onto the cross-cut cradle ready for
cutting.
If the log is warped, knotty, gnarly, too long, or otherwise dangerous to process as-is, pre-
process the log with a chain saw to make it safe to put through the firewood processor.
5. Pull the cross-cut cradle to its rear position and place the log in the cradle.
1. Loosen the locking nut of the
measuring device.
2. Slide the measuring device's stop
bar to the desired position; use the
length-indicating sticker to determine
the correct position.
3. Tighten the locking nut of the
measuring device.
Stop bar

14 (29)
Hakki Pilke Eagle Translation Version 5
Splitting
6. Push the log to be cut against
the measuring device stop bar.
7. Hold the log in the cradle
with one hand and push the
cradle smoothly and
steadily towards the saw
blade until the log is cut
through.
8. Repeat the process,
cutting several logs into the
collector through. Do not
overfill the collector
through!
When cutting, make sure
the level of cut logs in the
collector through does not
rise high enough to obstruct
the log being sawn.
Note! Grip the handle with both hands
as soon as the the splitting cone has
penetrated the log and splitting has
begun, as shown opposite.
Hold the log in place with one hand
only during the initial stage of splitting
when the wood is pushed towards the
splitting cone, as shown below.

15 (29)
Hakki Pilke Eagle Translation Version 5
Place the log to be split in an upright position on the splitting rack as shown in the figure.
When using the splitting cone, always:
- Place the log properly in the splitting rack and push the log against the cone with the rack.
- Do not split logs shorter than 30 cm or longer than 40 cm.
- Avoid splitting gnarly, knotty, or warped logs as they are tougher and hard to split. They
are also more likely to become wedged onto the cone or onto the guide wedge beneath the
cone.
Rack for thin wood
Rack for thick wood
The distance of the rack from the
cone can be adjusted with the nuts
below the rack
ALWAYS STAND BEHIND THE
WOOD WHEN SPLITTING
NEVER POSITION YOURSELF:
ABOVE THE LOG OR BESIDE THE RACK
- Always stand in
this position while
log splitting
- NEVER stand as shown below while
spiltting –the log can jump free of the
rack and cause injury!

16 (29)
Hakki Pilke Eagle Translation Version 5
EMERGENCY STOP Device
The emergency stop pedal is located on the bottom corner of the collector through. In the
event of hazard during machine operation, press the pedal fully down, ensuring that it latches
in the down position. See the figure below! The machine must be stopped within 10 seconds!
After stopping the machine with the emergency stop pedal, calmly switch off its power source,
e.g. the tractor.
REMEMBER! The emergency stop pedal has stopped the machine so there is no need to rush
to shut off the power. IN SHORT:
IN A DANGER SITUATION:
1. STOP THE MACHINE WITH THE EMERGENCY STOP PEDAL BY PRESSING
THE PEDAL FULLY DOWN SO THAT IT BECOMES LATCHED.
2. CALMLY SWITCH OFF THE MACHINE'S POWER SOURCE.
3. REMOVE THE CAUSE OF DANGER.
After removing the cause of the danger, activate the machine by releasing the locking latch
and by lifting the emergency stop pedal to its upper position.

17 (29)
Hakki Pilke Eagle Translation Version 5
REMEMBER! USE THE EMERGENCY STOP PEDAL IN A
DANGER SITUATION ONLY! NEVER USE IT FOR SERVICING
PURPOSES, E.G. WHILE SHARPENING THE SAW BLADE!
NOTE! Models with an internal combustion engine are equipped with
a separate emergency stop device!
1. Release the locking latch by
lifting the lifting bolt diagonally
upwards!
2. Lift the emergency stop pedal to its upper position!

18 (29)
Hakki Pilke Eagle Translation Version 5
Removing a Log Stuck on the Splitting Cone
If pulling the splitting table backwards fails to remove the log from the cone, stop the machine
by switching off its power source.
1. Use an axe to split the stuck log off the cone. Use the right amount of force and precision
to avoid damage or injury to the machine, the axe, or yourself.
2. If the wood does not come free with the axe, cut the wood into smaller pieces with a hand
saw or chain saw, taking extreme care to avoid injuring yourself or damaging the saw or the
machine.
Maintenance
Note! The machine must always be disconnected from the power source
(by disconnecting the PTO shaft or electrical cable) before servicing!
Sharpening the Saw Blade
Keep the blade sharp:
- a sharp blade will cut quicker and with less power;
- a badly dulled blade heats up during cutting and may thus lose its pre-stressing;
- less cracking between teeth occurs with a sharp blade.
- Use for example a 6" v-cut barette file for sharpening.

19 (29)
Hakki Pilke Eagle Translation Version 5
- Keep the original:
Pre-stressing the Blade
-If the blade has lost its pre-stressing, replace the blade with a new one or take it
to a professional blade doctor for pre-stressing.
Removing the Saw Blade
Always wear gloves when handling the blade, taking care not to harm yourself, the machine,
or the blade.
tooth form with a
transverse pitch of
max. 5°
filing angle of
max.
15º
Blade setting
The setting must be approx. 0.7 mm.
Running the blade with even a small hairline crack
is strictly forbidden!
1. Remove the blade
cover hinge bolt and
remove the cover.

20 (29)
Hakki Pilke Eagle Translation Version 5
2. Remove the cradle
inclination adjustment nuts.
3. Lower the cradle.
4. Lock the blade in place by placing, for
example, a tool or piece of wood in the
lower part of the cutting opening,
between the machine frame and the teeth
of the blade. (Note! If using a metal
object to lock the blade, be careful not to
damage the blade teeth!)
Table of contents
Popular Saw manuals by other brands

Bosch
Bosch CM8S Operating/safety instructions

Hilti
Hilti Nuron DSH 600-22 Original operating instructions

Edco
Edco DS-20 Operator's instruction manual

Porter-Cable
Porter-Cable SAW BOSS 345 instruction manual

King Canada
King Canada 8375 Service manual

CH Hanson
CH Hanson Norse 9683125 Operating manual & parts list