Halmarine 9.9 PK User manual

To the Owner
Thank you for selecting a outboard motor.This Owner’s Manual contains information
needed for proper operation,maintenance and care.A thorough understanding of these
simple instructions will help you obtain maximum enjoyment from you.If you have any
question about the operation or maintenance of your outboard motor,please consult a
dealer.
In this Owner’s Manual particularly important information is distinguished in the following
ways.
This is the safety alert symbol.It is used to alert you to potential personal injury
hazards.Obey all safety message that follow this symbol to avoid possible injury or death.
A WARNING indicated a hazardous situation which ,if not avoided,could result in
death or serious injury.
NOTICE:
A NOTICE indicated special precautions that must be taken to avoid damage to the
outboard motor or other property.
TIP:
ATIP Provides key information to make procedures easier or clearer.
To ensure long product life,we recommends that you use the product and perform the
specified periodic inspections and maintenance by correctly following the instructions in the
owner’s manual.

Table of Contents
1.Safety information………………..……………………… ……….....3
2. General information………………………………………………….5
3.Specifications and requirements………………………………......8
4.Components ………..………………………………..………………..13
5.Instruments and indicators…………………………………………20
6. Engine control system………………………………………………21
7. Installation…………………………………………………………… 21
8.Operation…………………………………………….………….……..25
9.Maintenance…………………………………………………………...45
10.Trouble recovery…………………………….……………..………..66

1
Safety information
Observe these precautions at all times.
Propeller
People can be injured or killed if they come
in contact with the propeller.The propeller
can keep moving even when the motor is in
neutral,and sharp edges of the propeller
can cut even when stationary.
zStop the engine when a person is in the
water near you.
zKeep people out of reach of the
propeller,even when the engine is off.
Rotating parts
Hands,feet,hari,jewelry,clothing,personal
flotation device(PFD) straps,etc.,can
become entangled with internal rotating
parts of the engine,resulting in serious
injury or death.
Keep the top cowling in place whenever
possible.Do not remove or replace the
cowling with the engine running.
Only operate the engine with the cowling
removed according to the specific
instructions in the manual.Keep
hands,feet,hair,jewelry,clothing,PFD
straps,etc.,away from any exposed moving
parts.
Hot parts
During and after operation,engine parts are
hot enough to cause burns. Avoid touching
any parts under the top cowling until the
engine has cooled.
Electric shock
Do not touch any electrical parts while
starting or operating the engine.They can
cause shock or electrocution.
Engine shut-off cord(lanyard)
Attach the engine shut-off cord so that the
engine stops if the operator falls overboard
or leaves the helm.This prevents the boat
from running away under power and
leaving people stranded,or running over
people or objects.
Always attach the engine shut-off cord to a
secure place on your clothing or your arm
or leg while operating.Do not remove it to
leave the helm while the boat is moving.Do
not attach the cord to clothing that could
tear loose,or toute the cord where is could
become entangled,preventing it from
functioning.
Do not route the cord where it is likely to be
accidentally pulled out.If the cord is pulled
during operation,the engine will shut off and
you will lose most steering control.The boat
could slow rapidly,throwing people and
objects forward.
Gasoline
Gasoline and its vapors are highly
flammable and explosive.Always,refuel
according to the procedure on page 36 to
reduce the risk of fire and explosion.
Gasoline exposure and spills
Take care not to spill gasoline.If gasoline
spills,wipe it up immediately with dry rags.

Dispose of rage properly.
If any gasoline spills onto your skin,
immediately wash with soap and water.
Change clothing if gasoline spills on it .
If you swallow gasoline,inhale a lot of
gasoline vapor,or get gasoline in your eyes,
get immediate medical attention. Never
siphon fuel by mouth.
Carbon monoxide
This product emits exhaust gases which
contain carbon monoxide, a colorless,
odorless gas which may cause brain
damage or death when inhaled. Symptoms
include nausea, dizziness, and drowsiness.
Keep cockpit and cabin areas well
ventilated.Avoid blocking exhaust outlets.
Modifications
Do not attempt to modify this outboard
motor.Modifcations to your outboard motor
may reduce safety and reliability,and render
the outboard unsafe or illegal to use.
Boating safety
This section includes a few of the many
important safety precautions that you
should follow when boating.
Alcohol and drugs
Never operate after drinking alcohol or
taking drugs.Intoxication is one of the most
common factors contributing to boating
fatalities.
Personal floation devices(PFDs)
Have an approved PFD on board for every
occupant.We recommends that you must
wear a PDF whenever boating. At a
minimum, children and non-swimmers
should always wear PFDs,and everyone
should wear PFDs when there are
potentially hazardous boating conditions.
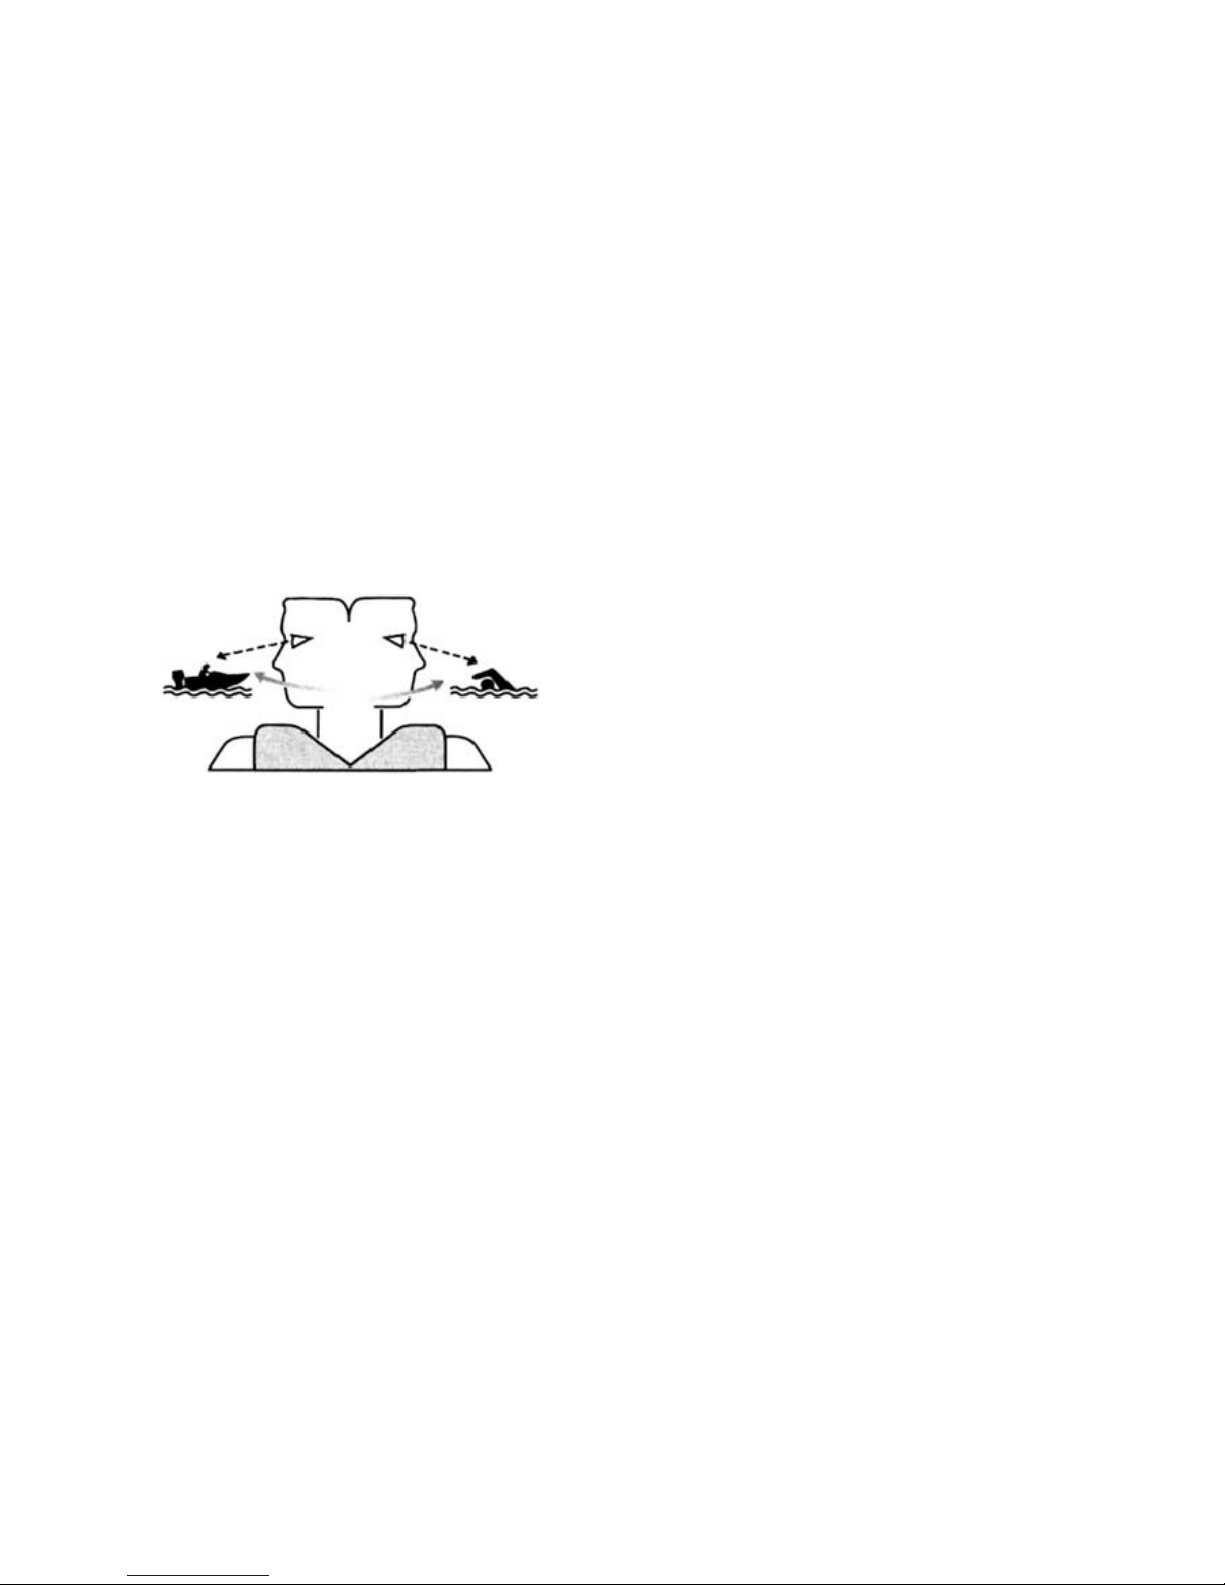
People in the water
Always watch carefully for people in the
water, such as swimmers, skiers, or divers,
whenever the engine is running.When
someone is in the water near the boat,shift
into neutral and stop the engine.
Stay away from swimming areas,Swimmers
can be hard to see.
The propeller can keep moving even when
the motor is in the neutral.Stop the engine
when a person is in the water near you.
Passengers
Consult your boat manufacturer’s
instructions for details about appropriate
passenger locations in your boat and be
sure all passengers are positioned properly
before accelerating and when operating
above an idle speed.Standing or sitting in
non-designated locations may result is
being thrown either overboard or within the
boat due to waves, wakes, or sudden
changes in speed or direction,Even when
people are positioned properly, alert your
passengers if you must make any unusual
maneuver,Always avoid jumping waves or
wakes.
Overloading
Do not overload the boat.Consult the boat

capacity plate or boat manufacturer for
maximum weight and number of
passengers. Be sure that weight is properly
distributed according to the boat
manufacturer’s instructions.Overloading or
incorrect weight distribution can
compromise the boats handling and lead to
an accident, capsizing or swamping.
Avoid collisions
Scan constantly for people, objects,and
other boats. Be alert for conditions that limit
your visibility or block your vision of others.
Operate defensively at safe speeds and
keep a safe distance away from people,
objects, and other boats.
zDo not follow directly behind other
boats or waterskies.
zAvoid sharp turns or other maneuvers
that make is hard for others to avoid you or
understand where you are going.
zAvoid areas with submerged objects or
shallow water.
zRide within your limits and avoid
aggressive maneuvers to reduce the risk of
loss of control,ejection,and collision.
zTake early action to avoid collisions.
Remember, boats do not have brakes, and
stopping the engine or reducing throttle can
reduce the ability to steer.If you are not
sure that you can stop in time before hitting
an obstacle, apply throttle and turn in
another direction.
Weather
Stay informed about the weather.Check
weather forecasts before boating.Avoid
boating in hazardous weather.
Passenger training
Make sure at least one other passenger is
trained to operate the boat in the event of
an emergency.
Boating safety publications
Be informed about boating safety.
Additional publications and information can
be obtained from many boating
organizations.
Laws and regulations
Know the marine laws and regulations
where you will be boating and obey
them.Several sets of rules prevail
according to geographic location,but all are
basically the same as the international
Rules of the Road.
General information
Identification numbers record
Outboard motor serial number
The outboard motor serial number is
stamped on the label attached to the port
side of the clamp bracket.
Record your outboard motor serial number
in the spaces provided to assist you in ordering spare parts from your dealer of for

reference in case your outboard motor is stolen.
1. Outboard motor serial number location
Read manual and labels
Before operating or working on this outboard motor:
zRead this manual.
zRead any manuals supplied with the boat.
zRead all labels on the outboard motor and the boat.
If you need any additional information, contact your dealer.
Warning labels
If these labels are damaged or missing, contact your dealer for replacements.

1
Contents of labels
The above warning labels mean as follows.
1.
Emergency starting does not have start-in-gear protection. Ensure shift control is in neutral
before starting engine.
2.
zKeep hands, hair, and clothing away from rotating parts while the engine is running.
zDo not touch or remove electrical parts when starting or during operation.
3.
zRead Owner’s Manuals and labels.
zWear an approved personal flotation device(PFD)
zAttach engine shut-off cord(lanyard) to your PFD,arm,or leg so the engine stops if you
accidentally leave the helm,which could prevent a runaway boat.

1
Symbols
The following symbols mean as follows.
Notice/Warning ReadOwner’sManual
Hazard caused by continuous rotation Electrical hazard
Specifications and requirements
Specifications
TIP:
“AL” stated in the specification data below represents the numerical value for the aluminum
propeller installed.
Dimension and weight:
Overall length:
983 mm (38.7 in)
Overall width:
357 mm (14.1 in)
Overall height S:
1008mm (39.7 in)
Overall height L:
1135mm (44.7 in)
Motor transom height S:
431 mm (17.0 in)
Motor transom height L:
558 mm (22.0 in)
Dry weight (AL) S:
40 KG (88 lb)
Dry weight (AL) L:
41KG (90lb)

Performance:
Full throttle operating range:
5000-6000 r/min
Rate power:
7.3 KW(9.9hp)
Idle speed (in neutral):
1000-1100 r/min
Power unit:
Type:
4-stroke SOHC L2 4 valves
Total displacement:
212 cm3 (12.9 c.i. )
Bore×stroke:
56.0×43.0 mm (2.2×1.69 in)
Ignition system:
CDI
Spark plug (NGK):
BR6HS-10
Spark plug gap:
0.9-1.0 mm (0.035-0.039 in)
Steering system:
Tiller handle
Starting system:
Manual starter
Starting carburetion system:
Choke valve
Valve clearance IN (cold engine):
0.15-0.20 mm (0.0059-0.0079 in)
Valve clearance EX (cold engine):
0.20-0.25 mm (0.0079-0.0098 in)
Lower unit
Gear shift positions:
Forward-neutral-reverse
Gear ratio:
2.08 (27/13)
Trim and tilt system:
Manual tilt
Propeller mark:
8 1/2 x 8 1/2
Fuel and oil:
Recommended fuel:
Regular unleaded gasoline
Unleaded gasoline
Min. research octane number (RON):
90
Fuel tank capacity:
12 L (3.17 US gal. 2.64 Imp. gal)
Recommended engine oil:
4-stroke outboard motor oil
Recommended engine oil grade 1:
SAE 10W-30/10W-40/5W-30
API SE/SF/SG/SH/SJ/SL
Engine oil quantity (without oil filter
replacement):
0.8 L (0.85 US qt, 0.7 lmp. qt)
Lubrication system:
Wet sump
Recommended gear oil:
Hypoid gear oil
Recommended gear oil grade:
SAE 90 API GL-4
Gear oil quantity:
0.150 L (0.159 US qt, 0.132 Imp. qt)
Tightening torque:
Spark plug:
24 Nm (2.45 kgf-m,17.7ft-lb)

Propeller nut:
17 Nm (1.73 kgf-m, 12.5 ft-lb)
Engine oil drain bolt:
24 Nm (2.45 kgf-m,17.7 ft-lb)
Installation requirements
Boats horsepower rating
Overpowering a boat can cause severe
instability.
Before installing the outboard motor(s),
confirm that the total horsepower of your
outboard motor(s) does not exceed the
boats maximum horsepower rating. See the
boat’s capacity plate or contact the
manufacturer.
Mounting the outboard motor
zImproper mounting of the outboard
motor could result in hazardous
conditions, such as poor handling, loss
of control, or fire hazards.
zBecause the motor is very heavy,
special equipment and training is
required to mount it safely.
Your dealer or other person experienced in
proper rigging should mount the motor
using correct equipment and complete
rigging instructions. For further information,
see page 31.
Battery requirements
Without a rectifier or Rectifier Regulator
NOTICE:
A battery cannot be connected to
models that do not have a rectifier or
Rectifier Regulator.
If you wish to use a battery with the models
without a rectifier or Rectifier Regulator,
install an optional Rectifier Regulator.
Install an optional Rectifier Regulator or
use accessories rated to withstand 18 volts
or higher with the above models .Consult
your dealer for details on installing an
optional Rectifier Regulator.
Propeller selection
Next to selecting an outboard motor,
selecting the right propeller is one of the
most important purchasing decisions a
boater can make. The type, size and
design of your propeller have a direct
impact on acceleration, top speed, fuel
economy, and even engine life. We designs
and manufactures propellers for every our
outboard motor and every application.
Your outboard motor came with a propeller
selected to perform well over a range of
applications, but there may be uses where
a different propeller would be more
appropriate.
Your dealer can help your select the right
propeller for your boating needs. Select a
propeller that will allow the engine to reach
the middle or upper half of the operating
range at full throttle with the maximum
boatload. Generally, select a larger pitch
propeller for a smaller operating load and a
smaller pitch propeller for a heavier load. If

you carry loads that vary widely, select the
propeller that lets the engine run in the
proper range for your maximum load but
remember that you may need to reduce
your throttle setting to stay within the
recommended engine speed range when
carrying lighter loads.
To check the propeller, see page 61
1. Type of propeller (propeller mark)
2. Propeller diameter in inches
3. Propeller pitch in inches
Start-in-gear protection
Our outboard motors are equipped with
with start-in-gear protection device.This
feature permits the engine to be started
only when it is in neutral. Always select
neutral before starting the engine.
Engine oil requirements
Select an oil grade according to the
average temperatures in the area where
the outboard motor will be used.
Recommended engine oil:
4-stroke outboard motor oil
Recommended engine oil grade 1:
SAE 10W-30/10W-40/5W-30
API SE/SF/SG/SH/SJ/SL
Recommended engine oil grade 2:
SAE 15W-40/20W-40/20W-50
API SH/SJ/SL
Engine oil quantity:
0.8L (0.85 US qt, 0.7 Imp. qt)
If oil grades listed under Recommended
engine oil grade 1 are not available, select
an alternative oil grade listed under
Recommended engine oil grade 2.
Recommended engine oil grade 1
Recommended engine oil grade 2
Fuel requirements
Gasoline
Use a good quality gasoline that meets the
minimum octane rating. If knocking or
pinging occurs, use a different brand of
gasoline or premium unleaded fuel. We
recommends that you use alcohol-free (see
Gasohol) gasoline whenever possible.
For Russia
Recommended fuel:
Unleaded gasoline
Min. research octane number (RON):
90

For others
Recommended fuel:
Regular Unleaded gasoline
Min. research octane number (RON):
90
NOTICE:
zDo not use leaded gasoline. Leaded
gasoline can seriously damage the
engine.
zAvoid getting water and
contaminants in the fuel tank.
Contaminated fuel can cause poor
performance or engine damage. Use
only fresh gasoline that has been stored
in clean containers.
Gasohol
There are two types of gasohol: gasohol
containing ethanol (E10) and that
containing methanol. Ethanol can be used
if the ethanol content does not exceed 10%
and the fuel meets the minimum octane
ratings. All ethanol blends containing more
than 10% ethanol can cause fuel system
damage or cause engine starting and
running problems. We does not
recommended gasohol containing
methanol because it can cause fuel system
damage or engine performance problems.
Anti-fouling paint
A clean hull improves boat performance.
The boat bottom should be kept as clean of
marine growth as possible. If necessary,
the boat bottom can be coated with an
anti-fouling paint approved for your area to
inhibit marine growth.
Do not use anti-fouling paint which includes
copper or graphite. These paints can cause
more rapid engine corrosion.
Outboard motor disposal requirements
Never illegally discard (dump) the outboard
motor. We recommend consulting the
dealer about discarding the outboard
motor.
Emergency equipment
Keep the following items onboard in case
there is trouble with the outboard motor.
zA tool kit with assorted screwdrivers,
pliers, wrenches (including metric sizes),
and electrical tape.
zWaterproof flashlight with extra
batteries.
zAn extra engine shut-off cord (lanyard)
with clip.
zSpare parts, such as an extra set of
spark plugs.
Consult your dealer for dealer for detail.

1
Components diagram
TIP:
* May not be exactly as shown; also may not be included as standard equipment on all
models (order from dealer)
1. Top cowing
2. Clamp bracket
3. Trim rod
4. Drain screw
5. Cooling water inlet
6. Propeller
7. Cowing lock lever
8. Idle hole
9. Anti-cavitation plate
10.Fuel tank

1. Choke knob
2. Steering friction adjuster
3. Tilt lock lever
4. Restraint cable attachment
5. Clamp screw
6. Manual starter handle
7. Alert indicator
8. Throttle friction adjuster
9. Gear shift lever
10.Throttle grip
Fuel tank
If your model was equipped with a portable
fuel tank, its function is as follows.
The fuel tank supplied with this engine is its
dedicated fuel reservoir and must not be
sued as a fuel storage container.
Commercial users should conform to
relevant licensing or approval authority
regulations.

1. Air vent screw
2. Fuel joint
3. Fuel tank cap
Fuel joint
This joint is used to connect the fuel line
Fuel gauge
This gauge is located on either the fuel tank
cap or on the fuel joint base, it shows the
approximate amount of fuel remaining in
the tank.
Fuel tank cap
This cap seals the fuel tank. When
removed, the tank can be filled with fuel. To
remove the cap, turn it counterclockwise.
Air vent screw
This screw is on the fuel tank cap. To
loosen the screw, turn it counterclockwise.
Tiller handle
To change direction, move the tiller handle
to the left or right as necessary
Gear shift lever
Move the gear shift lever forward to engage
the forward gear or rearward to engage the
reverse gear.
1. Forward ”F”
2. Neutral “N”
3. Reverse “R”

Throttle grip
The throttle grip is on the tiller handle. Turn the grip counterclockwise to increase speed
and clockwise to decrease speed.
Throttle indicator
The fuel consumption curve on the throttle indicator shows the relative amount of fuel
consumed for each throttle position. Choose the setting that offers the best performance
and fuel economy for the desired operation.
1. Throttle indicator
Throttle friction adjuster
A friction device provides adjustable resistance to movement of the throttle grip or the
remote control lever, and can be set according to operator preference.
To increase resistance, turn the adjuster clockwise. To decrease resistance, turn the
adjuster counterclockwise. Warning! Do not over tighten the friction adjuster. If there is
too much resistance, it could be difficult to move the remote control lever or throttle
grip, which could result in an accident.
When constant speed is desired, tighten the adjuster to maintain the desired throttle setting.

Engine shut-off cord (lanyard) and clip
The clip must be attached to the engine shut-off switch foe the engine to run. The cord
should be attached to a secure place on the operator’s clothing, or arm or leg. Should the
operator fall overboard or leave the helm, the cord will pull out the clip, stopping ignition to
the engine, this will prevent the boat from running away under power.
WARNING! Attach the engine shut-off cord to a secure place on your clothing, or
your arm or leg while operating. Do not attach the cord to clothing that could tear
loose. Do not route the cord where it could become entangled, preventing it from
functioning. Avoid accidentally pulling the cord during normal operation. Loss of
engine power means the loss of most steering control. Also, without engine power,
the boat could slow rapidly. This could cause people and objects in the boat to be
thrown forward.
1. Engine shut-off cord (lanyard)
2. Clip
3. Engine shut-off switch
Engine stop button
The engine stop button stops the engine when the button is pushed.
Pull-type-choke knob
Pull the choke knob to supply a rich fuel mixture to the engine.
1. Choke knob
Manual starter handle
The manual starter handle is used to crank and start the engine.

Steering friction adjuster
A friction device provides adjustable resistance to the steering mechanism, and can be set
according to operator preference. An adjuster lever is located on the bottom of the tiller
handle bracket.
To increase resistance, turn the lever to the port side “A”.
To decrease resistance, turn the lever to the starboard side “B”.
Do not overtighten the friction adjuster. If there is too much resistance, it could be
difficult to steer, which could result in an accident.
If the resistance does not increase even when the lever is turned to the port side “A”, make
sure that the nut is tightened to the specified torque.
1. Nut
Nut tightening torque:
8Nm (0.82kgf-m, 5.9 ft-lb)

Tip:
zSteering movement is blocked when the adjuster lever is set to the “A” position.
zCheck the tiller handle for smooth movement when the lever is turned to the starboard
side “B”
zDo not apply lubricants such as grease to the friction areas of the steering friction
adjuster.
Trim rod (tilt pin)
The position of the trim rod determines the minimum trim angle of the outboard motor in
relation to the transom.
1. Trim rod
Tilt lock mechanism
The tilt lock mechanism is used to prevent the outboard motor from lifting out of the water
when in reverse gear.
1. Tilt lock lever
To lock it, set the tilt lock lever in the lock position. To release, push the tilt lock lever in the
release position.
Tilt support bar
The tilt support bar keeps the outboard motor in the tilted up position.

NOTICE:
Do not use the tilt support bar when tailoring the boat. The outboard motor could
shake loose from the tilt support and fall. If the motor cannot be tailored in the
normal running position, use an additional support device to secure it in the tilt
position.
Cowling lock lever
The cowling lock lever(s) is used to secure the top cowling.
1. Cowling lock lever
Alert indicator
If the engine develops a condition which is cause for alert, the indicator lights up. For details
on how to read the alert indicator, see page 21.
1. Low oil pressure-alert indicator
Instruments and indicators
Indicators
Low oil pressure-alert indicator
If oil pressure drops too low, this indicator will light up. For further information, see page 21.
NOTICE:
zDo not continue to run the engine if the low oil pressure-alert indicator is on and
the engine oil level is level is lower, Serious engine damage will occur.
zThe low oil pressure-alert indicator does not indicate the engine oil level. Use the
Table of contents