Hamilton Beach 840117800 User manual

Humidifier
840117800
Consumer Safety Information ...... 2
Parts and Features ........................ 3
How to Assemble and Use............ 4
How to Clean .................................. 7
Troubleshooting Guide ................ 10
Customer Service.......................... 12
In USA: 1-800-851-8900
In Canada: 1-800-267-2826
840117800 Ev00 8/27/03 11:14 AM Page 1

2
IMPORTANT SAFEGUARDS
SAVE THESE INSTRUCTIONS!
1. Read all instructions before using this
humidifier. Save these instructions
for reference.
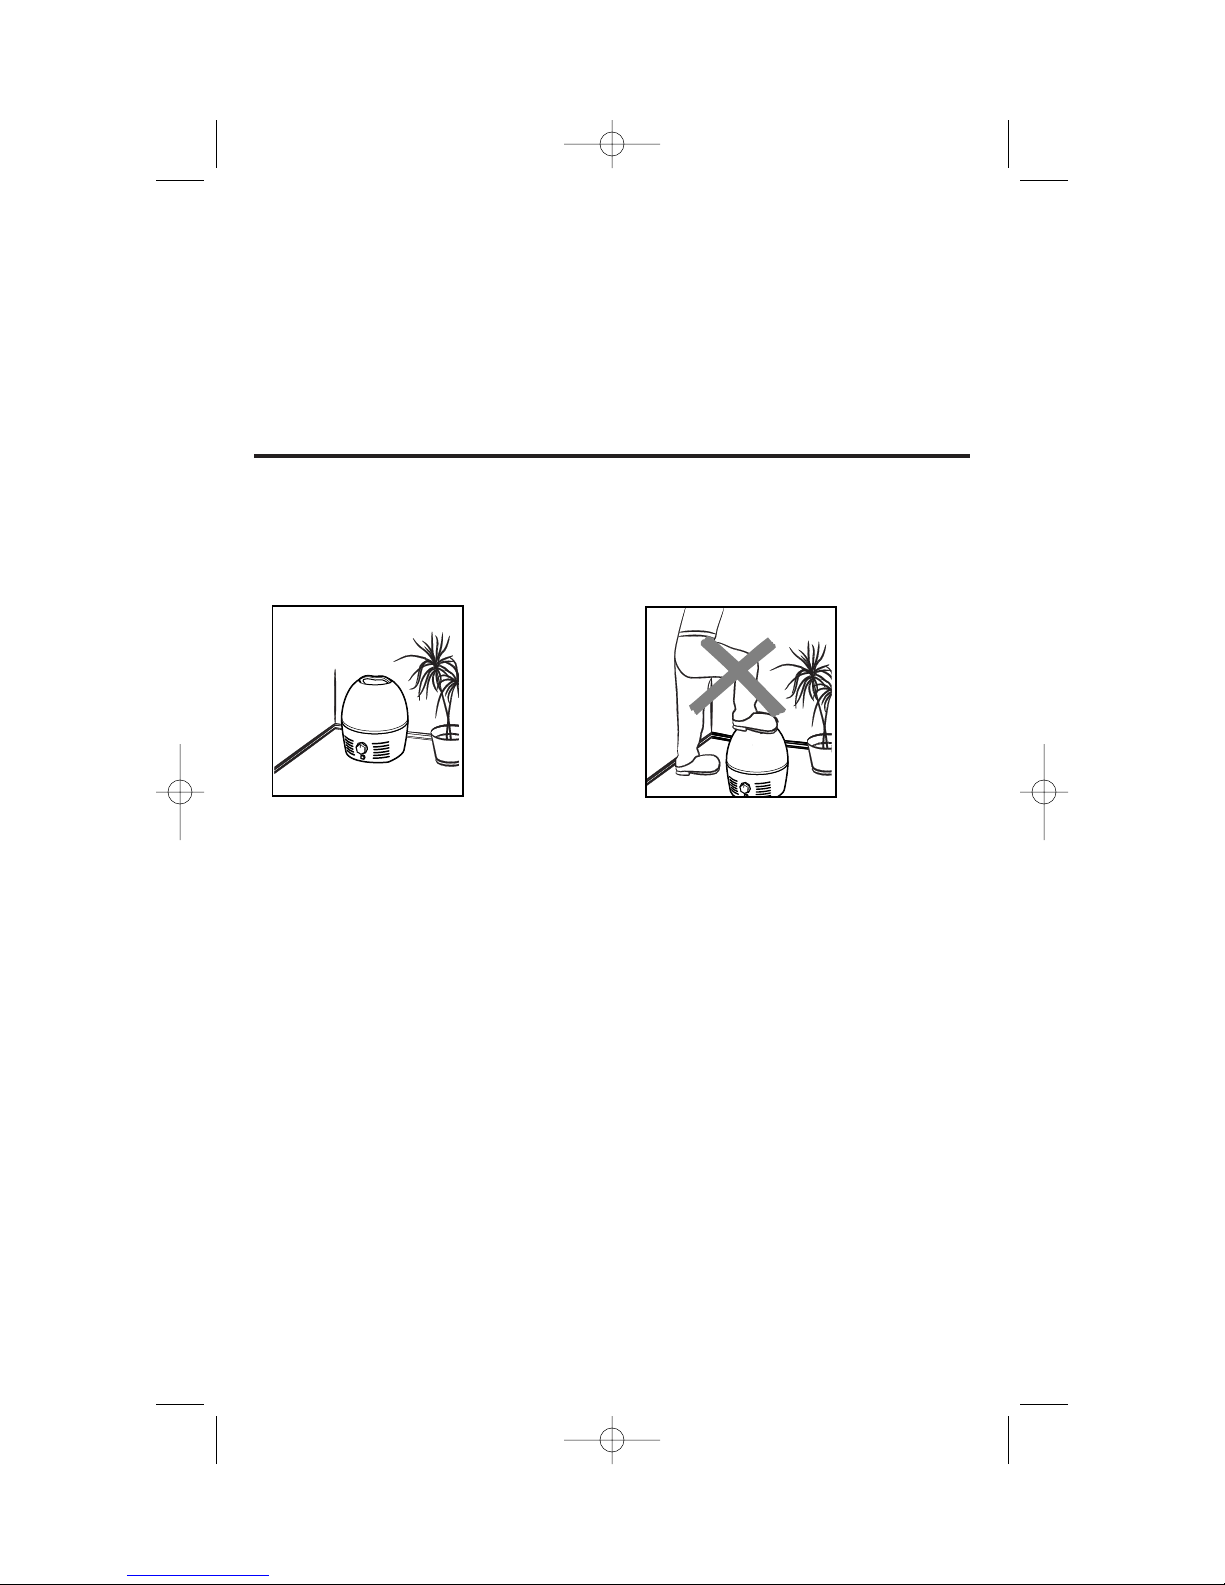
2. Always place the humidifier on a firm,
flat, level, water-resistant surface.
3. To reduce the risk of electrical shock,
never plug humidifier into an outlet while
your hands are wet.
4. Never drop or insert any objects into
any openings.
5. Never place the humidifier in a location
where it is accessible to children.
6. Do not place the humidifier on or
near heat sources such as stoves, radi-
ators, heaters, or in direct sunlight.
7. Never connect the humidifier to any
power source other than 120 V AC.
8. Always unplug the humidifier before
refilling, cleaning, servicing, or moving.
9. Before each use, check the cord and plug
for damage. Do not operate any appliance
with a damaged cord or plug, or after the
appliance malfunctions or is dropped or
damaged in any manner. Call our toll-free
customer service number for information on
examination, repair or electrical or mechani-
cal adjustment.
10. Always unplug and empty humidifier
and tank when it is not in use.
11. Never tilt or attempt to move the humid-
ifier or supporting surface while it is
operating or full of water. Turn off and
unplug the humidifier before removing
the water tank and moving the unit.
12. This humidifier requires regular cleaning
and maintenance. Refer to the instruc-
tions in the “How to Clean” section.
Never clean the humidifier in a manner
other than described in this manual.
13. Do not immerse fan enclosure in
water or other liquids, or allow it
to get wet.
14. Never use detergents, household clean-
ers, or other solvents to clean the
humidifier, other than those specified in
the Cleaning Instructions provided in
this manual.
15. Do not direct output from unit at walls,
furniture, or the like.
16. Do not use filters or other replacement
parts not recommended or sold by
Hamilton Beach/Proctor-Silex, Inc.
17. To disconnect cord, turn the control
to OFF, then remove plug from
wall outlet.
18. Do not use appliance for other than
its intended purpose.
19. Never stand or sit on any part of the
humidifier, and never place objects
on the humidifier.
Consumer Safety Information
This appliance is intended for
household use only.
This appliance is equipped with a
polarized plug. This type of plug has
one blade wider than the other. The
plug will fit into an electrical outlet
only one way. This is a safety feature
intended to help reduce the risk of
electrical shock.
If you are unable to insert the plug into
the outlet, try reversing the plug. If the
plug should still fail to fit, contact a
qualified electrician to replace the
obsolete outlet. Do not attempt to
defeat the safety purpose of the
polarized plug by modifying the plug
in any way.
If a longer cord is necessary an
approved extension cord may be used.
The electrical rating of the extension
cord must be equal to or greater than
the rating of the humidifier. Care must
be taken to arrange the extension cord
so that it will not drape over the coun-
tertop or tabletop where it can be
pulled on by children or accidentally
tripped over.
READ AND SAVE THESE INSTRUCTIONS.
When using electric appliances, basic safety precautions should always be followed,
including the following:
840117800 Ev00 8/27/03 11:14 AM Page 2

3
Do Not Over-humidify
Do not over-humidify. The suggested
level for the best health benefit is 50%.
Care should be taken not to over-
humidify, which will be dependent on
both the construction of your home
and the outside weather conditions.
Do not allow water to condense on
walls, floors, or windows as water
damage could result. If you see these
conditions occur, lower the desired
humidity level on the humidifier or turn
the unit off. Hamilton Beach/Proctor-
Silex, Inc. will not be responsible for
damage caused by water.
Before First Use
Be sure to remove all packing materials.
Choose a flat, level, water-resistant
location for the humidifier that will allow
for good air circulation and that is not
accessible to children.
Do not place the humidifier where it
or its cord presents a tripping or
stumbling hazard, or where the air
vents are blocked.
Parts and Features
Water Tank Assembly
1. Carrying Handle
2. Water Tank
3. Gasket
4. Filler Cap
Base Assembly
5. Filter
6. Water Tray
Fan Enclosure
7. Control Knob
8. Exhaust Grilles
9. Air Intake Grille
840117800 Ev00 8/27/03 11:14 AM Page 3

4
DO NOT:
• Do not stand, sit, or place any
objects on
the humidifier.
It is not
designed
to support
additional
weight.
• Do not block the air intake and
exhaust grilles. This will cause poor
performance and may cause moisture
damage and mildew build-up.
• Do not use in a small, enclosed
space or in an area with a humidity
level above 50%. Excessive humidity
could result.
• Do not place on or near heat sources
such as stoves, radiators, or heaters,
or in direct sunlight.
• Never place the humidifier in a
closed room. A closed room may
result in excessive humidity.
• To reduce electrical noise and
interference, do not place on or near,
or plug into the same outlet as, TVs,
baby monitors, or cordless phones.
How to Assemble and Use
IMPORTANT: Your Hamilton Beach humidifier is designed for easy use and
maintenance. Make sure that the water tray and filter are properly installed before
filling the tank and operating the humidifier.
DO NOT USE THE HUMIDIFIER WITHOUT THE FILTER IN PLACE!
Selecting the Proper Location
To prevent the risk of injury or damage to the humidifier and furnishings and
provide the best possible performance of your humidifier, follow the placement
guidelines below:
DO:
• Place the humidifier on a flat, stable,
waterproof
surface.
• Place the humidifier along an inside
wall near an electrical outlet where
it is out of the way and it and its cord
do not present
a tripping hazard.
• Select a location with adequate
air circulation.
• Leave at least 36 inches (90 cm)
between the front of the humidifier
and any walls or furnishings.
• Unplug the humidifier and empty the
water tank and tray if the humidifier is
to be moved, or will not be used
for several days.
840117800 Ev00 8/27/03 11:14 AM Page 4

5
1. Remove the filler cap on the bottom
of the tank
by turning it
counter-
clockwise
until the
UNLOCK
arrows line
up with the
ridges on
the tank.
2. Fill the tank with COOL tap water.
DO NOT
USE HOT
WATER.
Be sure to
keep the
tank free of
debris.
NOTE: Using distilled or deionized
water will prolong the life of the filter.
Never place oils, scents, or perfumes
in the water tank.
3. Replace the filler cap and turn
clockwise
until the
LOCK
arrows line
up with the
ridges on
the tank
opening.
Return the
tank to
an upright
position. When carrying the tank, use
the carry handle and support the
tank from the other side.
NOTE: Always make sure the filler
cap is locked and the gasket is in
place before inverting water tank.
Filling the Water Tank
1. Insert the water tray into the humidifier
base. Be
sure that it
is securely
seated in
the indent
in the base.
2. Place the filter on the water tray
as shown.
Humidifier Assembly
Filter Tip!
To prolong the life of the filter, it is
recommended that you turn over the
filter each time you fill the water tank.
Replace the filter when it displays mildew
or becomes stiff and non-absorbent.
840117800 Ev00 8/27/03 11:14 AM Page 5

6
Placing the Water Tank on the Base
Lower the tank into place until it is
properly seated,
using the fan
enclosure and
the base to align
the tank.
IMPORTANT! Never pour water into
or allow water to splash into air intake
or exhaust grilles.
NOTE: Some water will flow out of
the tank and into the water tray when
the tank is in position.
CAUTION: Once the humidifier has
been filled, do not attempt to tilt or
move it. If it is necessary to move
the humidifier, make sure it is
unplugged and remove the water
tank first.
Plugging in the Humidifier
WARNING: To reduce the risk of
electrical shock, never plug in the
humidifier while your hands are wet!
Once the humidifier has been assembled
and placed in its final location, and the
tank has been filled, plug the humidifier
into a wall outlet.
NOTE: The polarized plug will only
fit in one direction—DO NOT try
to force the plug! If you are unable to
insert the plug into the outlet, try
reversing the plug. If the plug still does
not fit, contact a qualified electrician to
replace the obsolete outlet.
Setting the Controls
1. Fan Speed Knob
2. Power On Indicator – lights
when unit is on.
Setting the fan speed
Turn the fan speed knob to the
desired setting. To increase the
humidity in a room more quickly, set
the knob to HI. For quiet, nighttime
operation or for a more gradual
increase, set the knob to Quietmist™.
Indicator lights
The power on indicator will light to
indicate that the humidifier is on.
840117800 Ev00 8/27/03 11:14 AM Page 6

7
wWARNING
To reduce risk of electric shock:
• Always unplug before cleaning.
• Do not immerse fan enclosure in water or other liquid.
Daily Maintenance:
1. Turn off humidifier and unplug it from
electrical outlet.
2. Lift off water tank and remove filter.
3. Remove water tank and tray
and carry them to the sink. Pour
any remaining water into sink.
4. Rinse water tray and tank thoroughly
to remove any dirt or sediment. Wipe
clean, then dry with a clean cloth or
paper towel.
5. Reinstall water tray and filter, and
refill water tank with cool tap water
as instructed on pages 5-6..
NOTE: To prolong the life of the filter,
it is recommended that you turn over
the filter each time you fill the water
tank.
How to Clean
The evaporative, wick-type humidifier
adds moisture to the air in the form of
water vapor, by using a fan to force air
through a moistened-filter medium.
To ensure the proper and efficient
operation of your humidifier, the
following cleaning and maintenance
procedures must be followed.
Failure to follow the recommended care
and maintenance instructions could
lead to a buildup of micro-organisms,
including algae, bacteria, and mildew,
which may lead to respiratory or other
ailments in some individuals.
Cleaning the Humidifier
Wipe the fan enclosure, control knob, and cord with a damp cloth or sponge.
Weekly Maintenance:
1. Turn off humidifier and unplug it from
electrical outlet.
2. Lift off water tank and remove filter.
3. Remove water tank and tray and
carry them to the sink. Pour any
remaining water into the sink.
4. To remove scale caused by hard
water deposits and to clean the tank
and water tray, these parts can be
either cleaned in a dishwasher or
washed by hand.
5. Inspect the filter each week. If it
becomes hard to the touch, or
shows discoloration (caused by
mineral deposits or mold/mildew
buildup), it should be replaced.
See page 12 for information about
ordering a replacement filter.
6. After cleaning and drying all parts,
follow the instructions on pages 5-6
to reassemble the humidifier. If the
humidifier will not be used for at
least two weeks, see the “Storing
the Humidifier” section.
840117800 Ev00 8/27/03 11:14 AM Page 7

8
(Cleaning in a dishwasher)
The parts shown on the right are
dishwasher-safe for easy cleaning.
These parts are a transparent smoke
color for easy identification.
NOTES:
•Always wash humidifier parts
separately from dishes.
•Always use a heated water wash cycle.
• If your dishwasher has a heated dry
cycle, it should be turned OFF.
•Do not use rinse aid while cleaning
humidifier parts.
•ALWAYS remove the filler cap from
the water tank before placing the
tank in the dishwasher.
1. Place the filler cap in the dishwasher’s
silverware basket. This small part
must be secured in the silverware
basket to prevent it from being
damaged by the dishwasher.
2. Place water tank in the dishwasher
with the tank opening facing down if
possible. This position will trap the
least amount of water in the tank.
Filler
Cap
Water
Tank
Water
Tray
Preferred Cleaning Method
Tip!
If the water tank won’t stand up in your
dishwasher, try moving the silverware
basket to another area in the dishwasher
and place the tank in the silverware
basket recess.
840117800 Ev00 8/27/03 11:14 AM Page 8

9
Storing the Humidifier
1. Unplug the humidifier.
2. Empty the water tank and water tray.
3. Discard the filter. DO NOT leave it in
the humidifier. To order a new filter,
see page 12.
4. Follow the cleaning instructions for
weekly maintenance.
5. Make sure all parts are completely
dry. DO NOT leave any water in the
humidifier when storing it.
6. Place the humidifier in the original
box and store in a cool, dry place.
7. Clean the humidifier and install the
new filter before using it again.
If the humidifier will not be used for at least two weeks:
(Cleaning by hand)
To remove mineral deposits:
1. Partially fill the water tray with a
solution of one gallon water and
8 ounces undiluted white vinegar.
2. Gently swirl around the tank every
few minutes to wet all inside sur-
faces. Allow to stand for 20 minutes,
then clean all interior surfaces
with a soft brush.
3. Dampen a soft cloth and wipe out
entire tray to remove scale.
4. Rinse thoroughly with clean warm
water to remove any remaining scale
and vinegar/water solution.
To clean the tank:
1. Fill the tank with one gallon of water
and one teaspoon of chlorine bleach.
2. Replace the filler cap, and let the
solution stand for 20 minutes,
swirling it around the tank every few
minutes to wet all inside surfaces.
3. Empty the tank, rinse tank and filler
cap thoroughly with water until no
bleach smell is noticeable. Dry with
a clean cloth or paper towel.
Alternate Cleaning Method
840117800 Ev00 8/27/03 11:14 AM Page 9

10
Troubleshooting Guide
The Humidifier Will Not Turn On
• Is humidifier turned on? • Is humidifier plugged into a powered
outlet?
The Tank Leaks
• Is the filler cap gasket in place?
If not, press it into the groove
around the tank fill opening. If the
gasket seal is missing or damaged,
call the customer service number
on the cover to order a replacement
gasket. Do not use the humidifier
without the gasket in place.
• Is the filler cap locked tightly? Make
sure that the
“LOCKED”
arrows line
up with the
ridges on
the fill neck.
• Is something trapped under the edge
of the rubber seal in the center of the
filler cap? Check for debris under the
edge of the seal, or for damage to
the seal. If the seal is damaged, a
replacement seal can be ordered
by calling the customer service
number on page 12.
The following section provides the solutions to many common problems and ques-
tions. If your humidifier is not working correctly, review these solutions first; it may
save you a phone call. If your problem is still not solved after reviewing this guide,
call our toll-free customer service number, listed on page 12.
840117800 Ev00 8/27/03 11:14 AM Page 10

11
• Make sure that the cord or other
objects are
not trapped
under the
water
tank.
The Filler Cap Is Difficult to Remove
• Sometimes a vacuum can form in
the tank,
especially
if it has not
been seated
on the base
for a long
period of
time. Press
the button
in the center
of the filler cap to relieve the vacuum.
• Apply 100% pure petroleum jelly
to the filler cap gasket. Wipe off
any excess.
Fan Enclosure or Tank Does Not Fit on Base
Press here
The Tank Is Full But the Tray Does Not Fill
• Is the cord or another object trapped
under the tank? Make sure that the
tank is properly seated on the base
and that the power cord is routed
correctly. If the tank will not seat prop-
erly, see “Fan Enclosure or
Tank Does Not Fit on Base.”
840117800 Ev00 8/27/03 11:14 AM Page 11

12
Customer Service
If you have a question about your humidifier, call our toll-free customer service
number. Before calling, please note the model, type, and series numbers and fill
in that information below. These numbers can be found on the bottom of the unit.
This information will help us answer your question much more quickly.
MODEL: ______________ TYPE: _______________ SERIES: _________________
trueair.com 8/03
840117800
HAMILTON BEACH PROCTOR-SILEX,INC.PROCTOR-SILEX CANADA,INC.
263 Yadkin Road
Southern Pines, NC 28387
Picton, Ontario K0K 2T0
Replacement Filter
Humidifier Capacity: 1.5 gallons/day
Model: 05510
Filter Part Number: 05900
LIMITED WARRANTY
This product is warranted to be free from defects in material and workmanship for a
period of one (1) year from the date of original purchase, except as noted below. During
this period, we will repair or replace this product, at our option, at no cost. THE
FOREGOING WARRANTY IS IN LIEU OF ANY OTHER WARRANTY, WHETHER
EXPRESS OR IMPLIED, WRITTEN OR ORAL, INCLUDING ANY WARRANTY OF
MERCHANTABILITY OR FITNESS FOR A PARTICULAR PURPOSE. ANY LIABILITY IS
EXPRESSLY LIMITED TO AN AMOUNT EQUAL TO THE PURCHASE PRICE PAID, AND
ALL CLAIMS FOR SPECIAL, INCIDENTAL AND CONSEQUENTIAL DAMAGES ARE
HEREBY EXCLUDED. There is no warranty with respect to the following, which may be
supplied with this product: the filter. This warranty extends only to the original consumer
purchaser and does not cover a defect resulting from abuse, misuse, neglect, use for
commercial purposes, or any use not in conformity with the printed directions. This
warranty gives you specific legal rights, and you may also have other legal rights which
vary from state to state, or province to province. Some states or provinces do not allow
limitations on implied warranties or special, incidental or consequential damages, so the
foregoing limitations may not apply to you.
If you have a claim under this warranty, DO NOT RETURN THE APPLIANCE TO THE
STORE! Please call our CUSTOMER SERVICE NUMBER. (For faster service please have
model, series, and type numbers ready for operator to assist you.)
CUSTOMER SERVICE NUMBERS
In the U.S. 1-800-851-8900
In Canada 1-800-267-2826
Web site address: www.trueair.com
KEEP THESE NUMBERS FOR FUTURE REFERENCE!
840117800 Ev00 8/27/03 11:14 AM Page 12

Humidificateur
840117800
Sécurité de l’humidificateur .......... 2
Pièces et caractéristiques ............ 4
Méthode d’utilisation .................... 5
Méthode de nettoyage.................. 8
Dépannage.................................... 10
Service à la clientèle .................... 12
Aux É.-U. : 1-800-851-8900
Au Canada : 1-800-267-2826
840117800 FRv00 8/27/03 11:14 AM Page 1

2
PRÉCAUTIONS IMPORTANTES
CONSERVEZ CES INSTRUCTIONS!
1. Lire toutes les instructions avant
d’utiliser cet humidificateur. Conserver
ces instructions à titre de référence.
2. Placer toujours l’humidificateur sur une
surface ferme, plate, unie et résistante
à l’eau.
3. Pour réduire le risque de choc
électrique, ne jamais brancher
l’humidificateur sur une prise de
courant avec les mains mouillées.
4. Ne jamais faire tomber ou insérer
des objets dans les ouvertures.
5. Ne jamais placer l’humidificateur
dans un endroit où il est accessible
aux enfants.
6. Ne pas placer l’humidificateur sur
ou près des sources de chaleur
telles que : cuisinières, radiateurs
et appareils de chauffage, ou action
directe de la lumière solaire.
7. Ne jamais raccorder l’humidificateur
à une source de tension autre que
120 V CA.
8. Débrancher toujours l’humidificateur
avant de le remplir, de le nettoyer,
d’en faire l’entretien, ou de
le déplacer.
9. Avant d’utiliser l’humidificateur,
vérifier que le cordon et la fiche ne
présentent aucun dommage. Ne pas
utiliser un appareil dont le cordon ou
la fiche est endommagé, après un
mauvais fonctionnement, une chute
ou un dommage occasionné de
quelque façon que ce soit. Communiquer
avec notre Service à la clientèle sans
frais pour tout renseignement sur
l’inspection, la réparation électrique,
la réparation mécanique ou le réglage
de l’humidificateur.
10. Débrancher toujours l’humidificateur,
le vider ainsi que son réservoir lorsqu’il
n’est pas utilisé.
11. Ne jamais incliner ni essayer de
déplacer l’humidificateur ou la surface
d’appui lorsqu’il est en service ou
qu’il est plein d’eau. L’éteindre et le
débrancher avant d’extraire le réservoir
d’eau et de déplacer l’unité.
12. Cet humidificateur nécessite un
entretien et un nettoyage périodiques.
Consulter les instructions à la section
intitulée Méthode de nettoyage.
Ne jamais nettoyer l’humidificateur
d’une manière qui n’est pas présentée
dans ce guide.
13. Ne pas plonger le boîtier du ventilateur
dans l’eau ou d’autres liquides, et
éviter qu’il soit mouillé.
14. N’utiliser jamais des détergents,
des produits d’entretien ménager
ou d’autres solvants pour nettoyer
l’humidificateur, sauf ceux qui sont
indiqués dans les instructions de
nettoyage fournies dans ce guide.
15. Éviter d’exposer les murs, les meubles
ou les objets apparentés au débit d’air
de l’unité.
16. Ne pas utiliser les filtres ou d’autres
pièces de rechange que ne
recommande pas ou que ne vend
pas Hamilton Beach/Proctor-Silex, Inc.
17. Pour débrancher le cordon, mettre
le sélecteur sur ARRÊT (OFF), puis
extraire la fiche de la prise murale.
18. Ne pas employer l’appareil à des fins
distinctes de l’utilisation prévue.
19. Ne jamais se tenir ni s’asseoir sur une
pièce quelconque de l’humidificateur,
et ne jamais poser des objets sur
l’appareil.
LIRE ET CONSERVER CES INSTRUCTIONS.
Lorsqu’on utilise des appareils électroménagers, des précautions de sécurité
fondamentales doivent être observées, y compris les suivantes :
840117800 FRv00 8/27/03 11:14 AM Page 2

3
Renseignements de sécurité aux
consommateurs
Cet appareil est conçu uniquement
pour l’usage domestique.
Cet appareil est muni d’une fiche
polarisée. Ce type de fiche présente une
broche plus large que l’autre. La fiche ne
peut être introduite dans une prise que
dans un sens seulement. Il s’agit d’une
caractéristique de sécurité visant à réduire
le risque de choc électrique. Si la fiche ne
peut pas être insérée dans la prise, la
tourner dans l’autre sens.
Si elle ne peut toujours pas être insérée
dans la prise, contacter un électricien
qualifié pour qu’il remplace la prise
désuète. Ne pas essayer de contourner
l’objectif de sécurité de la fiche polarisée
en la modifiant de quelque manière que
ce soit.
Si un cordon plus long est nécessaire,
utiliser une rallonge appropriée. Le
calibrage de la rallonge doit être le même
que celui de l’appareil ou supérieur.
Lorsqu’on utilise une rallonge, s’assurer
qu’elle ne traverse pas la zone de travail,
que des enfants ne puissent pas tirer
dessus par inadvertance et qu’on ne
puisse pas trébucher dessus.
Comment éviter un taux
hygrométrique excessif
Il faut éviter les taux hygrométriques
excessifs. Le point de consigne
hygrométrique optimal que l’on
recommande pour la santé des
personnes est égal à 50 %. Il faut
prendre soin de ne pas être hors limites,
ce qui est fonction de la construction
de la résidence et des conditions
météorologiques externes. Éviter de
laisser l’eau se condenser sur les murs,
les planchers ou les fenêtres, car cela
peut occasionner des dommages.
Lorsque ces conditions prévalent, il faut
baisser le point de consigne sur l’hu-
midificateur, ou éteindre l’unité. La
société Hamilton Beach/Proctor-Silex,
Inc. ne sera en aucun cas tenue respon-
sable des dommages provoqués par
l’eau.
Avant une première utilisation
Prendre soin de retirer tous les produits
d’emballage. Choisir un endroit plat,
uni
et résistant à l’eau pour l’humidificateur,
endroit qui permettra une bonne
circulation de l’air et n’est pas accessible
aux enfants.
Ne pas placer l’humidificateur là où son
cordon présente un risque de chute ou
de faux pas, ou bien dans des endroits
où ses évents sont bloqués.
840117800 FRv00 8/27/03 11:14 AM Page 3

4
Pièces et caractéristiques
Réservoir d’eau
1. Poignée de transport
2. Réservoir d’eau
3. Joint
4. Bouchon de remplissage
Base
5. Filtre
6. Plateau à eau
Boîtier du ventilateur
7. Bouton de contrôle
8. Grilles d’échappement
9. Grille d’admission d’air
840117800 FRv00 8/27/03 11:14 AM Page 4

5
OPÉRATIONS INTERDITES :
• Ne pas se tenir debout, s’asseoir ou
placer tout
objet sur
l’humidificateur.
L’appareil
n’est pas
conçu pour
accepter un
poids supplé-
mentaire.
• Ne pas bloquer les grilles d’admission
et d’échappement de l’air. Cela peut en
effet réduire le rendement, provoquer
des dommages dus à l’humidité et
l’accumulation de moisissure.
• Ne pas utiliser l’appareil dans un espace
restreint et clos, ou dans une zone où le
taux hygrométrique est supérieur à 50
%. Un excès d’humidité peut s’ensuivre.
• Ne pas placer l’humidificateur sur ou
près des sources de chaleur telles que :
cuisinières, radiateurs, et appareils de
chauffage, ou en plein soleil.
• Ne jamais placer l’humidificateur dans
une pièce fermée. Une pièce fermée
peut produire une humidité excessive.
• Pour réduire les parasites et les
interférences d’origine électrique, ne pas
placer l’humidificateur sur ou à proximité
des postes de télévision, des moniteurs
pour enfants, ou des téléphones sans fil,
ni le brancher dans la même prise que
celle de ces derniers.
Méthode d’assemblage
et d’utilisation
Pour empêcher tout risque de blessure ou dommage de l’humidificateur et des
garnitures, tout en assurant le meilleur rendement possible de l’appareil, il faut
suivre les directives de mise en place ci-après :
OPÉRATIONS AUTORISÉES :
• Placer l’humidificateur sur une surface
plate, stable et
imperméable
à l’eau.
• Placer l’humidificateur le long d’un
mur intérieur, à proximité d’une prise
électrique et à l’écart. L’appareil et son
cordon ne doivent présenter aucun
risque de faux pas.
• Sélectionner un endroit où la circulation
d’air est suffisante.
• Laisser un écart d’au moins 36
pouces (90 cm) entre l’humidificateur
et n’importe quels murs ou garnitures,
à défaut de quoi la moisissure ou
l’humidité peuvent occasionner
des dommages aux murs ou aux
meubles.
• Débrancher l’humidificateur, puis
vider le réservoir et le plateau à eau si
l’appareil doit être déplacé ou ne sera
pas utilisé pendant plusieurs jours.
IMPORTANT : L’humidificateur Hamilton Beach est conçu pour une utilisation et
un entretien faciles. S’assurer que le plateau à eau et le filtre sont convenablement
installés avant de remplir le réservoir et d’utiliser l’humidificateur.
IL NE FAUT PAS UTILISER L’HUMIDIFICATEUR SANS QUE LE FILTRE
NE SOIT EN PLACE!
Sélection de l’emplacement convenable
840117800 FRv00 8/27/03 11:14 AM Page 5

6
1. Enlever le bouchon de remplissage à
la partie
inférieure du
réservoir en
le tournant
dans le sens
antihoraire
jusqu’à ce
que les
flèches
UNLOCK.
s’alignent
sur les arêtes du réservoir.
2. Remplir le réservoir à l’eau FRAÎCHE
du robinet.
NE PAS
UTILISER
L’EAU
CHAUDE.
S’assurer
que le réser-
voir
ne contient
aucun débris.
REMARQUE : L’emploi d’eau distillée
ou déionisée a pour effet de prolonger la
durée de vie du filtre.
Ne jamais placer d’huiles ou parfums
dans le réservoir d’eau.
3. Replacer le bouchon de remplissage,
puis le
tourner
dans le sens
horaire
jusqu’à
ce que
les flèches
LOCK.
s’alignent
sur les
arêtes de
l’orifice du
réservoir. Remettre le réservoir en posi-
tion verticale. Pendant le transport de
ce dernier, utiliser la poignée et tenir le
réservoir de l’autre côté.
REMARQUE : S’assurer toujours que
le bouchon de remplissage est ver-
rouillé et que le joint est en place
avant d’inverser le réservoir d’eau.
Remplissage du réservoir d’eau
1. Insérer le plateau à eau dans la base
de l’humi-
dificateur.
S’assurer
qu’il est
bien assu-
jetti dans
la base.
2. Placer le filtre sur le plateau à eau,
conformé-
ment à
l’illustration.
Assemblage de l’humidificateur
Conseil utile!
Pour prolonger la durée de vie du filtre,
on recommande de retourner le filtre
chaque fois que le réservoir d’eau est
rempli. Remplacer le filtre quand il
présente de la moisissure ou lorsqu’il
devient rigide et non absorbant.
840117800 FRv00 8/27/03 11:15 AM Page 6

7
Mise en place du réservoir d’eau sur la base
Mettre en place le réservoir en le
baissant jusqu’à
ce qu’il soit
convenablement
assujetti, et
utiliser la base
et le boîtier du
ventilateur
pour aligner
le réservoir.
IMPORTANT! Il ne faut jamais verser
de l’eau dans les grilles d’admission et
d’échappement d’air ni permettre
qu’elles en soient éclaboussées.
REMARQUE : Un peu d’eau est éjectée
du réservoir et dans le plateau à eau
lorsque le réservoir est mis en position.
MISE EN GARDE : Après le
remplissage de l’humidificateur, il ne
faut pas essayer de l’incliner ou de le
déplacer. S’il est nécessaire de le
déplacer, s’assurer qu’il n’est pas
branché, puis retirer d’abord le
réservoir d’eau.
Branchement de l’humidificateur
AVERTISSEMENT : Pour réduire le
risque de choc électrique, ne jamais
brancher l’humidificateur sur une prise
de courant avec les mains mouillées.
Après avoir assemblé et assujetti
l’humidificateur, puis rempli le réservoir,
le brancher sur une prise murale.
REMARQUE : La fiche polarisée ne
s’adapte que dans un seul sens – Ne
PAS essayer de forcer la fiche! Si la fiche
ne peut pas être insérée dans la prise, la
tourner dans l’autre sens. Si elle ne peut
toujours pas être insérée dans la prise,
contacter un électricien qualifié pour qu’il
remplace la prise désuète.
Réglage des commandes
1. Bouton de réglage de la vitesse du
ventilateur
2. Voyant d’alimentation – S’allume
lorsque l’unité est en marche
Réglage de la vitesse du ventilateur
Mettre le bouton de réglage de la vitesse
du ventilateur sur la valeur désirée. Pour
augmenter plus rapidement l’humidité
dans une pièce, régler le bouton sur
HAUT (HI). Pour un fonctionnement
nocturne silencieux, ou pour une
augmentation plus graduelle, régler le
bouton sur Quietmist™.
Voyants lumineux
Le voyant d’alimentation s’allume
pour indiquer que l’humidificateur est
en marche.
840117800 FRv00 8/27/03 11:15 AM Page 7

8
Entretien quotidien :
1. Éteindre l’humidificateur et le
débrancher de la prise électrique.
2. Soulever le boîtier du ventilateur, puis
enlever le filtre.
3. Enlever le réservoir d’eau et le
plateau à eau, puis les porter à l’évi-
er. Verser toute eau résiduelle dans
l’évier.
4. Rinser à fond le plateau à eau et le
réservoir afin d’en éliminer tous les
sédiments ou poussières. Les
essuyer avec un chiffon, puis les
sécher avec un chiffon propre ou
un essuie-tout.
5. Réinstaller le plateau à eau et le filtre,
replacer le boîtier du ventilateur, puis
remplir le réservoir d’eau à l’eau
fraîche du robinet, selon les instruc-
tions de la pages 5-6.
REMARQUE: Pour prolonger
la durée de vie du filtre, on
recommande de retourner le filtre
quand le réservoir d’eau est rempli.
Méthode de nettoyage
Les humidificateurs par évaporation
à mèche permettent d’augmenter
l’humidité de l’air sous forme de vapeur
d’eau, au moyen d’un ventilateur qui
force l’air dans un média filtrant
humecté.
Pour assurer le fonctionnement conve-
nable et efficace de l’humidificateur, il
faut suivre la procédure suivante de net-
toyage et d’entretien.
À défaut d’observer les instructions
recommandées en matière de soin
et d’entretien, des microorganismes
peuvent s’accumuler, y compris des
algues, des bactéries et la moisissure,
pouvant causer des maux respiratoires
ou autres pour certaines personnes.
Nettoyage de l’humidificateur
Essuyer avec une éponge ou un chiffon humide le boîtier du ventilateur, le
panneau de commande et le cordon.
wAVERTISSEMENT
Pour réduire tout risque de choc électrique :
• Débrancher toujours l’appareil avant de le nettoyer.
• Ne pas plonger le boîtier du ventilateur dans l’eau
ou tout autre liquide.
840117800 FRv00 8/27/03 11:15 AM Page 8
This manual suits for next models
2
Table of contents
Languages:
Other Hamilton Beach Humidifier manuals